How To Paint Cabinet Hardware
Easily update your cabinets by painting the hardware with spray paint. Full our tutorial to complete this easy DIY painting project.
Print Tutorial
Equipment
- Cardboard boxes or Cardboard
- Screwdriver
- Green Scotchbrite Pad
Instructions
- Remove hardware. If you are only spraying handles or knobs, you can leave the screws in the cabinets so that you don’t misplace them. If spraying hinges, then you need to take the screws out to spray them.
- Clean hardware. Use a green Scotchbrite and dish soap and water.
- Wipe down with a deglosser. Let handles fully dry.
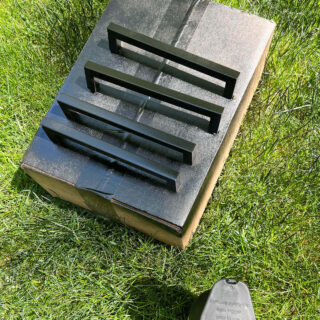
- Set up a spray painting station. Just make sure you are able to fully spray all surfaces of the hardware.
- Cover all surfaces of your hardware with a spray bonding primer. Let dry. Put a fresh piece of cardboard down before adding color.
- Use spray paint in large sweeping motions. Let first coat fully dry.
- Repeat for 3 coats making sure you fully are covering the hardware.
- Let your handles and hardware cure as long as possible. We like to let them dry overnight before putting them back on the cabinets.
Notes
- Use thin coats of spray paint.
- Work in a well-ventilated area.
- Be patient in between coats.
- Make sure your handles and cabinet knobs are completely dust-free before spraying.
- Hold the spray nozzle at different angles to help fully paint the hardware.
- Most likely at least 3 coats of spray paint will be needed.
- Don’t try to spray paint on a really humid or windy day.
- Use large sweeping motions when spraying. It is best if you start spraying right before the item and stop past your item. This will stop large droplets from landing on your hardware.
Cost: under $10