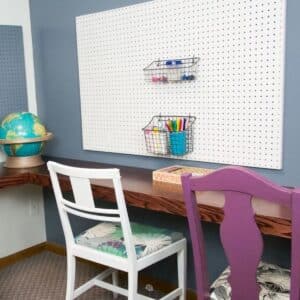
Build An Easy DIY Pegboard
Learn how to make easy large pegboards for your craft room or garage.
Print Tutorial
Equipment
- Rollers/Brushes
- Circular Saw
- Screws
- Stud Finder
- Drill
- Nail Gun
Supplies
- Pegboard
- Wood Scraps
- Paint in the color of your choice
Instructions
Build Pegboards
- Cut pegboards to size with a circular saw.
- Create a frame for the back of the pegboard. You can rip plywood or use furring strips. You want your boards to be at least 1/2" off the wall.
- Attach frame to the pegboard using a nail gun.
- Paint with a roller. Painting the sides will help create a more finished look.
Install Pegboards
- Find studs with a stud finder
- Use a 4' level to mark the height you want to hang.
- Place level on top of pegboards before hanging to ensure your board is level.
- Screw threw the top of the pegboard and frame into studs.
Notes
- We purchased prefinished pegboards and did not need to use primer before painting.
- In order for metal pegboard hooks and accessories to work, your boards need to be around 1/2" thick once your frame is added.
- You can add a frame to the front to dress-up your pegboard or even paint a fun design on them.
Cost: under $40