How To Build DIY Closet Shelves
Create simple wooden shelves in your closet with this step-by-step closet shelving idea tutorial.
Print Tutorial
Equipment
- Measuring Tape
- Torpedo level
- Drill
- Circular Saw
- Wood Glue
- Pencil
- Stud Finder
- Clamp
- 2.5" Synthetic Paint Brush
Supplies
- 2.5 1" x 12" x 8' Common Whitewood or Pine Board
- Drywall Screws
- 1 1/2" Wood Screws
- White Latex Paint
- Wall Paint
- White Primer
Instructions
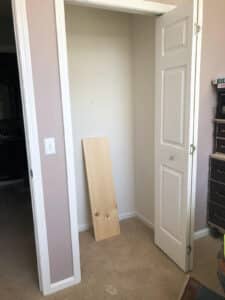
- Remove all existing content from the closet.
- Patch any spots on the wall and paint the walls with the color and finish of your choice.
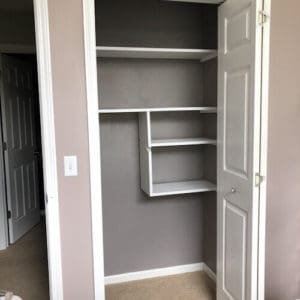
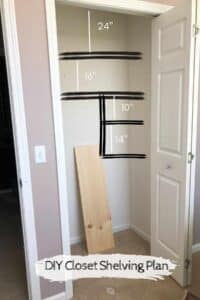
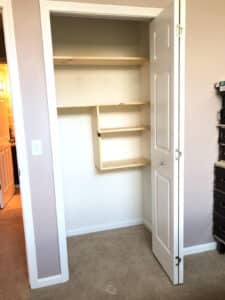
- Develop a sketch of your closet design. See tips above for factors in your closet.
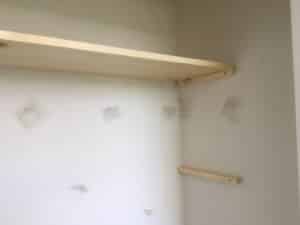
- Use stud finder and mark where you will be screwing in wooded brackets (small pieces of wood made from scrap pine wood).

- Cut 2 pine wood brackets for all shelves. Ours measured 1" x 1" x 12'.
- Mark the wood where the studs are and drill pilot holes through the pine wood scraps.
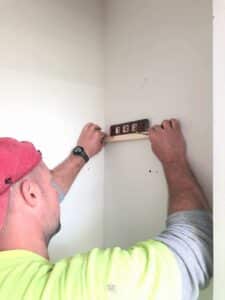
- Attach pine wood brackets for the first shelf. Use a torpedo level to make sure they are level.
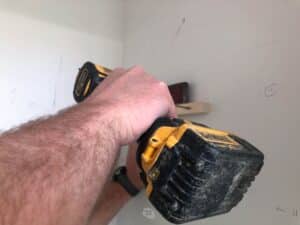
- Use screws to attach the bracket to wall into the stud.
- Cut common pine wood to desired length (the width of your closet).

- Attach shelf to wood brackets by using wood glue and wood screws. Again, drill pilot holes before using 1.5" screws.
- Repeat bracket building steps and add pine boards across for each level.
- Use steps to create wooden shelves to fit your design.
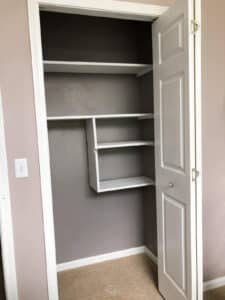
- Prime and paint closet to fit your style.
Notes
See the full post for how to build shelves that do not go fully across the closet.
Cost: $100