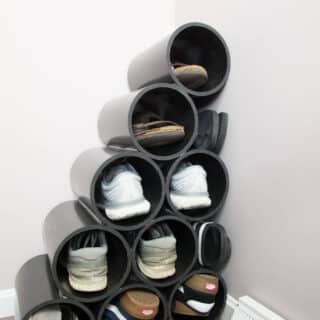
DIY PVC Shoe Rack
Easily orangize your shoe clutter with this PVC shoe organizer idea. Customize this DIY project to fit your home's needs.
Print Tutorial
Equipment
- Miter saw
- Sharpie
- Tape Measurer
- Pencil
- 80 Grit Sandpaper
Supplies
- Construction Adhesive
- PVC Pipe 6"
- Spray Paint finish and color of your choice
Instructions
- Use a tape measure and a permeant marker to mark length.
- Cut the pipe to length.
- Use 80 grit sandpaper to clean up pipe and edges at cuts.
- Clean PVC pipe. We did this in our bathtub and let them completely dry. The adhesive and paint will stick better to
- “Dry fit” pieces together to make sure you are happy with the shape and size your shoe rack.
- Use construction adhesive to put the pipe together. We used one bead line in between each place the pipes would touch.
- You will need to prop or use clamps to keep it together while the adhesive is drying. We had a piece of wood against our dryer to hold the bottom against the wall and clamps on the other pieces.
- The next day spray paint the new shoe shelf with the spray paint and the color of your choosing. Don’t be scared to showcase your personality with different colors.
Notes
- Each section of pipe was cut to 11” for ours.
- We used a miter saw but you can also use a regular hack saw. When cutting the 6” diameter with a miter saw you have to cut and rotate to get all the way through.
- Hammered spray paint will give a textured look and may hide imperfections.
Cost: under $100