
Equipment
- Tape Measure
- Painter’s Tape
- Pencil
- Wood clamps
- Shop vacuum
- Miter saw
- Table saw
- Air compressor
- Brad nailer
- Jigsaw
Supplies
- 1” deep x 3” wide x 8’ long oak trim
- Plexiglass or Polycarbonate Sheet
- Stain
- Spray Poly
- Sawtooth Hanger
- Wood glue
Instructions
- Decide on your design and size.
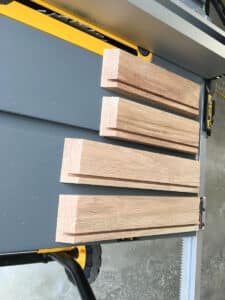
- Using a circular saw or a miter saw cut all of the pieces of oak trim to length.
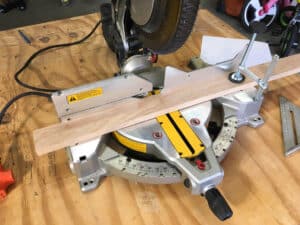
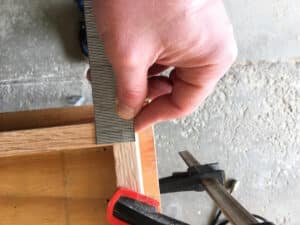
- Using a circular saw or a miter saw cut a 45-degree corner.
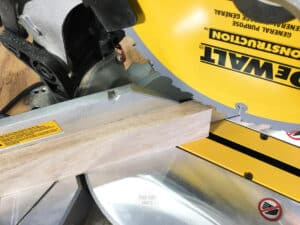
- Using a table saw, set at a one-half inch above the table saw height and run the wood through/over the table saw to create a groove. This groove will be where you slide the plexiglass and artwork for display.
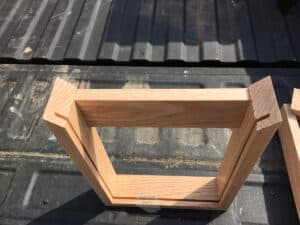
- Dry fit the frame together and make sure everything fits.
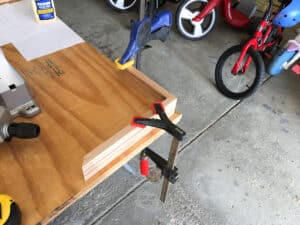
- Use wood glue, clamps and brad nails to attach the frame together. Remember, you do not want to attach the top piece.
- You can choose to add extra support of wood across the back of the frame for support and for a place to put your sawtooth holder. Use the brad nailer and wood glue to attach this.
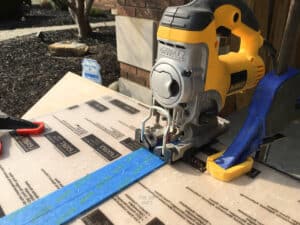
- If needed, use a jigsaw and a fine-tooth blade (metal blade) cut the plexiglass.
- Check fit of plexiglass in box.
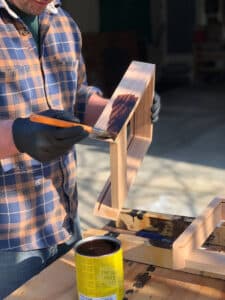
- Apply and wipe stain. Let dry for 24 hours.
- Apply spray on poly and let dry.

Notes
- We made ours the correct size for an 8.5” x 11” piece of paper (copy paper size) and also a 9” x 12” piece of paper which is a normal construction paper size.
- The outside dimensions of our boxes are 12 1/4″ x 9 7/16″ for the copy paper-sized shadow box and 13 1/8″ x 10 1/4″ for the construction paper-sized box.
- Pick the type of wood you want your frame to be made out of. We used oak based on staining the boxes vs. painting them. You could use a cheaper wood like pine if you are painting the frames.
Cost: $25