DIY Shadow Box Frame With Storage

Is your home overflowing with art projects and school papers? We are raising our hand in this family. We needed a solution, and this DIY shadow box and frame was just that. This project not only displays art but also stores it!

Why We Love This DIY
Our kid’s craft room had a blank wall, which was the perfect place to add a creative art display. Our step-by-step tutorial will show you how to build your own DIY shadow boxes.
Supplies You’ll Need
*Disclosure: This post may contain affiliate links that at no additional cost to you, may earn a small commission. Read our full privacy policy.
*We got a larger piece, but Plexi is expensive so depending on how many frames you are building will depend on the amount of Plexi needed)**
Other Places To Consider Buying Plexi
Depending on sales, you may be able to find precut plexiglass that works for you. Here are a few places I would look to compare prices (especially if you do not want to cut it yourself).
- Micheals: 11 x 14 plexiglass with an option for 6 different sizes
- Amazon: 8 x 12 plexiglass (2-pack) that is really reasonably priced
- Local Frame Shop
Other Tools
- Miter saw
- Table saw
- Air compressor
- Brad Nailer
- Jigsaw
- Wood glue
- Tape Measure
- Painter’s tape
- Pencil
- Wood clamps
- Shop vacuum
DIY Shadow Box Tutorial
TIP: Buy your plexiglass first to help determine the size of your shadow boxes.
Step 1: Decided On Your Design and Size
Decide on the size you would like your shadow box to be.
- We made ours the correct size for an 8.5” x 11” piece of paper (copy paper size) and also a 9” x 12” piece of paper which a normal construction paper size.
- The outside dimensions of our boxes are 12 1/4″ x 9 7/16″ for the copy paper-sized shadow box and 13 1/8″ x 10 1/4″ for the construction paper-sized box.
- Our oak trim was common 3” wide x 1” deep x 8’ long. Here is the same board in pine (great if you plan on painting and it is a lot cheaper) than the oak trim.
Step 2: Cut Wood Pieces
Using a circular saw or a miter saw cut all of the pieces to length.
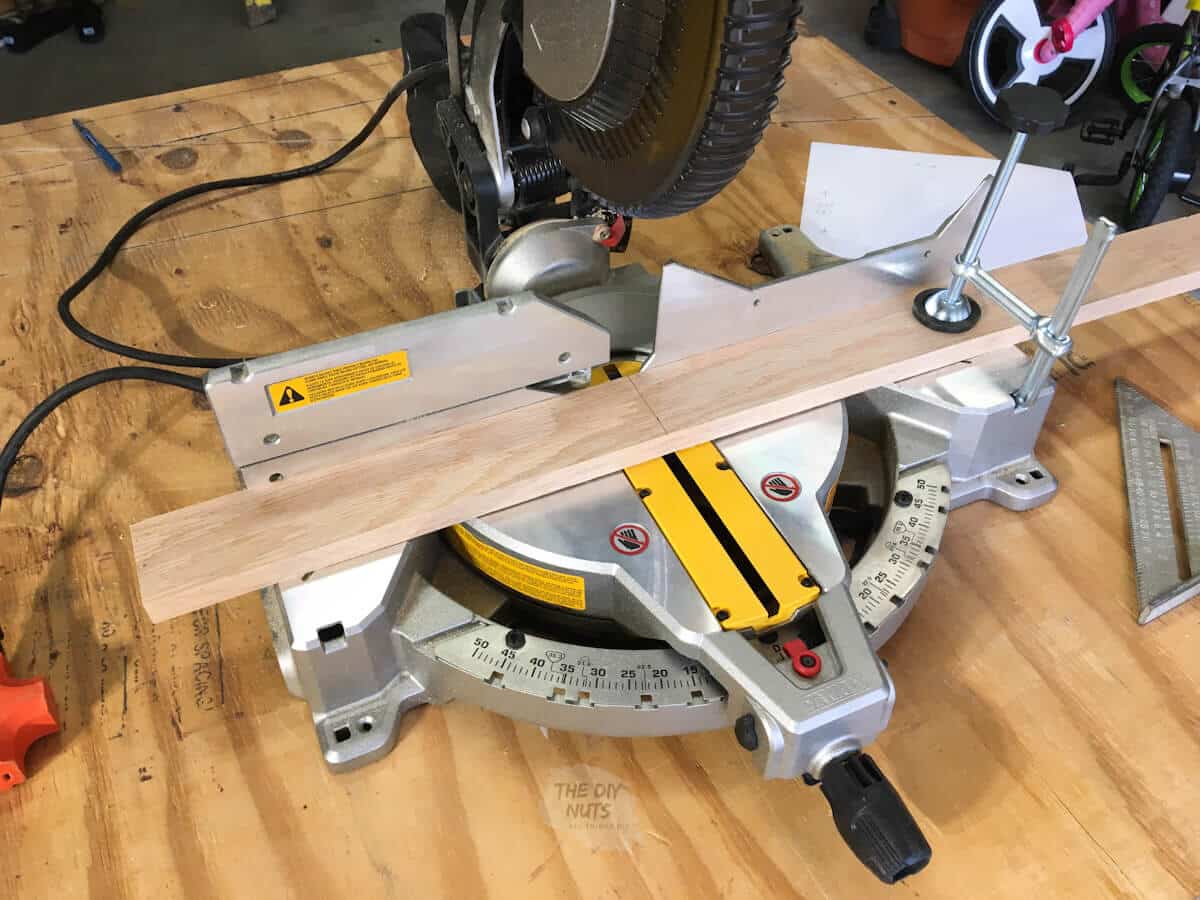
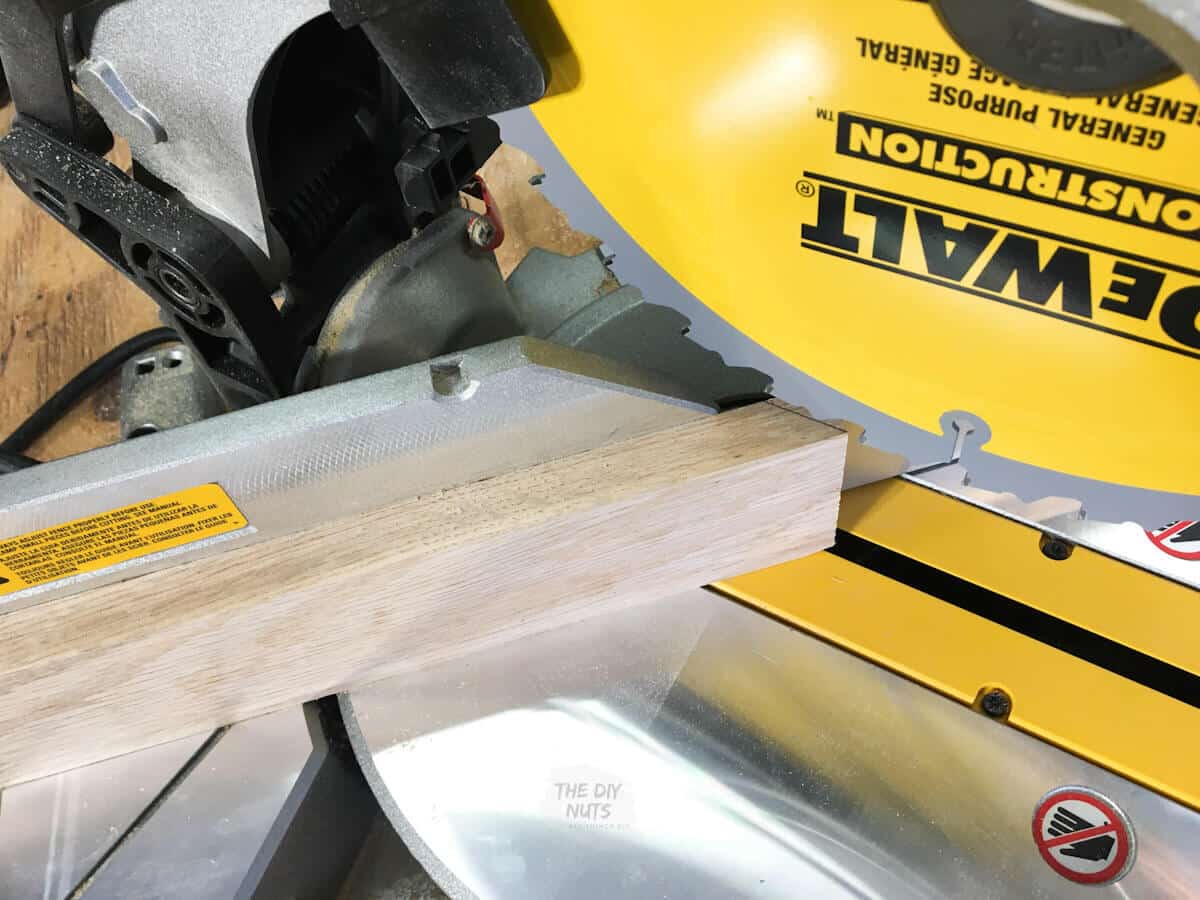
Step 3: Cut 45 Degree Angles
Using a circular saw or a miter saw cut a 45-degree corner.
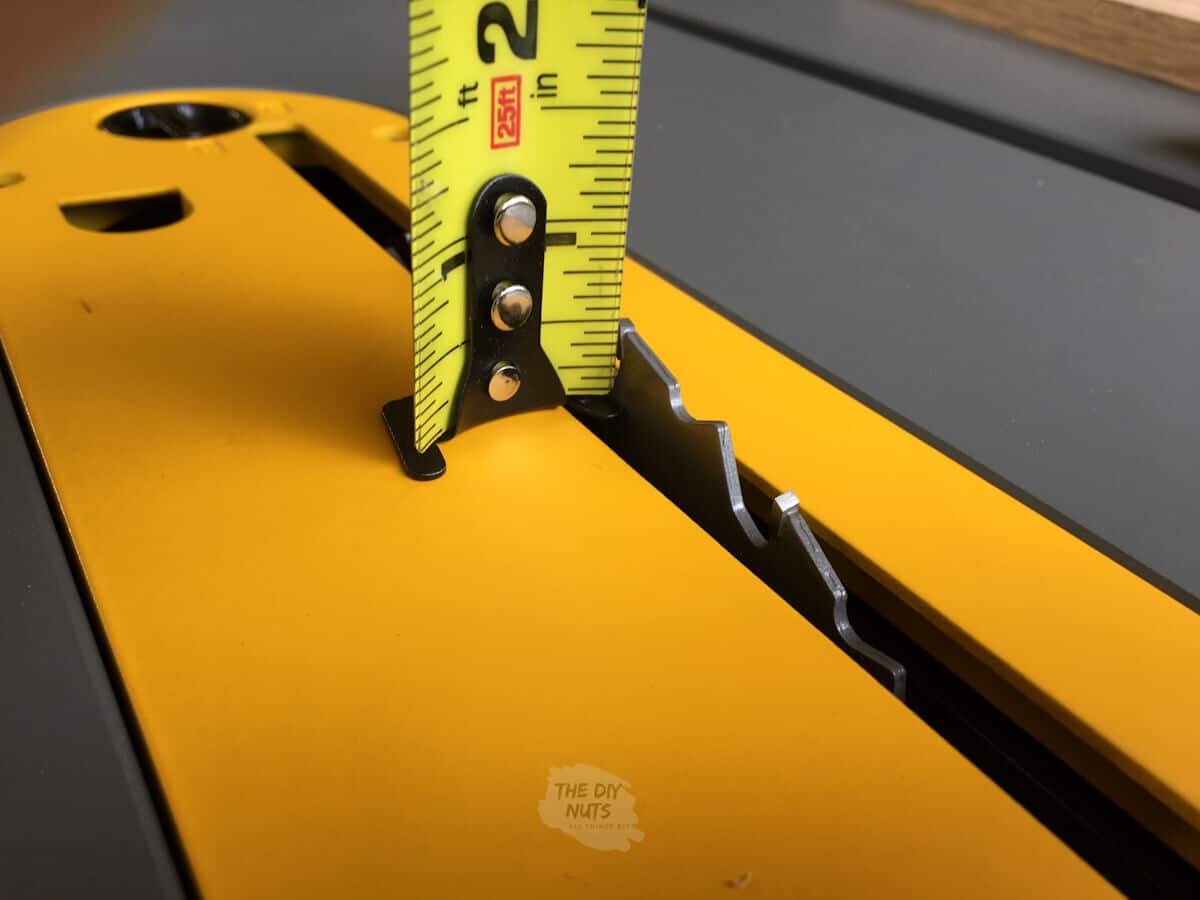
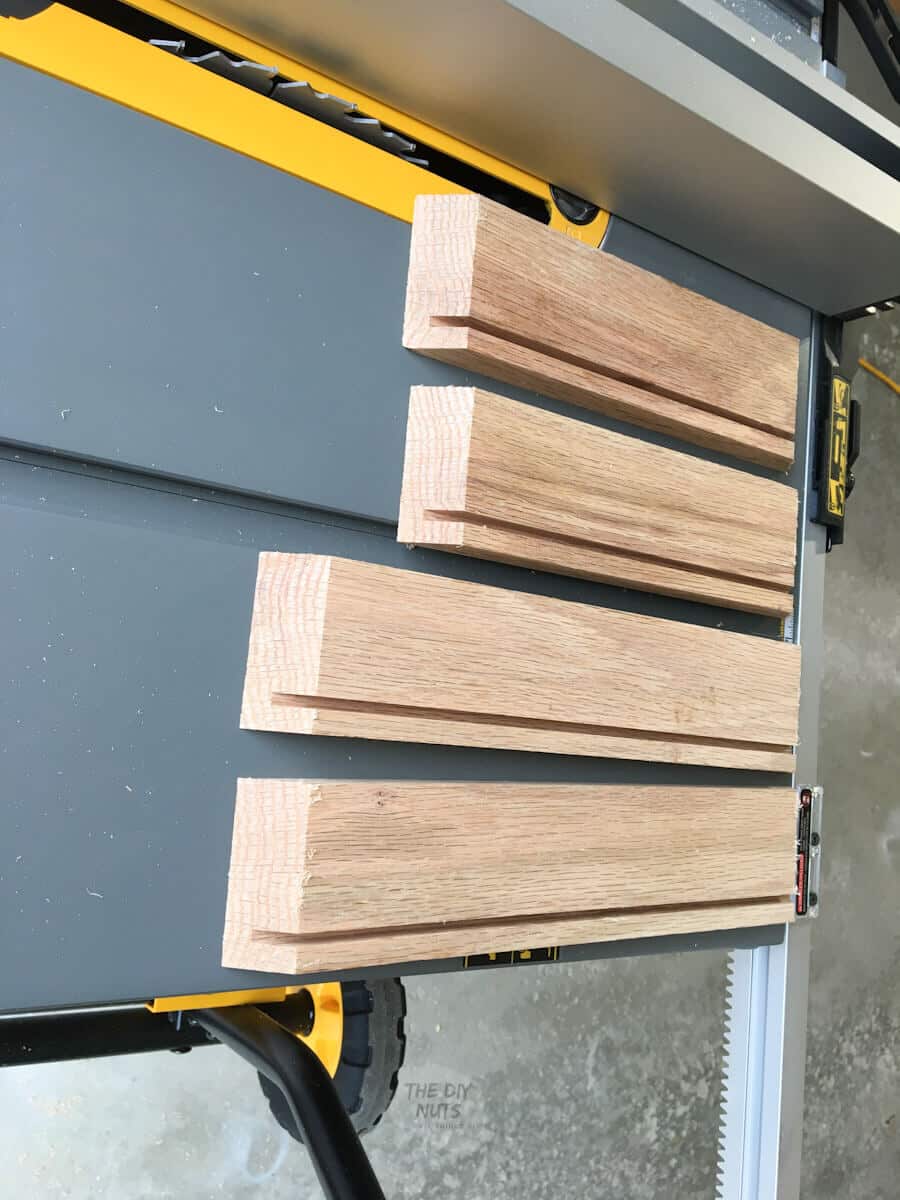
Step 4: Cut Groove or Slot For Plexi
Using a table saw, set it 1/2″ inch above the table saw height and run the wood through/over the table saw to create a groove. This groove will be where you slide the plexiglass and artwork for display.
You can see the matching shadow box pieces below.
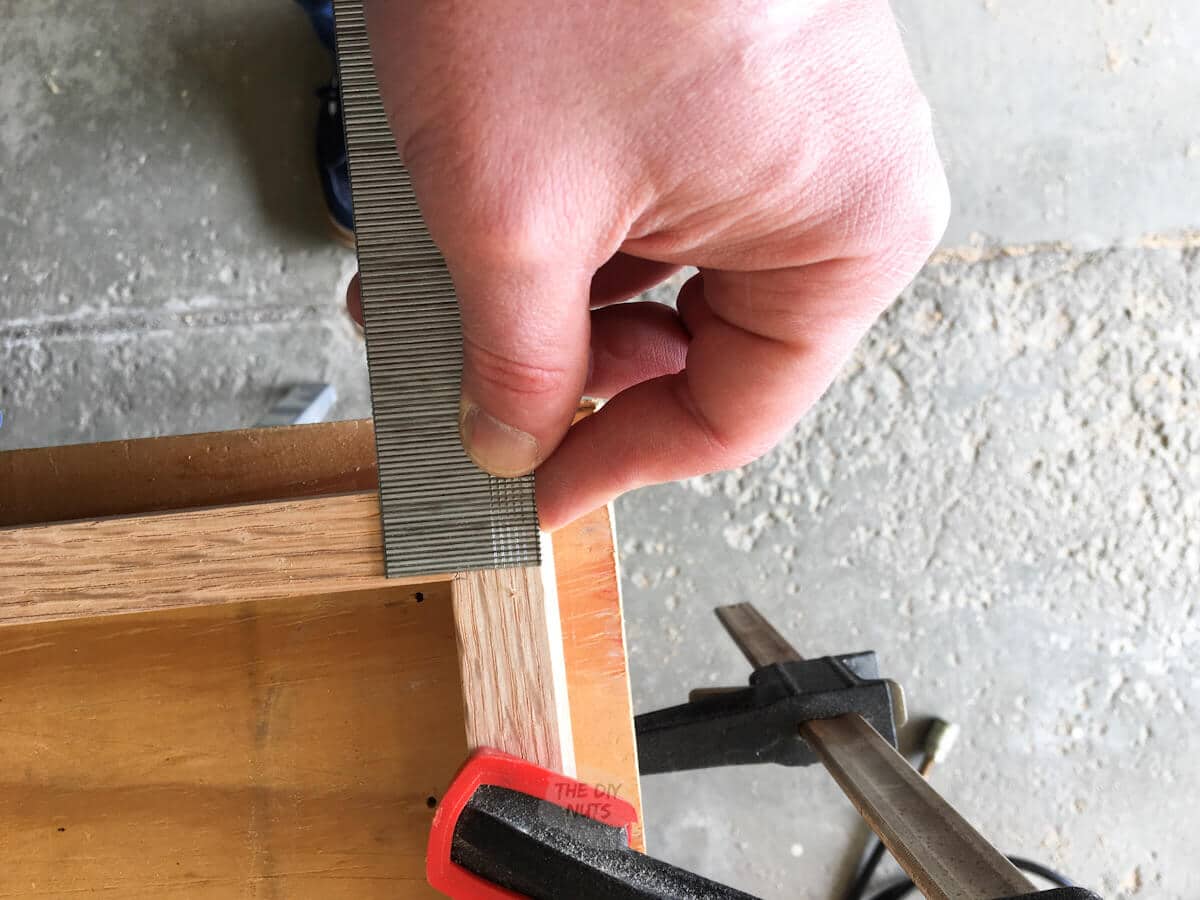
Step 5: Check The Fit
Dry fit the frame together and make sure everything fits.
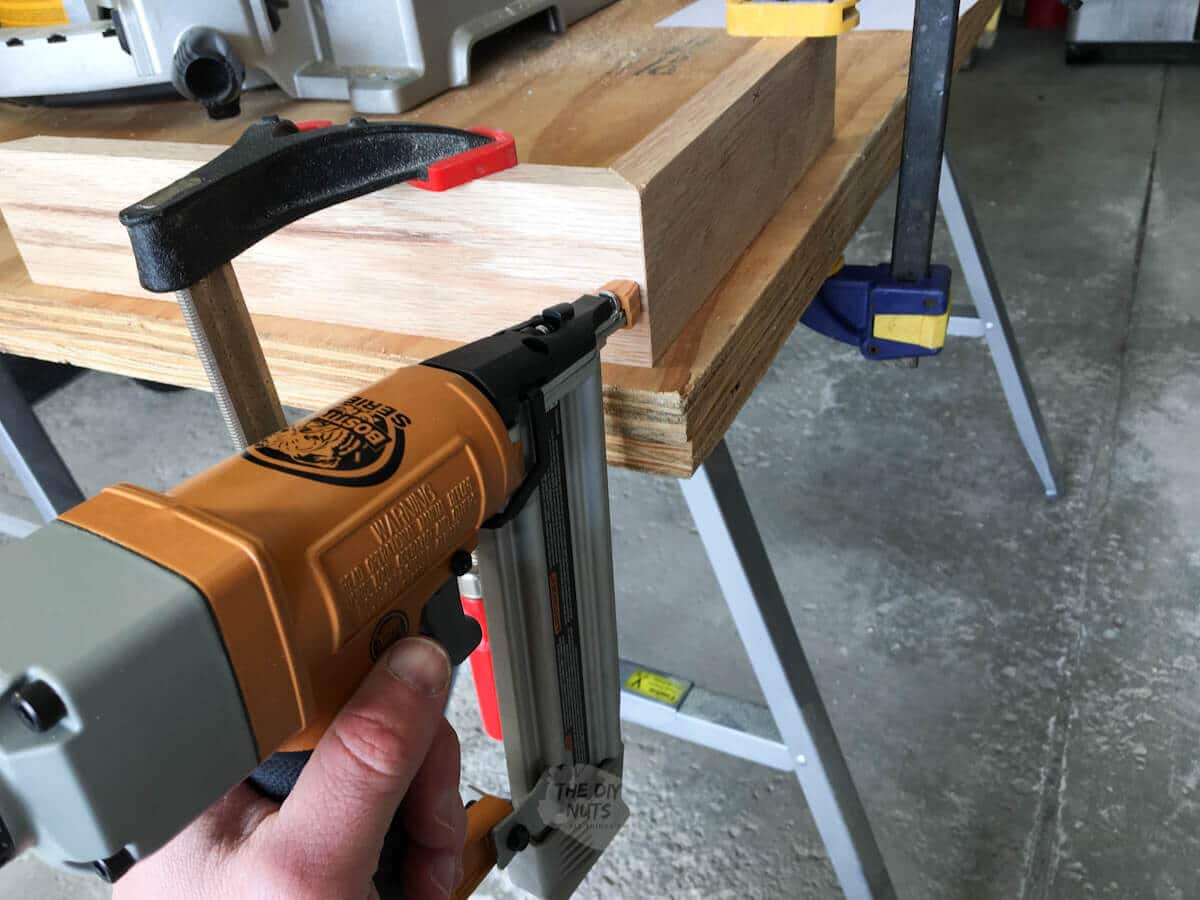
Step 6: Put The Box Together
Use wood glue, clamps, and brad nails to attach the frame together.
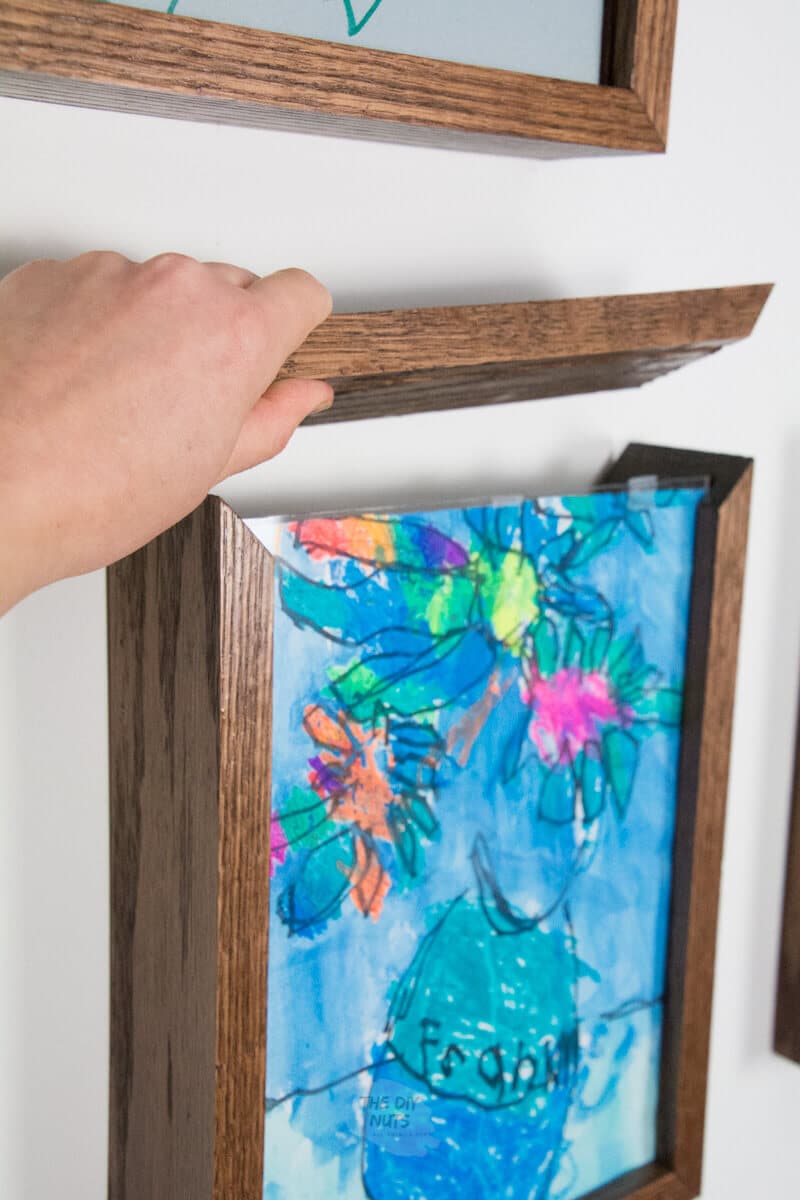
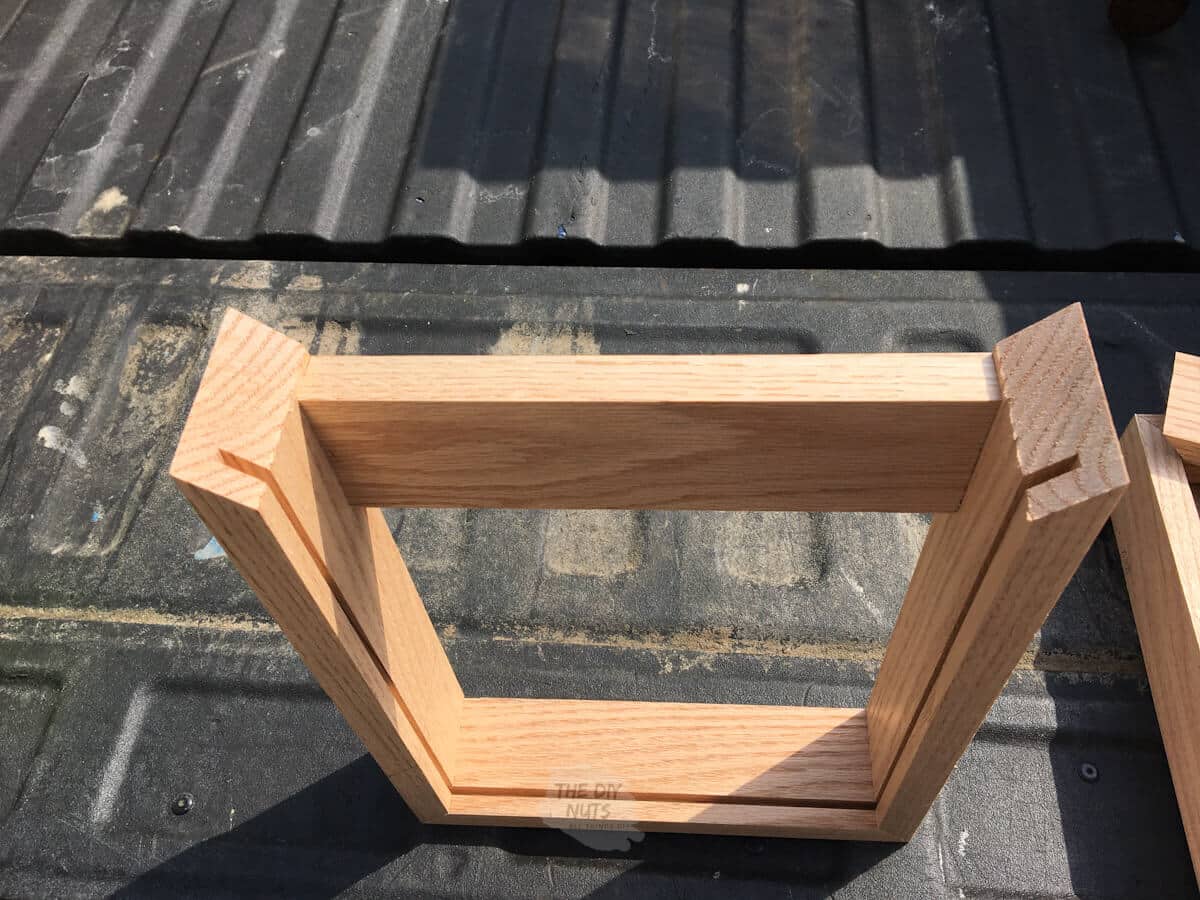
Remember not to attach the top piece if you want to rotate projects easily in your DIY shadow box.
After you have displayed the art, you could attach the top if you don’t want to change it. The grove in the top frame piece will rest on the plexiglass so that you can easily store your child’s art or change it out.
Step 7: Add Extra Support
You can choose to add extra wood support across the back of the frame to provide support and a place for your sawtooth holder. Attach this using the brad nailer and wood glue.
Step 8: Cut Plexi To Size (if needed)
Using a jigsaw and a fine-tooth blade (metal blade) cut the plexiglass.

Make sure to tape both sides and draw the dimensions with the painter’s tape.
Step 9: Check Fit With Plexi
Slide the plexiglass in and make sure you are happy with it
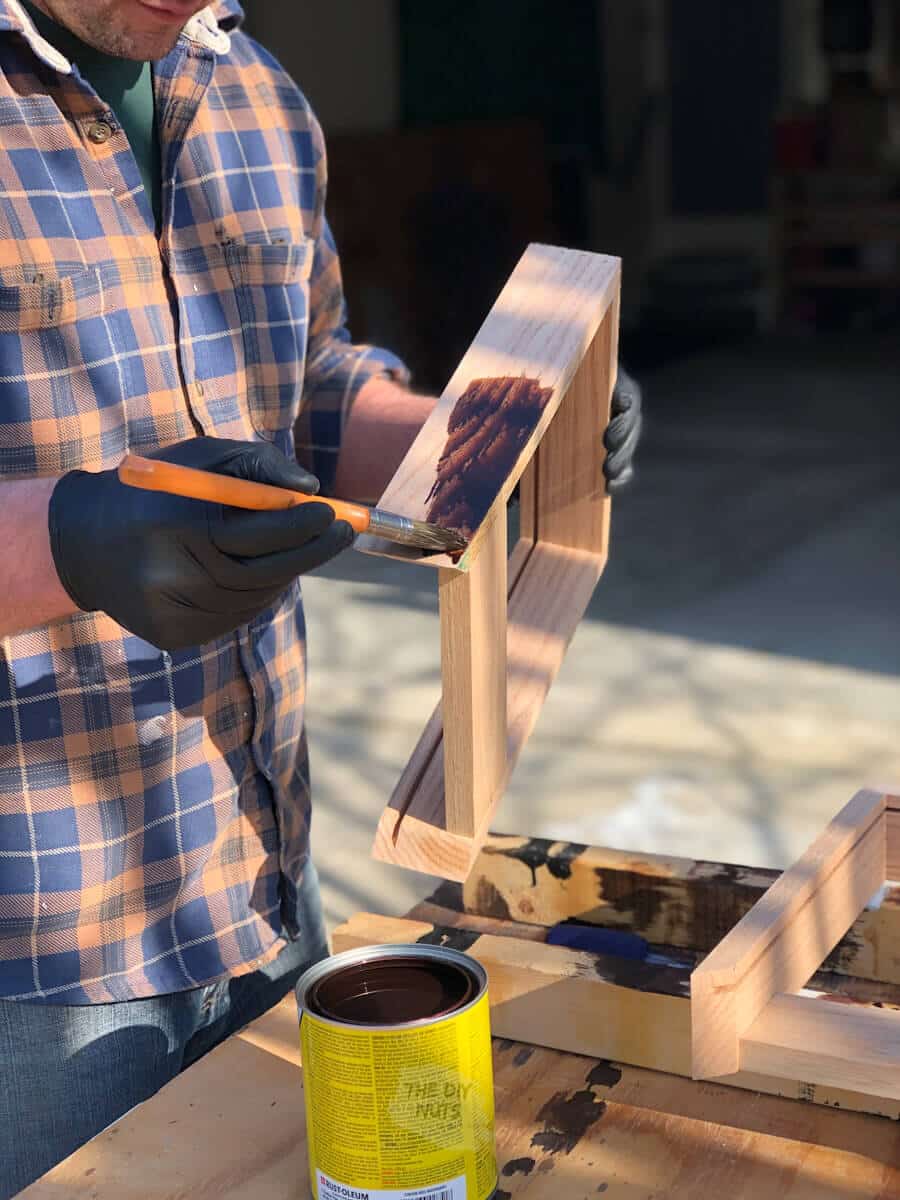
Step 10: Stain, Paint and Poly The Shadow Box
- Stain or paint with the color of your choice. We used Red Mahogany stain.
- Let it fully dry.
- Use Spray poly or apply poly with a brush.
Step 11: Attach Hanger and Display Art
Attach a sawtooth hanger to the back of your frame. Place them in the middle and at the same height down on each art display box. This will make hanging on a wall easier.
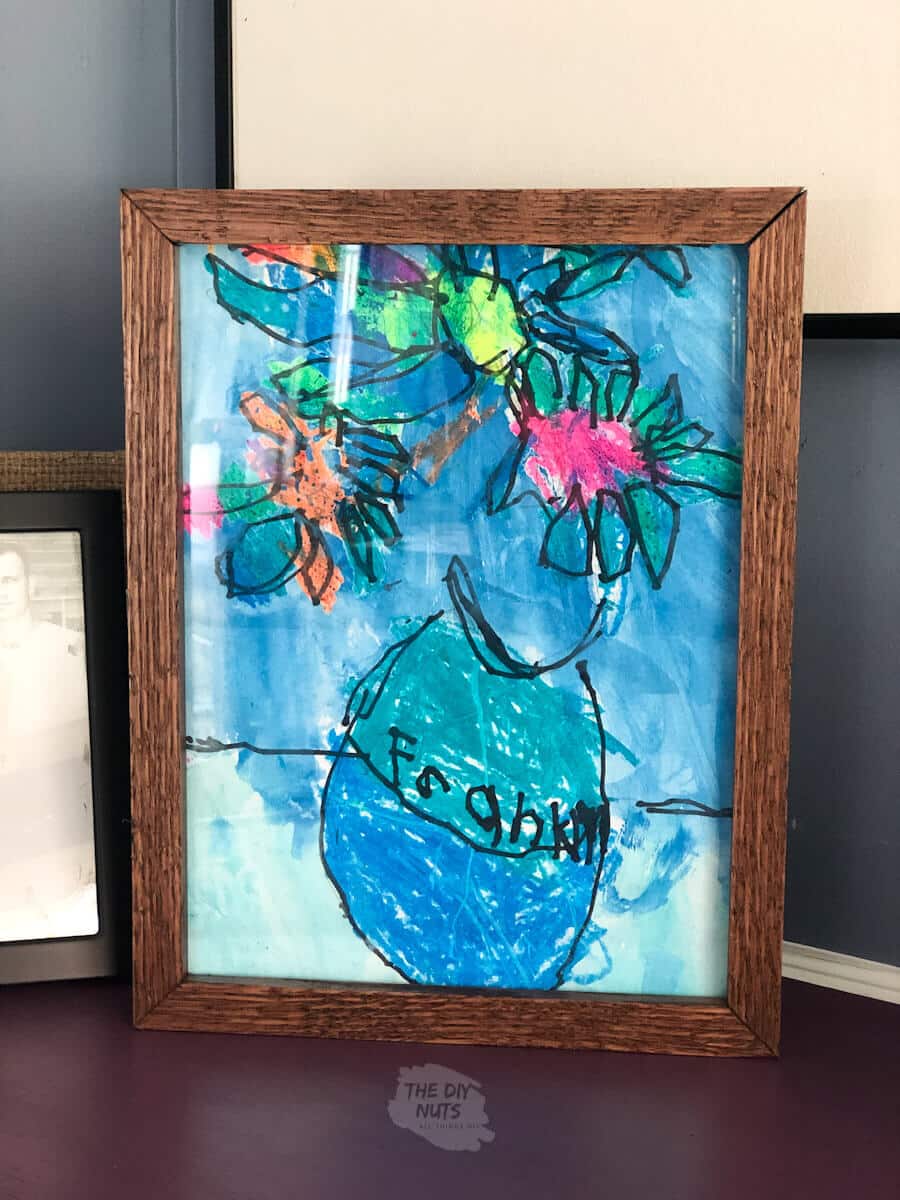
Lift the top wood piece and slide the plexiglass out. Match the artwork with the plexi and slide it back in.

If you cut the plexiglass to the right size, your top piece with the groove will fit right in that slot. We love how easily we can store artworks in this frame and change out new ones when a new piece of art or craft is made.
Tips
- You may need to adjust the paper from the back to fit it in or carefully ease the paper into the bottom groove.
- If choosing to paint your frames, pine boards will work and will be cheaper.
- You could use glass, plexiglass, waxed lambskin, or nothing in the opening.
Follow us on Pinterest, YouTube or Facebook for more DIY inspiration!


More Home Decor DIYs
- FOR THE KIDS: 5 Easy Ways To Display Kid Artwork
- PICTURE WALLS: How To Hang A 9-Grid Gallery Wall
- FOR STORAGE: 27+ Unique DIY Shelves For Any Room In Your Home
Enjoy your DIY art shadow boxes and an easy way to store and rotate your child’s artwork.
If you like this tutorial, please give it 5 stars below 🤩🤩🤩🤩🤩. Your support helps us continue to provide unique and budget-friendly DIYs.

Equipment
- Tape Measure
- Pencil
- Wood clamps
- Shop vacuum
- Miter saw
- Table saw
- Air compressor
- Brad nailer
- Jigsaw
Supplies
- 1” deep x 3” wide x 8’ long oak trim
- Plexiglass or Polycarbonate Sheet
- Stain
- Spray Poly
- Sawtooth Hanger
- Wood glue
Instructions
- Decide on your design and size.
- Using a circular saw or a miter saw cut all of the pieces of oak trim to length.
- Using a circular saw or a miter saw cut a 45-degree corner.
- Using a table saw, set at a one-half inch above the table saw height and run the wood through/over the table saw to create a groove. This groove will be where you slide the plexiglass and artwork for display.
- Dry fit the frame together and make sure everything fits.
- Use wood glue, clamps and brad nails to attach the frame together. Remember, you do not want to attach the top piece.
- You can choose to add extra support of wood across the back of the frame for support and for a place to put your sawtooth holder. Use the brad nailer and wood glue to attach this.
- If needed, use a jigsaw and a fine-tooth blade (metal blade) cut the plexiglass.
- Check fit of plexiglass in box.
- Apply and wipe stain. Let dry for 24 hours.
- Apply spray on poly and let dry.
Notes
- We made ours the correct size for an 8.5” x 11” piece of paper (copy paper size) and also a 9” x 12” piece of paper which is a normal construction paper size.
- The outside dimensions of our boxes are 12 1/4″ x 9 7/16″ for the copy paper-sized shadow box and 13 1/8″ x 10 1/4″ for the construction paper-sized box.
- Pick the type of wood you want your frame to be made out of. We used oak based on staining the boxes vs. painting them. You could use a cheaper wood like pine if you are painting the frames.