Easy DIY Shrinky Dink Instructions (DIY Keychain Tutorial)
Our free template can help you create the cutest state shrinky dinks for keychains, magnets, and more. This family-friendly craft is fun for everyone. Learn all the tips for creating a shrinky dink craft in just a few minutes.
*Disclosure: I only recommend products I would use myself and all opinions expressed here are our own. This post may contain affiliate links that at no additional cost to you, I may earn a small commission. Read our full privacy policy.
We have a new love for a childhood favorite craft. Our whole family is super excited about shrinky dinks.
Quick Take: best temperature to cook plastic shrink film = 325 degrees Fahrenheit for 1-3 minutes.
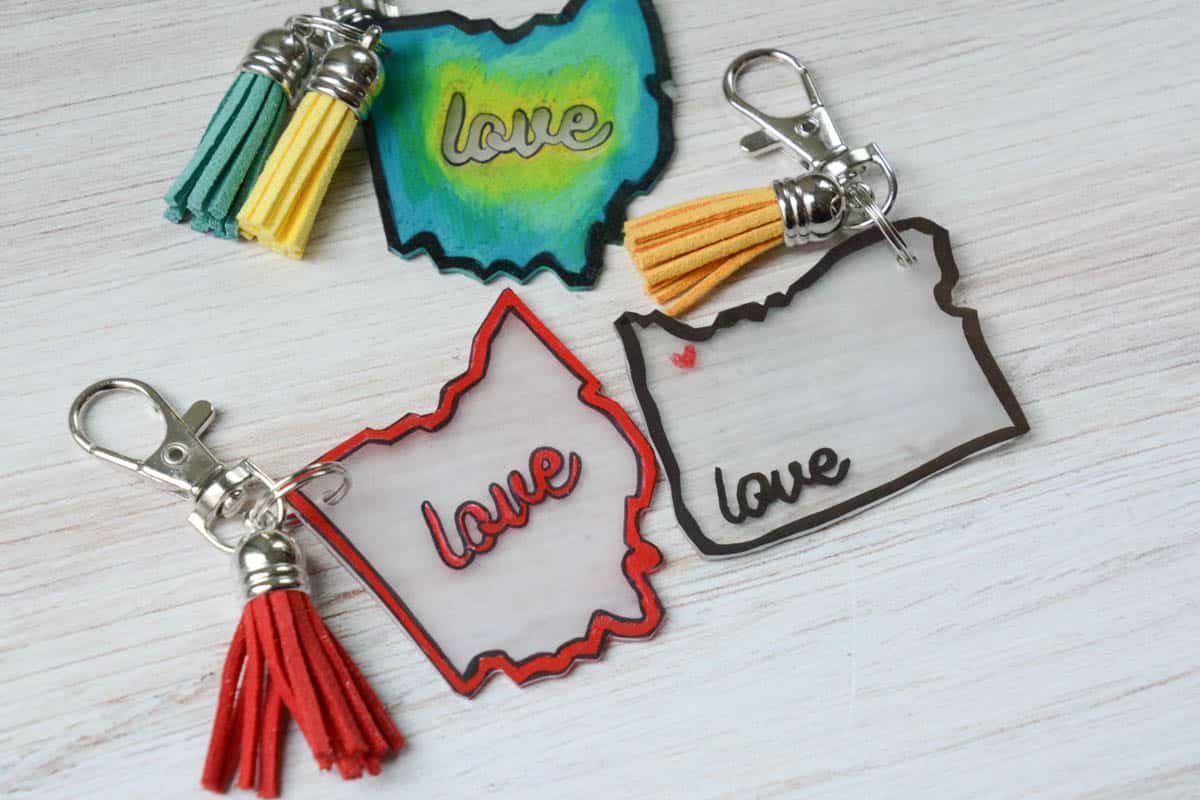
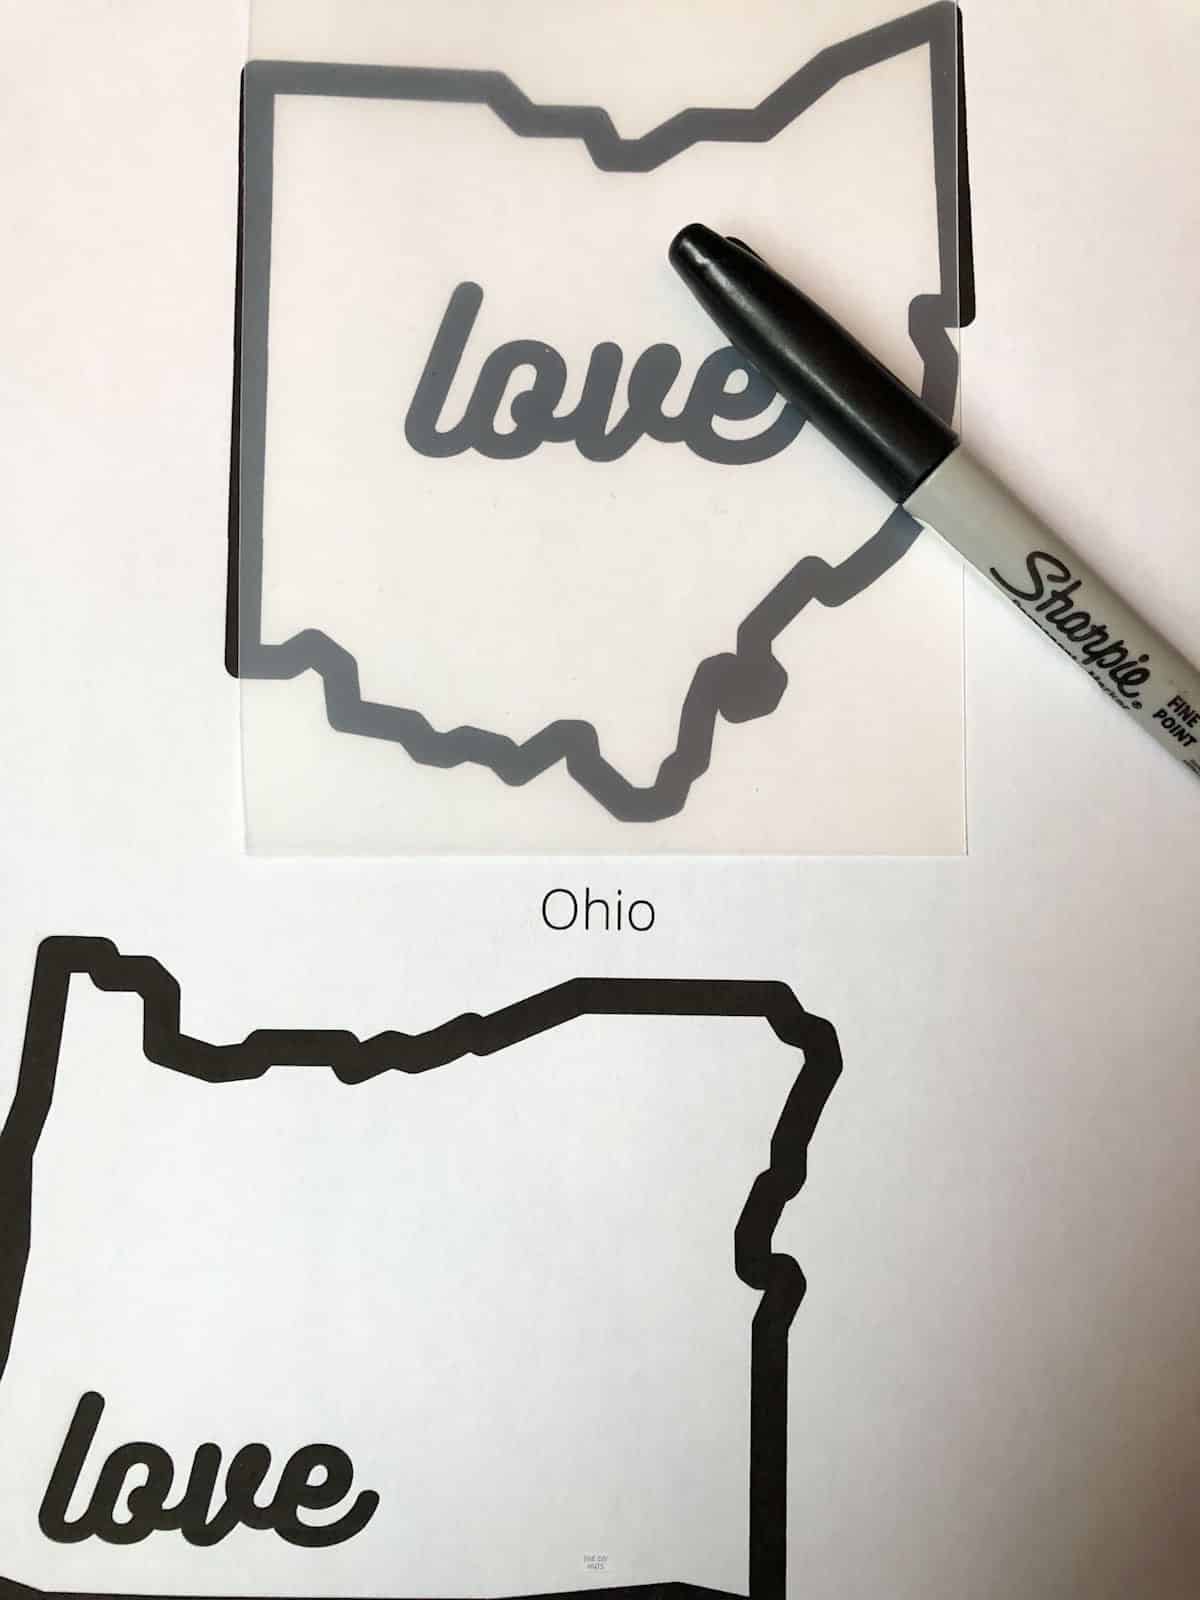
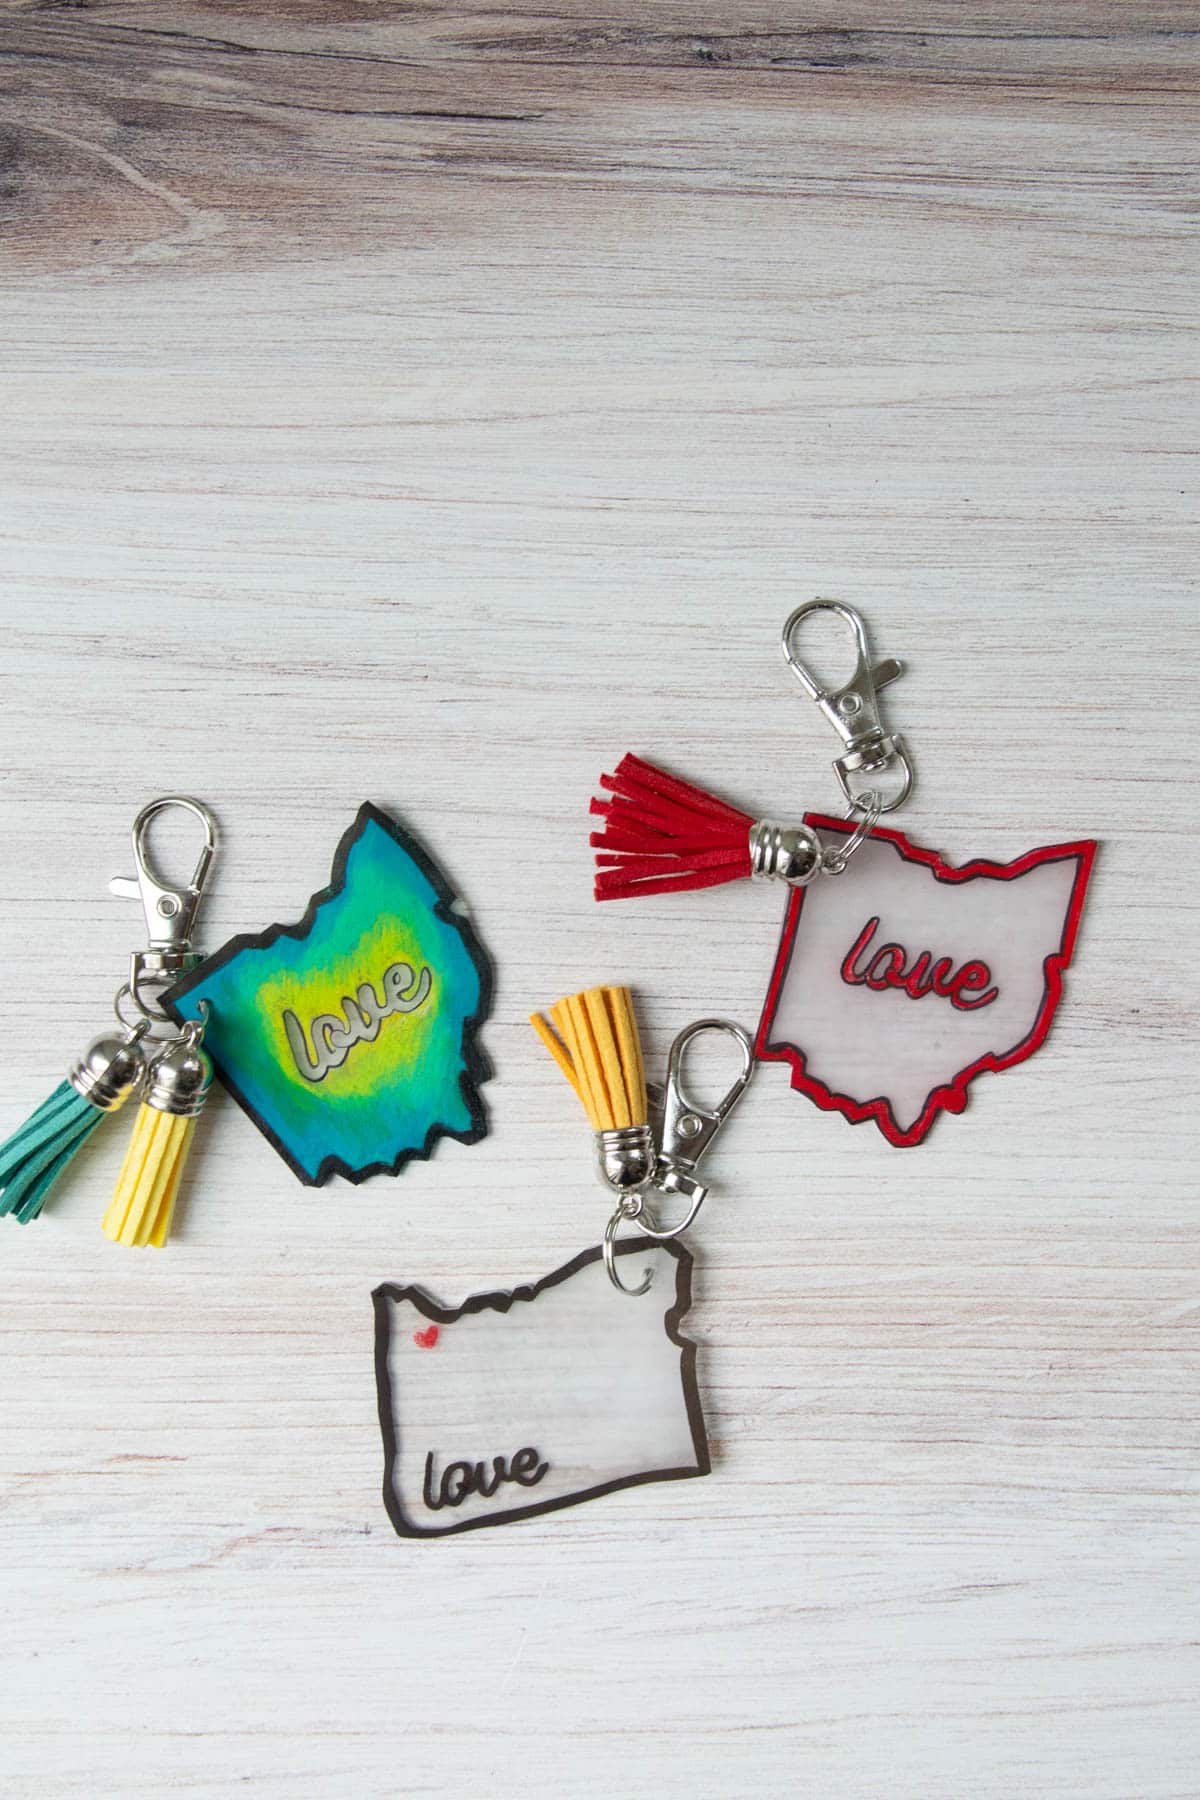
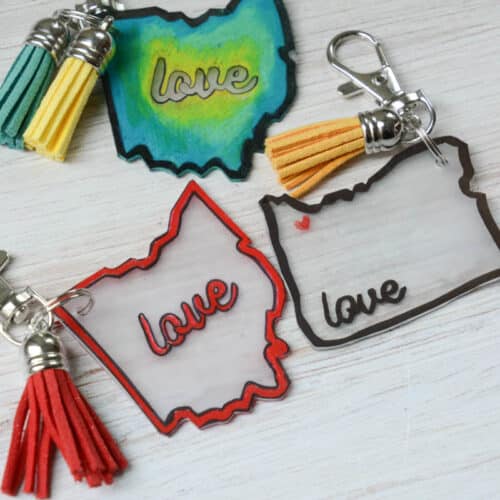
Our State Design Idea
You can make more advanced shrinky dinks like the design we will share or more kid-friendly designs and scribbles. No matter what, watching your plastic design shrink is super cool!
We love (no pun intended) state artwork. You can make these with just a black marker or have fun with color. Our DIY charms can help you create any keychain, Christmas ornament, or fun magnet.
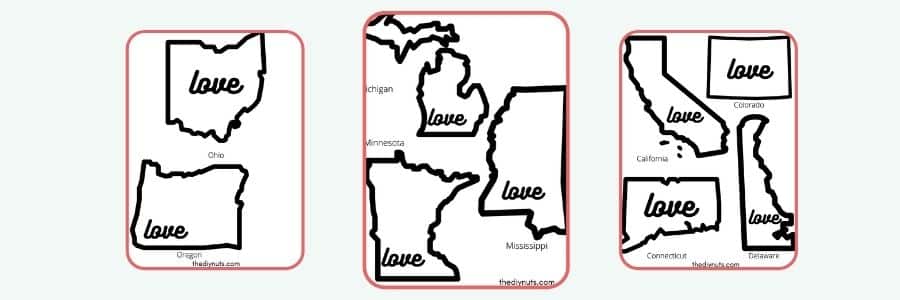
Using Our Plastic Shrink Template
If you would like to change the size, you could always adjust your printer settings to make it scale differently. We also only recommend printing the page you need and not all the pages (no need to waste ink). I guess you would print all the templates if you are making 50 states!
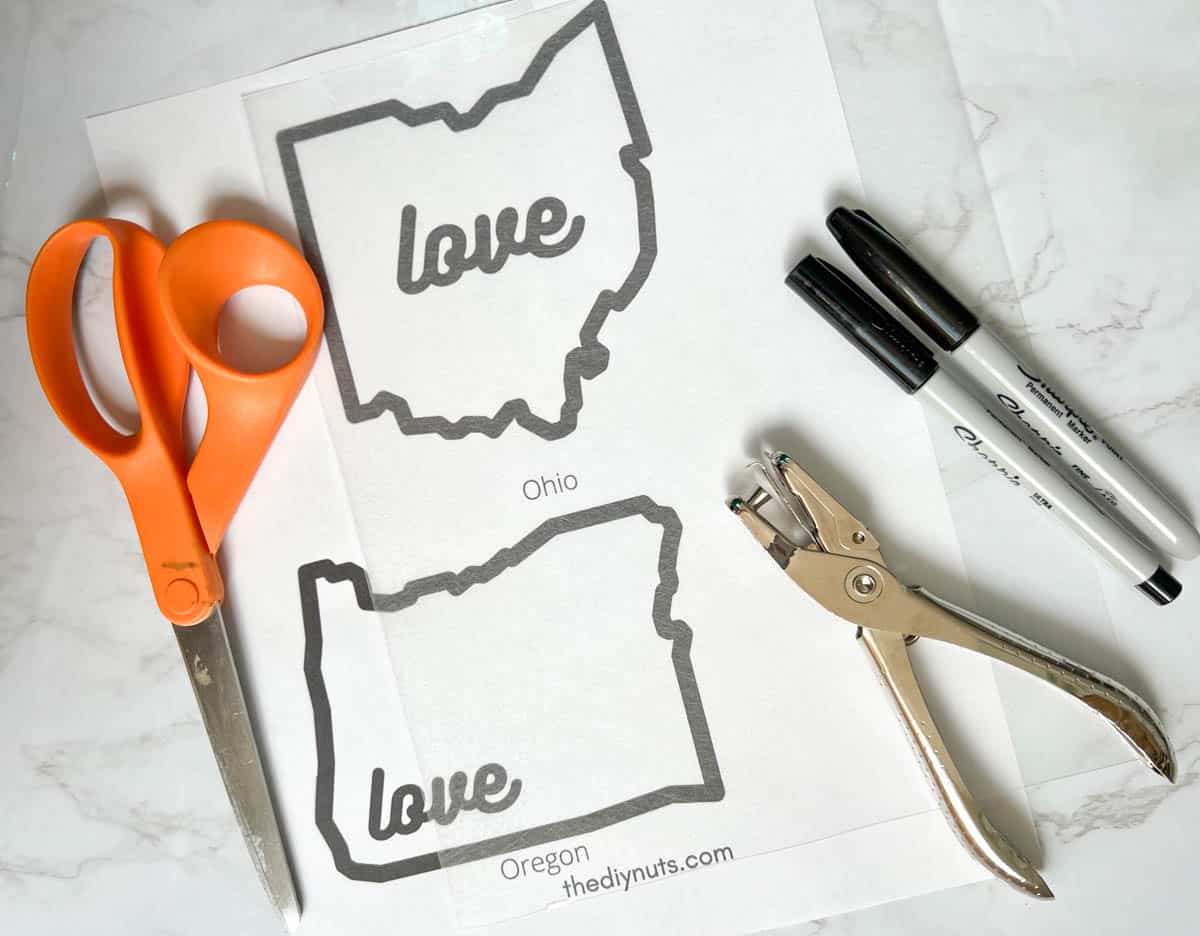
Supplies You’ll Need
*Disclosure: This post may contain affiliate links that at no additional cost to you, I may earn a small commission. Read our full privacy policy.
*Optional
Where can you buy shrinky dinks?
Any local craft store or online retailer should have this easy craft. Here are a few landing pages for Shrinky Dink film so you can shop around for the best price!
State Shrinky Dink Instructions
Before You Begin: Preheat Your Oven
Preheat your oven to 325 degrees F and print templates (or create a drawing to work from).
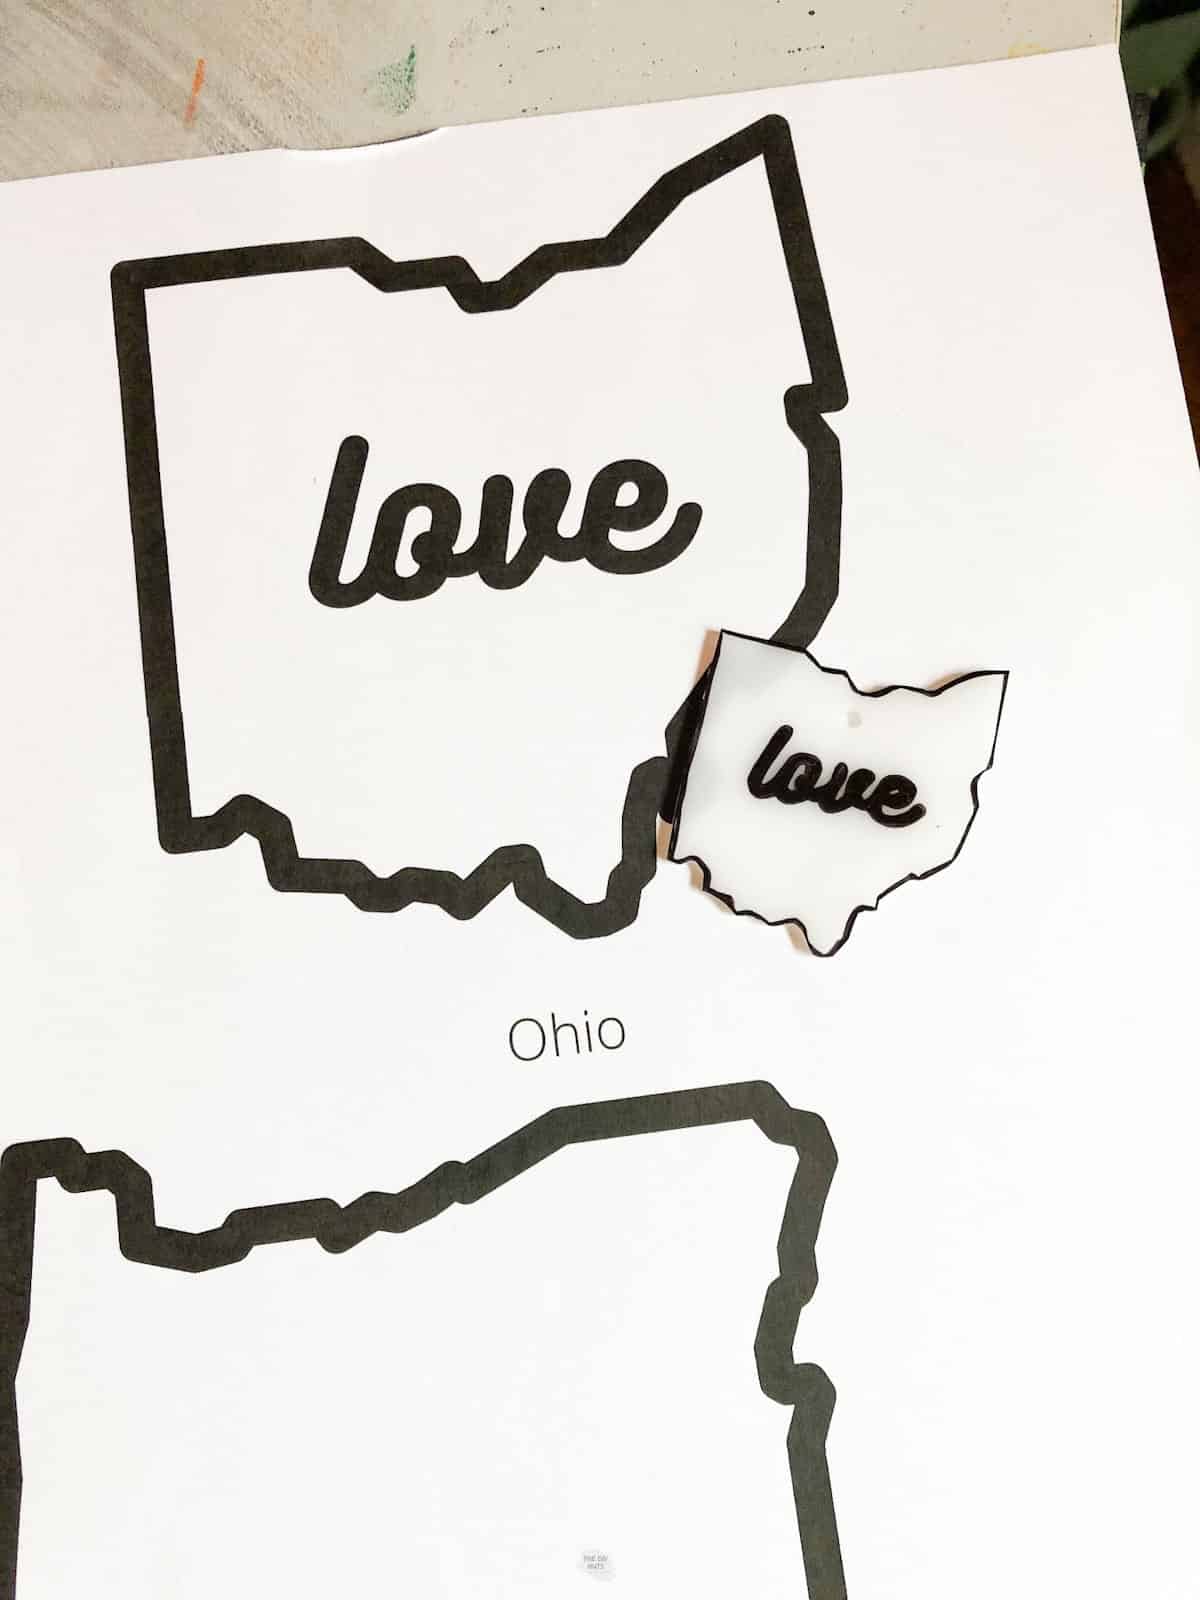
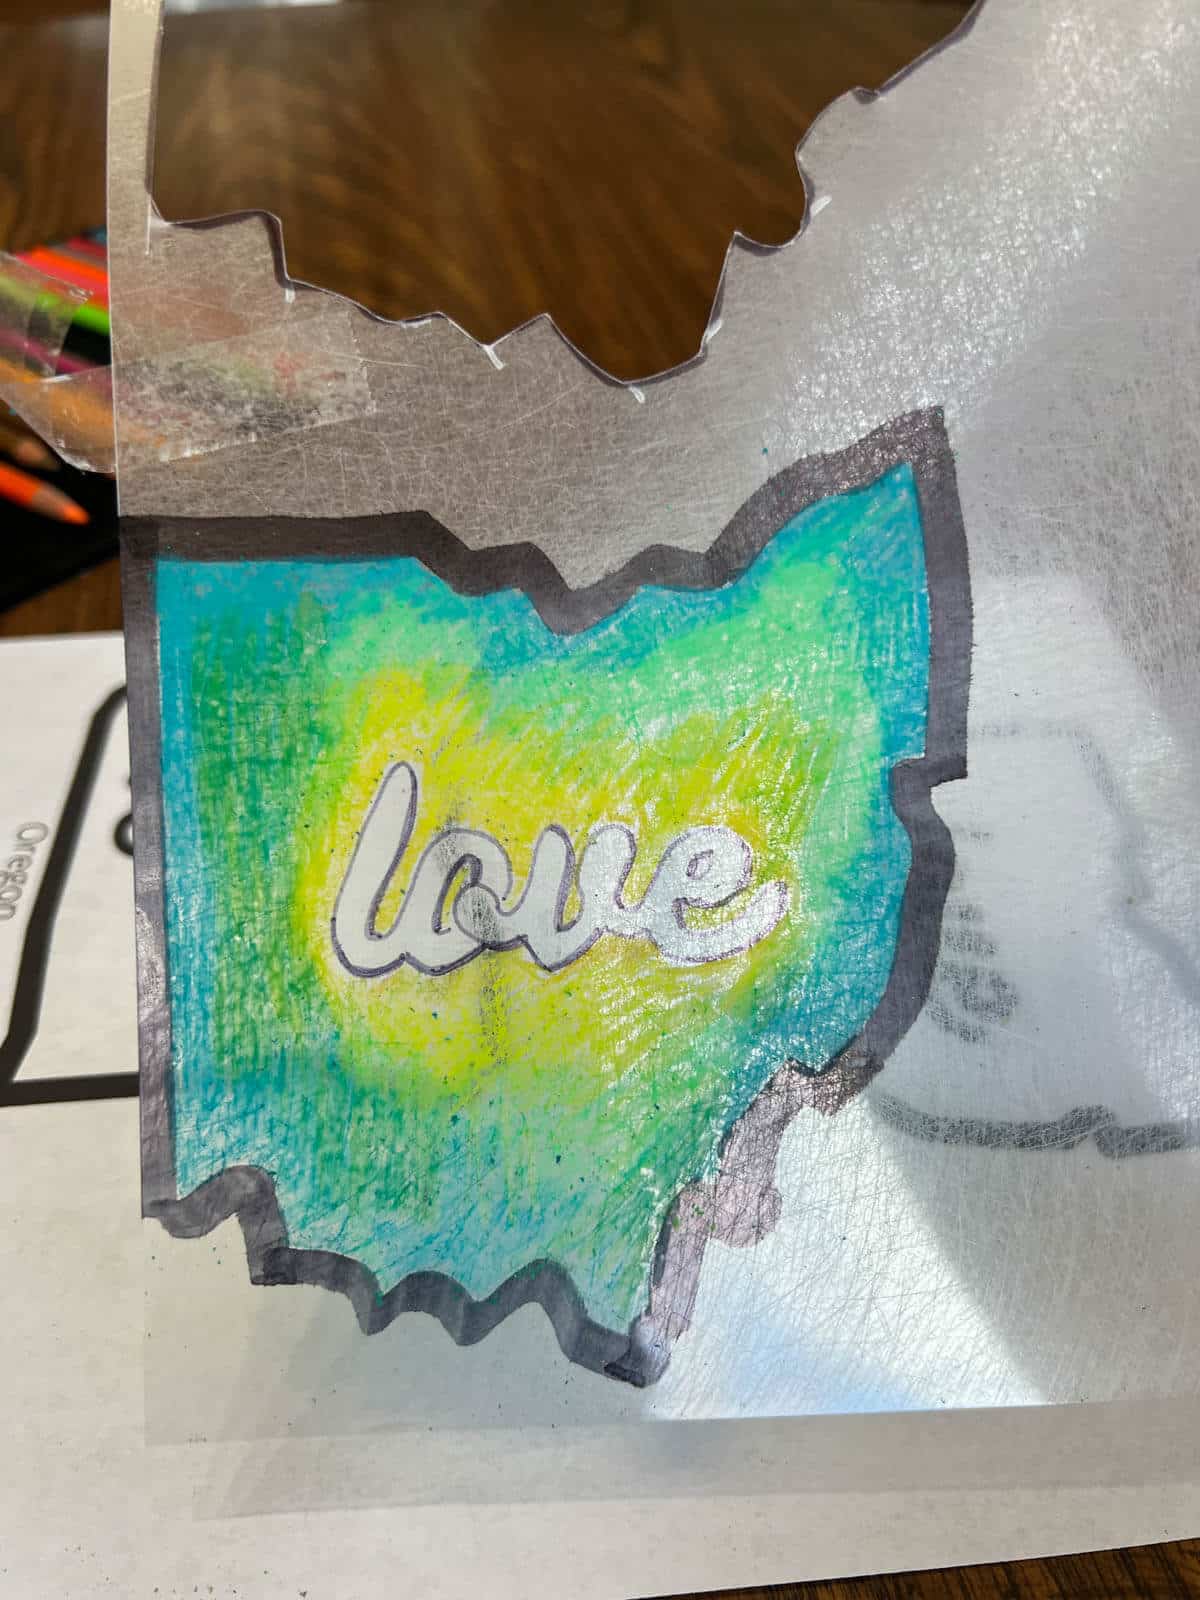
Step 1: Trace Your Drawing Onto Shrink Film
Carefully line up the film to the template and tape the plastic shrinky film so it does not move. Begin to trace your artwork onto the Shrinky Dink film.
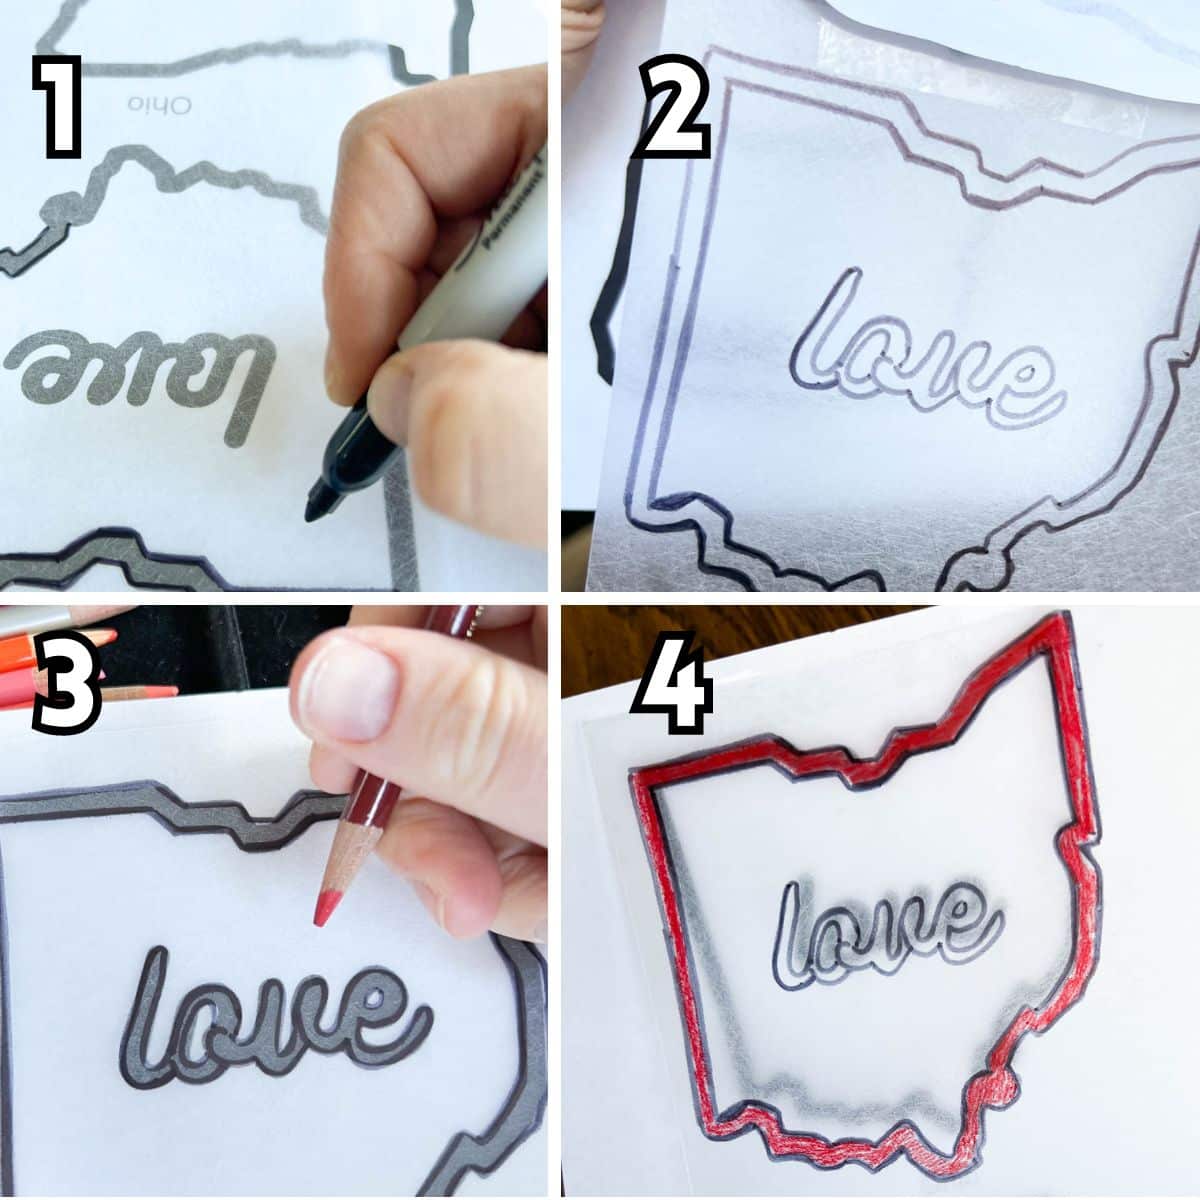
Step 3: Add More Details or Colors
If you are using colored pencils you will want to color on the rough side on the film. With permanent markers, you can color on either side.
Step 4: Cut Out Design
Cut out your shape once you are done coloring. You will not be able to cut the plastic after it has been in the oven.
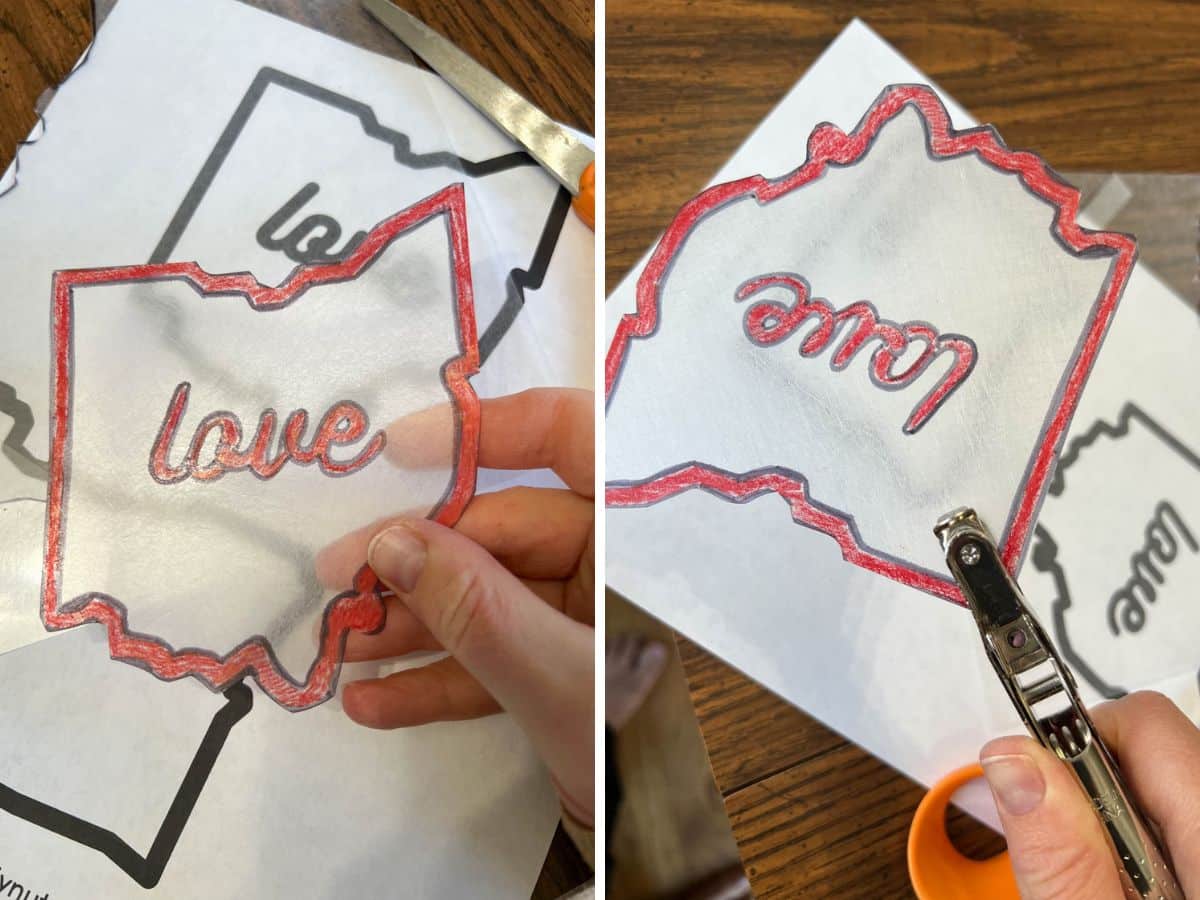
Optional: Punch A Hole
Use a hole punch to add a hole near the top, but not too close to the edge.
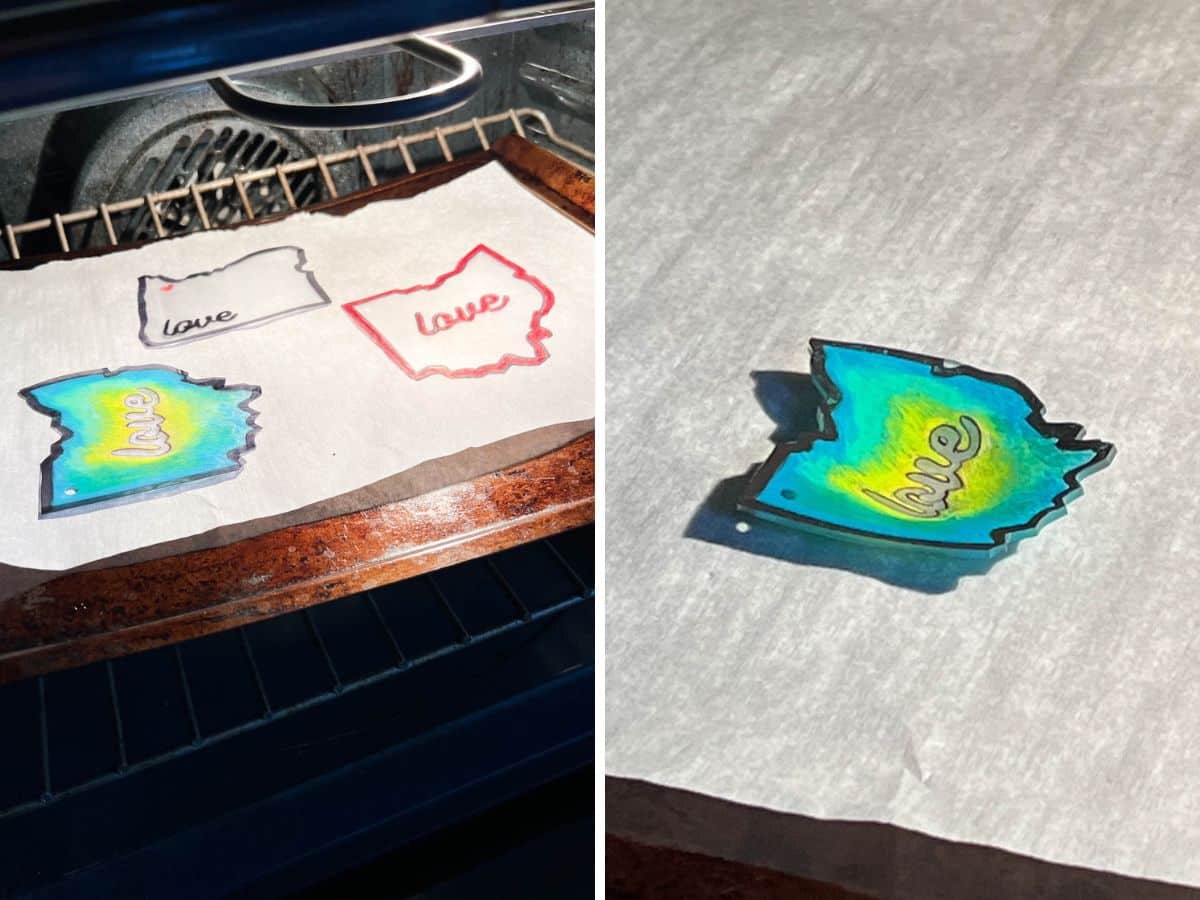
Step 5: Place Shrinky Dink On Cookie Sheet
Cover your cookie sheet with parchment paper first.
Step 6: Place In Oven
- You will bake your Shrinky Dink at 325°F for 1-3 minutes.
- Watch your project.
- Take the cookie sheet out of the oven after the shrink plastic has been lying flat for 30 seconds.
Just like with our DIY letter crayons, cooking time may vary depending on your oven and environment.
Step 7: Let Cool
Let your craft cool down.
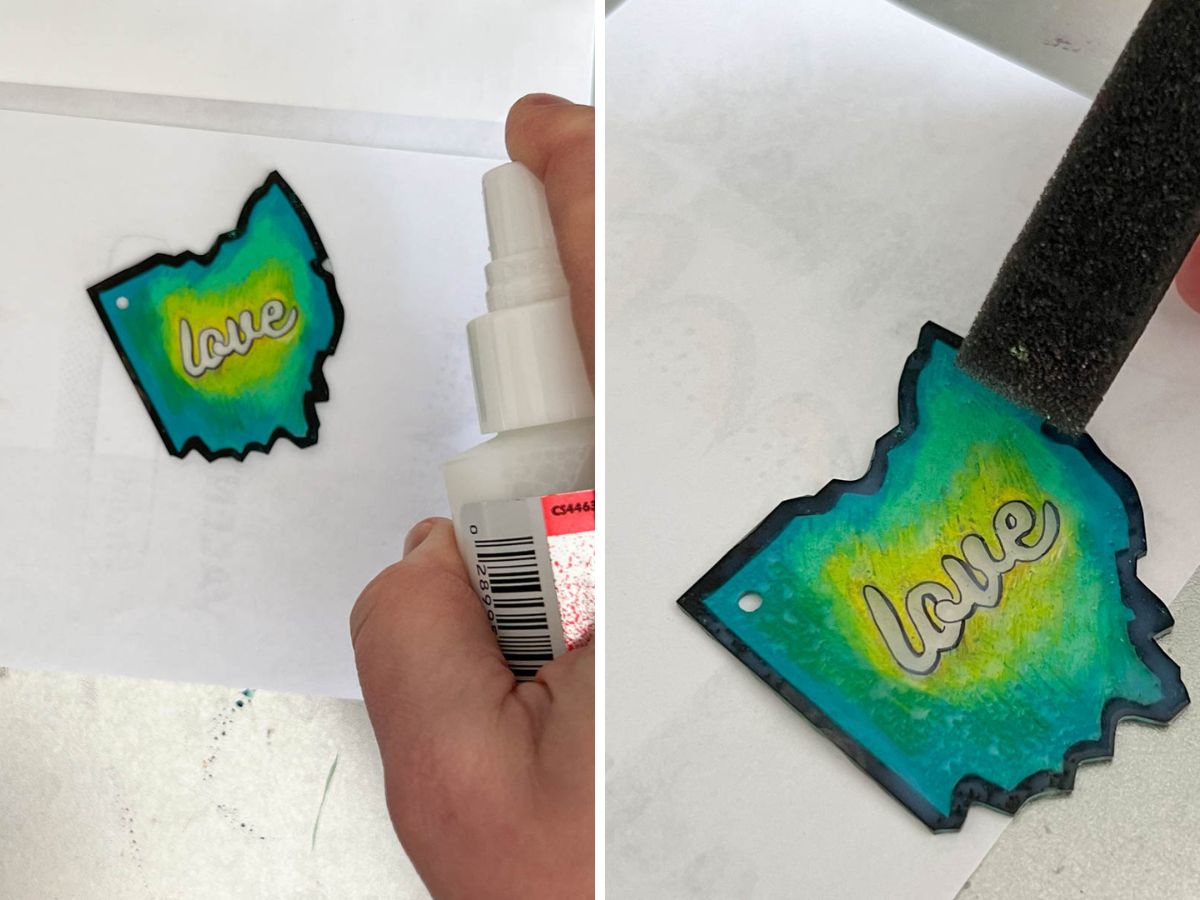
Optional Step: Add A Protective Clear Coat
You can use a clear craft resin or Mod Podge to protect your plastic shrinky design. We used spray Mod Podge and a quick swipe of a foam brush. Regular Mod Podge is probably best, but we were trying to save time.
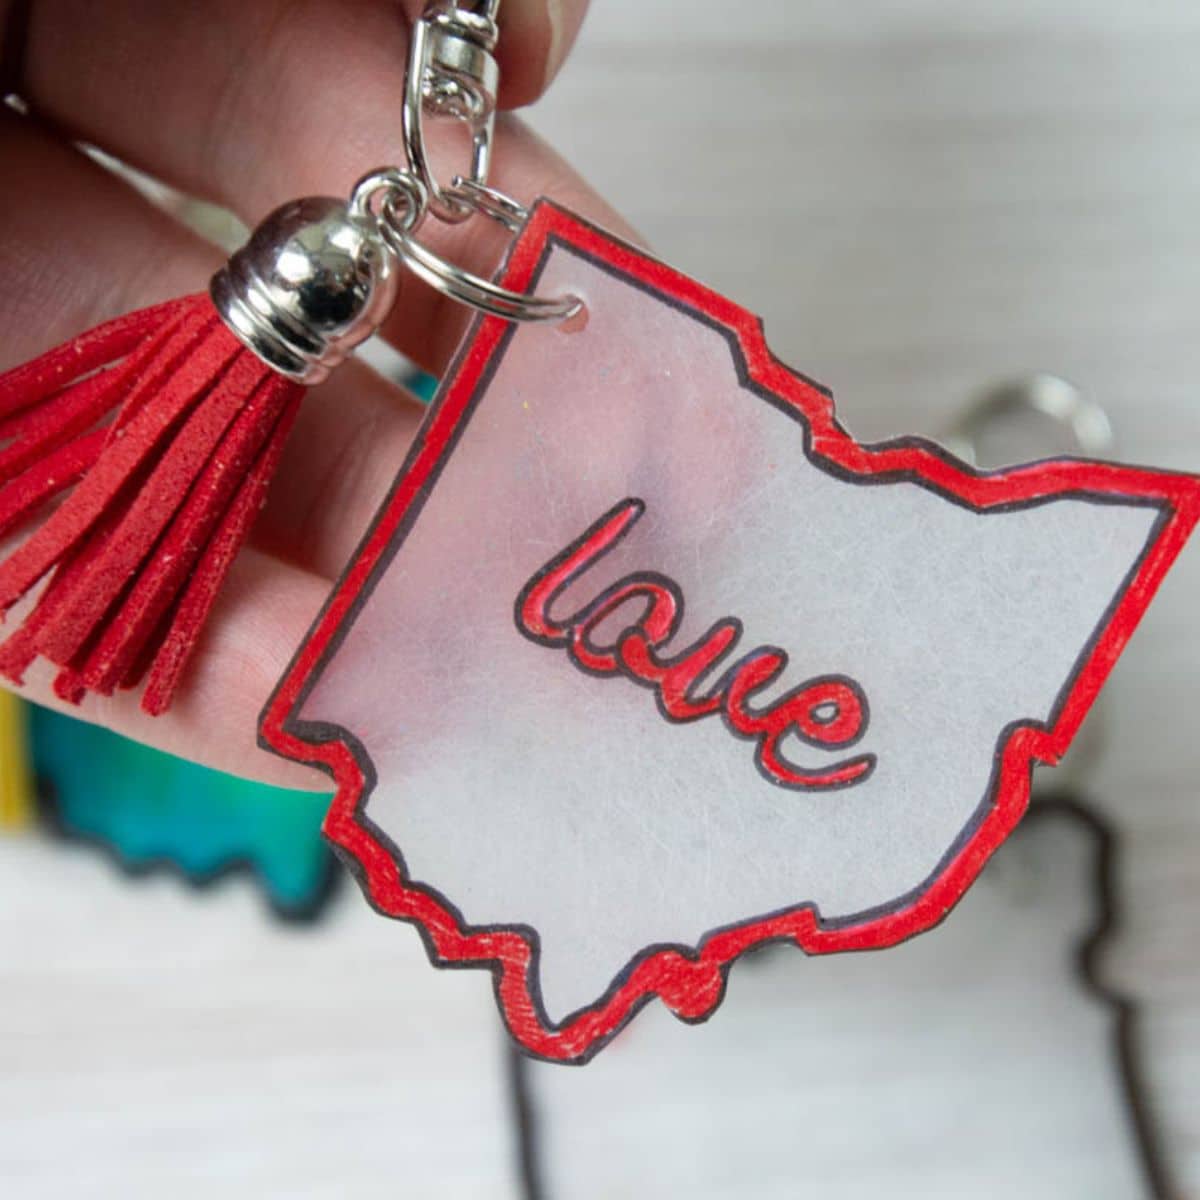
Step 8: Add Accessories
Add a string, keychain, tassels or magnet.
Tips
- Don’t worry if the plastic twists and turns. This is completely normal. We thought ours were going to touch together, but after they flipped and bent, they straightened out.
- If yours curls up and touches the other side, carefully use a spatula or tweezers to pull the touching parts away. Then reheat the shrinky dink until it lies flat.
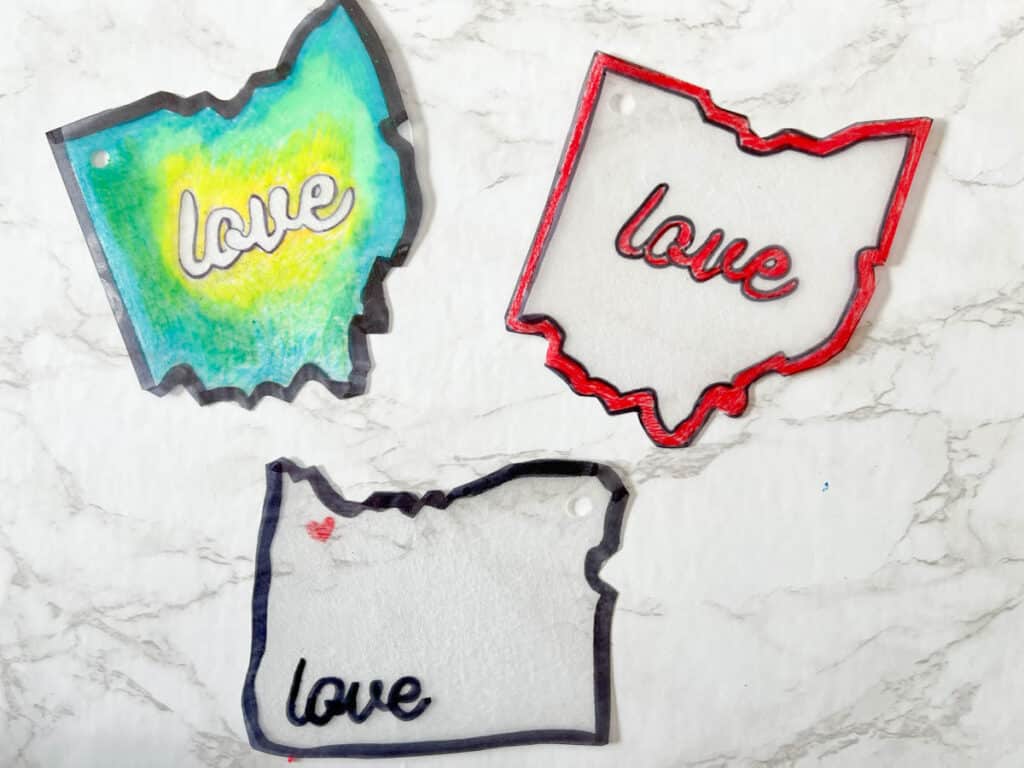
- Our plastic shrink film is about 1/3 size of the original design and a lot thicker than the original film.
- To shrink plastic film, you need a heat source. The most common way to shrink Shrinky Dinks is in your oven or toaster oven. A heat gun or blow dryer is also said to work.
- Have fun experimenting with color. We love using colored pencils on shrink film.
Craft FAQs
Follow us on Pinterest, YouTube or Facebook for more DIY inspiration!
Related Easy Crafts & DIYs
- Fun DIY Nail Polish Dipped Mugs
- How To Make String Art
- How To Make A Piñata With A Balloon
- How To Water Marble For Cool Effect
- How To Melt Crayons On Canvas
Now we think we need to make more easy shrinky dinks with this family-friendly craft idea.
Did you have fun making this craft with your family? Make sure to leave a 5-star ⭐️ ⭐️ ⭐️ ⭐️ ⭐️ review in the comments!
DIY Shrinky Dink Instructions
Equipment
- Hole Punch
- Cookie Sheet
Supplies
- Shrinky Dinks
- Colored Sharpies or permanent markers
- Parchment paper
- String optional
- Pin backing optional
- Magnet optional
Instructions
- Print out the state printable or sketch your own drawing.
- Place shrinky dink film on top and don't let it move.
- Use a Sharpie or permanent marker to trace your drawing or template.
- Neatly cut out design.
- Punch a hole if you plan to hang it.
- Preheat oven to 325 degrees Fahrenheit.
- Place on parchment paper on a cookie sheet.
- Once the oven is heated, place a cookie sheet in for 1-3 minutes. You will see the plastic curl and twist, wait 30 seconds after it is flat.
- Pull out of the oven and let cool.
- Add magnet, pin, or string.
- Enjoy your easy Shrinky Dink craft!
Video
Notes
- You can use colored pencils, colored permanent markers or acrylic paint to add color to your Shrinky Dinks.
- Make sure to cook in the oven for 30 secs after the plastic film lays flat.
- Do not touch the plastic until it is fully cooled.
Can’t wait to try the AZ, ND, MN, & CA States as shrinks dinks
Hi Deb! Good luck with your shrinky dink project!
In the past I have used a heat embossing tool and it works. I always keep a pair of scissors to help flatten out any long piece and use something heavy to keep the shrinky creation flat.
Great tip! Yes, in the oven you do risk a shrink dink possibly curving together. If that happens you can normally use a pair scissors or something metal to carefully stop it and reflatten. Thanks for the great shrinky dink tip!
Looking forward to making some of these for gifts, and one for me!
Have fun with your Shrinky Dink project!