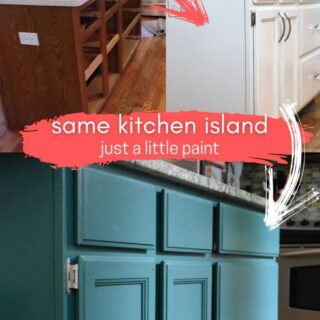
How To Repaint Painted Cabinets (Our Green Kitchen Cabinets)
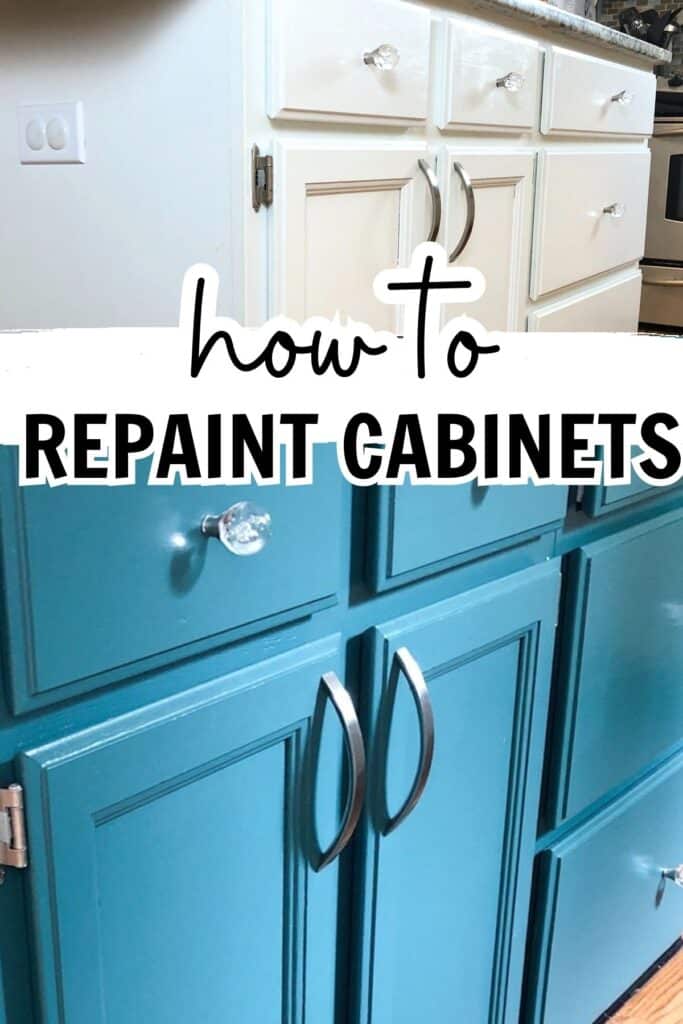
Are you looking for a way to freshen up your kitchen cabinets? Keep reading to find out what steps to take for painting kitchen cabinets that are already painted. We absolutely love our repainted kitchen cabinets and the fun paint color we chose.
*Disclosure: I only recommend products I would use myself and all opinions expressed here are our own. This post may contain affiliate links that at no additional cost to you, I may earn a small commission. Read our full privacy policy.
Why did we repaint our cabinets?
We knew we wanted to update our painted kitchen cabinets recently. Even though we did a pretty good job painting our old oak cabinets the first time, 8 years and a few children have still done a number on them.
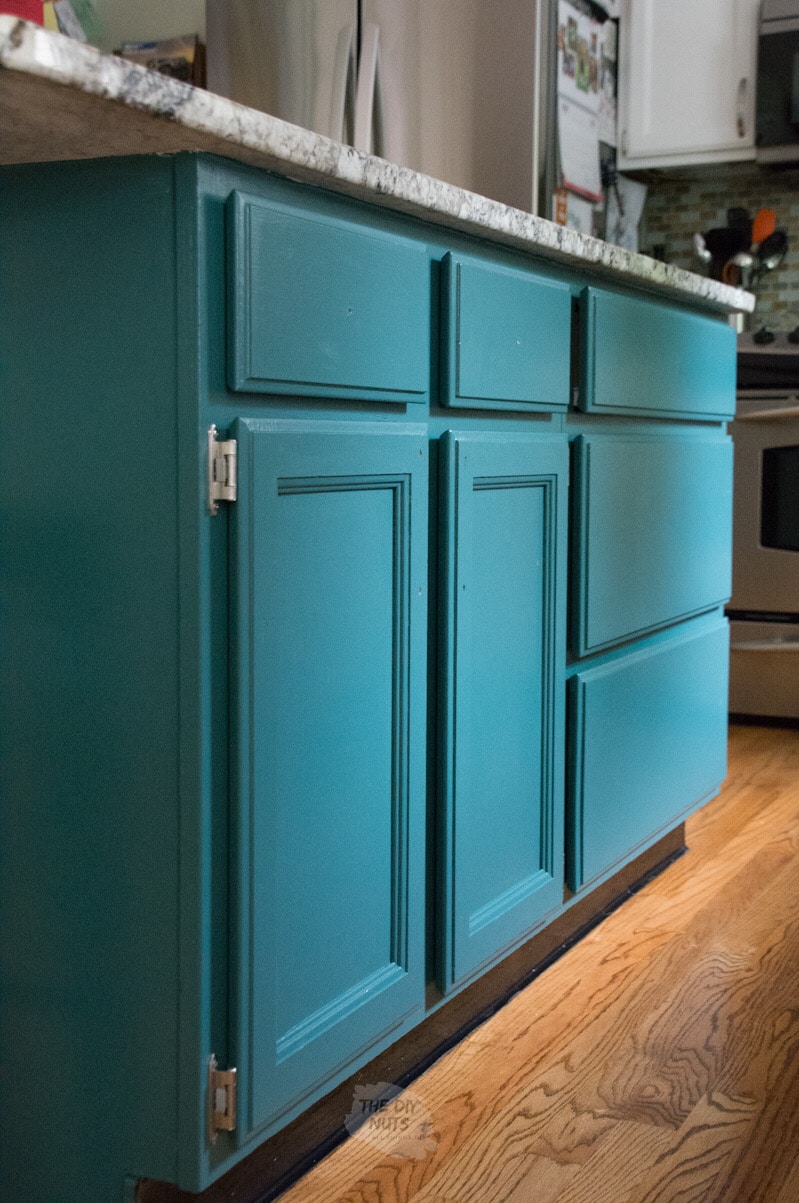
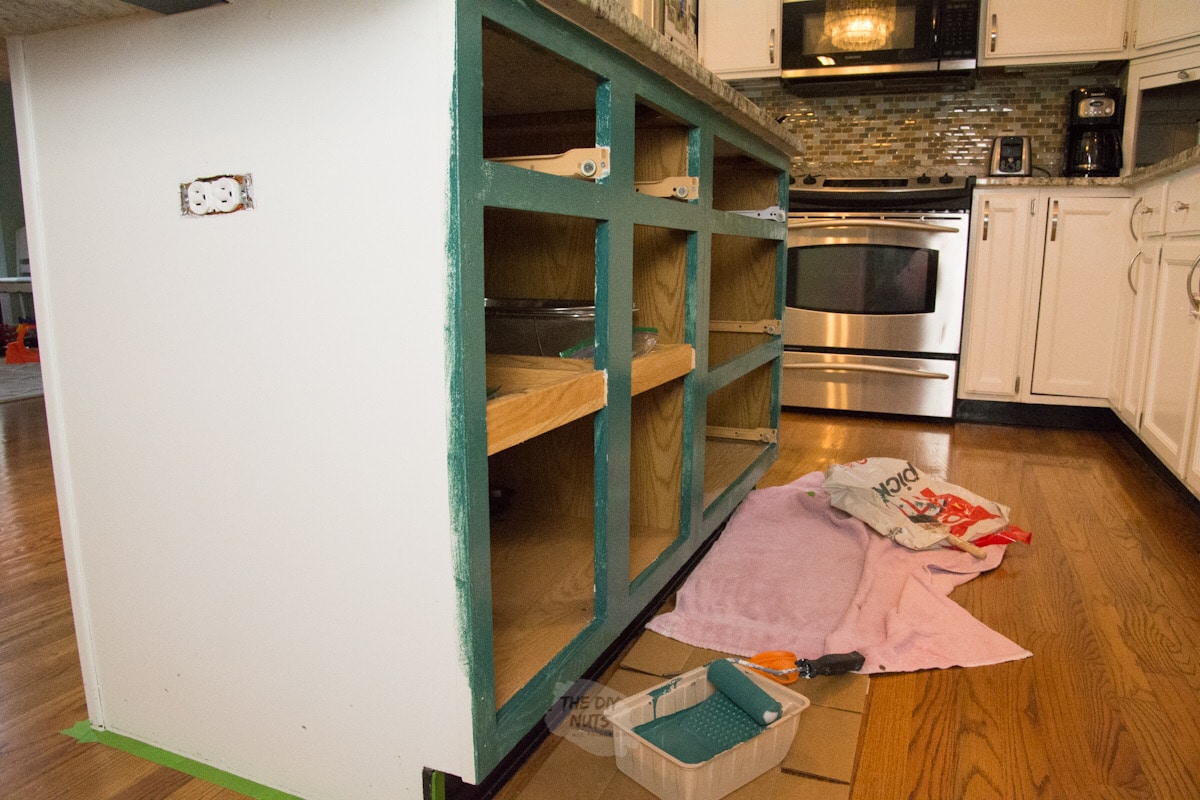
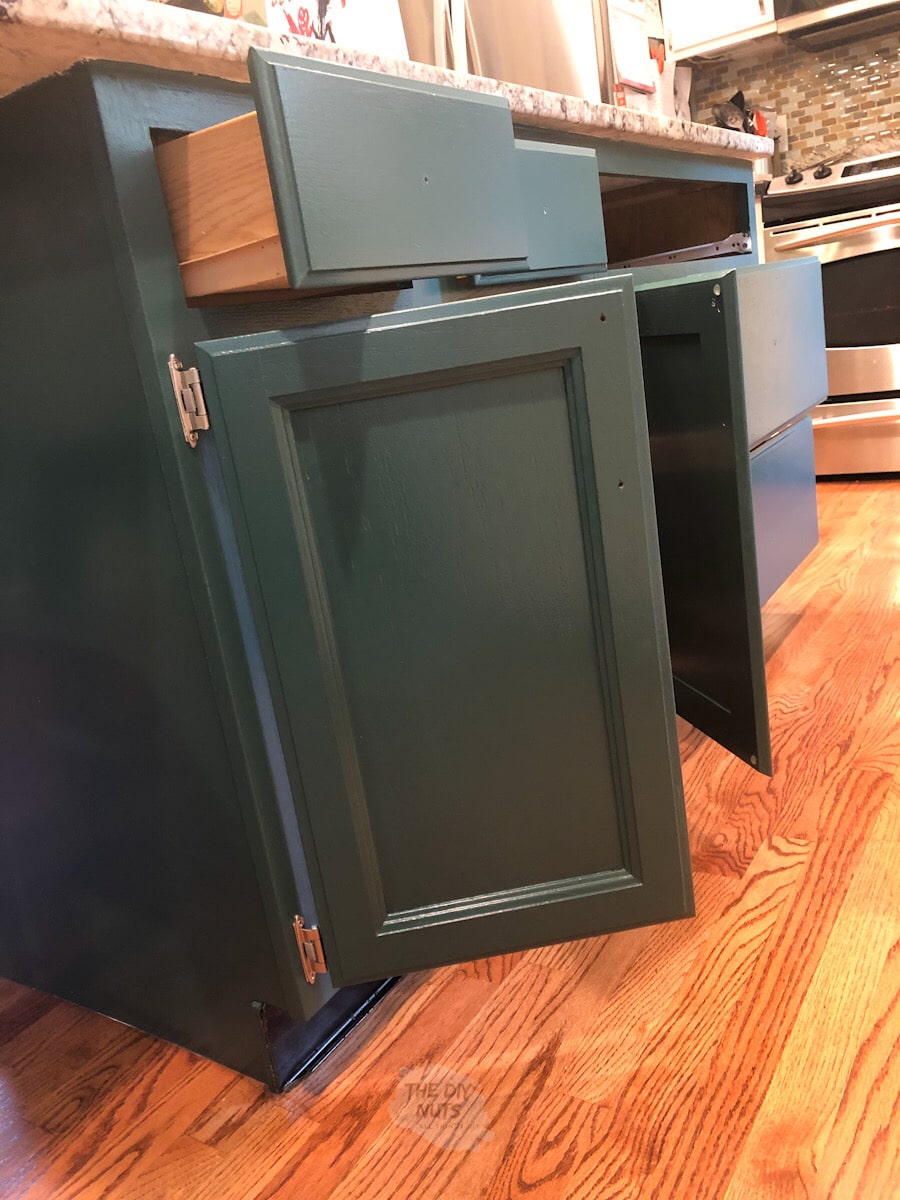
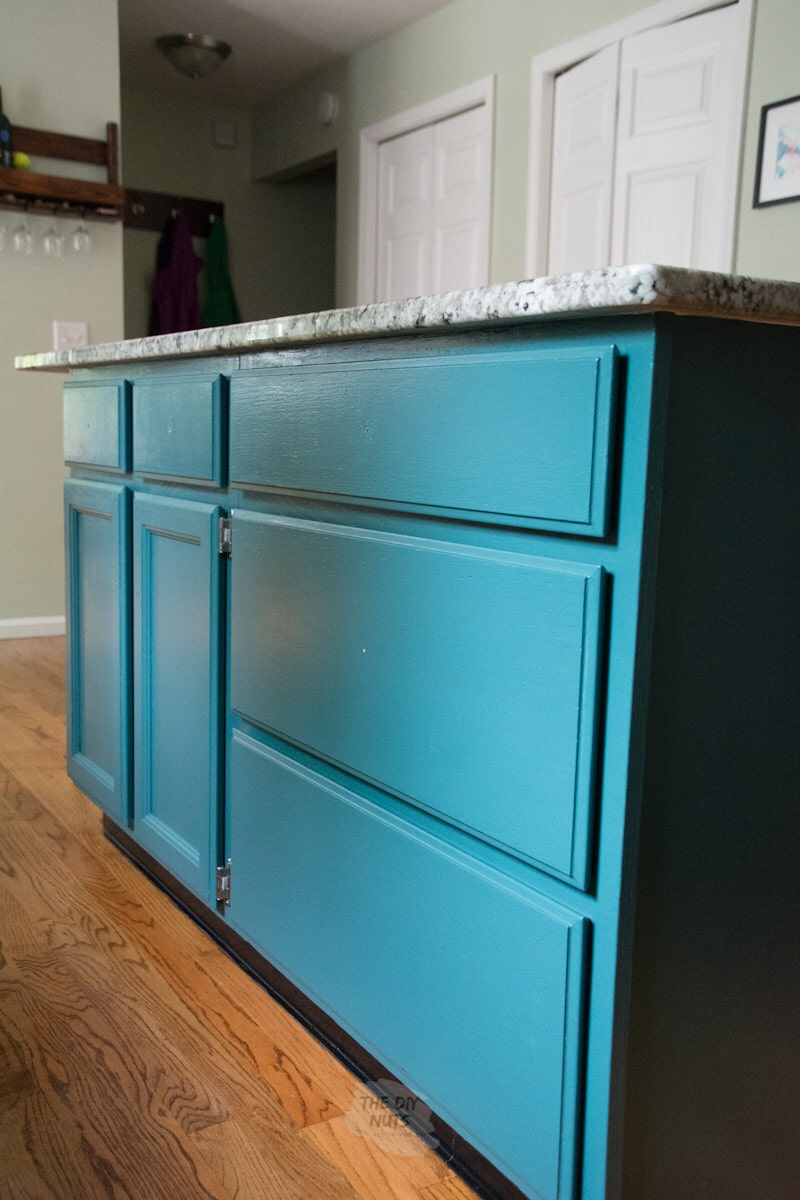
I absolutely knew I wanted to repaint the white kitchen cabinets on our island a fun & deeper color to go with our walls in our living space.
Spoiler Alert: I honestly still can’t get over how much I love our newly painted island. Soon I will be doing all of our lower cabinets and painting our backsplash to completely update our kitchen for probably under $200.
How hard is it to paint kitchen cabinets?
The prep is the biggest pain when painting cabinets. Cabinet painting is a pretty easy DIY project that can really impact your space. You just need patience, proper prep, and dry wait time.
Most people probably run into problems when they try to rush the cabinet painting process. We love that painting projects do not have to include a lot of tools and normally can be done pretty inexpensively.
If you are entirely new to painting, I would not recommend starting with cabinet painting. Try painting walls in a room with your favorite color first to see if you are up for all the elbow grease involved.
We do love how paint can change a space, just know that it will take time for you to fully paint your kitchen cabinets.
Is painting kitchen cabinets a good idea?
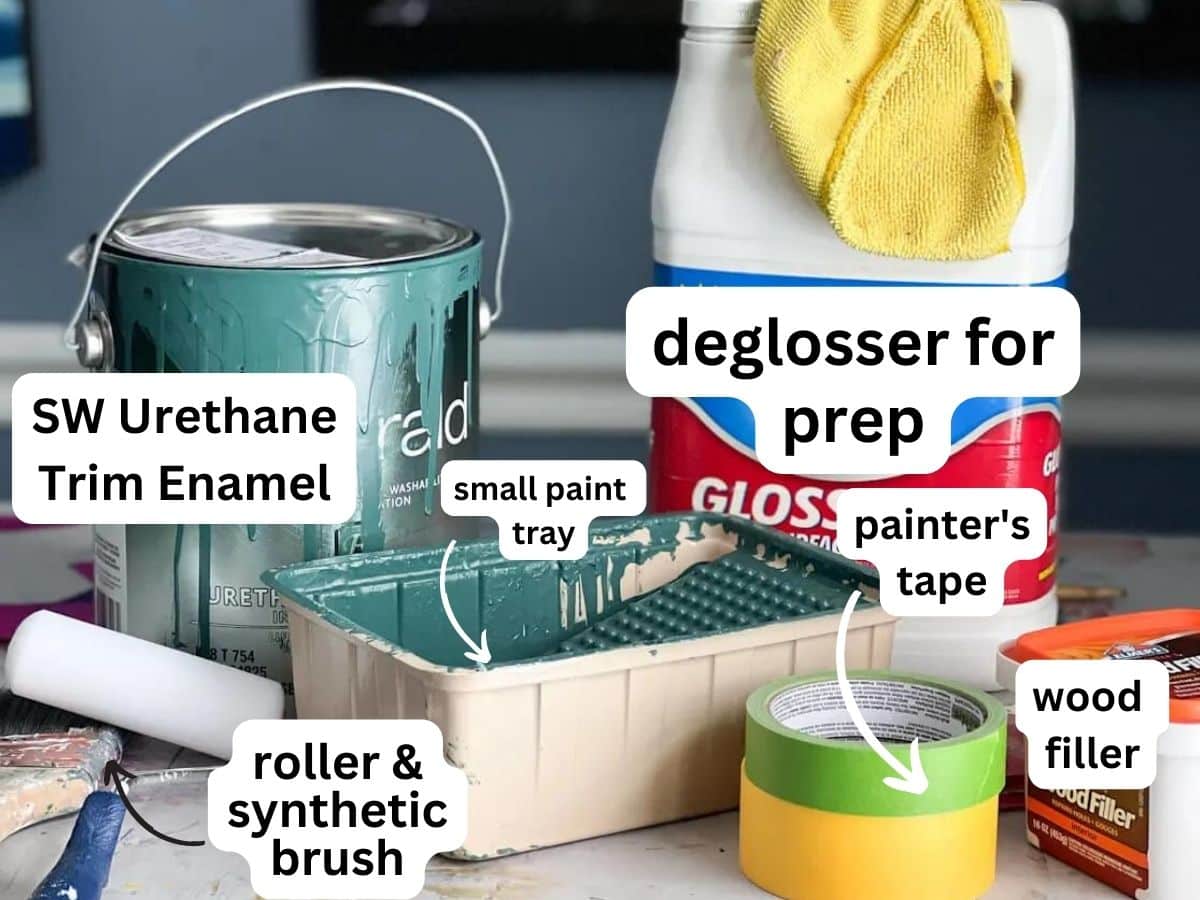
Yes, when done properly. Don’t expect it to be a fast DIY project where you can just messily slap on some normal latex paint. We recommend using the proper paint (either a latex enamel or Urethane Trim Enamel Paint) as well as a proper primer.
If you are not willing to prep the area properly or take your time doing this DIY painting project the right way, then you may not want to take this on. However, it is honestly one of the cheapest DIY ways to modernize a home. See how we decided on what paint color to use. It honestly was a bold choice and I am so happy I just went for it.
Types Of Paint Matter
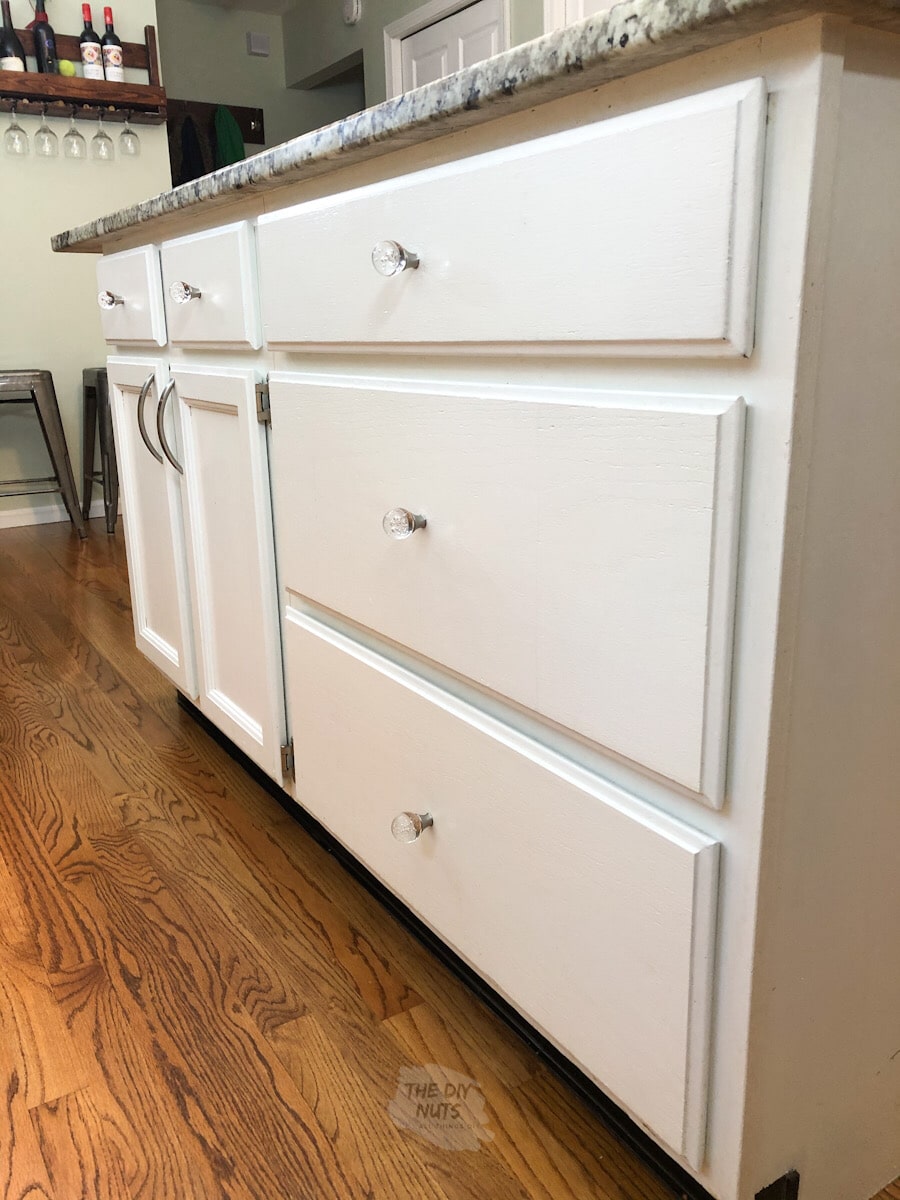
We first painted our oak kitchen cabinets white (see the whole process by clicking the link to our post). You can see how they have held up after 7 or now 8 years, hint pretty well, but after 8 years it was time for a change.
I still wanted to work on updating them more. I thought let’s add a fun color to my kitchen island. However, I needed to figure out the proper way to prep my cabinets for the Emerald Urethane Paint I planned on using.
Painting over SW Proclassic paint with SW Emerald Urethane Trim Enamel
For reference, we are painting over Sherwin Williams Proclassic Latex Enamel with SW Emerald Urethane Trim Enamel paint.
At the Sherwin Williams store, we were told there was no need to prime and that you should lightly scuff up the surface. They noted that you should sand any areas where you see brush marks or other imperfections because the SW Emerald paint will self-level and show all of that.
Note that we had one or two areas where I didn’t even notice the dings on the drawer fronts. The SW Emerald really does self-level well and those spots did become noticeable. I should have used wood filler in those areas first if I would have noticed them. They are tiny so really not that big of a deal.
Make sure your surfaces are as smooth and ding-free as possible before your painting project.
I lightly scuffed the area with extra-fine sandpaper and wiped it down with a deglosser. We always use a deglosser before any painting project.
The Easiest Way To Paint Cabinets
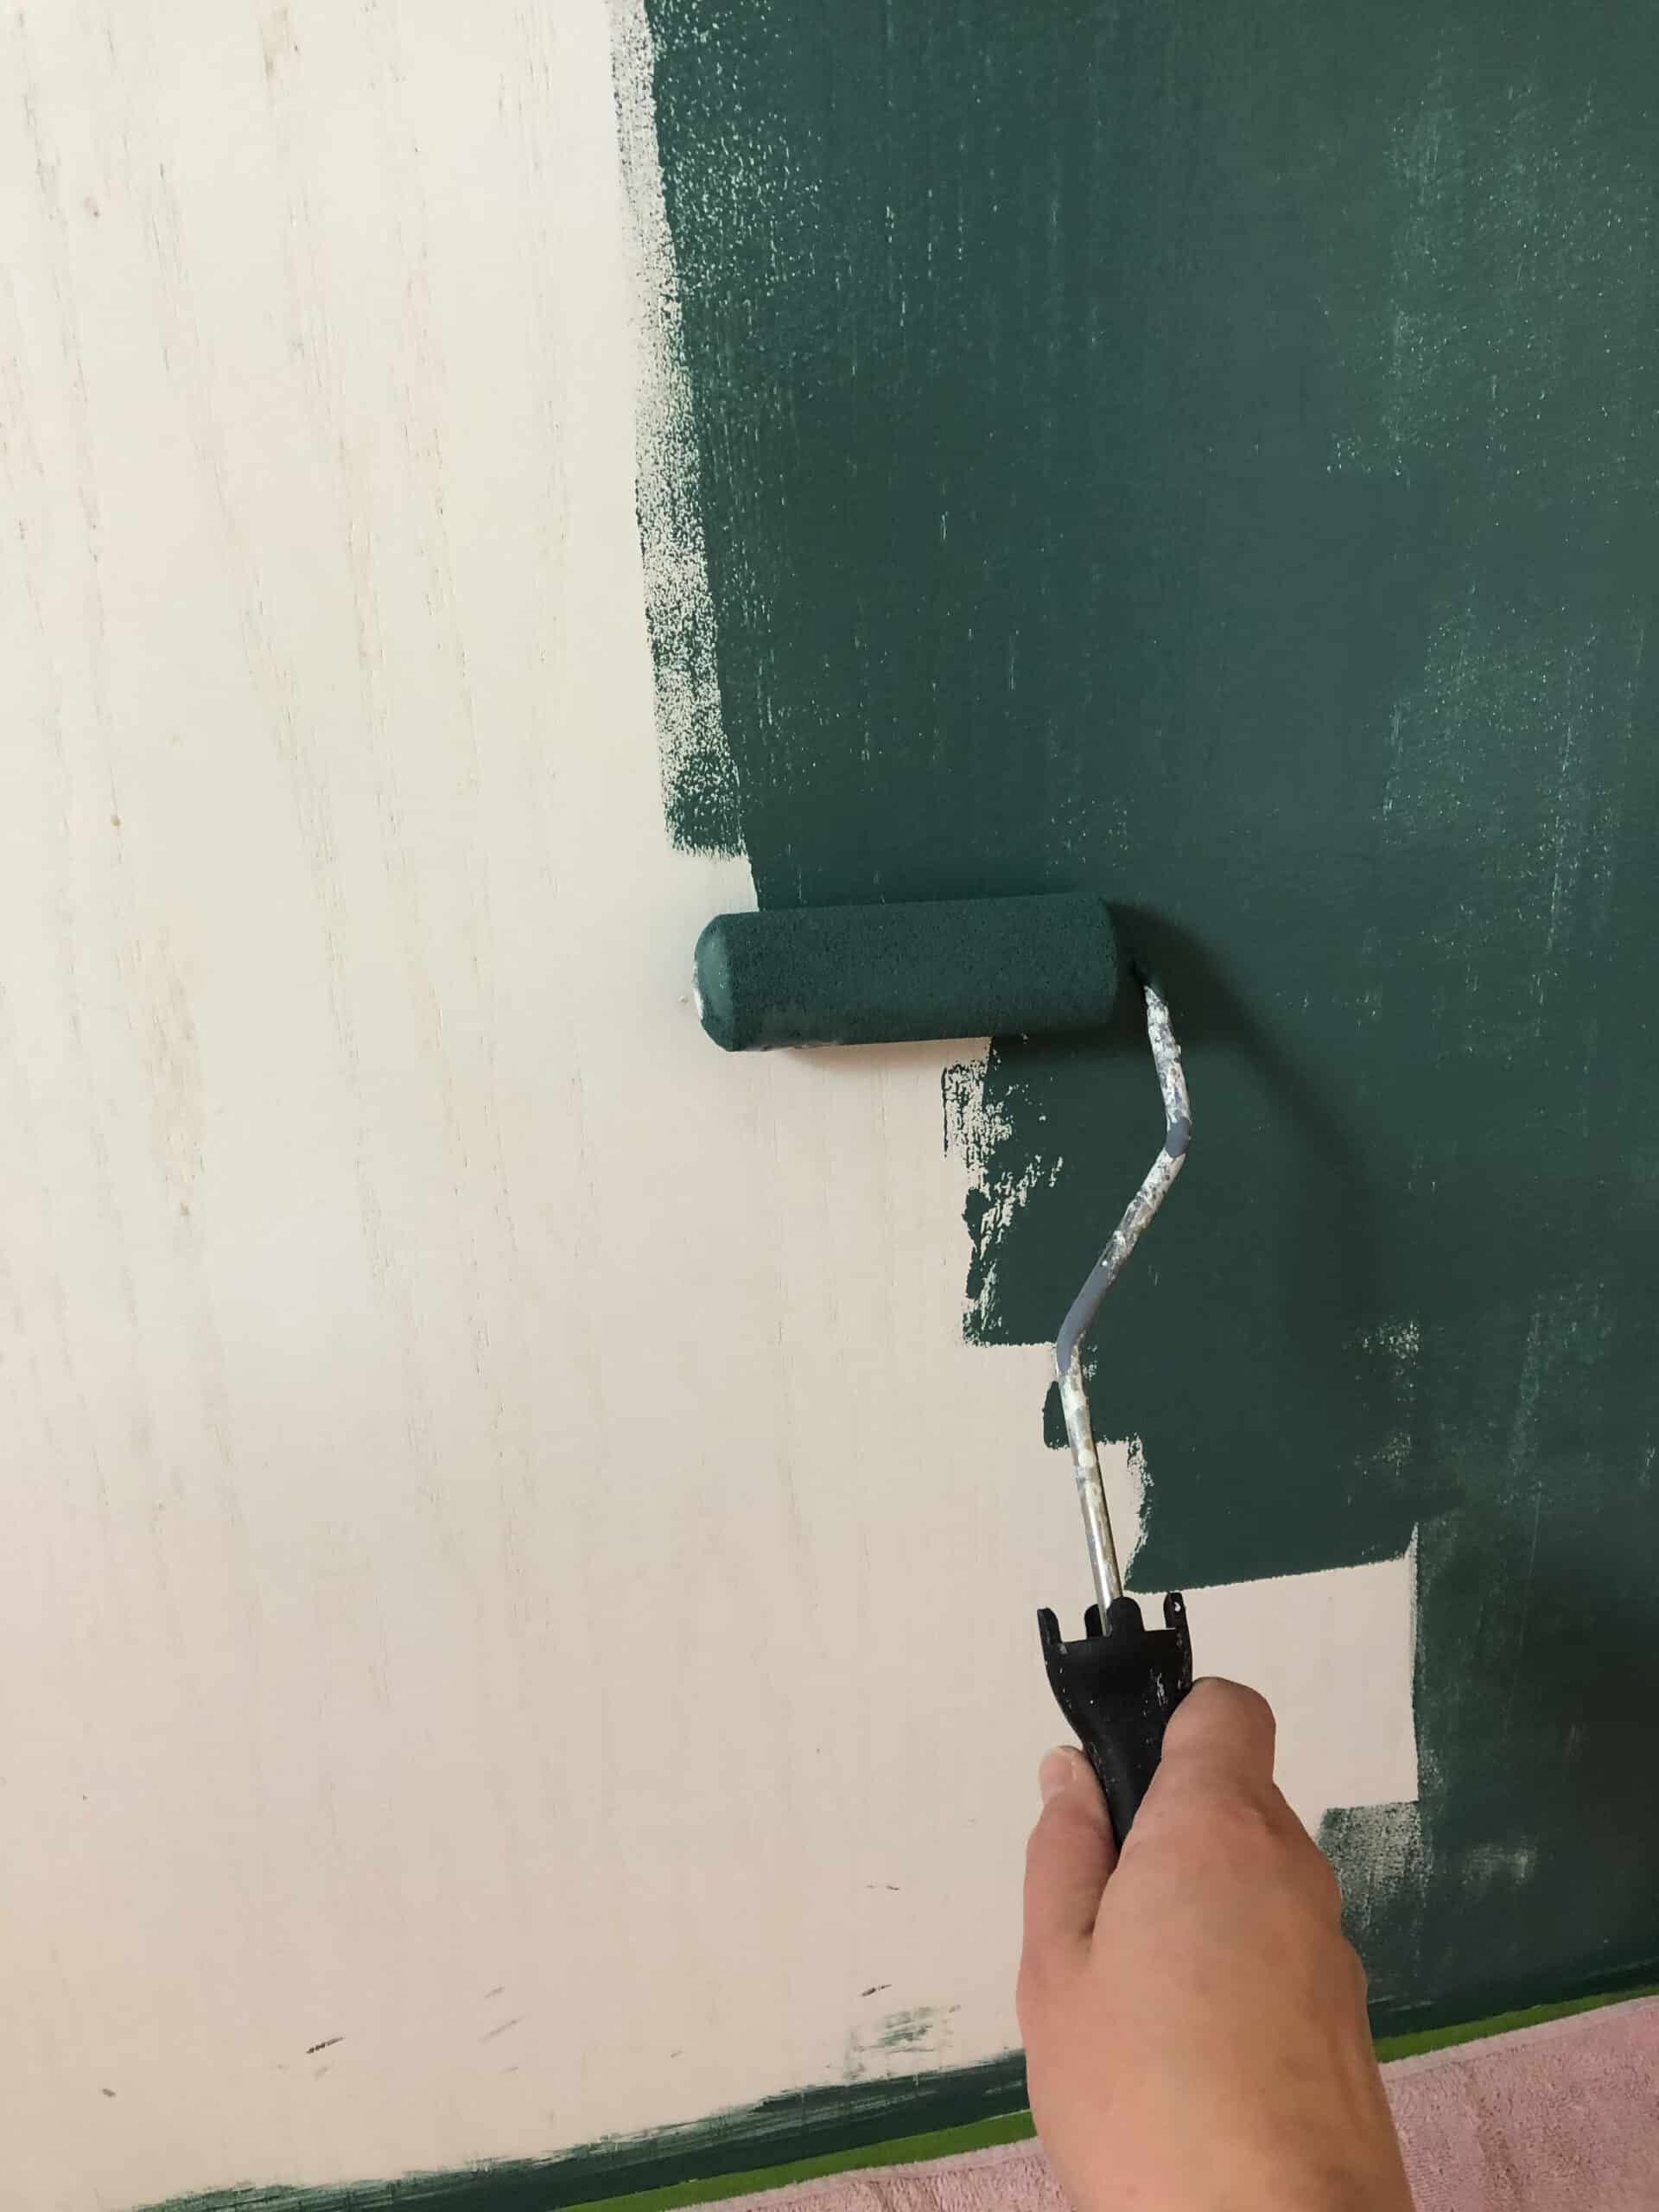
We like to use a small foam roller, small paint tray and 2.5″ good angled paintbrush as we did in our painted our bathroom cabinets. I recently purchased a paint sprayer, but just like the simple way of using a small foam roller and brush.
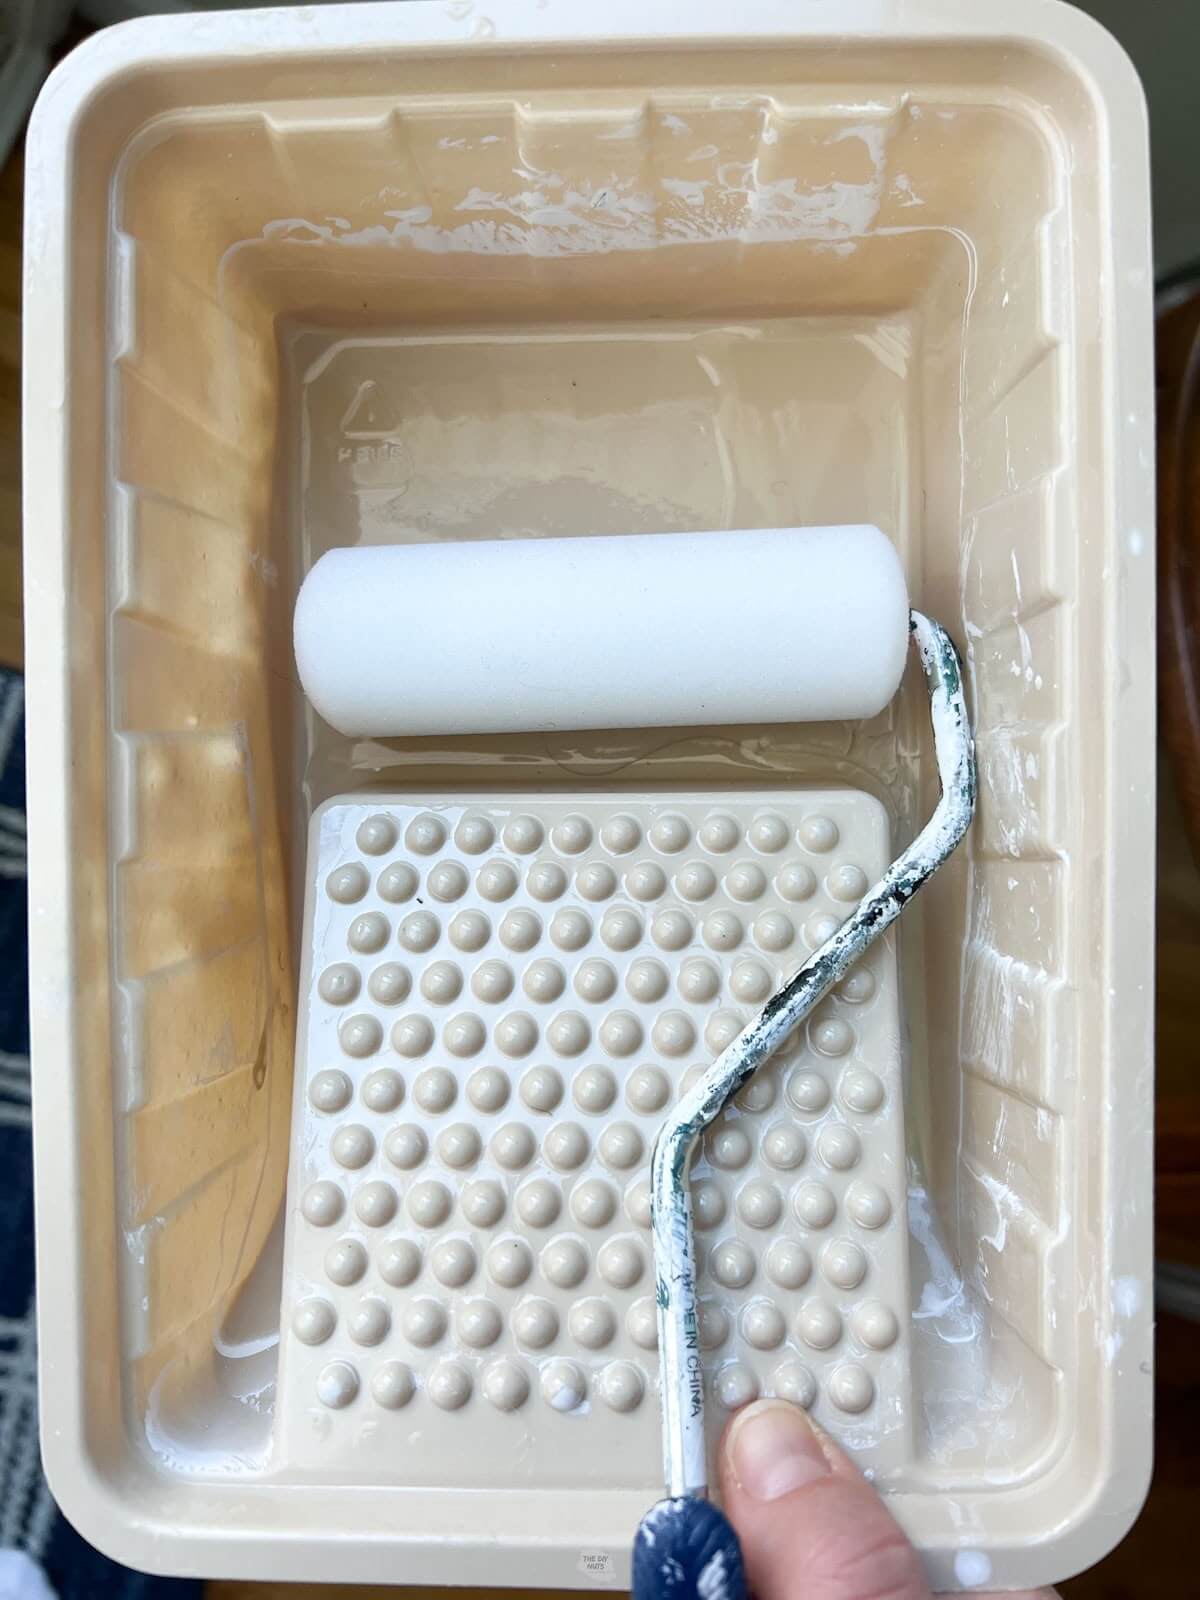
Note: I had no problem using the Emerald paint with a small foam roller, but some people in reviews said they had higher success with a little more nap on the roller.
I just feel like I have more control with a small foam roller and it is what I always use. The idea of taping out your whole kitchen and using plastic wrap just sounds like too much for me.
A roller allows you to slowly paint your cabinets at your pace and not have to get everything done right at once. And for this busy mom, that is super important.
What to use on kitchen cabinets before painting?
At Sherwin Williams, they said you really just need your cabinets to be clean. If you do have brush marks from a previous paint job, then you really will want to sand with extra fine sandpaper.
They also mentioned you could use a green Scotch-Brite pad to just rough up the surface. We also always use a deglosser to help prep any surface (even previously painted cabinets).
You can read more of our cabinet painting tips and FAQs in this post.
Recommended Supplies
- Deglosser (this is what we have used to prep molding and doors in our basement, bathroom vanity cabinets and oak railing)
- Painter’s Tape (this brand)
- Purdy 2.5” angled brush or Wooster 2.5″ angled brush
- Small Foam Rollers and handle
- 220 Sandpaper
- Caulk and Caulk gun (optional)
- Sherwin Williams Proclassic (old favorite cabinet paint) or
- SW Emerald Latex Enamel Paint (new favorite cabinet paint)
Looking for links to all of these items in one place? Check out this photo collage with shoppable links.
Step-by-Step Cabinet Painting Tutorial
Step 1: Remove All Hardware
Take off all hardware including hinges, doors and handles. Put the hardware in labeled baggies.
Depending on how many doors and drawers you have you may want to label the doors, draw a map and While this is a pain to do at the moment, you will be happy you did it when you are putting your kitchen back together.
Pro Cabinet Painting Tip
Don’t take the hardware out completely on the drawers, just enough so that the front is smooth and not sticking out.
Step 2: Set-Up Painting Station
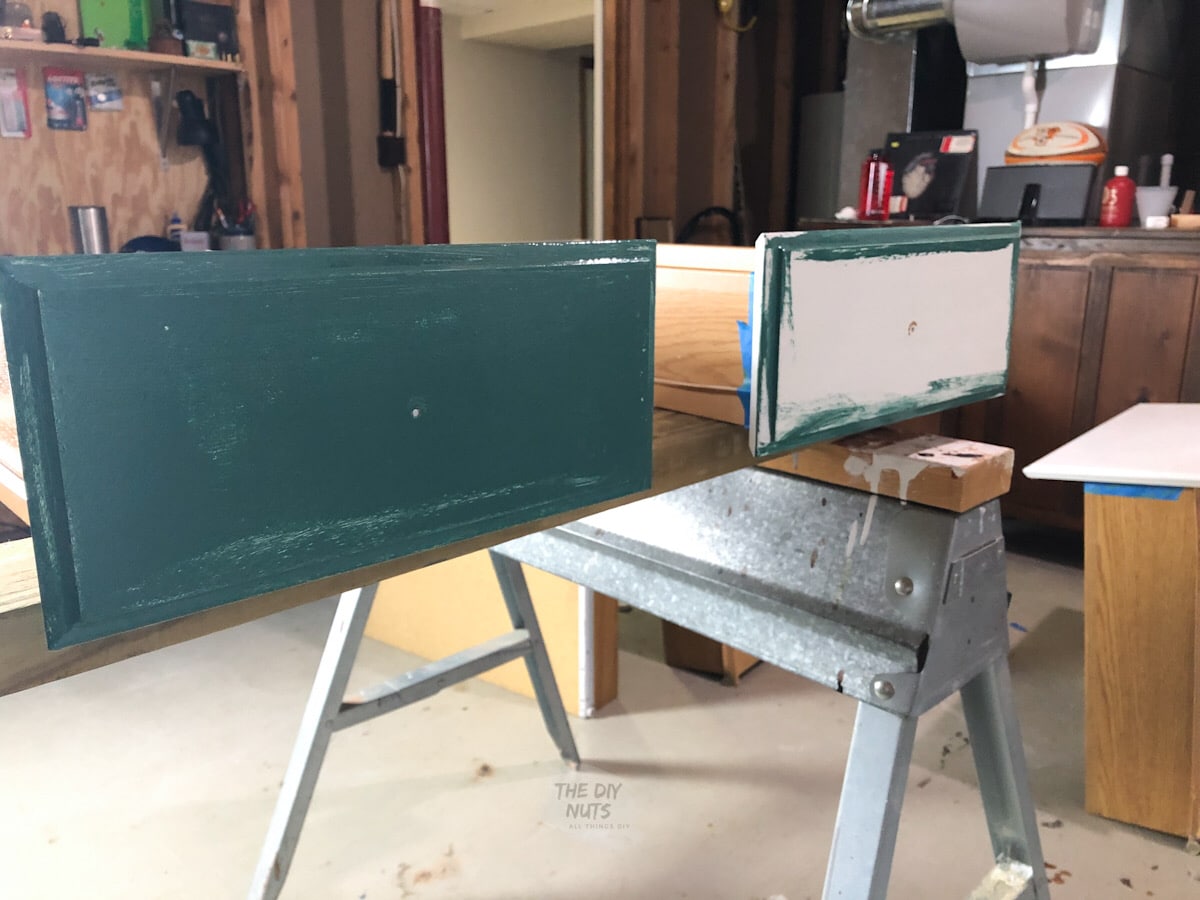
Set up a painting station for your drawers and doors. While I love the finished feel of the Emerald paint, the biggest con is that took a while to not feel tacky.
Therefore, the longer you can just leave your drawers and doors somewhere else to dry the better. We set up sawhorses in our basement and just take the drawers completely out.

You could take the drawer fronts off, but I like to stand up the drawers in my paint area to save my back and not have to set up more sawhorse.
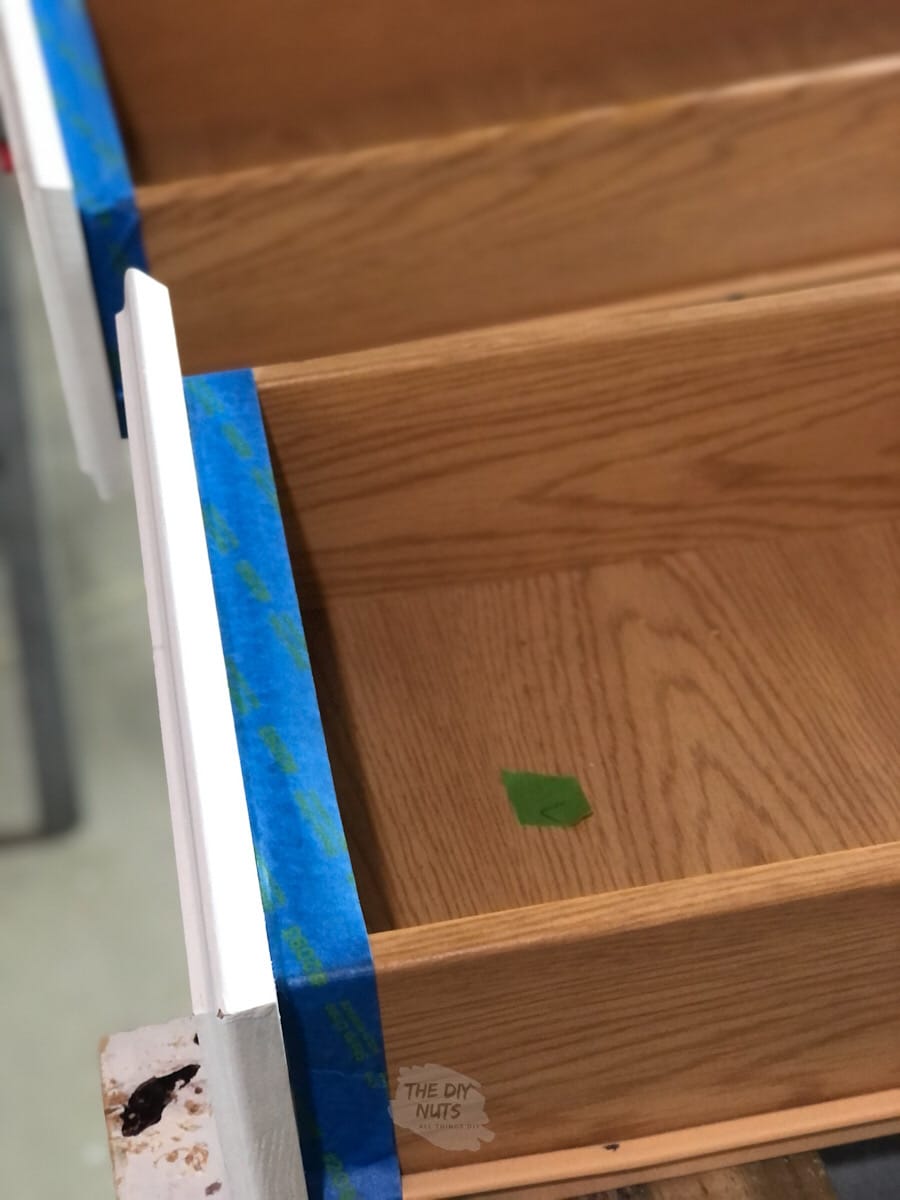
I would think this is probably the recommended way professional painters do it so that they can clean lines on the inside. We made the mistake of using blue painter’s tape and not our favorite tape when taping the inside of the drawers. We did have a little bleeding.
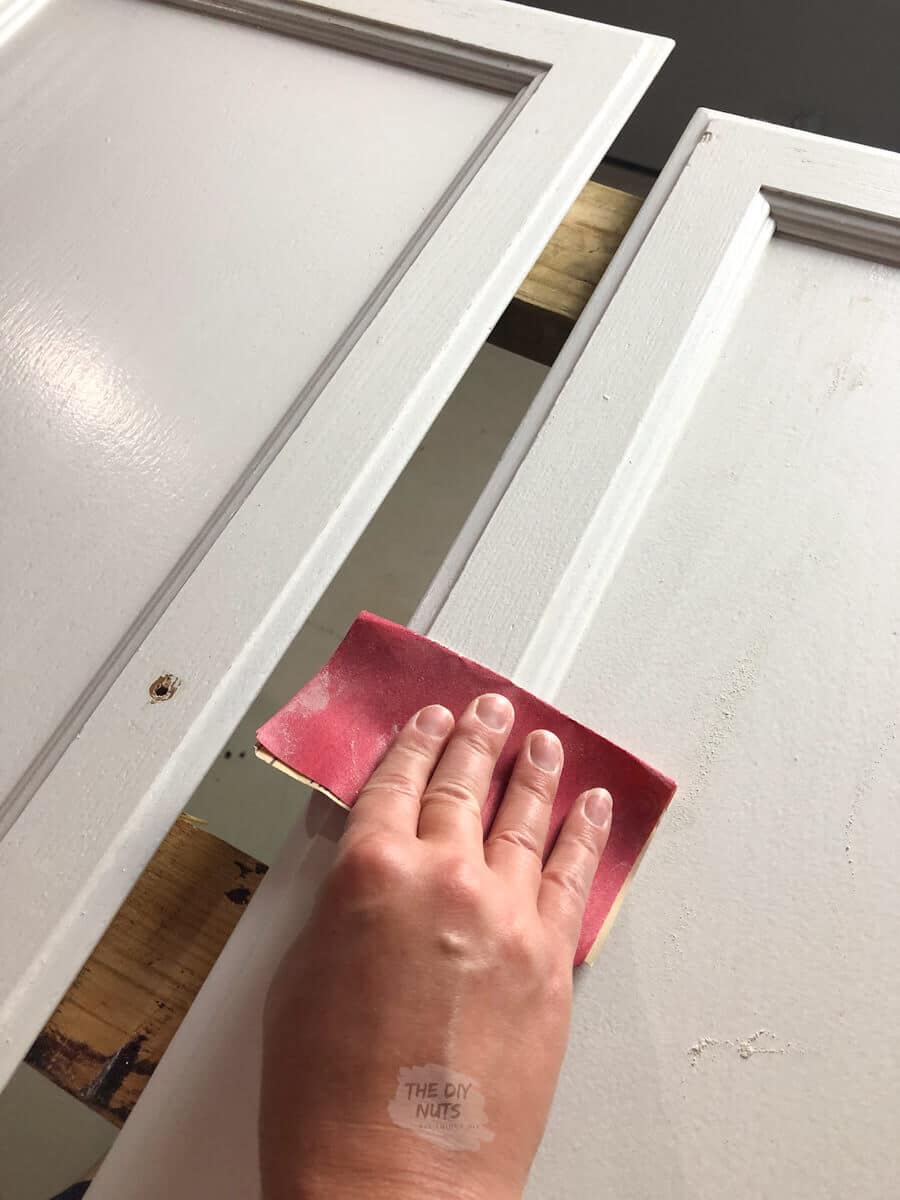
Step 3: Lightly Scuff Surface
Lightly scuff the surface with extra-fine sandpaper or even a green Scotch-Brite pad.
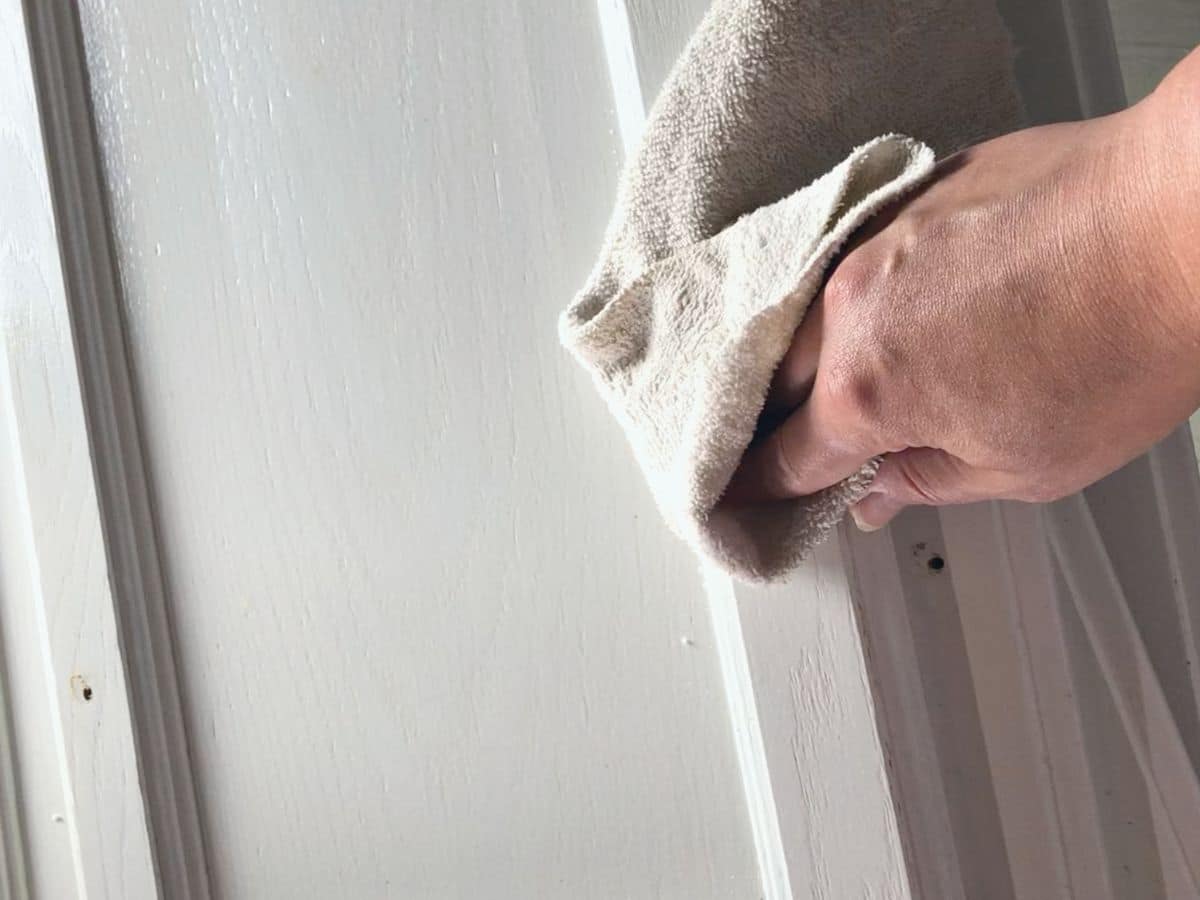
Step 4: Wipe Down With Deglosser
Put the deglosser on a rag and wipe all surfaces completely clean. Do not skimp on cleaning your cabinets. The last thing you want is dust getting stuck in your nice smooth surface.
Optional Step: Add Painter’s Tape
Use painter’s tape anywhere you think you might not get a straight line. I felt I could easily paint the lip of the cabinet without taping, but you might want to.
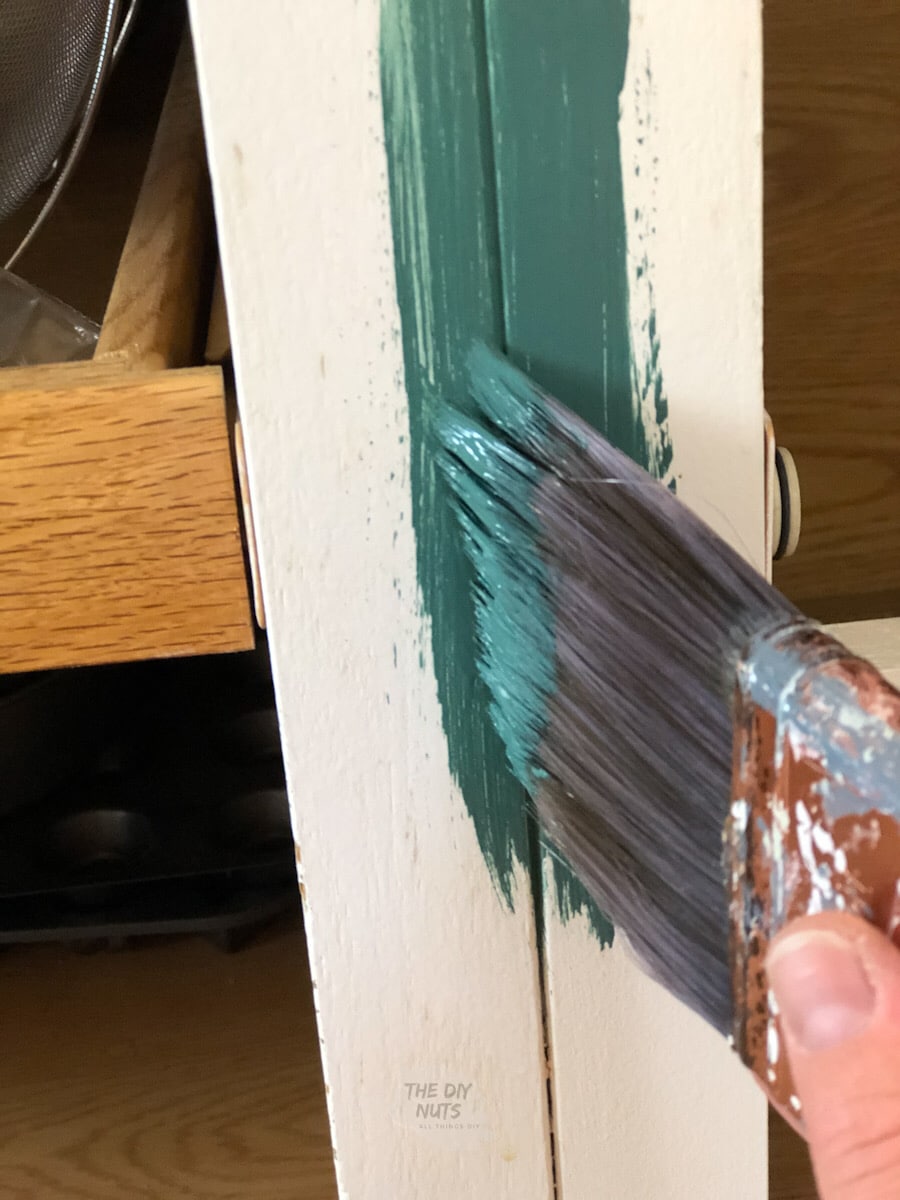
Step 5: Paint Hard To Reach Areas With Brush
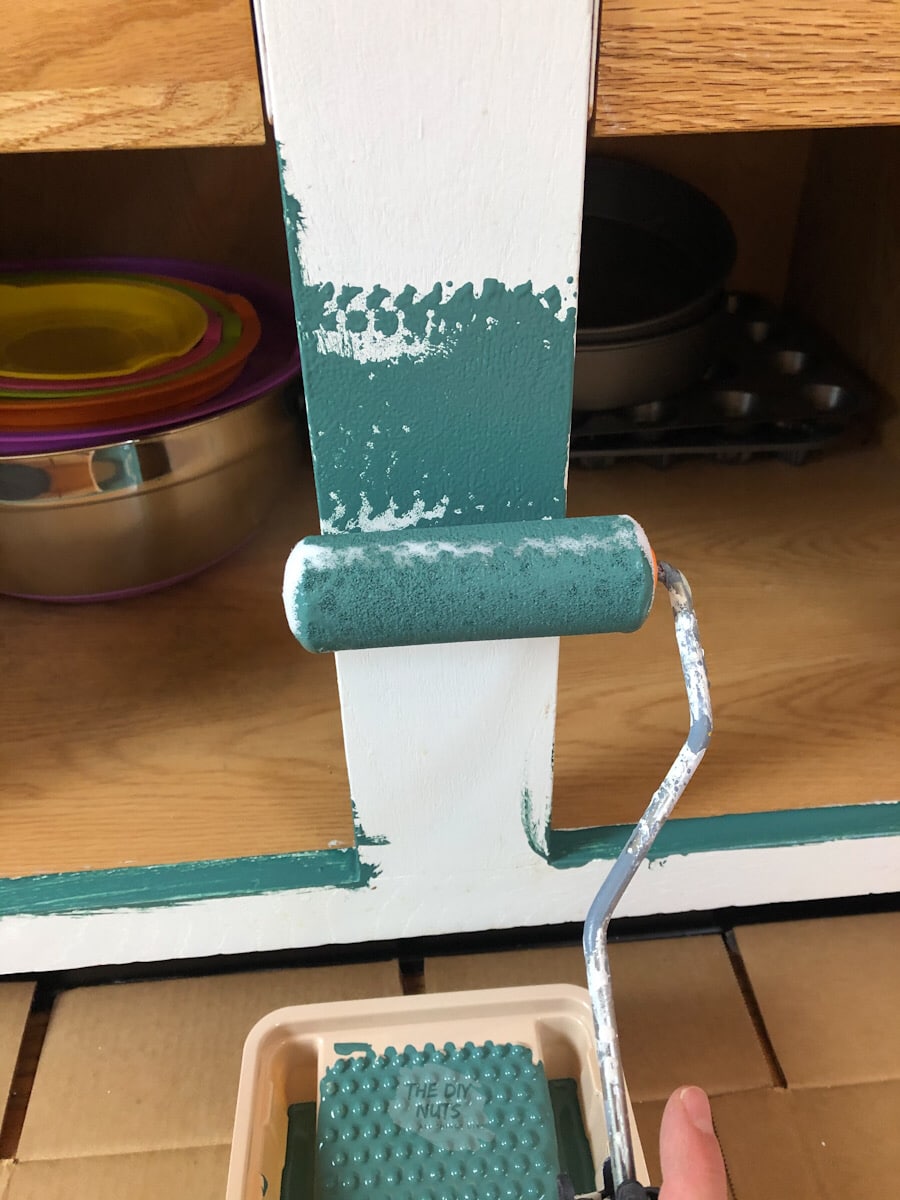
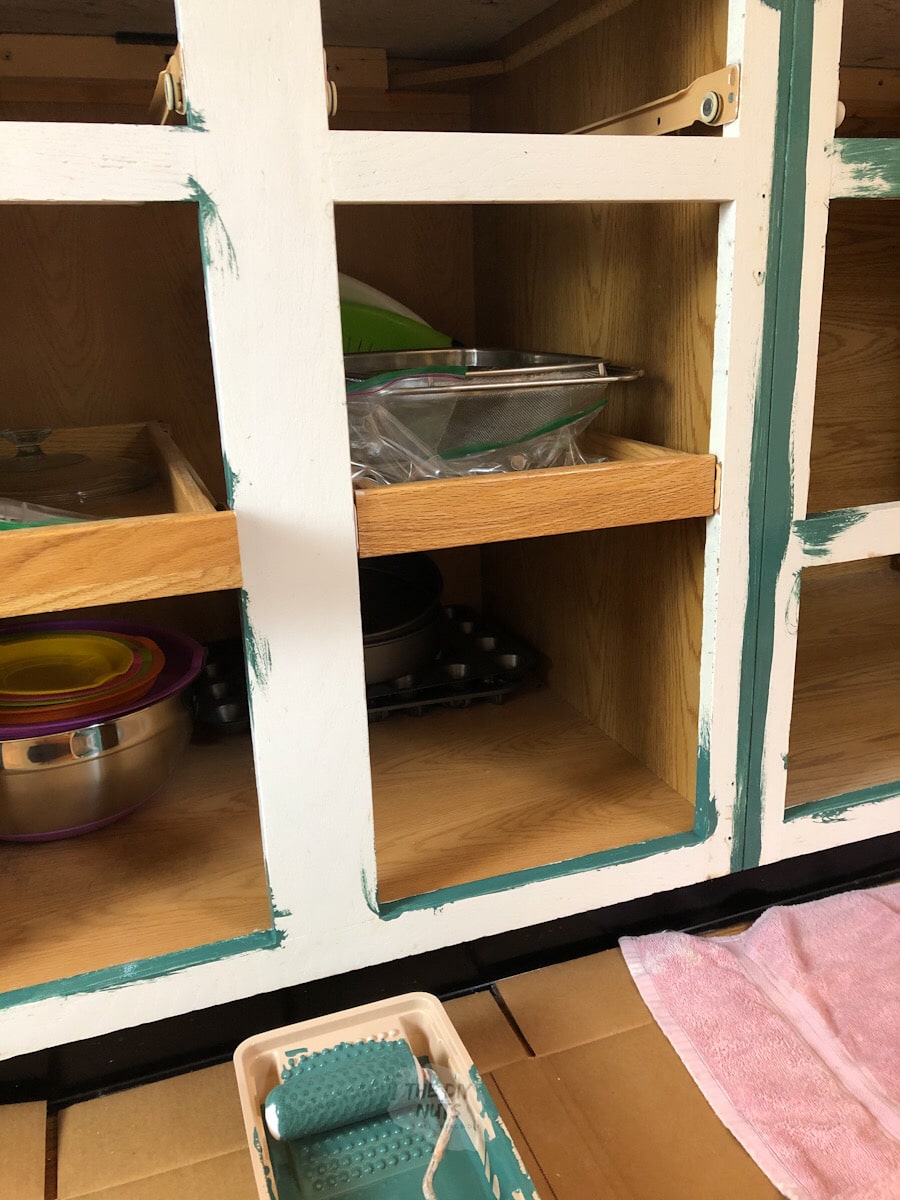
Begin using an angled 2.5″ brush to trim out places that the roller can’t get to on the box and drawers, and doors. I like to do this first so that you can use the roller to help smooth out the areas after and lightly feather in on top of brushstrokes.
Step 7: Let The First Layer Fully Dry
Let dry before painting a second coat. You don’t want your paint to be tacky to the touch. Read the paint can label to find out your dry time. This Emerald Sherwin Williams blue-green paint color takes 4-6 hours to dry.
Remember the roller is great on the edges of the doors (you will get a much more even coat).
Step 8: Add A Second Coat Of Paint
Repeat all painting steps for a second coat.
Tip For Painting Doors
For your doors, you have to be extra patient. Due to painting two coats on each side. We recommend making sure your last coat of paint is on the front to ensure the smoothest finish.
Click on the link for our full detailed tutorial on how to paint cabinet doors.
Step 9: Let Paint Cure
Let everything cure as long as possible. I honestly felt that with the surface of this paint, a week was the ideal time to keep the doors and drawers off. We are going to wait even longer to put the hardware handles back on.
Step 10: Put Cabinets Back Together
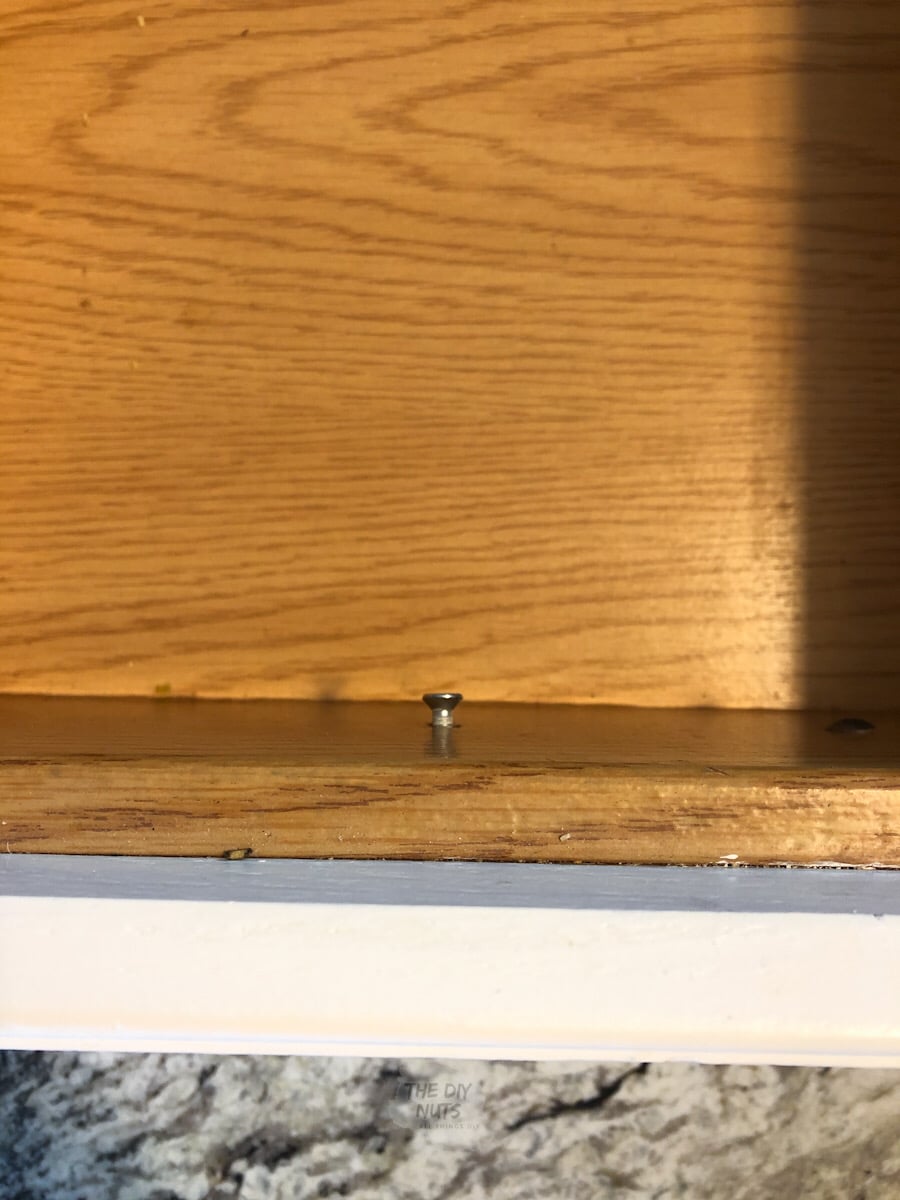
Once you do put the doors and drawers back in, make sure you add small rubber stoppers to help your doors and drawers from rubbing against the cabinet box.
Allow cabinets to cure as long as possible before installing new hardware. We like to wait at least a week and even a month before installing new hardware.
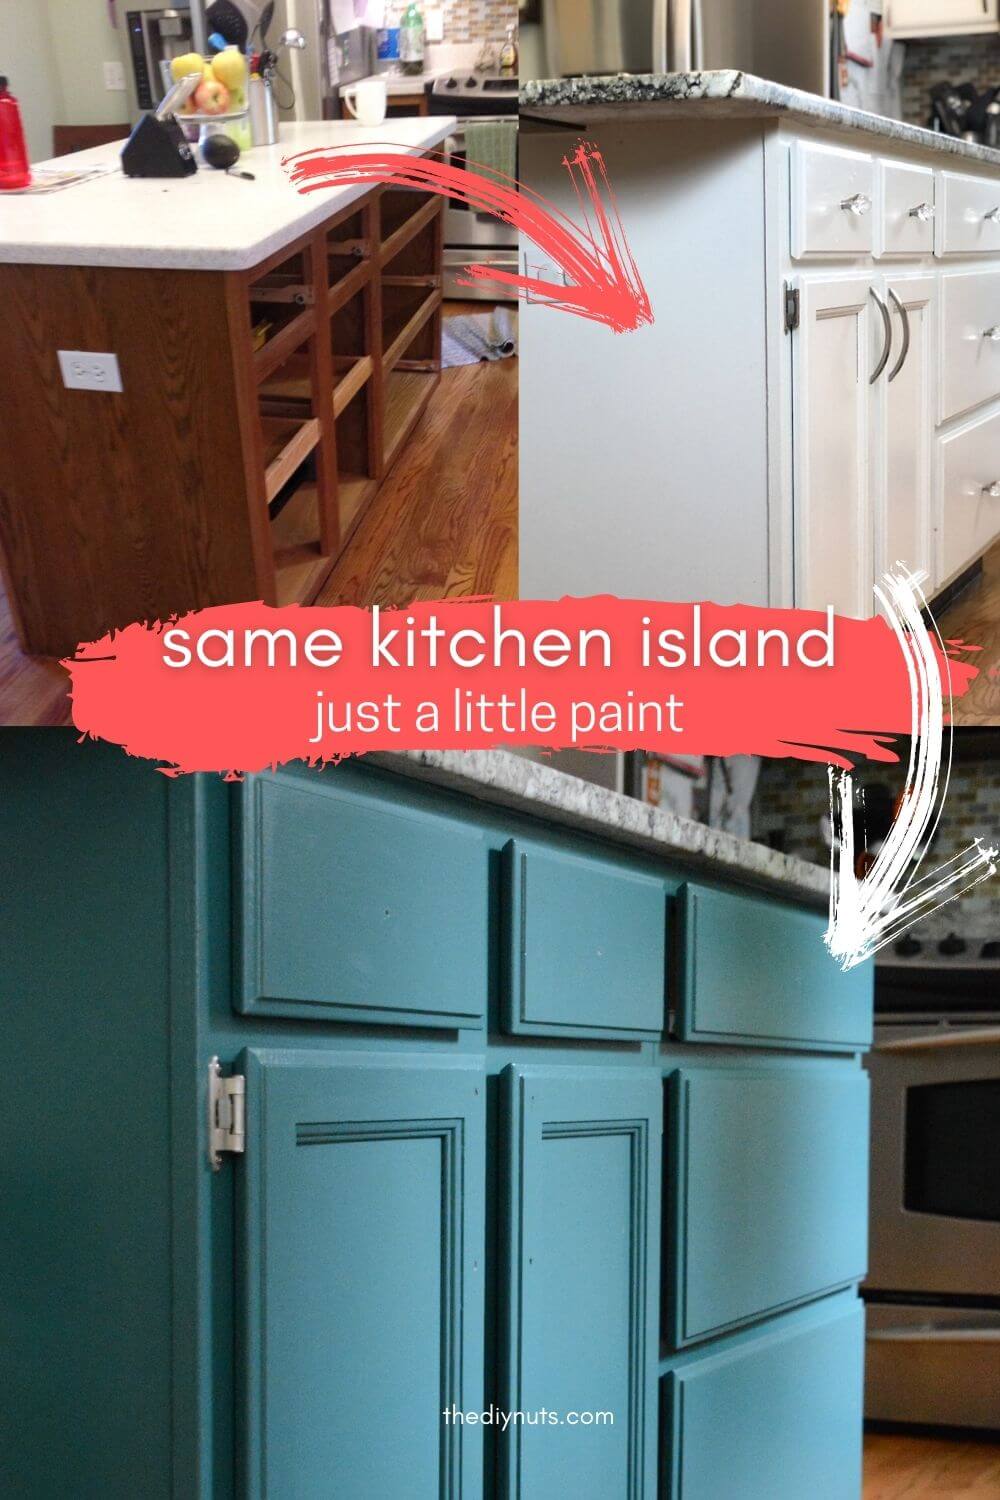
Our Before White Painted Kitchen Cabinets
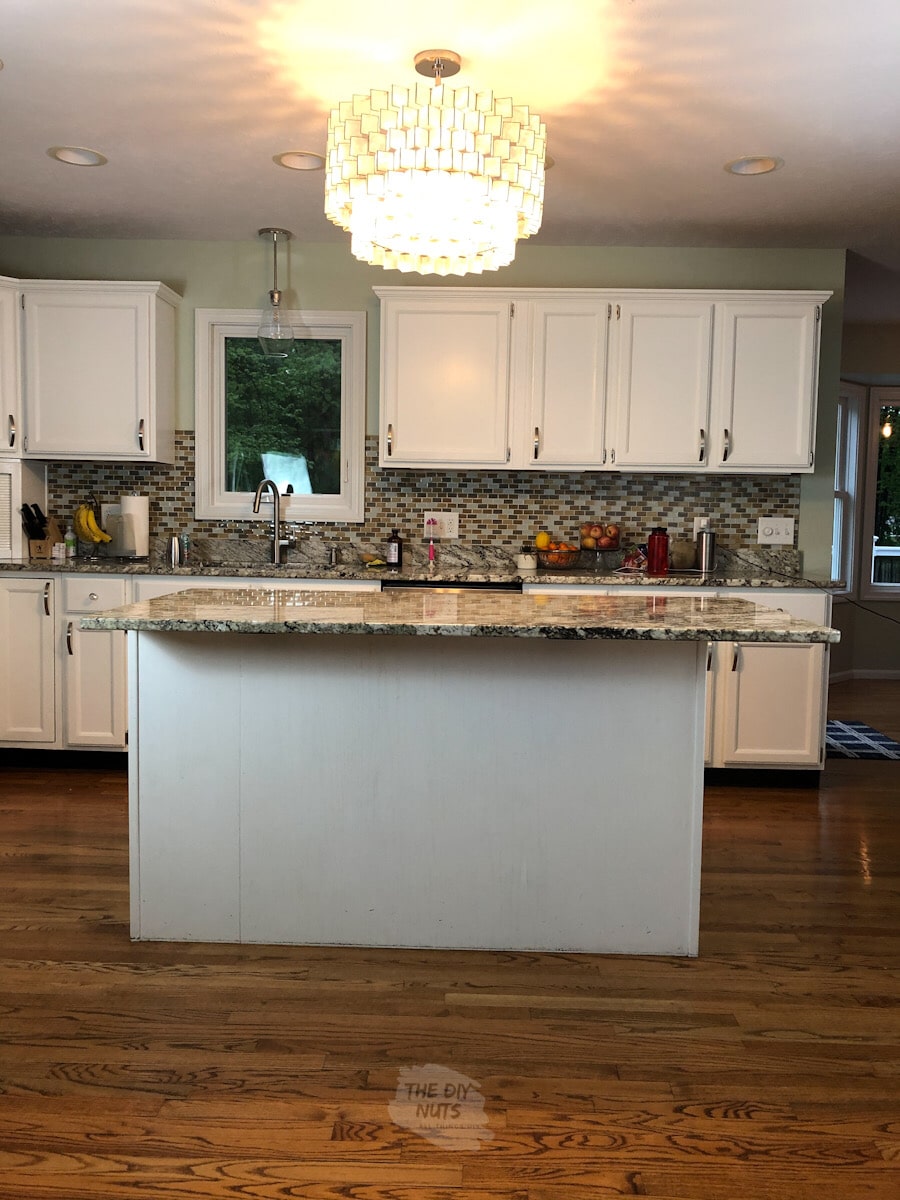
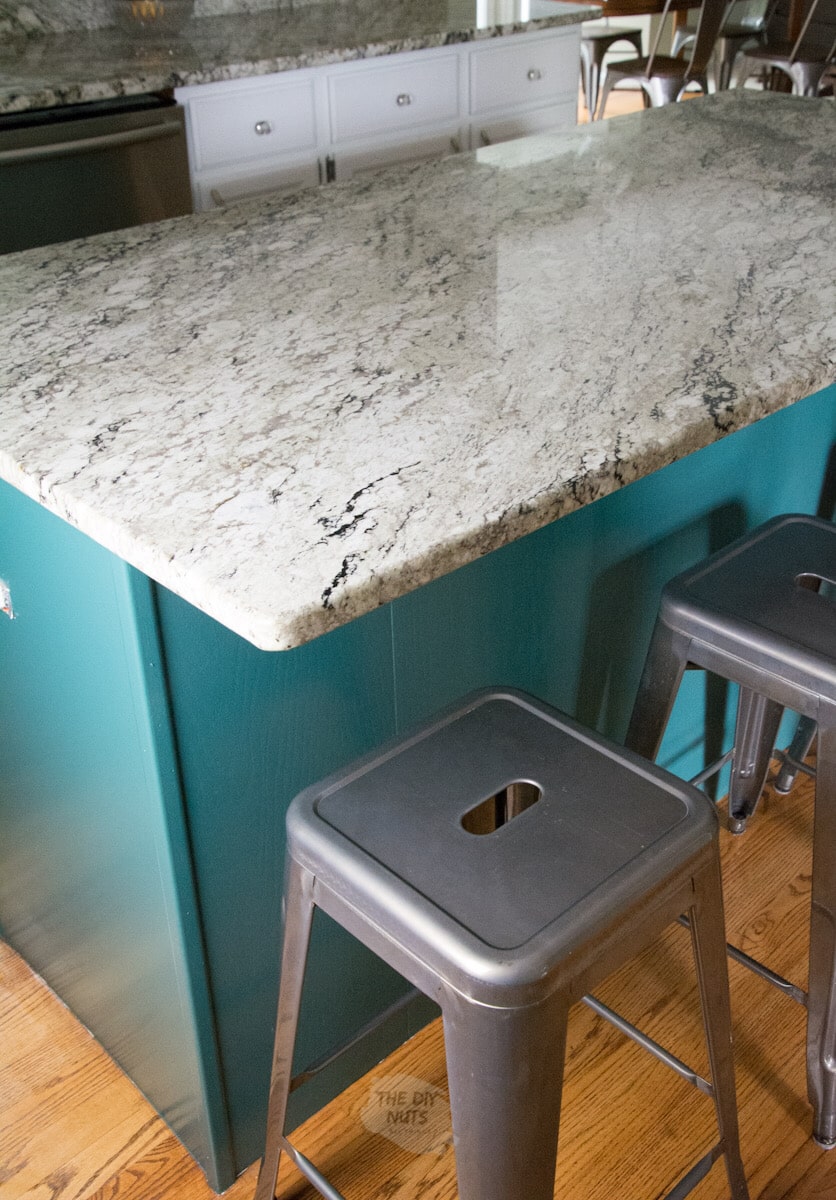
In the image below you can see the areas that were worn and why we needed a fresh coat of paint. Choosing SW Rookwood Sash Green was a great complement to our granite and Liveable Green Wall color. We plan on updating our glass backsplash soon!
Our After Modern Green Kitchen Cabinets
See what our kitchen looks like now!
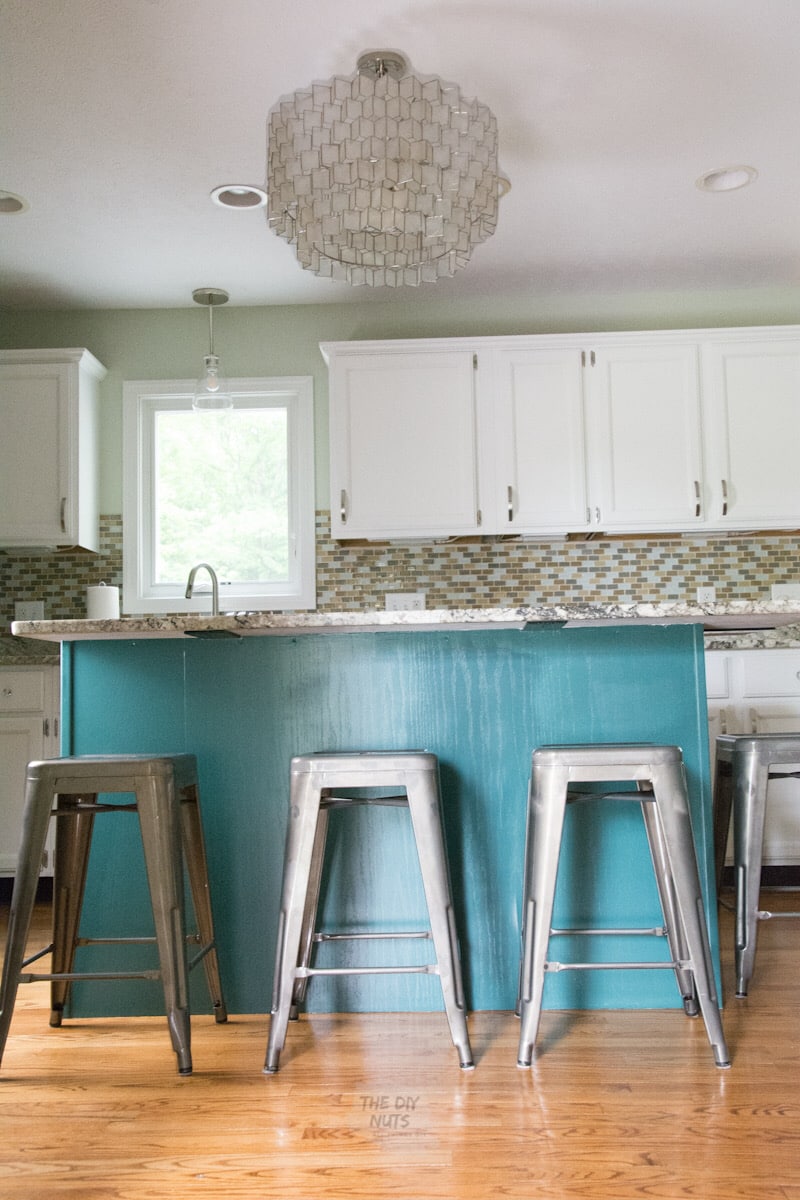
And guess what??? We finally got around to painting our tile backsplash and the other lower cabinets. You have to see what a difference it made in our kitchen. We still can’t believe that we were able to update our kitchen with just paint.
Related Reading
- How To Paint Already Painted Wood (see our green mudroom cubby closet)
- Best Roller For Painting Cabinets
- How To Repaint Bathroom Cabinets
We are always preaching about how paint can help transform your space. This kitchen cabinet painting experience was no different. Choose colors to fit your style and start to do-it-yourself.
Follow us on Pinterest, YouTube or Facebook for more DIY inspiration!
How To Repaint Painted Kitchen Cabinets
Equipment
- 2.5″ Angled Paintbrush
- Small Paint Tray (will make your life so much easier)
Supplies
- Peel and Stick Paint Samples if you need help finding color
- Deglosser paint prep
- Extra Fine Sandpaper
- Painter’s Tape
- Sherwin Willams Emerald Urethane Trim Enamel Paint
Instructions
- Take off all cabinet hardware including hinges. Label and place in bags.
- Create a map of the doors and label them in the corner under where the hinges will go, use painter's tape or label on your drop cloth.
- Set-up paint station for drawers and doors.
- Tape drawers so that you are only painting the wood part, but not the whole drawer.
- Lightly scuff already painted cabinets with extra fine sandpaper or green Brite pad. Pay extra attention to brush marks and imperfections. Now is the time to fix those.
- Wipe down cabinets and all surfaces to be painted with a deglosser.
- Make sure cabinets are completely clean and dust-free.
- Trim out areas on cabinets with a brush that the small foam roller will not be able to get. You want to work in stages.
- Once you have trimmed a few areas or ridges in the doors, use a small foam roller to paint all flat areas with high-quality paint like Sherwin Williams Emerald Urethane Trim Enamel. Working in thin layers will be your best bet.
- Let the first coat dry and repeat the painting process for at least 2 coats of paint.
- Look at your cabinet from multiple angles to make sure you are painting all areas evenly.
- Let the paint cure for as long as you can (at least a few days).
- Put hinges back on and put doors and drawers back in.
Video
Notes
- Starting with a clean and smooth surface will help your new paint layer adhere.
- Work in thin layers of paint with your roller.
- Check for drips as you work. Before painting the next coat, you can always lightly sand any uneven spots or drips.
- Let your cabinets cure for at least a week before adding hardware back on.
- You can test if your paint is adhering well by trying to scratch it with your fingernail once it dries.
Absolutely beautiful! Fabulous instructions, hope the tutorial helps others to tackle this overwhelming job!
Thanks! I appreciate it. There are so many ways to paint kitchen cabinets but this worked for us and our painted kitchen cabinets still look great a year later!
Wonderful! Great tips! We’re painting ours a similar color (more on the green side). May I ask what color your (granite?) countertops are? I’m looking at Santa Cecilia White vs Dallas White granite.
Hi Myra! Good luck with our green cabinets. Our granite is called Taupe or White Taupe I believe. It was a unique slab that isn’t always carried places. We liked the fun contrast in our island. We still love our granite but we put it in over 8 years ago. If I were remodeling today I might look at some of the quartz options with more veins than speckles like Calacatta Plata or one that is a little grayer. Good luck with your search!
This is great! We recently just finished our third coat of paint (the other two ended up looking terrible), and we are now looking around for some tips and tricks! This blog was a great help for us! However, we have dug ourselves into a pretty deep hole with how badly we have messed up our cabinets, ha! We called in a cabinet painting service to help us out! They were great and our cabinets now look amazing!
Hi, great tips ! One question I’m going to repainted painted cabinets, there are some highly worn areas do I sand them then prime them before repainting ?
Thanks for feedback Tracy
Hi Tracy. Yes, I would sand and get those areas as smooth as possible. If wood is showing through then priming those areas would allow your new paint to stick. When in doubt, I would take some images to your local paint store for advice before fully undertaking your project. Good luck with your cabinet painting!