How To Repaint Bathroom Vanity Cabinets Black
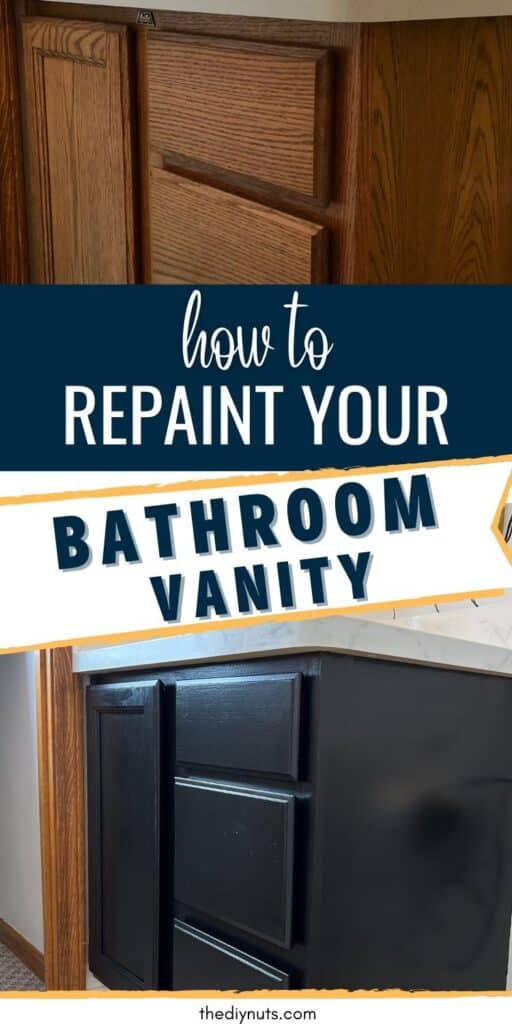
Has your style changed? Are you looking for a cheap and easy way to make over your bathroom vanity cabinets? Use our step-by-step tutorial to learn how to repaint your bathroom cabinets this weekend for a completely fresh look.
*Disclosure: I only recommend products I would use myself and all opinions expressed here are our own. This post may contain affiliate links that at no additional cost to you, I may earn a small commission. Read our full privacy policy.
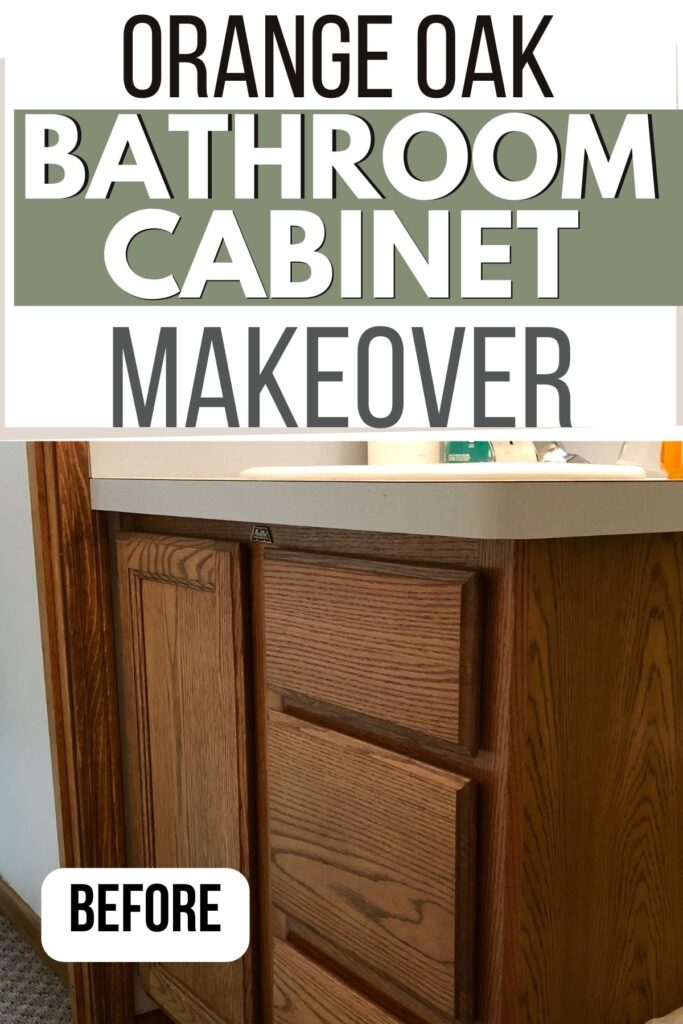
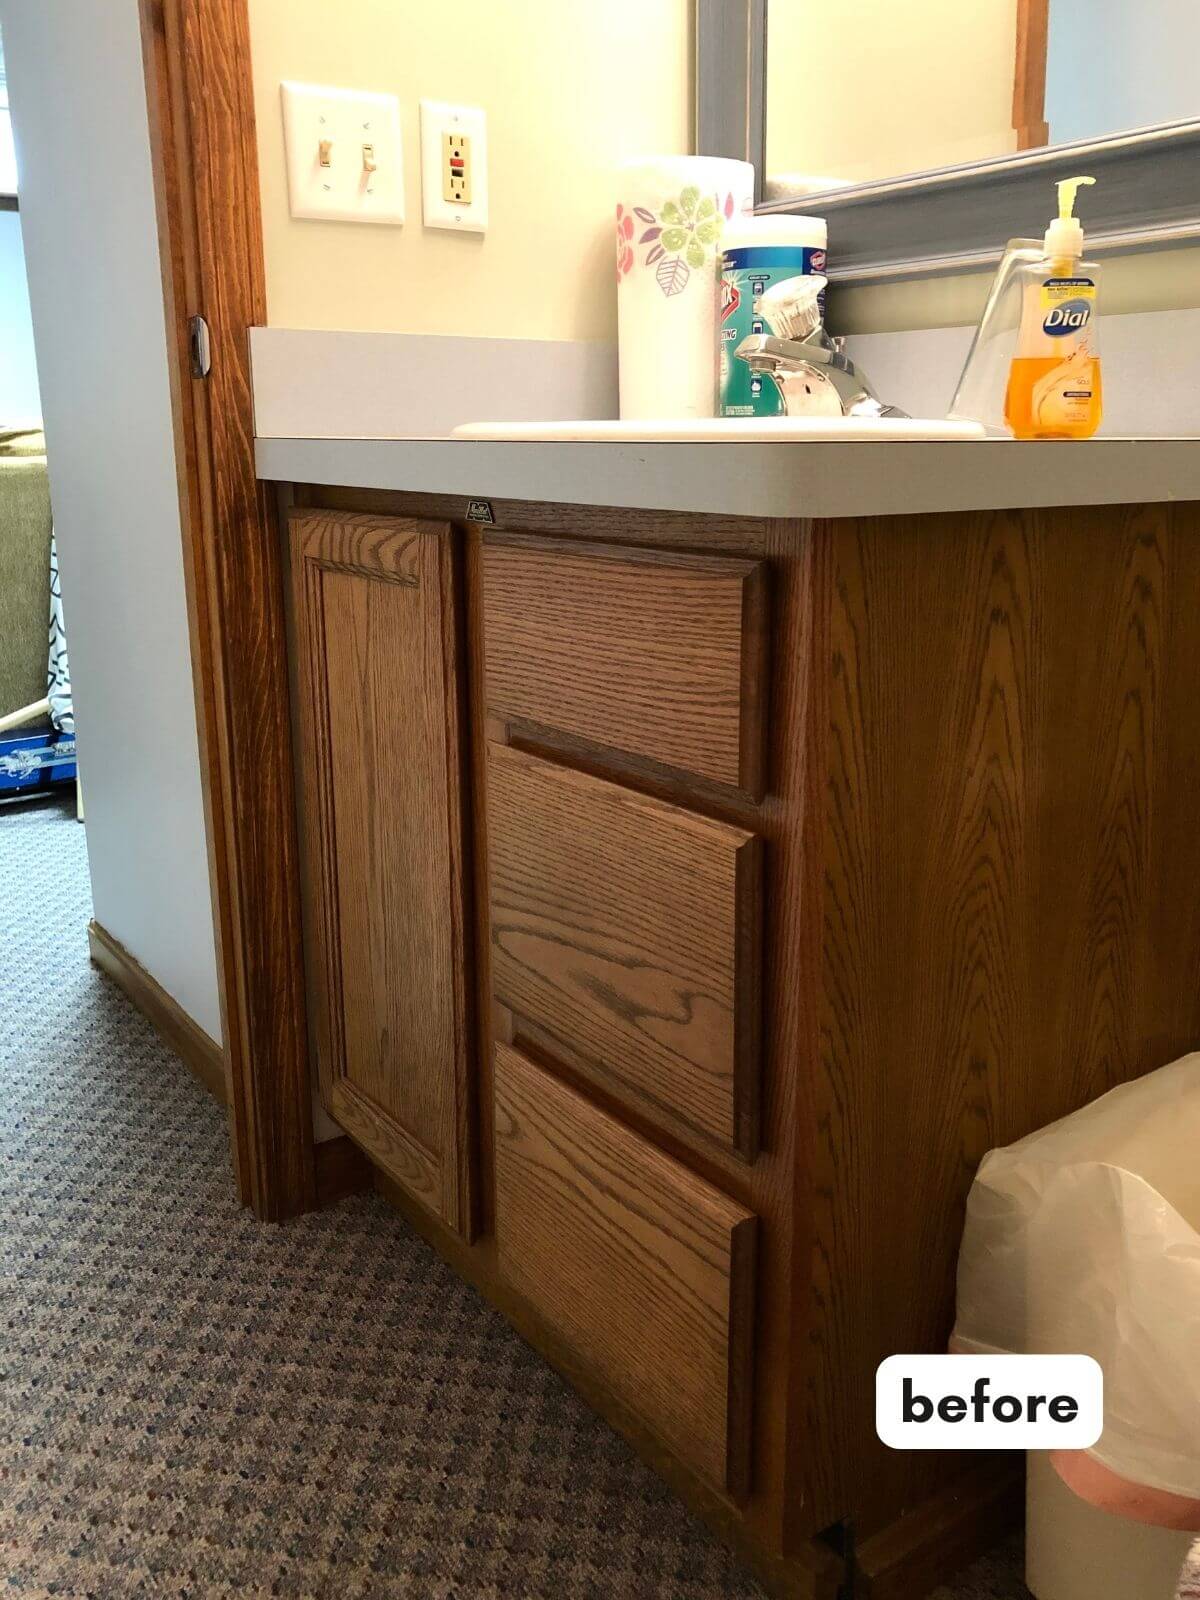
The “Before” Vanity
When we first moved into this house this is what the oak vanity looked like.
We painted it a charcoal blue when we also painted our upstairs bathroom cabinets. There is nothing we like more than a DIY painting project.
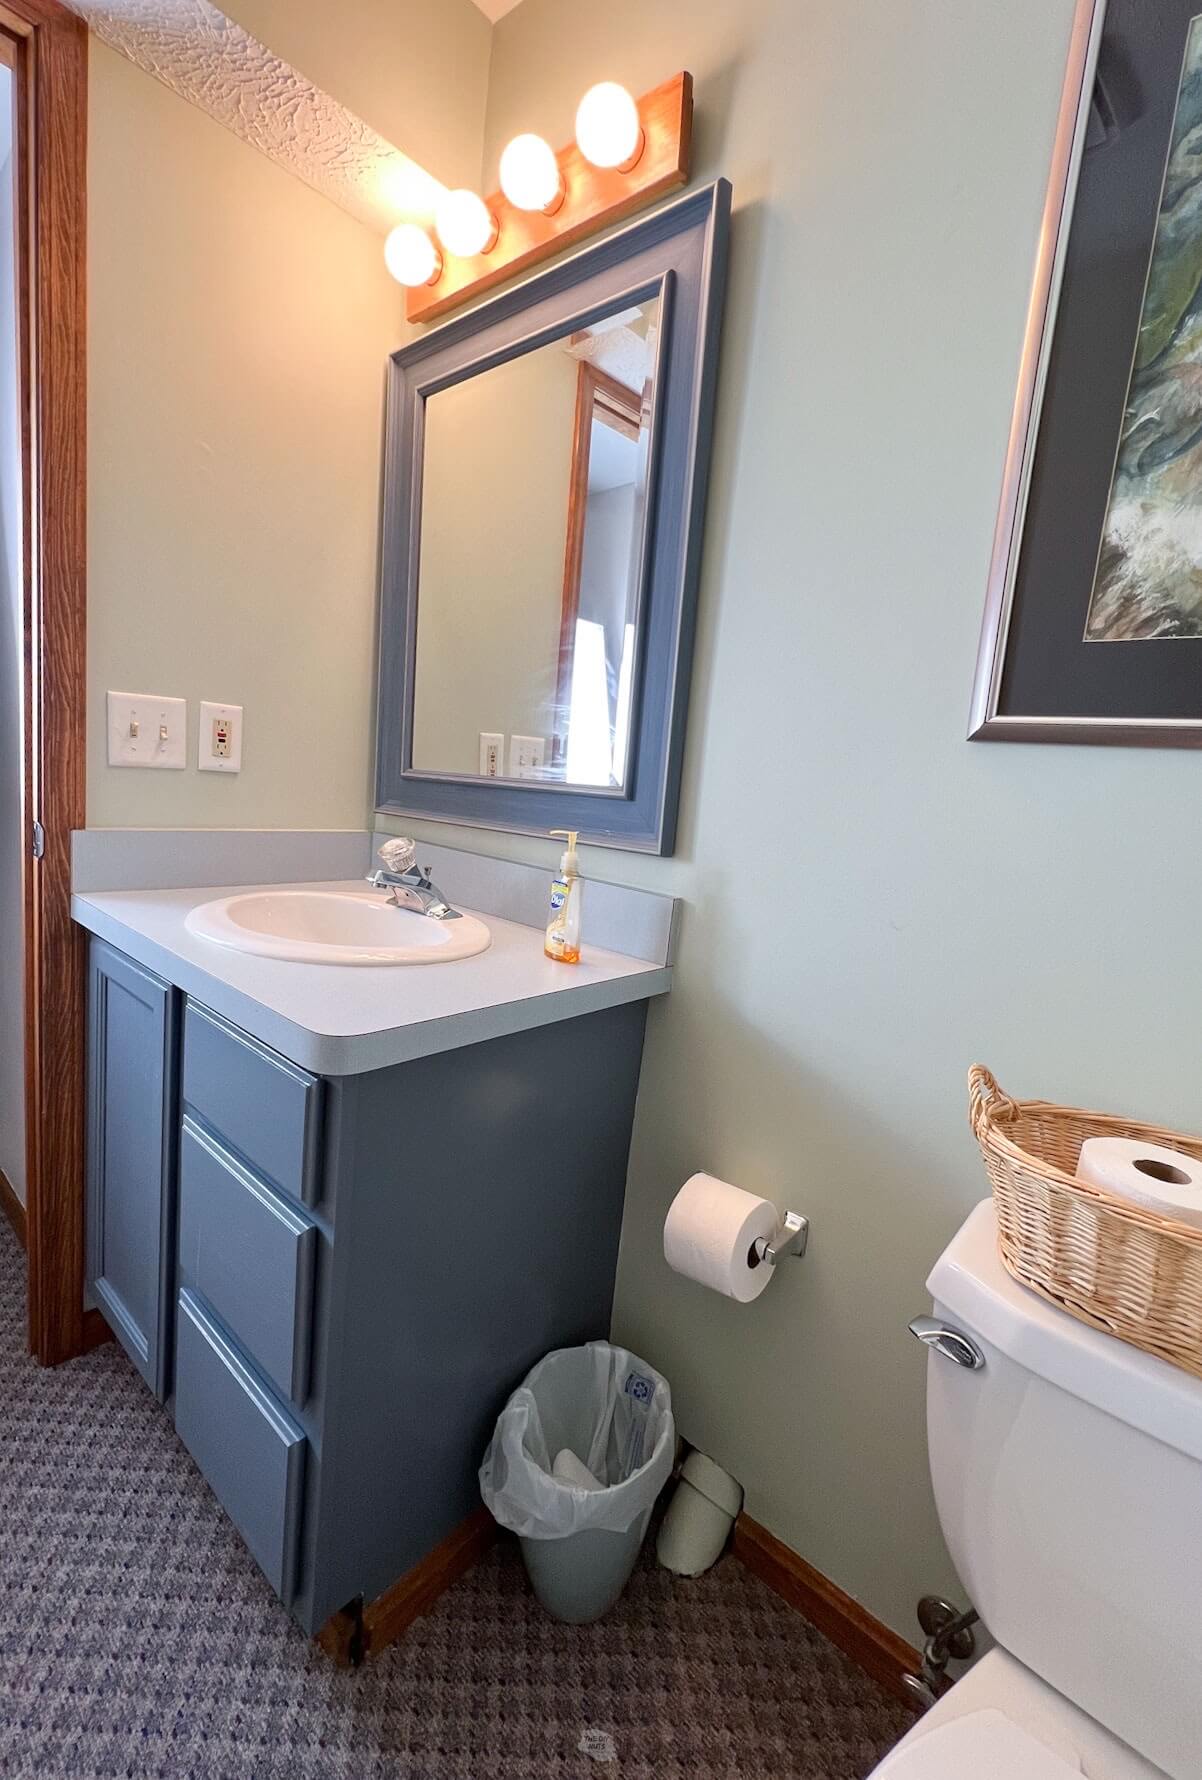
One of the biggest advantages of paint is that you can easily change colors when your tastes change. That is exactly what happened when we decided to paint the laminate bathroom counter and faucet in to modernize this small bathroom.
Why are we repainting our bathroom cabinets?
We have a small half-bathroom in our basement that really hasn’t gotten much attention. It even had carpet in there which was totally gross (we will share more on that later).
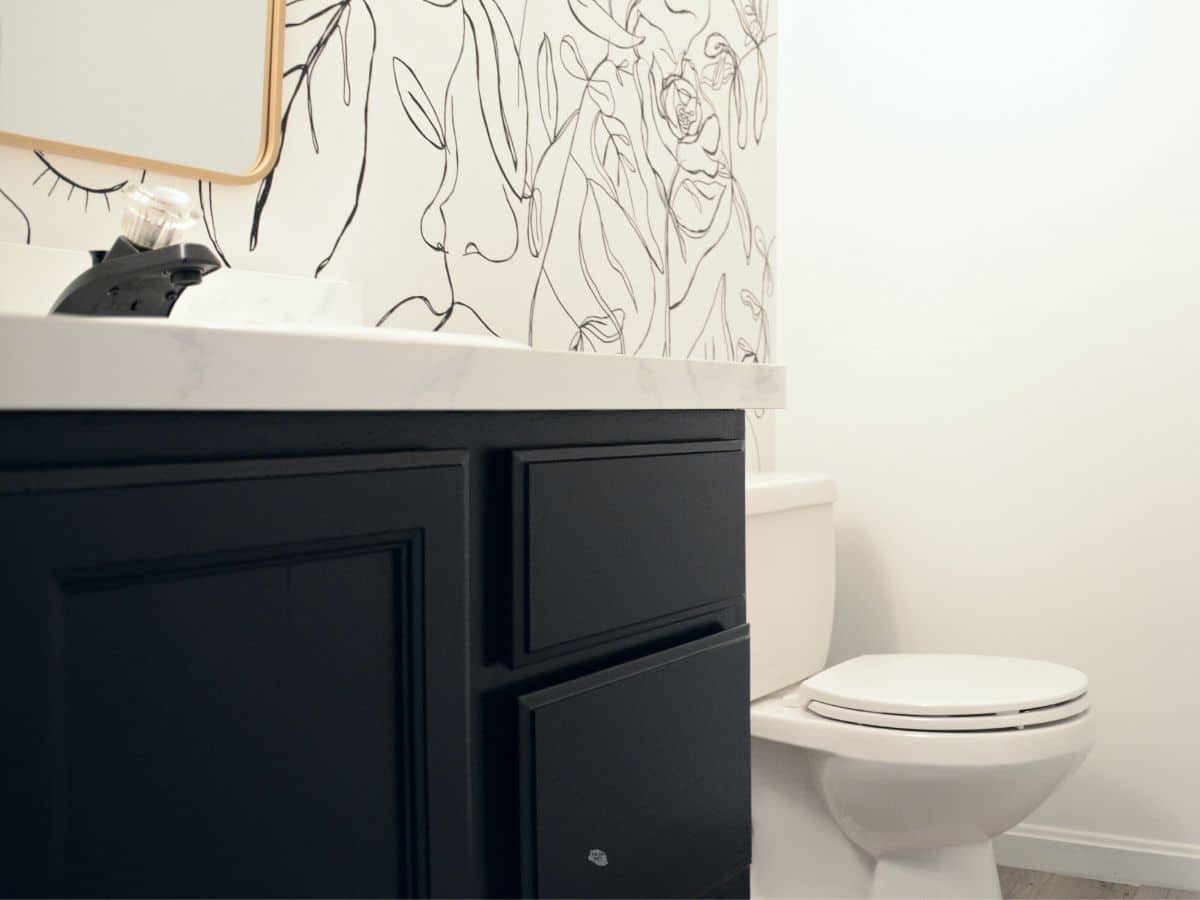
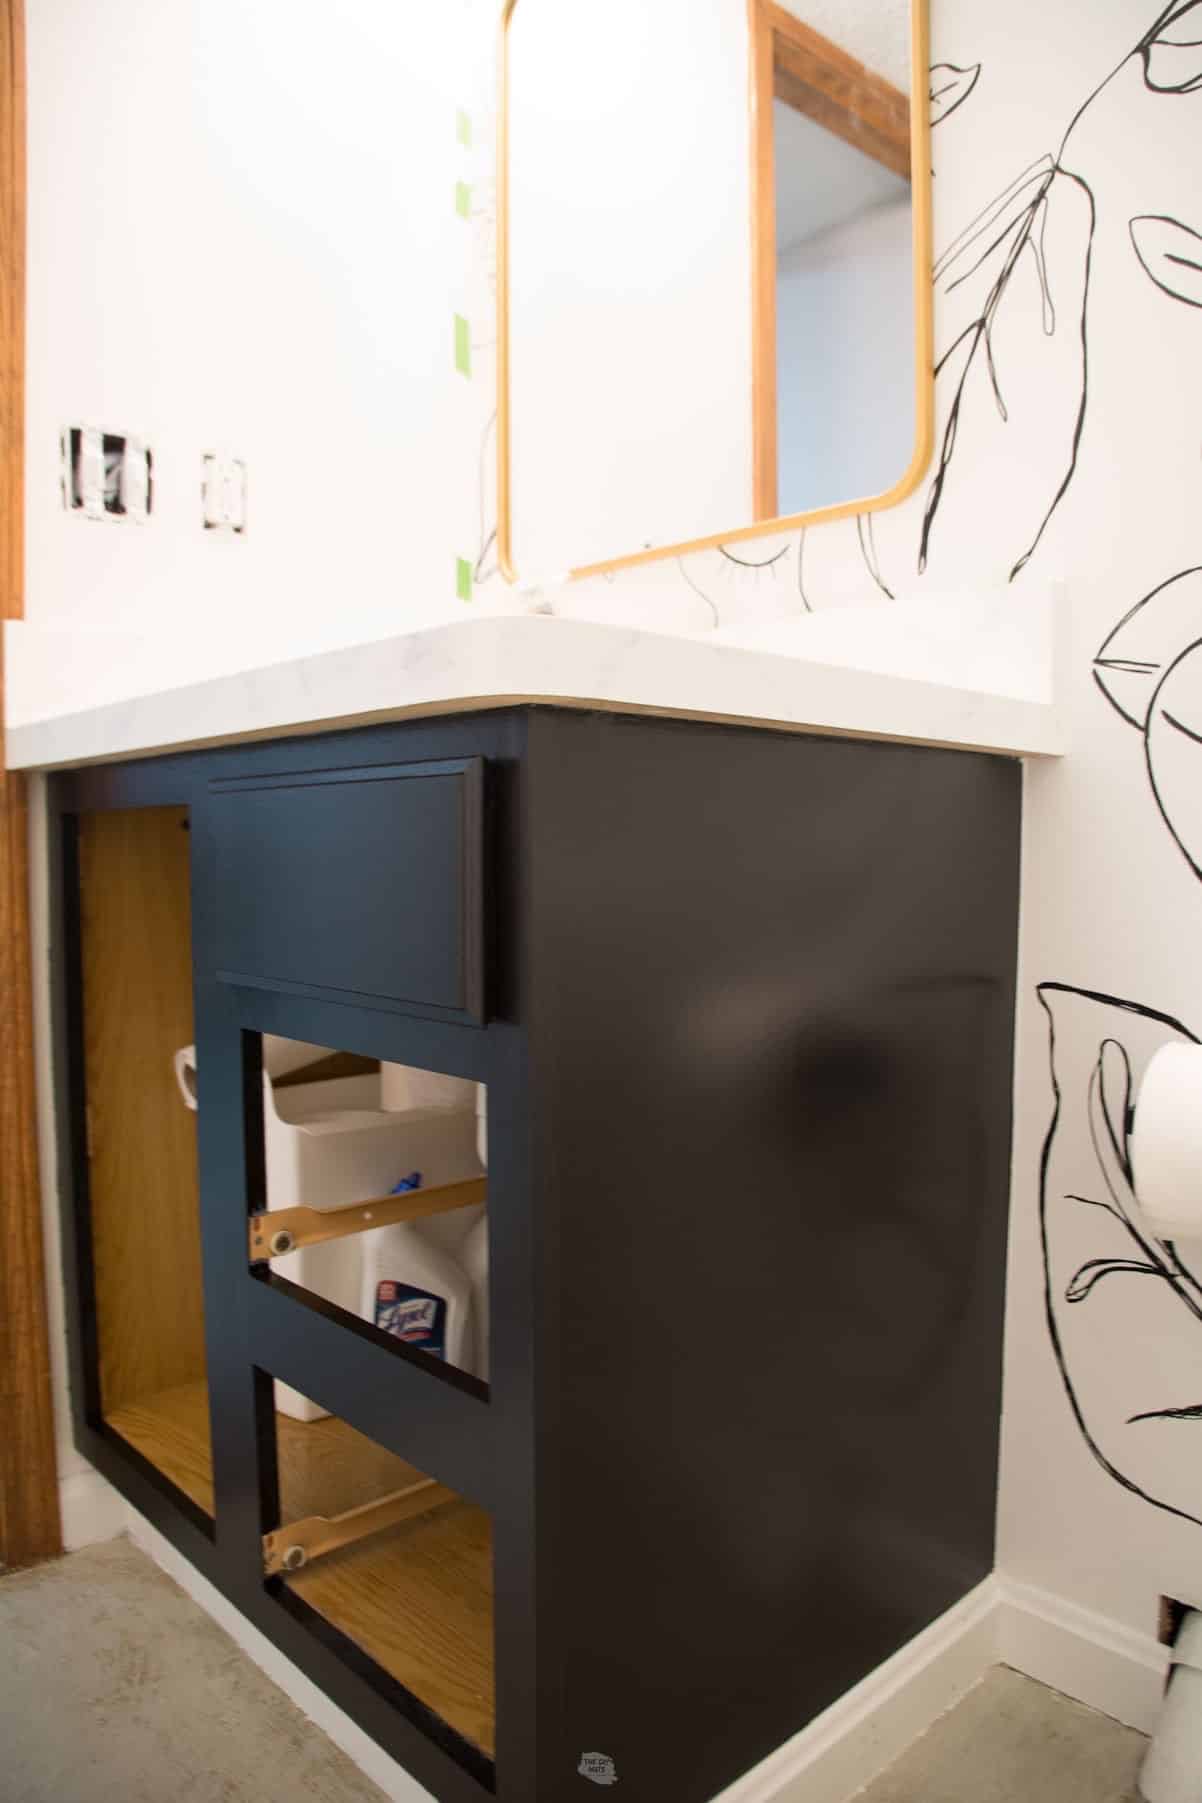
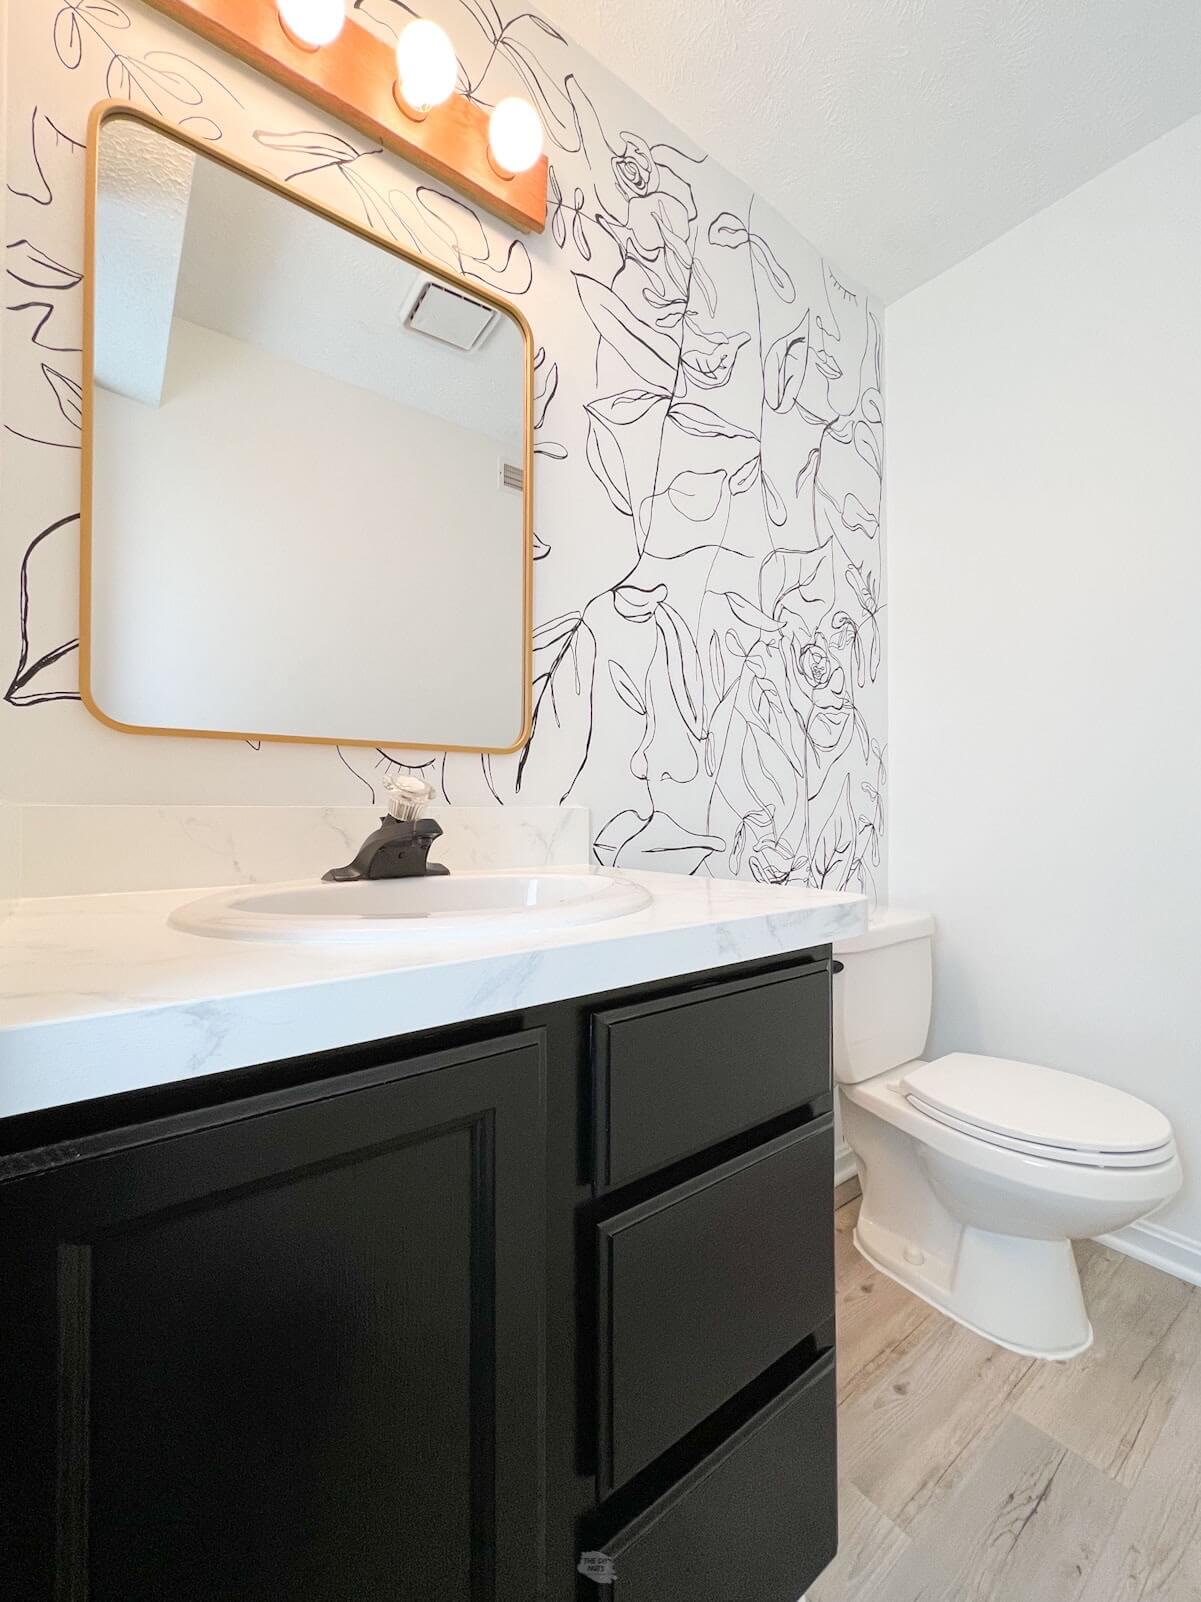
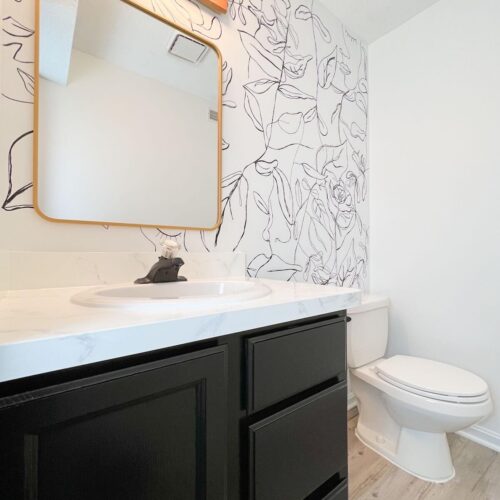
We are currently working on finishing the amazing makeover and knew that the charcoal blue painted cabinets just weren’t going to fit our new style. After much consideration, we decided to go with a modern black for our vanity makeover.
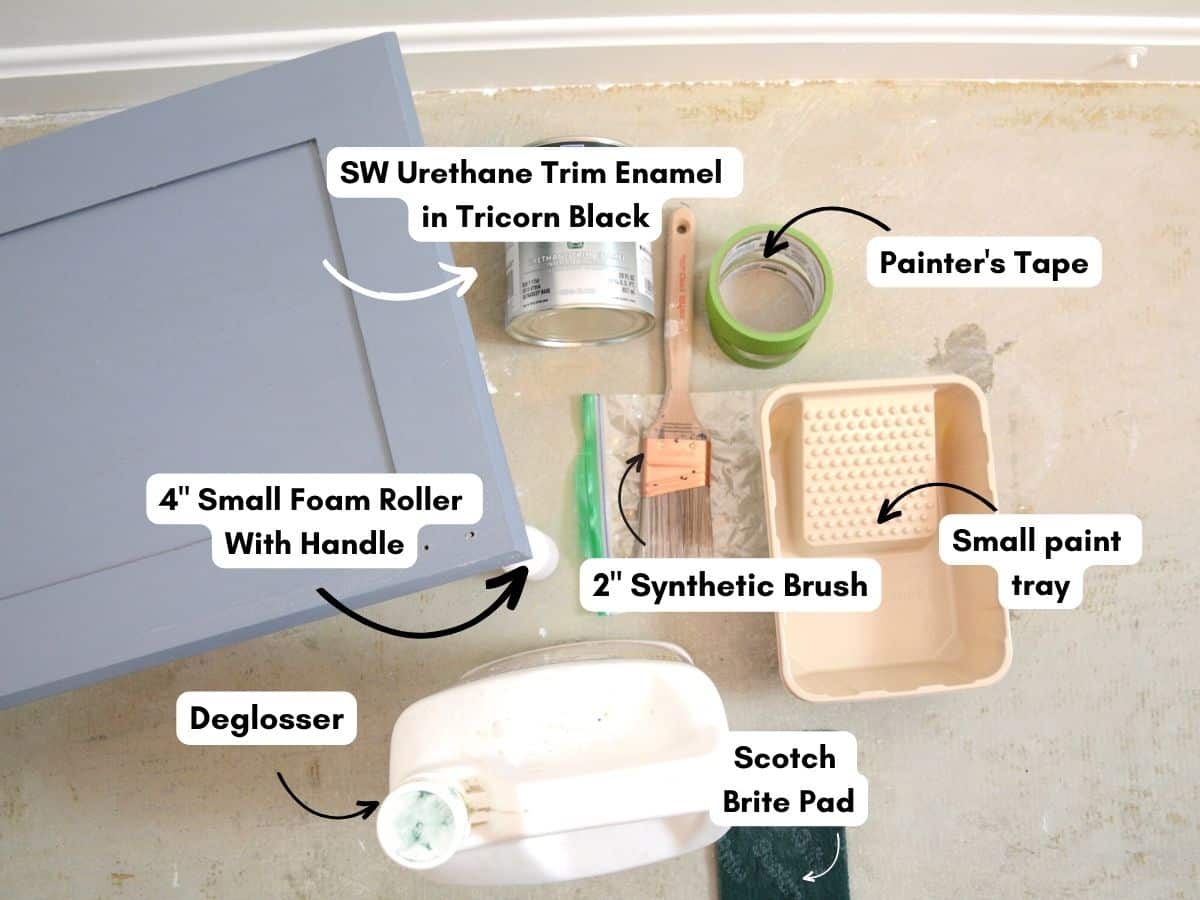
Recommended Supplies
- Deglosser: this is what we have used to prep molding and doors in our basement and the first time we painted the bathroom vanity cabinets
- Painter’s Tape: this brand is the one we have the most success with
- Purdy 2.5” angled brush or Wooster 2.5″ angled brush
- Small Foam Rollers and handle
- Small Paint Tray-this paint trays are great because they are cheap and sturdy enough to move around.
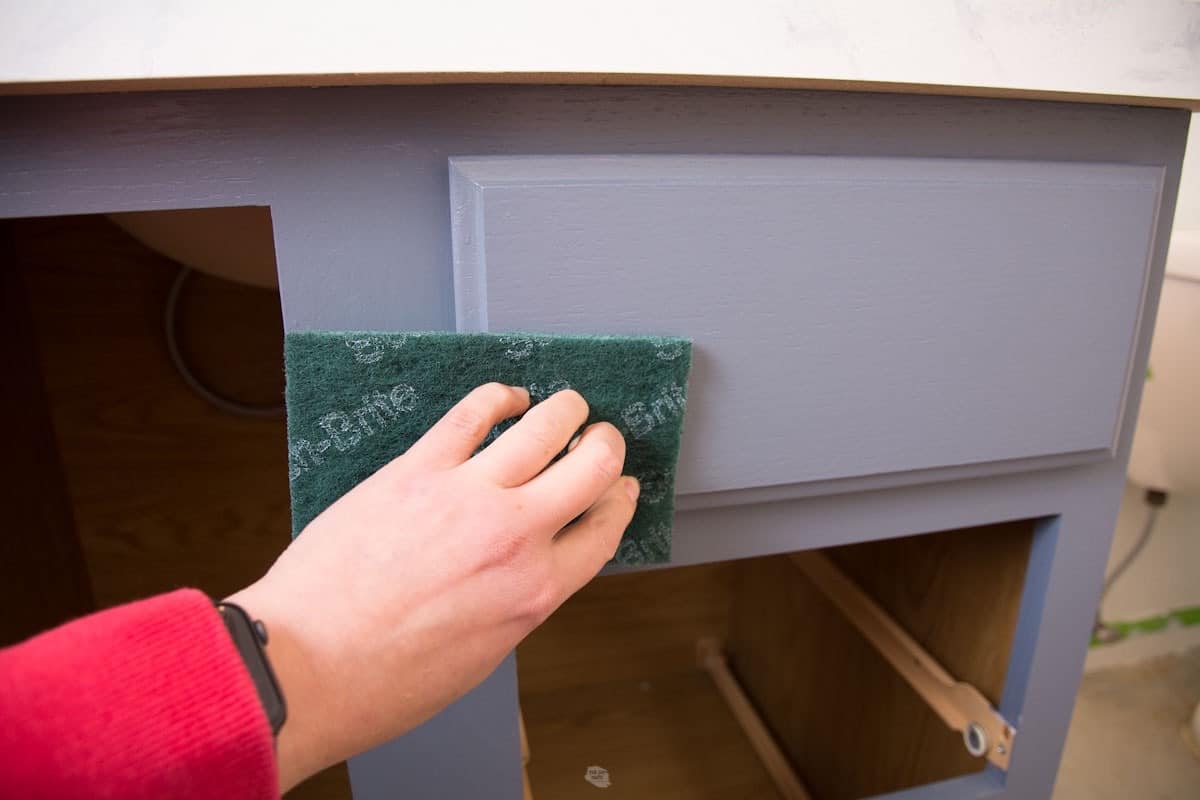
- 220 Sandpaper or Green Scothbrite Pad
- Caulk and Caulk gun (optional)
- SW Emerald Urethane Trim Enamel in Tricorn Black
- Screwdriver
- Rag
Need Help Picking Paint Colors?
We recently just tried Samplize, which beats having to buy individual paint samples. These 9″ x 14.75″ samples will be shipped directly to you and save the hassle of clean-up (we loved that). See our full review here.
Step-by-Step Instructions
Before You Begin
Repair any damaged spots on your cabinets before repainting. We were lucky that are painted cabinets were in pretty good shape and just needed a fresh coat of paint to fit our cheap bathroom makeover ideas.
You may also want to use paintable caulk along the walls and let it dry before taping and painting.
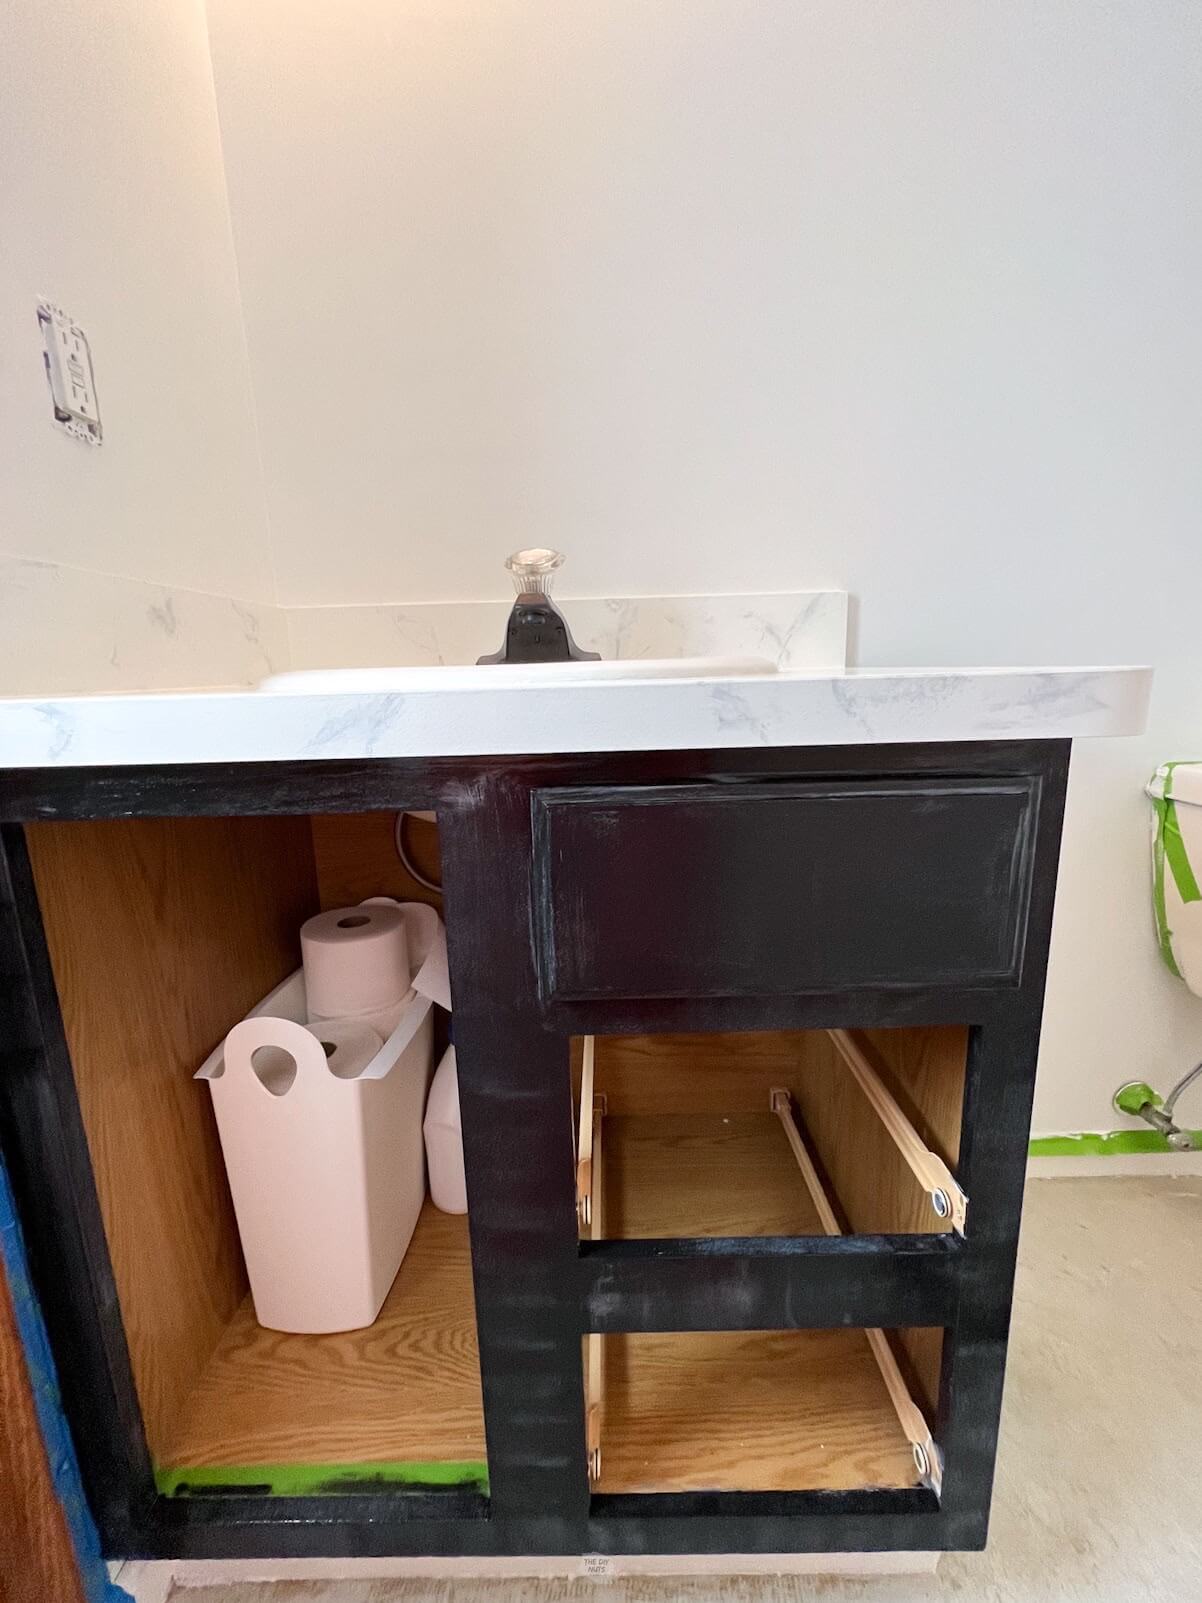
Step 1: Remove All Hardware, Doors and Drawers
Take off all hardware including hinges, doors and handles. Remove drawers carefully. Put the hardware in labeled baggies.
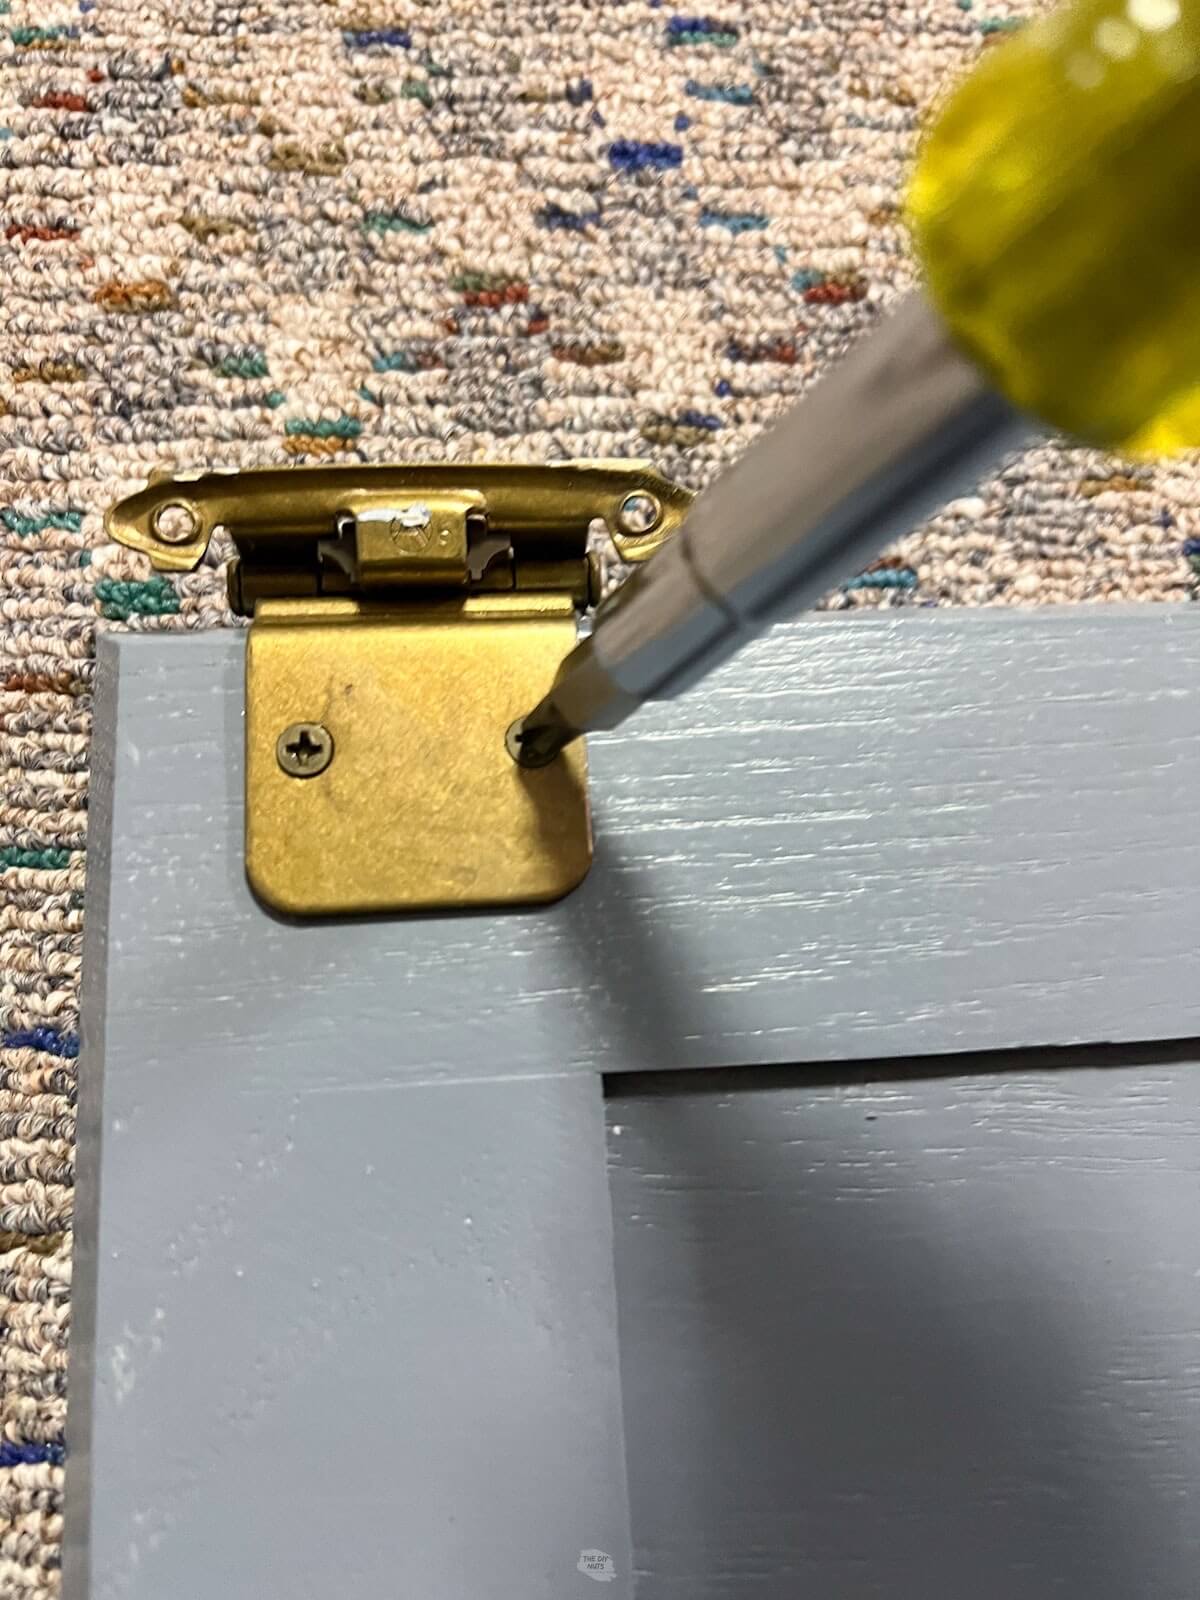
Luckily, a bathroom vanity cabinet will not have too many hinges. You can use a screwdriver or a drill to help with this process.
Pro Cabinet Painting Tip
Don’t take the hardware out completely on the drawers, just enough so that the front is smooth and not sticking out.
Step 2: Set Up The Painting Station
Set up a painting station for your drawers and doors. For us, that simply meant placing the door on two paint cans and placing the drawers on a drop cloth.
Because we’re only doing two drawers and one door, we did not feel the need to set up an elaborate station like we would have if we were repainting kitchen cabinets.
Some cabinets will allow you to take the drawer fronts off, however, we just taped them around the edge for less work. For a finished look though, you still want to paint the back of the drawer fronts.
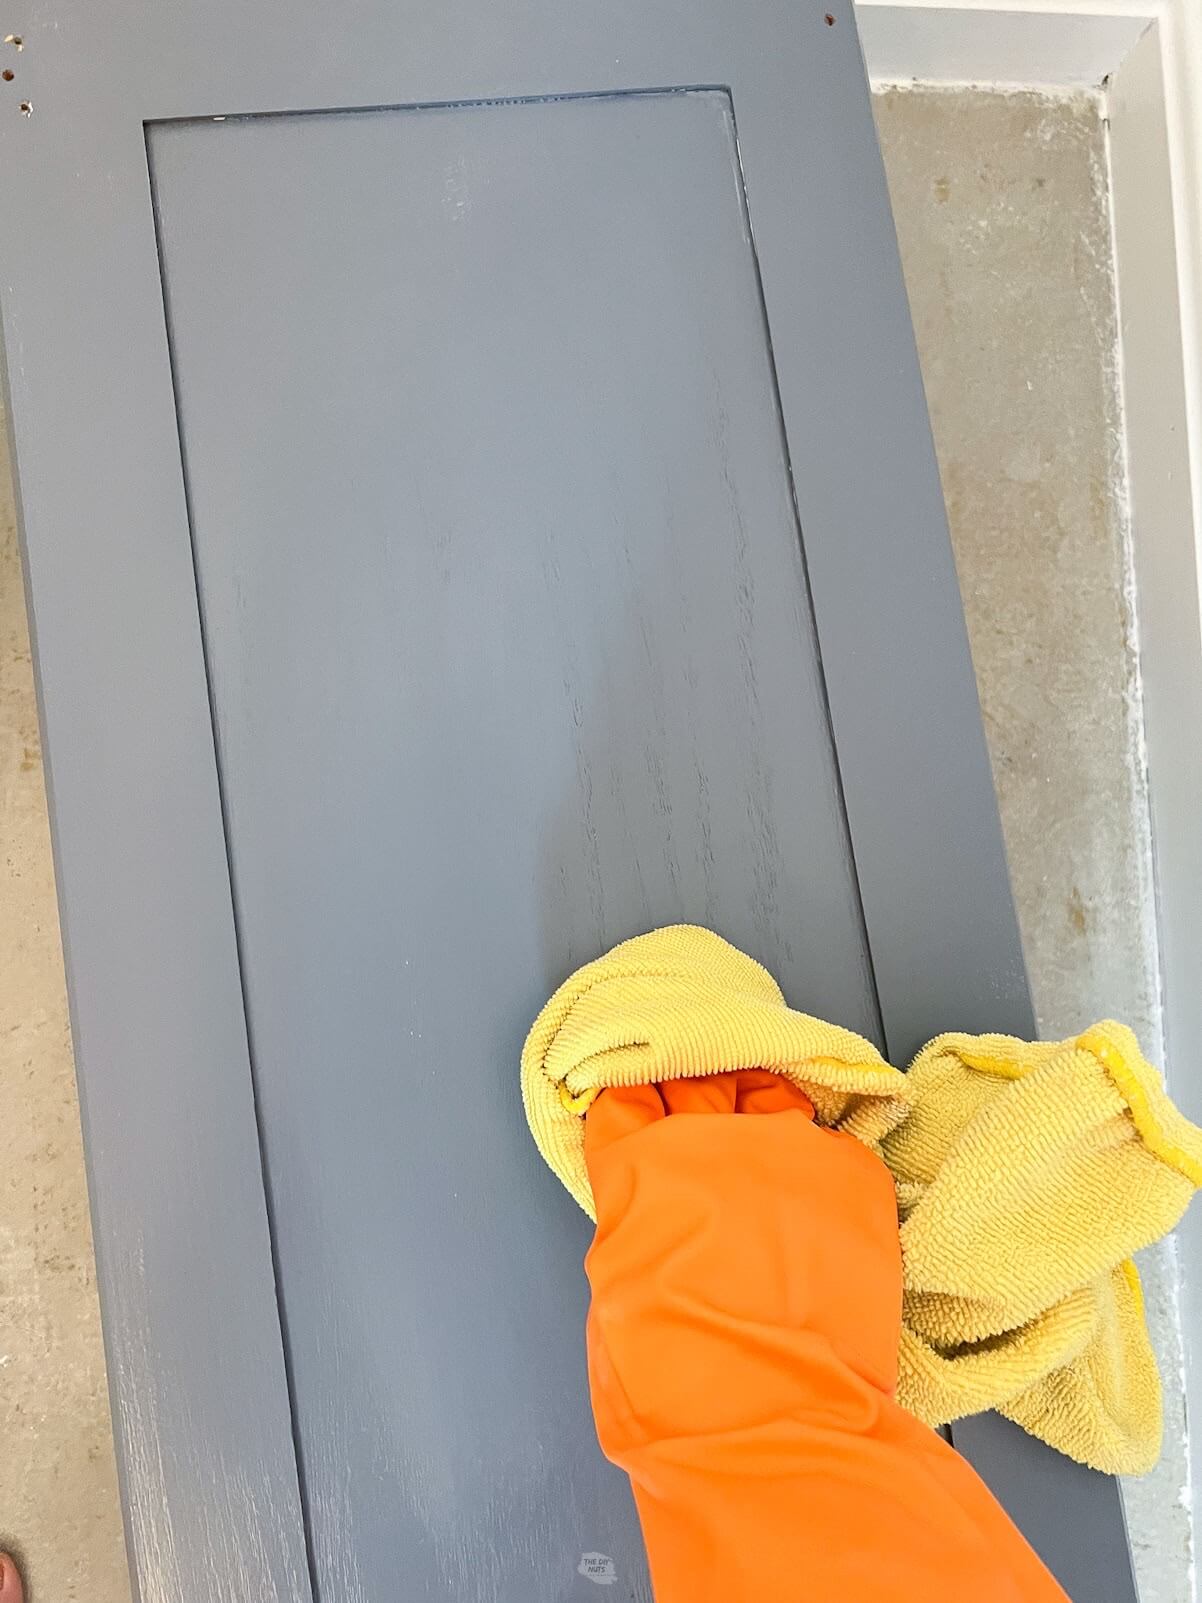
Step 4: Wipe Down With Deglosser
You want to wear gloves for this part. Put deglosser on a rag and wipe all surfaces completely clean. Do not skimp on cleaning your cabinets. The last thing you want is dust getting stuck in your nice smooth surface.
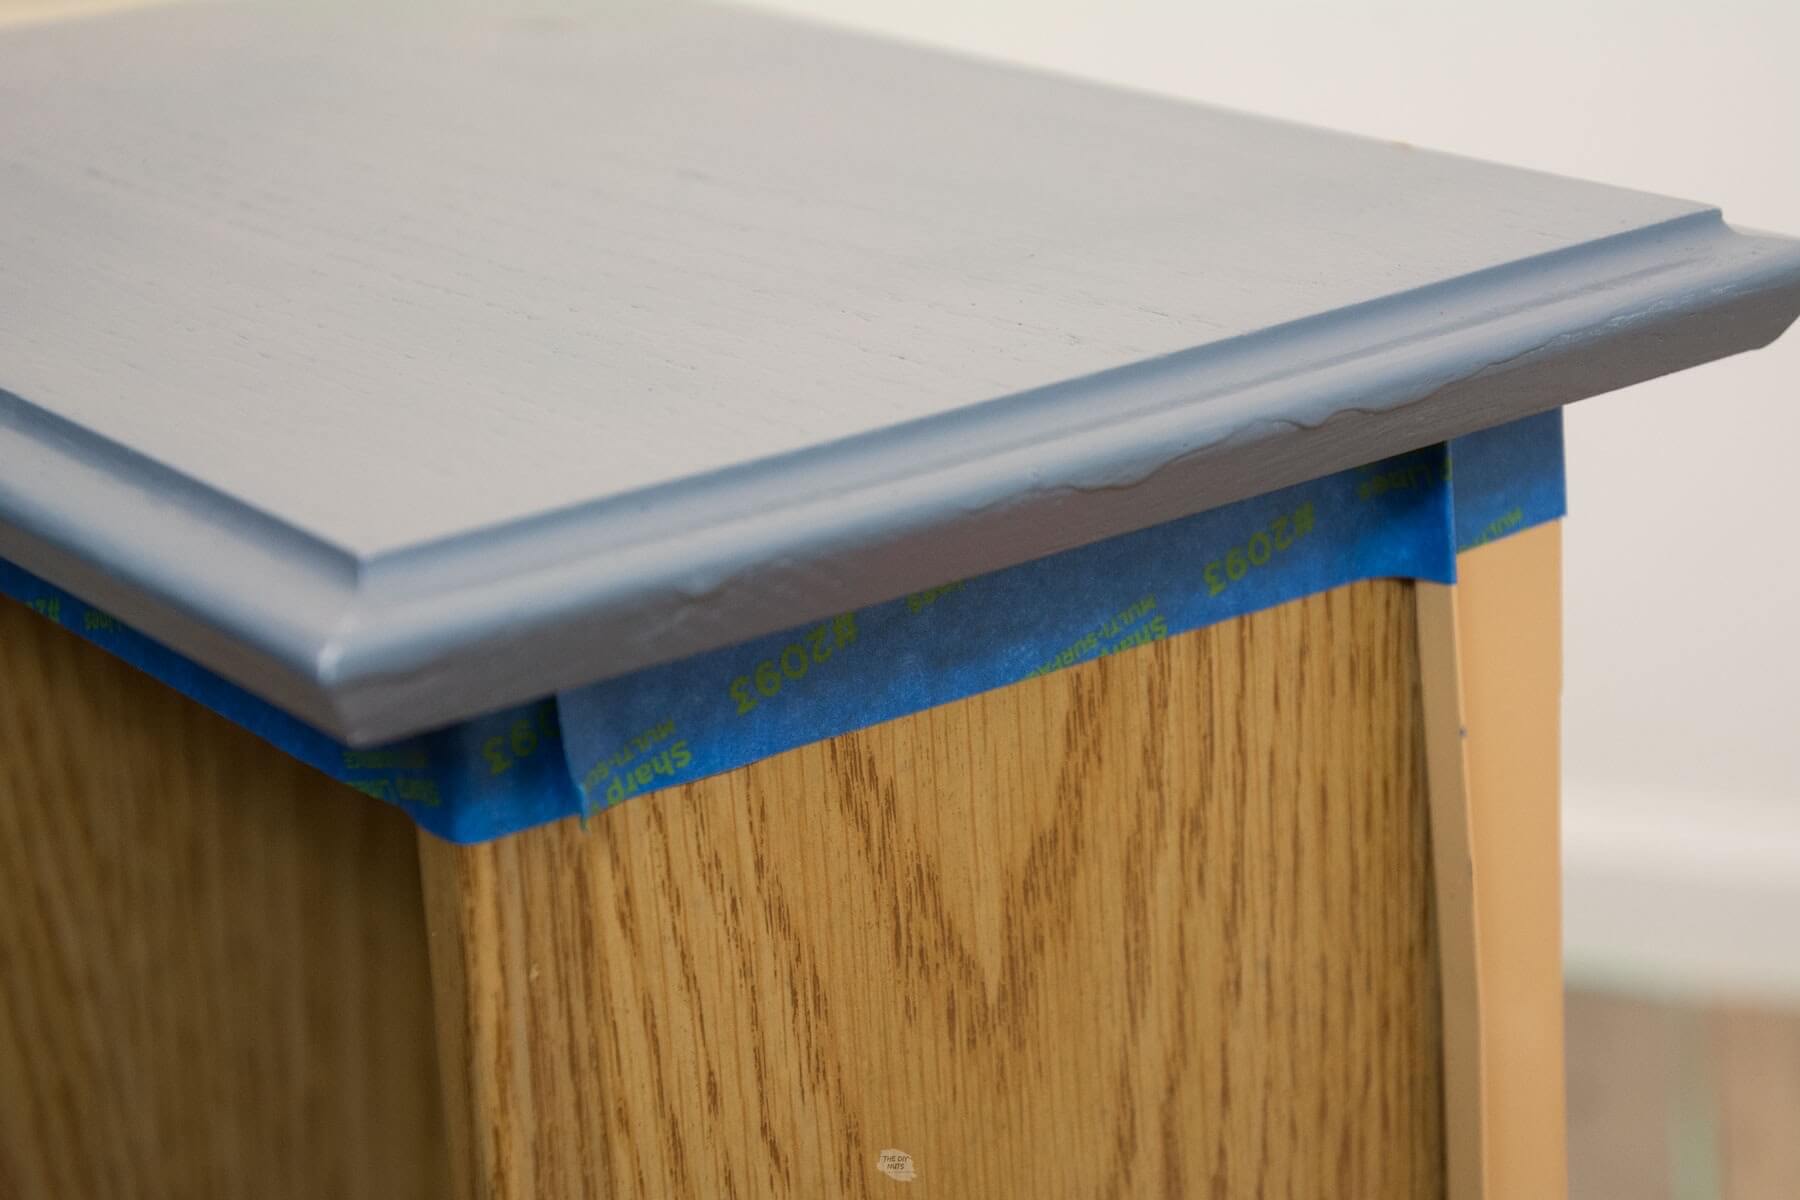
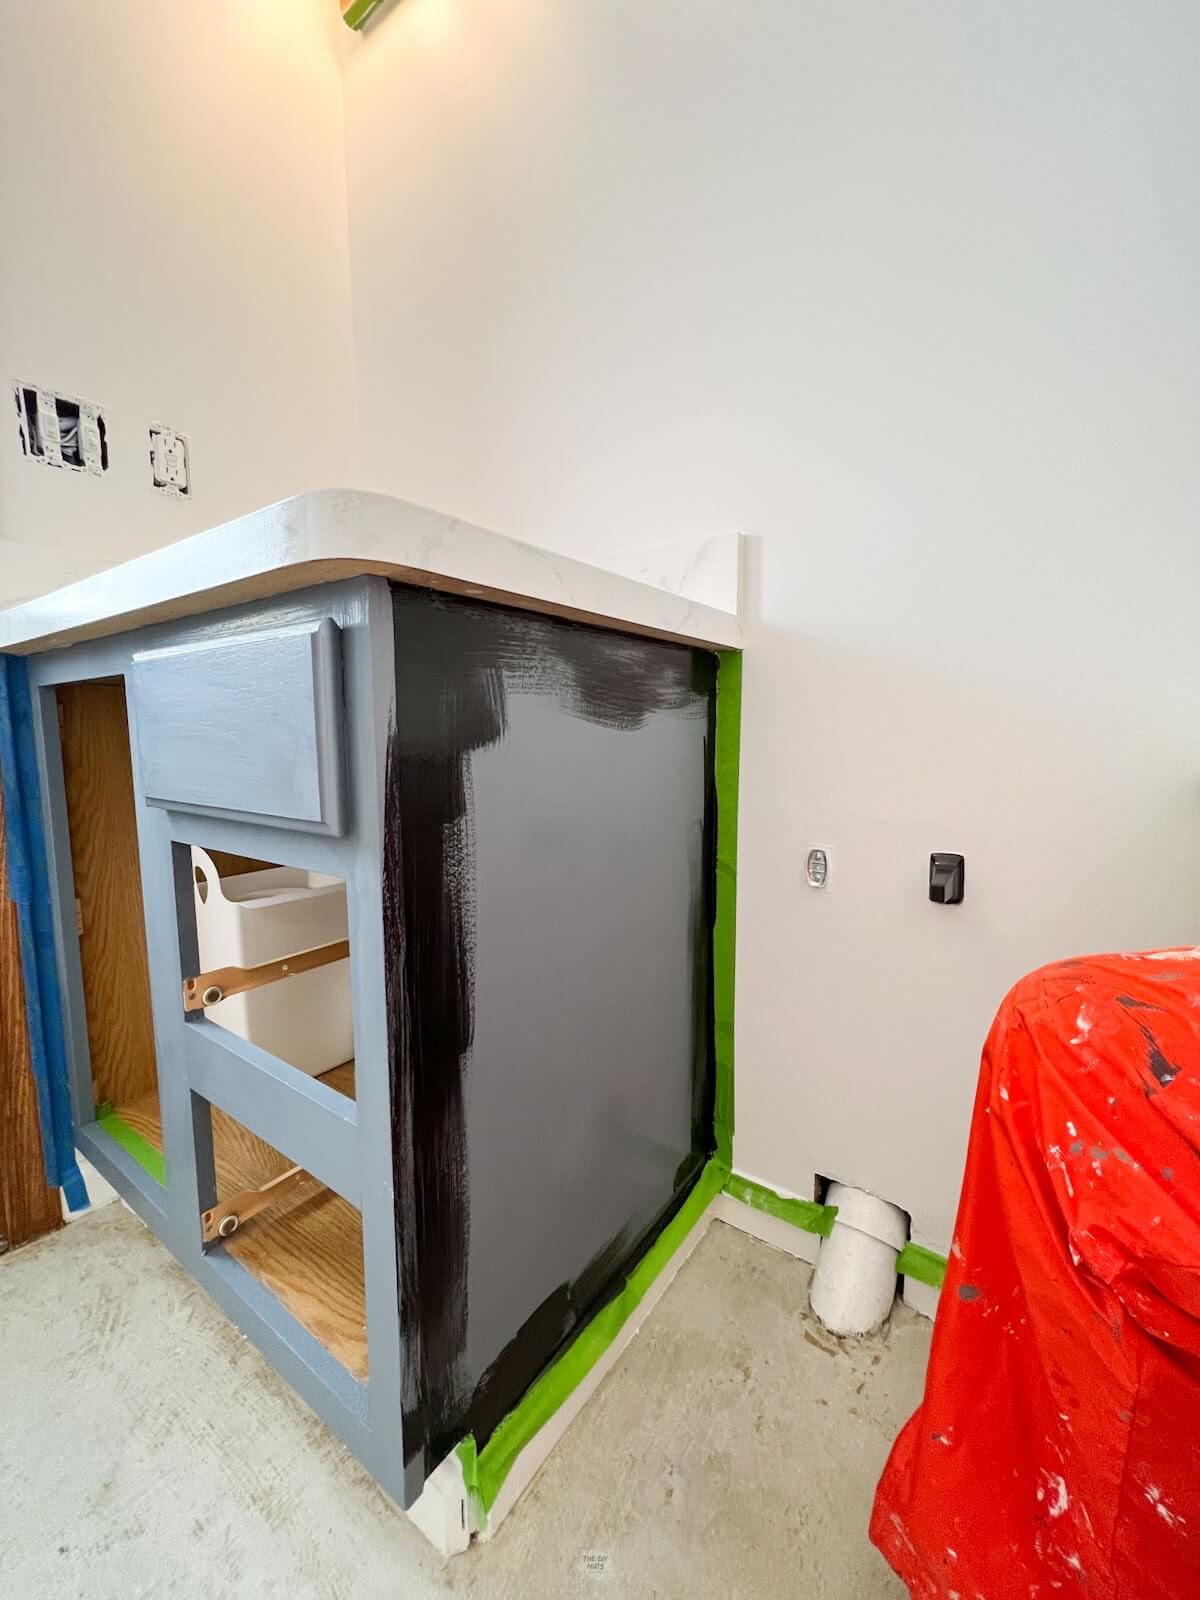
Step 4: Tape Out Areas You Don’t Want To Be Painted
Use painter’s tape anywhere you think you might not get a straight line. The biggest place to tape is where your cabinet hits the wall and the molding on the base.
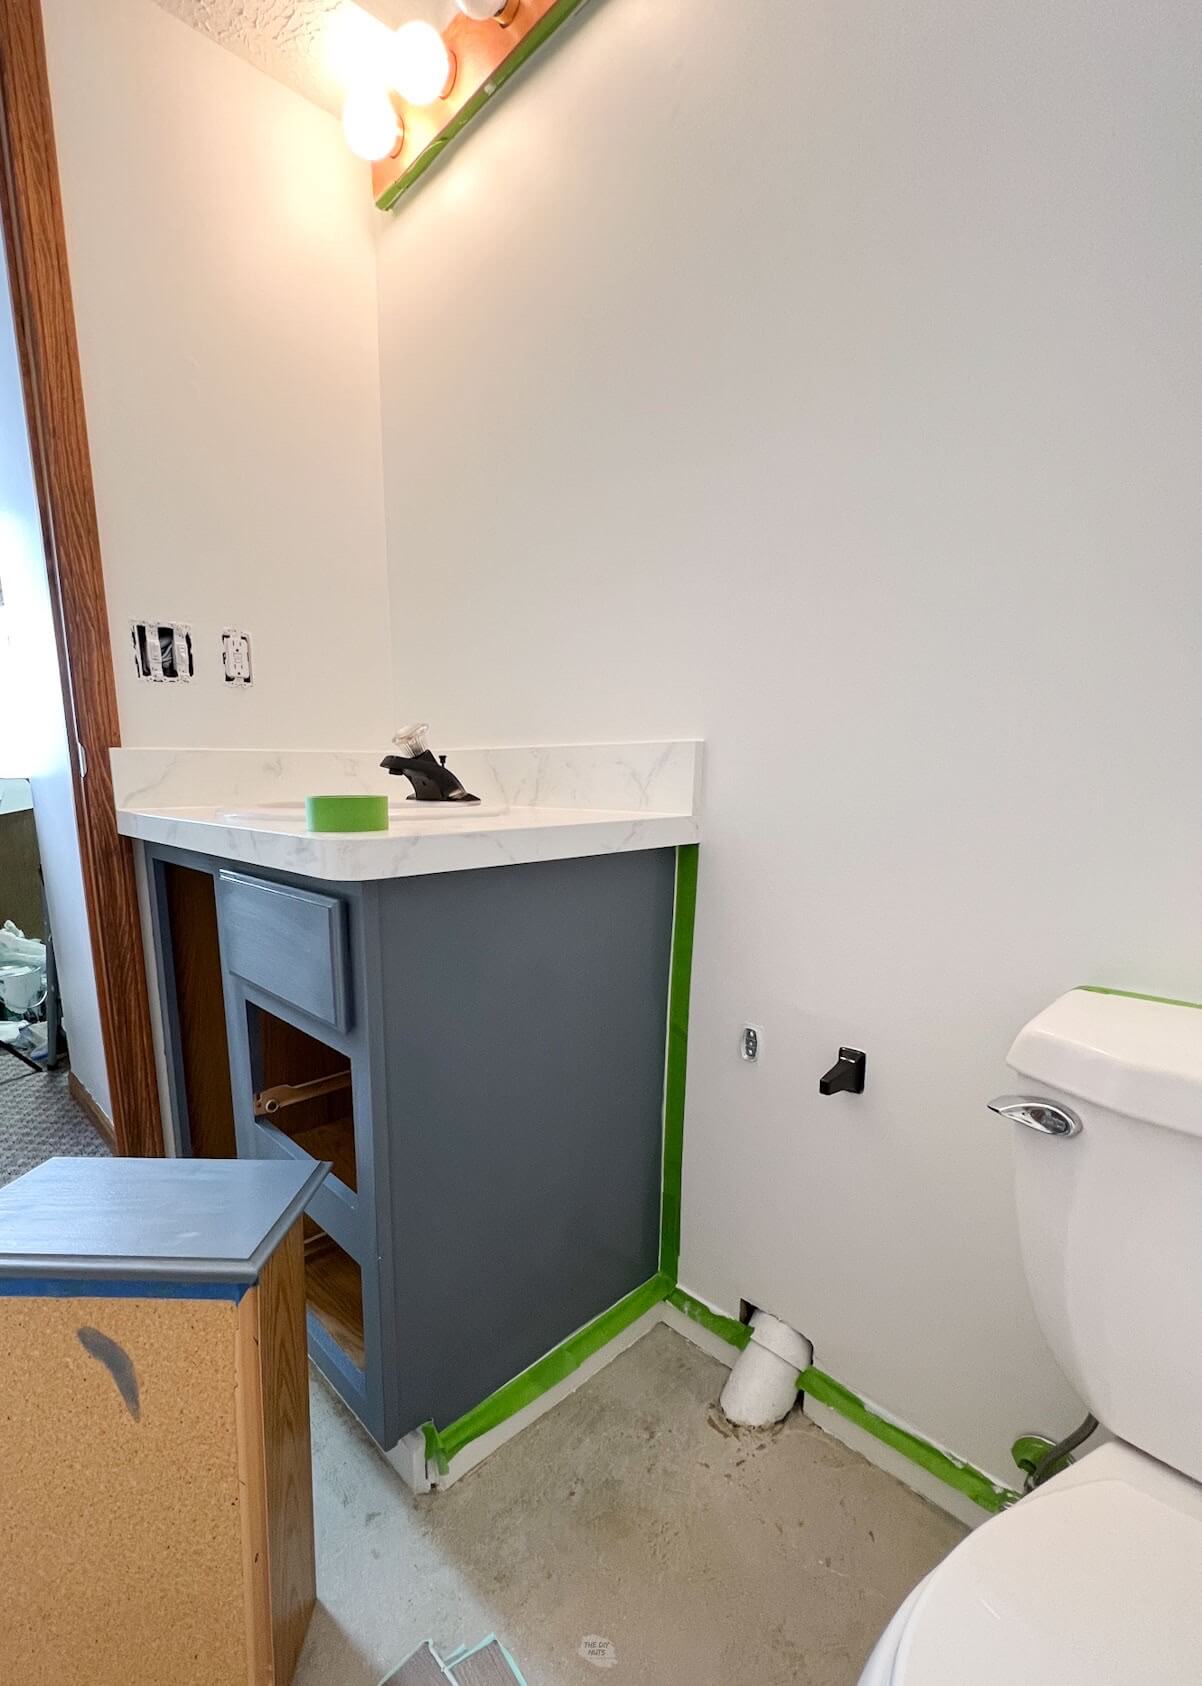
You can also tape inside the cabinet lip, around drawer fronts or edges you don’t want to be painted.
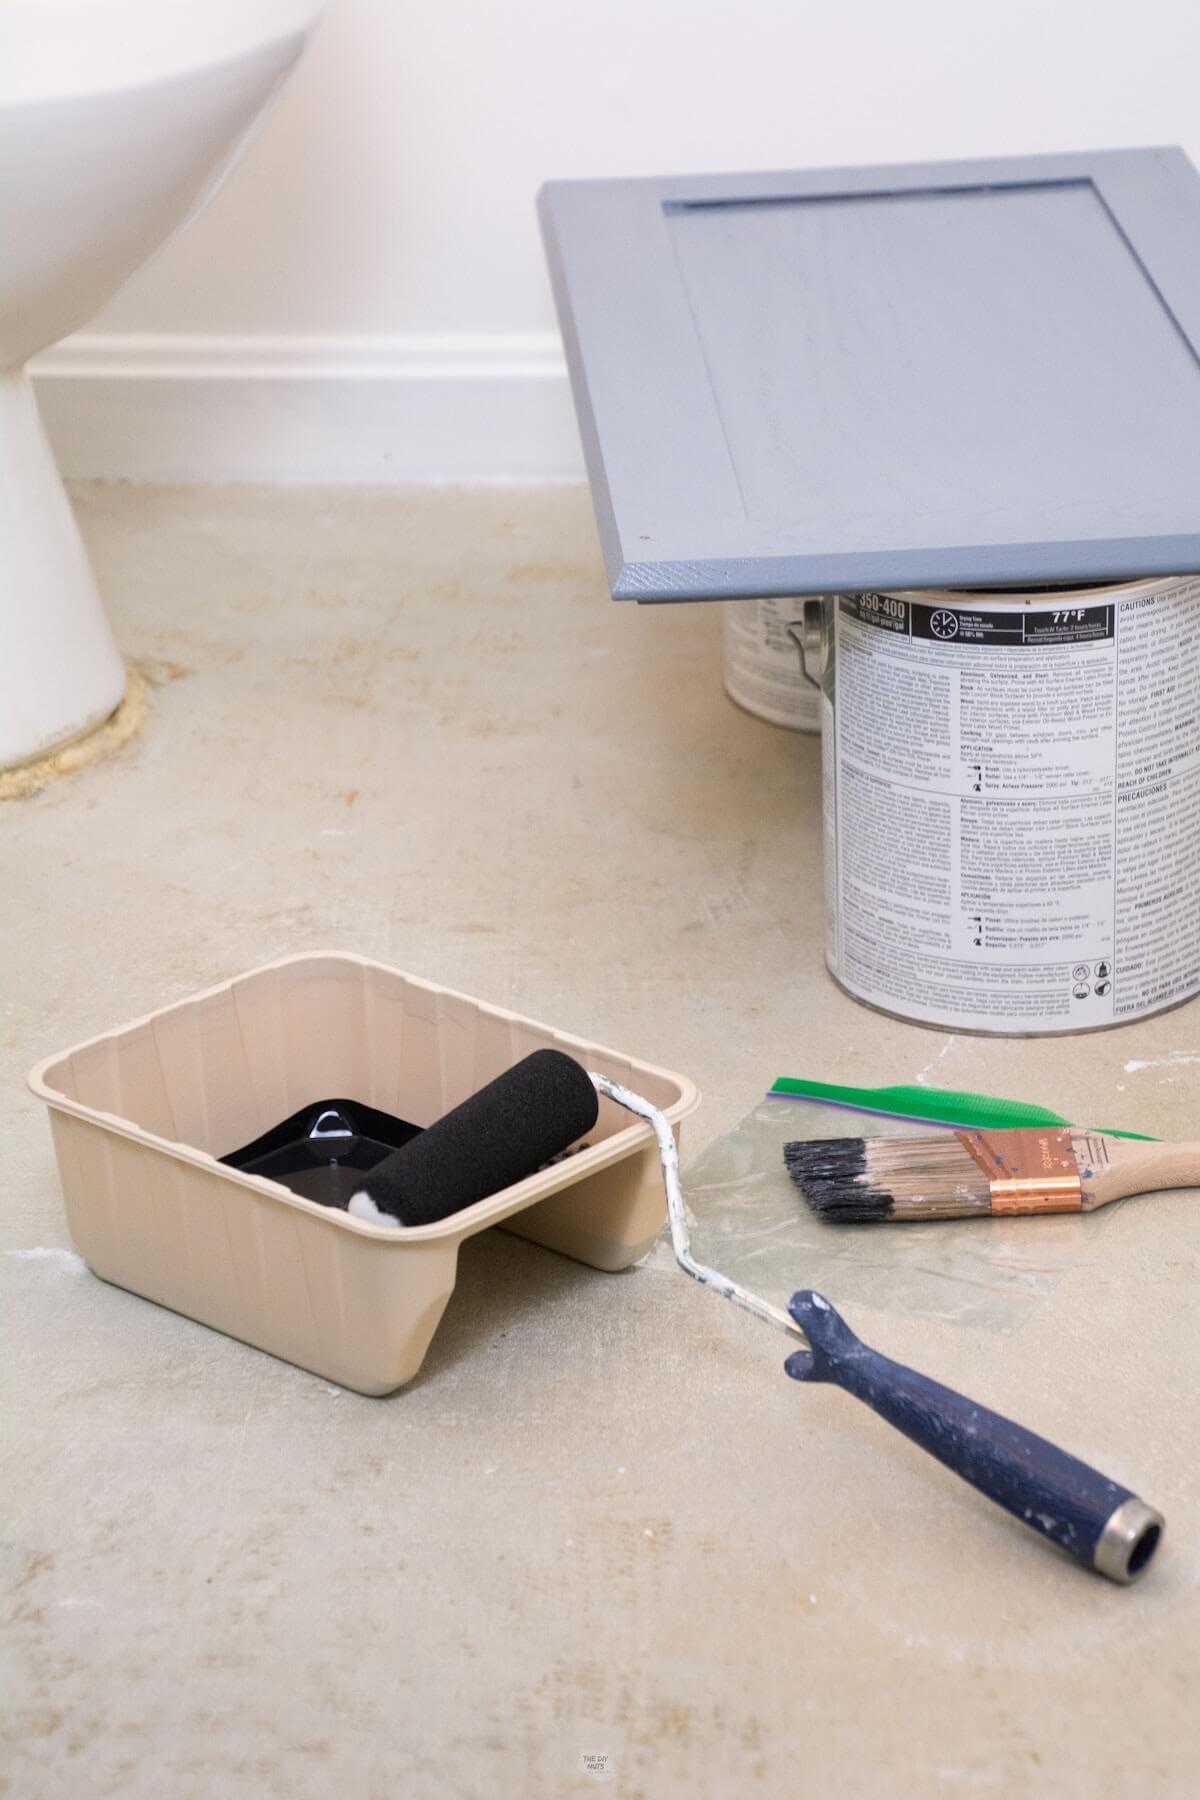
Step 5: Paint Hard To Reach Areas With A Brush
Begin using an angled 2″ or 2.5″ brush to trim out places that the roller can’t get to on the box and drawers, and doors.
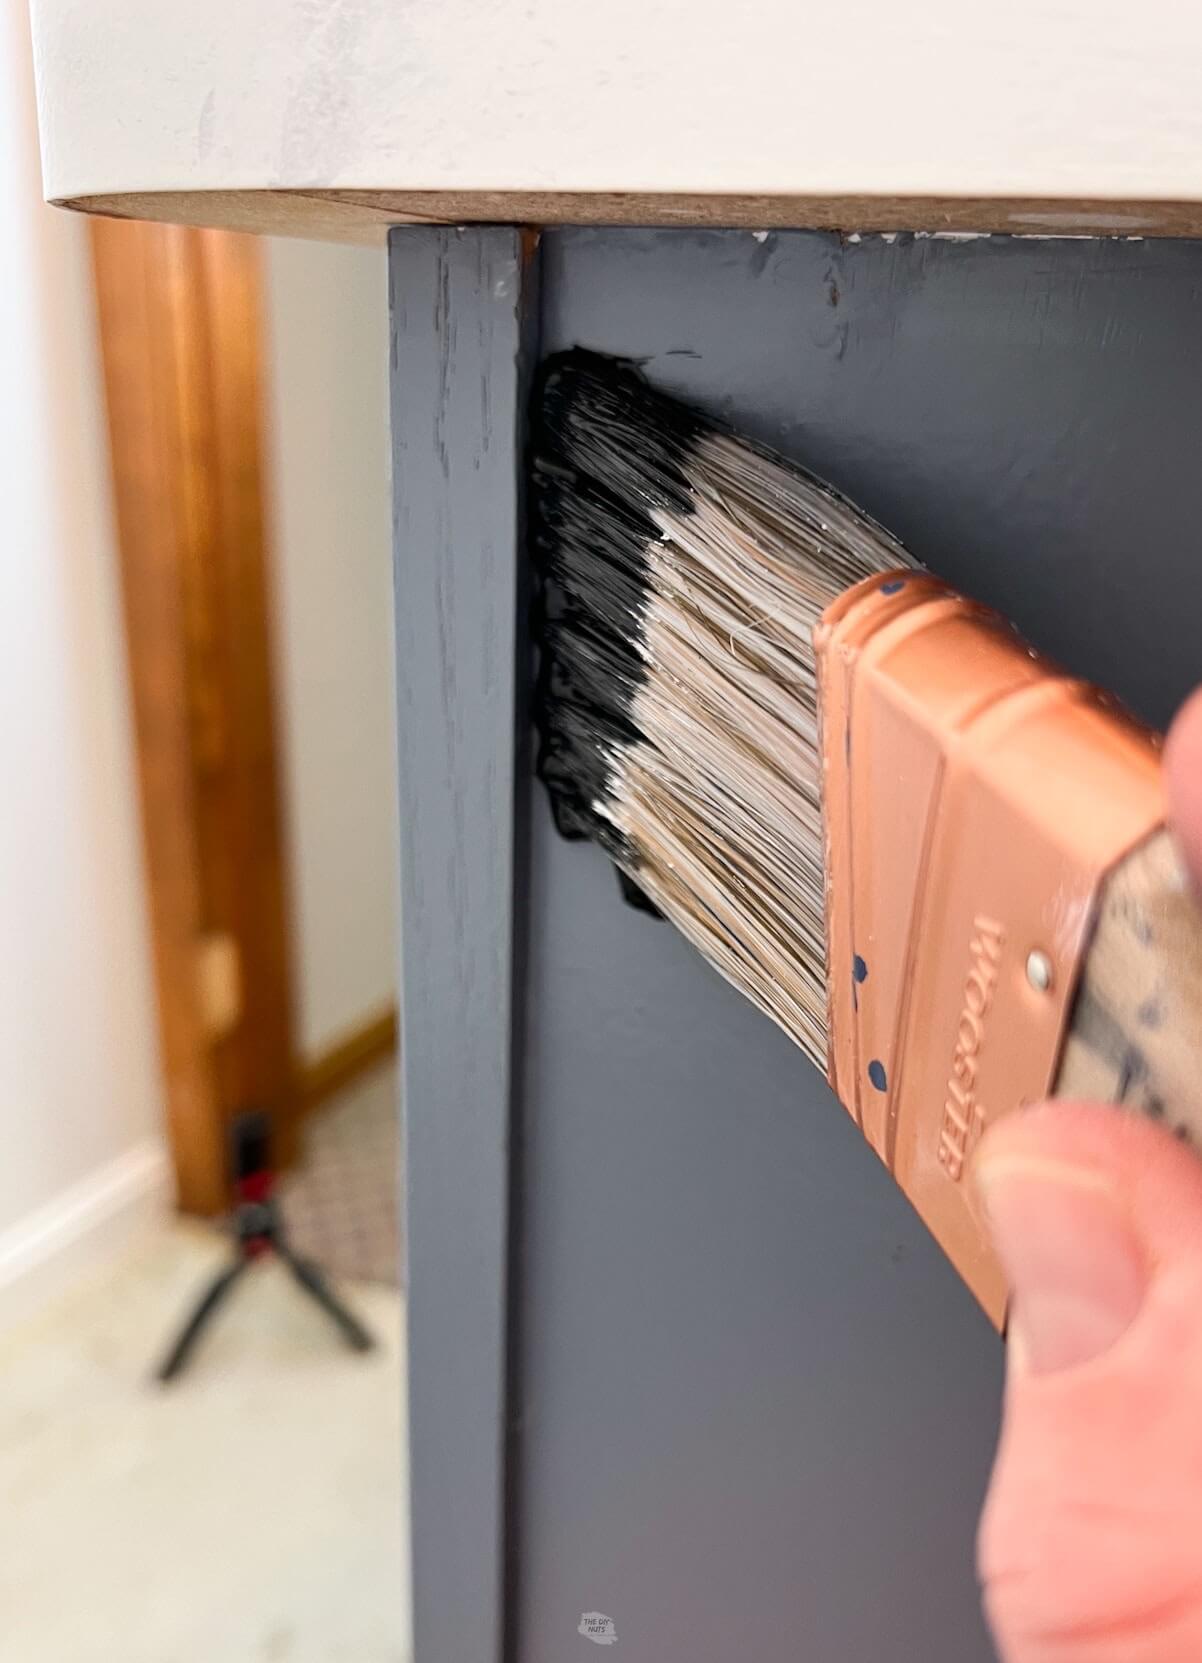
By doing this first you can use the roller to help smooth out the areas after and lightly feather in on top of brushstrokes.
Read More>>>Get All Our Detailed Tips For Painting Cabinet Doors
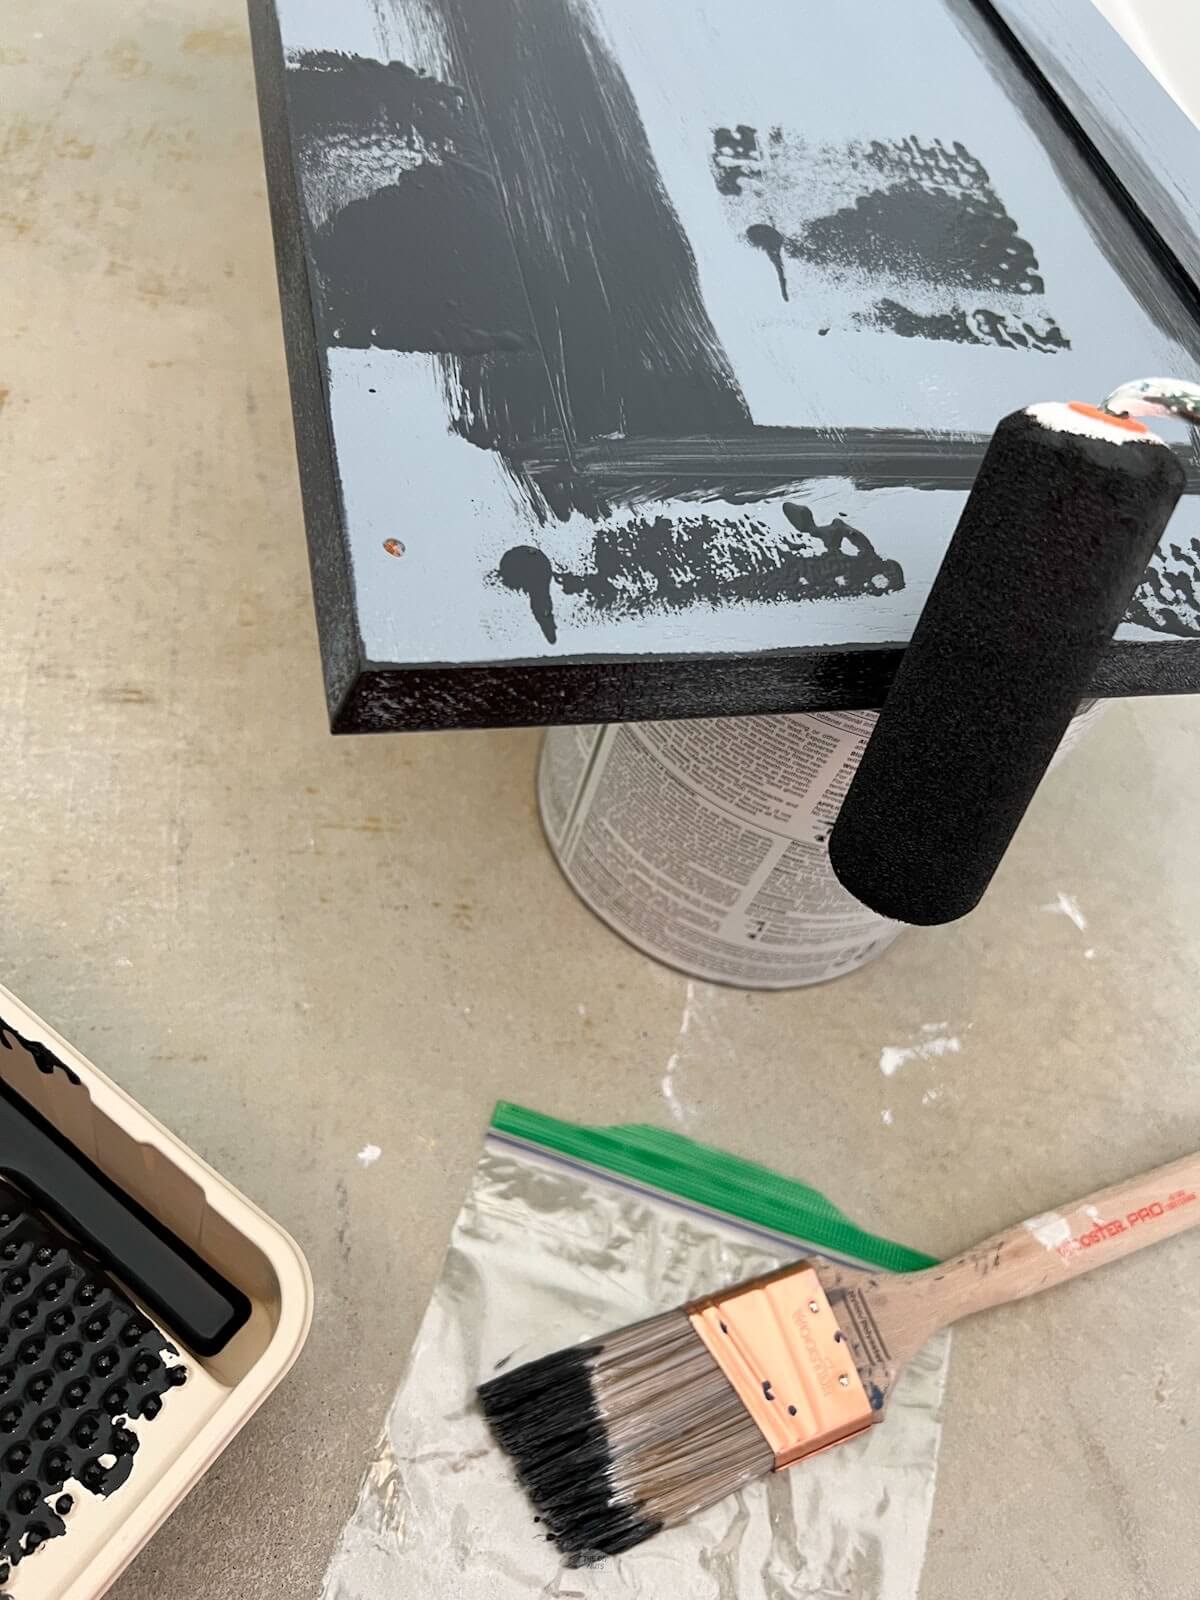
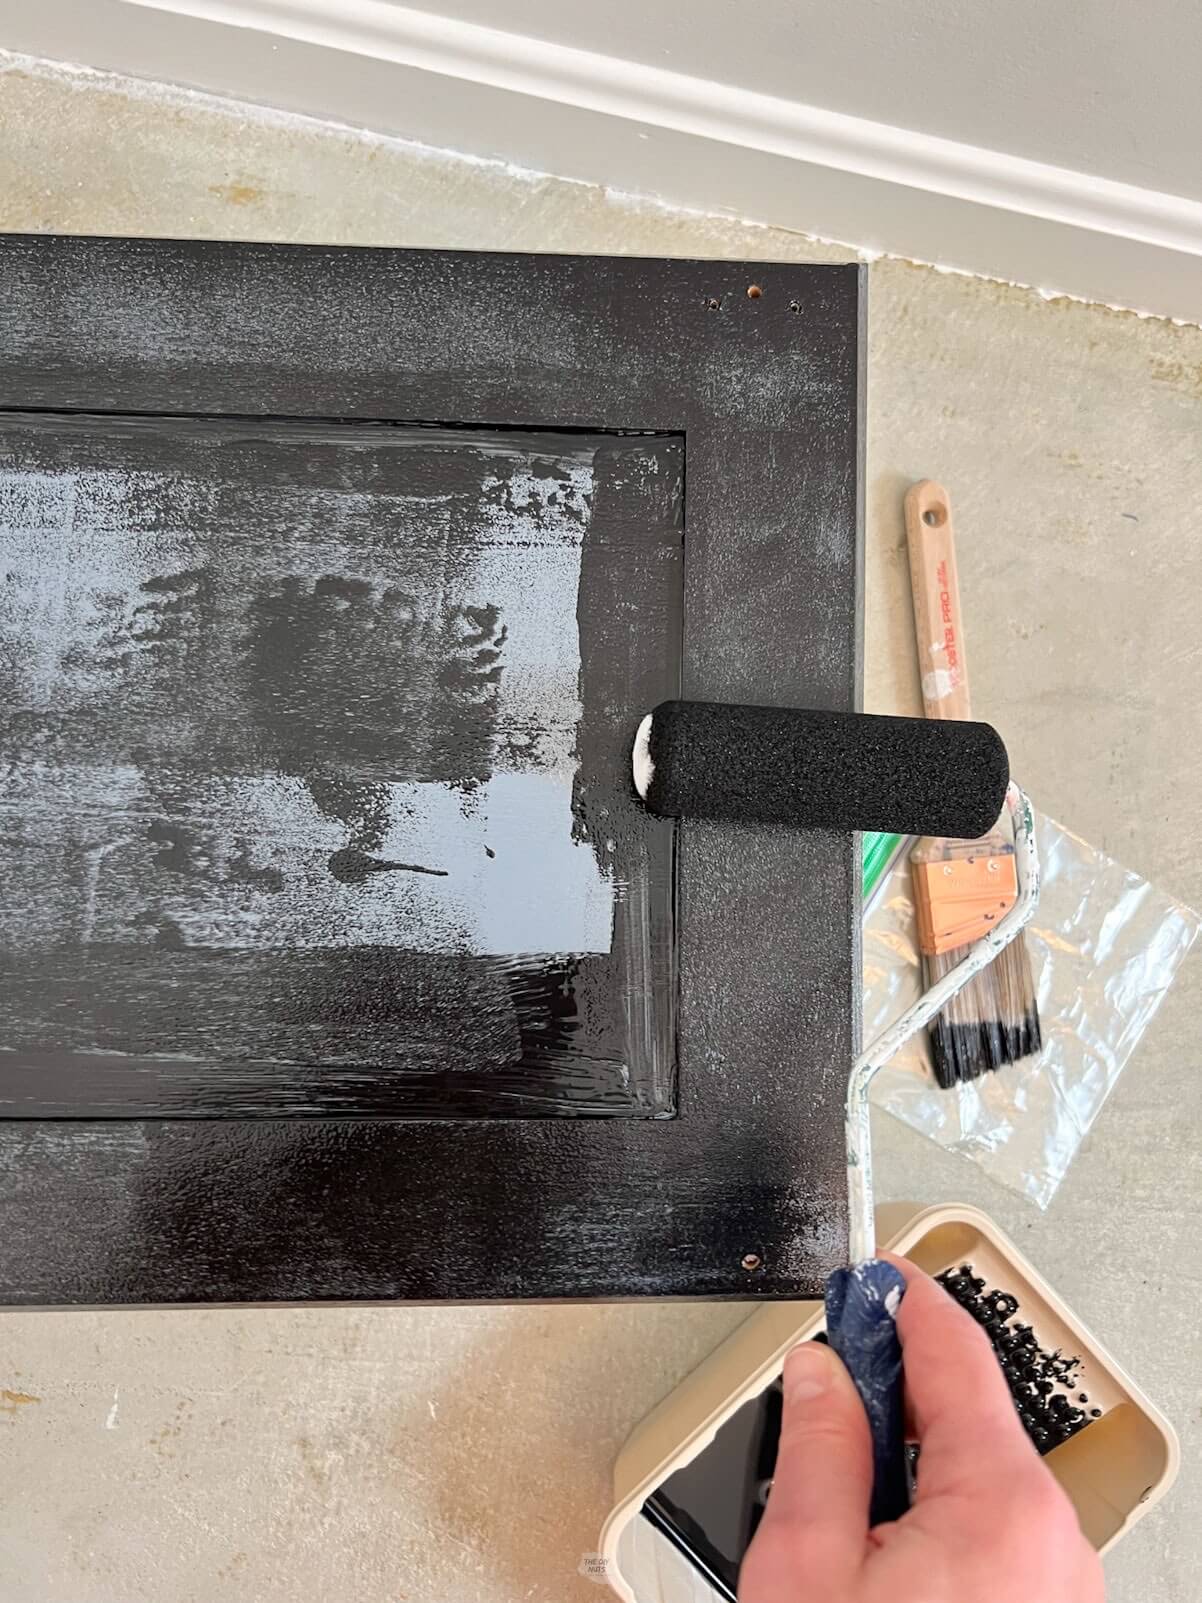
Step 6: Use A Small Foam Roller
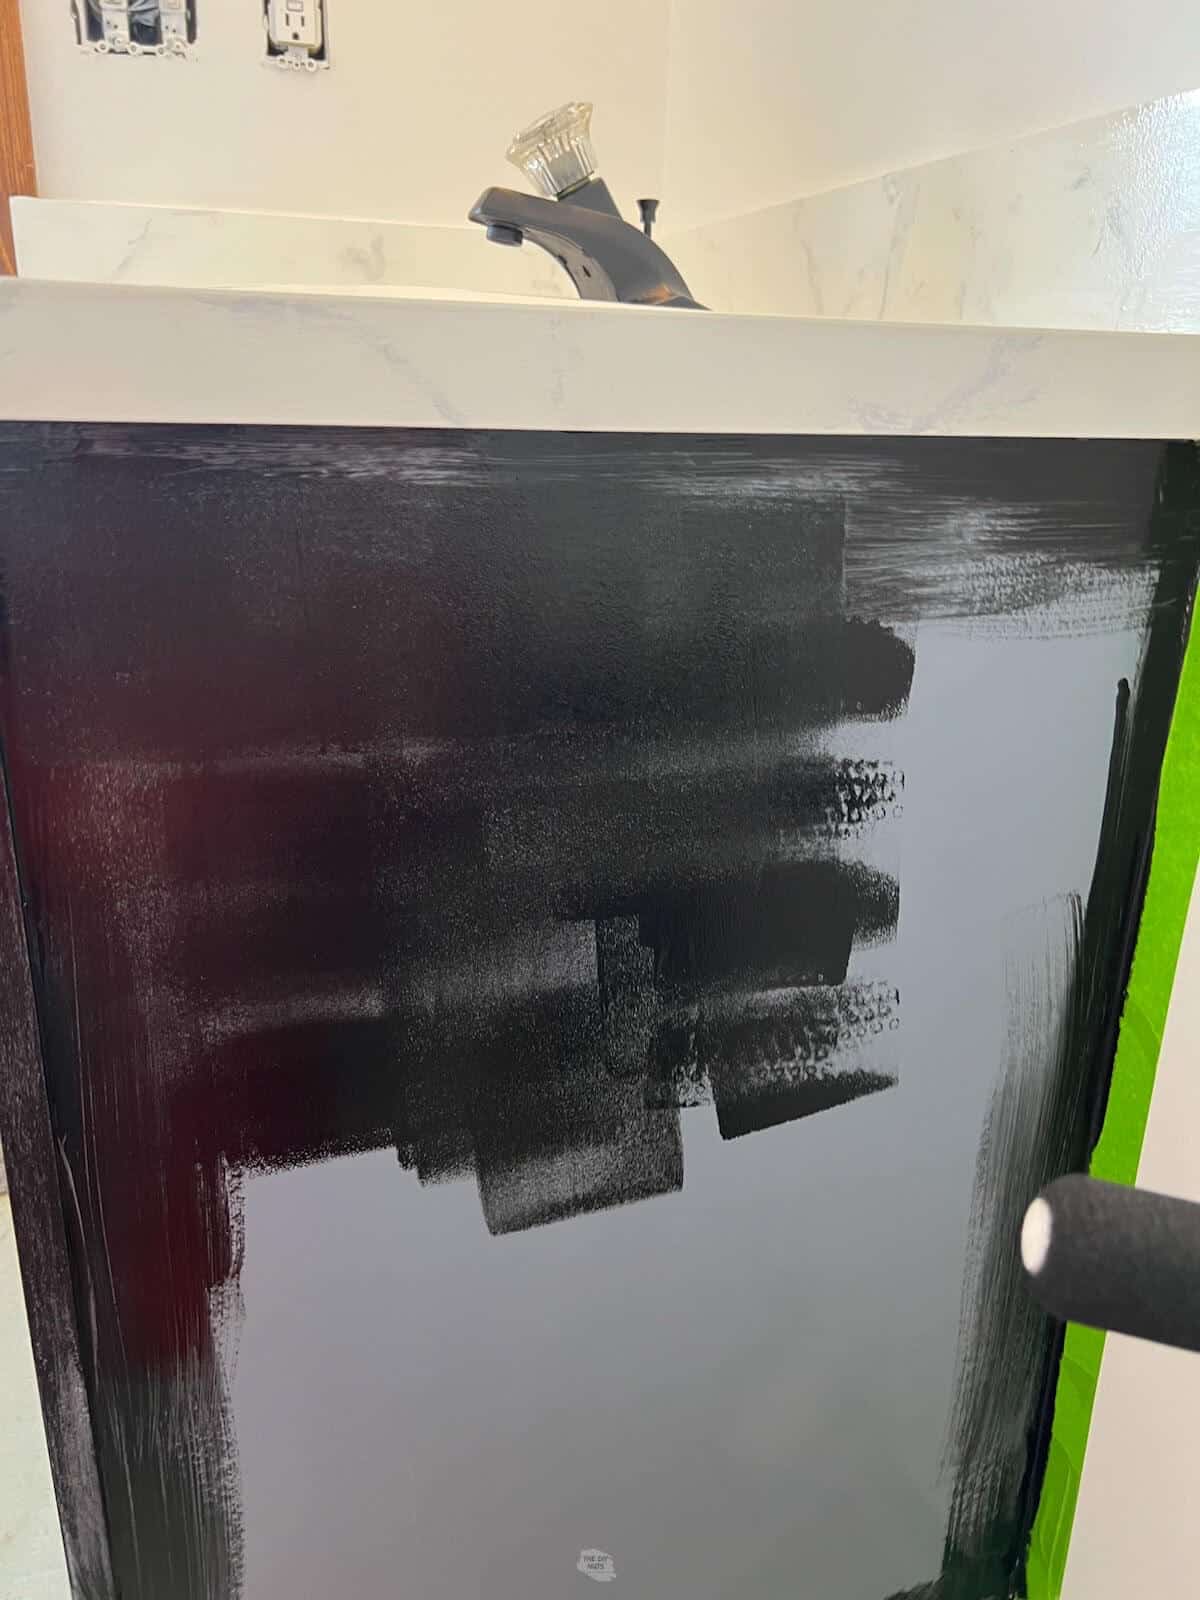
You will work in light layers with the foam roller. Use the small roller to apply your first coat of cabinet paint. Don’t worry if your first layer of paint is a little splotchy or uneven.
Step 7: Let The First Layer Fully Dry
Let dry before painting a second coat. You don’t want your paint to be tacky to the touch. Read the paint can label to find out your dry time. Sherwin Williams Emerald Urethane Paint takes 4-6 hours to dry.
Remember the roller is great on the edges of the doors (you will get a much more even coat).
Step 8: Add 1-2 More Coats Of Paint
Repeat all cabinet painting steps for a second and/or third coat. Because of our color choice, we added a third coat to really make sure all areas of the cabinet were completely covered.
Step 9: Remove The Tape
Be careful when removing painter’s tape. You can use a small razor to help cut clean lines if needed.
Step 10: Let Paint Cure
Let everything cure as long as possible. In the past, we thought that the Urethane Trim Enamel took a while to dry. I now realized that it was because it was so humid when we painted our kitchen cabinets.
The good news was that our repainted bathroom cabinets were able to be reassembled after a few days with no problems.
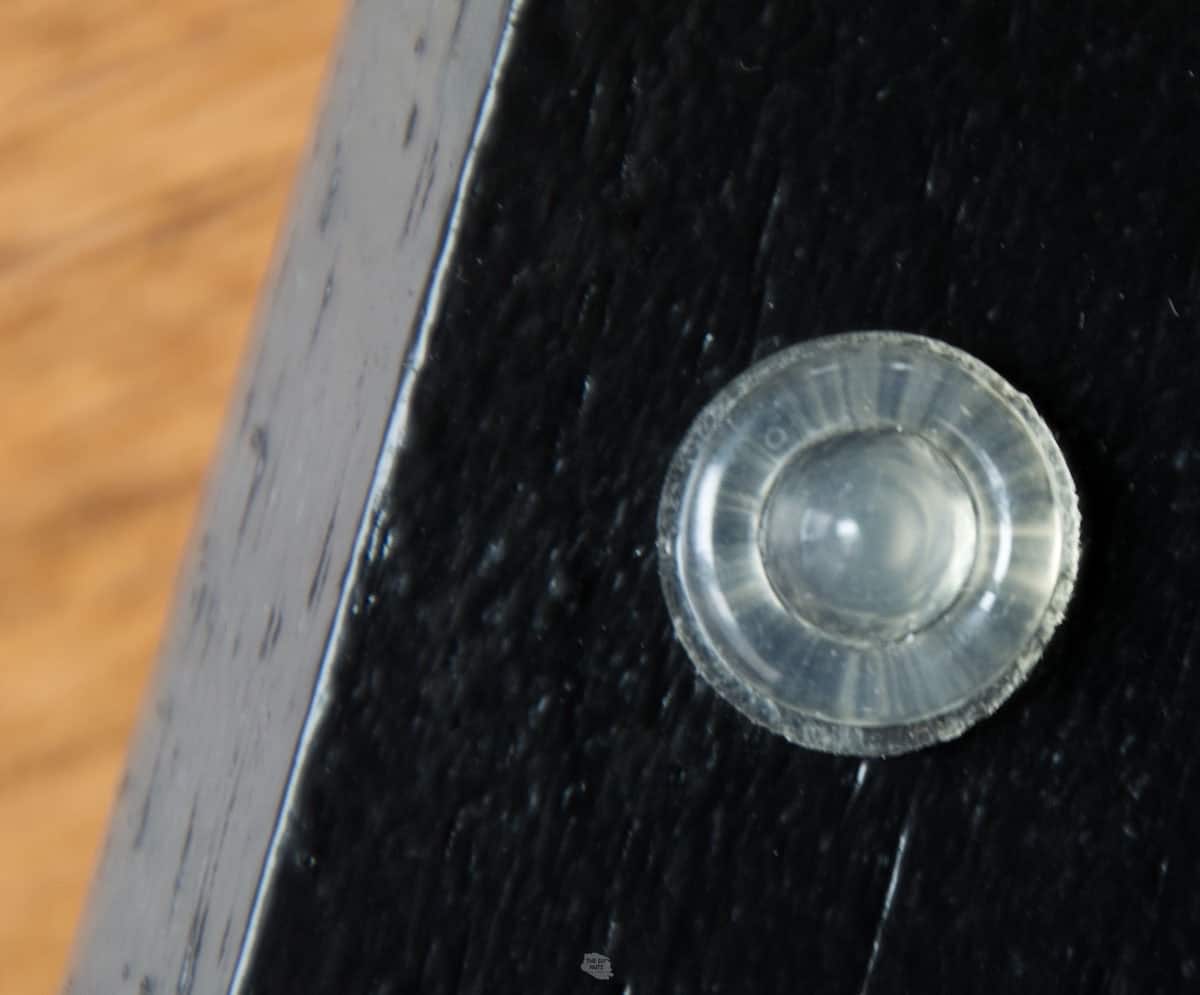
Step 11: Add Small Rubber Bumpers
Add small rubber stoppers to help your doors and drawers from rubbing against the cabinet box.
Step 12: Put Vanity Back Together
Carefully add your drawers back in and screw in your hinges.
Optional: Add New Hardware
Allow cabinets to cure as long as possible before installing new hardware. You can also spray paint old hardware if you are sticking with keeping this a budget DIY. Wait at least a week or even a month before installing your hardware.
We plan on going with a mixed metal vibe and adding gold hardware to the cabinets in the future.
We will continue to write about all the DIY projects we were able to do to complete this small bathroom makeover for under $150!
Tips For Repainting Bathroom Vanity
- For your doors, you have to be extra patient. Paint the backside of the door first. You want your last coat of paint on the front to ensure the smoothest finish.
- Work in small layers.
- Come back and check for drips as you are working. If you see a drip, use extra fine sandpaper before painting the next coat of paint.
Before and After Repainted Vanity
It is crazy to look at these pictures to see how our DIY projects have been able to cheaply makeover this bathroom space and painting the bathroom vanity was no exception.

Tutorial FAQs
You need to make sure that you are using paint meant for cabinetry and woodwork. The two best DIY paints we have found our Sherwin Williams Urethane Trim Enamel and Benjamin Moore Pro Advance.
We like Sherwin Williams Emerald Urethane Trim Enamel as a great option for painting bathroom vanity cabinets, as it provides a durable and beautiful finish that can withstand moisture and humidity in a bathroom environment.
Semi-gloss or satin are the go-to choices normally for painting cabinets. However, semi-gloss paint will be easier to clean due to its shiny surface in your bathroom.
You need a smooth and clean surface. You can use 220 sandpaper or a Scotch Brite pad to scuff the surface of your cabinets. Wipe down with a deglosser and make sure that the cabinets are completely dust-free before painting your new color.
When hand painting cabinets, you want to roll as much as possible. Use a brush first to get in the areas where a roller will not fit and feather in with your roller to get a smooth finish. Using self-leveling paint will also help with this process.
If you are using high-quality paint meant for wood then you will not have to seal it.
If wood is showing through from the previous paint job, you will need to prep and prime those areas before adding paint. If painting water-based paint on top of water-based paint, there is no need to prime the whole cabinet.
Get More Painting Inspiration
- How To Paint A Stair Railing: use similar supplies to update your staircase.
- How To Paint A Kitchen Backsplash: yes, you really can get a fresh look for under $30.
- How To Paint Already Painted Wood: Use all the same supplies for a fresh look to other places in your house. We updated our closet mudroom cubby.
If you like this tutorial, please give it 5 stars below 🤩🤩🤩🤩🤩. Your support helps us continue to provide unique and budget-friendly DIYs.
How To Repaint Bathroom Vanity Cabinets
Equipment
- 2" or 2.5" Angled Paintbrush
- Small Paint Tray (will make your life so much easier)
- Screwdriver
- Rag
Supplies
- Peel and Stick Paint Samples if you need help finding color
- Deglosser paint prep
- Extra Fine Sandpaper
- Scotch Brite Pad
- Painter’s Tape
- Sherwin Willams Emerald Urethane Trim Enamel Paint In Tricorn Black
Instructions
- Remove doors and drawers.
- Take off all cabinet hardware including hinges. Label and place in bags.
- Set-up paint station for drawers and doors.
- Tape drawers so that you are only painting the wood part, but not the whole drawer.
- Lightly scuff already painted cabinets with extra fine sandpaper or green Scotch Brite pad. Pay extra attention to any previous brush marks and imperfections. Fix those with sandpaper before beginning.
- Wipe down cabinets and all surfaces to be painted with a deglosser.
- Make sure cabinets are completely clean and dust-free.
- Trim out areas on cabinets with a brush that the small foam roller will not be able to get. You want to work in stages.
- Once you have trimmed a few areas or ridges in the doors, use a small foam roller to paint all flat areas with high-quality paint like Sherwin Williams Emerald Urethane Trim Enamel. Working in thin layers will be your best bet.
- Let the first coat dry and repeat the painting process for at least 2 coats of paint.
- Look at your cabinet from multiple angles to make sure you are painting all areas evenly.
- Let the paint cure for as long as you can (at least a few days).
- Put hinges back on and put doors and drawers back in.
Notes
- Starting with a clean and smooth surface will help your new paint layer adhere.
- Work in thin layers of paint with your roller.
- Check for drips as you work. Before painting the next coat, you can always lightly sand any uneven spots or drips.
- Let your cabinets cure for at least a week before adding hardware back on.
- You can test if your paint is adhering well by trying to scratch it with your fingernail once it dries.
- If wood is showing through from the previous paint job, you will need to prep and prime those areas before adding paint. If painting waterbased paint on top of waterbased paint, there is no need to prime the whole cabinet.
How did yall do the counter it looks so good?
Hey Amie. We have a whole tutorial on how we painted the laminate countertop. The biggest thing is to make sure you properly prep and prime before starting with the design.
Your tutorial and excellent photos give me the confidence to consider painting my vanity. The black was a bold choice, but it came out really well.
Thanks Elizabeth! Yes we had a little fun making bold choices in our basement bathroom makeover!
Thank you for the detailed, yet simple and helpful information on your tutorials! It makes the projects much less intimidating and I feel like I can do it!
Hi Tammy! I am glad you liked the tutorial. We think painting bathroom cabinets is a great first cabinet painting project to try!