Creative DIY Sharpie Wall Tutorial

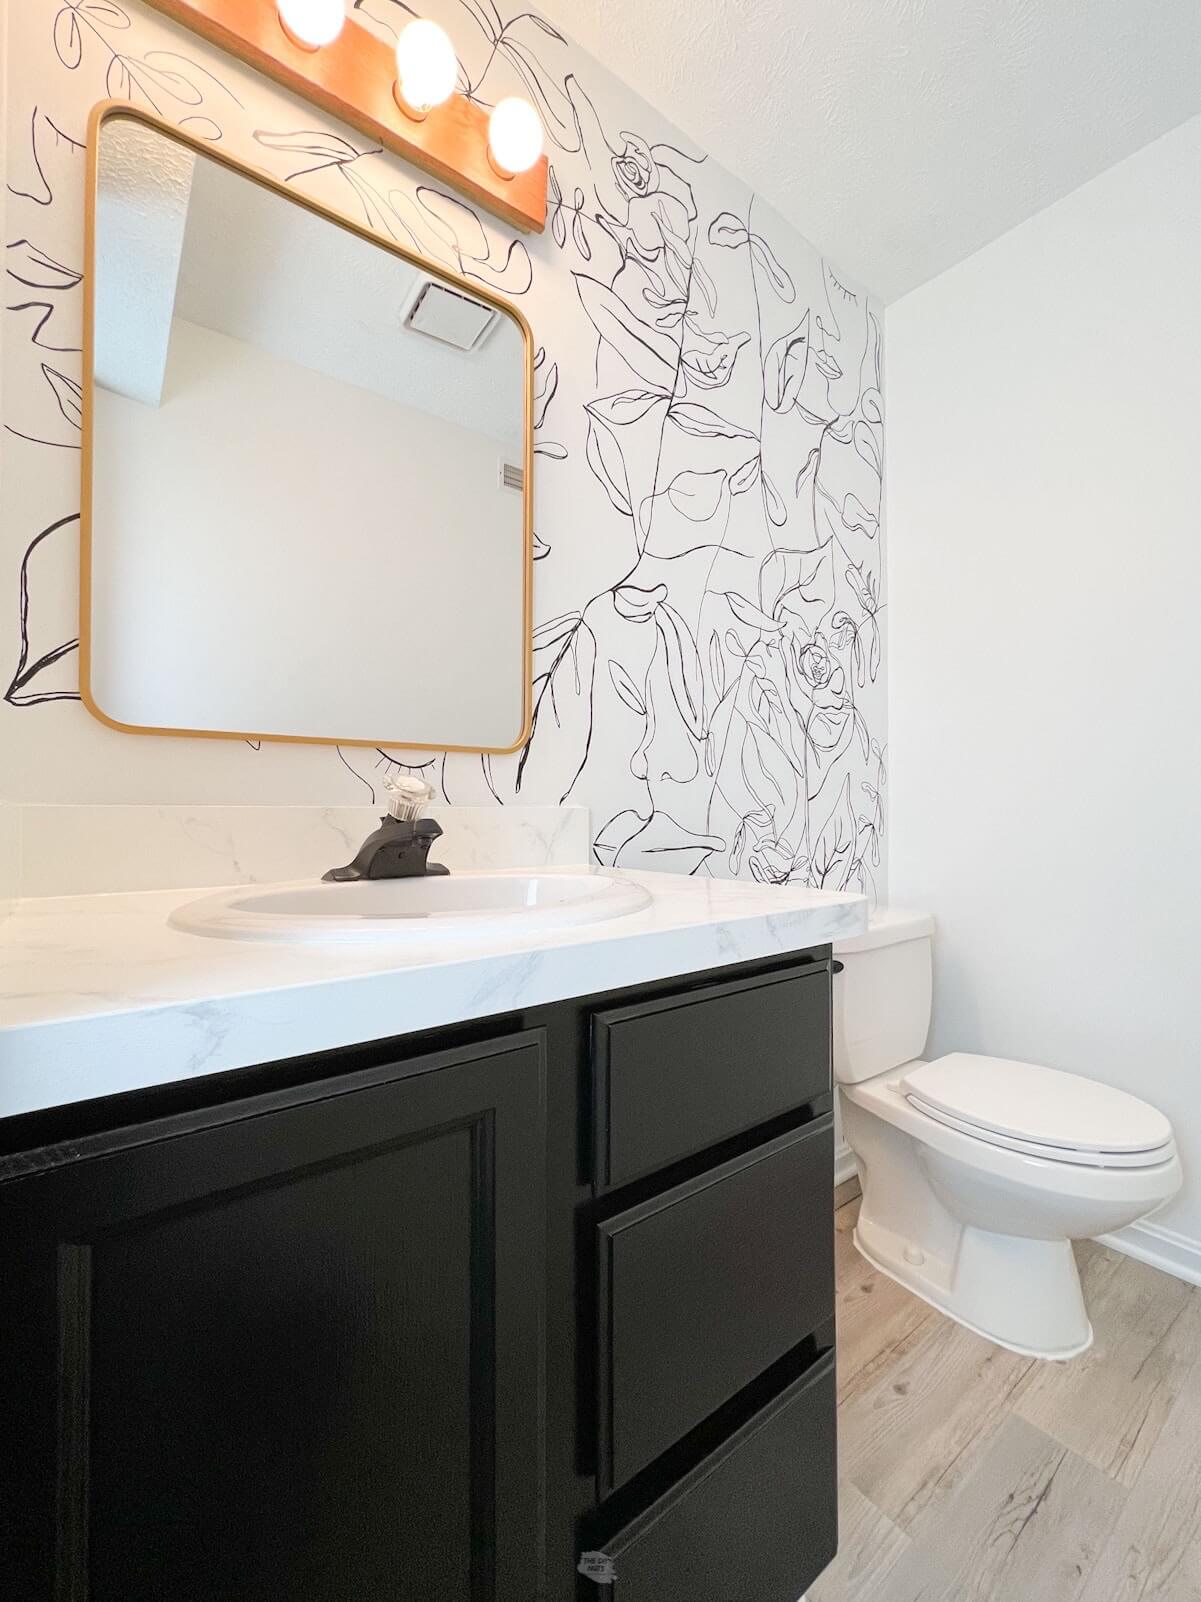
We searched high and low for the right modern wallpaper for our tiny bathroom but found a much better solution. Did you know that for under $10, you can create a DIY Sharpie wall? Use our detailed tutorial to save time, money, and the hassle of hanging wallpaper!
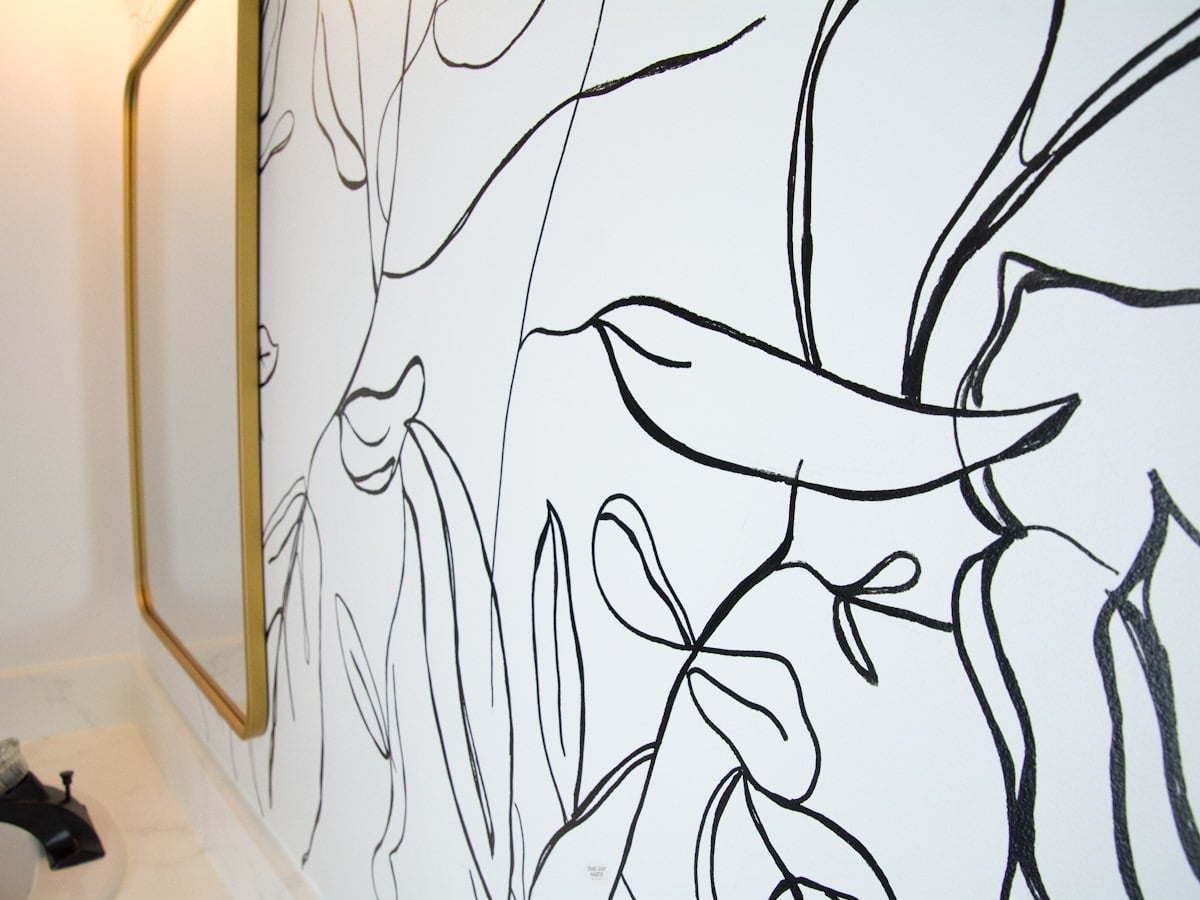
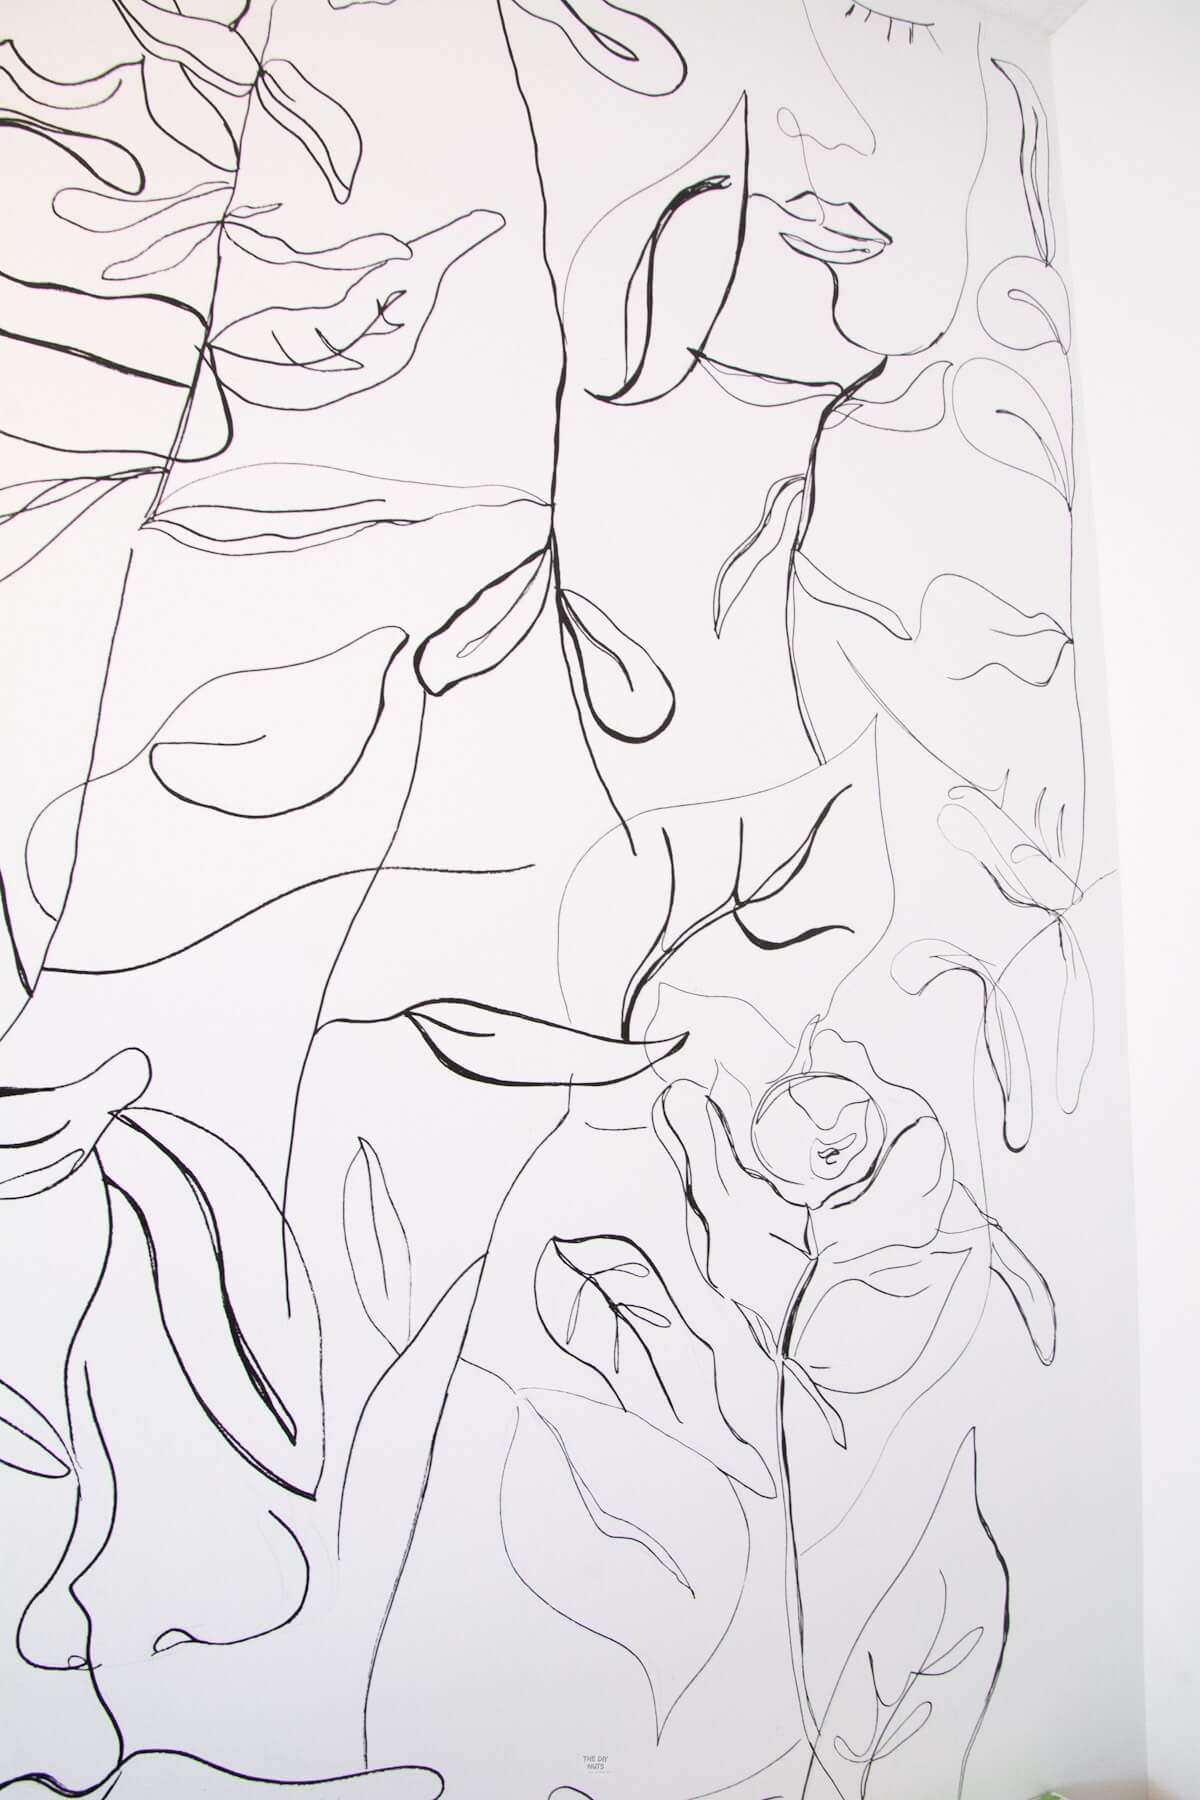
We were nervous about taking on this Sharpie wall, but we are so happy we did. It was so fun to create, and the end result was a unique design element that added to our cheap half-bath makeover.
Key Tutorial Takeaways
Choosing A Design
Our suggestion is that you find a wallpaper that you like and use that as inspiration for your wall mural.
Considerations
- Do you want a nature-inspired abstract design or a combination of both for your DIY accent wall design?
- Do you want various lines where some are thicker, and some are thinner?
- What else will go on the wall? Will the space be broken up with decor like a bathroom wall shelf or mirror?
- If you’re designing a more traditional faux wallpaper, will you repeat the same pattern over and over? If so, you’ll probably want to consider making a template like we did when making this painted geometric wall idea.
READ MORE: 12+ Creative Bathroom Accent Wall Ideas
Once you have a wall design idea, you are ready to start getting to work! No matter what design you choose, you can follow our basic steps.
Supplies You’ll Need
*Disclosure: This post may contain affiliate links that, at no additional cost to you, may earn a small commission. Read our full privacy policy.
More Info About The Supplies
- Buy at least the 3-pack of markers so you can change out markers when the lines are not as bold as you would like.
- As crazy as it sounds, we love Ticonderoga pencils, and having a box around is always a great idea.
- We used Samplize peel-and-stick paint samples to help us decide which white paint was best for our small space.
- For Bolder lines, consider using this broader tip paint marker

How To Make Faux Wallpaper With Sharpie
Before You Begin
- It would be best to practice drawing with paint pens and markers.
- You also need to start with a clean and dry painted surface. We painted our walls with SW Pure White before beginning this drawing process.
- Tape any areas where your lines may hit the other walls and counters. Small pieces of tape will work just fine.

Step 1: Create A Sketch On Paper
Sketching your design on paper is very important. Your design will naturally change once you start, but it is helpful to get your ideas on paper first.
Step 2: Sketch On The Wall
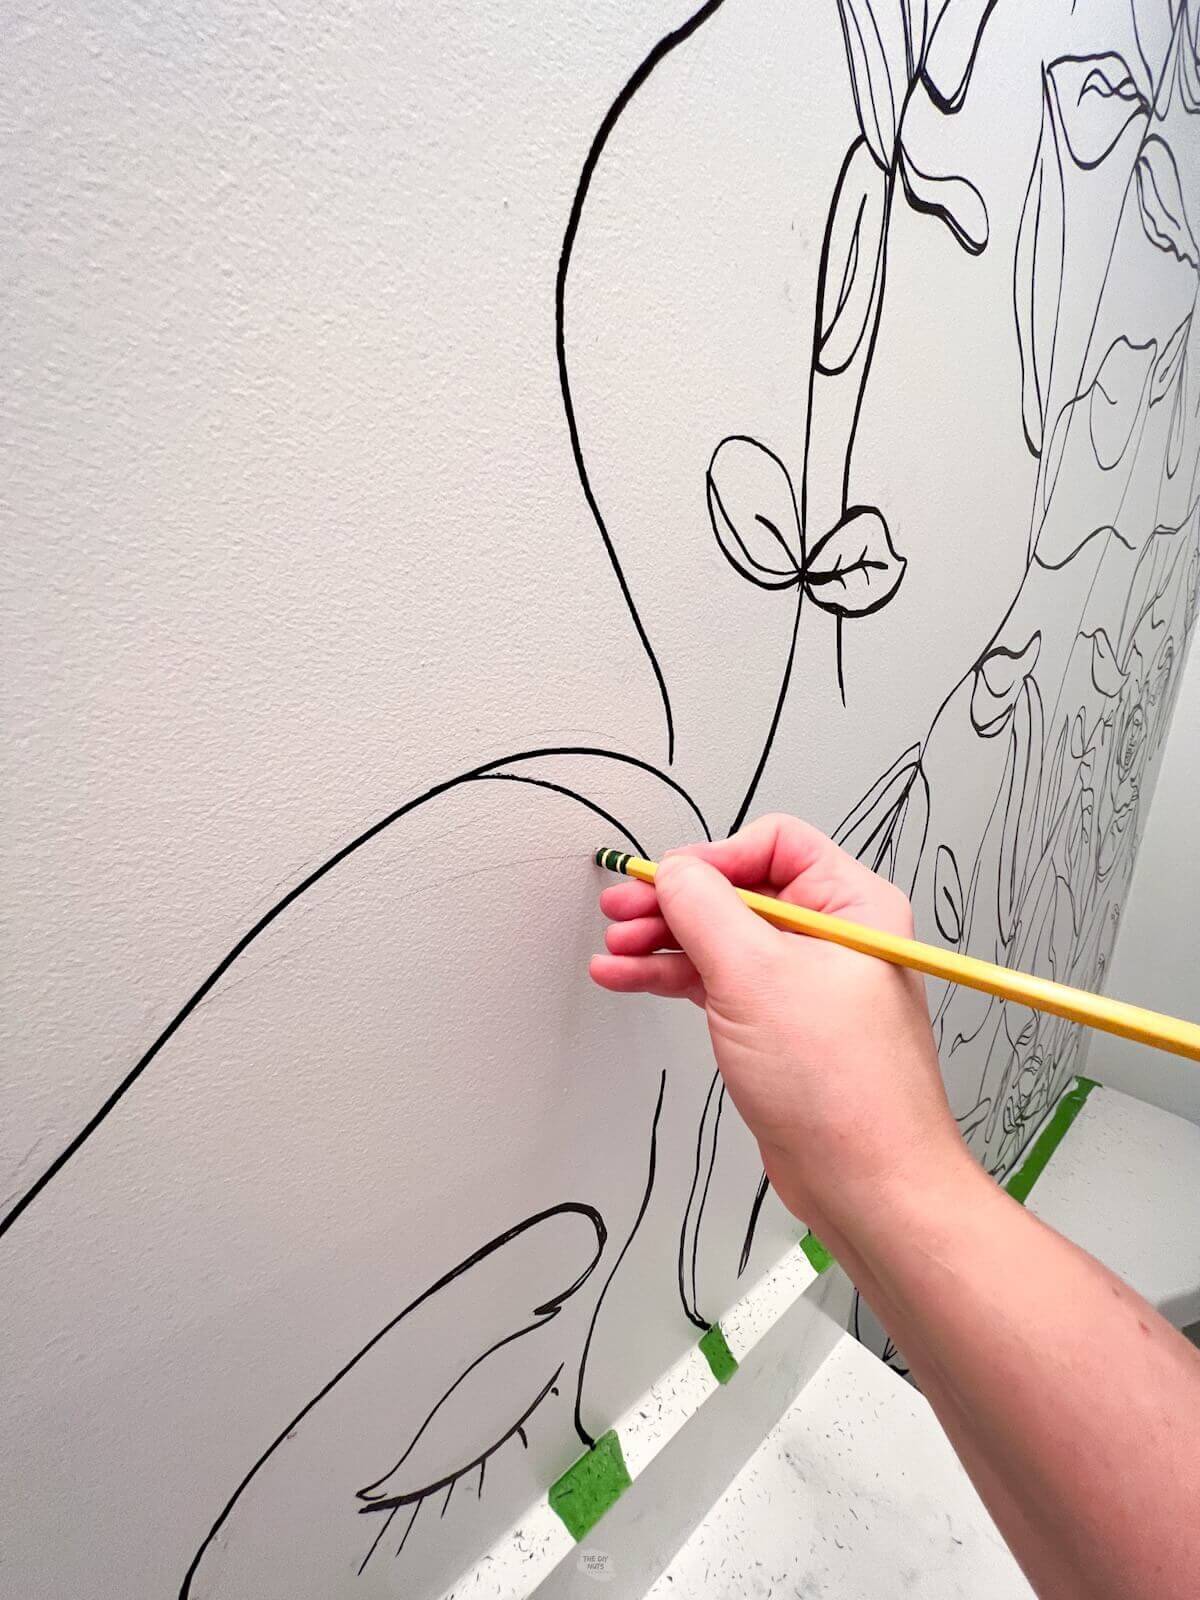
Draw on the wall as lightly as you can. If you think you can just go for it with the marker, it will save you some eraser time in the end.

Since we were freehand drawing this mural, we found pencil sketching was the best design method.
PRO TIP: Step away from the wall periodically and look at the sketch from a distance. When looking up close for a while, it is hard to see what the finished mural will look like.
Step 3: Begin Tracing With Paint Pen
Use the paint marker to go over your designs. It is easiest to do the thin lines first, then go back to thicken the lines that also did not turn out.

PRO TIP: When drawing on the wall, hold the paint marker at as much of a 90-degree angle as possible. This will help the paint flow from the tip and give you the smoothest, boldest line.
Step 4: Continue To Look At Your Mural From A Distance
Step back and look for areas that could use more details, thicker lines, or ones that should be left alone. Like most artmaking, it can be hard to decide when to stop. Just remember, sometimes less is more.
Step 5: Let The Paint Marker Fully Dry
These markers dry surprisingly fast on drywall. Give extra time before erasing, as you do not want to smudge all your hard work.

Step 6: Erase Visible Pencil Lines
We were nervous about eraser marks and smudges on a white-painted wall. After a few tests, we found that a pink eraser on a good-quality pencil worked best for us with the texture of our wall. You can experiment with other erasers, but some smudge more than others.
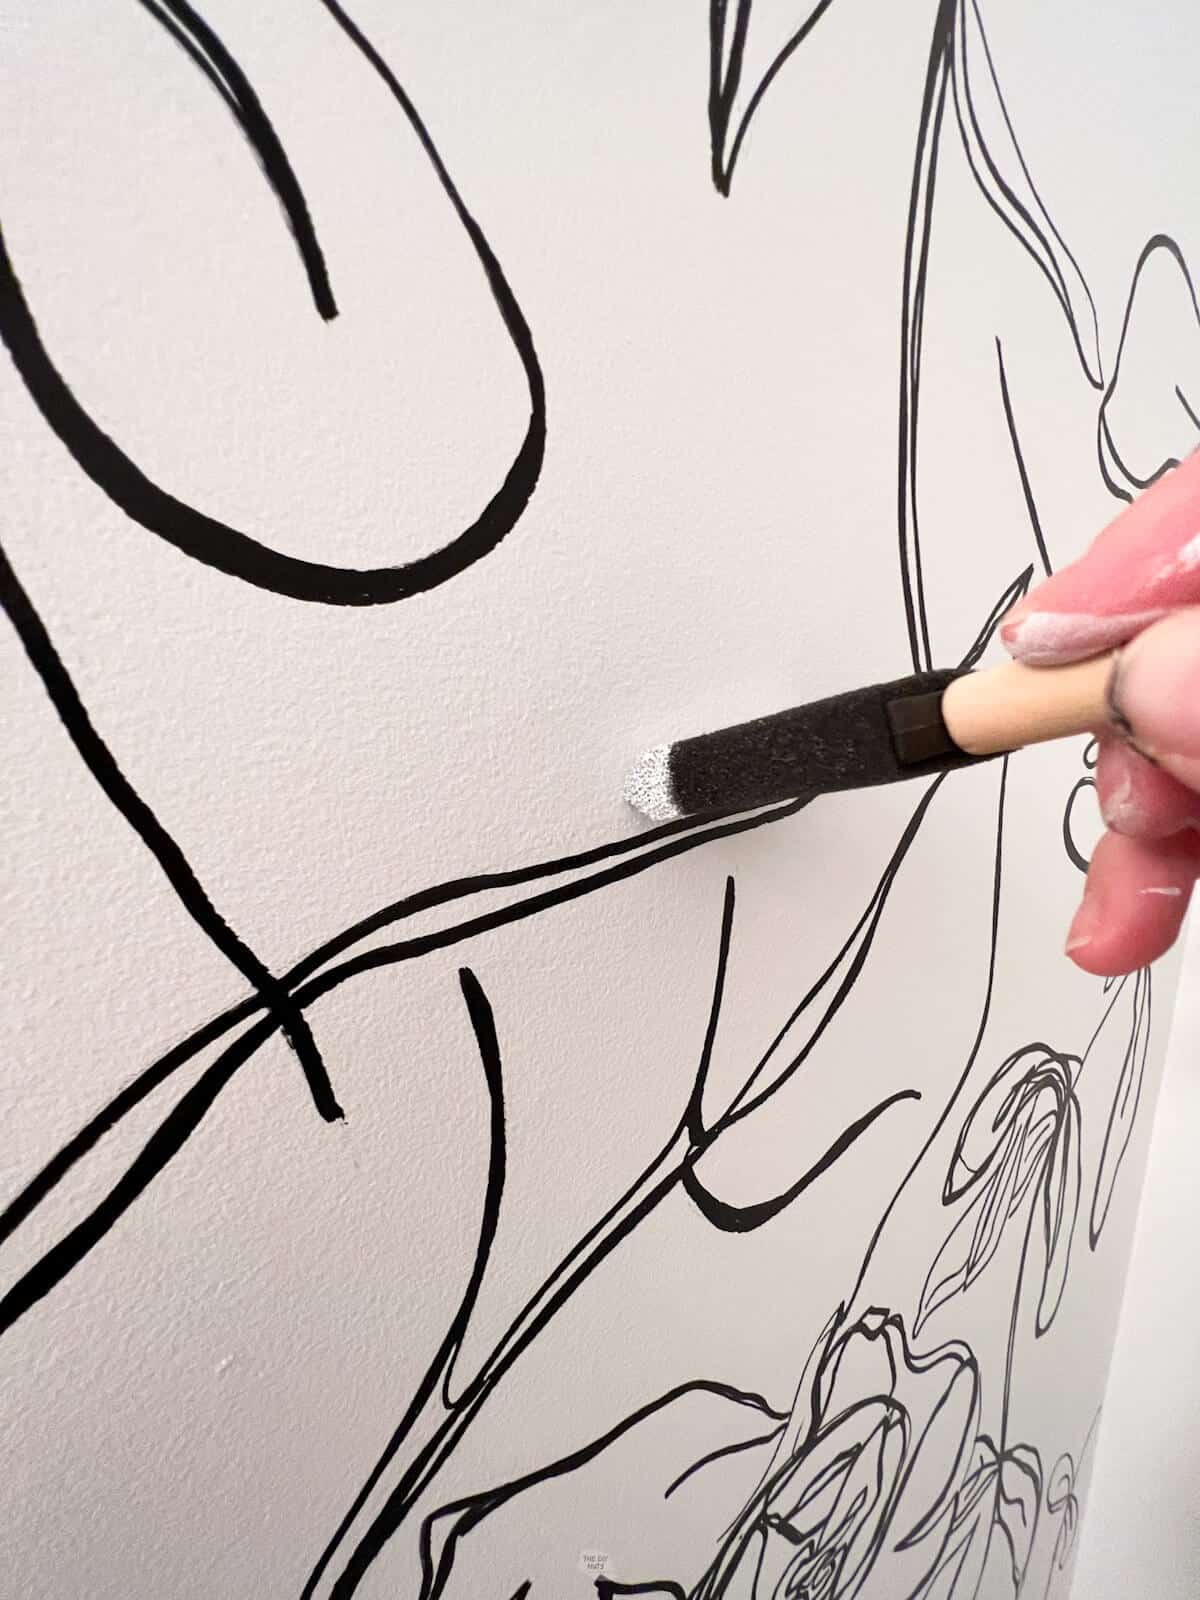
Optional: Use A Foam Brush For Touch-Ups
If there are any areas that you don’t like or that smudge, you can use a small foam brush with your wall color to try to clean them up. Just be careful not to overdo it and make an area worse.
Tips
- Before beginning, test that you can erase pencil lines on your wall without smudging or making it look horrible. You need to be able to draw lightly and find the right eraser for your space.
- Paint markers or pens will give you a smoother and bolder line than regular permanent markers.
- Plan your Sharpie Wall in advance. If repeating a pattern, make a stencil or tape out guidelines.
- You can use an overhead projector to project the design on the wall. However, this half bath is so small that we could not do that.
Tutorial FAQs
You must not rub your hand against the wet paint when using the marker. Once the paint marker dries, it appears to be very permanent. The lines did not smudge when erasing the pencil or when a little water was rubbed onto the wall.
Paint pens or markers are the perfect way to draw a fun mural or create faux wallpaper easily.
Paint pens usually have a smaller tip, such as ultra-fine or fine, while paint markers generally have a broader or chisel tip. You can use any-sized paint pen or marker for your mural. It depends on what you are comfortable with and your drawing details.
No, you can find water-based paint pens and markers in a variety of colors. If you don’t want white walls with black, you could always try black or gray walls with white paint pens for a fun and modern mural in your home.
This accent wall has many drawings and bold lines, and we did not use three full markers. To keep the lines fresh and bold, we switched between a three-pack of water-based medium-tipped paint markers. We still have some paint left on all three markers.
Follow us on Pinterest, YouTube or Facebook for more DIY inspiration!
Before and After

We love this budget-friendly gold mirror we added to the accent wall.


More Bathroom DIYs
Explore more DIYs we did in this half bath makeover!
- EASY FLOORING INSTALLATION: How To Install Peel-and-Stick Flooring Tiles
- DIY COUNTERTOP MAKEOVER: How To Paint A Laminate Countertop
- BLACK PAINTED CABINETS: How To Repaint Bathroom Cabinets So They Last
This Sharpie wall definitely added a fun and unique design element to our half bath. If we can pick up a marker and doodle on the wall, you can too!
If you like this tutorial, please give it five stars below 🤩🤩🤩🤩🤩. Your support helps us continue to bring you more budget-friendly DIYs.
DIY Sharpie Wall Tutorial

Equipment
- 1 Small Foam Brush optional
- Painter’s Tape only a few small pieces
Supplies
- Water-based Paint Markers With Medium Tip this 3-pack comes in handy to switch out markers while working
- Pencil With A Good Eraser
Optional
- New Wall Paint Color sample of SW Pure White that we used to repaint our bathroom
Instructions
Before You Begin
- Plan out your wall mural design on paper.
- If needed, paint your walls a new base color of your choosing.
Making Your Wall Design
- Follow directions on paint pen to get paint flowing.
- Tape any areas where your lines may hit the other walls and counters. Small pieces of tape will work just fine.
- As lightly as you can, draw on the wall with a pencil.
- Step away from the wall periodically and look at the sketch from a distance. When looking up close for a while it is hard to see what it really will feel like in the space.
- Use the paint marker to go over your designs with thin lines to start.
- Continue to work on your lines by making some thicker than others. Make sure to hold the marker as close to 90° for the smoothest application.
- Let the paint pen fully dry.
- Use a good eraser to get rid of extra pencil lines.
- If needed, add a little wall color to a foam brush to clean any smudges or imperfections.
Video
Notes
- Test that you are able to erase pencil lines on your wall without smudging or looking horrible. You need to be to lightly draw and find the right eraser for your space.
- Paint markers or pens will give you a smoother and bolder line than regular permanent markers.
- Plan your faux wallpaper ahead of time. If repeating a pattern, make a stencil or tape out guidelines.
- You can use an overhead projector to project design on the wall. We were unable to do this due to this half bath being such a small space.
As a Zentangle artist I look forward to following your ideas!
Hey Peggy. Thanks for your kind words. As a former art teacher, I love Zentangles and making them with our family. Your ideas probably would be awesome on an accent wall!
I’m obsessed with the pattern you added to the wall! Would you ever consider drawing one up and selling/posting it?! I’d love to do this in my office but fear my abilities to sketch it out well!
Hey Dylan. That is a great idea, but I am not sure how I would do it at scale. If I ever end up with designing custom wallpaper I will let you know!
This is exactly what I was looking for. But, my question… are you an artist? This is SO good.
Hi Susie! Yes, I have an art degree! But anyone can draw different patterns using the same materials. Good luck.