How To Whitewash A Brick Fireplace
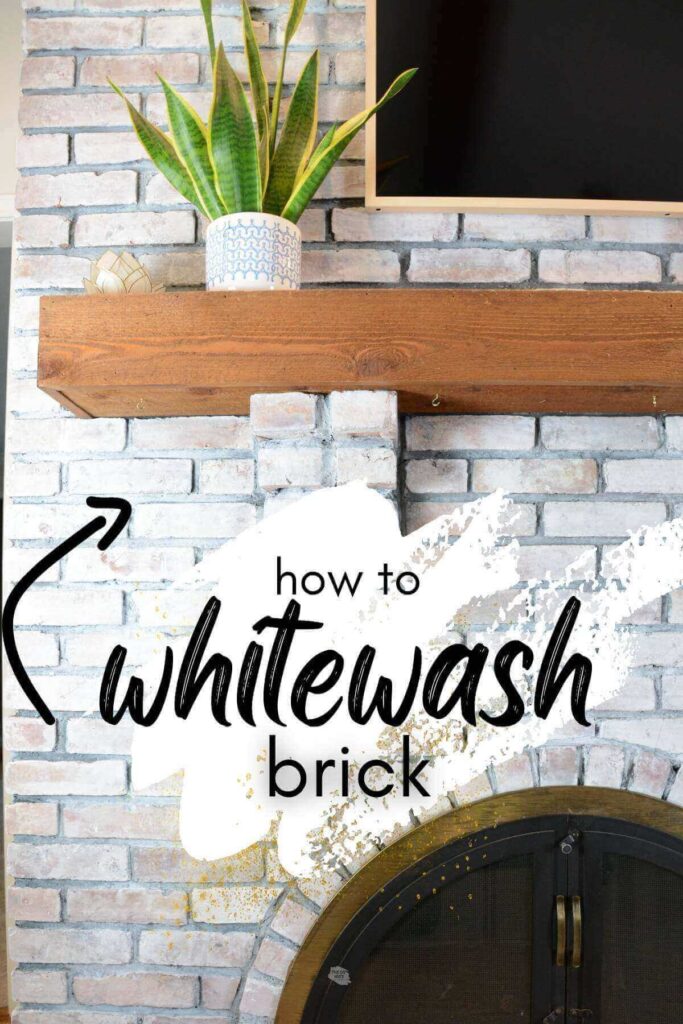
Do you love your brick fireplace, but hate the boring red or brown brick? This DIY painting project turned out so much better than we could have imagined. Read all of our tips and tricks for whitewashing a brick fireplace.
*Disclosure: I only recommend products I would use myself and all opinions expressed here are our own. This post may contain affiliate links that at no additional cost to you, I may earn a small commission. Read our full privacy policy.
The best part about this DIY project is that it is easier and takes less time than you think. We thought we would need a whole day. Because we had the prep done beforehand we were able to go out to lunch while the fireplace dried.
📌 Featured Comment
“Love this fireplace !! Looks amazing.”
Stephanie
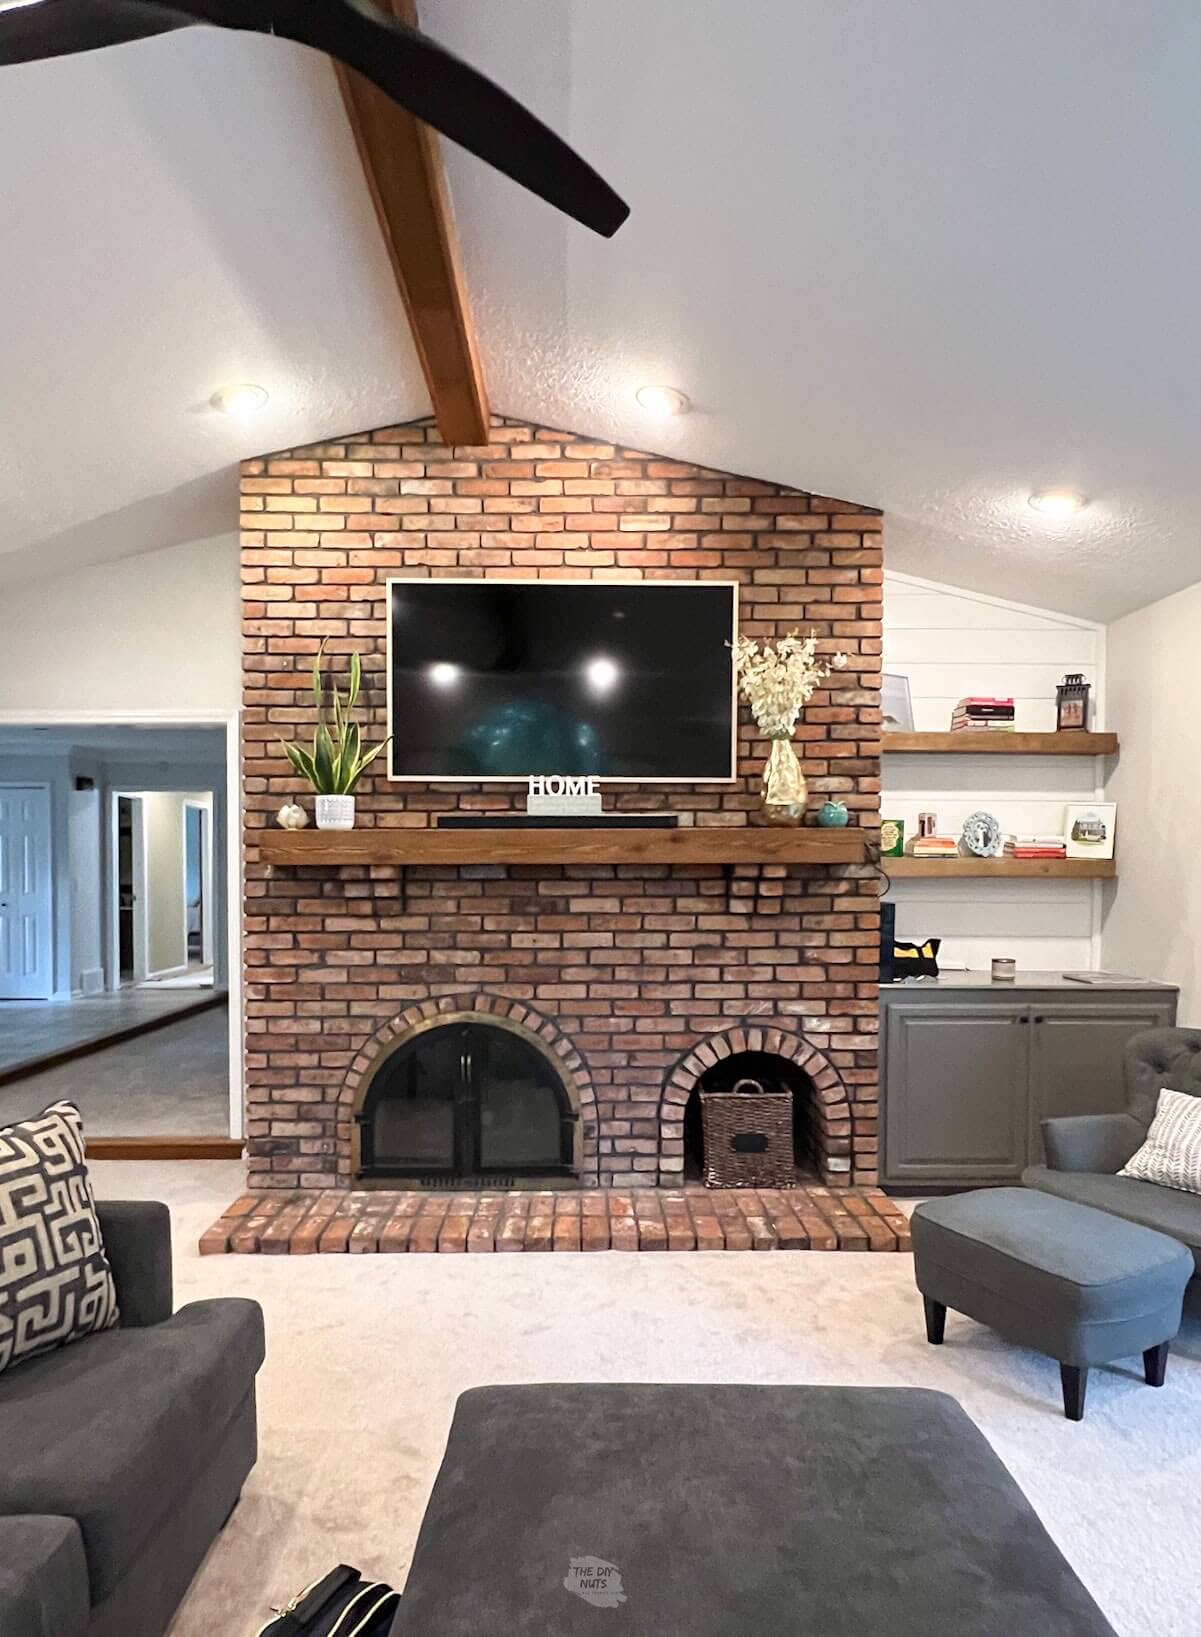
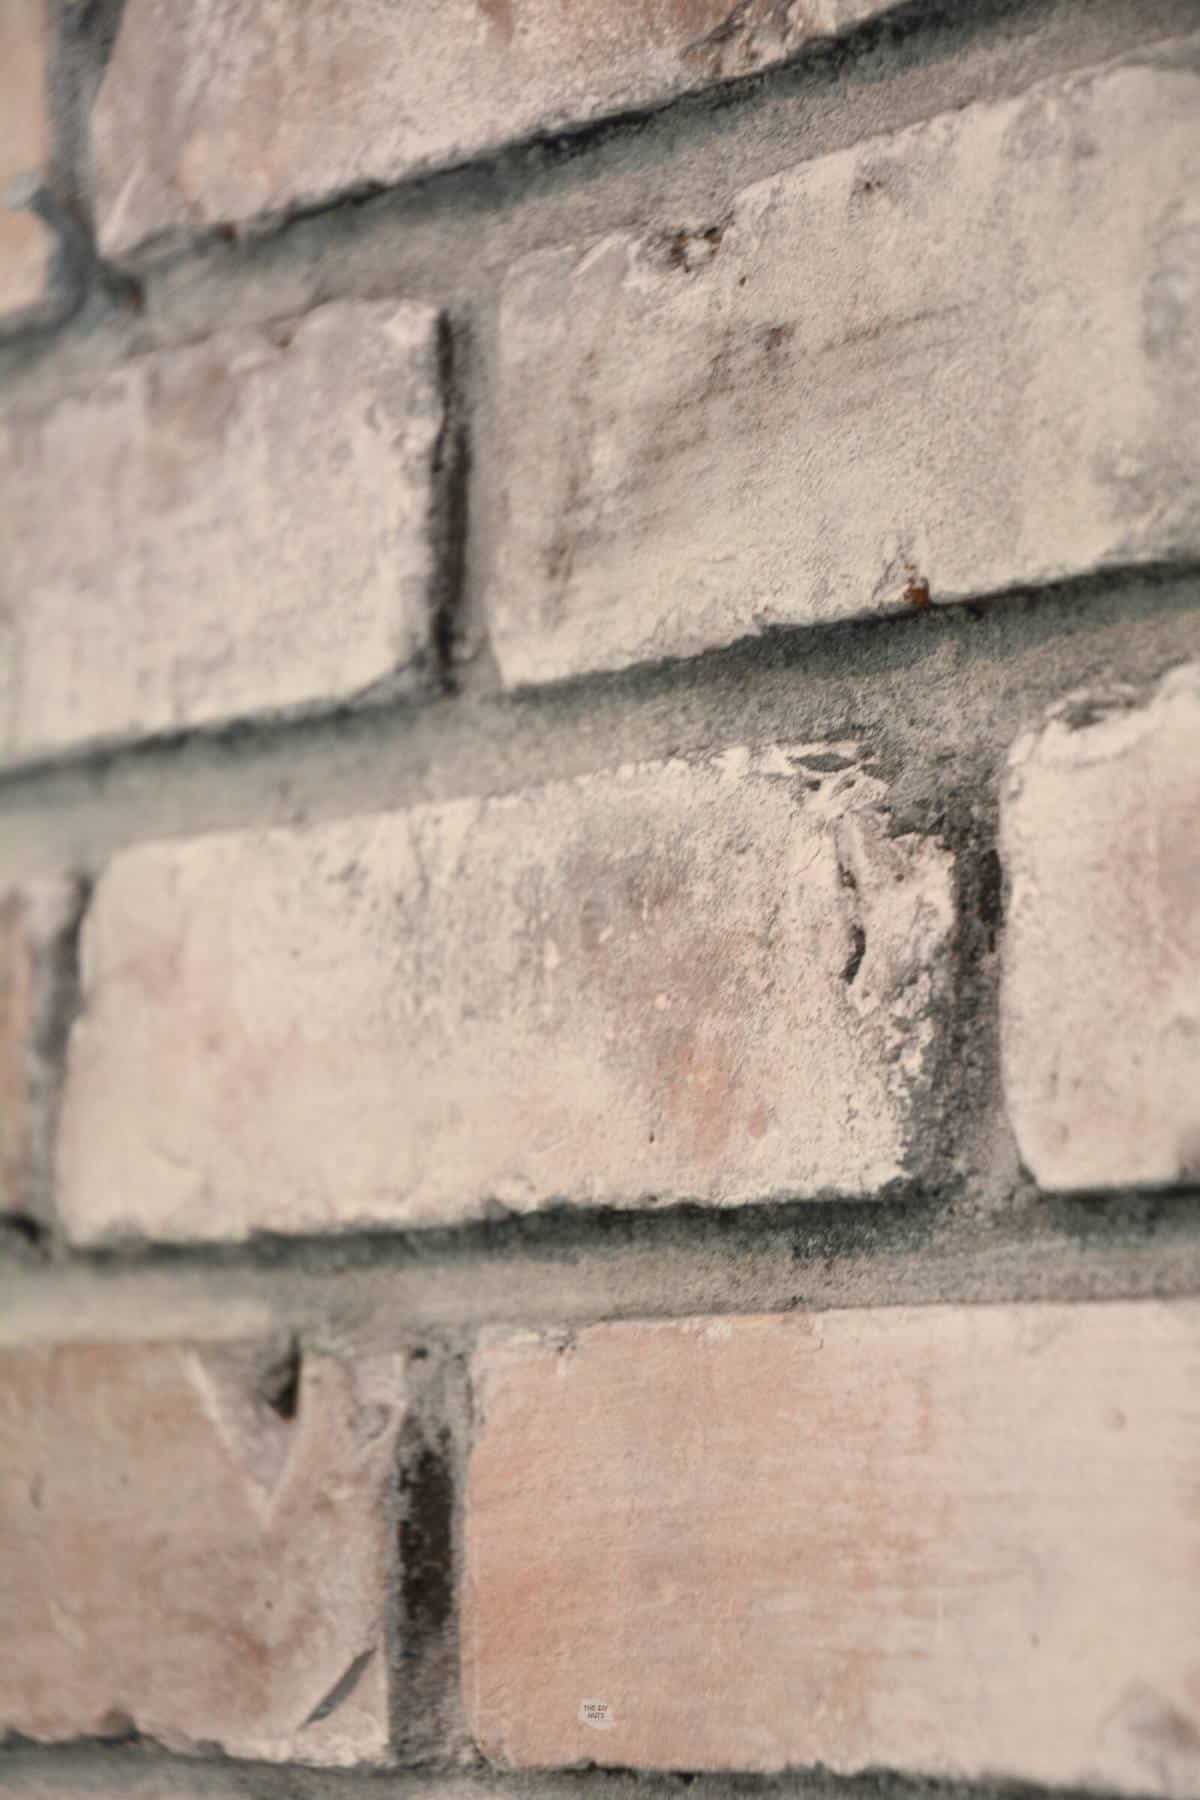
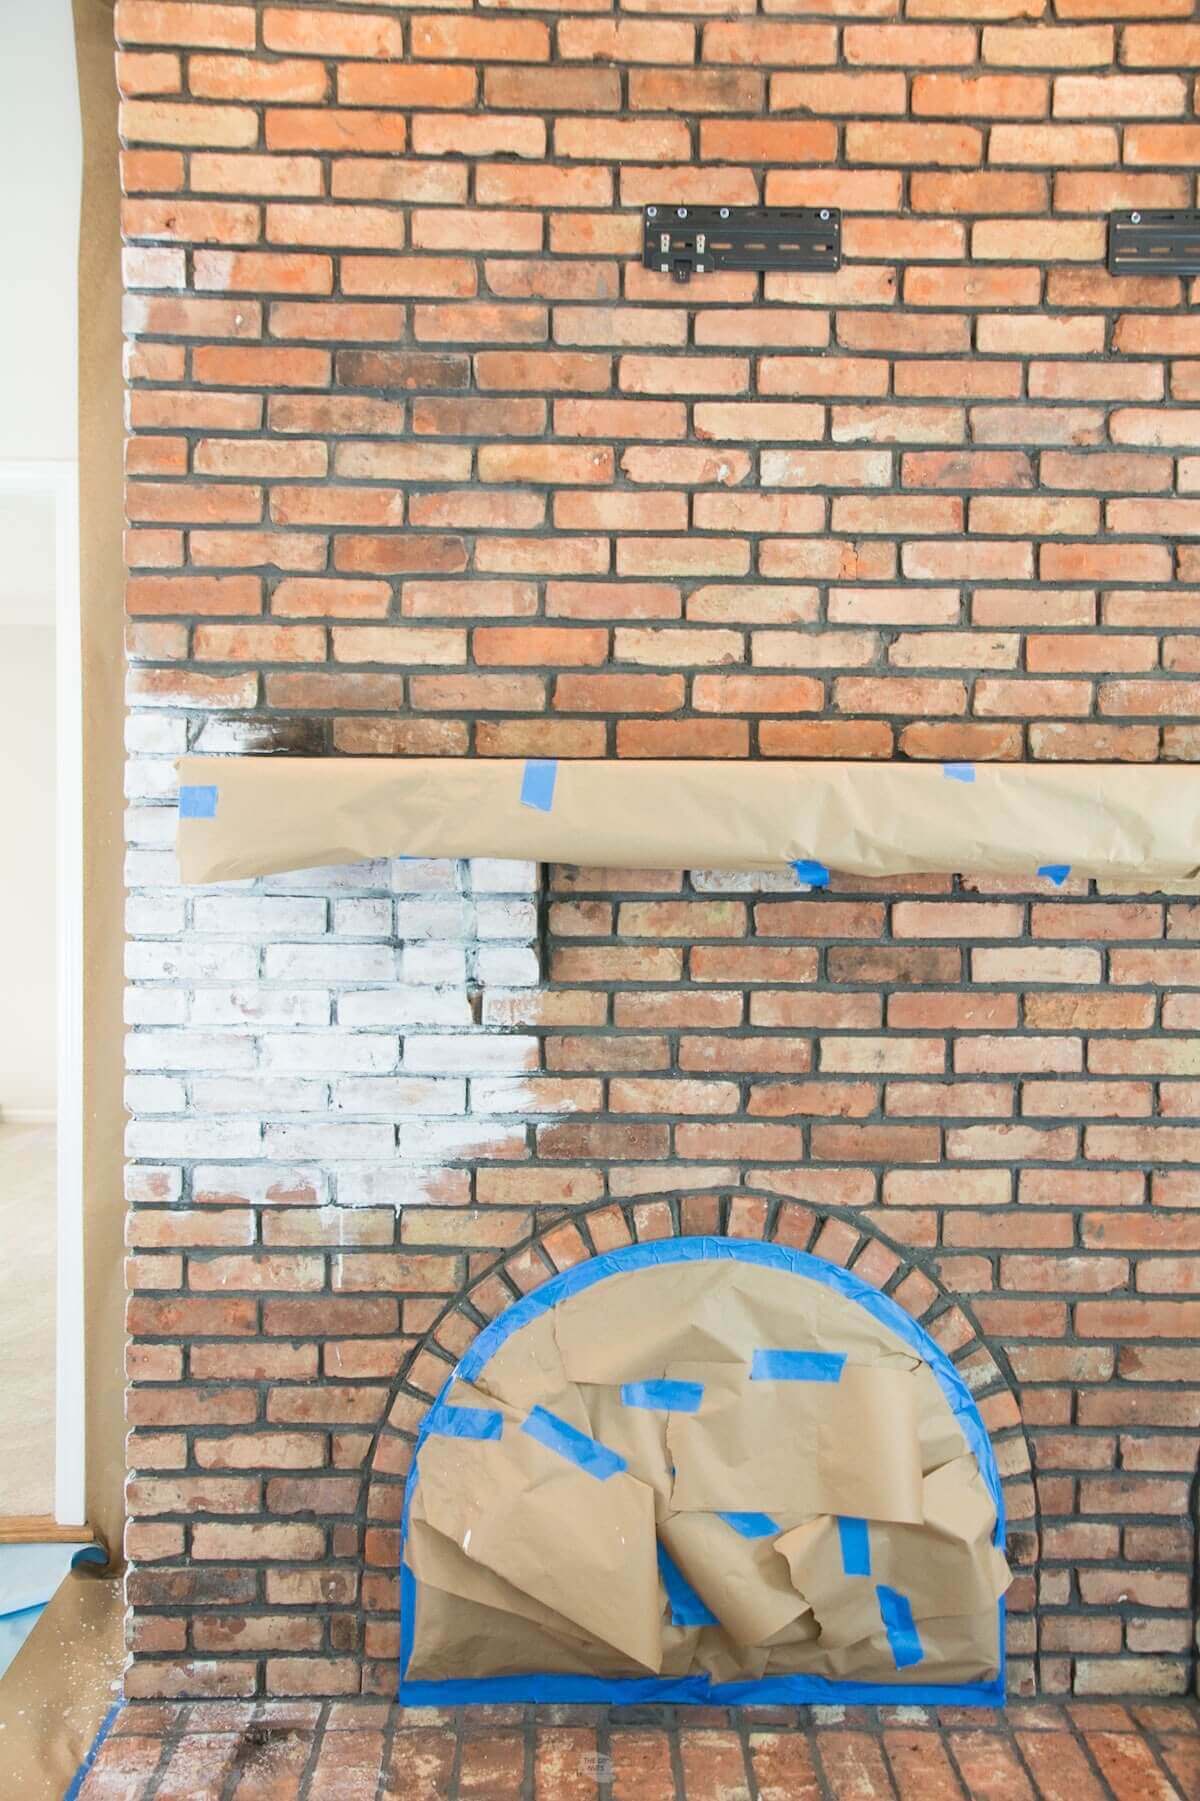
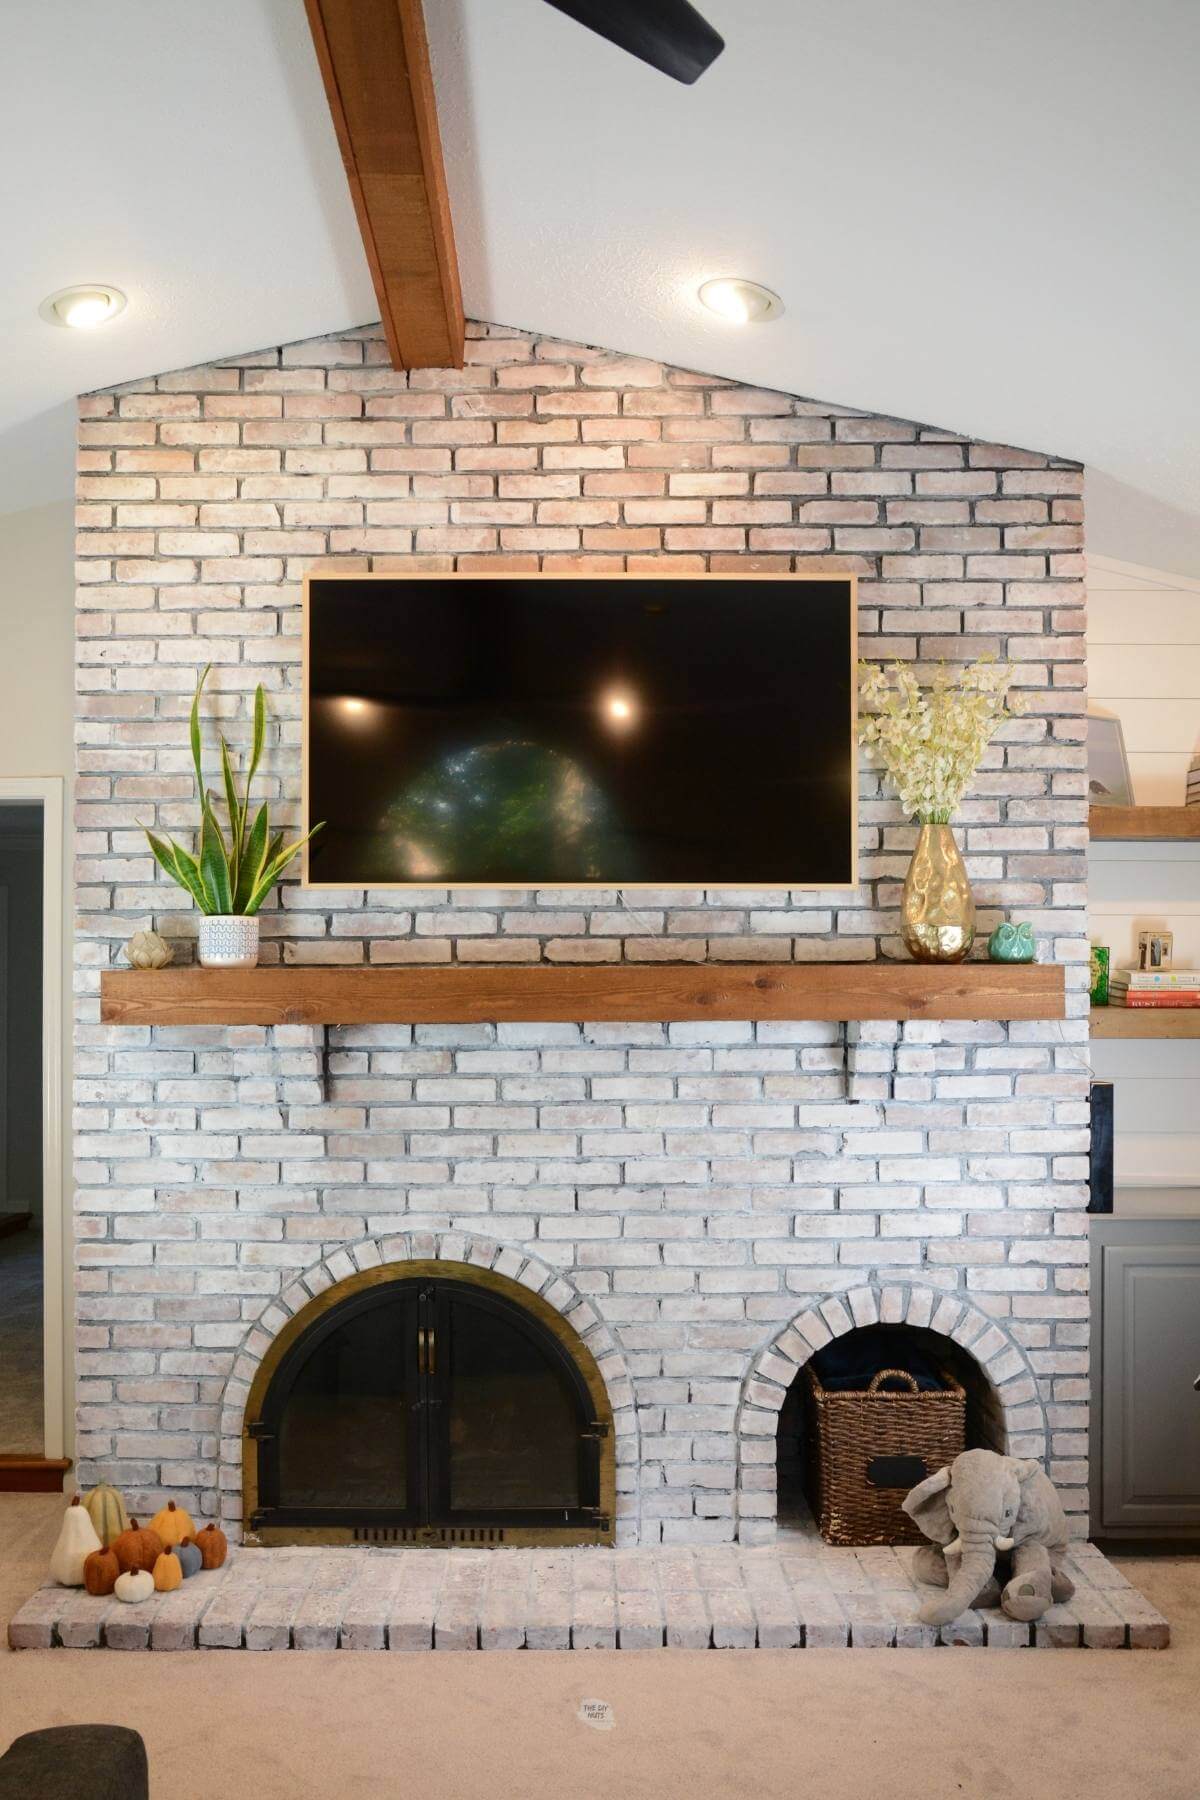
The “Before” Fireplace
When our friends bought this house they knew that the fireplace just wasn’t their style. It was an amazing feature, but they wanted to brighten up the room a little. We did just that for the price of paint and some painter’s tape.
Is whitewashing brick easy?
Yes, whitewashing brick is an easy DIY. My friend who has very limited painting experience said that she felt like she couldn’t mess it up.
The biggest con to this brick painting method is that it can be messy. There is more natural paint spray from off your brush, due to working with diluted paint.
Recommended Materials and Supplies
- Small Wire Brush
- Cleaning Rag
- Cups or Large Paint Cups With Measurements
- Dawn Dish Soap and Water or TSP
- Old Paint Brushes
- Old Cut Up T-Shirts-cotton t-shirts are the perfect material to use to wipe the paint mixture for the whitewash look.
- Painter’s Tape
- Drop Cloths
- Optional: Other plastic coverings or paper
- Sherwin Williams Loxon Masonry Paint (we used the base white)
Why Did We Choose A Masonry Paint
After a lot of research, we were not sure that just diluted latex wall paint was our best bet. When I visited a paint store, they did not want to guarantee that their regular latex paint would not chip off the brick or withstand the heat.
I visited another paint store they suggested Loxon paint because:
- The masonry paint we chose has a primer built-in and is meant to stick to brick
- Could withstand some heat (but not a direct flame)
- Was still low VOC (as my friend was pregnant at the time)
Before You Begin
Just like with many painting projects, prep is the most important part. For this project that meant:
- Making sure the brick is clean and as soot and dust-free as possible
- Completely taping and covering anything that we did not want to get paint splatter on such as a mantel, surrounding shelves and walls
Test Different Dilutions
Before we began, we tested to see if we liked the 1:1 ratio of paint and water. We also applied the paint thicker and thinner in some areas to make sure we like the look.
How To Prep Your Room
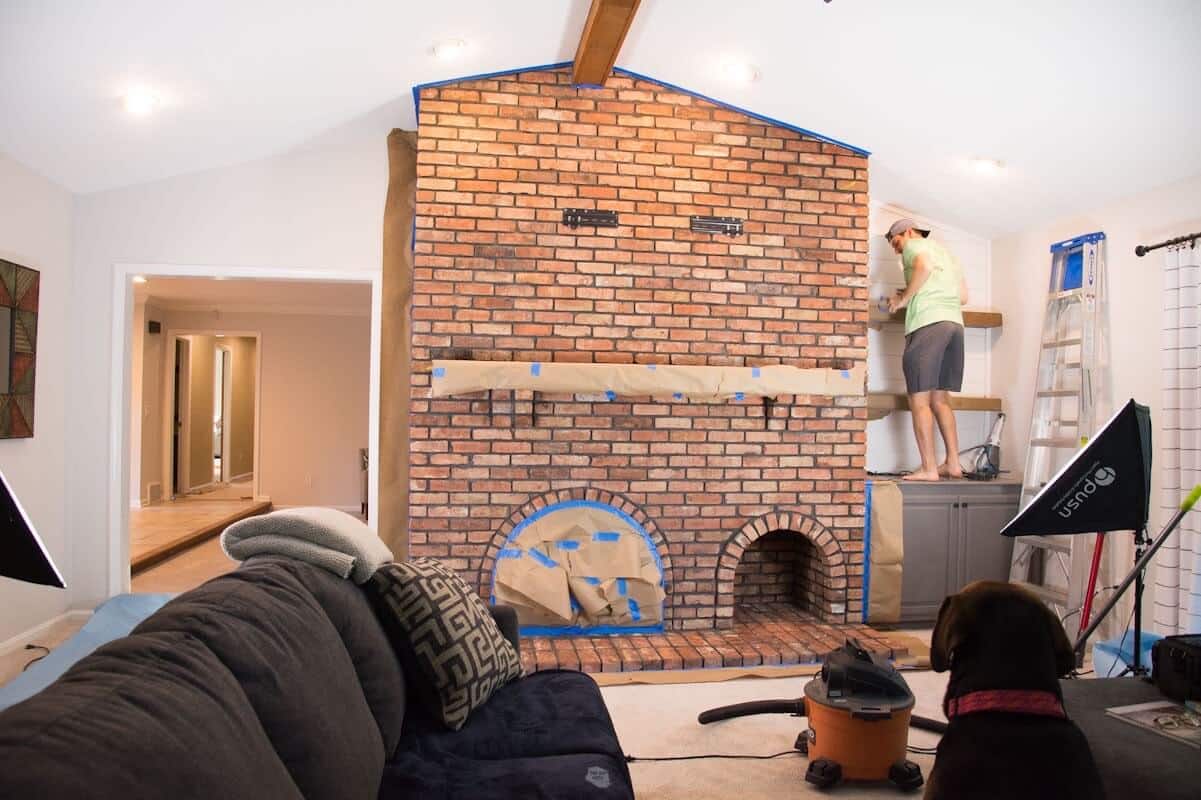
Step 1: Tape Areas Not Getting Whitewashed
Use painter’s tape on all edges including where the fireplace touches the carpet. For this particular room that meant taping along the ceiling, wood beam, wall edges, and under the brick where it touches the carpet.
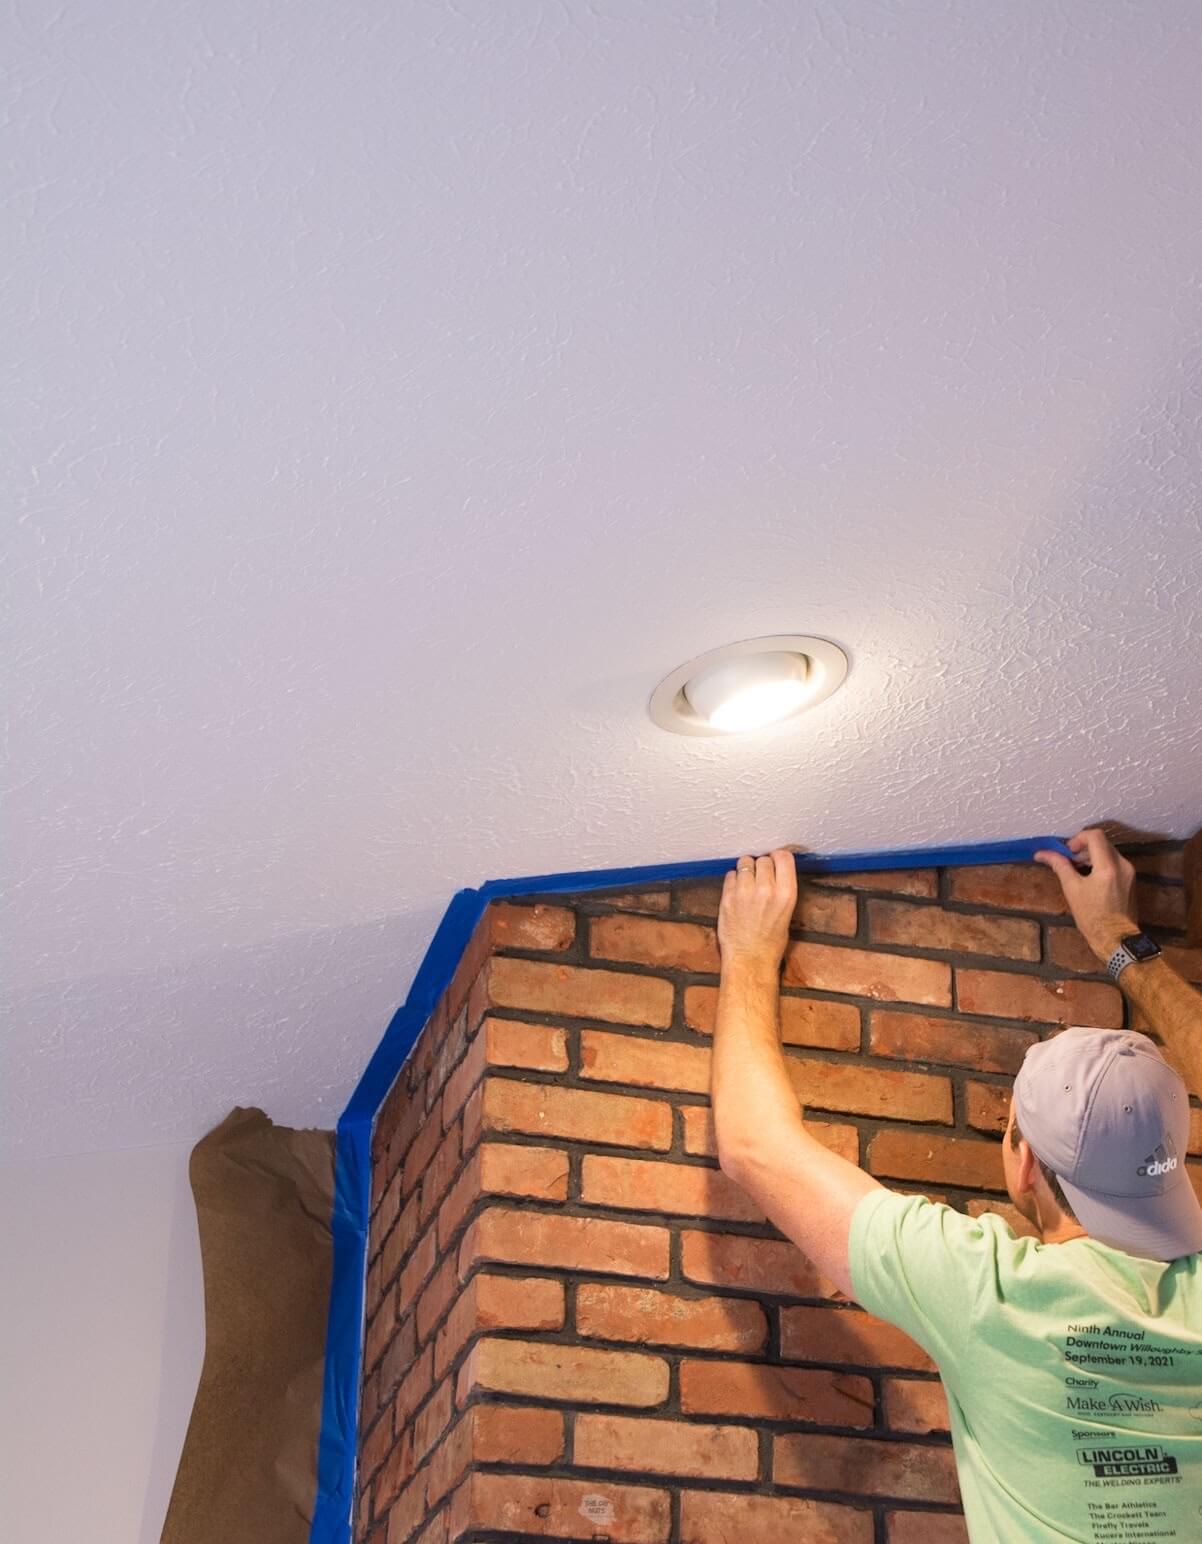
Step 2: Cover Mantel and Carpet
You can use drop cloths, paper or plastic drop cloths with painter’s tape to make sure that your surrounding areas are completely protected. Trust us, this matters more for this painting project than others.
You also could tape and cover your fireplace mantel, fireplace cover or remove them if possible.
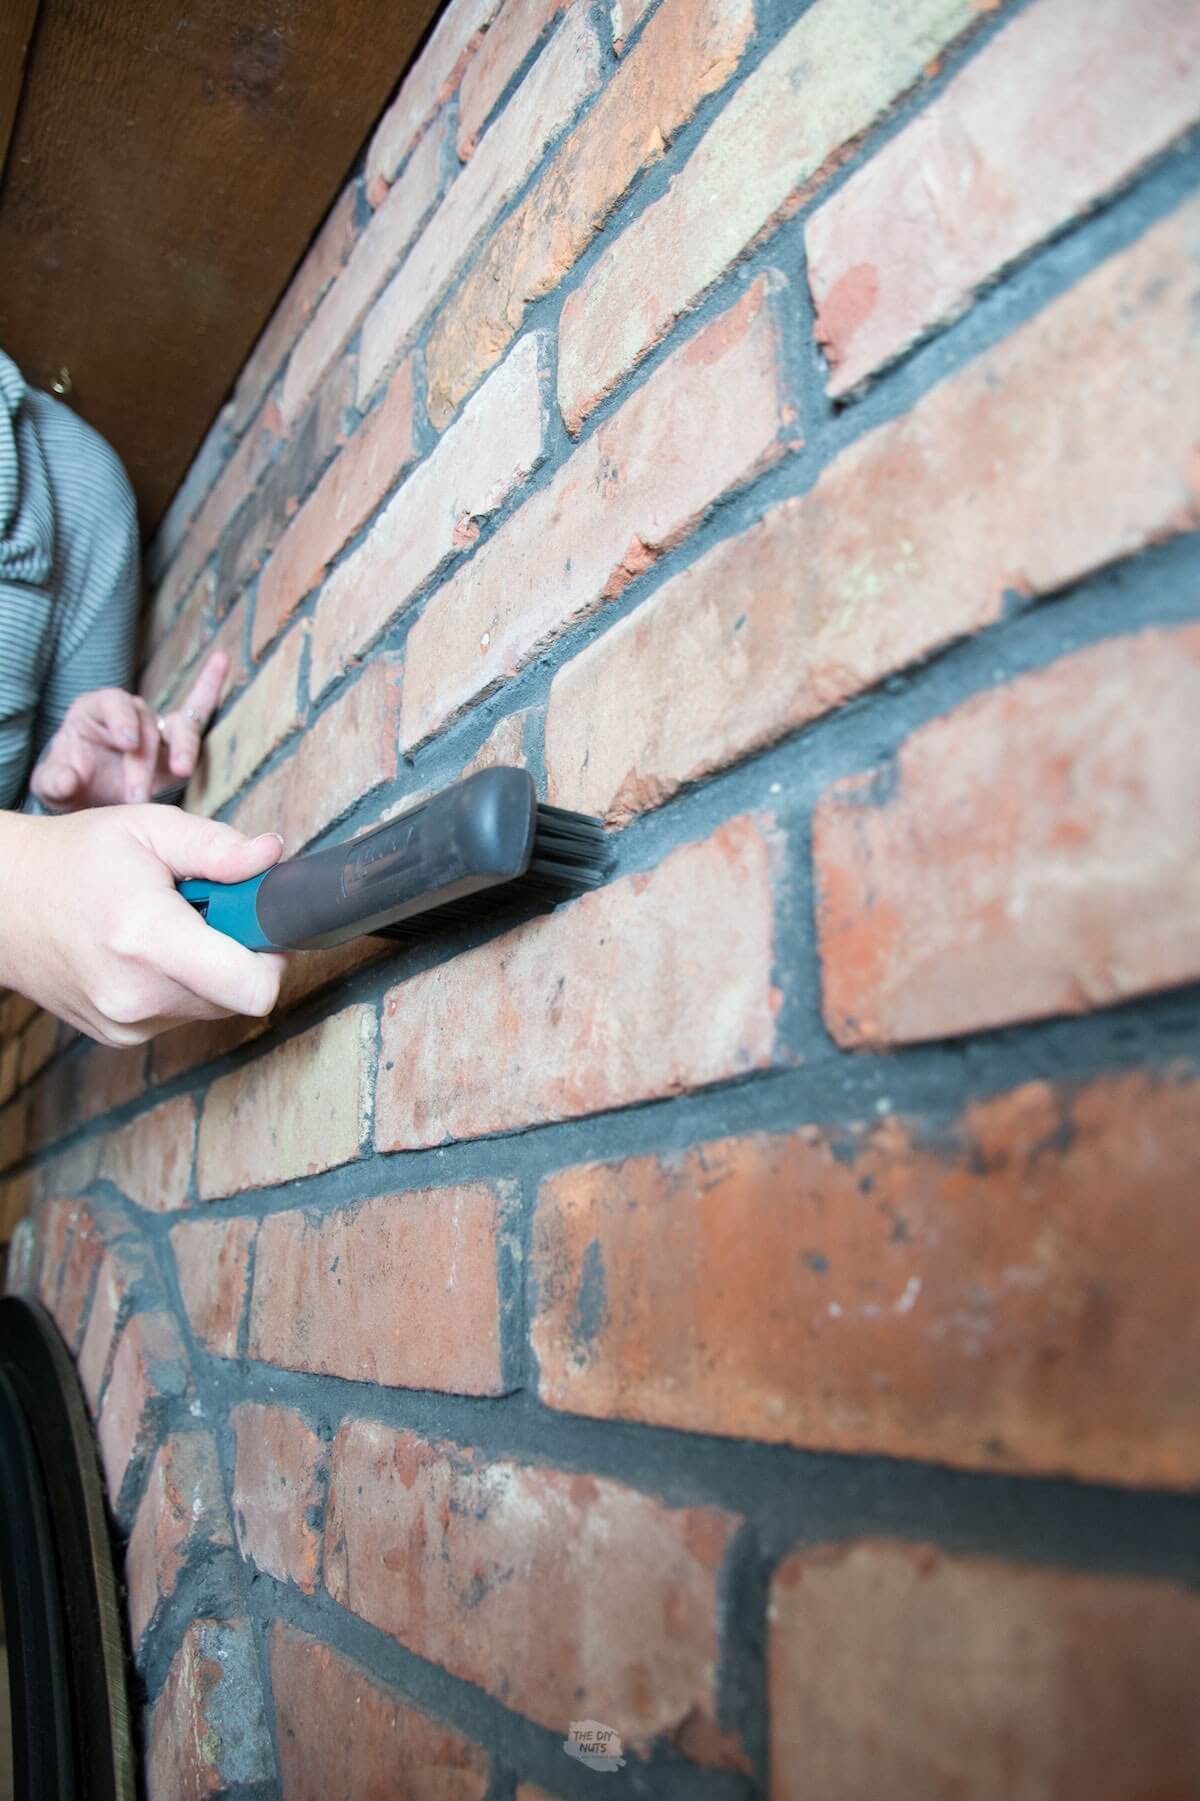
Step 3: Clean With A Wire Brush
Fireplaces can accumulate a lot of dirt and grim on them. Use a small wire brush to help knock loose dirt off.
No need to worry about getting every little spec of dirt. Since you are getting a variety of colors with whitewashing you probably won’t notice a little soot mixed in.
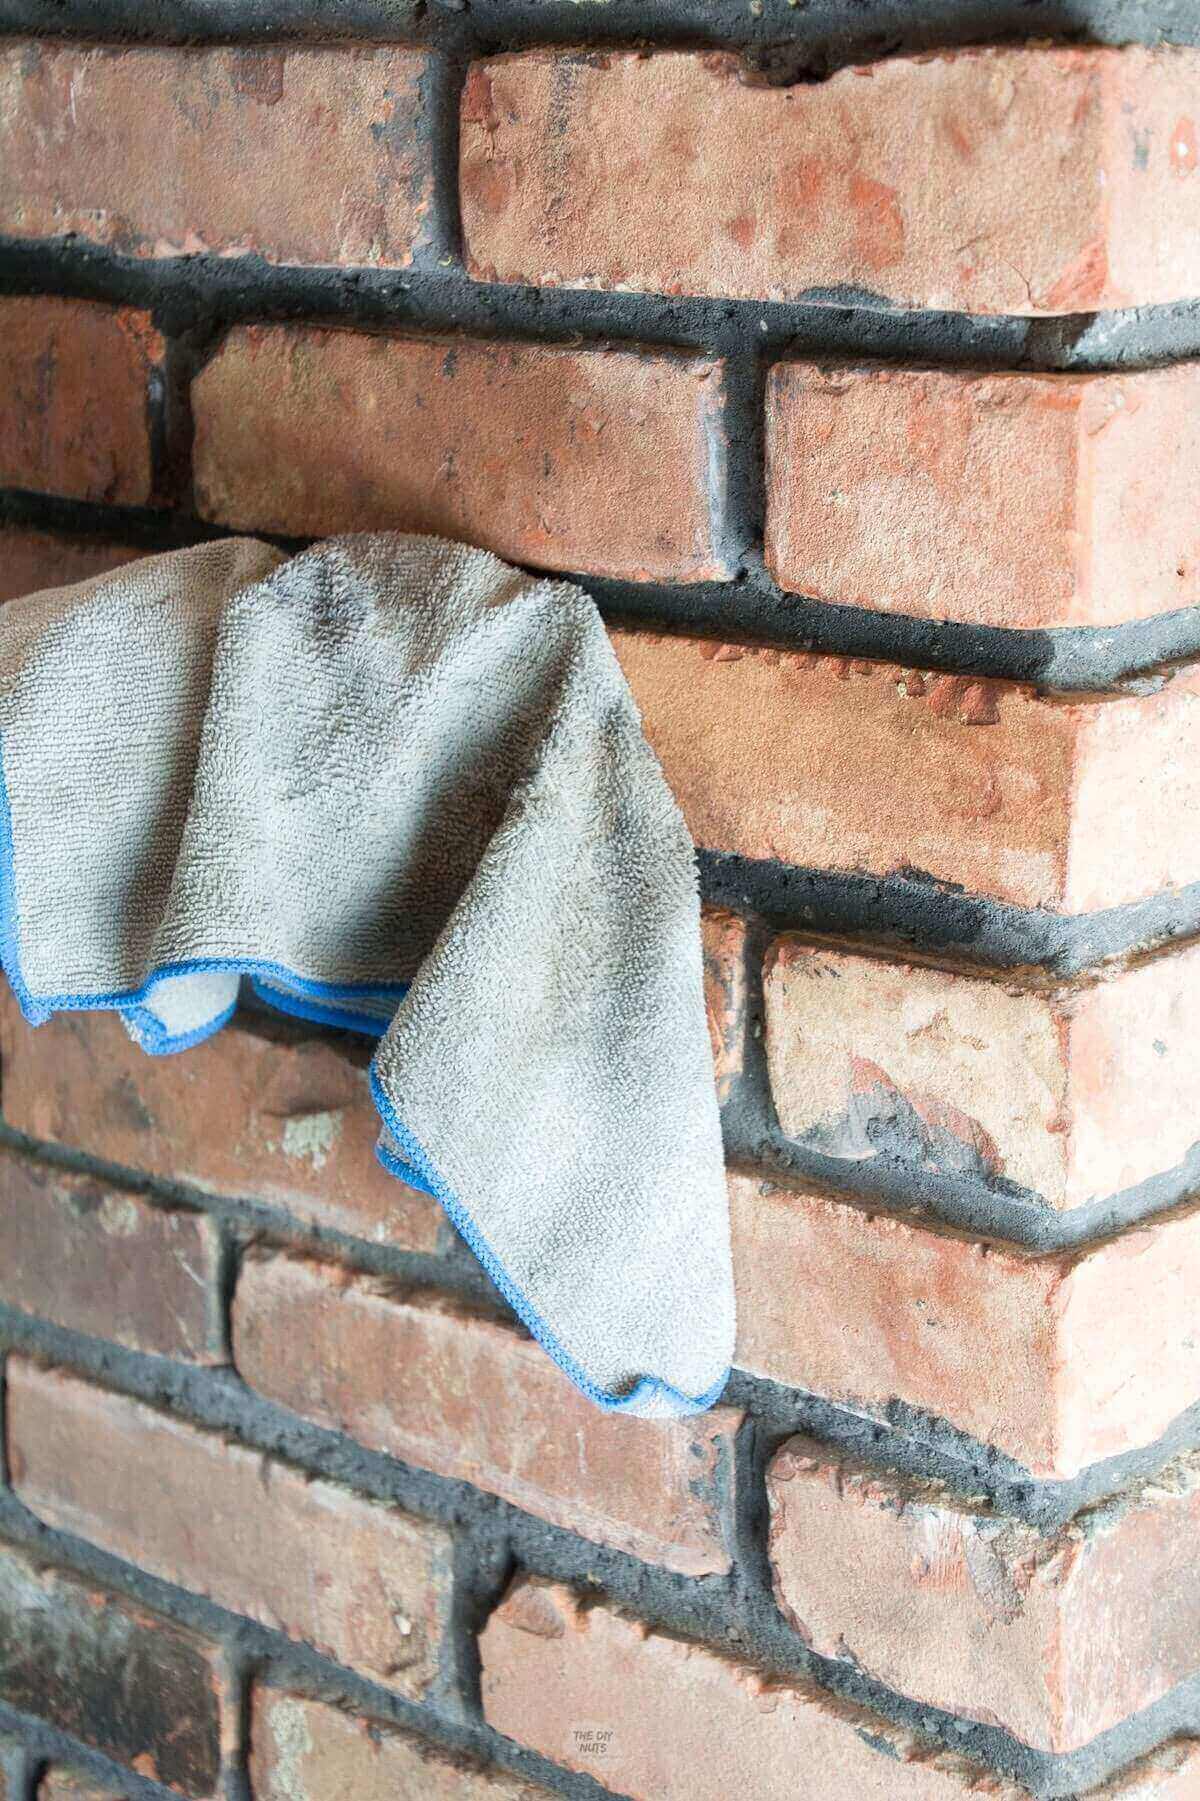
Step 4: Wipe Down The Brick
You can use TSP clean on a rag or use Dawn dish soap and water. Let the brick fully dry before painting.
Whitewashing Tutorial
Once your fireplace is clean and areas taped you are ready to start whitewashing.
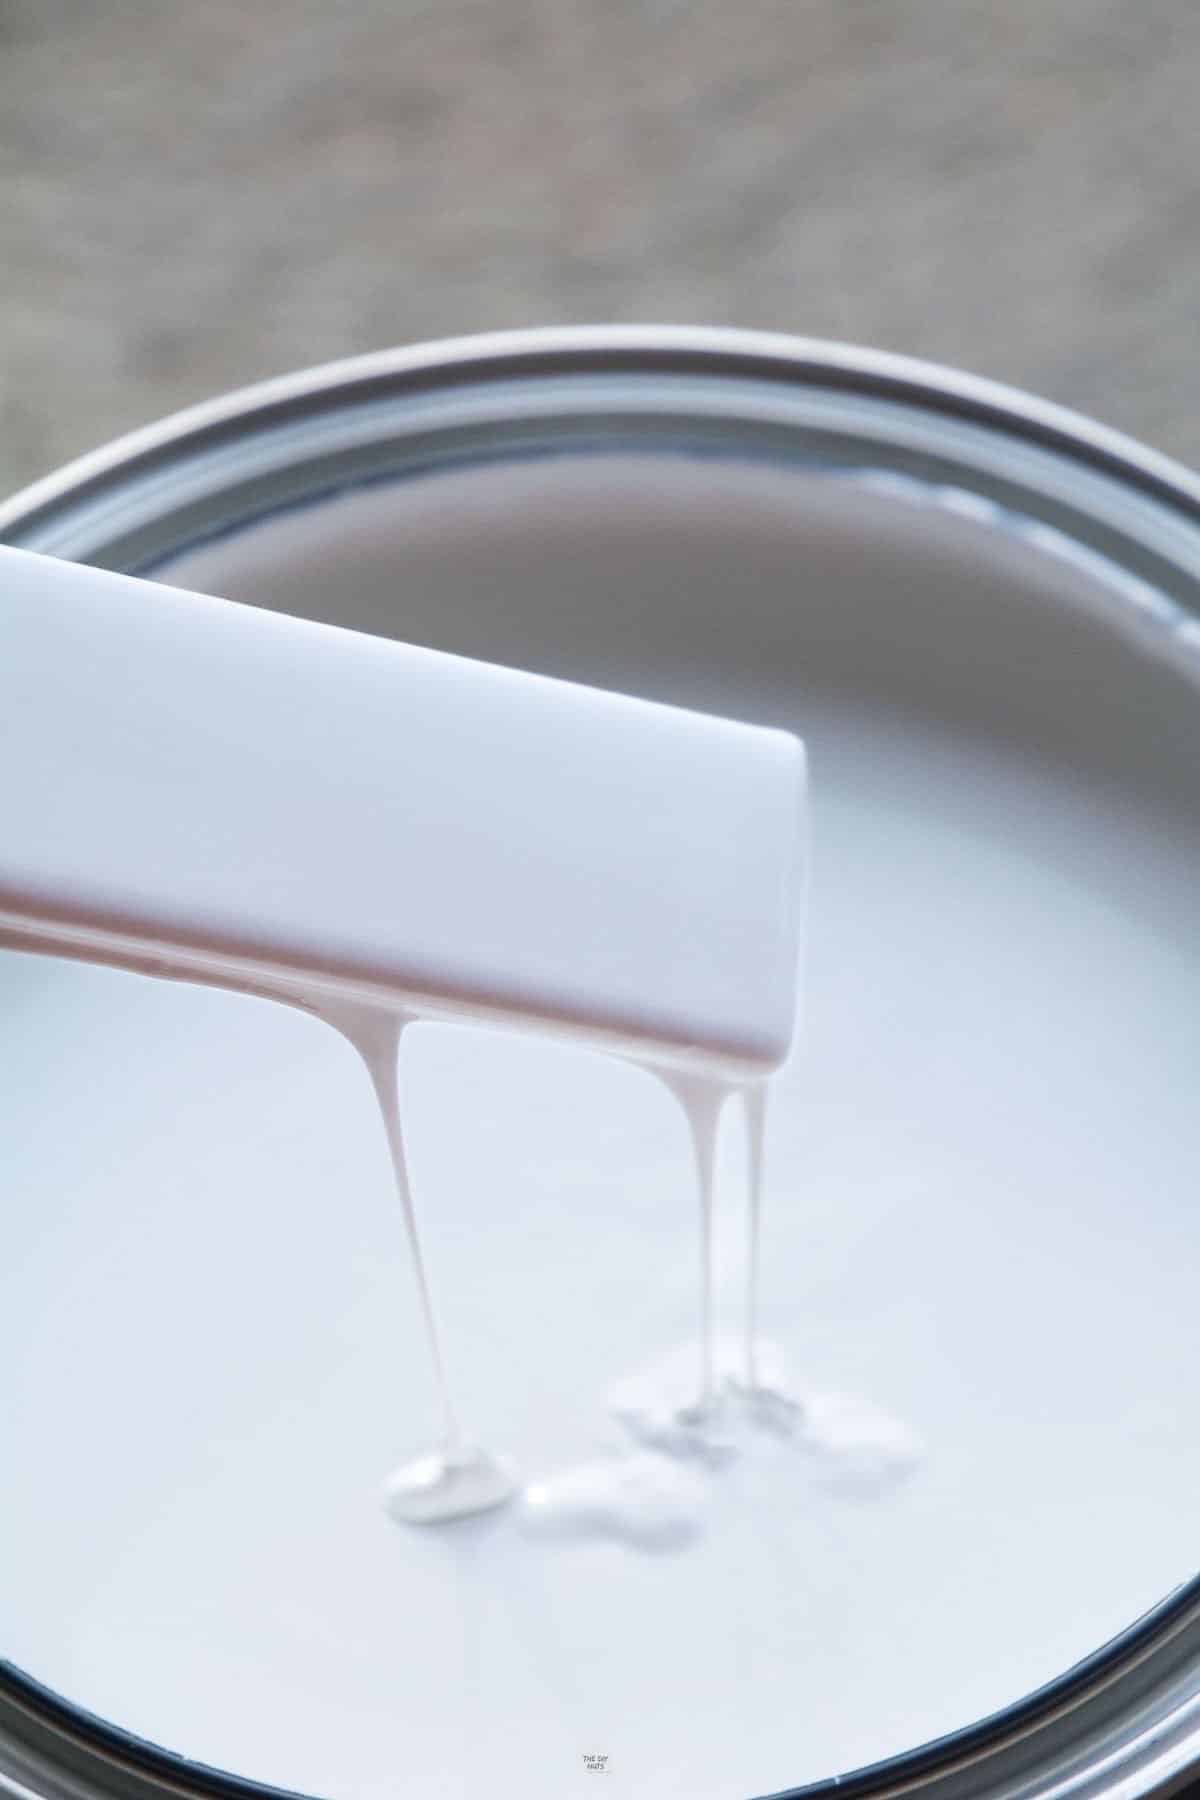
Step 1: Mix Paint With Water
We tested a 1:1 mixture and liked that we were able to see some of the brick showing through. You can use this type of cup with measurements on it or mark a solo cup where half would be.
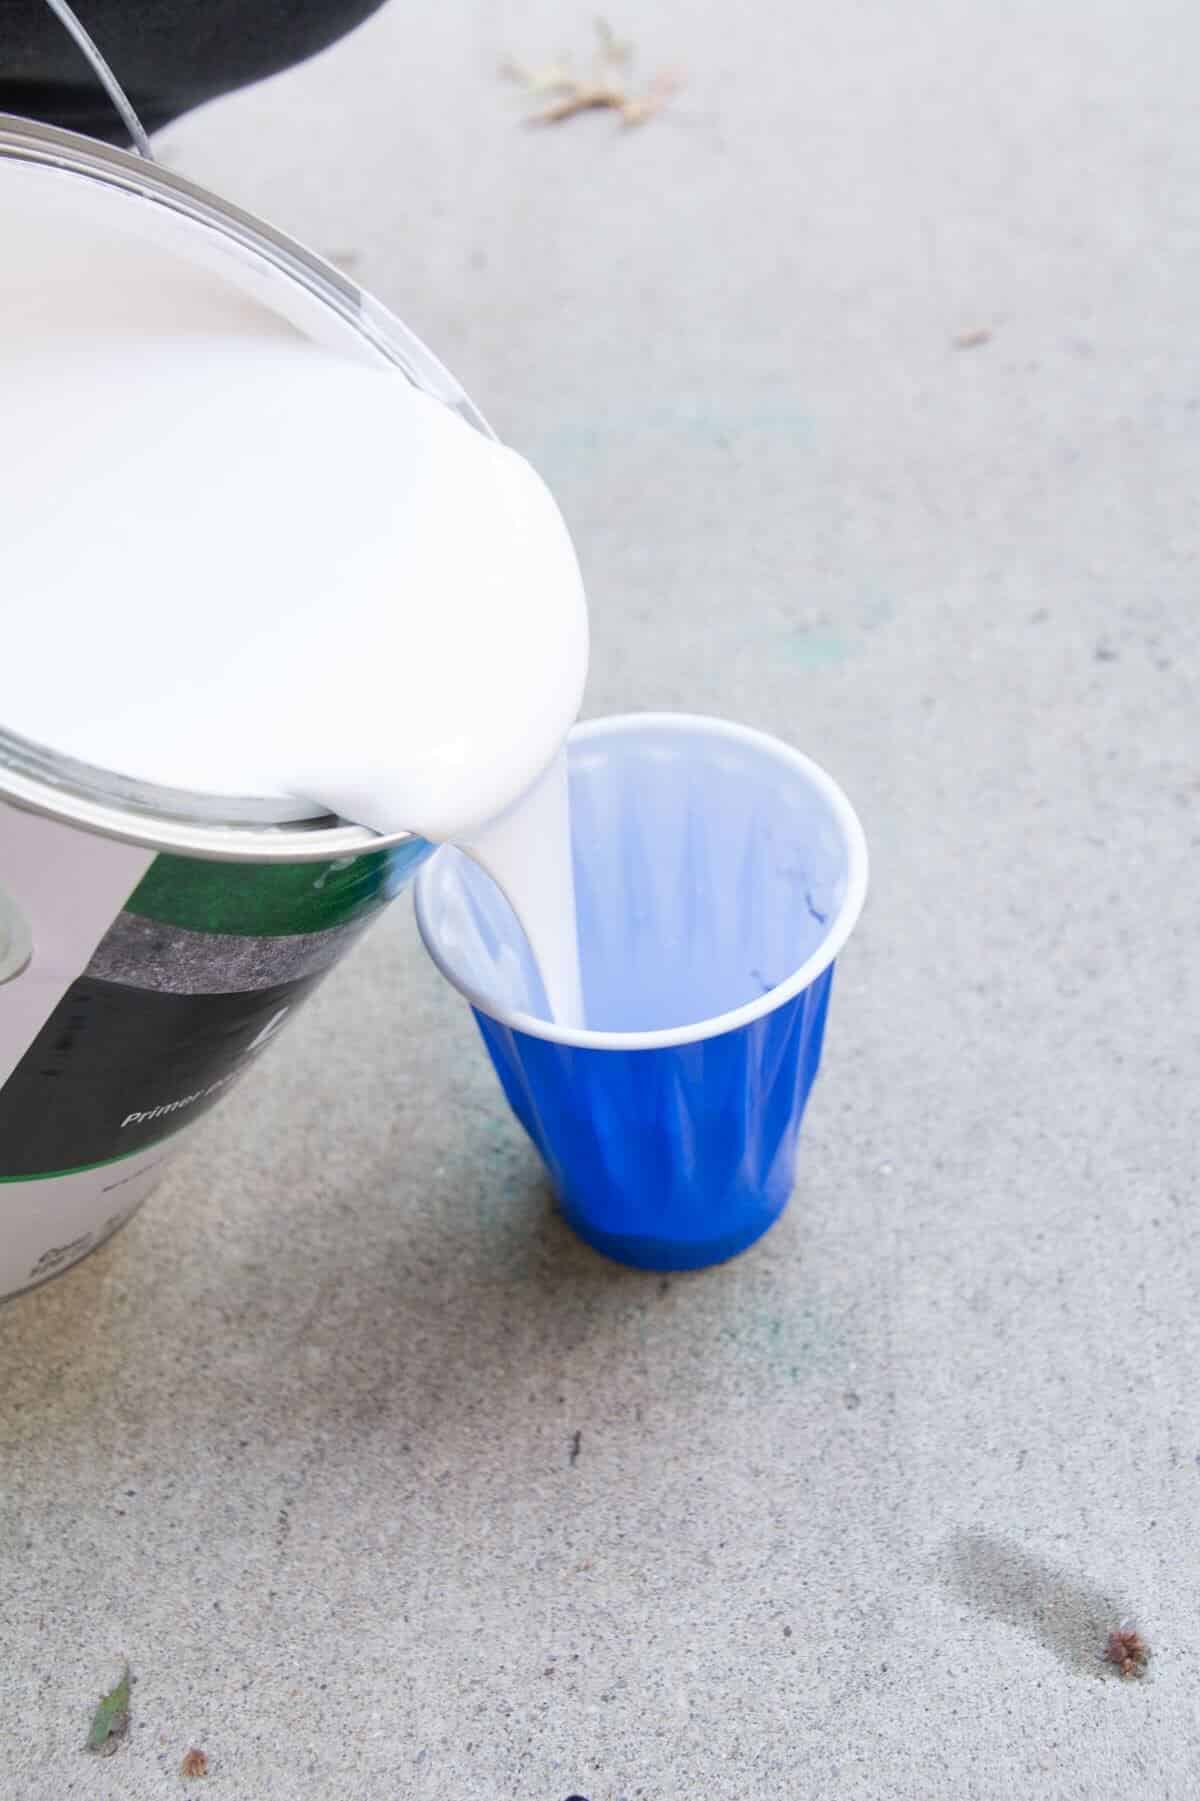
Add water to the paint.
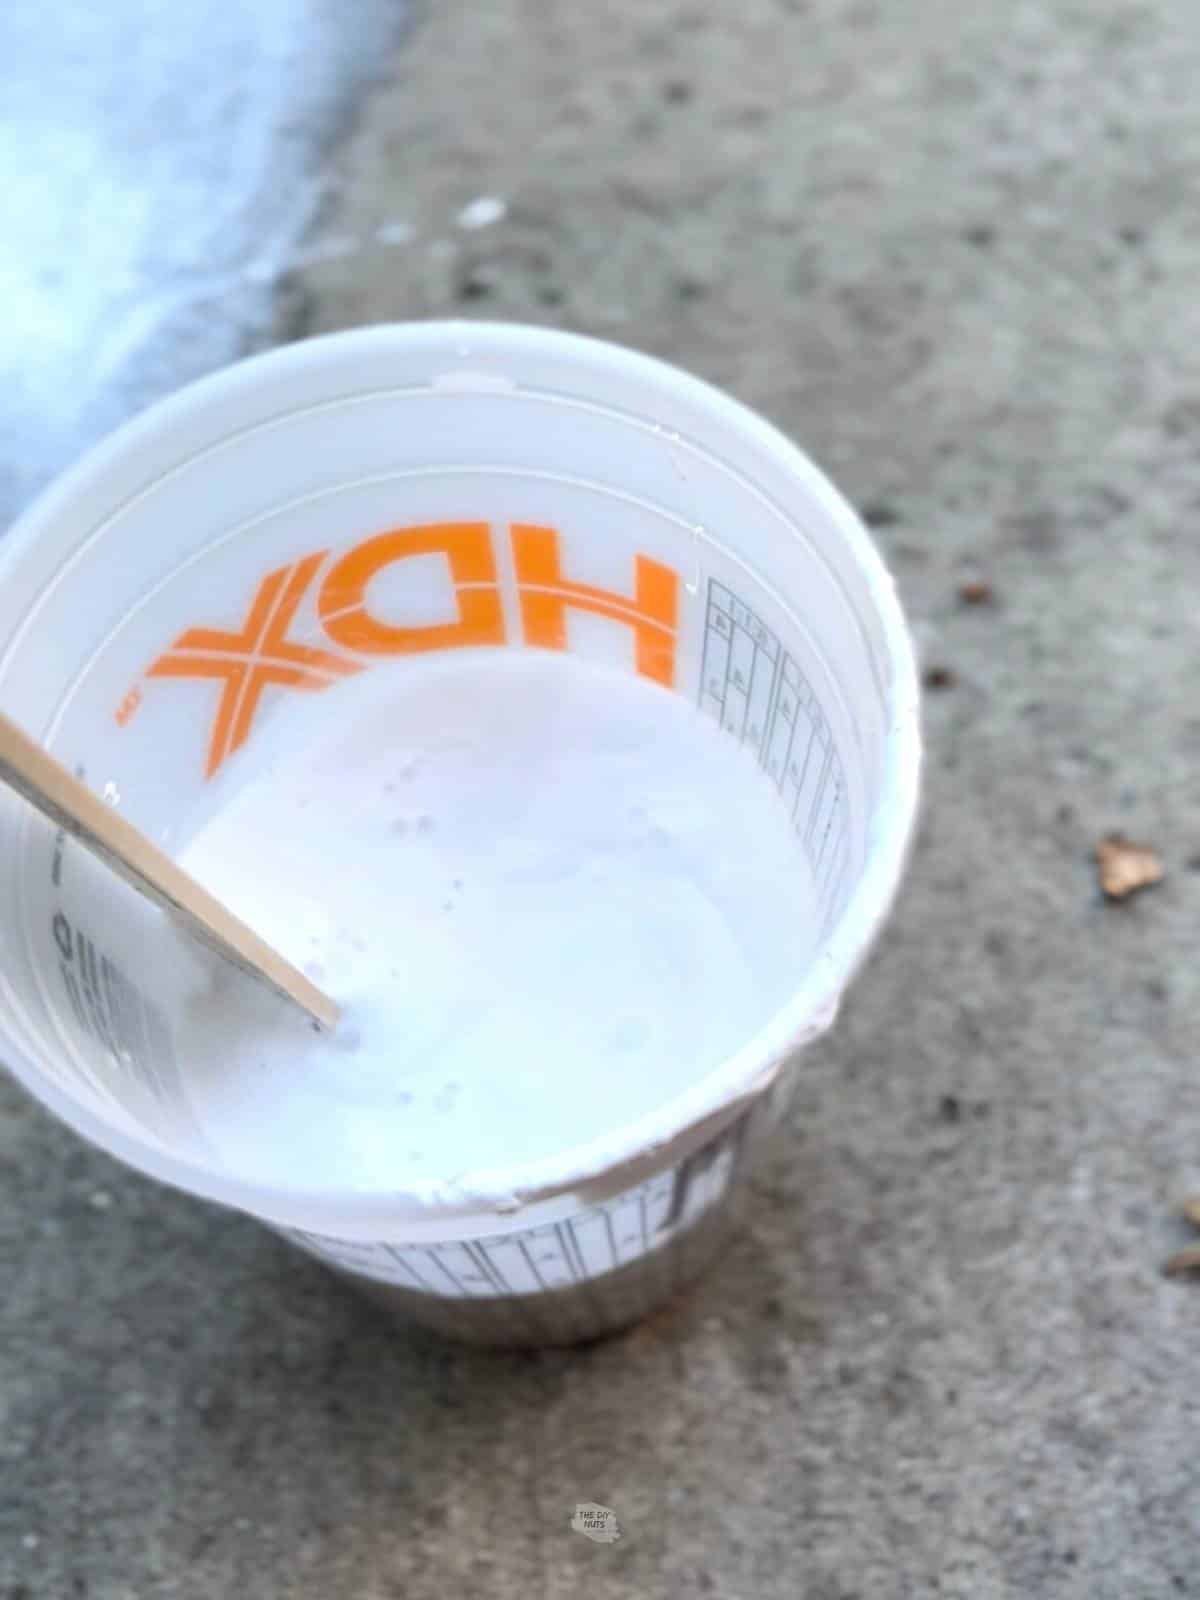
Step 2: Mix Paint and Water Thoroughly
Keep mixing the paint as you work to get a consistent look.
Step 3: Use A Brush To Apply The Mixture
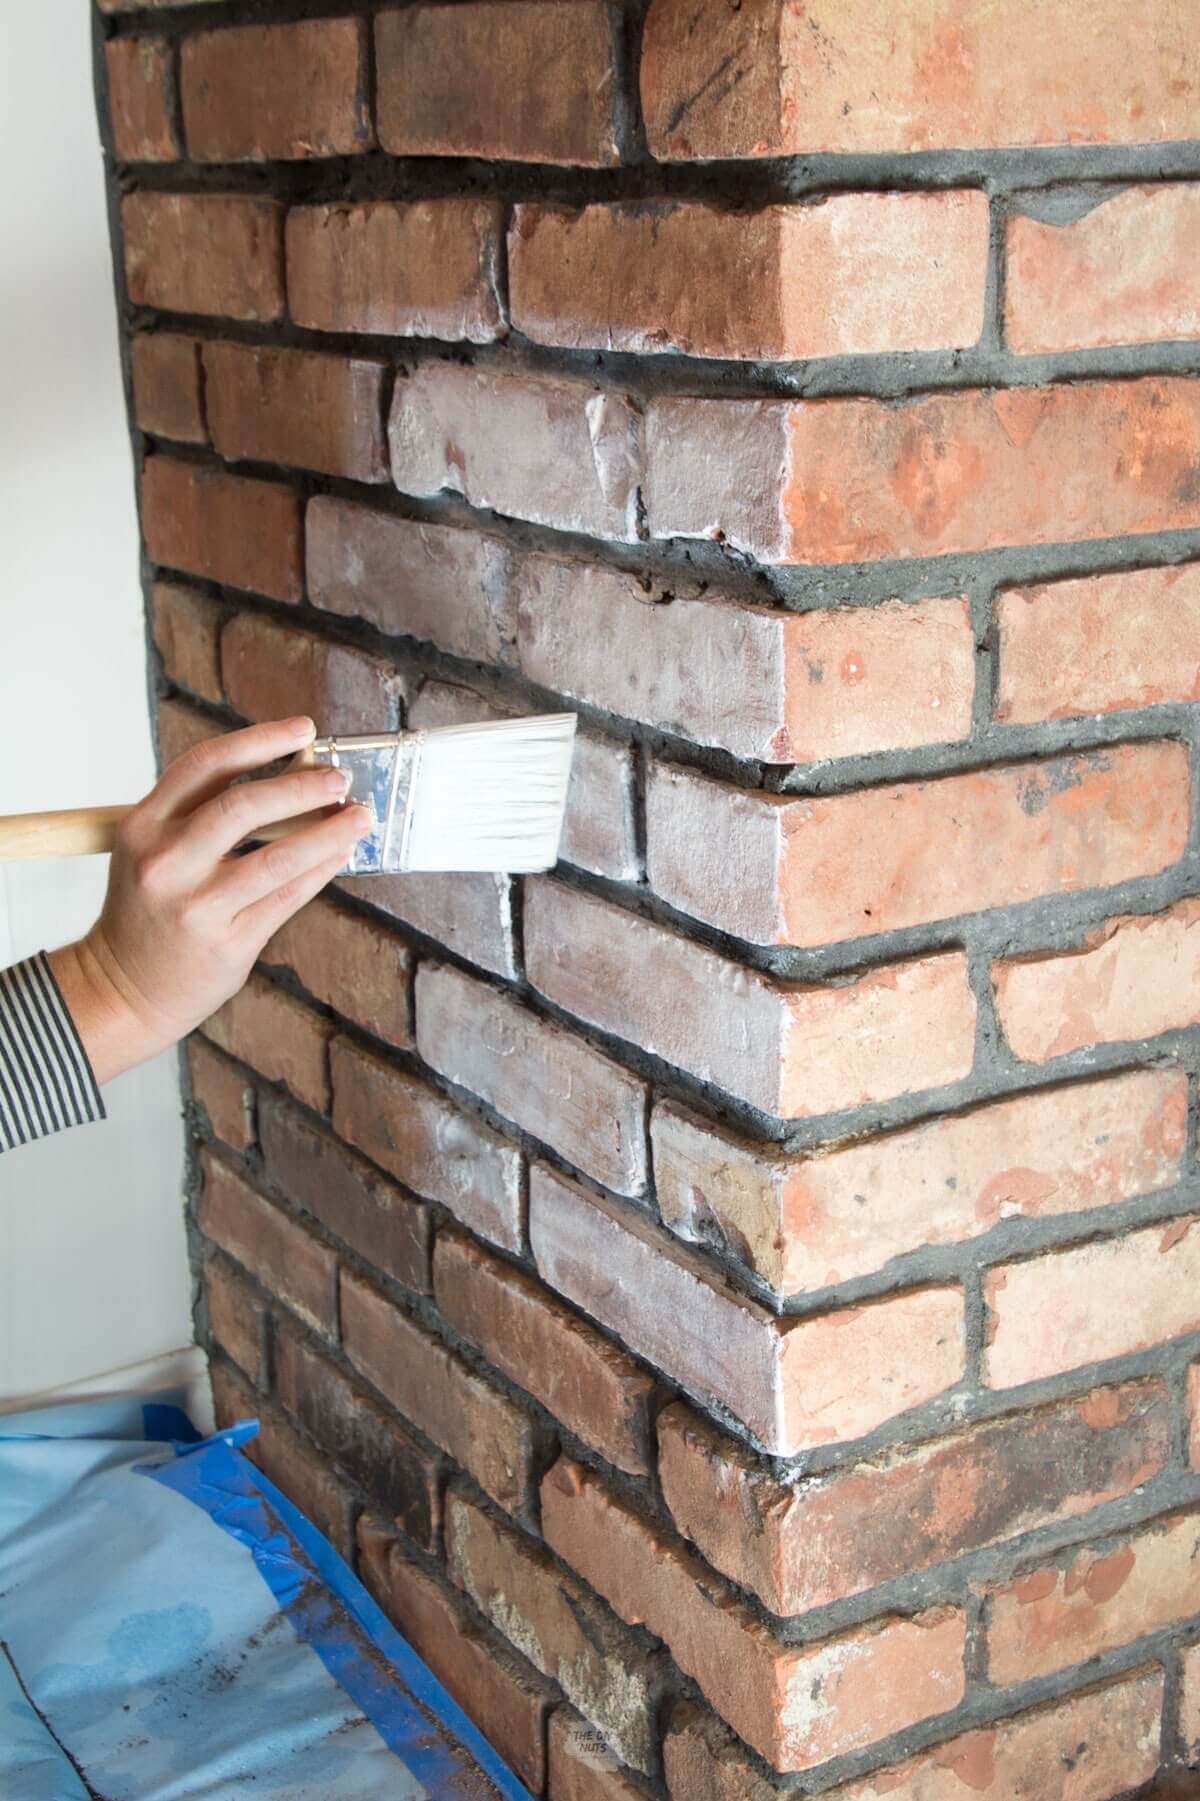
This will be messy.
You can see it may drip as you are working especially to get the mortar or grout covered.
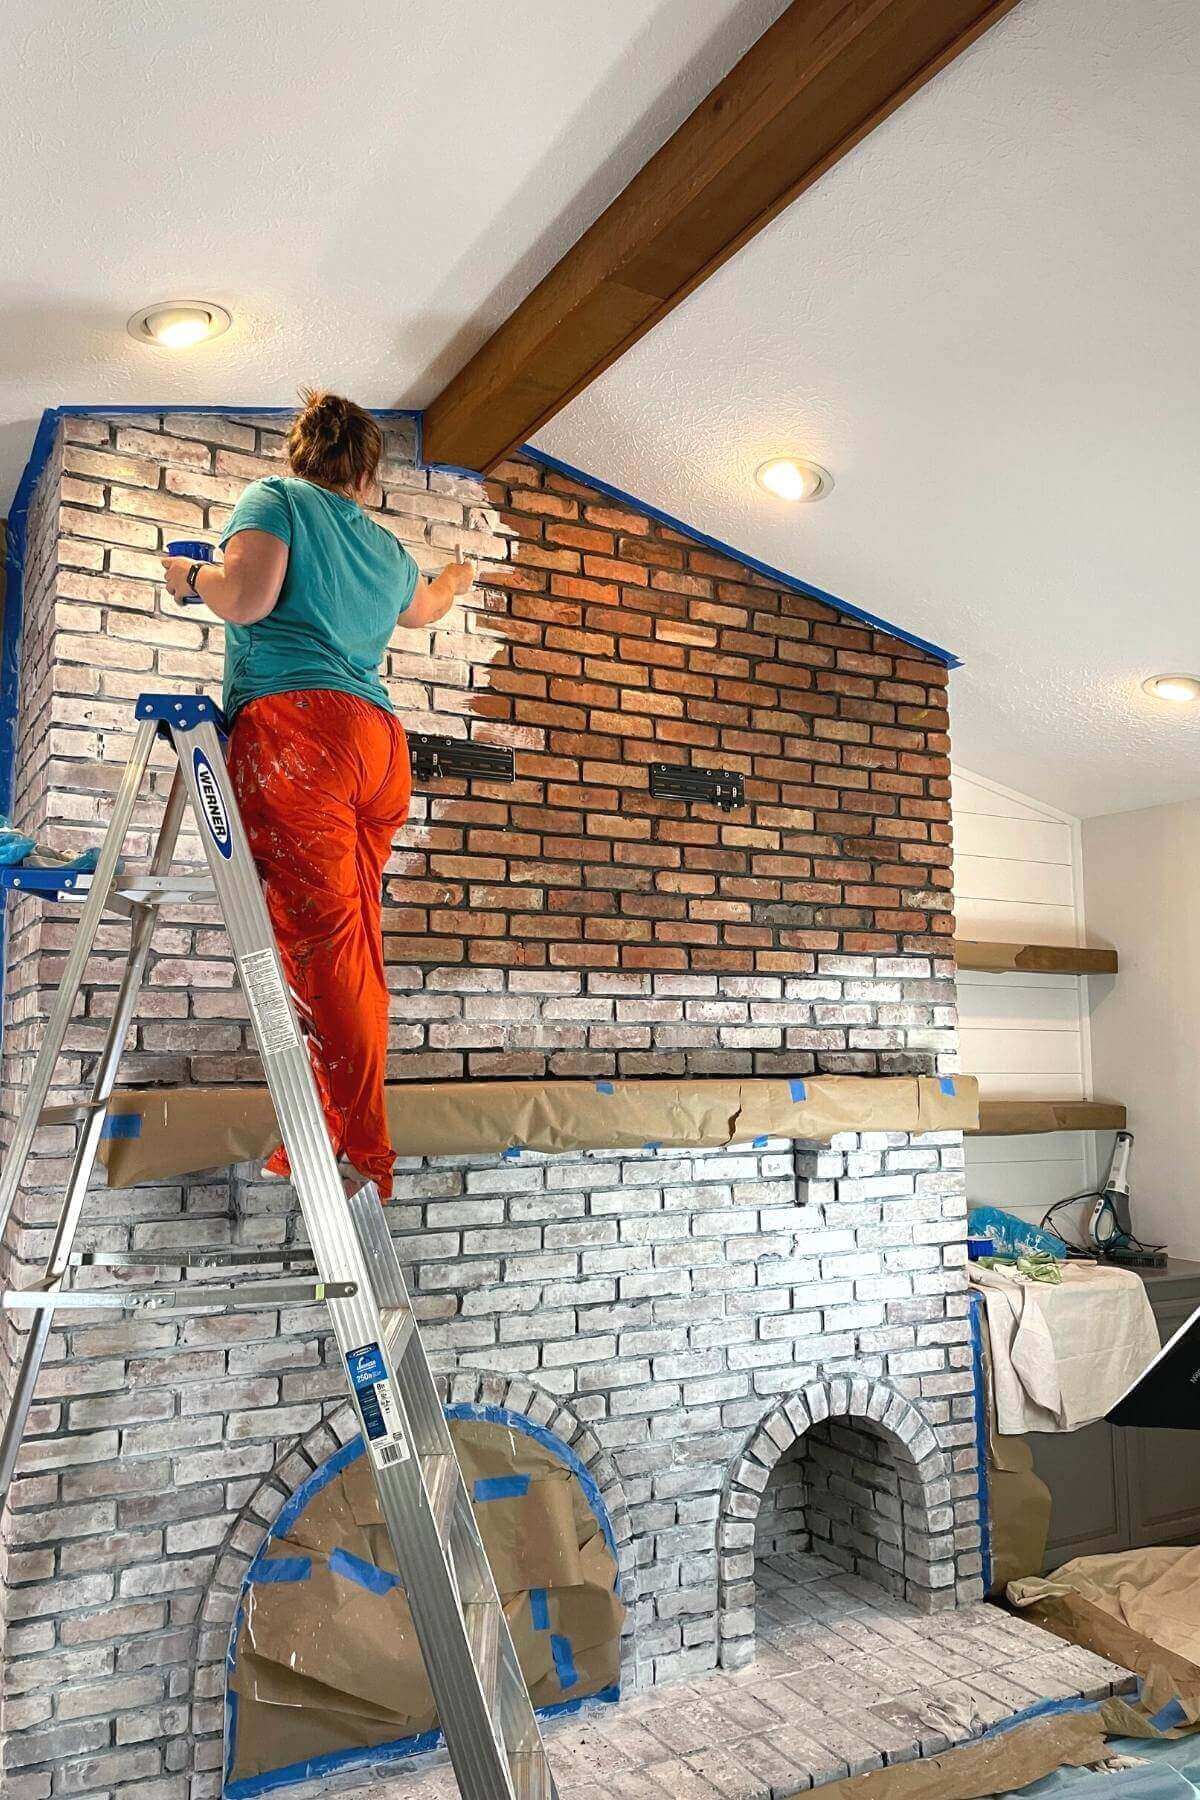
Work in small sections. I would paint for about 4-5 minutes and then start wiping after that.
Pro Tip: Have one person paint while the other person wipes and checks for drips. This will make your whitewashing process go faster since you don’t have to keep switching materials.
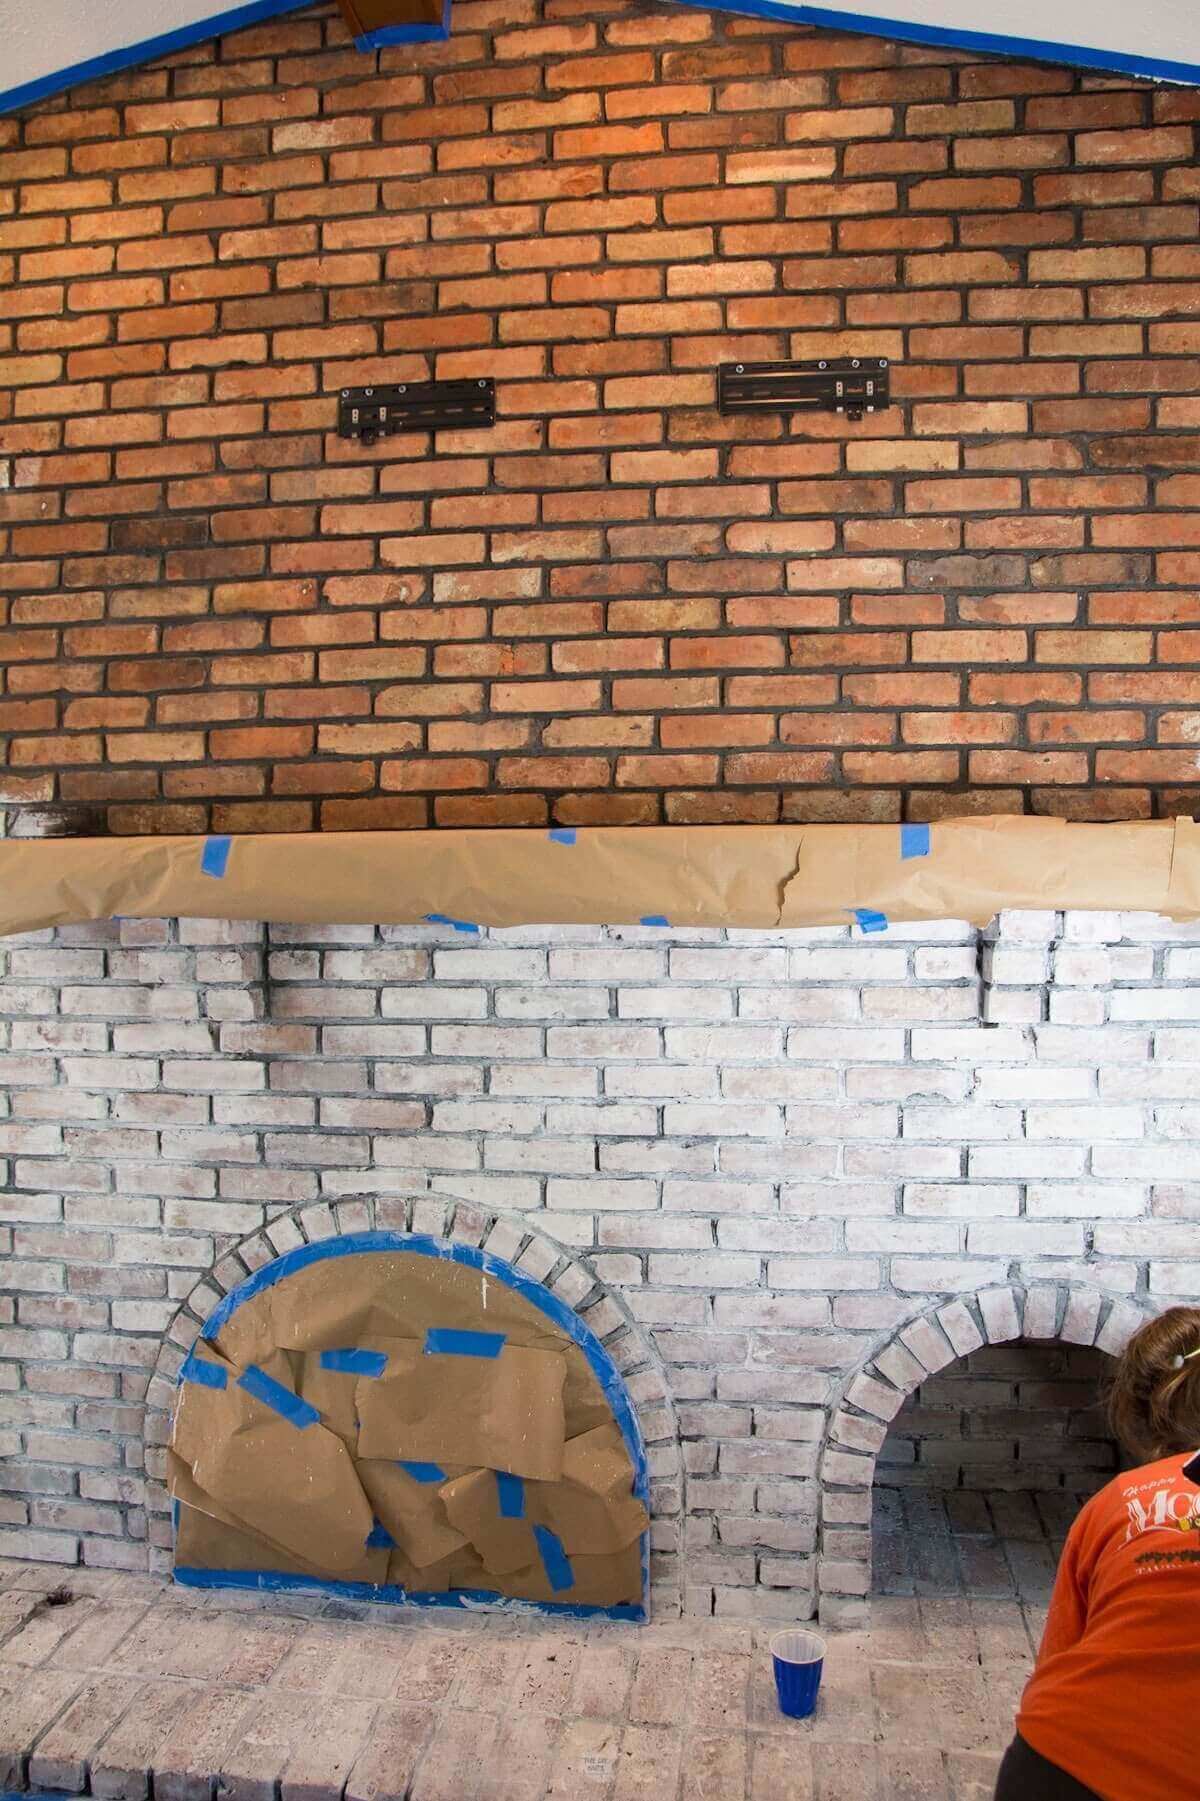
Working top to bottom is best
Start in a place that you don’t see all the time. For example, we started on the top side to get the feel for how thick we wanted the paint.
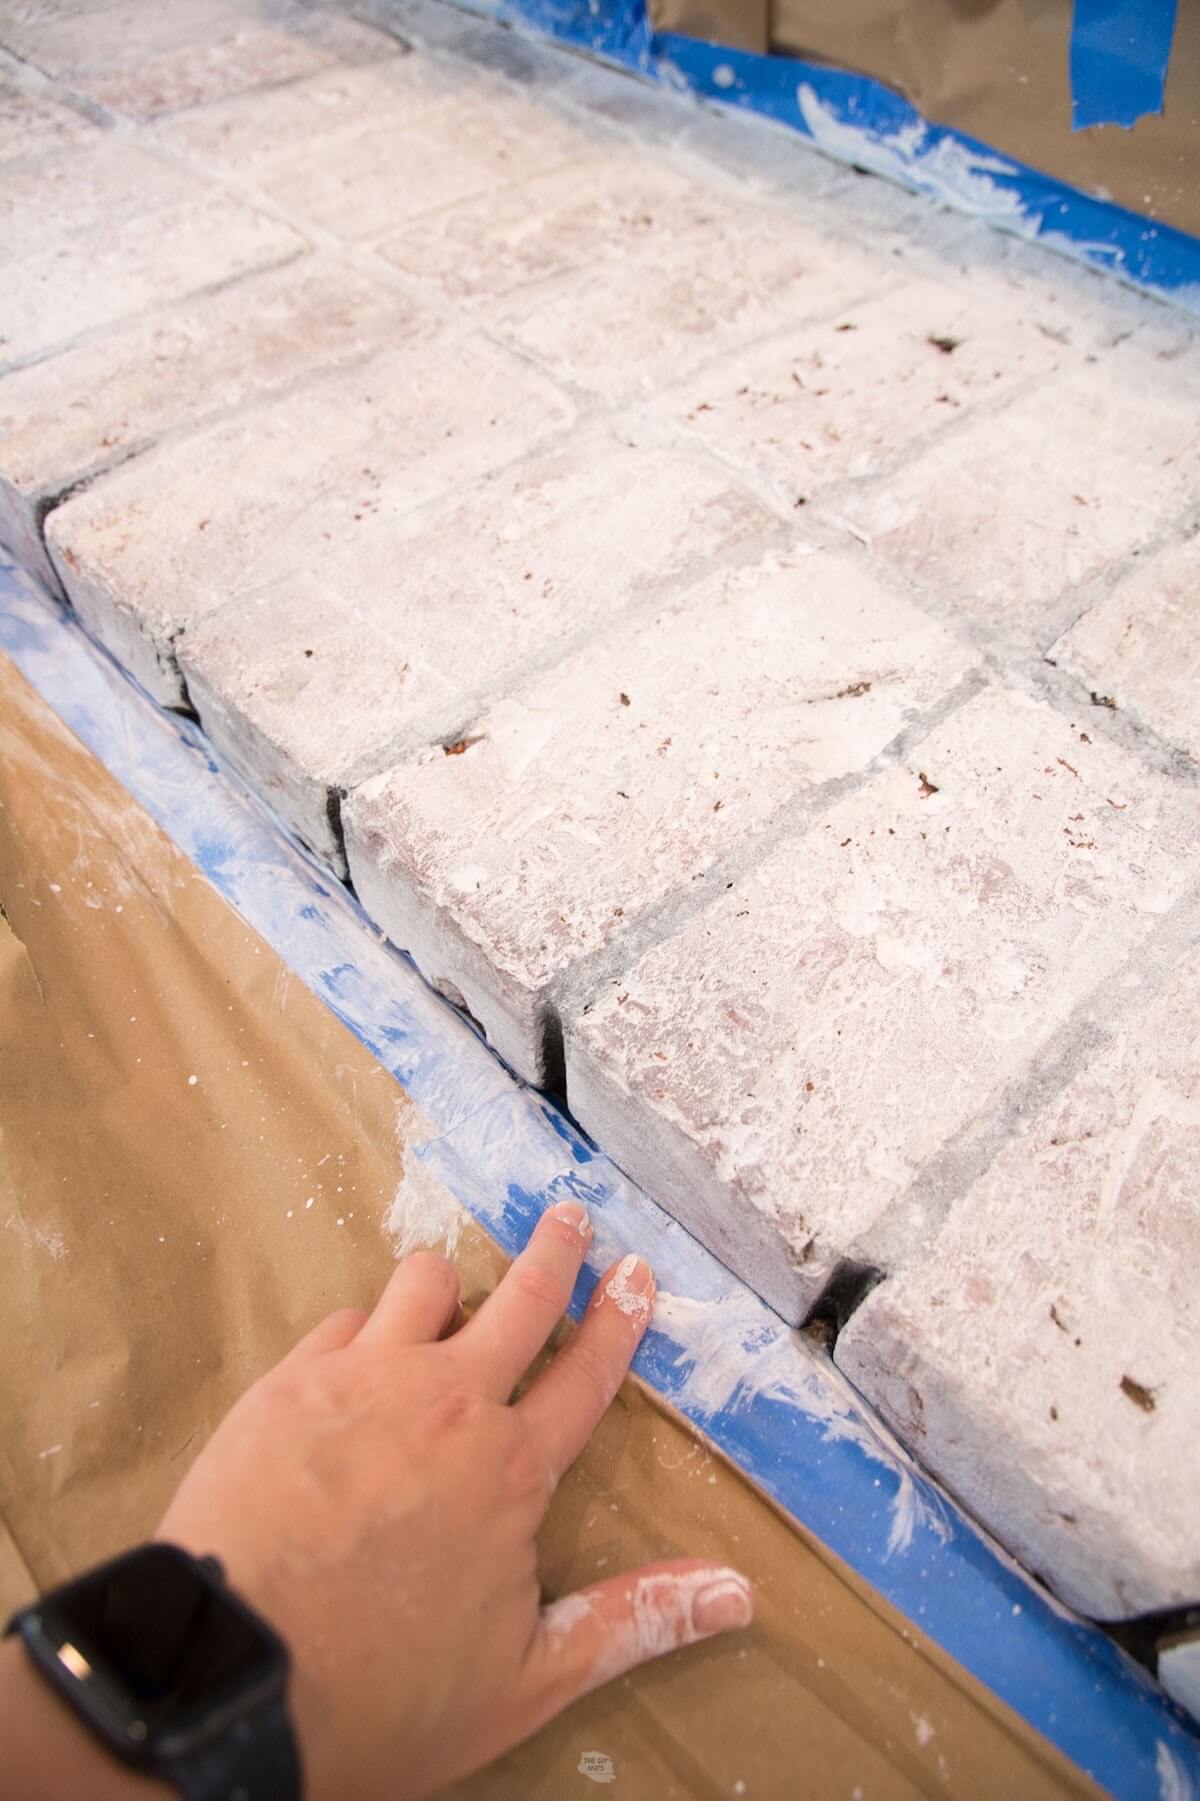
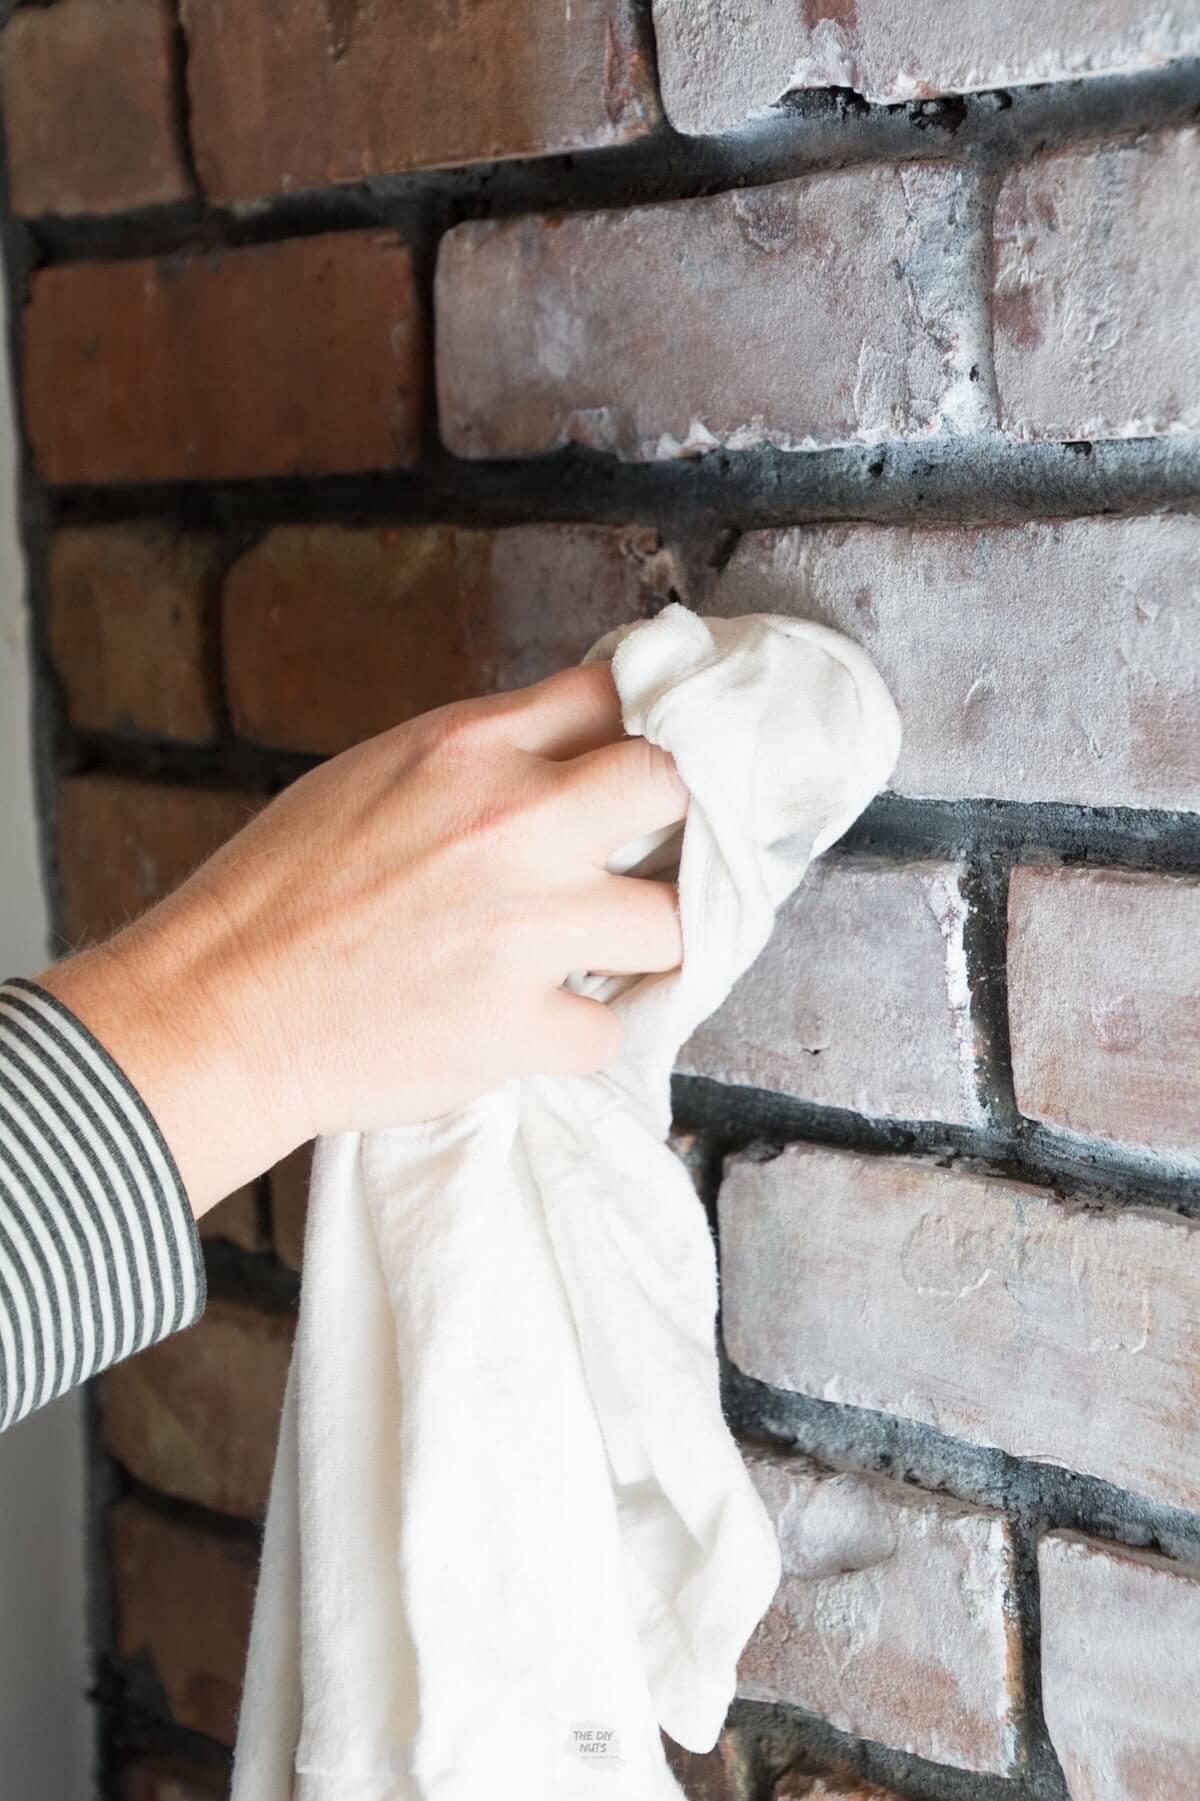
Step 4: Use T-Shirt Rags To Wipe
Depending on how fast you paint, you want to wipe the paint before it really dries. This is actually an optional step. Though we did find that wiping it definitely helped get that whitewash look.
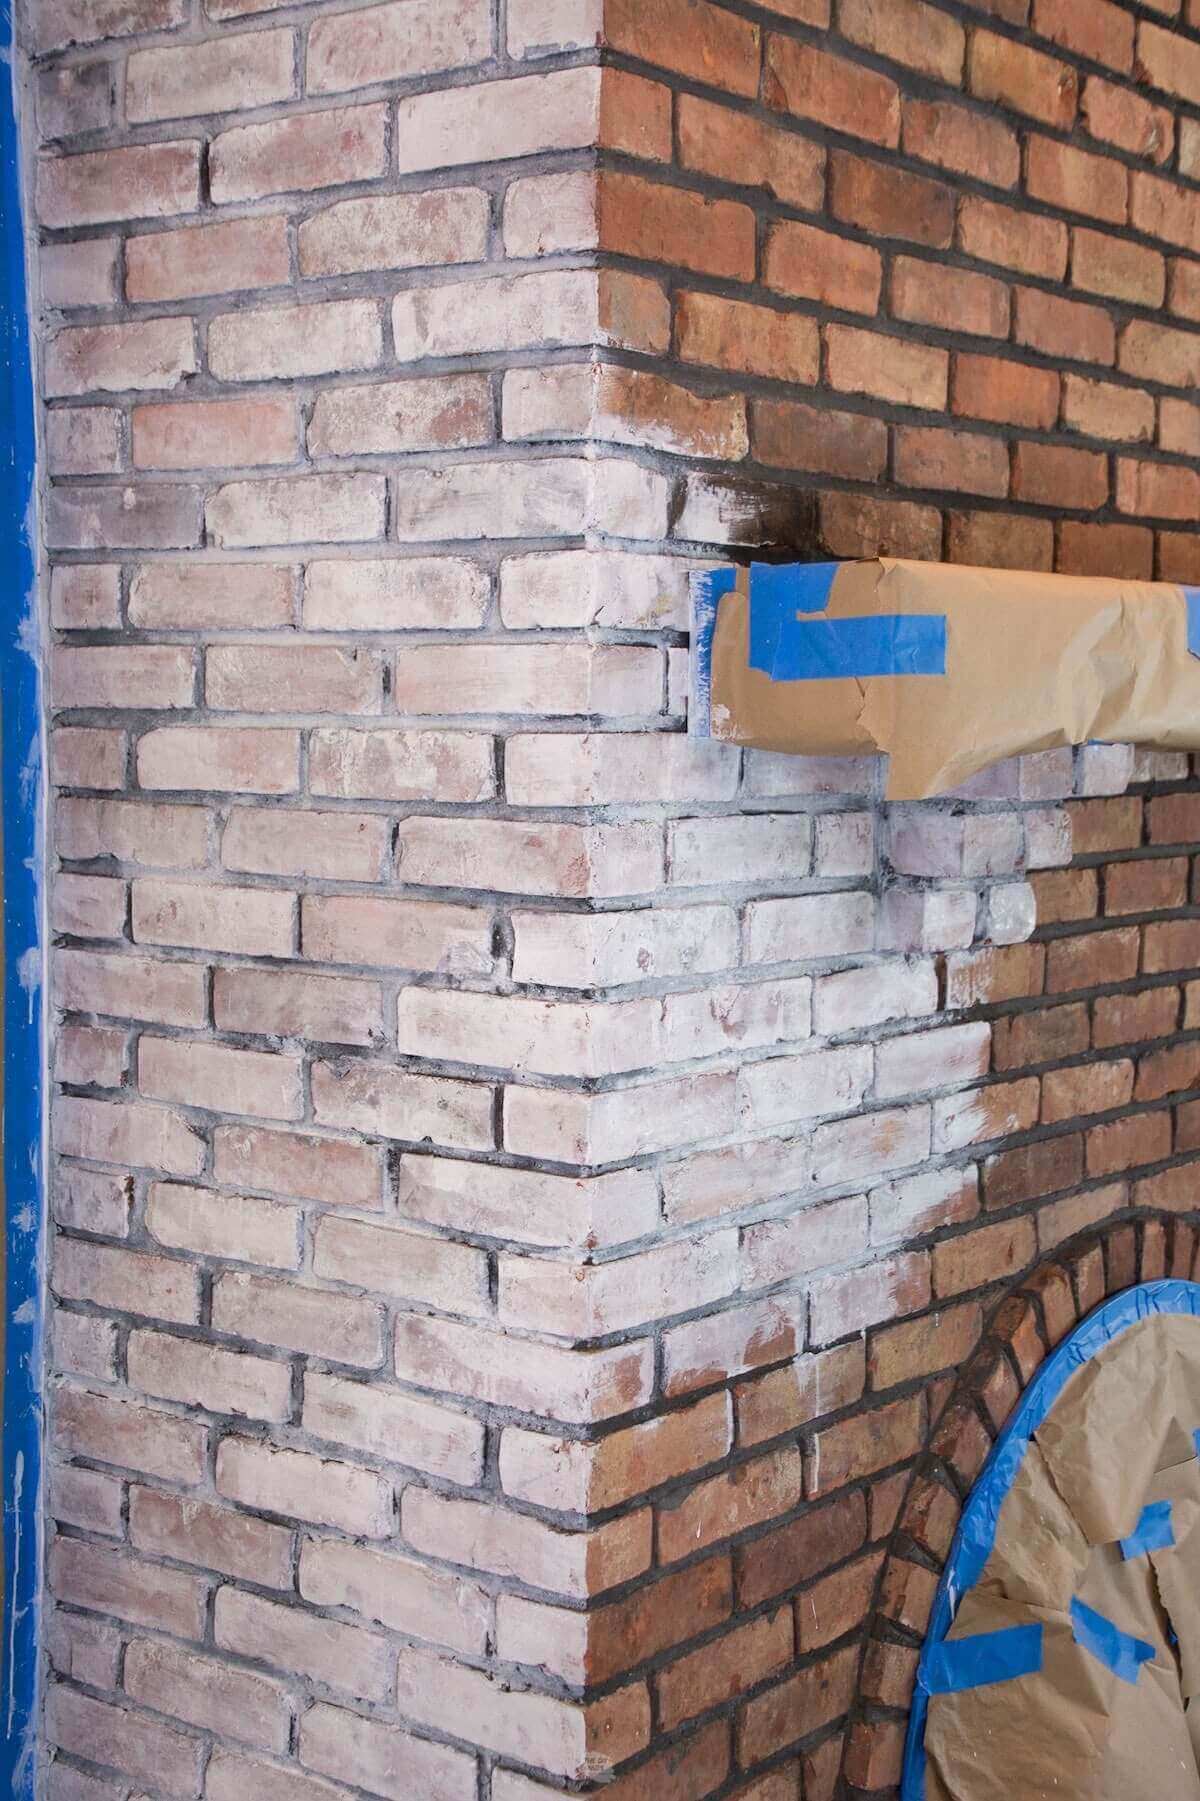
Step 5: Continue To Work In Sections
Make sure you are able to reach the areas you need before painting. This fireplace was very large and therefore we had to be strategic about how to move the ladder or what to paint when.
Even though working top to bottom is probably best we painted under the mantel first since that is more of the focal point of the room. The mantel also stopped any drips from continuing down the wall.
Step 6: Let Dry & Clean-Up
Before fully cleaning up and removing all painter’s tape, make sure you are happy with how the whitewash has dried. You can always go back and add a little extra white to some spaces if needed.
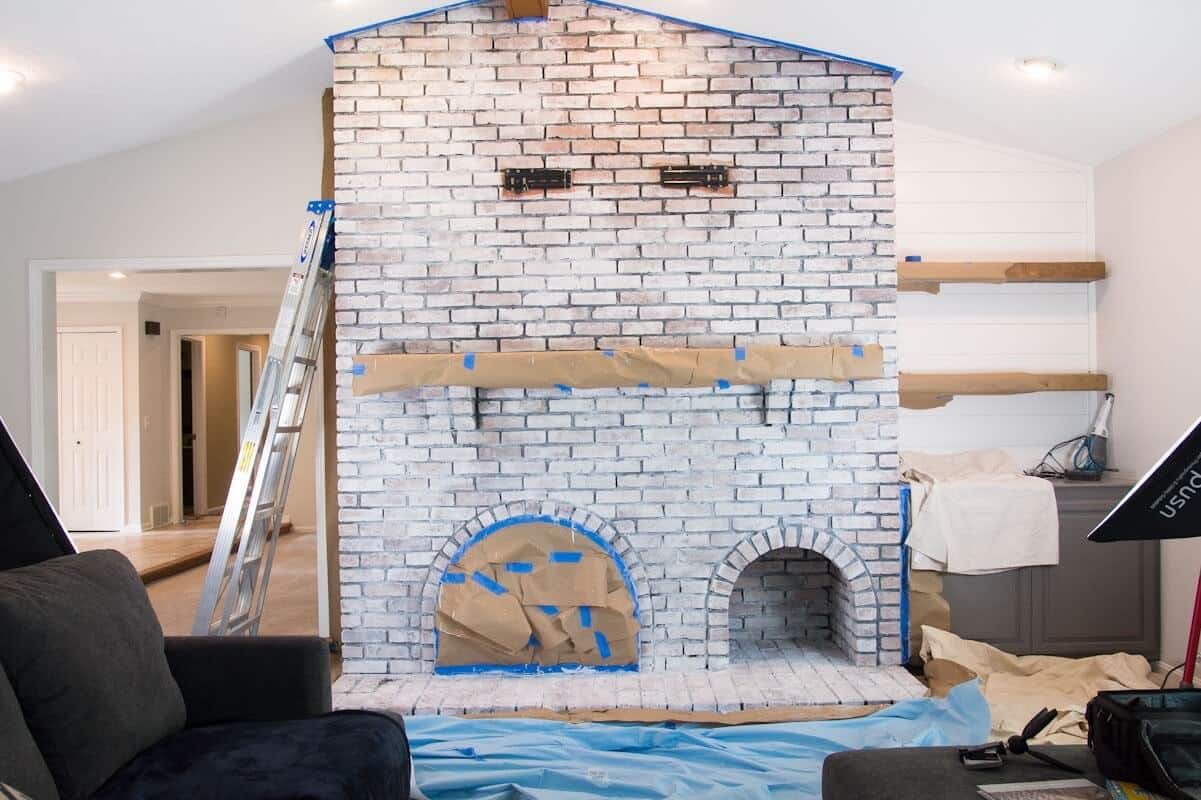
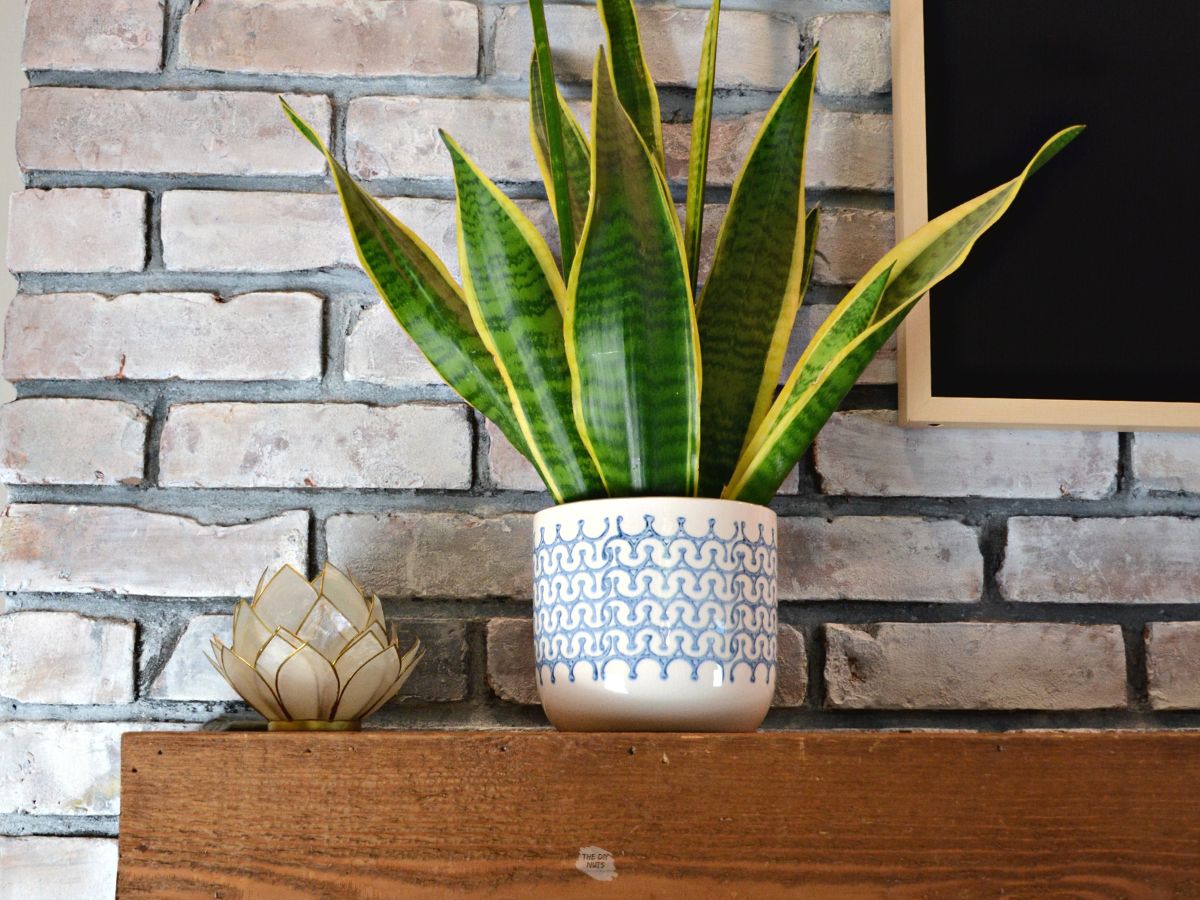
Step 7: Enjoy Your Whitewashed Fireplace
Add your own decorations and touches to this new focal point in your room.
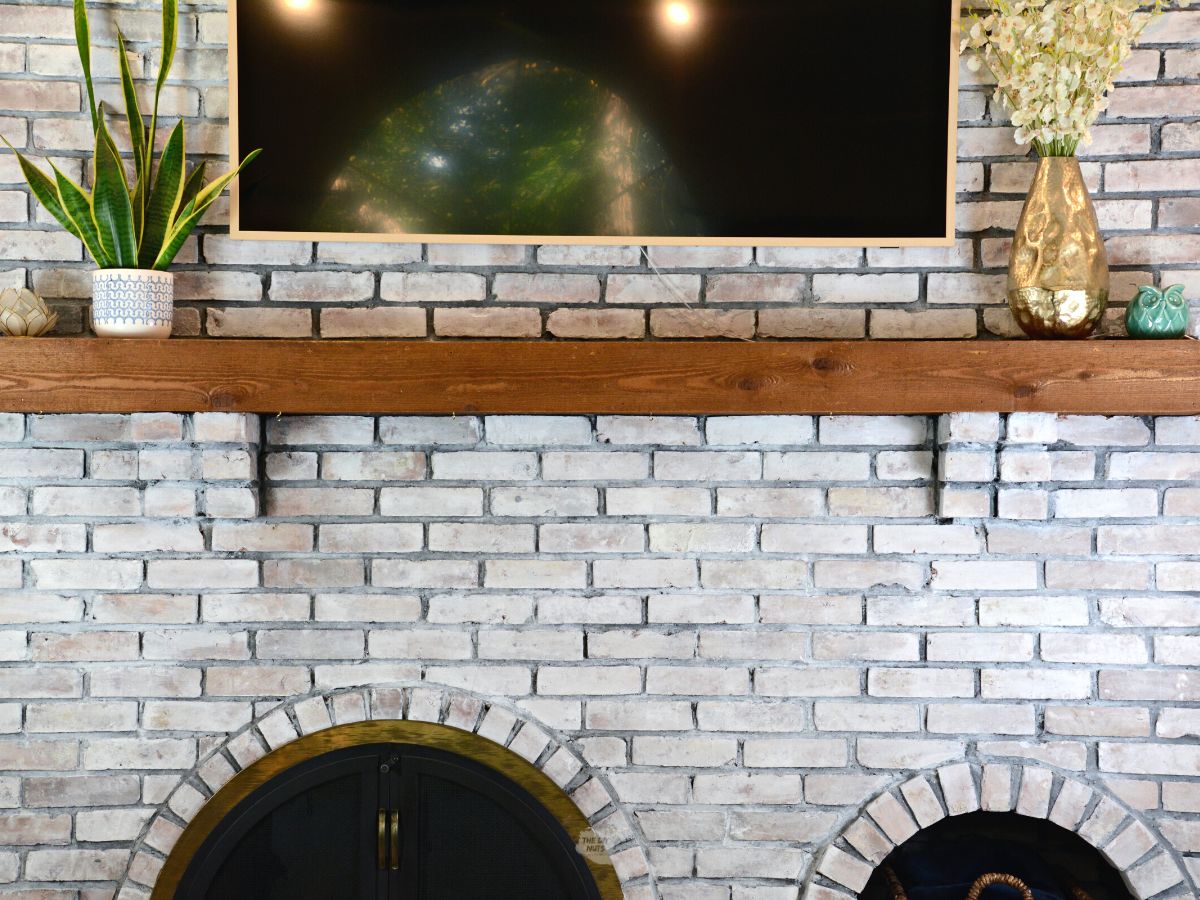
We are completely jealous of their Frame TV with a beige frame. The newly painted fireplace was the perfect place.
What if you want a solid color?
You have to check out this brick fireplace painted white. Another amazing DIY fireplace makeover.
Expert Tips
- No need to buy new paintbrushes for this DIY. Whitewashing brick is the perfect time to use your old paintbrushes. You are going to ruin them on the texture of the brick and having new brushes will not get a better outcome.
- The paint and water will start to separate in your cup as you are working. Make sure to mix the cup occasionally.
- We liked the variation of saturation of color.
- The paint mixture will soak into the brick and change its appearance a little as it dries. Make sure to step back and see if you like how it drying as you work.
- You can always add more paint in some areas or use fine sandpaper if needed.
Before and After Painted Brick Fireplace

More Painting DIY Ideas
How-To FAQs
Yes, the Sherwin Williams Loxon paint is actually meant to paint the brick a solid color. This would be a perfect paint to try if you are going for a more solid look.
At first, we thought we needed to be completely accurate. However, because the paint settles in the cup as you are working you can just eyeball it.
If you want an accurate 1:1 ratio you can either use a cup like this or mark where 3/4 cup water is in the solo cup and then mark again where the 1 1/2 cup line is.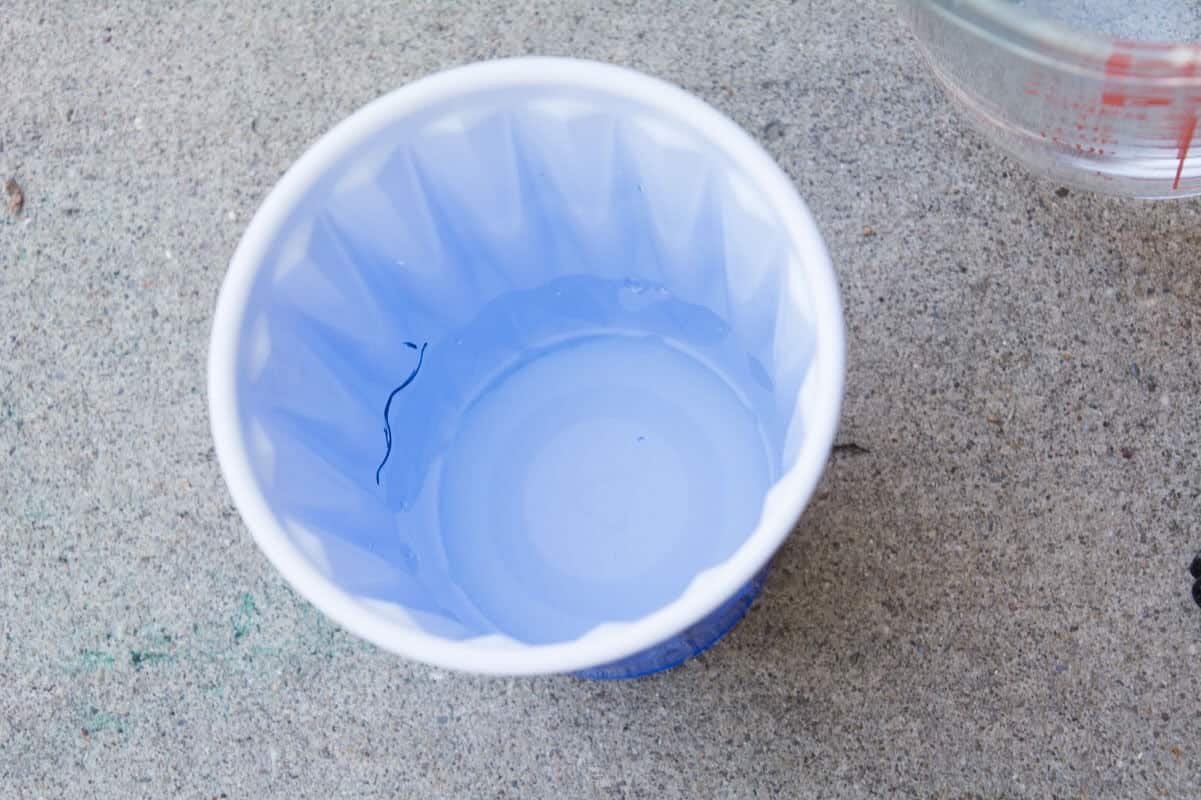
The homeowners of this fireplace actually liked the darker-looking mortar and wanted it to show through. If you want yours to be lighter, we recommend painting the grout first with less diluted paint and then whitewashing the brick after.
We can paint pretty fast so I painted a few rows in 5 minutes and would wipe. We also had one of us paint while the other wiped the brick. As long as the paint isn’t fully soaked in or dry you should be able to wipe it for the look you are going for.
Depending on your mixture and the look you want, you also may really not have to wipe too much. Just test it out first to see your method.
At our local Sherwin Williams store, we were able to purchase this paint at 40% off. We also purchased two medium-quality brushes with the paint all for a total of $50.83. My friends already had painter’s tape, wire brush, paper and drop cloths to use.
We used around 1/3 of a gallon of paint to makeover this brick fireplace. We had around 2/3 gallon of Loxon paint left over. Because you are diluting the paint, you don’t use as much as you would think.
If you like this tutorial, please give it 5 stars below 🤩🤩🤩🤩🤩. Your support helps us continue to provide unique and budget-friendly DIYs.
How To Whitewash A Brick Fireplace
Equipment
- Cleaning Rag
- Dawn Dish Soap and Water or TSP
- Old Paint Brushes
- Old Cut Up T-Shirts-cotton t-shirts are the perfect material to use to wipe the paint mixture for the whitewash look.
- Drop Cloths
- Optional: Other plastic coverings or paper
Supplies
- Sherwin Williams Loxon Masonry Paint we used the base white
- Water
Instructions
Prep Area and Brick
- Use painter's tape and drop cloths or paper to cover areas not geting painted. Consider taping along the ceiling, wood beams, wall edges, and under the brick where it touches the carpet.
- Clean the brick with a small wire brush. Use a shop vac to clean the mess.
- Wipe down the brick with dish soap and water or TSP.
- Let fully dry.
Whitewashing Brick
- Mix 1:1 ratio of white paint and water in cup.
- Use a paint brush to apply mixture. Paint an small area before wiping.
- Wipe painted brick with old rags or cut up cotton t-shirts for your desired look.
- Continue painting and wiping sections.
- Let paint fully dry and touch-up areas that may need more whitewash paint.
- Take tape off and decorate your newly whitewashed fireplace.
Video
Notes
- No need to buy new paintbrushes for this DIY. Whitewashing brick is the perfect time to use your old paintbrushes. You are going to ruin them on the texture of the brick and having new brushes will not get a better outcome.
- The paint and water will start to separate in your cup as you are working. Make sure to mix the cup occasionally.
- We liked the variation of saturation of color.
- The paint mixture will soak into the brick and change its appearance a little as it dries. Make sure to step back and see if you like how it drying as you work.
- You can always add more paint in some areas or use fine sandpaper if needed.
- If you are working with someone, it went faster if one paints while the other wipes. some areas might not even really need to be wiped.
Love this fireplace !! Looks amazing.
Can you tell me exactly which paint you used? It seems that there are a couple of options. I love the look of the white washed fireplace brick! Thanks.
Hi Laura. I used the Loxon paint (Base white color) from Sherwin Williams watered down 1:1 ratio.
I’ve got a couple questions :).
1. Is water preferred over some type sealant? With just the water and paint, how long will this last?
2. Do you need to apply a sealant over the brick once fully white washed?
Thank you!
Hi. I was worried about using regular latex paint as well. That is why I watered down masonry paint meant for brick. Since it is porous it soaks into the brick and is meant to be applied to stone and brick (even in exteriors of houses which get way more wear and tear). We did not add a top coat of any sort. It has been a year since we have done this whitewashing and it looks exactly the same.
One more question, I’m sorry….
Can I paint my grout? I don’t like the color I have now. It is too dark!
Hi Jeanene. Yes you should be able to paint the grout. Our friends wanted to keep the variation in color in their whitewash project.
Looks great. I’m afraid to get started. Did you use white white? I’m leaning toward grayish white
Hi Deb. Yes, we used a white white. I was a little nervous about that but by diluting and test on a few bricks we were able to see how quickly to wipe off. You can always add more paint but it hard to take away once it soaks in. We also purposely wanted some variation in colors so applied less paint mixture in those areas. Good luck with your project!
Looks great can’t wait to try.