Easy Peel and Stick Flooring DIY Tips and How-To
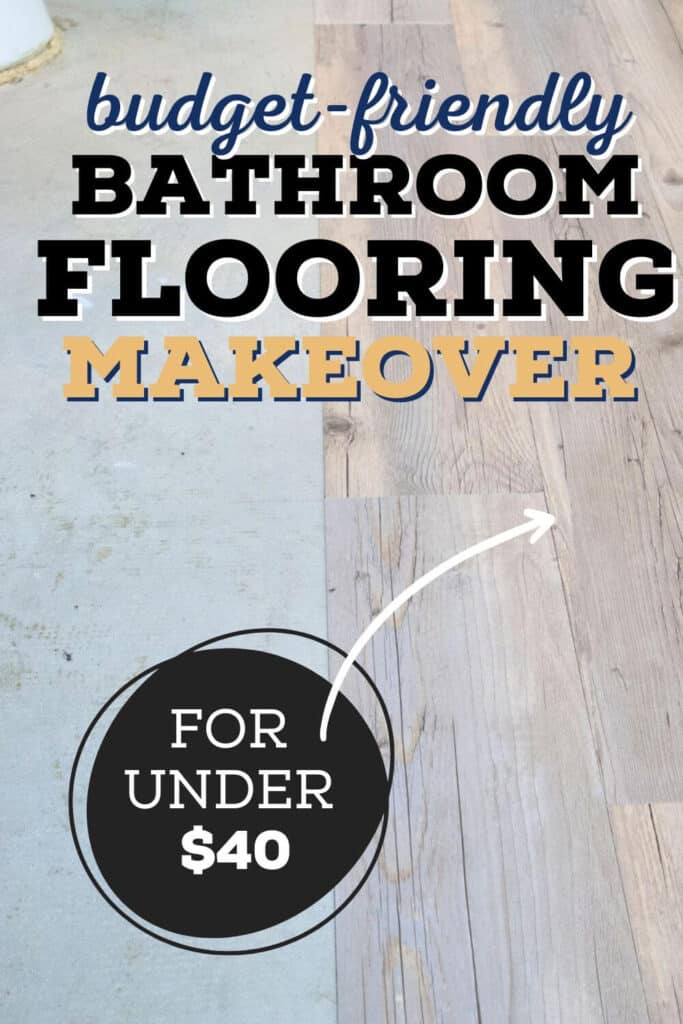
Are you looking for one of the cheapest ways to redo your flooring? Peel and stick vinyl tiles are one of the most affordable options for a flooring makeover. Learn from our experience as we share the ins and outs of installation and get inspired with our bathroom flooring makeover.
*Disclosure: I only recommend products I would use myself and all opinions expressed here are our own. This post may contain affiliate links that at no additional cost to you, I may earn a small commission. Read our full privacy policy.
Why choose peel and stick tiles?
The good news is that peel and stick flooring has come a long way. It can be a great temporary solution or just a good choice when trying to stay within a center price point. We were amazed at all the modern-looking tile options that are out there.
Peel And Stick Options
If you want a more traditional tile look you could consider groutable vinyl tiles to add extra durability to high traffic areas.
You can get more traditional tiles or completely fun patterned ones. There is a tile design for your budget and style.
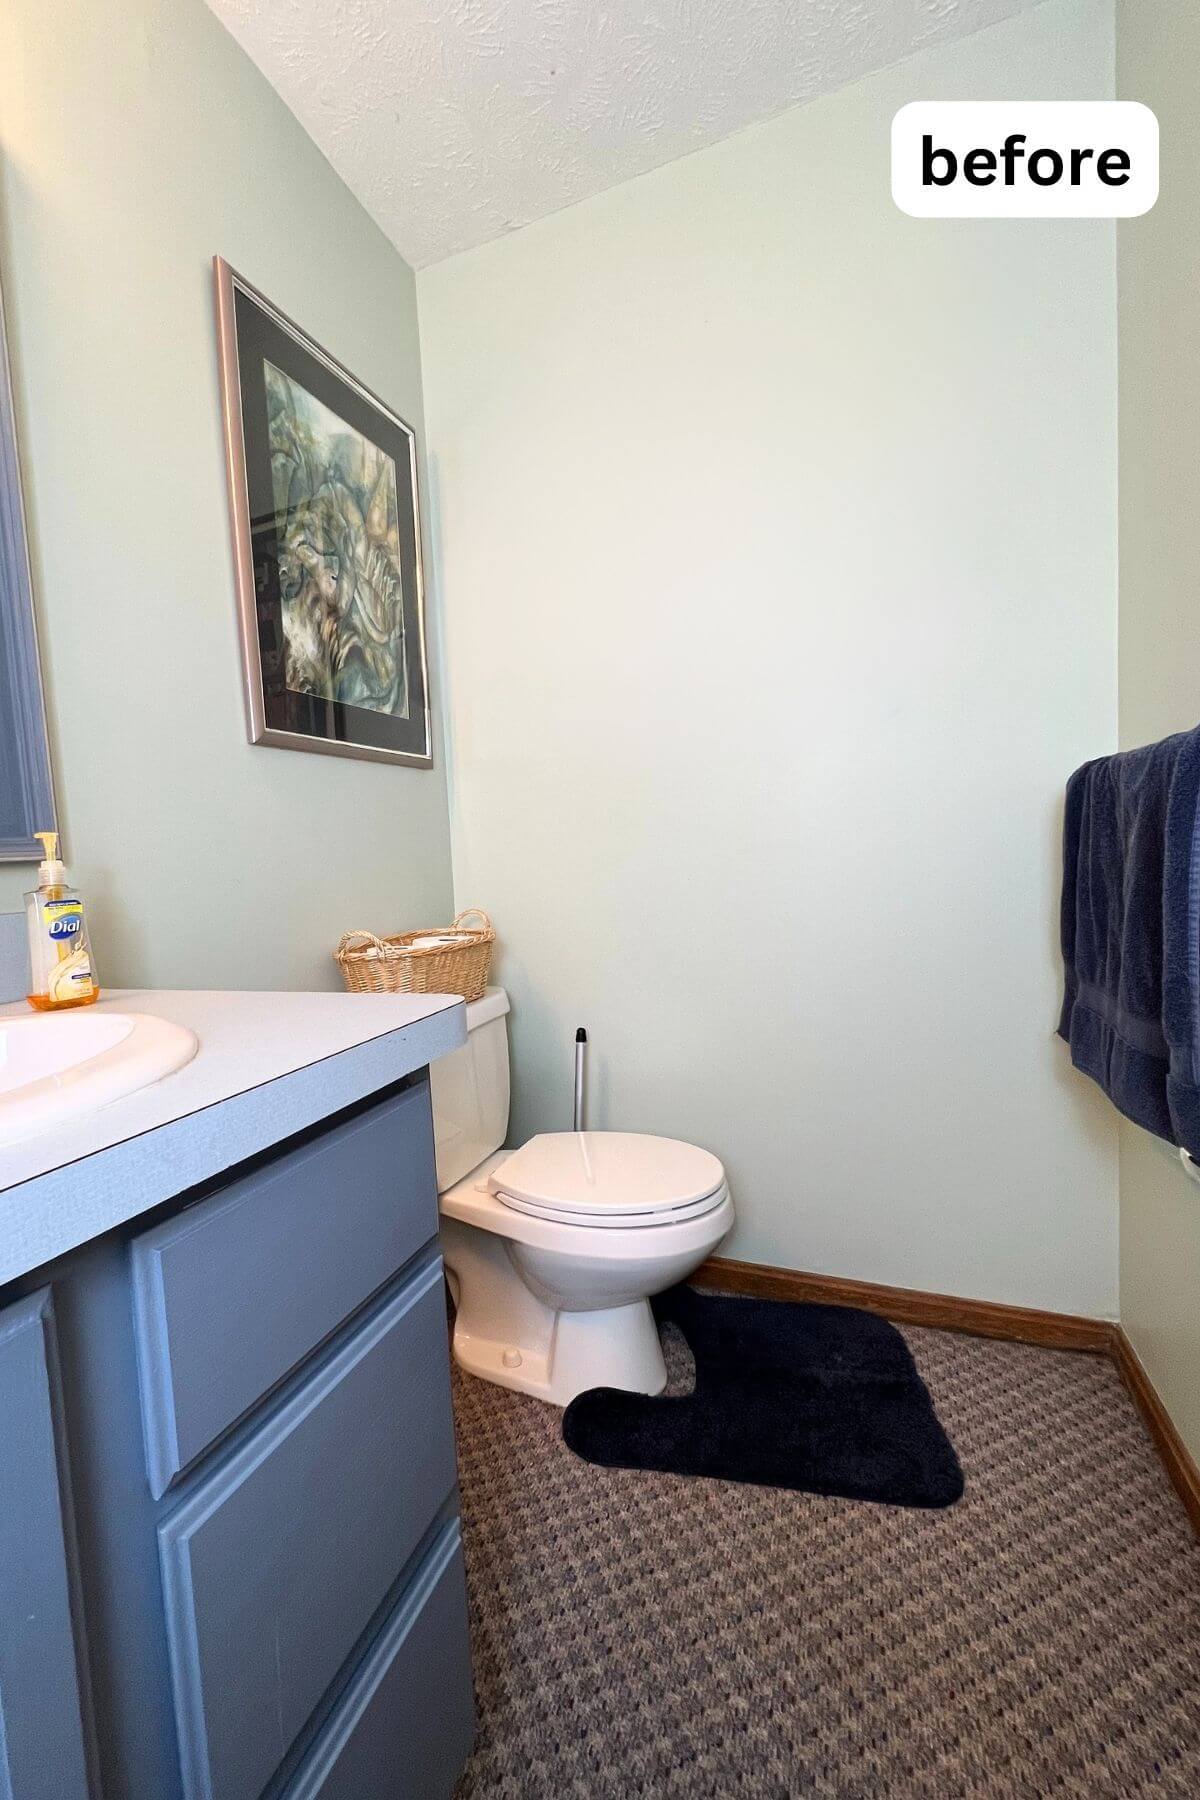
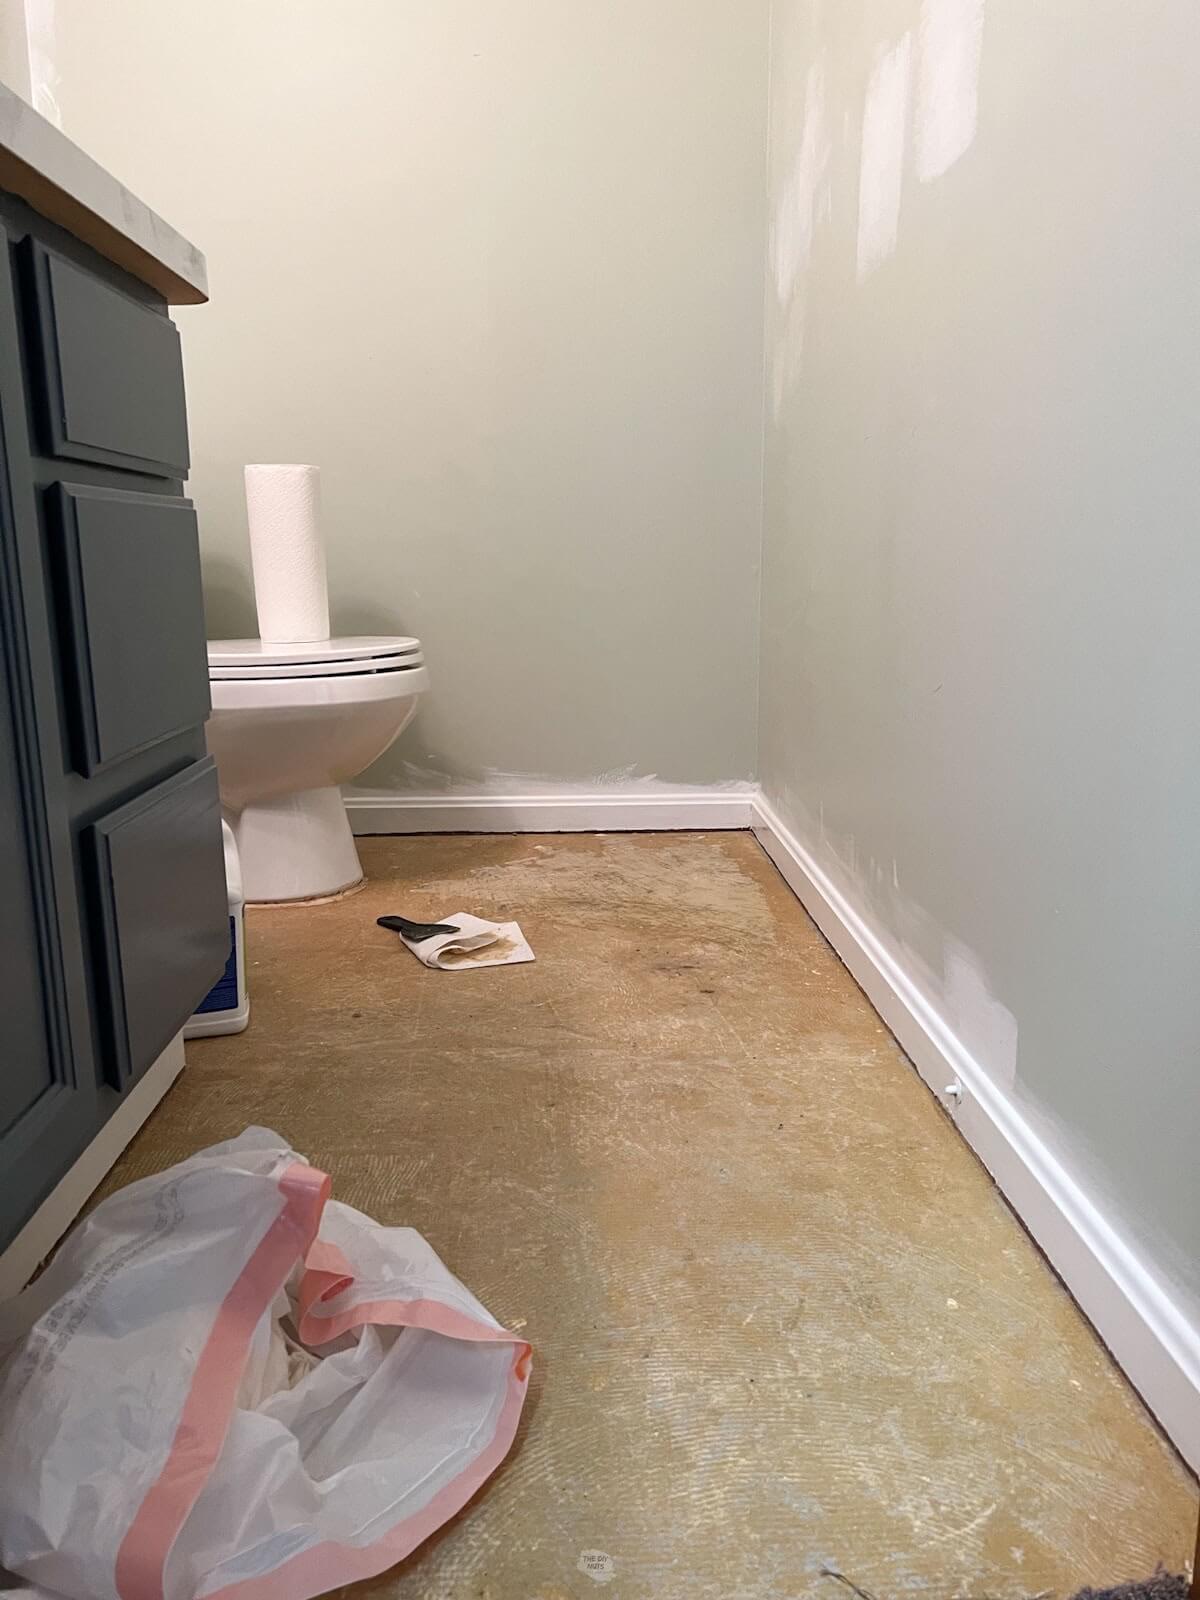
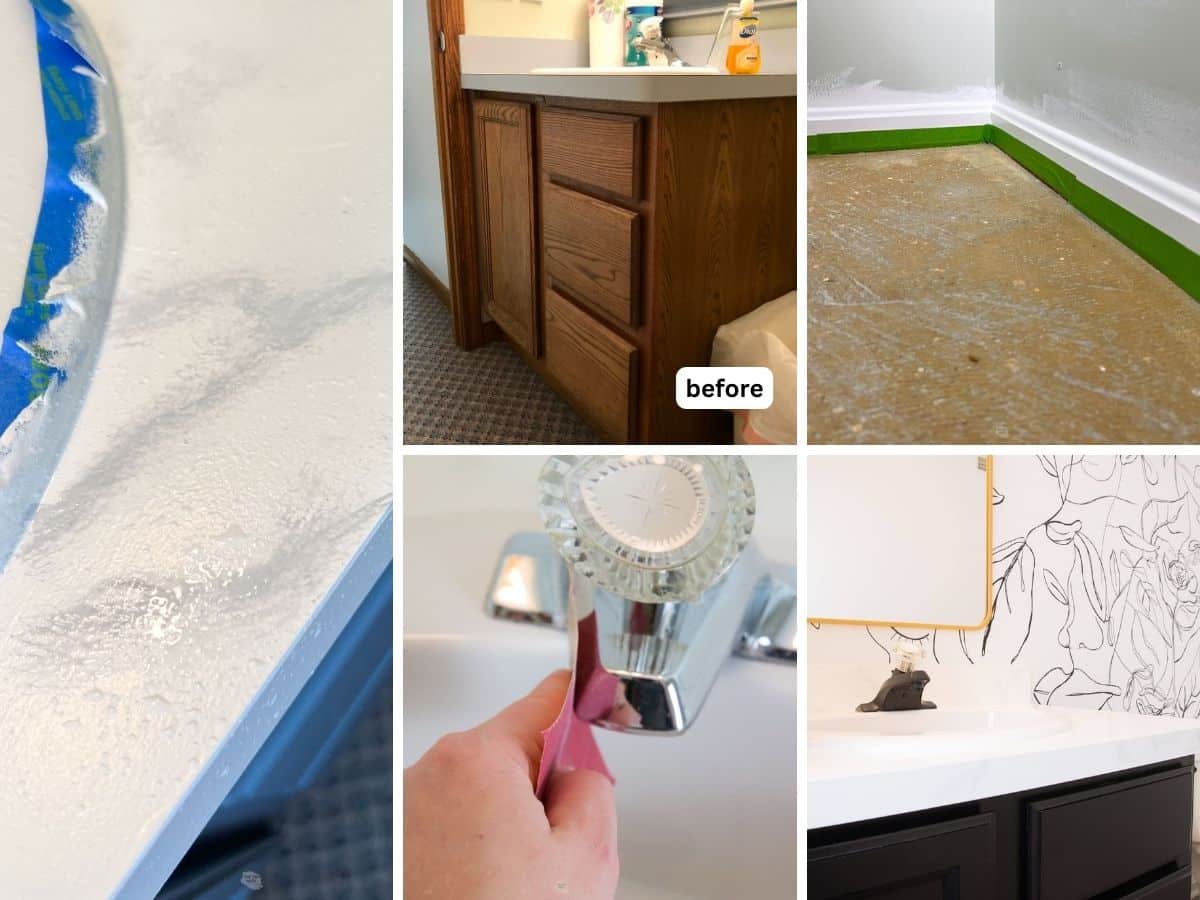
The “Before” Bathroom
Here you can see the old and dated carpet that was in this half bath. We felt comfortable using self-stick vinyl tiles in this space because it is not a full bath and it gets used a very little. We were also looking to keep this bathroom makeover under $150 and adhesive tiles fit right in that budget.
Recommended Supplies
- Speed square
- Shop-Vac
- Hair Dryer
- Safety Gear (such as glasses or kneepads)
- Tape Measurer
- Roller (we used an old ink brayer, but they do sell small hand rollers or you can rent a 100 lb. roller to ensure the best adhesion)
- Pencil or marker
- Sharp Utility Knife and Extra Blades
- Peel and Stick Vinyl Floor Tiles: Here are the gray barnwood peel and stick planks we used.
- Sharp Scissors
- Transition Strip
Optional:
- Shoe Molding
- Acetone
- Contour Tool: This tool can really help make those cuts around molding and your toilet easier.

Tip When Buying Your Tiles
Buy more vinyl floor tiles than you need. Make sure that you can return the unused pieces. This allowed for us to be very picky when laying out the design of the floor.
Also, some of the tiles were stuck together and required a little extra cleaning. If you have extras you can avoid this by only using tiles that are as clean as possible to begin with.
How To Install Peel-and-Stick Tiles
Before You Begin
You need to remove any old flooring. Our bathroom floor was old carpet on concrete (not our doing). We had to remove the carpet and carpet glue. We also chose to remove our bathroom door and paint it to make our flooring installation easier.
For the most professional looking fit, you will want to remove your toilet. We did not do this as it is only our basement bathroom. We were also nervous we would have issues with the toilet if we moved it. It is the original toilet that was put in this space and we really didn’t want to chance needing to replace it.
You may also want to remove your baseboards. We chose to add shoe molding and paint all the baseboard white. We did not want to deal with the hassle of removing the baseboards in this space.
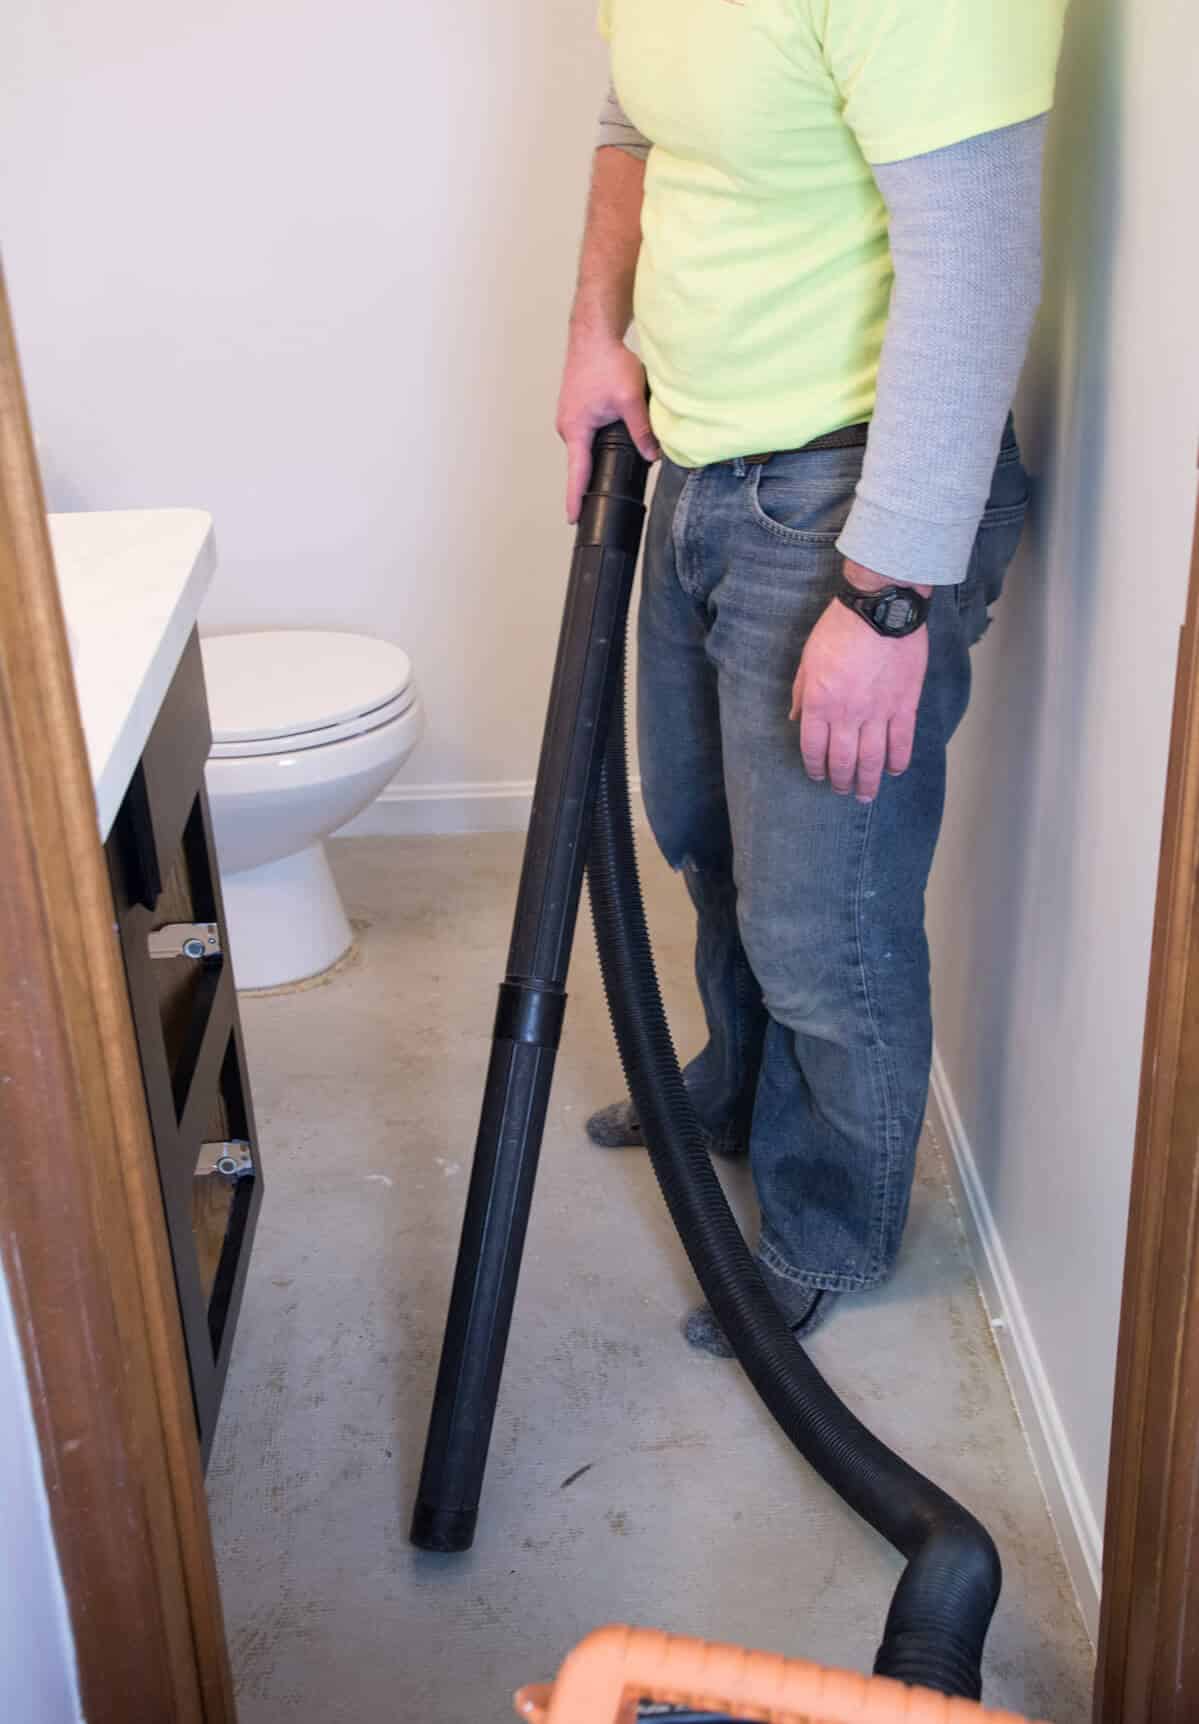
Prep The Floor
These steps may vary depending on the materials of your floor. Some people will install peel-and-stick flooring over existing surfaces, such as ceramic tile or old laminate flooring. If you are doing this, you may want to consider painting the old grout lines or filling in with thinset mortar to give you an even subfloor. Sand any areas that may not be completely flush.
No matter what you are installing the new tiles on, the surface needs to be:
- Free from any debris, dirt, and dust before installation. You can vacuum and wipe the subfloor to clean it.
- Level: If your flooring is not level, you will have a difficult time installing new peel-and-stick tiles on top.
- Completely Dry: The adhesives on the tiles will not stick well if there is moisture on your subfloor. If you have cleaned the areas with a solvent or soapy water, make sure that you have allowed proper dry time.
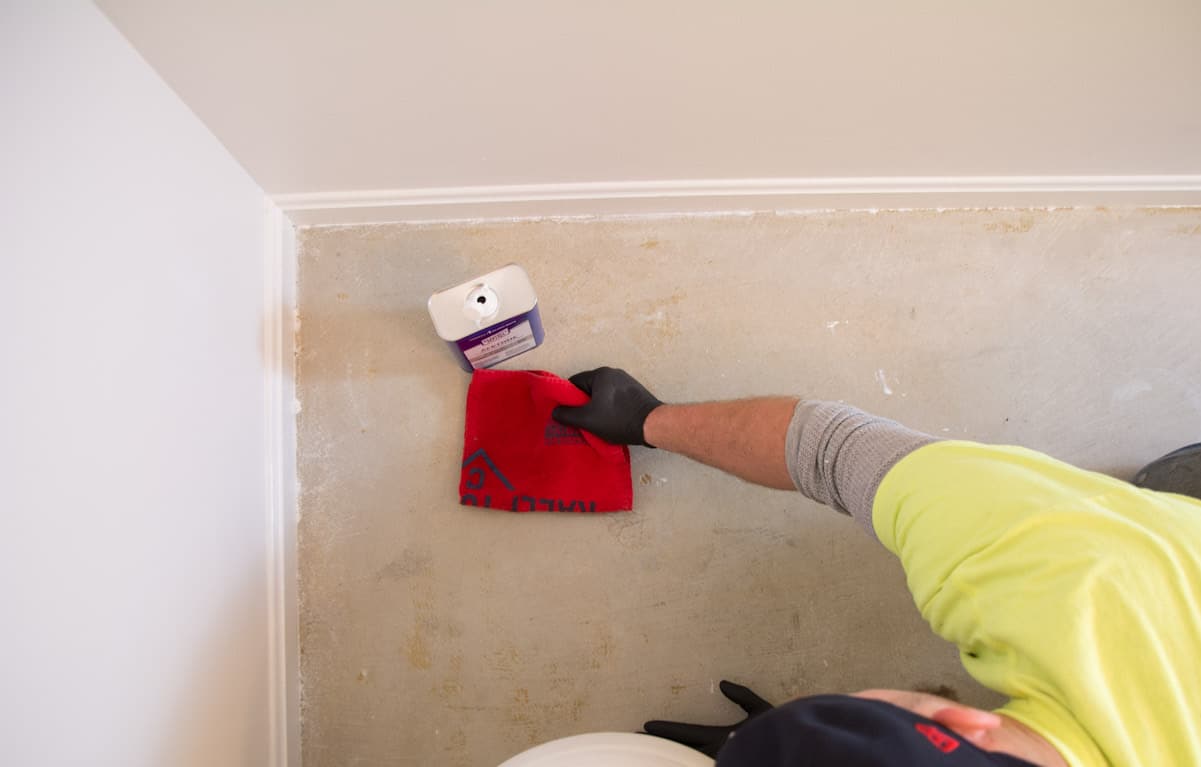
Optional Cleaning On Concrete
In a well-ventilated space, you can also wipe your concrete floors with acetone. Make sure to wear gloves and a mask when performing this task. Acetone is a strong solvent and may not be suitable for everyone.
Step 1: Unpack Tiles
There are a few reasons you want to do this. Unpacking your new flooring first allows the self-adhesive tiles to acclimate. This allows them to adjust to room temperature and humidity before installation.
You may also notice that some of the tiles have blemishes or that you do not like the patterns on some. Our faux gray wood planks had around five different pattern variations printed. We also made sure to set aside any that were not in perfect condition.
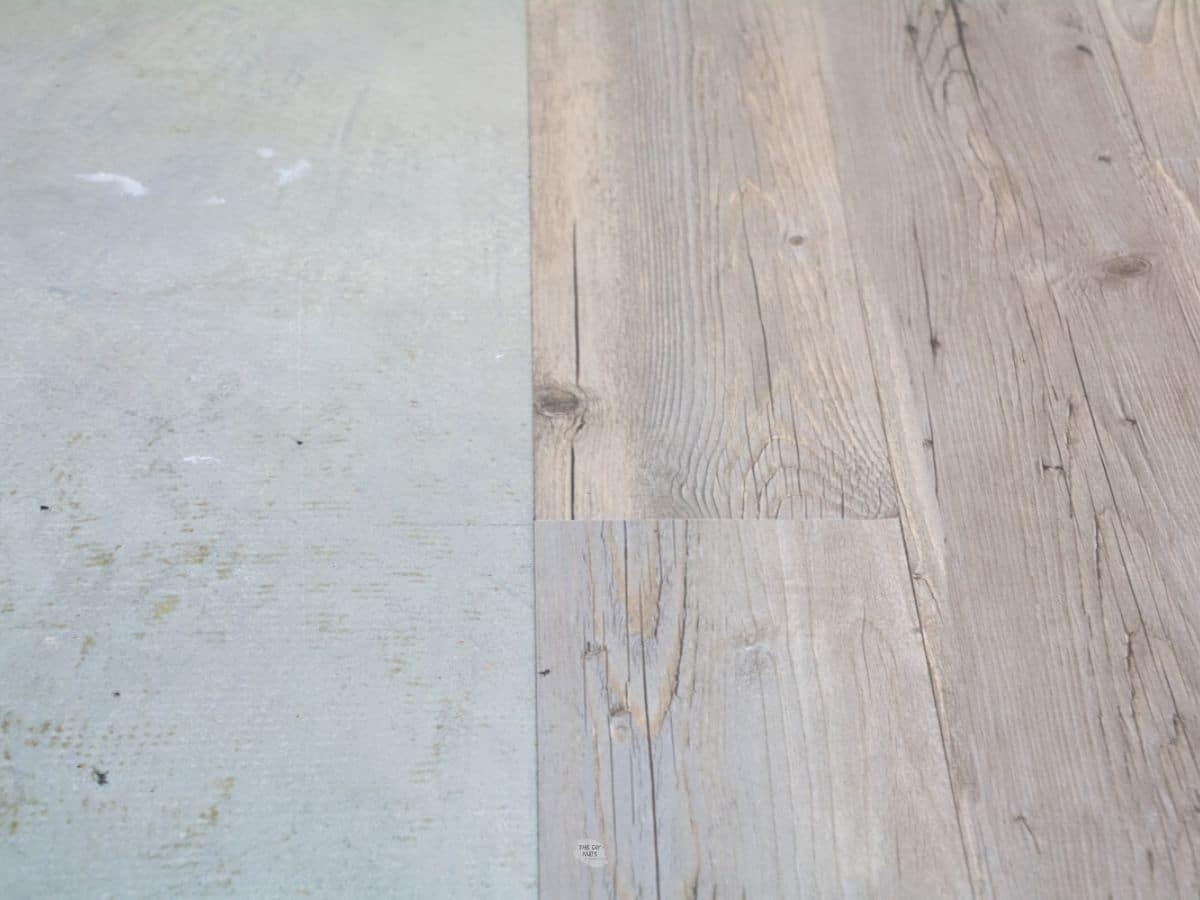
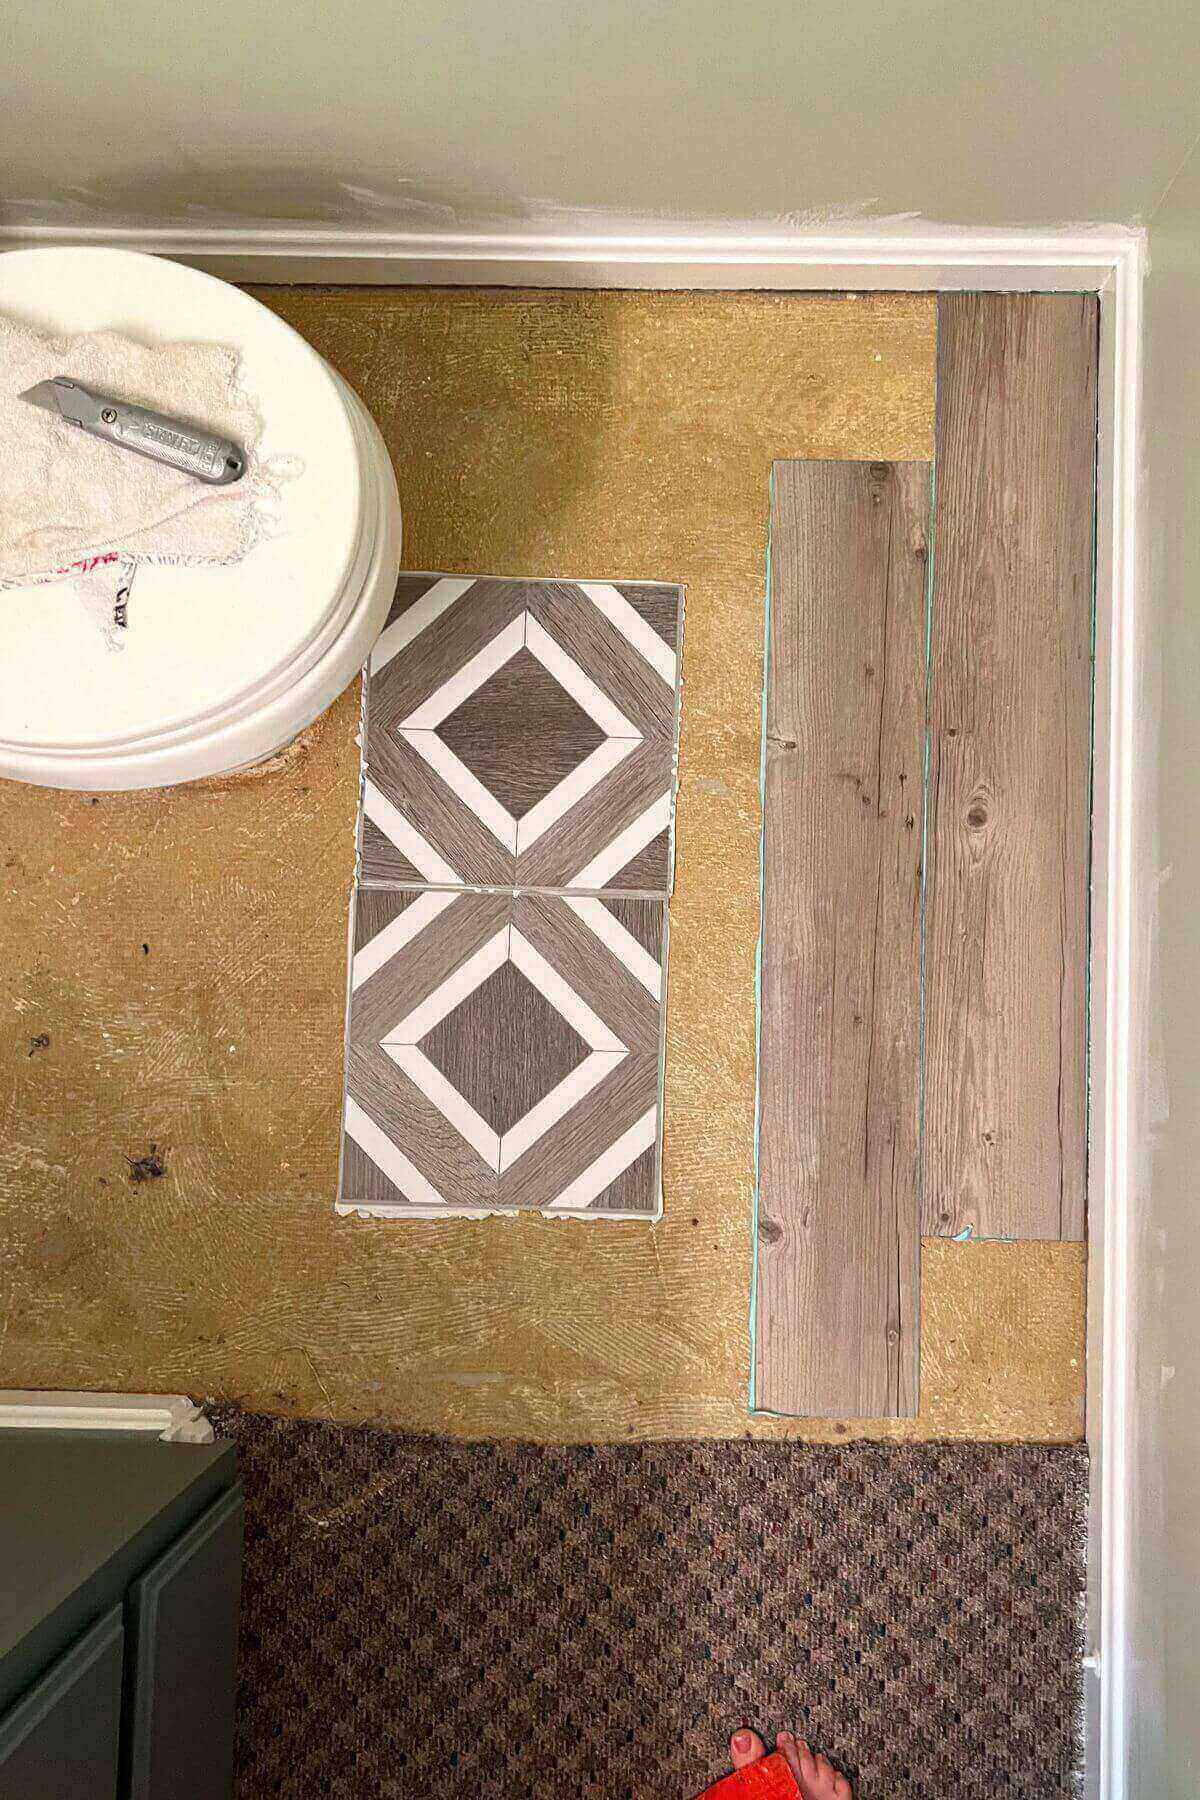
Step 2: Dry Fit Your Tiles
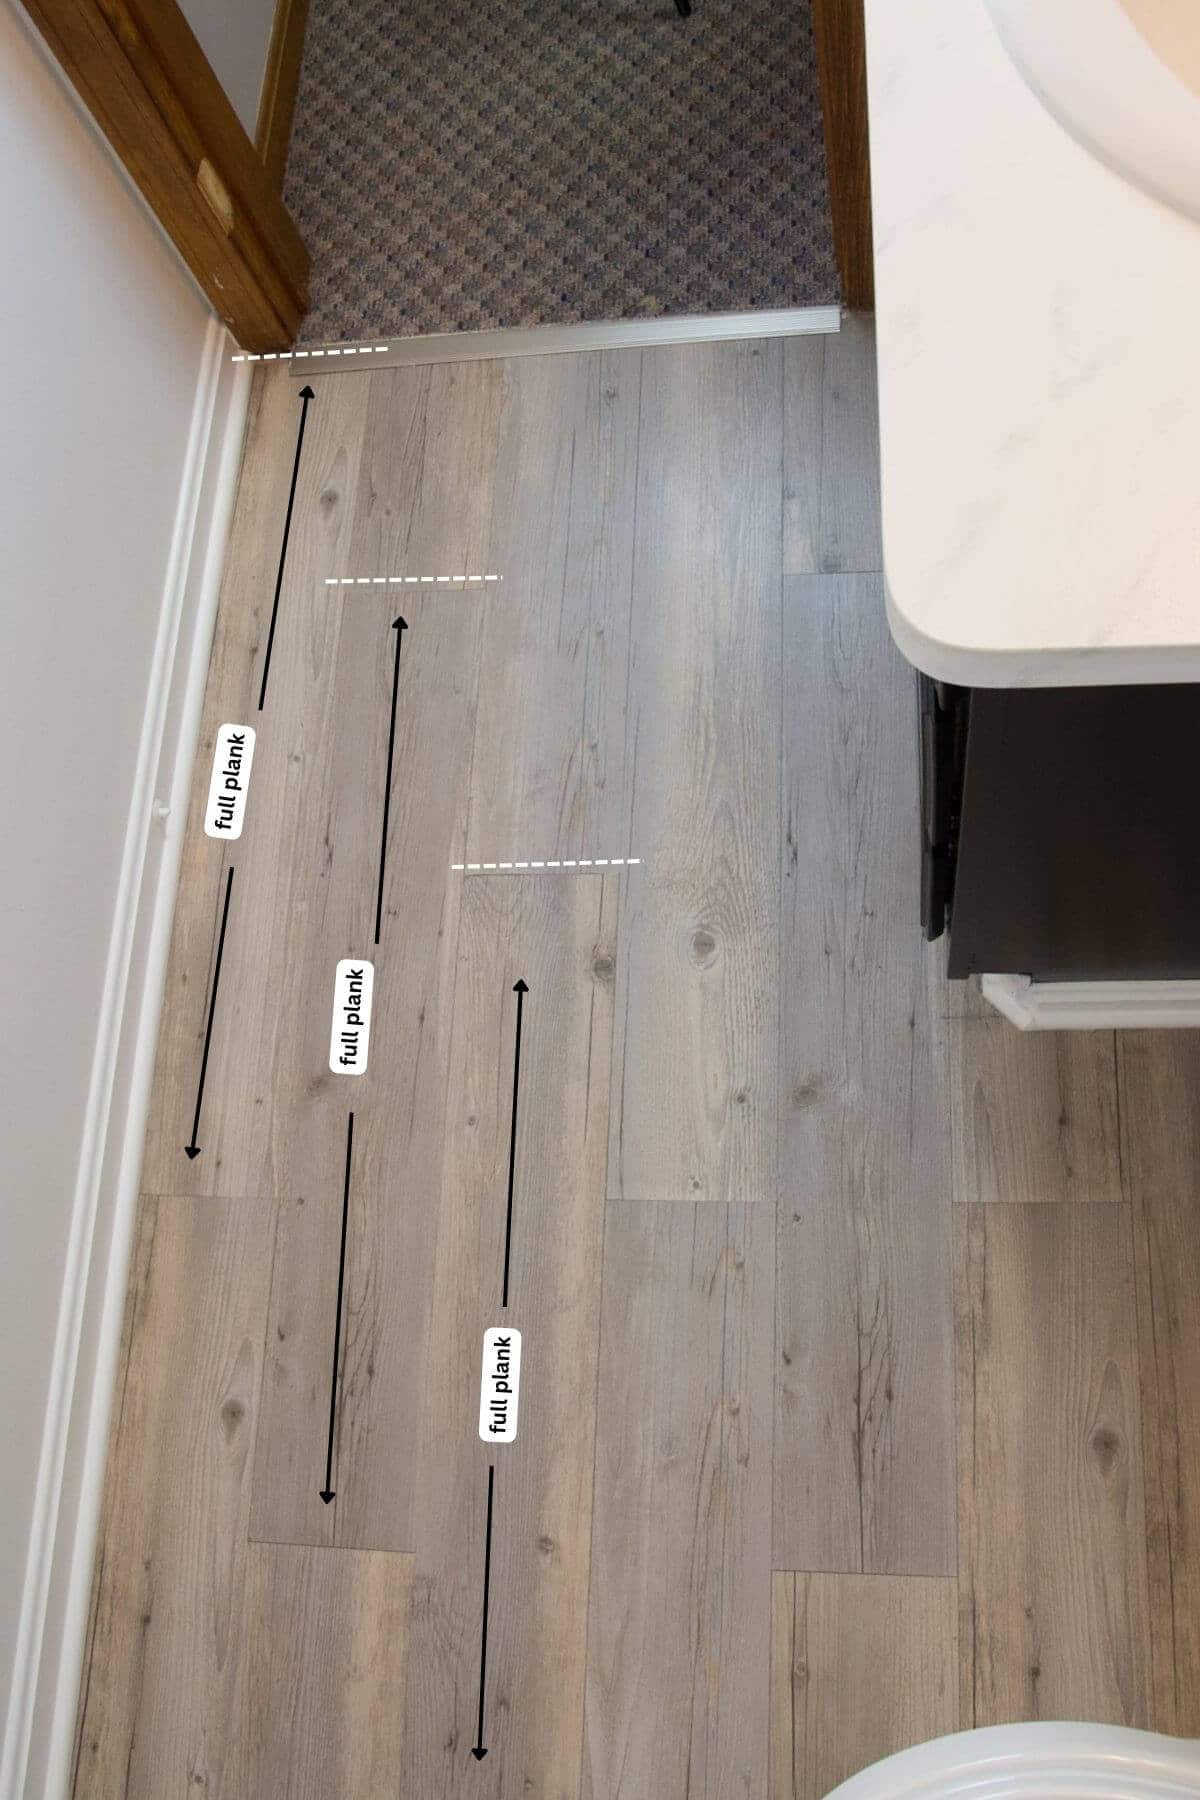
Decide on the flooring pattern you would like. For wood planks, you need to consider where the seams are. We knew that we would repeat the same pattern every 3 rows. You can also check to see if your room is square.
By dry laying the tiles on your clean floor, you can ensure you have enough to cover the entire area. You will also be able to check that the layout of the tiles looks even and balanced. This can help to avoid any issues with uneven spacing or mismatched tiles that can occur if you start the installation process without careful planning.
If you have a larger room, you can make a chalk line down the center of your room. Consider building off of this straight line or using as a guide.
If the room is not a perfect rectangle (and most aren’t), starting from the center will actually help to make the tiles more even at the edges of the room. As you work, you can adjust the layout to avoid having narrow or uneven tiles at the edges of the room.
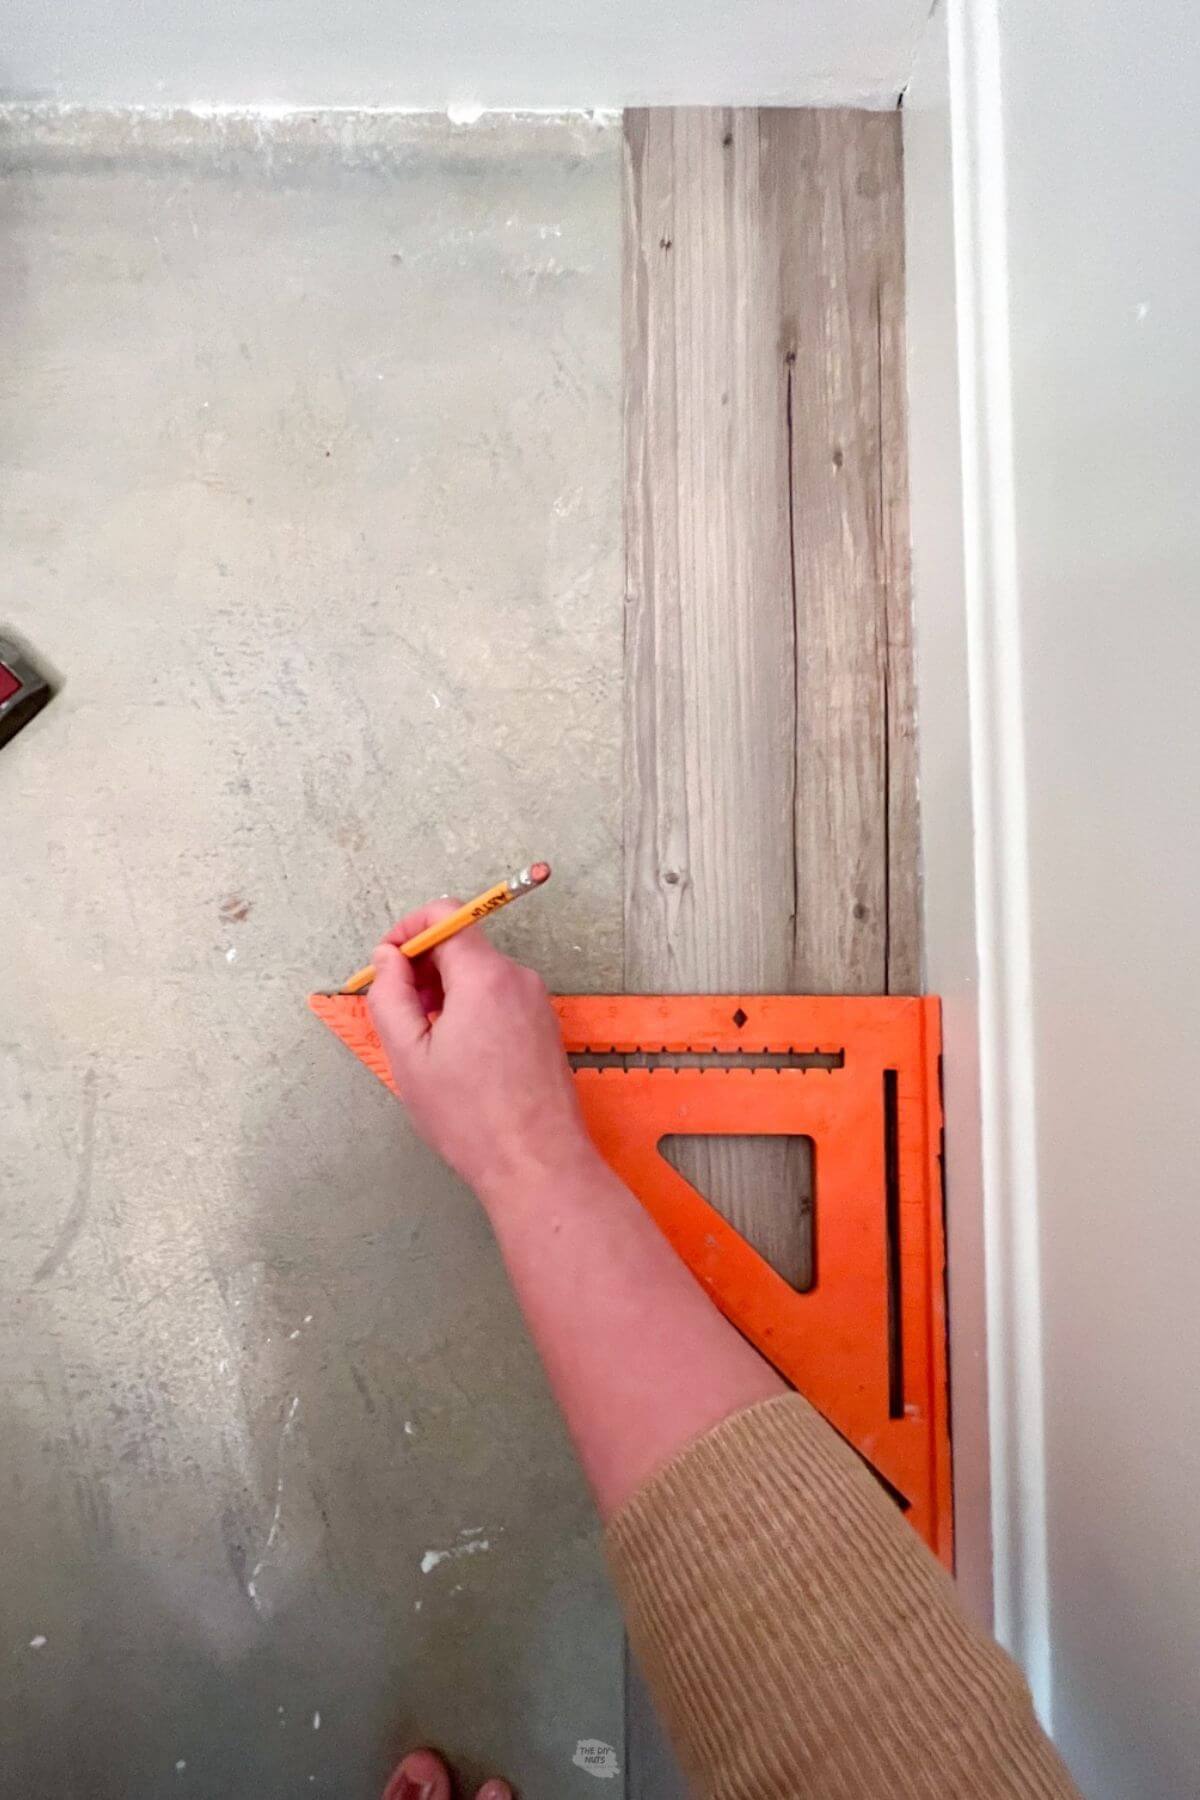
Step 3: Cut Tiles
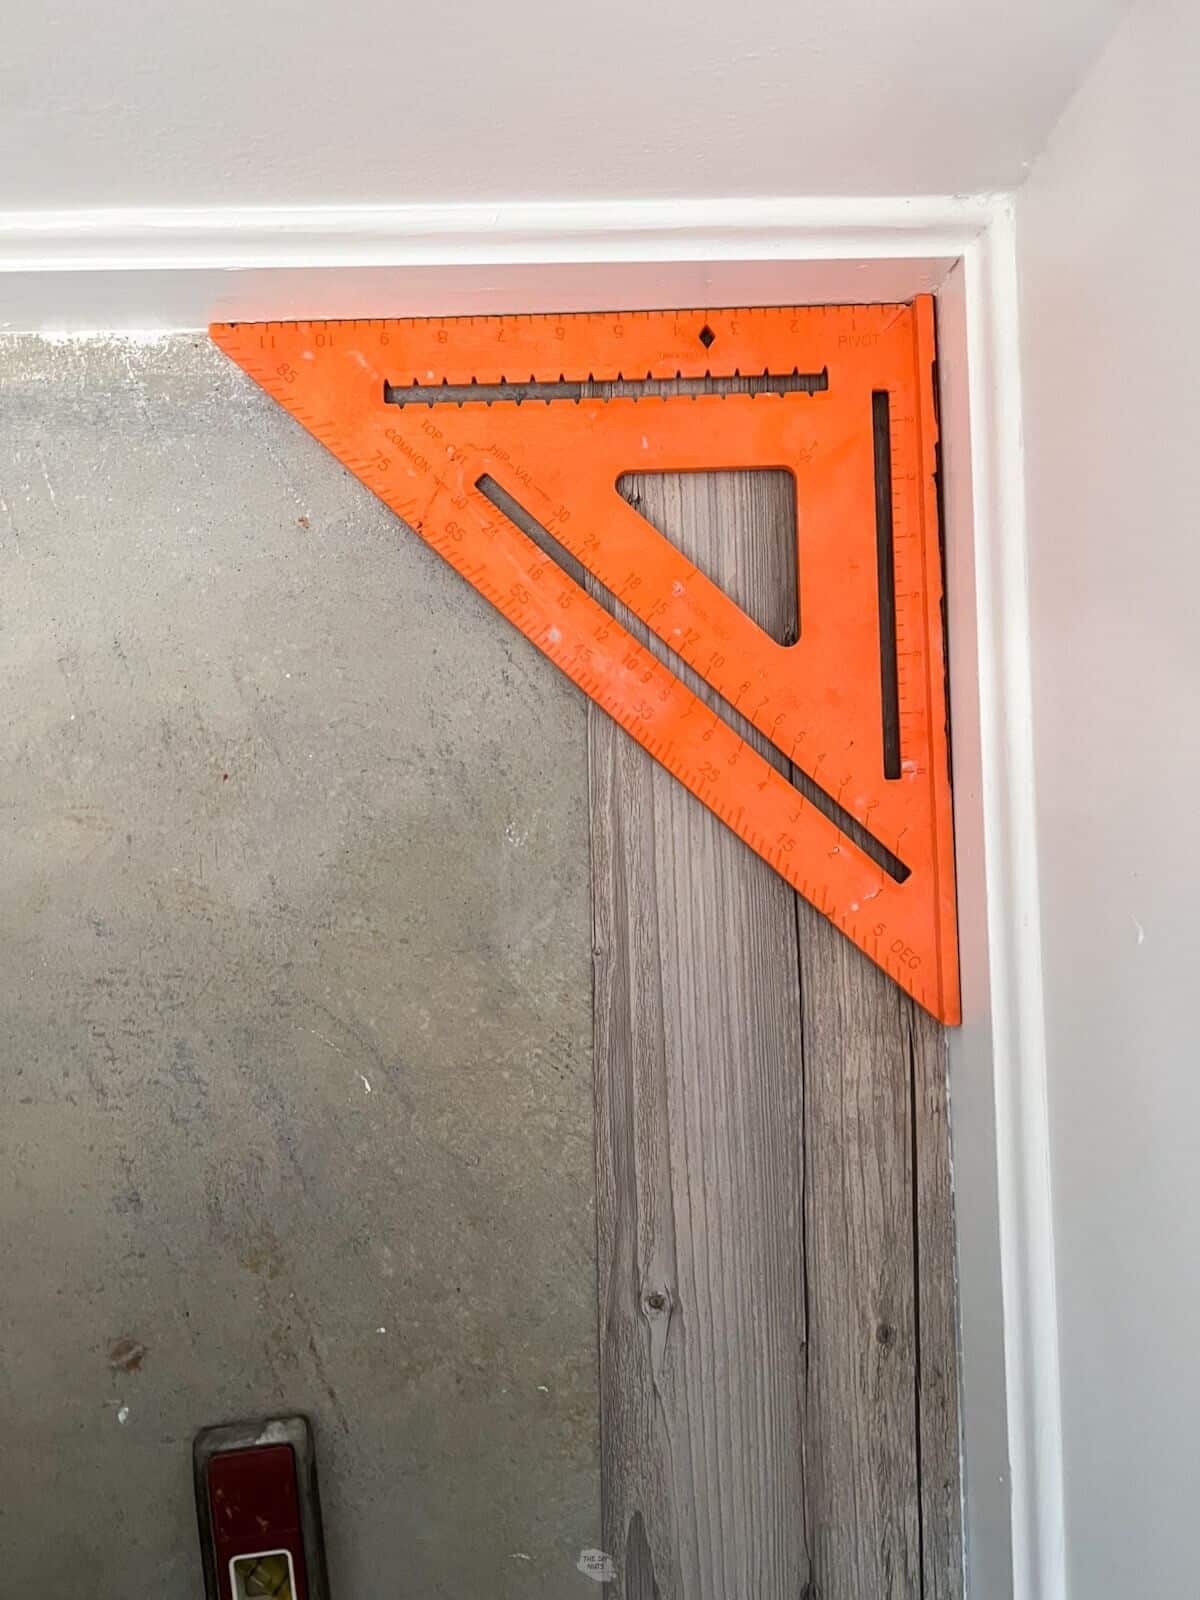
When the planks need to be cut, measure carefully and use your speed square and a utility knife to score the back of your tiles. You may need to go over the cut line a few times. Then snap the tiles for an even break.
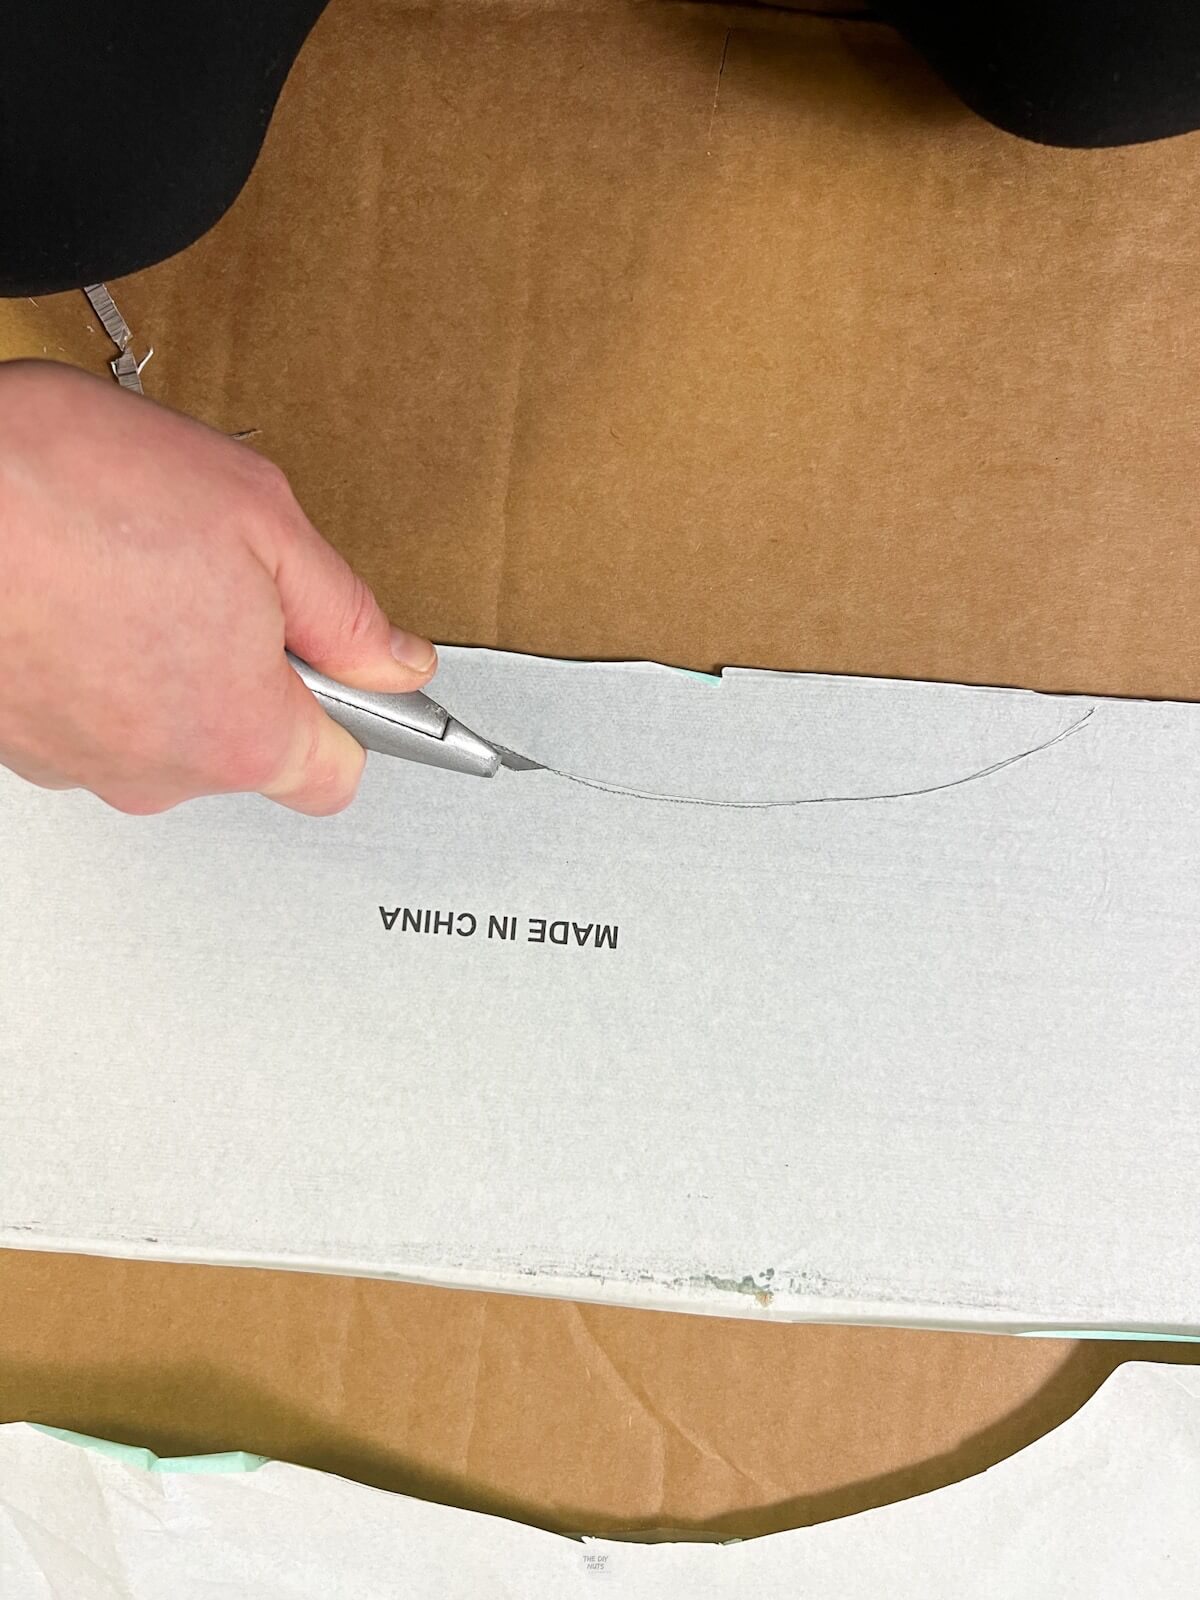
For complicated cuts, consider using a hairdryer to warm the tiles to make the cuts easier. Be patient and take breaks when needed. This part did require a little elbow grease and patience.
Tip: Use a contour tool to help easily measure non-straight cuts.
You can also use a pair of high-quality scissors in some areas to trim excess or make hard cuts. This can be hard on your hands, but I was able to have better control for a few cuts.
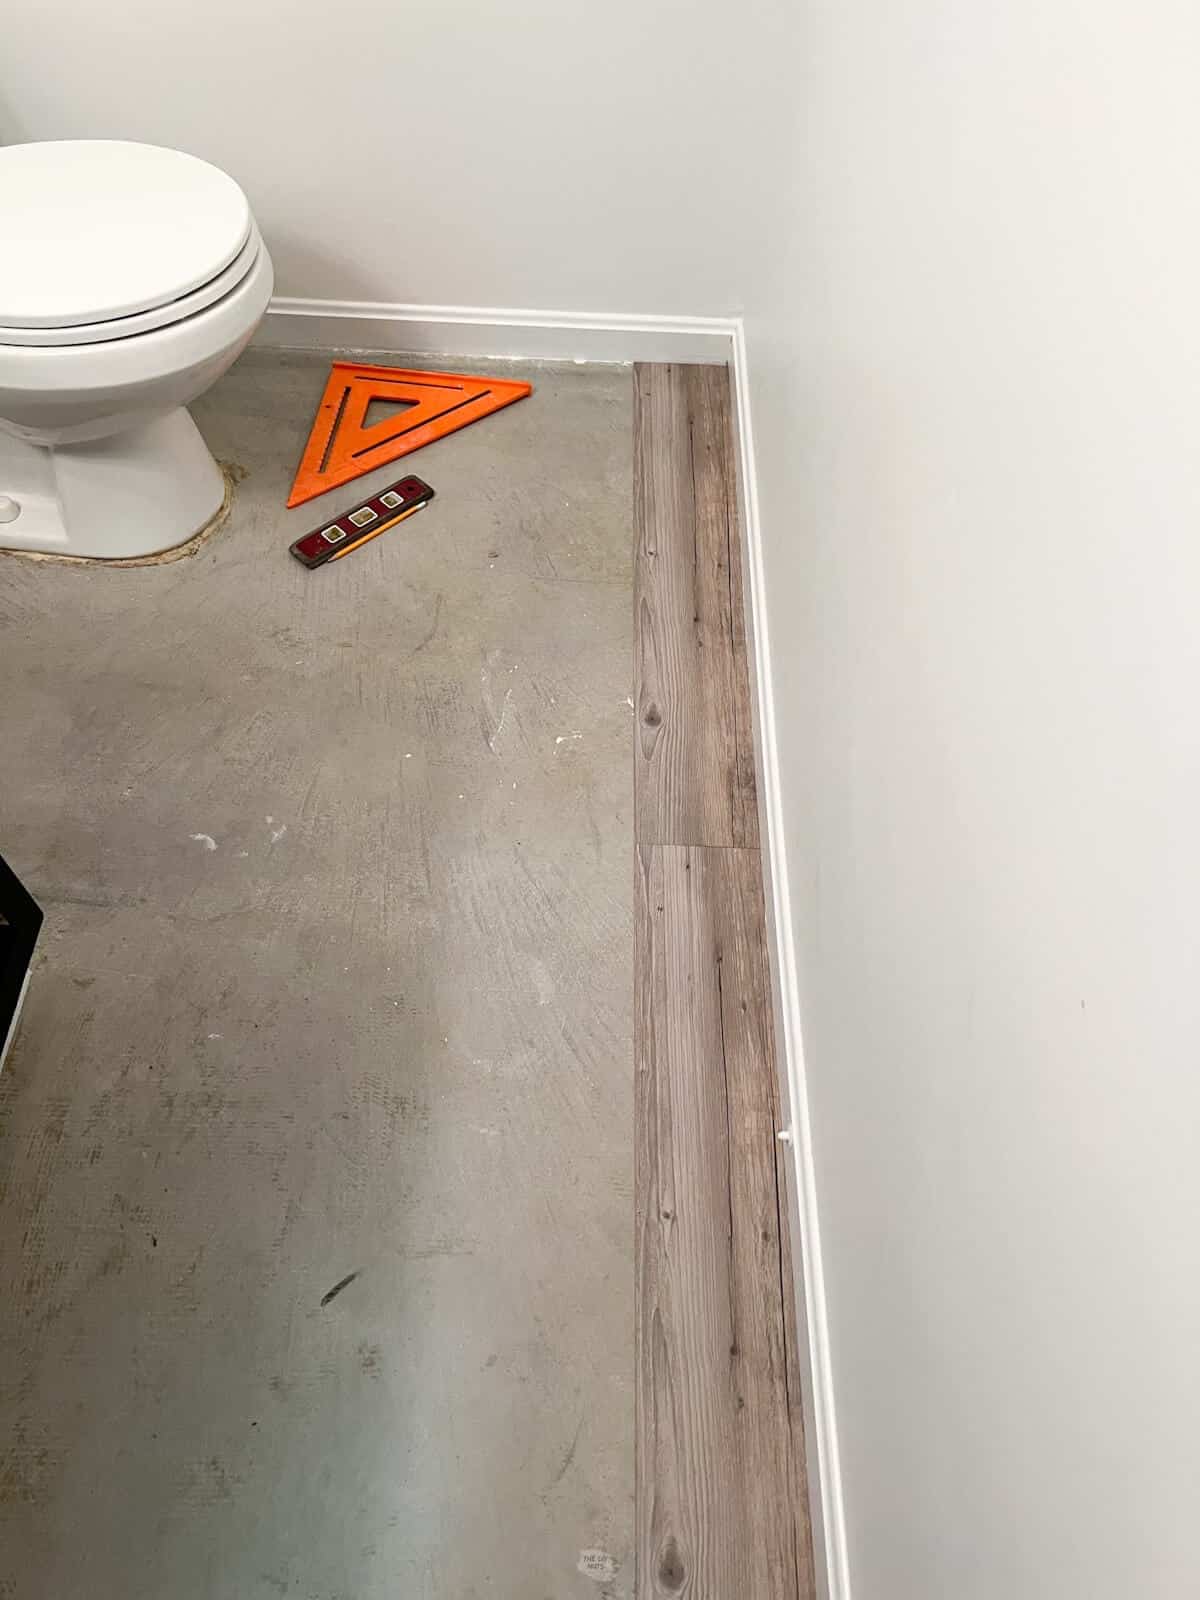
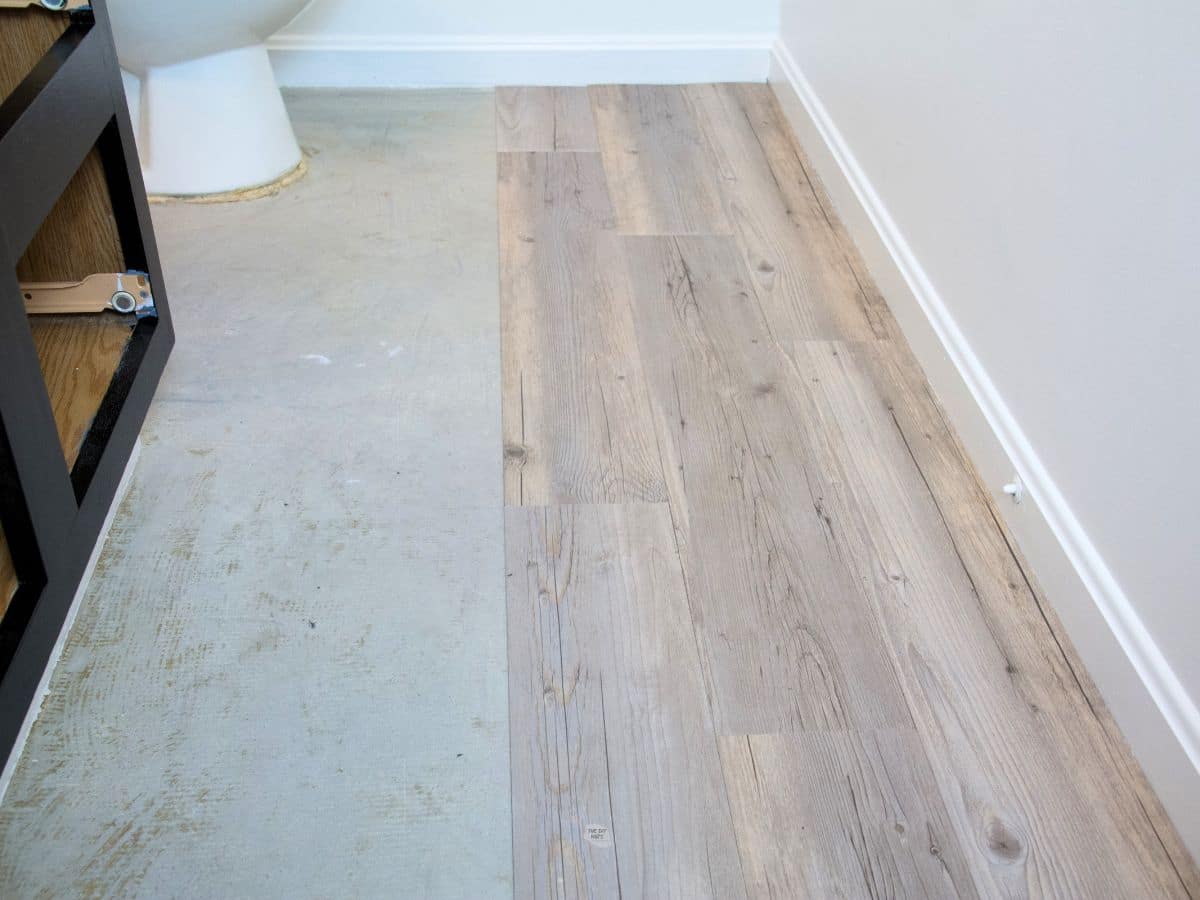
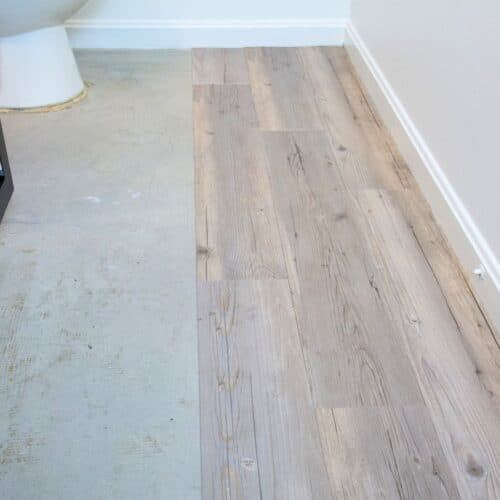
Step 4: Begin Installation
Our room was pretty square and then the length of the bathroom was almost 2 full tiles or planks long. Therefore started in the corner of the room. Due to the small floor space, we did not dry fit the whole space, but worked in sections once we had a general idea.
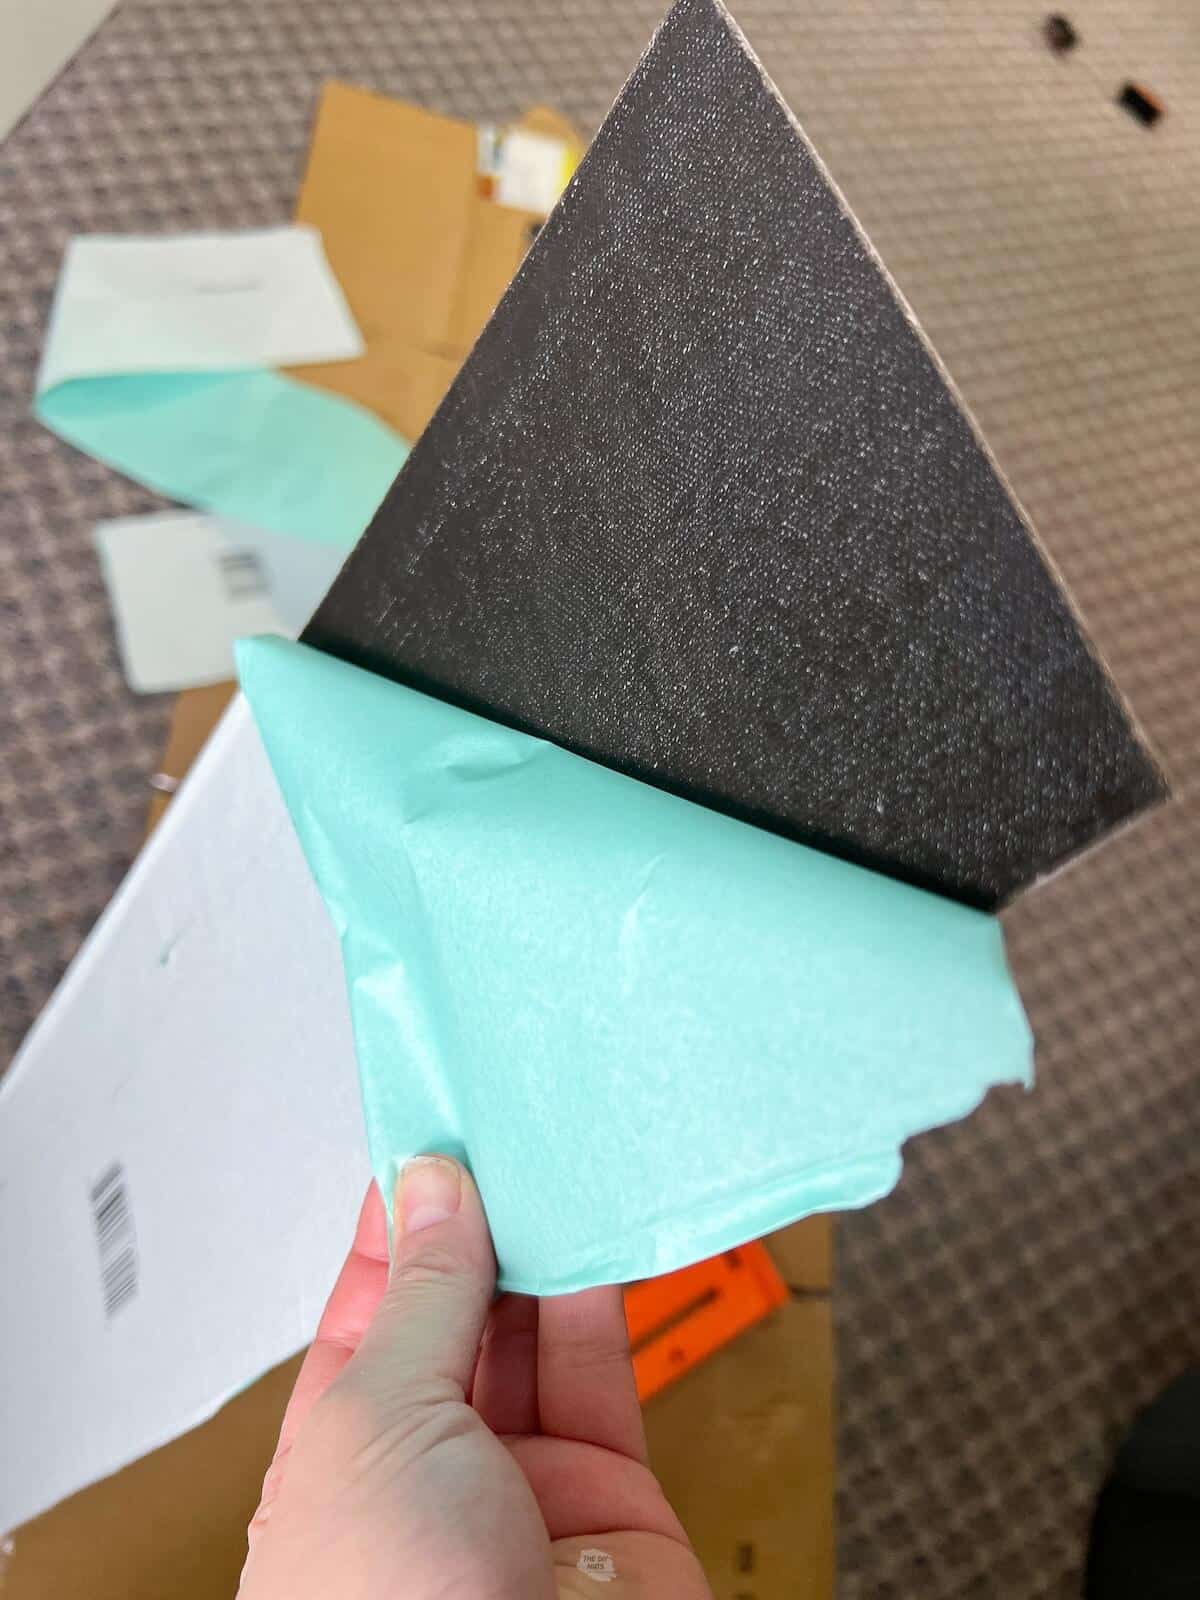
Remove Paper Backing
Once the planks were cut, remove the paper backing. Try not to touch the tile adhesive too much. Line up the plank and lay it down. Be sure that you are happy with the placement before pushing down. For the type of tiles, we tried to keep our seams as tight as possible.
Read the manufacturer’s instructions to find out the seam gaps and the amount that should be left open around the perimeter. You can also use your speed square to mark where the seam for the next plank should go.
Use Floor Roller
Once a row was complete, we used a roller to help even push the adhesive into the concrete.

Step 5: Continue Installation
Repeat the above steps to complete the whole DIY flooring installation.
Step 6: Add Finishing Touches
Install Baseboards or Shoe Molding
We chose to miter shoe molding after painting it white to match our baseboards.
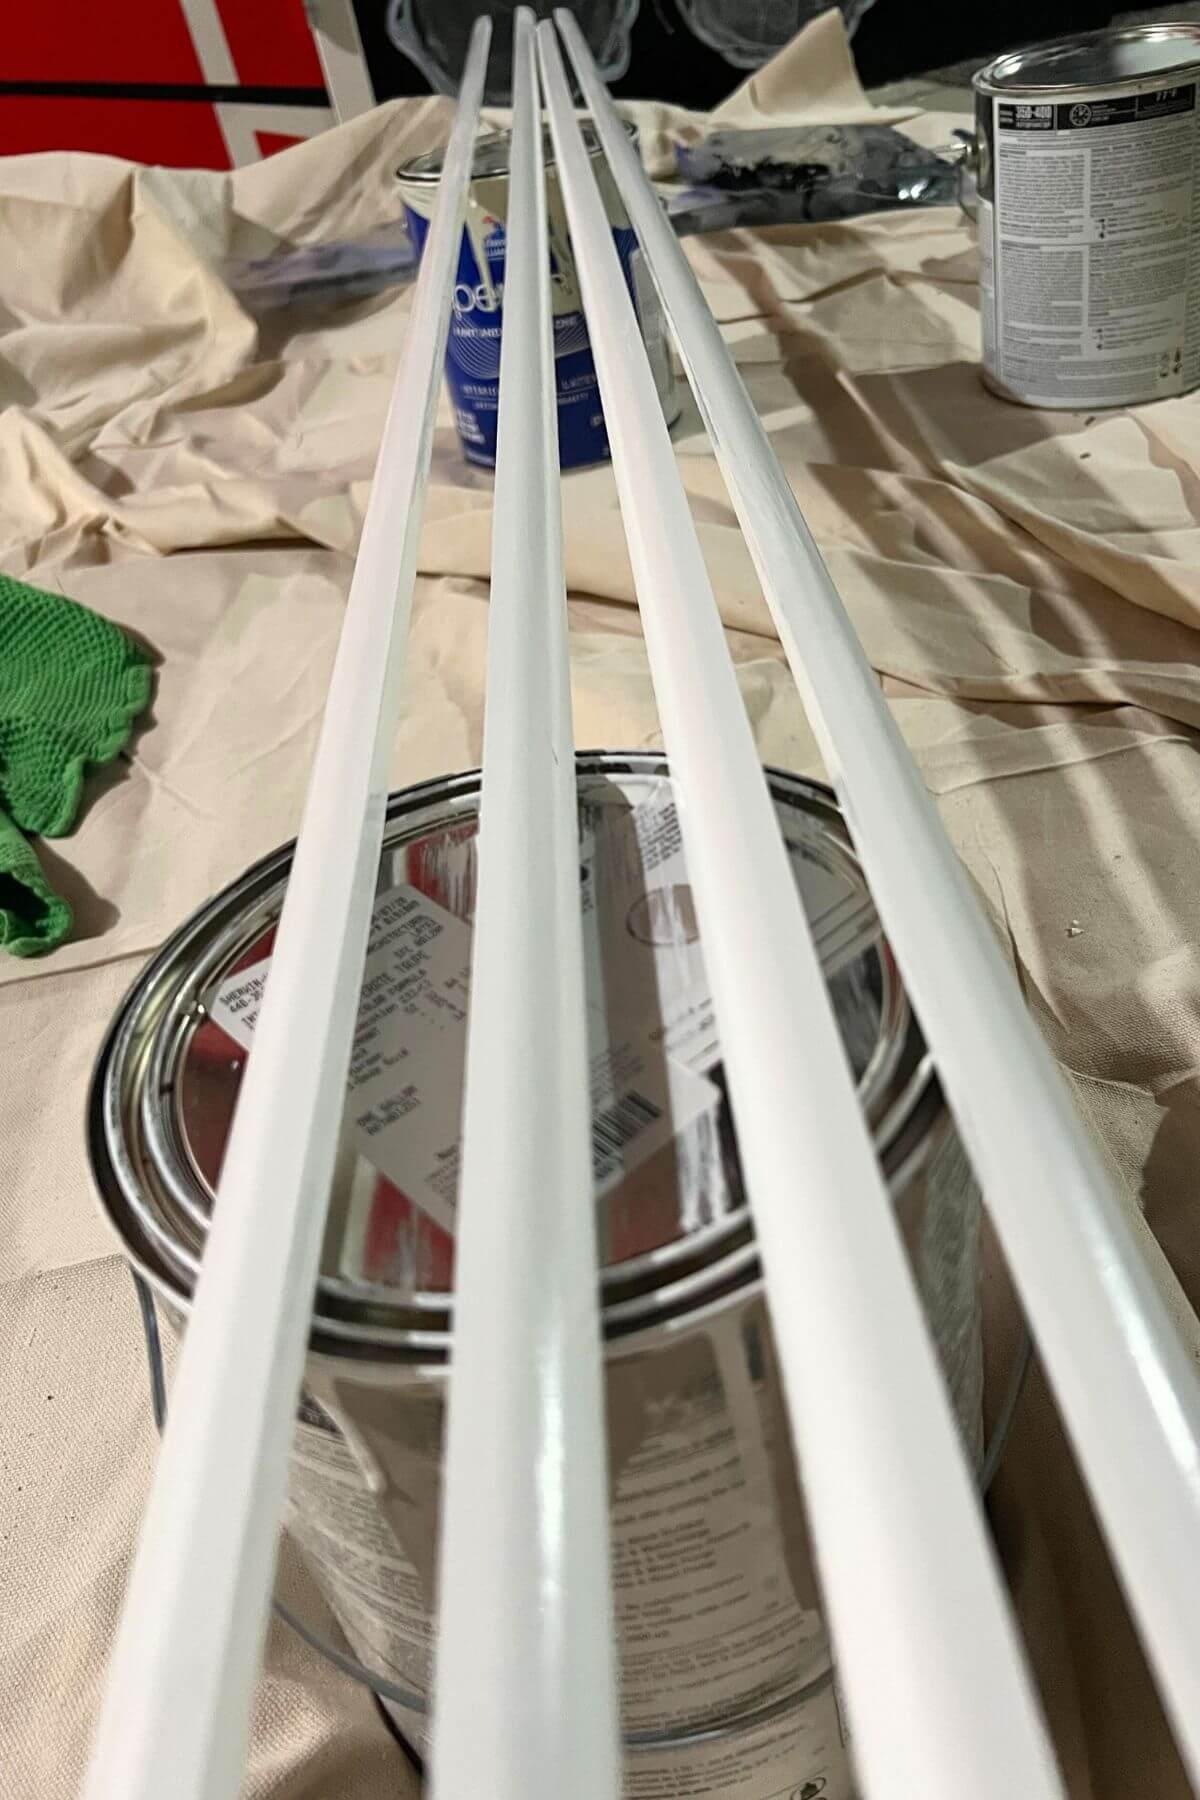
The shoe molding was installed on top of the flooring with a nail gun. To finish the look, I caulked any seams and small holes and painted one coat of Trim paint in those areas.
Caulk Around Fixtures
In this half bathroom, this meant using silicone caulk around the toilet to limit moisture that could seep under the tiles.
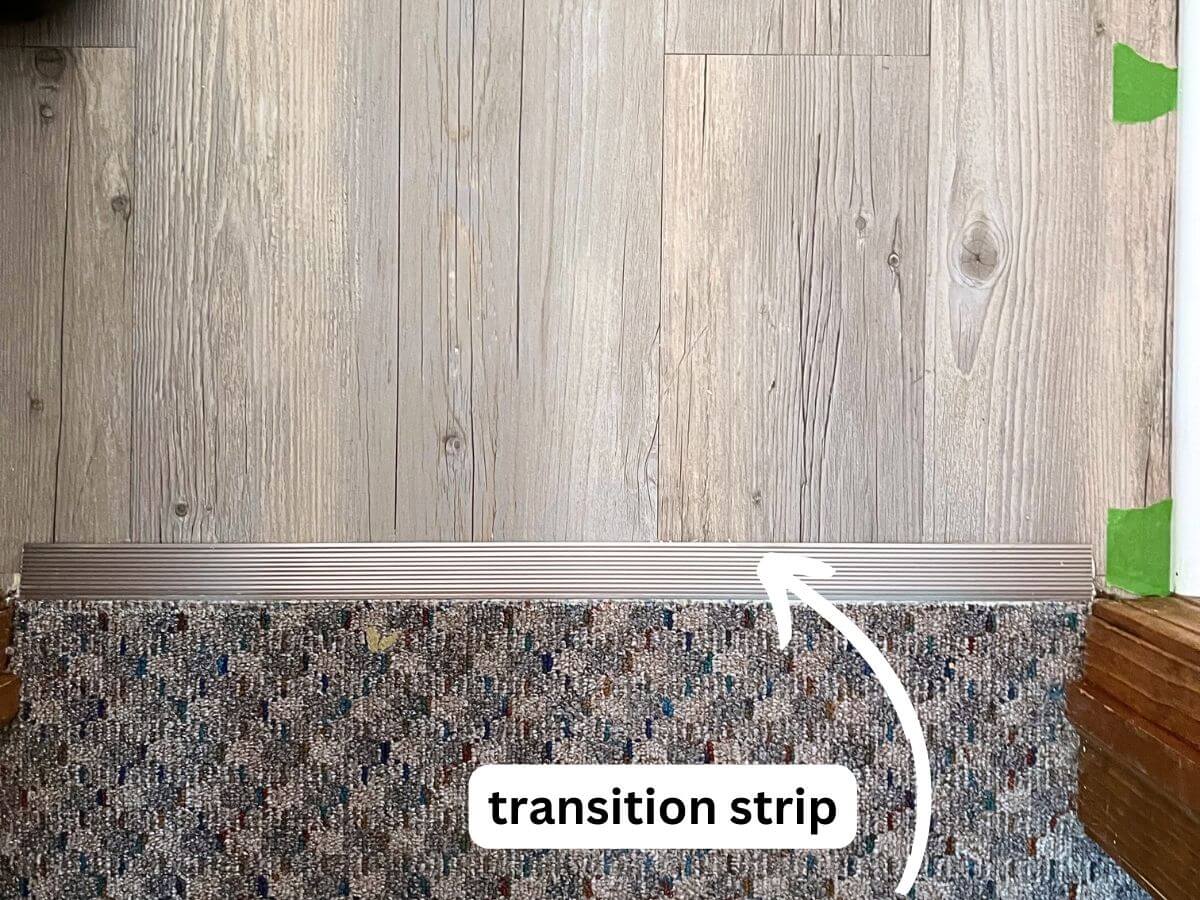
Install Transition Strip
Depending on the type of flooring in your surrounding area, you may need to install a flooring transition strip near your door frame.
Our Real Life Tips
- Carefully look at the patterns and quality of the tiles before installing them.
- Save extra tiles or planks in case you need to easily replace any tiles.
- Take your time and take breaks.
- Look at your flooring from a distance while working to ensure that things stay straight and patterns work well together.
- Apply pressure when installing with a roller. This will help to ensure a long-lasting, durable floor.
- A good rule of thumb is to estimate 10% extra needed for mistakes and cuts when buying flooring. It is always better to have more than run out.
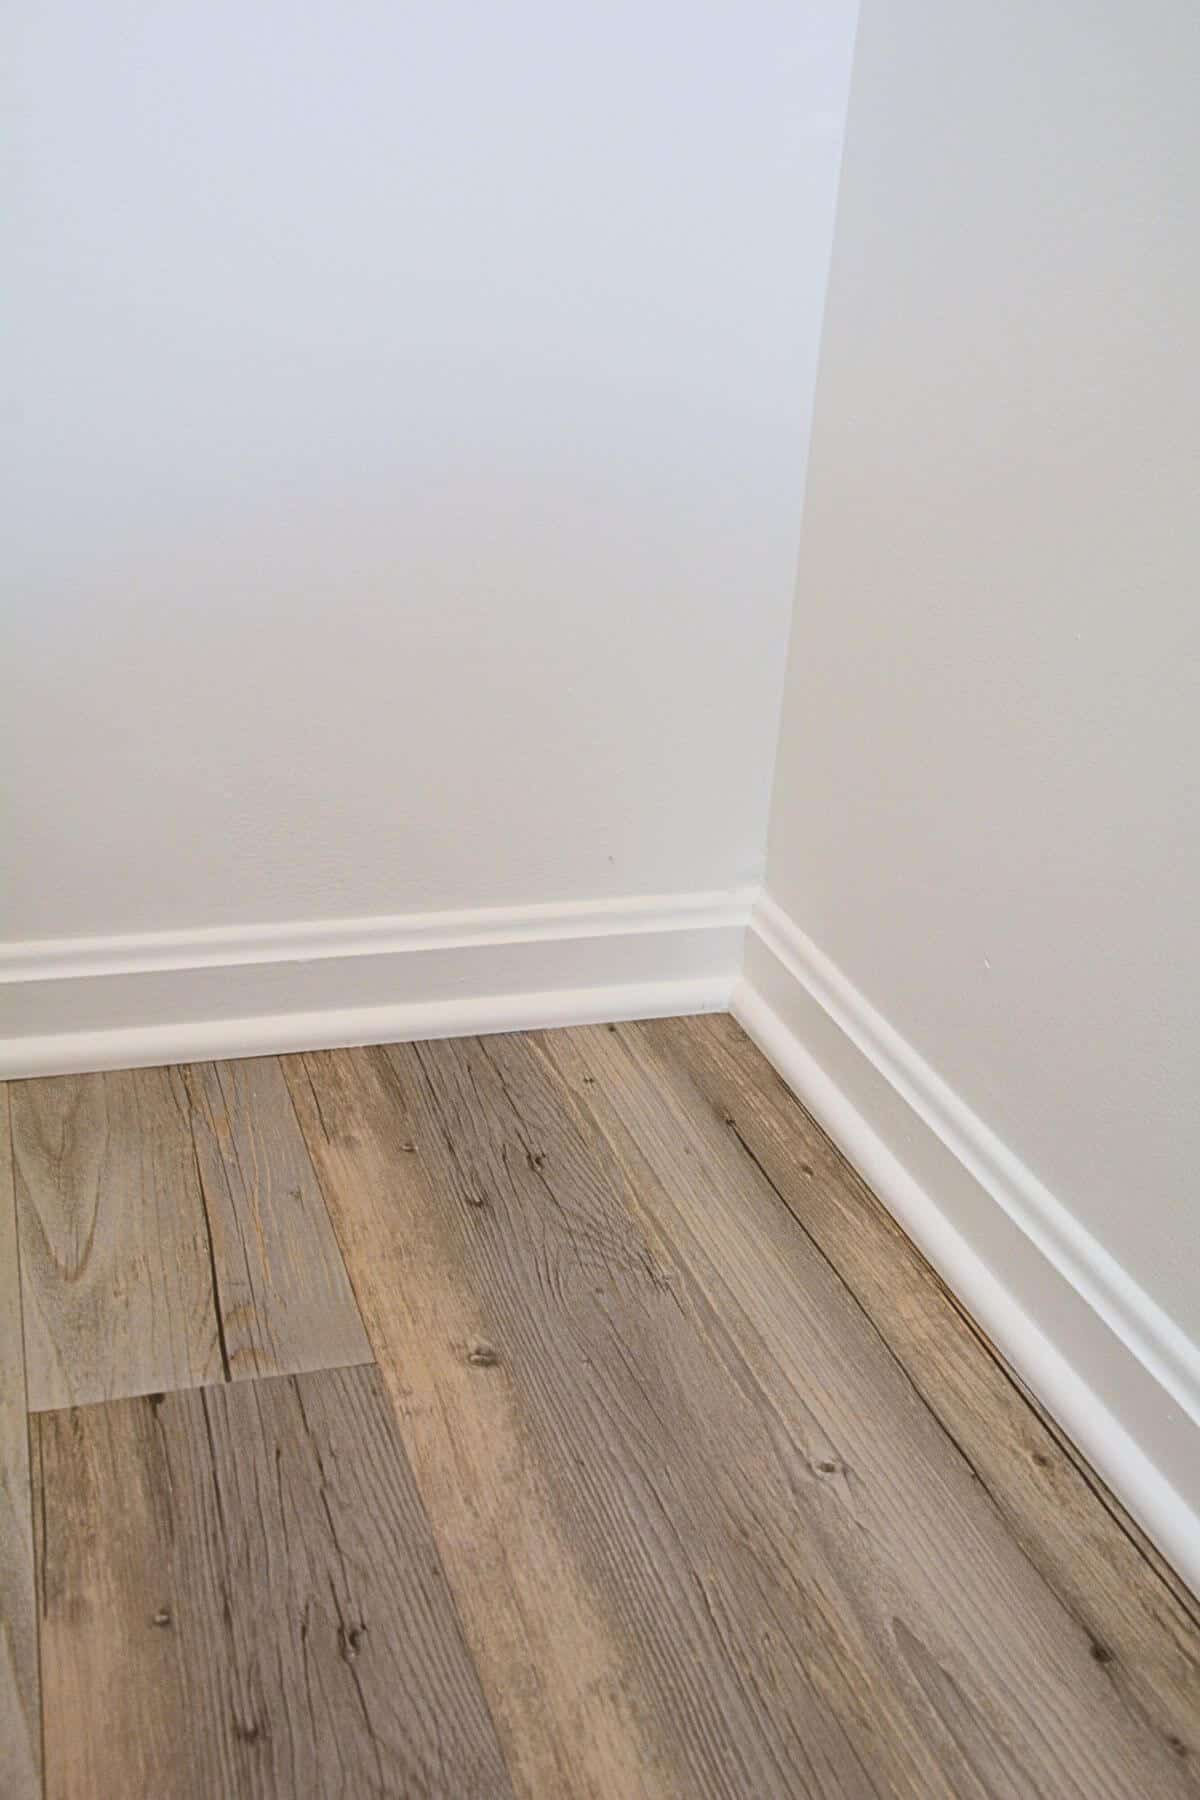
Before and After Bathroom Floor
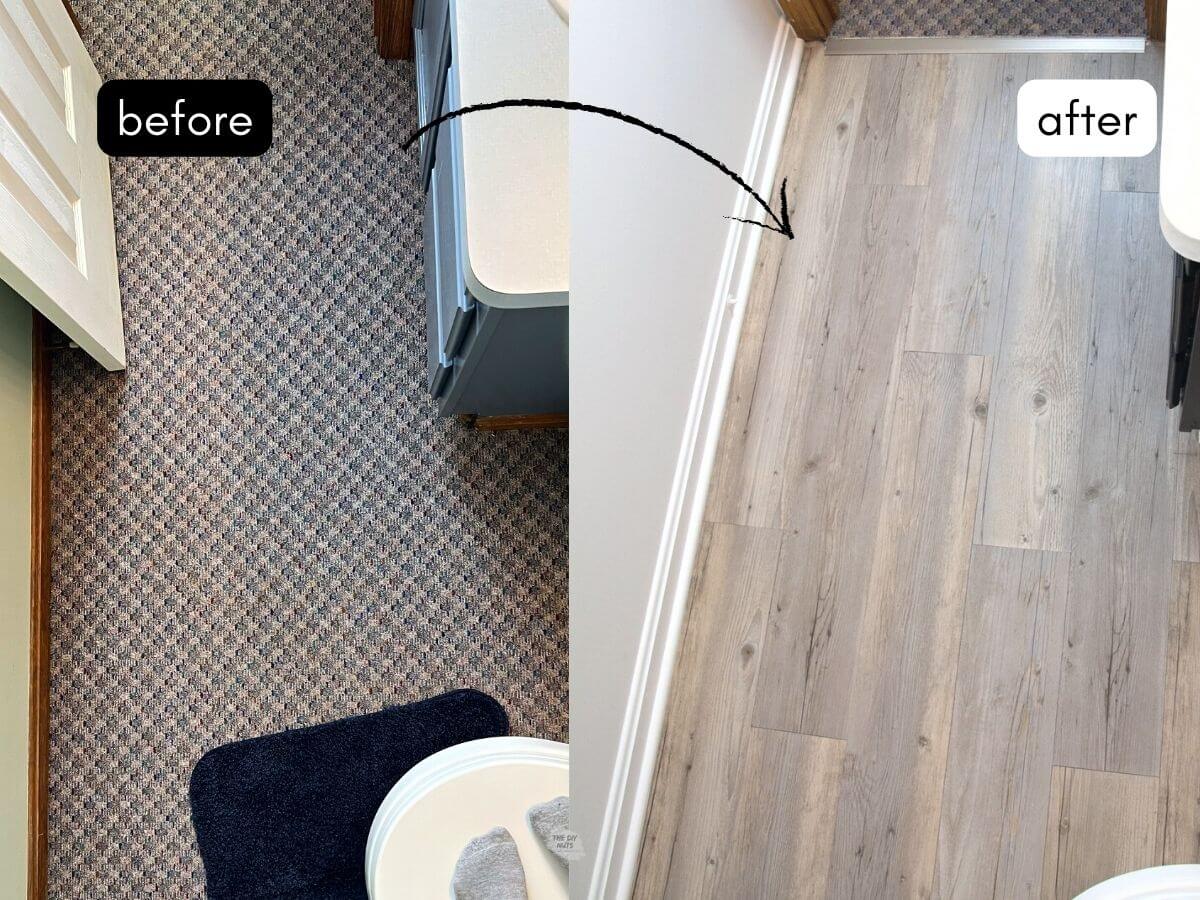
We are so happy that we finally were able to get rid of the carpet in our small basement bathroom.
How-To FAQs
Peel-and-stick flooring, also known as self-adhesive vinyl flooring, is a convenient and cheap flooring option. Each full tile or plank comes with self-adhesive backing. This means that it’s easy to install without the need for nails or glue. It’s available in various styles and designs, such as wood, tile, and stone-look patterns.
Your subfloor needs to be as clean and dust-free as possible. If installing on concrete, you can consider wiping your floor with acetone in a well-ventilated area. Another option is to consider using a primer that is specifically designed to improve adhesion and provide a clean, even surface.
Cleaning a concrete surface with acetone before installing peel-and-stick vinyl flooring can help get a stronger bond with adhesives. Acetone dissolves contaminants and leaves a smooth surface. Use it in a well-ventilated area with protective gear and let it dry before installation.
In most cases, yes. Peel and stick flooring can be installed over a variety of existing flooring materials, including concrete, wood, and vinyl. However, it is important to make sure the existing flooring is smooth, level, and in good condition before installing.
Yes, peel-and-stick flooring is water-resistant and can be installed in bathrooms and kitchens. We would be cautious about installing systems with heavy water use. However, it is important to use a silicone sealant around the edges of the room and any fixtures, such as toilets or sinks, to prevent water from seeping under the flooring.
To estimate how much peel and stick flooring is needed, measure the room’s length and width, multiply them to get the total square footage, add 10% extra for waste and mistakes, and then divide the total by the square footage per box indicated on the product packaging to know the number of boxes required. Note that some places will allow you to purchase tiles individually instead of just in the box.
Before installing peel and stick flooring in your bathroom, it’s best to remove the toilet for proper installation. However, if you prefer not to remove it, you can cut around it with a utility knife. If not removing, be sure to leave a small gap around the toilet to allow for expansion and contraction of the flooring, and use a silicone-based caulk to prevent water from seeping under the flooring.
Follow us on Pinterest, YouTube or Facebook for more DIY inspiration!
More Budget Bathroom DIY Projects
These cheap bathroom remodel projects helped us cheaply makeover this space. Seriously, we could not believe that we were able to get this done for under $150!
Get These Tutorials!
- How To Repaint A Bathroom Cabinet: Get our tried and true method for repainting painted cabinets. We just love the modern feel of adding classic black to the vanity.
- How to Paint Laminate Countertops: This step-by-step tutorial will show you exactly how to paint your countertops without using an expensive kit.
- How To Spray Paint Bathroom Fixtures: No need to always replace your fixtures when a little spray paint can make them match your current decor. See what primer is the most important part of this DIY project.
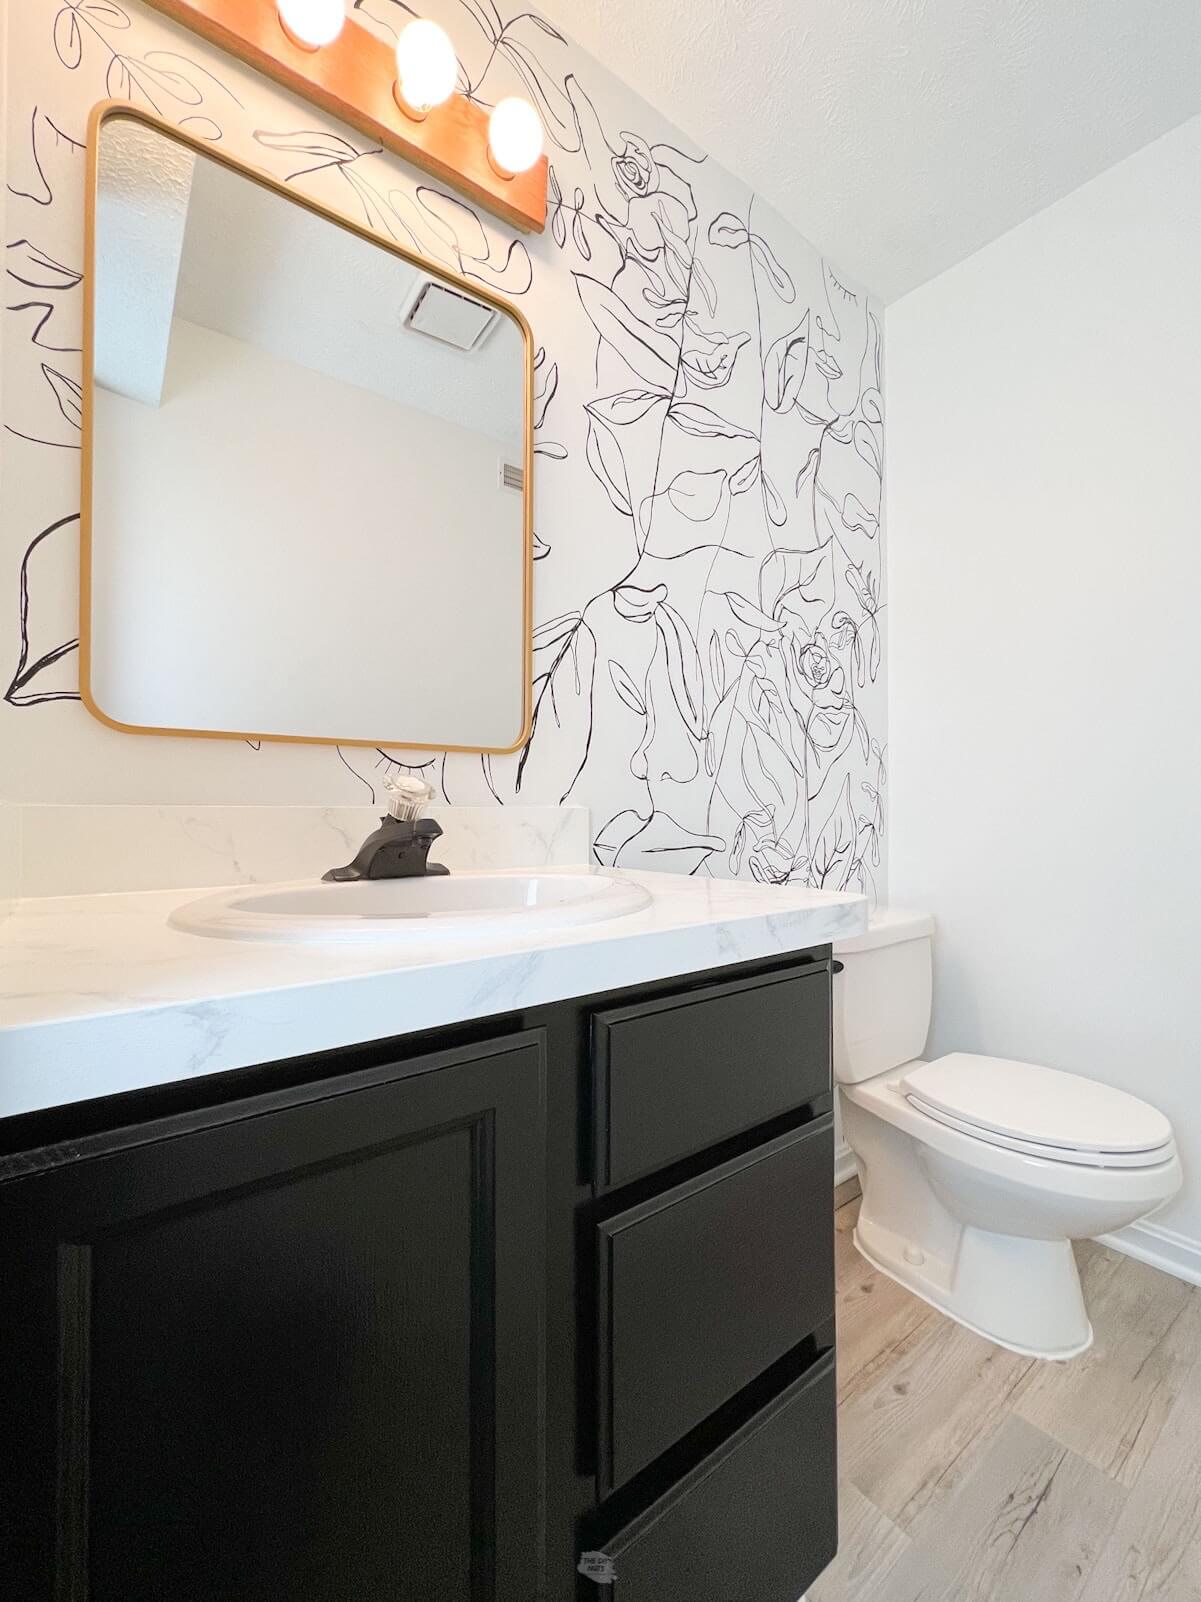
- How To Create Faux Wallpaper: See how you can create an awesome accent wall for under $10!
We just love that we were able to get a fresh look on our bathroom floor for under $35. Using faux wood flooring was the perfect solution for our basement powder room.
If you like this tutorial, please give it 5 stars below 🤩🤩🤩🤩🤩. Your support helps us continue to provide unique and budget-friendly DIYs.
DIY Peel and Stick Floor Tiles – How to Install Them Yourself
Equipment
- Hair Dryer
- Safety Gear (such as glasses or kneepads)
- Tape Measurer
- Sharp Scissors
- Floor Roller (we used an old ink brayer, but they do sell small hand rollers or you can rent a 100 lb. roller to ensure the best adhesion)
- Pencil or marker
- Sharp Utility Knife and Extra Blades
Supplies
- Peel and Stick Vinyl Floor Tiles here are the gray barnwood peel and stick planks we used.
- Transition Strip this come in all varieties depending on the floor surrounding your peel and stick.
Instructions
Before You Begin
- Remove old flooring, including any adhesive.
- Consider removing baseboards and toilet.
- Ensure that the floor is clean, level, and completely dry.
Prep The Floor
- Vacuum and wipe the subfloor clean.
- Sand any areas that are not completely flush.
- Optional: Paint old grout lines or fill them in with thinset mortar.
- Optional: Clean concrete floors with acetone (optional).
- Unpack the tiles and let them adjust to room temperature and humidity before installation.
- Set aside any tiles with blemishes or patterns you don't like.
- Dry fit your tiles and decide on your flooring pattern and dry lay the tiles on your clean floor.
- Check that you have enough tiles to cover the entire floor.
- Ensure that the layout of the tiles looks even and balanced.
- Cut the tiles. Measure carefully and use a speed square and utility knife to score the back of the tiles. Use high-quality scissors in some areas to trim excess or make hard cuts.
- Begin installation by starting at a straight edge of the room or in the center. For larger rooms it is recommended to start in the middle.
- Remove the paper backing and lay down the tile.
- Line up the plank and make sure you are happy with the placement before pushing down.
- Use a roller to help even push the adhesive into the concrete.
- Repeat the above steps until the whole floor is covered.
- Reinstall baseboards or shoe molding.
- Miter shoe molding after painting it white to match baseboards.
- Install a transition strip if needed.
Notes
- Start in the corner of your room or in the center.
- Make a chalk line down the center of larger rooms to use as a guide.
- For complicated cuts, use a hairdryer to warm the tiles to make the cuts easier.
could these be used on a wall? Kinda like shiplap?
Hi Joan. I wouldn’t think they would stay long term. Some people add extra adhesive even when doing flooring, but that will ruin your walls if you ever choose to remove it.