Easy Tips For Painting Trim White (DIY Tutorial)

One of the ways you can easily update your home is by adding a fresh coat of white paint. Properly prepping and taking your time are important steps when learning how to paint your molding white. Come along as we share the ins and outs of our DIY trim painting projects.
*Disclosure: I only recommend products I would use myself and all opinions expressed here are our own. This post may contain affiliate links that at no additional cost to you, I may earn a small commission. Read our full privacy policy.
The methods we are going to share are ones that we have used to paint all the molding in two houses. Just know that this project will take longer than you think, but it is well worth it. This DIY guide is a combination of using products that work well for DIY while giving a nice finish.
Now, I am the first to say that painting molding isn’t the funniest DIY paint project, but it can make a huge impact on your space.

Recommended Supplies
- Multi-Surface Painter’s Tape
- 2″ or 2.5″ Synthetic Brush
- Extra Fine Sandpaper (220)
- Deglosser
- Primer (if painting wood trim for the first time)
- Quality Hybrid Paint (Emerald Urethane Trim Enamel or Benjamin Moore Pro Advance)
- Paintable Caulk: we like this caulk or the Pro Flex
- Rag
- Drop Cloth or Tape and Drape
- Wood Filler or Spackling Compound (if needed)
- Paint Shield (optional but may help keep paint off of carpet or walls)
Step-By-Step Instructions
Before You Begin
If needed, you can use two-part wood filler or spackling compound to fill large dents. Follow the directions, and let dry and lightly sand smooth before moving on.
You follow similar prep guidelines when painting kitchen cabinets white.
Notes On Filling Holes
- The most time-saving way to apply spackling compound is with a light coat with a putty knife. Then a light sanding until smooth.
- If you are super picky you may want to do two light coats with a putty knife with sanding in between.
Some small finishing nail holes can be filled with paintable caulk or just with paint.
Step 1: Lightly Scuff The Molding
Use no-load sandpaper or extra fine (220) to lightly sand the area that needs to be primed. We typically use 220 sandpaper to scuff the surface.

Step 2: Wipe Down
Wipe down with a deglosser. You want your molding to be dust-free and grime-free. A deglosser helps prep the surface to be painted.

Step 3: Let Dry
Step 4: Prep Areas
Depending on if you are only painting the molding or the whole room, you have to decide what you want to tape out.
Some professionals will tell you never to tape a wall, but we normally have had success with using multi-surface Frog tape and peeling off as soon as we are done. If you do not want to tape the wall, we understand then you may consider using a paint shield when it comes to keeping your walls clean.
If painting baseboards, you for sure want to tape out the floor. Sometimes there is a little gap you can help slip your tape under.

If painting on the carpet, push the carpet down with your fingers or a flat edge of a tool like a drywall tape knife or paint shield. Then add the tape under the trim the best you can.

Step 5: Caulk If Needed
Use paintable caulk for a seamless look. If painting the walls, you can also caulk along the top edge of the molding, any gap showing, and more. Make sure you wait 30 minutes or 2 hours depending on which caulk you are choosing before starting to paint.

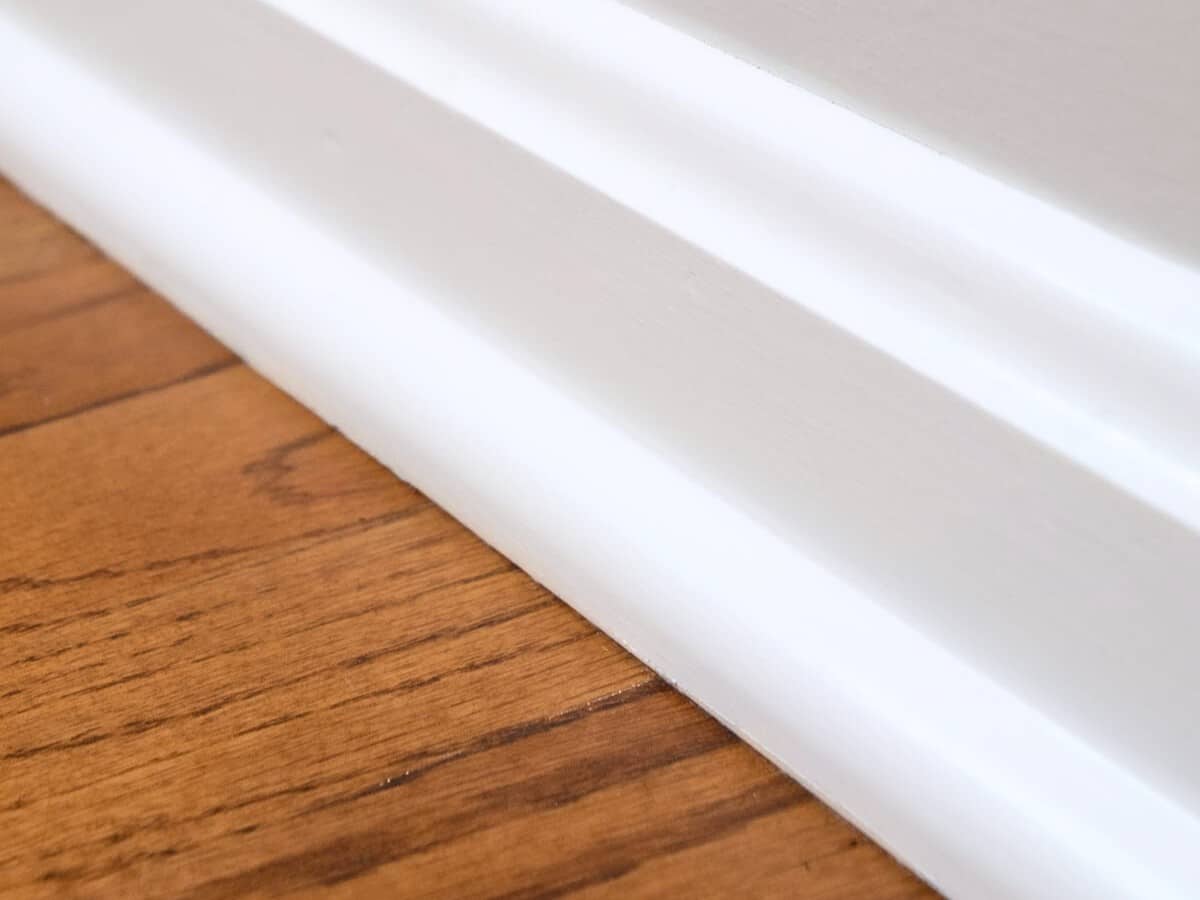
We have shoe molding in our office and foyer due to adding new wood flooring there. Caulking with paintable caulk helped create a seamless look before repainting white.
Step 6: Prime If Bare Wood Is Showing
Add a primer to areas with wood showing. If you are repainting molding, then you only need to prime in spots that are larger than an eraser tip or spots that are in areas that are highly touched.

Step 7: Let Dry
Step 8: Begin To Paint
While a little more expensive, we like a hybrid paint like Sherwin Williams Urethane Trim enamel. It can be cleaned with soap in water but acts more like an oil-based paint.
Brush your first coat of paint.
If you did not tape the walls or don’t plan to paint the walls, you will carefully need to use a brush to cut in for a clean line. You could also use a drywall knife again to stop the paint from getting on the wall.
If You Plan To Paint The Walls Afterwards
If you do plan on painting the walls, just make sure that there are not any drips on the other surfaces.

Step 9: Paint 2-3 Coats
For best results that will last, make sure you wait for the proper dry time in between layers and apply two or three layers.

As you can see in the above room makeover, the trim was painted before the walls. When we repainted everything in this room.
Painted in this order:
- Demoed and Patched Walls
- Painted Ceiling
- Painted Trim
- Painted Walls
- Built-Cabinets
We chose to get the walls done because the cabinets were being installed. We could have also done one coat of paint on the walls, painted the cabinets and then finished the walls in case there were any touch-ups that were needed.
Step 10: Remove Painter’s Tape
Pull the painter’s tape away from the molding. We also like to take the tape off as soon as the paint is pretty dry. This way if any paint leaks, you may be able to scrap it off with your nail or clean it up before the paint starts to cure.

How To Fix Already Painted Molding
No matter how good of a job you do, you are bound to get a few chips and dings over the years. You can follow this guide for how to repaint already painted wood, molding and trim to easily get a fresh look.
Tips For A Smooth Finish
- Take your time and take breaks in between tasks. We sometimes rush with the prep, caulking, etc. and then later regret it.
- You can use extra fine sandpaper for any drips or in between layers if you notice a texture you do not like.
- Apply paint only to a 1/3 of the brush bristles and then swipe on the baseboards.
- Work the paint with and forth strokes until it feels evenly applied. Be careful not to take away paint you have already applied by overworking the area.
- You can use a gentle tip stroke to smooth out the surface when painting. Only use the tip of the brush a very gentle continuous stroke in the same direction.
- Don’t touch the paint once it starts to tack up or dry.
- For the easiest painting of trim, paint it before it is installed on sawhorses. However, you will most likely still have to add a layer or paint for a finished look or at least in the finishing nail holes.

How-To FAQs
Yes, while some professional painters still use oil-based paints, the technology of paint has come a long way. Hybrid enamels are perfect for DIYers to use when painting molding due to their durability, ease of use and clean-up methods.
It is best to apply a paintable caulk to molding before painting. Caulk can yellow over time and can collect dust. By painting on top of it you will get a smoother finish that can be easily wiped. Just make sure that you smooth the caulk out well for a seamless look.
By caulking around your trim you are able to get a professional look, can stop drafts and can also prevent bugs from entering your home through small cracks and crevices.
Follow us on Pinterest, YouTube or Facebook for more DIY inspiration!
If you like this tutorial, please give it 5 stars below 🤩🤩🤩🤩🤩. Your support helps us continue to provide unique and budget-friendly DIYs.
Painting Trim White

Equipment
- Rag
Supplies
- Extra Fine Sandpaper 220
- Deglosser
- Primer if painting wood trim for the first time
- Quality Hybrid Enamel Paint Emerald Urethane Trim Enamel or Benjamin Moore Pro Advance
- Paintable Caulk latex-acrylic caulk with added silicone
- Drop Cloth or Tape and Drape
- Wood Filler or Spackle if needed
- Painter’s Tape
Instructions
Prep Trim For A Smooth Paint Surface
- If needed, you can use two-part wood filler or spackling compound with a puddy knife to fill large dents and nail holes. Follow the directions, and let dry and lightly sand smooth before moving on.
- Use sandpaper or extra fine (220) to lightly sand the area that needs to be primed. We typically use 220 sandpaper to scuff the surface.
- Wipe down with a deglosser. You want your molding to be dust-free and grime-free. A deglosser helps prep the surface to be painted.
- Let fully dry.
Prepping Surrounded Areas
- Depending on if you are only painting the molding or the whole room, you have to decide what you want to tape out.
- If painting baseboards, you for sure want to tape out the floor. Sometimes there is a little gap you can help slip your tape under.
- If painting on the carpet, push the carpet down with your fingers or a flat edge of a tool like a drywall tape knife or paint shield. Then add the tape under the trim the best you can.
Caulking
- Use paintable caulk for a seamless look. If painting the walls, you can also caulk along the top edge of the molding, any gap showing, and more. Make sure you wait 30 minutes or 2 hours depending on which caulk you are choosing before starting to paint.
Priming and Painting
- Brush a coat of primer to areas with wood showing. If you are repainting molding, then you only need to prime in spots that are larger than an eraser tip or spots that are in areas that are highly touched.
- Let the primer fully dry.
- Brush your first coat of paint. If you did not tape the walls or don’t plan to paint the walls, you will carefully need to use a brush to cut in for a clean line. You could also use a drywall knife again to stop the paint from getting on the wall.
- If you do plan on painting the walls, just make sure that there are not any drips on the other surfaces.
- Paint 2-3 Coats with your trim paint.For best results that will last, make sure you wait for the proper dry time in between layers and apply two or three layers.
- Pull the painter’s tape away from the molding. We also like to take the tape off as soon as the paint is pretty dry. This way if any paint leaks, you may be able to scrap it off with your nail or clean it up before the paint starts to cure.
Notes
- Some professionals will tell you never to tape a wall, but we normally have had success with using multi-surface Frog tape and peeling off as soon as we are done.
- If you do not want to tape the wall, we understand then you may consider using a paint shield when it comes to keeping your walls clean.
- Some small finishing nail holes can be filled with just with paint.
- Take your time and take breaks in between tasks. We sometimes rush with the prep, caulking, etc. and then later regret it.
- Work the paint back and forth strokes until it feels evenly applied. Be careful not to take away paint you have already applied by overworking the area.
- Go in one motion in the same direction with the tip for the final stroke and let dry.
- You can use extra fine sandpaper or block in between layers for the smoothest finish.