How To Easily (re)Paint Your Stair Handrail & Banister Black
We have a lot of experience painting already painted surfaces or other oak areas in our home. This updated railing project was no exception. Find out how you can get a whole new-looking stair railing for under $30 with just a little paint.
*Disclosure: I only recommend products I would use myself and all opinions expressed here are our own. This post may contain affiliate links that at no additional cost to you, I may earn a small commission. Read our full privacy policy.
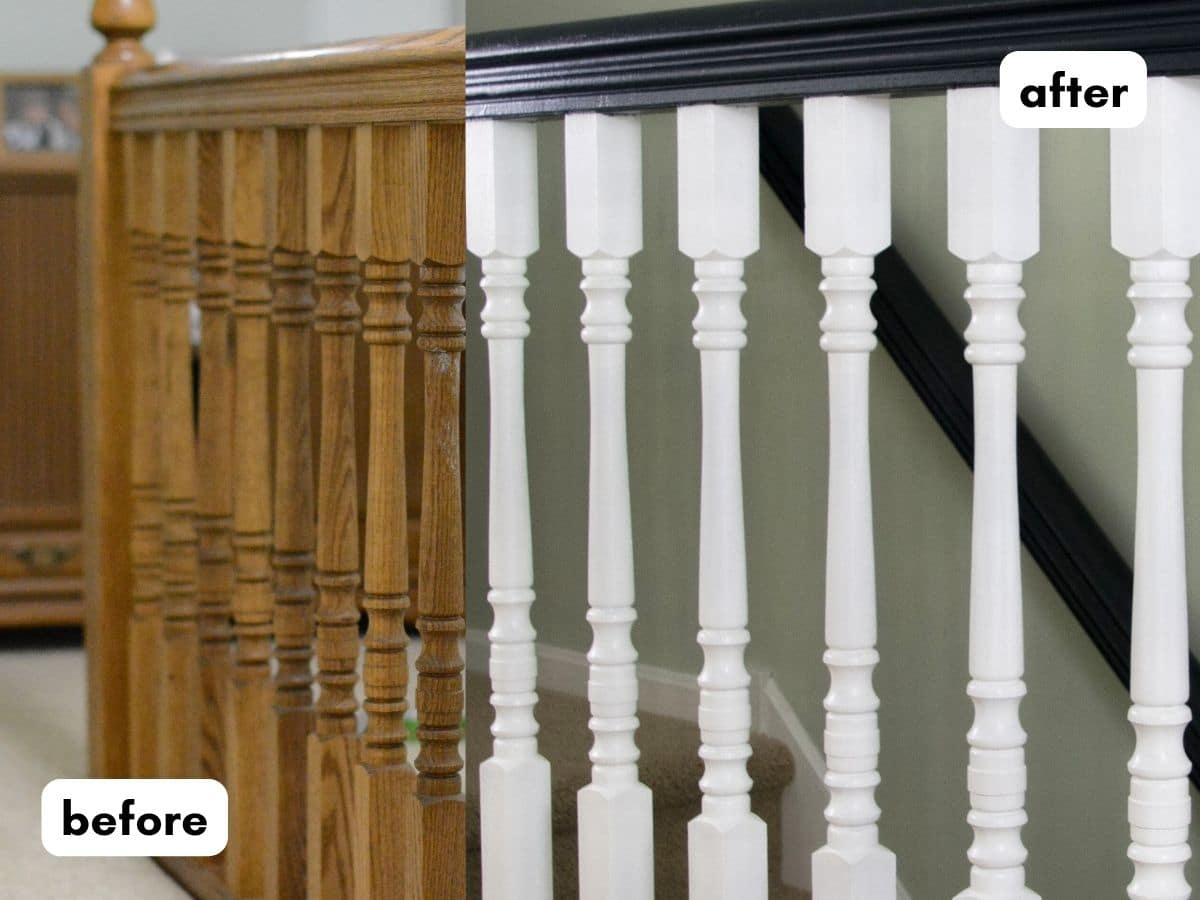
Before Oak Stair Railing
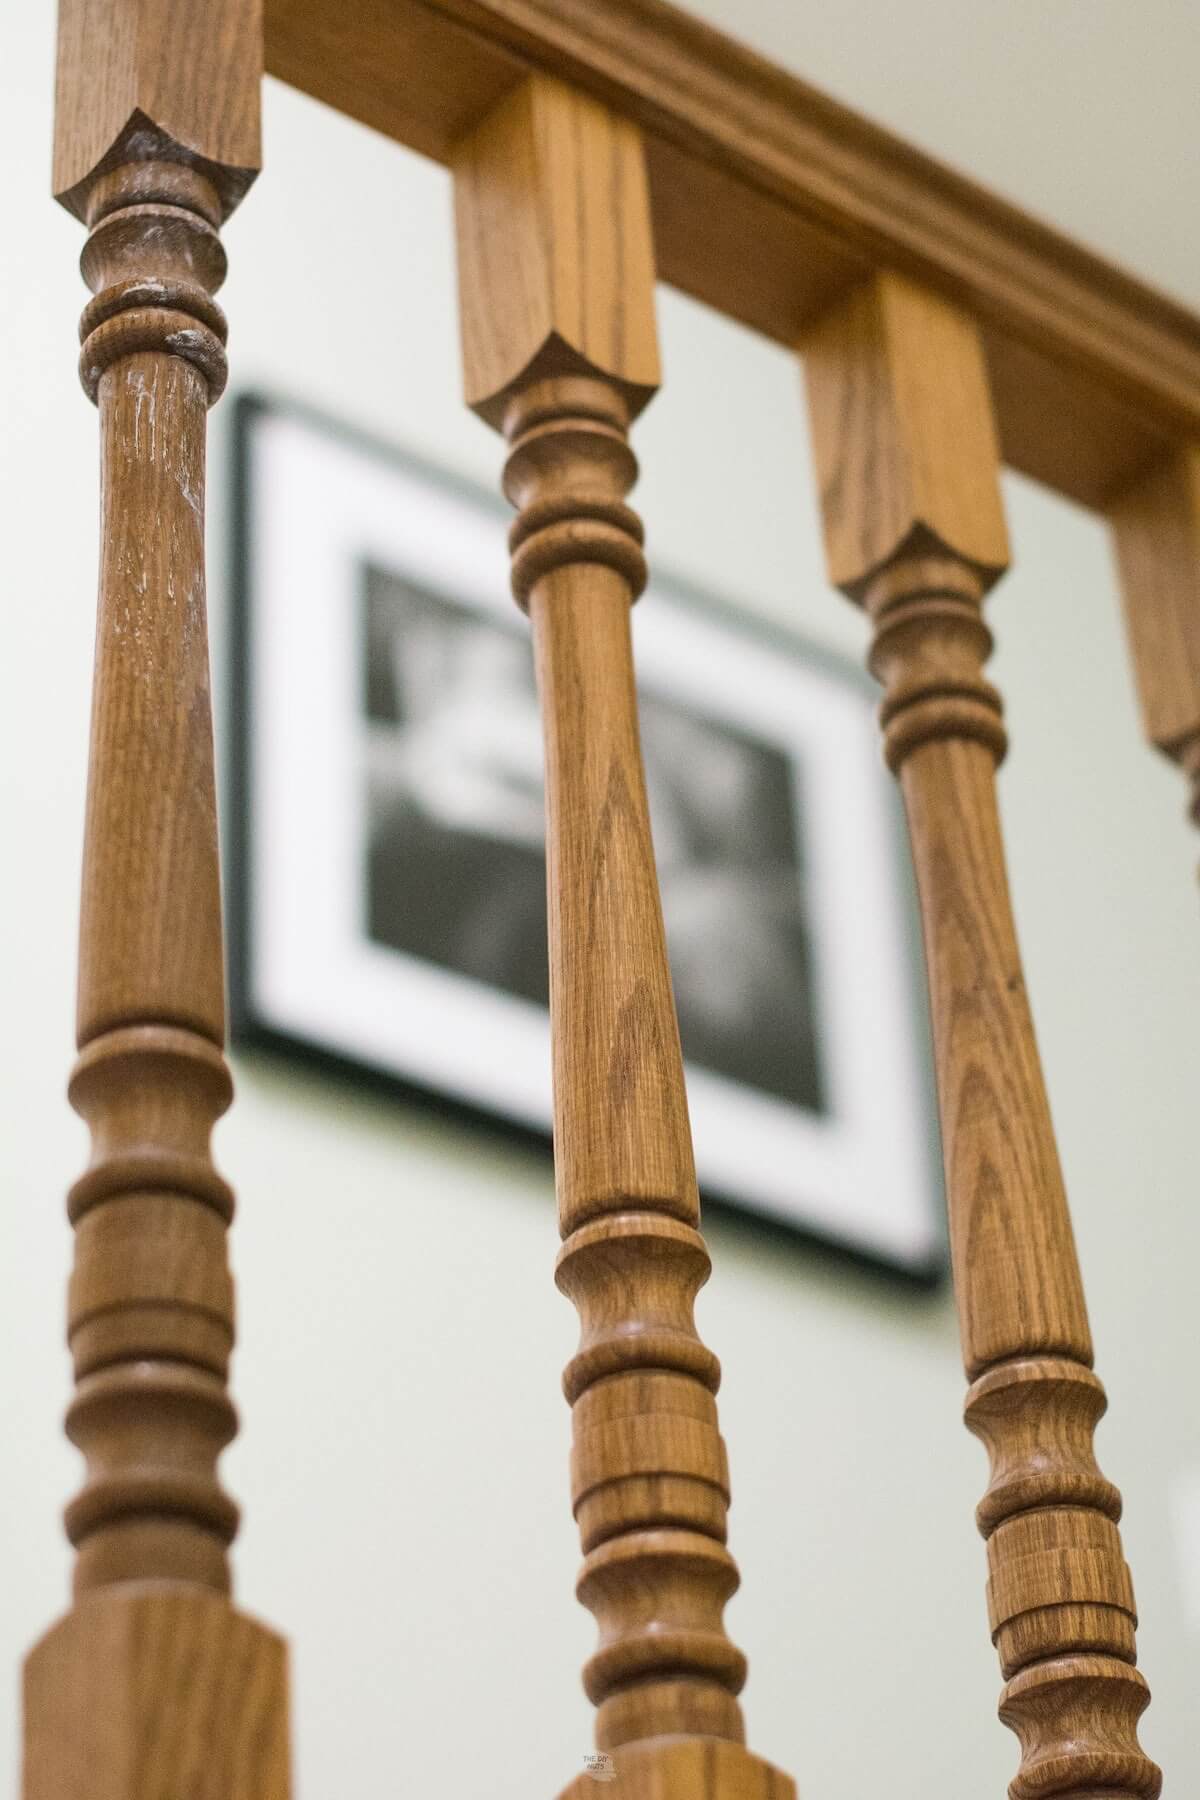
This is the original stair railing when we moved in. A few years ago we painted the stair railing for the first time.
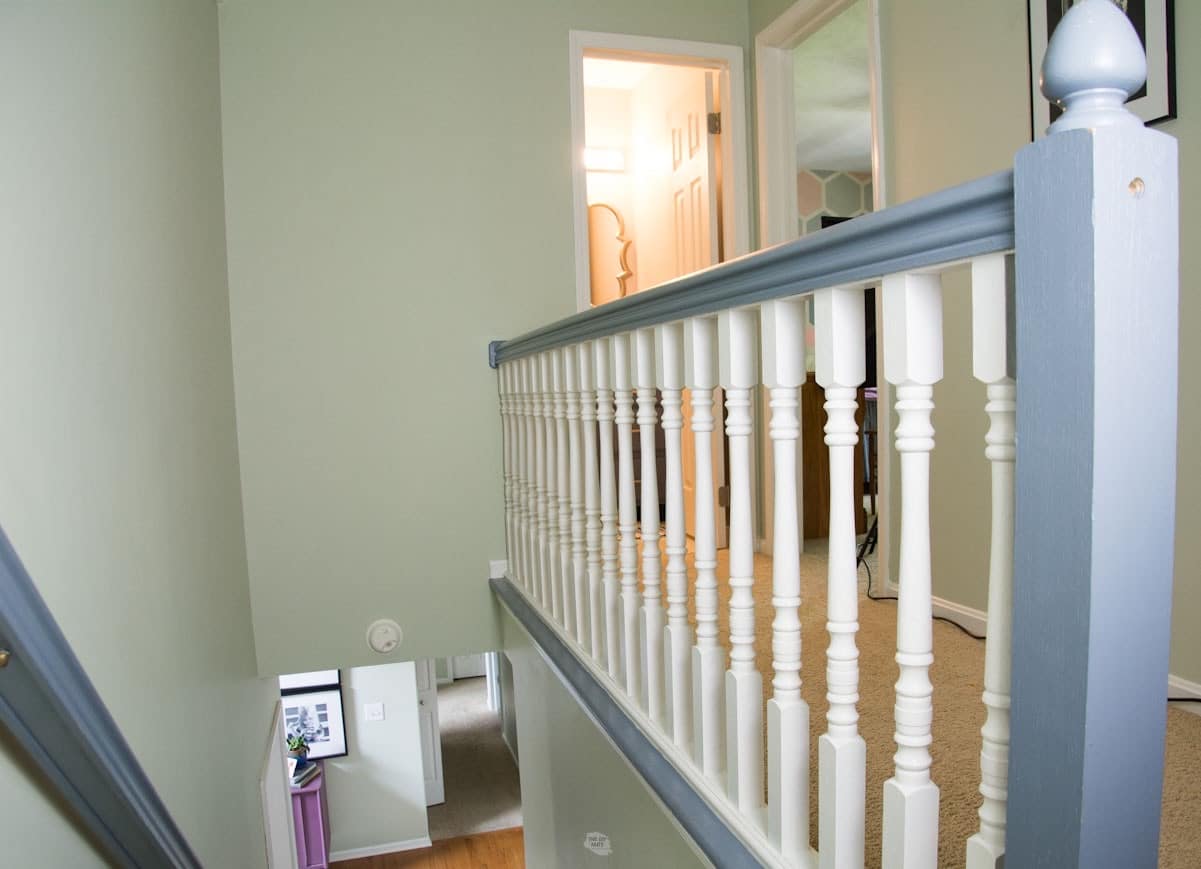
However, our tastes have changed. After we repainted our already-painted bathroom cabinets black in a small bathroom, we knew a black and white stair railing would fit our current style.
Recommended Supplies
- Deglosser: this is what we have used to prep surfaces from painted tiles to painted bathroom cabinets
- Rag or tack cloth
- Protective Gloves: to use when wiping down with the deglosser
- Painter’s Tape: this brand is the one we have the most success with
- Purdy 2.5” angled brush or Wooster 2.5″ angled brush
- Small Foam Rollers and handle
- Small Paint Tray: these paint trays are great because they are cheap and sturdy enough to move around.
- 220 Sandpaper or Green Scothbrite Pad
- Caulk and Caulk gun or wood filler (optional)
- SW Emerald Urethane Trim Enamel in Inkwell
- Primer: if you have any wood showing on painted spots
- Screwdriver

Note that any time you are painting a previously painted surface your old paint may contain lead. Please take proper safety precautions when working on your particular situation. You can always buy a test kit before sanding the surface.
Do you need help deciding what color of paint to use?
We recently just tried Samplize, which beats having to buy individual paint samples. These 9″ x 14.75″ samples will be shipped directly to you and save the hassle of clean-up (we loved that). See our full review here.
Before You Begin
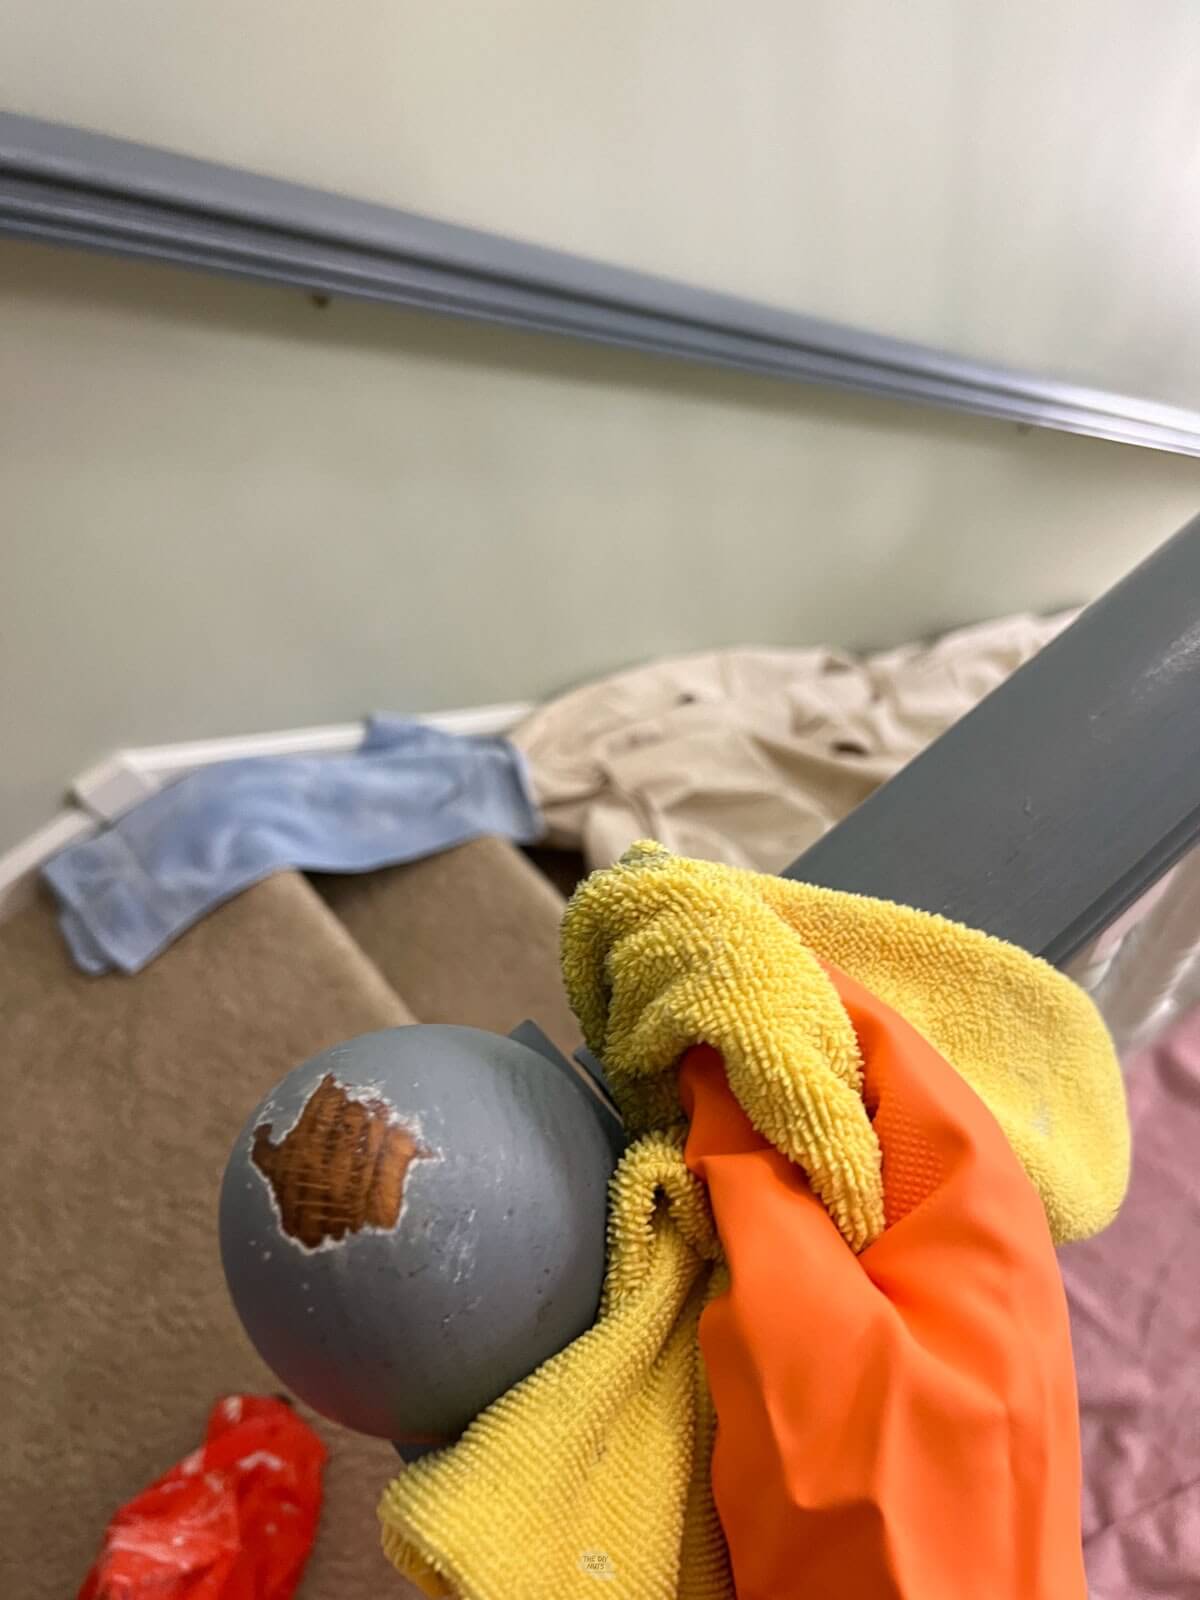
Pay extra attention to any areas that are worn down. These areas should be sanded smooth and primed if the wood is showing through.
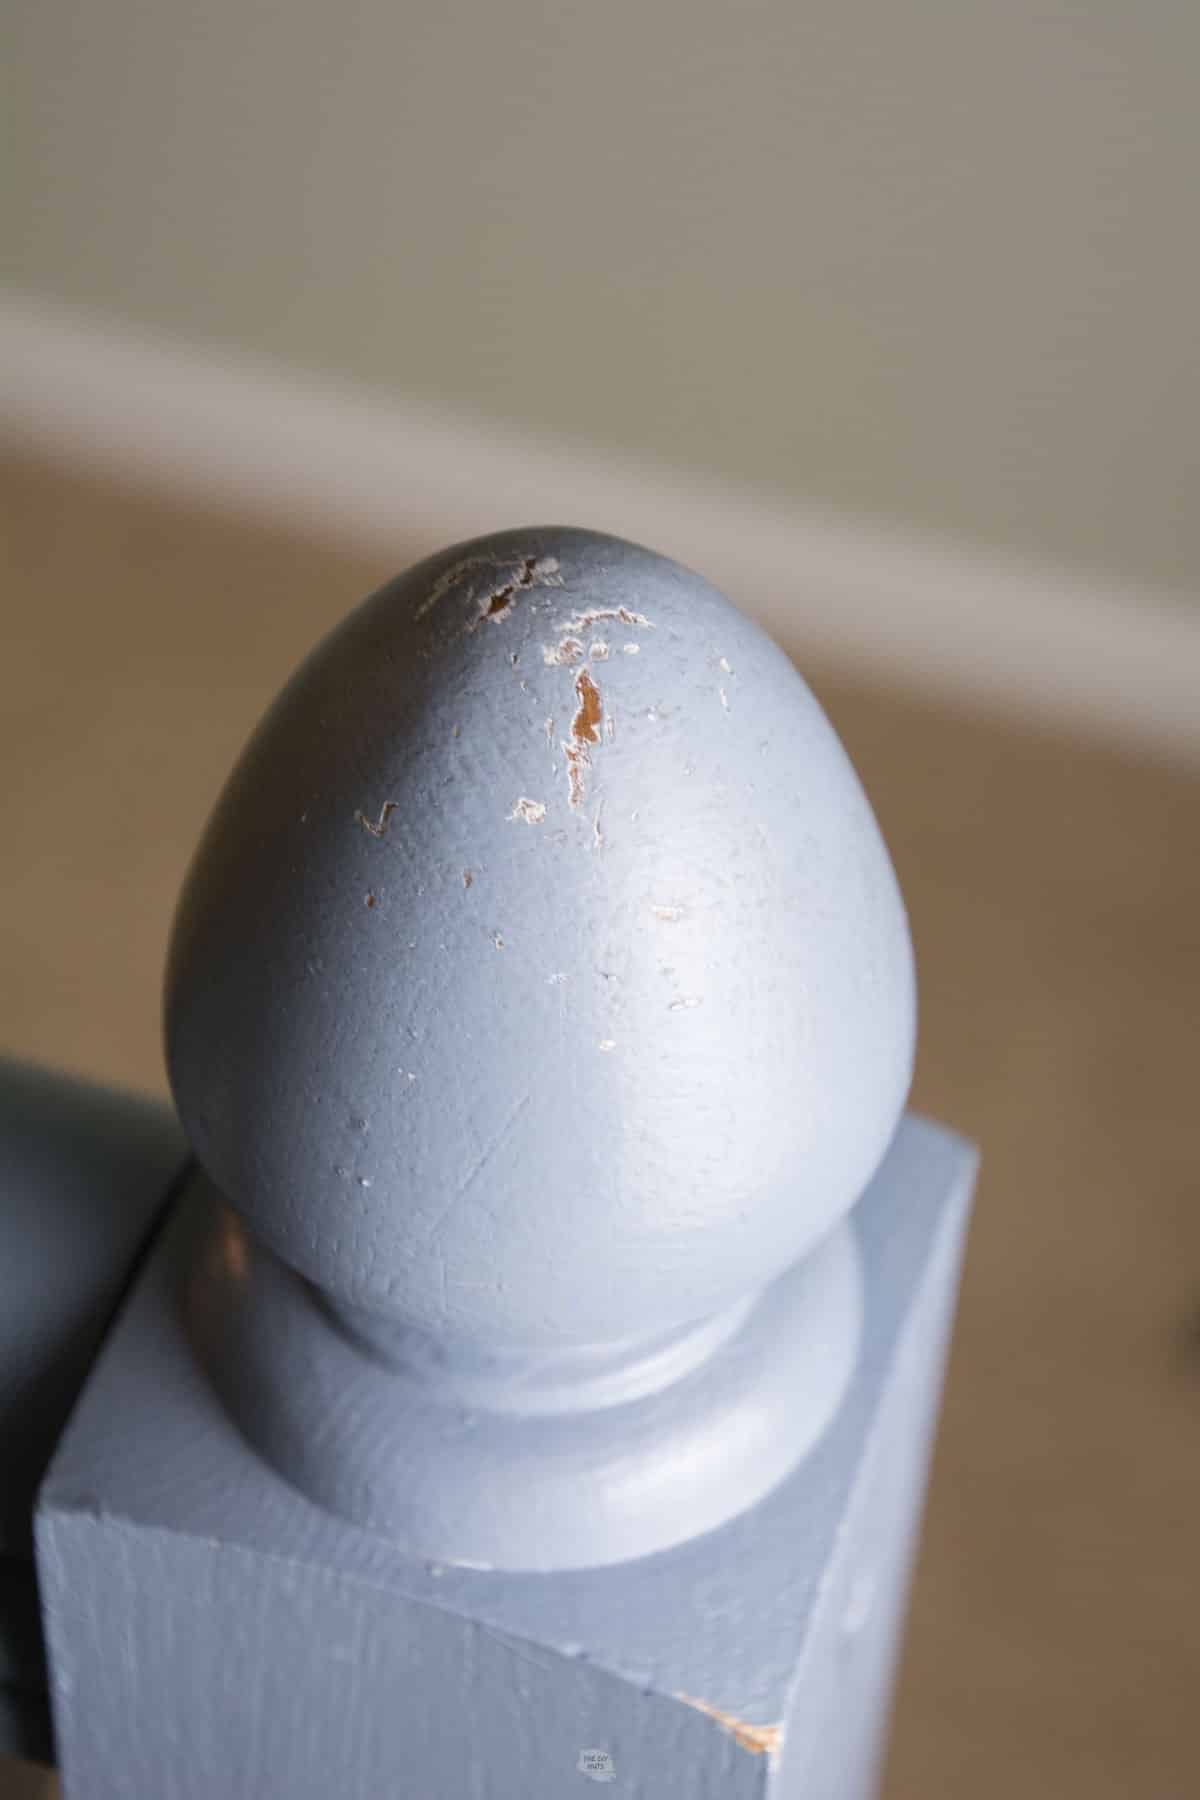
We had to do this on the end of the railing where our children had rubbed their hands over and over.
When You May Need A Primer
- The original surface is too glossy
- The quality of the original paint job is sloppy
- Going from a dark color to a very light one-priming may save you on the coats of paint you need
- If the new paint does not seem to adhere to the surface. You can test a small area for adhesion as we did when with our painted kitchen tile.
You don’t always need to prime already painted wood. If the old paint is in great shape, doesn’t have chipping, and seems to adhere to the surface then you should be able to get away with scuffing the surface, deglossing and painting.
If you are unsure of the type of paint used, the finish, or how it was sealed, you may want to consider using an adhesion primer (like water-based Kilz or Zinsser Bin). Just note, if we can avoid using oil-based primers and paints we normally do.

We only needed to prime this spot because we sanded it down because some of our original paint had chipped off. We did not need to use primer on the other painted surfaces that were in good shape.
What paint do we recommend?
We have been using Sherwin Williams Urethane Trim Enamel for most of our cabinet painting and repainting oak cabinet projects. We like this trim paint so much that we knew that the one spot that had worn from when we originally painted the railing needed to be repainted with this brand.

Other Paints To Consider
Just like when painting cabinets, there are a few other brands and lines of paint we consider or recommend.
- Benjamin Moore Advance provides not only the most sheens from a matte to a high-gloss finish but also a high-quality primer that comes in numerous colors.
- Sherwin Williams Pro-Classic Interior Water-based Acrylic Alkyd is available in semi-gloss and satin is a great choice as well.
Pros Of Hybrid Enamel Paints
- Self-leveling qualities will help create a smooth even when using a brush and roller.
- No topcoat is needed.
- Dries almost as hard and durable as classic oil paint products.
- Easy to clean up brushes and rollers with soap and water.
- Satin, semi-gloss or gloss finishes are easy to wipe clean.
Do you need help deciding what color of paint to use?
We recently just tried Samplize, which beats having to buy individual paint samples. These 9″ x 14.75″ samples will be shipped directly to you and save the hassle of clean-up (we loved that). See our full review here.
How To Repaint A Painted Stair Railing Black and White
Once you have prepped and primed any really worn spots on your railing, you are ready to paint the rest of it. Make sure to protect the carpet and flooring with drop cloths.
Step 1: Lightly Sand
Typically, we use 220 Fine Sandpaper to help prep any surface we are painting. You don’t have to completely sand, but good scuffing will suffice.

Step 2: Wipe Down With a Deglosser
For most of our DIY painting projects, we choose to use Krud Kutter to wipe down the surface before we start painting. Make sure that you wear rubber gloves to protect your hands and wipe down the surface thoroughly.
Step 3: Tape Out Areas You Don’t Want To Be Painted
Because we had already painted our oak railing before we only had to tape out the new areas for color.
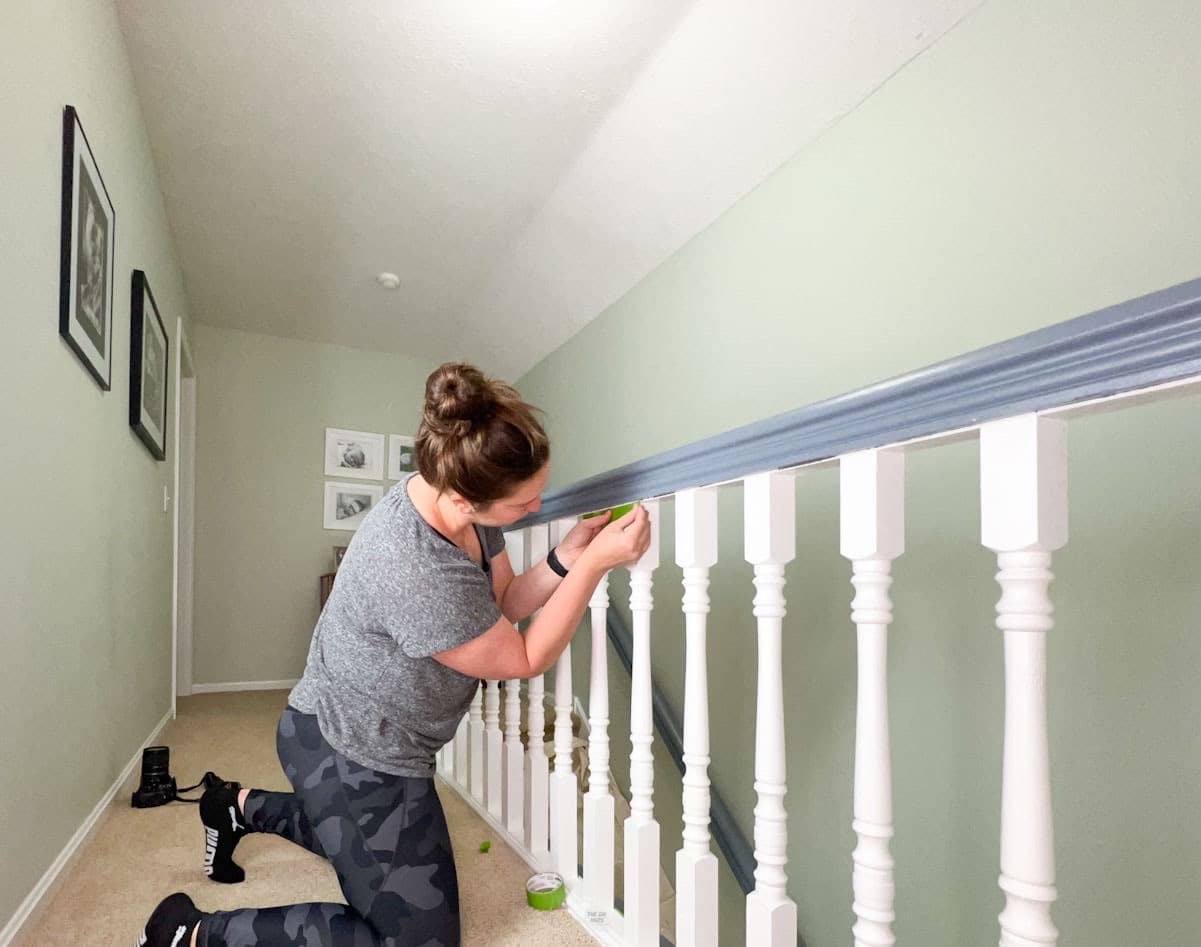
If you were painting your railing for the first time, you would want to prime and paint the spindles first and then tape out for the second color. Make sure to really press the tape with your fingernail.

Step 4: Use A Brush and A Small Foam Roller
Foam rollers allow you to get a smooth finish. However, a brush will be needed in areas that the roller can’t reach. As with any DIY home painting project, continue to always check for drips as you are painting.

Step 5: Let Dry
Let the first coat of paint dry.

Your first coat will not be too pretty. Don’t worry it will look a lot better soon.

Step 6: Paint Another Coat & Let It Dry
You will need at least 2-3 coats of Sherwin Williams Emerald Urethane Trim Enamel for a lasting finish.
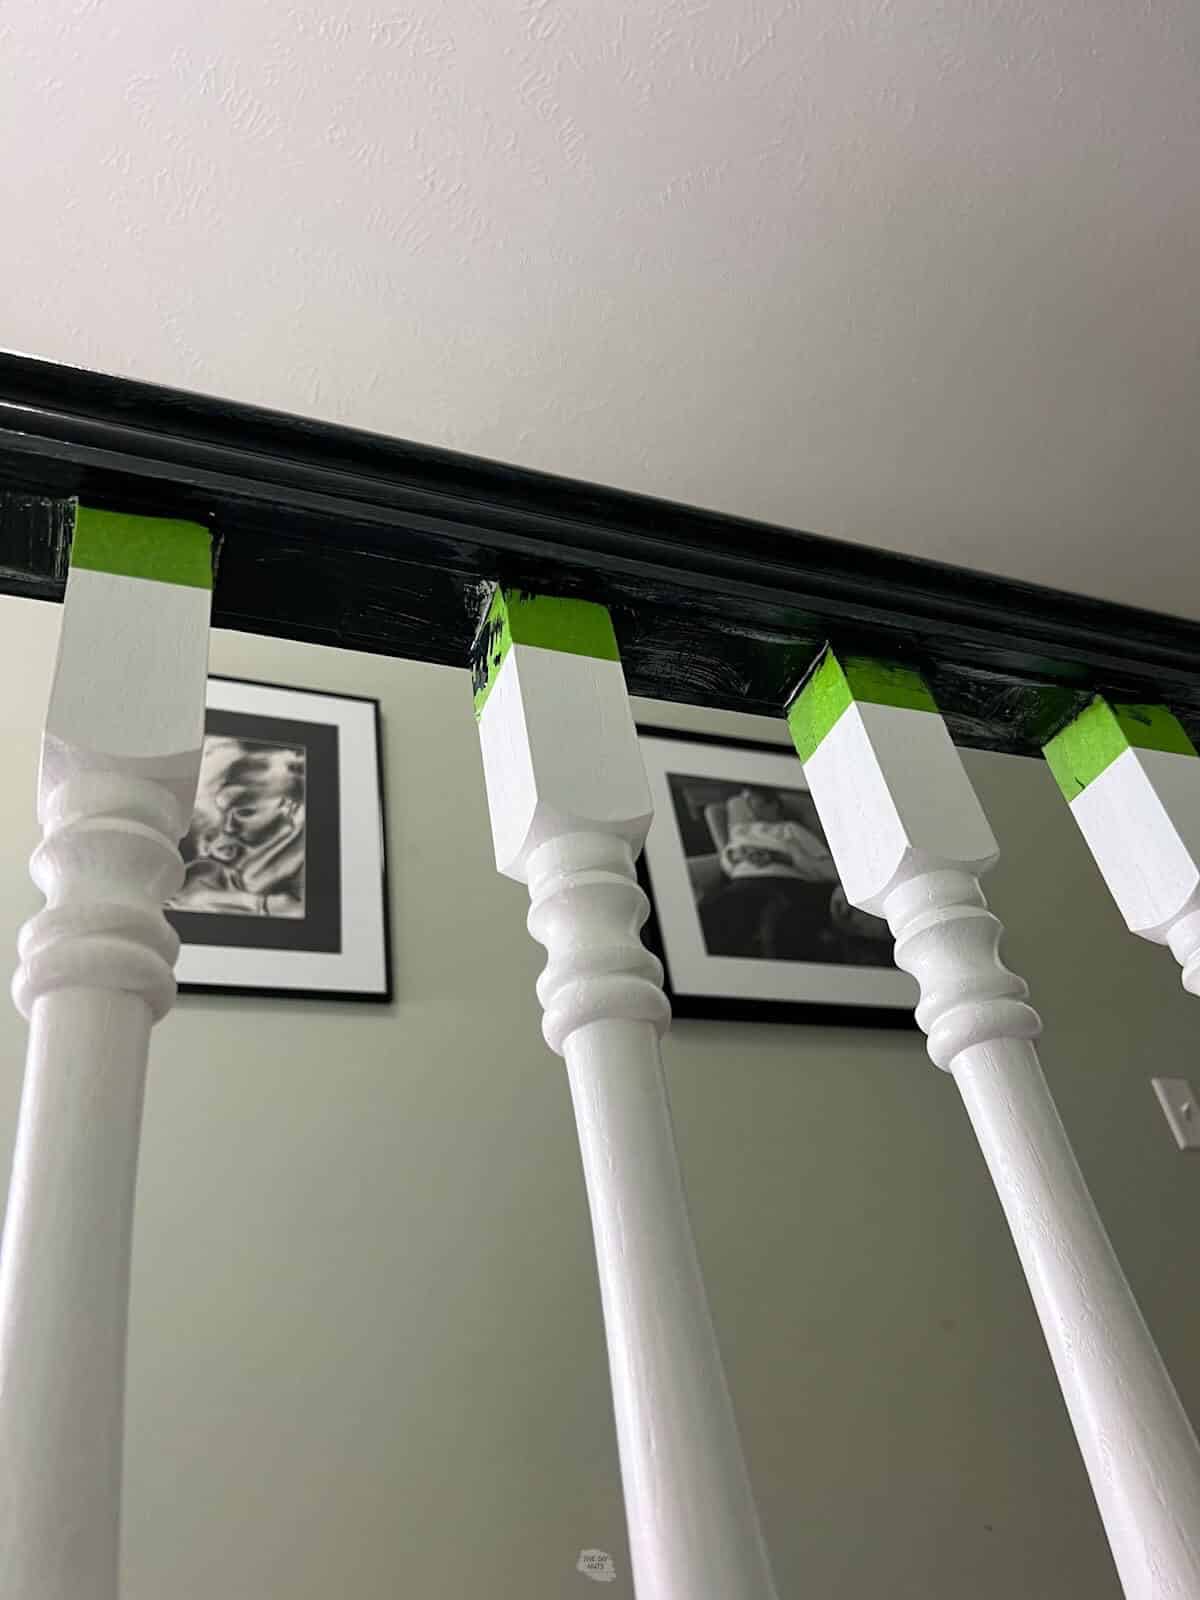
This was after two coats of paint. We ended up adding a third coat to completely cover the old color.

Step 7: Remove The Tape
Take the tape off by pulling in the direction you are going. You may want to use a small razor blade to cut along the tape for the cleanest lines. We like to pull our tape off before the paint has dried too long. As long as you are careful, taking the tape off when the paint is not super tacky will work well.
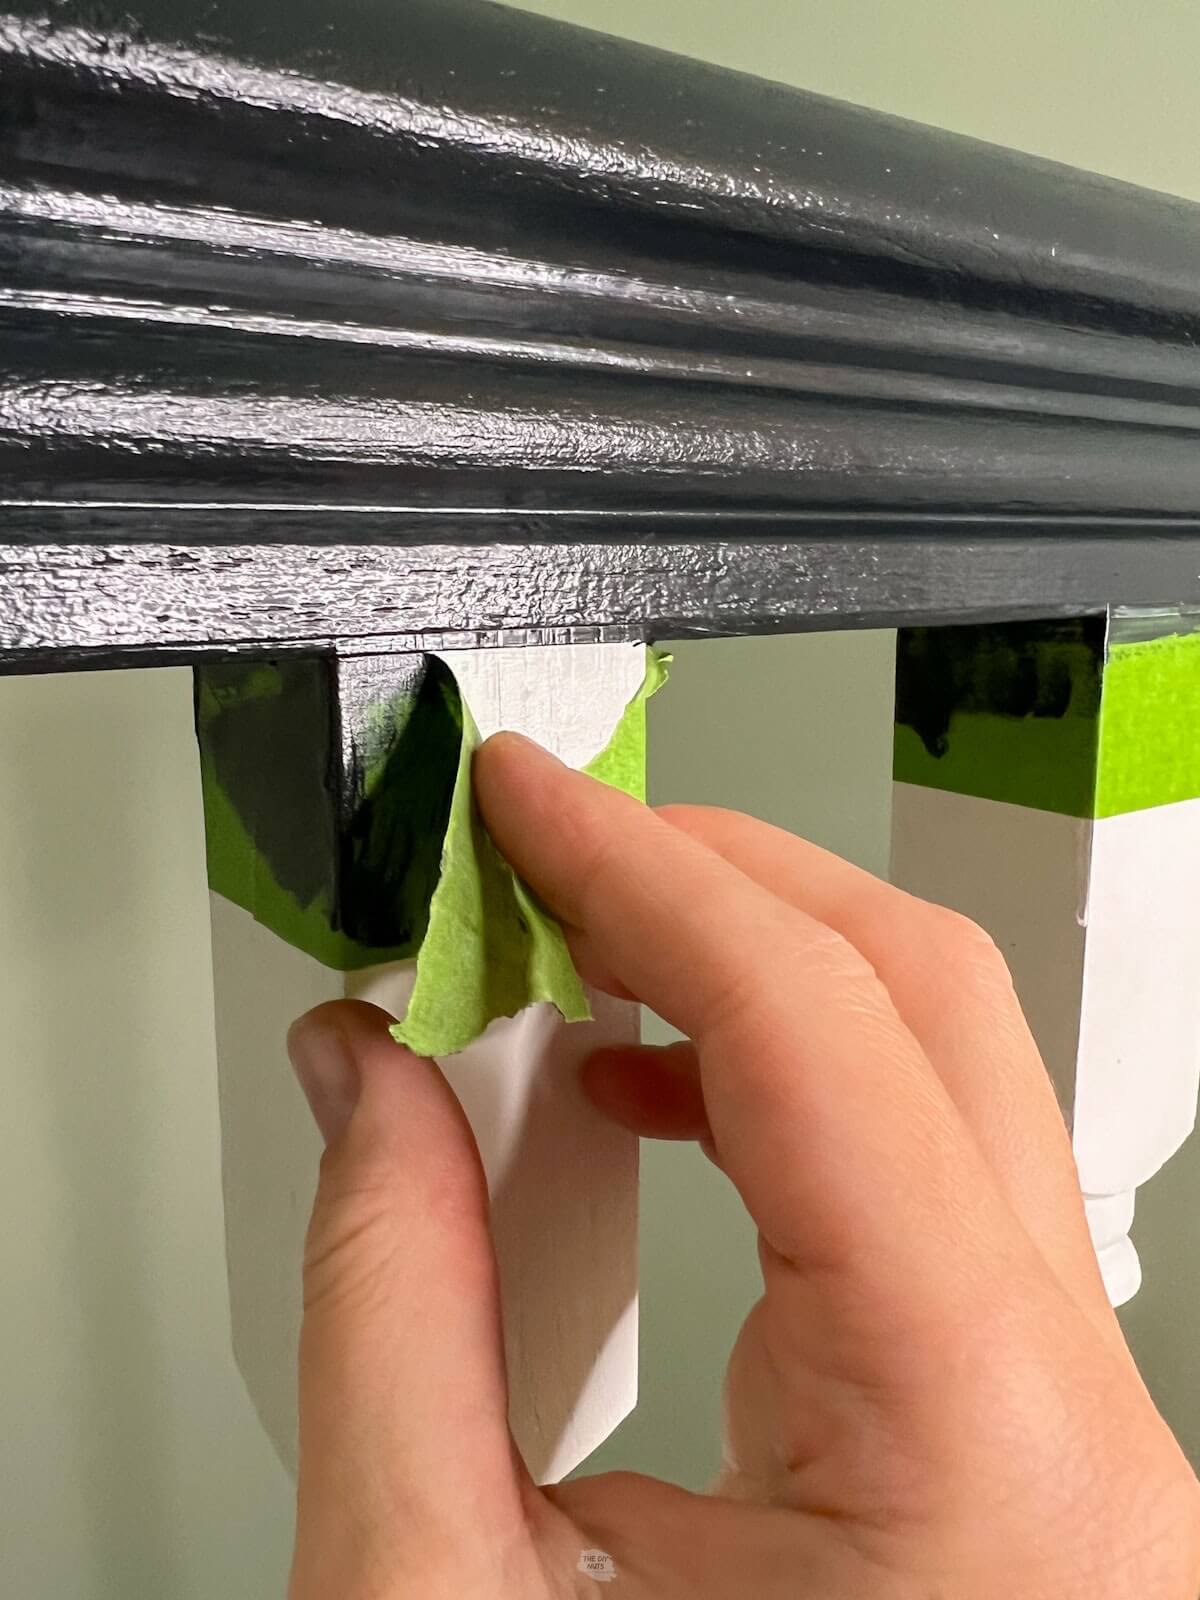
Step 8: Touch-Up Any Areas
Even though you will try to be perfect, it is challenging when painting a dark color near a lighter color. Use a small painter’s brush to neatly touch up any areas that need it.

Step 9: Let Paint Cure
Try to let the paint cure as long as possible before touching the railing. Paint takes around 30 days to fully cure and hardened so just be careful during that time.

Tips
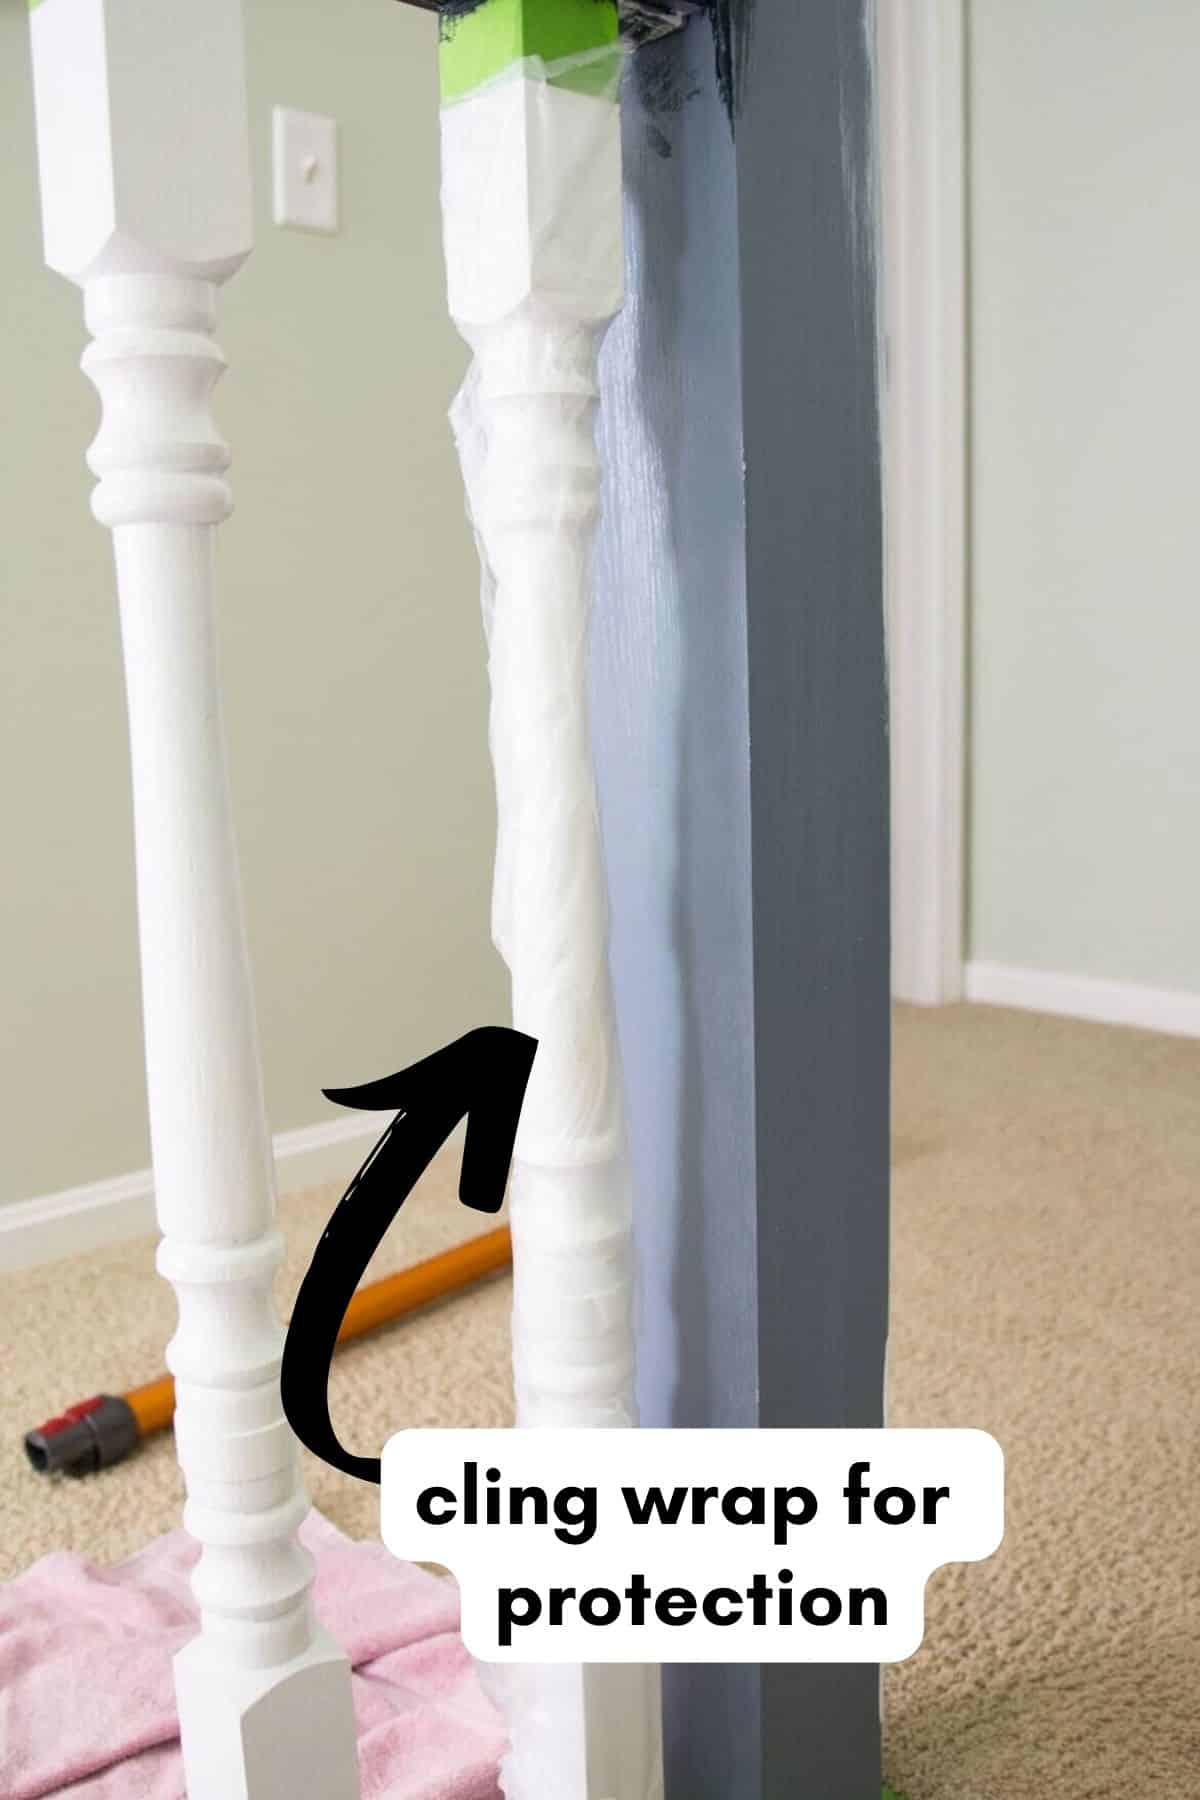
- You can wrap any spindles with clear cling wrap to help protect them from getting the dark paint.
- You need to look at your oak railing to decide what should be the darker color. For us, that meant the underside of the railing as well.
- You can lightly sand in between coats if needed.
Railing Painting FAQS
I wasn’t in love with the color choice that I made 5 years ago. Therefore, I chose to paint the railing black and white for an updated and modern feel. I also wanted to use our favorite paint for a durable and self-leveling idea.
We recommend using satin, semi-gloss or gloss finish for areas that will be touched often like a railing.
If you are using a high-quality paint meant for woodwork, like Benjamin Moore Pro Advance or Sherwin Williams Emerald Urethane Trim Enamel you should not need a top coat. These paints are designed to self-level as they dry hard, therefore, becoming very durable after being fully cured.
We used Inkwell to play off of some of the cooler colors and SW Pure White on the railings. SW Tricorn Black is also a great option.
Handrails and banisters are touched frequently, therefore using a hard enamel or hybrid paint in satin, semi-gloss or gloss will be the easiest to clean. Matte or eggshell finishes may show blemishes and may wear more over time.
Yes, unless you completely sand the railing smooth or fill in with a grain filler, you will still see some of the texture from the oak.
Follow us on Pinterest, YouTube or Facebook for more DIY inspiration!
Before and After Black and White Railing
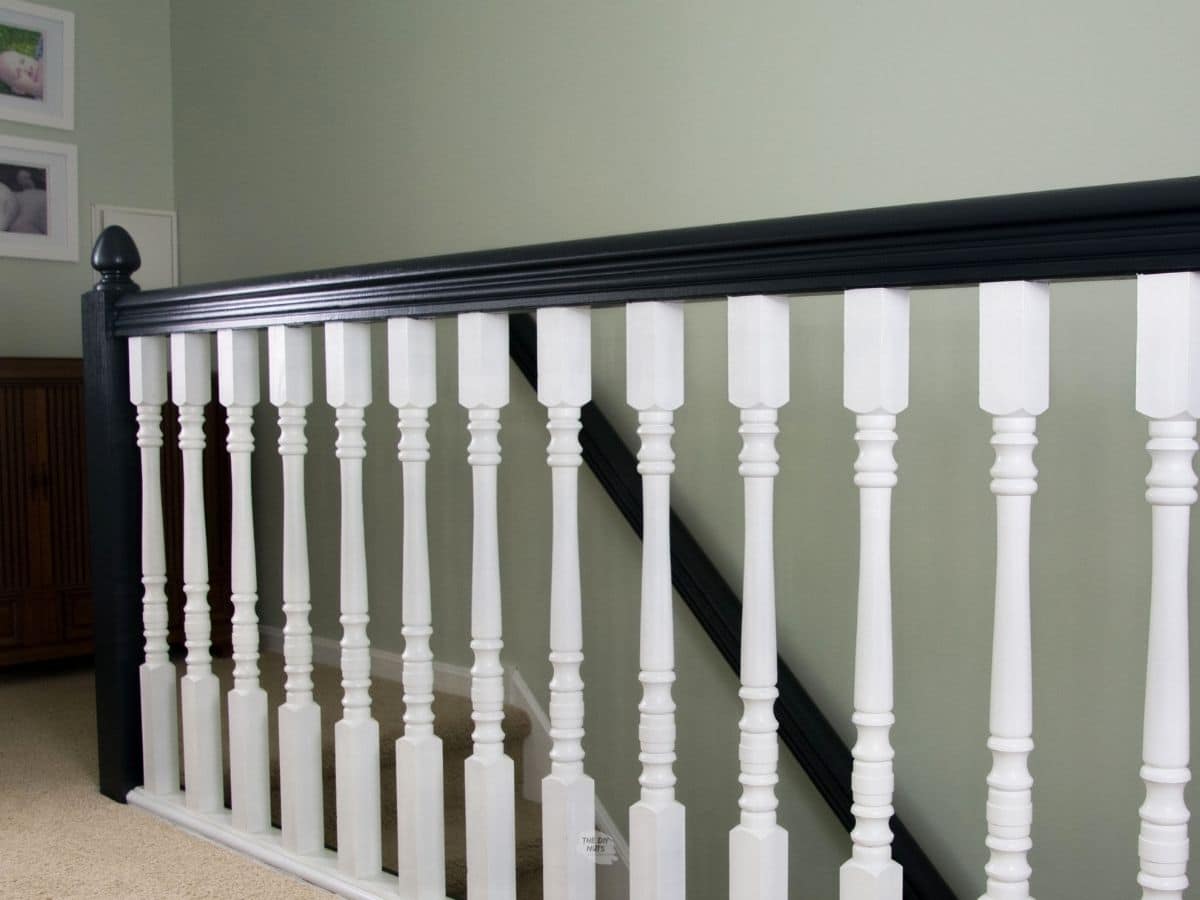
We probably should have painted this railing in black and white the first time. We love the classic look we now have on our painted banister and handrail.
Related Reading
- How To Repaint Kitchen Cabinets
- How To Repaint Bathroom Vanity Cabinets
- Our Favorite Non-Gray Neutral Paint Color
If you like this tutorial, please give it 5 stars below 🤩🤩🤩🤩🤩. Your support helps us continue to provide unique and budget-friendly DIYs.
How To Paint A Staircase Handrail & Banister Black
Equipment
- 2" or 2.5" Angled Paintbrush
- Small Paint Tray (will make your life so much easier)
- Screwdriver
- Rag
Supplies
- Peel and Stick Paint Samples if you need help finding color
- Deglosser paint prep
- Extra Fine Sandpaper
- Scotch Brite Pad
- Painter’s Tape
- Sherwin Willams Emerald Urethane Trim Enamel Paint In Tricorn Black
Instructions
- Assess the railing: Check for any worn-down areas that need sanding and priming.
- Prime if necessary: If the original paint is glossy, the paint job is sloppy, or you’re transitioning from a dark to a light color, consider using a primer.
- Choose the right paint: Recommended options include Sherwin Williams Urethane Trim Enamel, Benjamin Moore Advance, or Sherwin Williams Pro-Classic Interior Water-based Acrylic Alkyd.
- Lightly sand: Use 220 fine sandpaper to scuff the surface for better paint adhesion.
- Wipe down with deglosser: Use a deglosser like Krud Kutter to thoroughly clean the surface.
- Tape out areas: Use painter’s tape to mark off areas you don’t want to be painted.
- Use brush and roller: Apply the paint using a foam roller for a smooth finish and a brush for hard-to-reach areas.
- Let dry and apply multiple coats: Allow the first coat to dry, then apply 2-3 coats of Sherwin Williams Emerald Urethane Trim Enamel for a lasting finish.
- Remove the tape: Carefully remove the tape while the paint is still tacky for clean lines.
- Touch up any areas: Use a small painter’s brush to fix any imperfections between the colors.
- Let paint cure: Allow the paint to cure for approximately 30 days for maximum durability.
Notes
- Protect spindles with clear cling wrap during painting.
- Determine which areas should be the darker color based on the oak railing’s design.
- Lightly sand between coats if needed.

