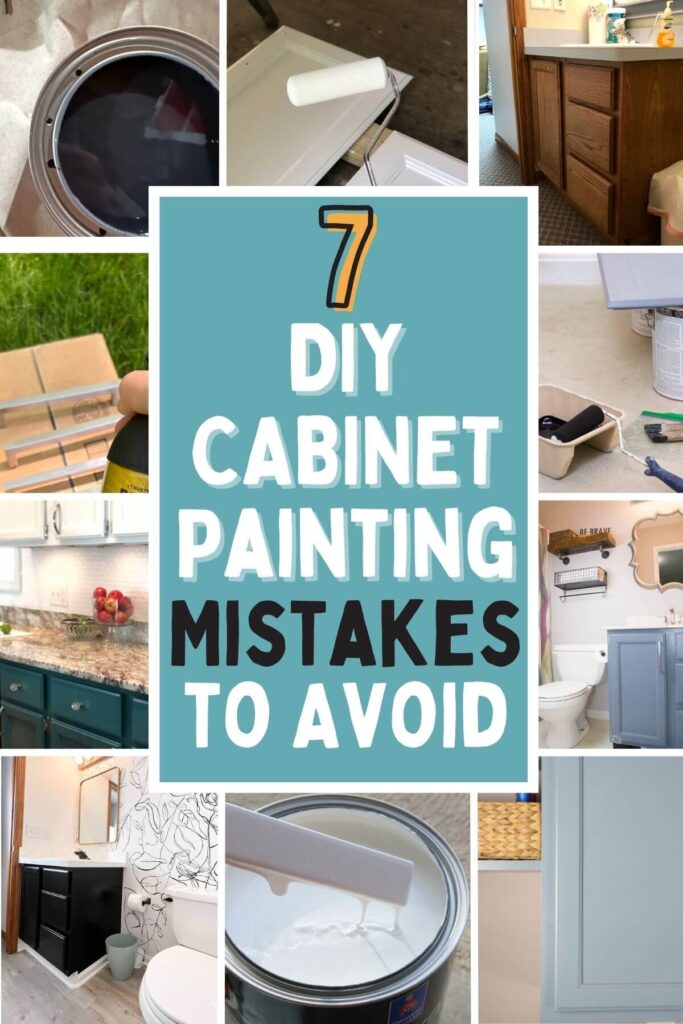
7 Mistakes to Avoid When Painting Cabinets + Our DIY Painting Tips
Do you want to tackle a DIY cabinet painting project with just a brush and roller? You’re in the right place! Whether it’s your bathroom vanity or your kitchen cabinets, we’ve painted enough cabinetry to know a thing or two. Get all the details on our favorite products, DIY cabinet painting tips and mistakes to avoid.
*Disclosure: I only recommend products I would use myself and all opinions expressed here are our own. This post may contain affiliate links that at no additional cost to you, I may earn a small commission. Read our full privacy policy.
Why paint your cabinets yourself?
As we have shown for many DIY projects, painting is honestly one of the most inexpensive ways to update your home and cabinets.
We know professional painters may have some different opinions about paints, etc. However, we tend to stick towards more latex-based products due to being a DIY painter’s best friend and these methods are what has worked for us over the years.
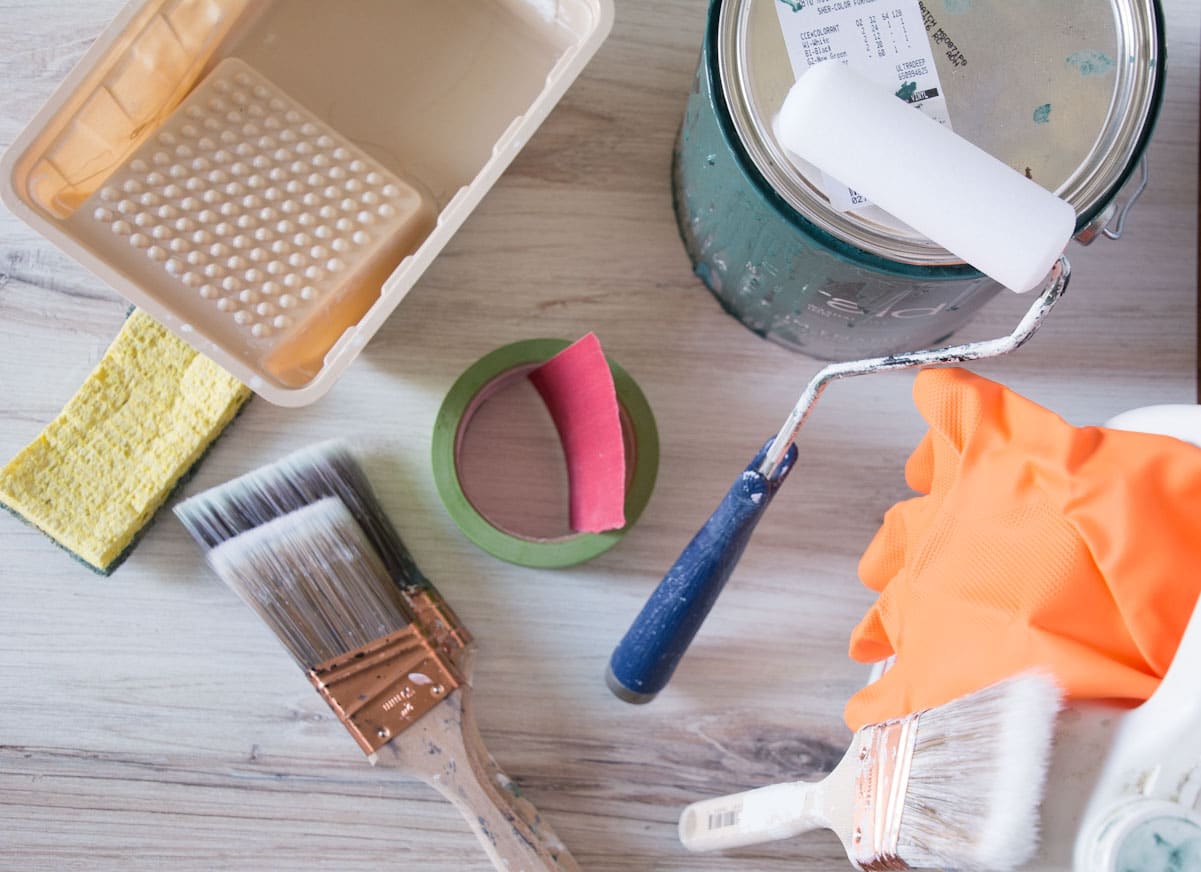
Recommended Supplies
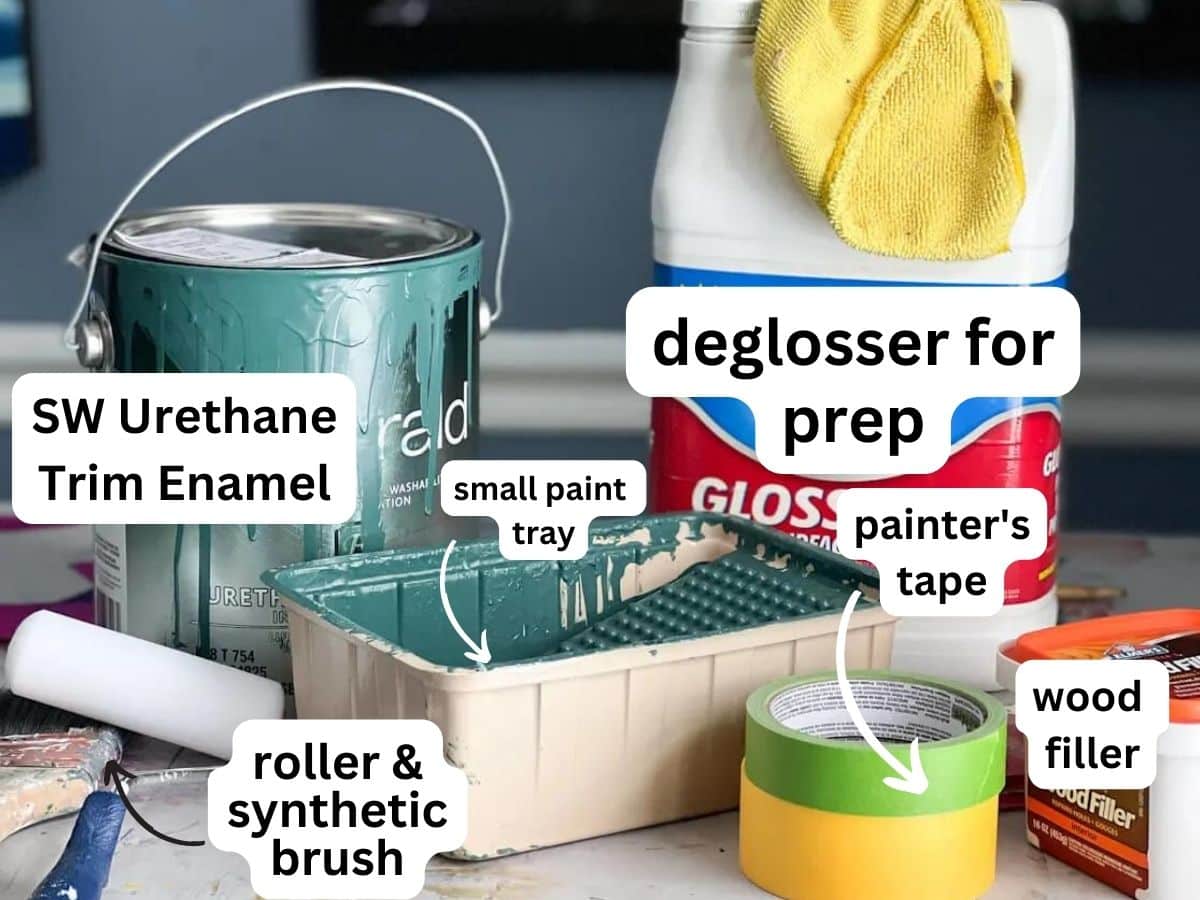
- Deglosser
- Painter’s Tape (this brand)
- Purdy 2.5” angled brush (You won’t regret buying a nice brush. It is worth the extra money than working with cheap brushes)
- Small Foam Rollers
- Caulk and Caulk gun
- Sherwin Williams Emerald Urethane Trim Enamel or Benjamin Moore Pro Advance
- Zinsser Primer: if painting cabinet for the first time
- Optional: Wood Filler if needing to fill in holes or for repair
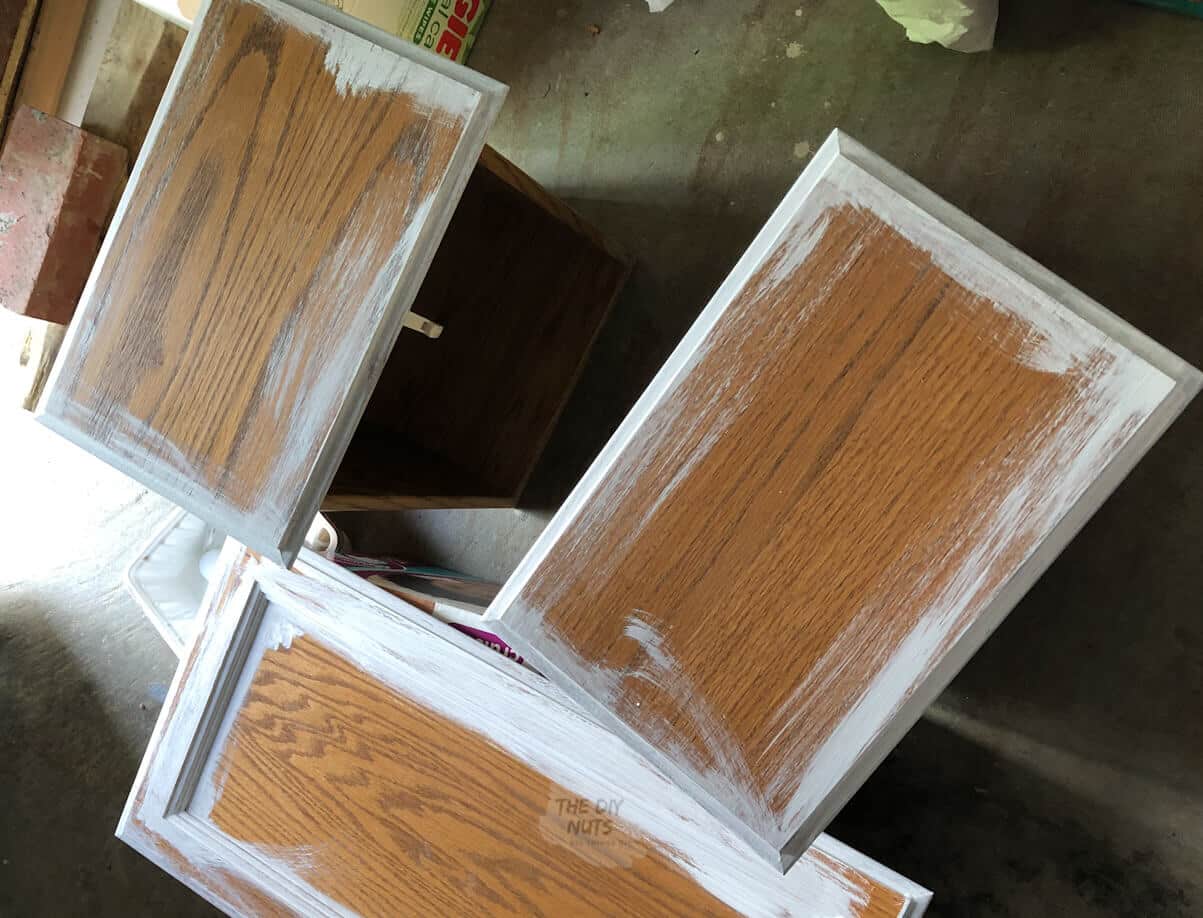
Mistake #1: Skipping the Cleaning and Sanding Process
Remove Doors and Cabinets
While it might seem like a hassle to remove your doors and drawers, it will make all the difference in getting a smooth finish. Set up a painting station, draw yourself a map and get to work.
Sanding and Deglossing
Luckily you do not have to completely sand down the finish of your cabinets. However, you do need to lightly sand and wipe down with a deglosser. We have never regretted spending ten minutes lightly sanding and cleaning before starting.

Mistake #2: Not Using A Primer
Choosing the right primer and paint is crucial for achieving a long-lasting and beautiful finish when painting or even repainting cabinets.
What To Look For
Here are some tips on how to choose the right primer for your project:
- Look for a primer that is specifically designed for use on wood surfaces. A wood primer will help the paint adhere to the surface of the cabinets and prevent any tannins or oils from bleeding through the paint.
- Note that for some of our projects we have used Sherwin Williams All-Purpose Latex primer successfully when using colored paint (not white) on the cabinets.

Recommended Primers
- If you are going to paint your cabinets and can handle a stinky smell, then Kilz primer, Bin Shellac, or other oil-based primers are great options.
- Zinsser Bulls Eye 1-2-3 Water-Based Primer: This primer is specifically designed for use on wood surfaces and can be used with both oil-based and water-based paints. It is low-VOC and dries quickly, making it a great choice for a cabinet painting project.
- Sherwin Williams All-Purpose Primer: If you are painting your cabinets a color, we have had great success with this primer as well.
What about oil-based primers?
It is true that some professional painters may recommend using an oil-based primer to prevent tannin or natural wood bleed through.
However, we like the water-based primers available that are specifically designed to prevent these issues. These water-based primers may also have the added benefits of being low odor and easy to clean up.
Ultimately, the choice between oil-based and water-based primers may depend on personal preference and specific project requirements.
Since we were painting our bathroom cabinets a color, SW All-Purpose primer worked well.
Don’t Skip Priming
Regardless, whatever you do, do not skip priming wood cabinets before painting. I have read post after post from others that say you do not have to prime your cabinets. I honestly feel ours have held up over the test of time due to primer. Don’t skip this step!!
Mistake #3: Using Just Any Old Paint
Picking the right paint is probably one of the most important things. I would also argue that picking the right primer may be more important when considering painting any cabinets in your home.
What To Look For
- Choose a paint that is specifically designed for bathroom and kitchen cabinets. These types of paints are durable, moisture-resistant, and can withstand the heat and humidity that are common in bathrooms.
- Opt for a paint with a satin, semi-gloss or high-gloss finish. These finishes are easy to clean and can withstand moisture, which is important in a bathroom or kitchen environment. Just note that glossy finishes will show imperfections easily.
- When selecting a cabinet paint color, keep in mind that lighter colors, like white cabinets, tend to show more wear and tear over time. If you choose a light color, you may need to touch up the paint more frequently than if you choose a darker color. However, scratches will show more easily in darker colors. Having a paint touch-up pen could be a solution for you no matter what color you chose.
- Look for paint products that are labeled as low-VOC or zero-VOC. These products contain fewer volatile organic compounds, which can be harmful to your health and the environment.
Need Help Picking Paint Colors?
We recently just tried Samplize, which beats having to buy individual paint samples. These 9″ x 14.75″ samples will be shipped directly to you and save the hassle of clean-up (we loved that). See our full review here.
In the past, we have always used latex enamel paint when painting cabinets. I am a big fan of Sherwin Williams ProClassic line.
However, after using Sherwin’s newer Emerald Urethane Trim Enamel paint, I will never use any other paint for cabinet painting. According to the SW site, “It is an Interior/exterior water-based urethane modified alkyd with the look and feel of an alkyd/oil finish.” To translate, it will look like an oil-based paint but has the benefits of being latex-based.
You can find out more about picking the right kitchen cabinet paint for you.
Pros To Hybrid Paints
- The finish is harder and more durable than the Proclassic line.
- It also is self-leveling so it really gave such a smooth and professional-looking finish.
- It is a water-based paint that is more resistant to stains, scratches, and mildew after it cures than other cabinet paint.
- Has a low VOC content, which means that it has fewer harmful fumes and is more eco-friendly than traditional oil-based paints.
- Easy to clean up with soap and water, which makes it a great option for a DIY cabinet painting project.
Biggest Con
The only con was that the cabinets were tacky to the touch for a few days. But if we could survive with young children and not ruin the cabinets, then you can too!
Mistake #4: Rushing the Process
When painting your doors you may prop them up on sawhorses, you have to make sure that your paint is completely dry and not tacky to the touch. If you flip the doors over without them being completely dry you will end up with bumps and scrapes.
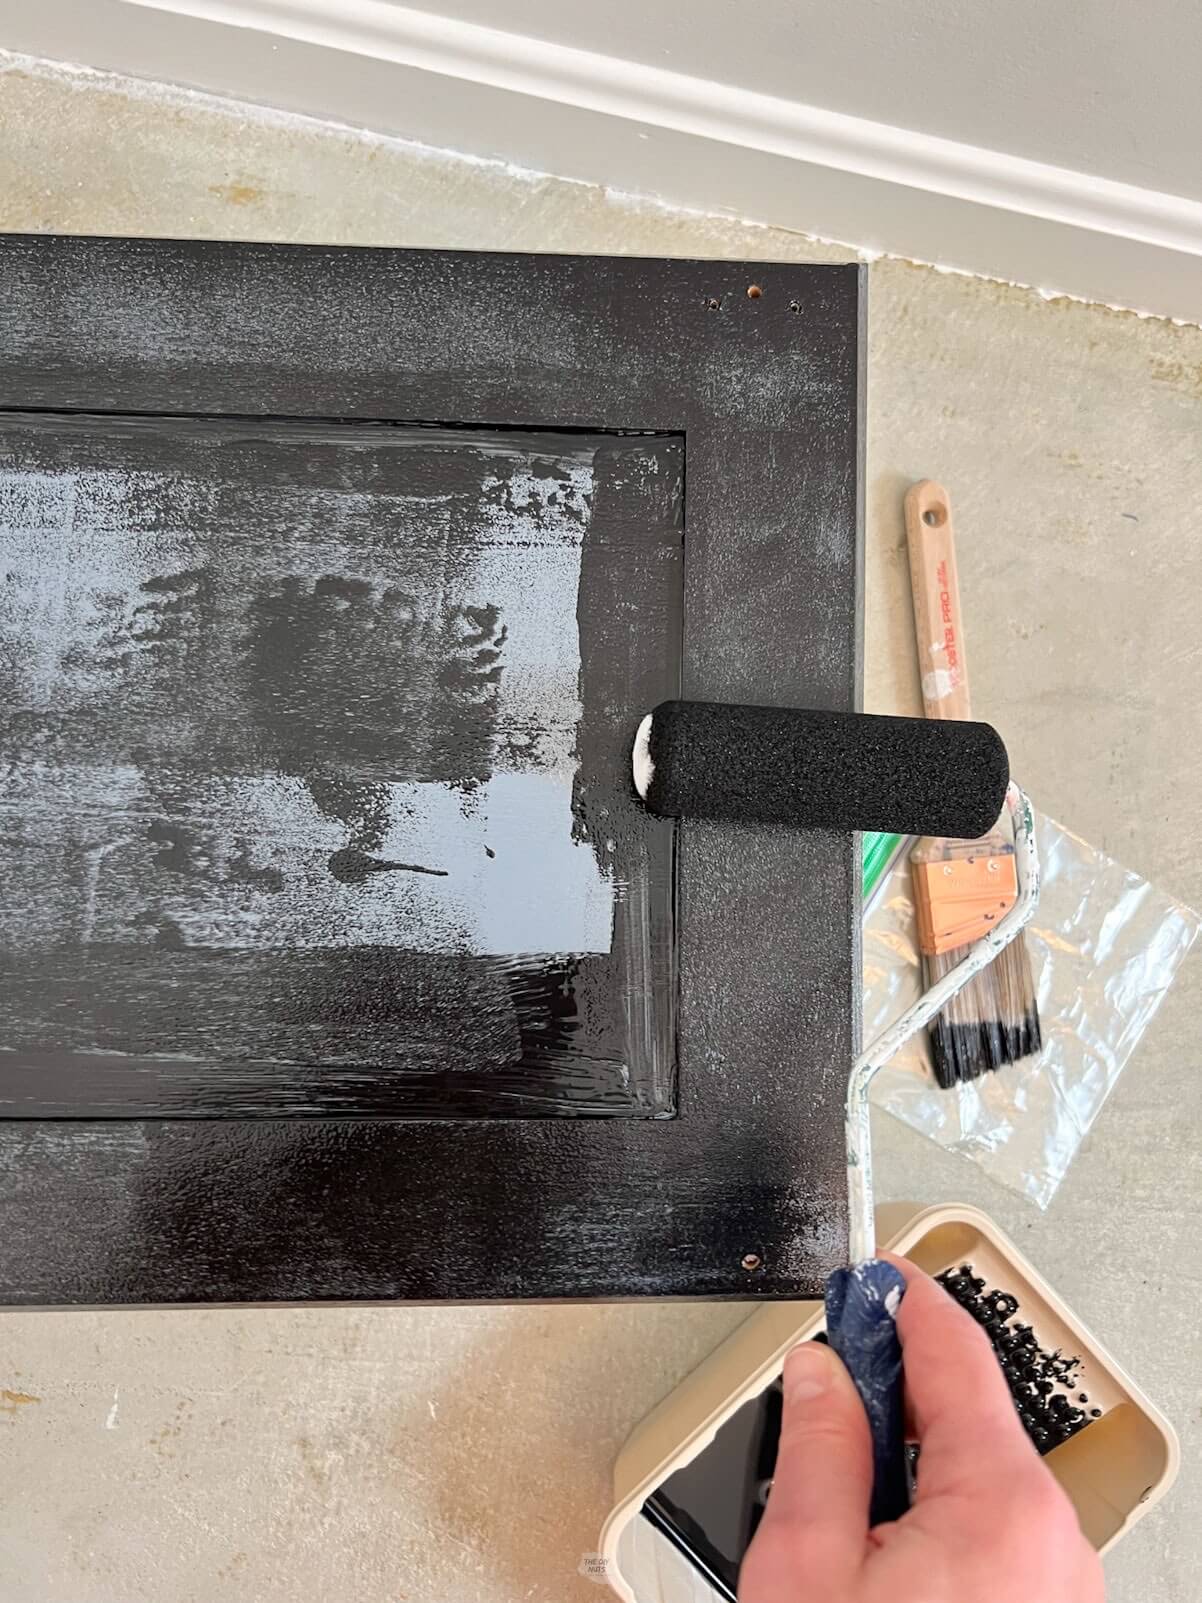
Paint In Thin Layers
You also want to paint in thin layers to avoid bubbling and drips. While you may think you are making this DIY project go faster by painting a more solid color, you will end up causing more work for yourself. Your first coat may not look the best and that is okay.
Mistake #5: Painting Hardware With Cabinet Paint
Some people try to keep the doors on their cabinetry when they are painting. You will get paint on your hinges and handles no matter how careful you are. Take your time and remove the doors, hinges, and handles.

Refinishing Hardware Is An Option
If you want a new look on your hardware, you could consider refinishing or replacing the hardware. You can paint your cabinet hardware with spray paint. We did this in our laundry room to match the black brackets and they still look great.
Mistake #6: Not Allowing Paint to Fully Dry Before Reassembling
Yes, you have been working hard all week and you want your bathroom or kitchen to finally get put back together. Do yourself a favor and wait a few extra hours or days longer than you think you need to. By letting your paint cure as long as possible you are limiting extra scuff marks that may occur.
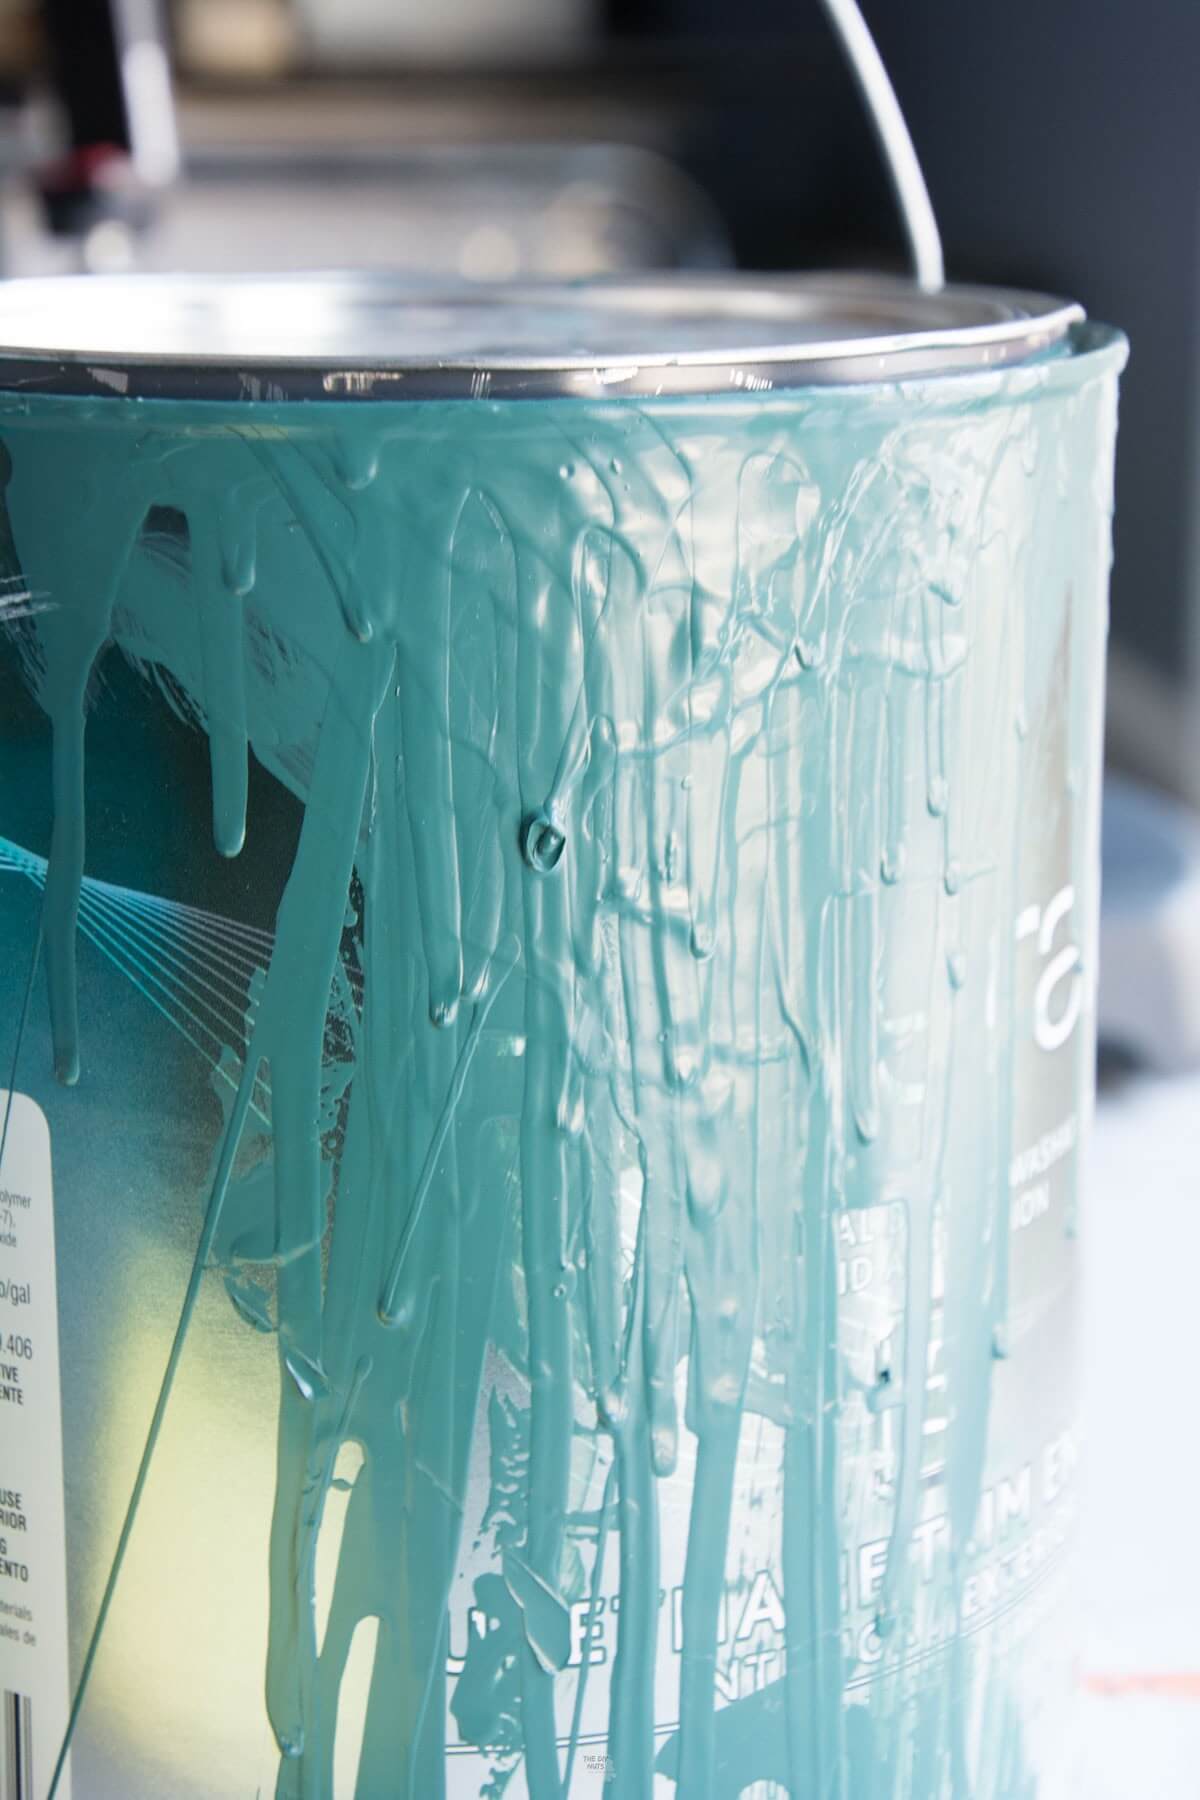
While you can put your cabinets back together sooner, some paint doesn’t fully cure for 30 days. You can see how we left our blue green painted doors off for over a week before reinstalling them. Be extra careful and add bumpers to limit extra friction between doors, drawers and painted cabinet boxes.
Mistake #7: Failing to Properly Ventilate the Work Area
Even though we recommend low-VOC paints, you still want to make sure that you are ventilating your work area. Take breaks when you feel you need to.
Cabinet Painting FAQs
We do not recommend using chalk paint, regular latex paint or an all-in-one paint & primer on cabinets that get a lot of wear and tear. We love DIY chalk paint for furniture makeovers but feel that you may regret your decision after you a year or two. You need your paint to adhere properly and give you the proper finish that cabinetry paints will do.
Yes, you can spray cabinets as a DIY project, but it requires the proper set-up and a confident hand with a paint sprayer. For achieving the smoothest finish, spraying the cabinets can be a great option. However, one of the downsides of spraying is the difficulty in controlling overspray. Setting up a spraying station and spraying the cabinet doors and drawers may be a viable option if you have the space to do so. However, if you are not comfortable with spraying, using a good brush and a small roller can still yield great results.
A synthetic 2.5” angled brush is a great option to use for cabinet painting with latex enamel paint. Some people also love this shorter handled angled brush for cabinet painting.
Small foam rollers allow you the ability to control the amount of paint applied easily and leave a smooth finish when painting your cabinets.
We always use semi-gloss. For the same reason you wouldn’t want to use chalk paint, you wouldn’t want to use matte or even eggshell paint. Semi-gloss is the perfect solution to help hide some imperfections while giving an easily cleanable surface.
However, recently I was in Sherwin Williams and apparently satin is the most common finish for cabinets, especially kitchen cabinets.
Follow us on Pinterest, YouTube or Facebook for more DIY inspiration!
Related Posts
- 14+ DIY Bathroom Vanity Makeover Ideas
- How To Make Oak Cabinet Look Modern Without Painting
- DIY Paint Pen Accent Wall: Pictured above, this small bathroom makeover was done for around $150.
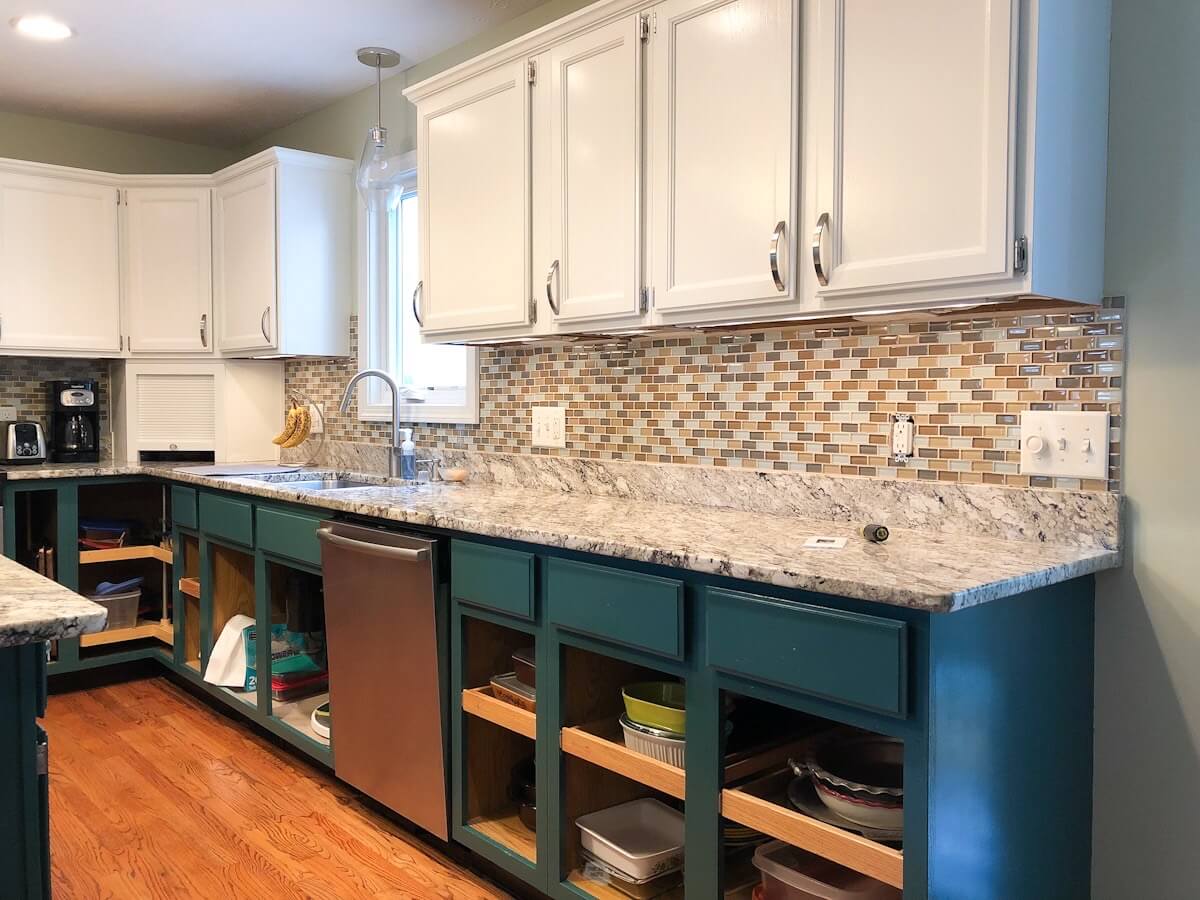
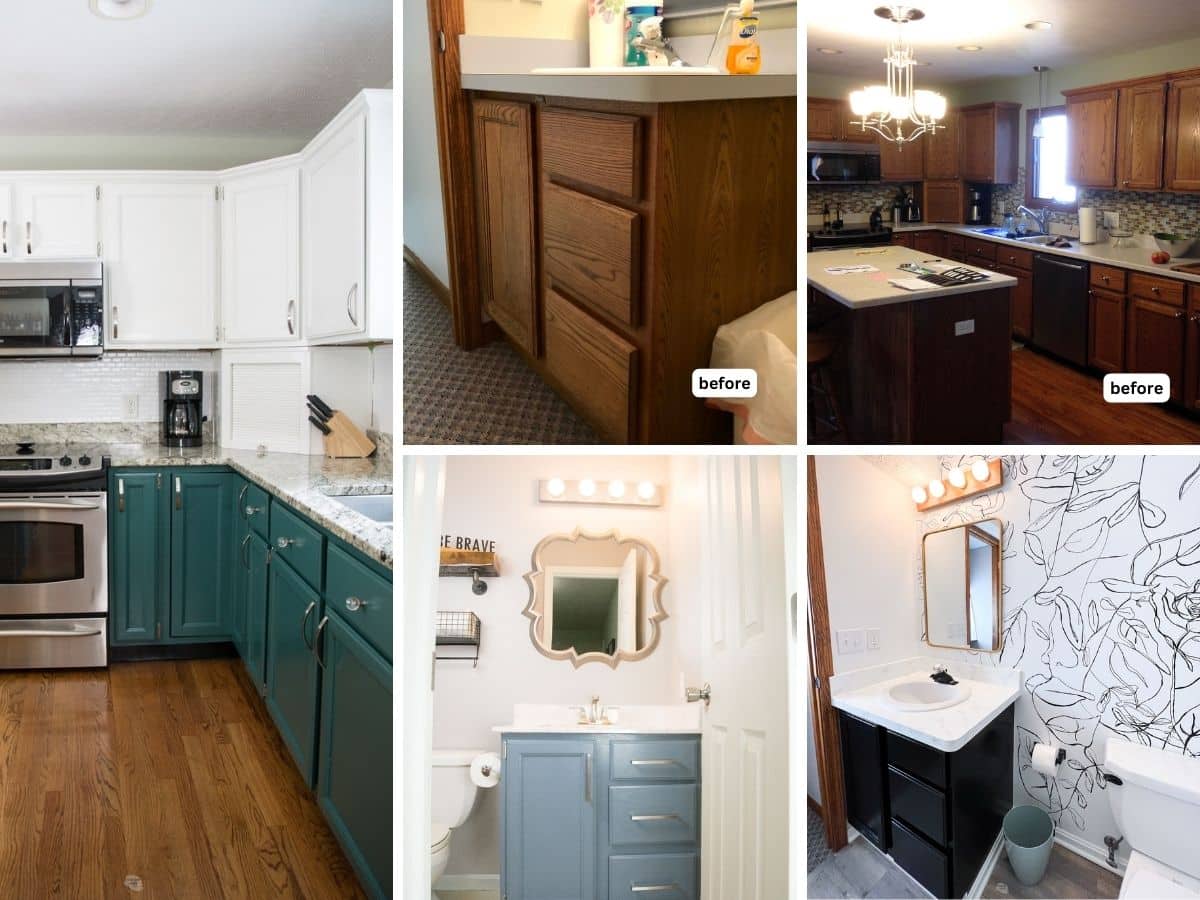
Painting cabinets can be one of the most economical ways to give your kitchen or bathroom a makeover. With the right tools and techniques, you can achieve a professional-looking finish on this DIY project. Whether you choose to use a brush, roller, or sprayer, taking the time to properly prep and prime your cabinets will help ensure a long-lasting result that you can enjoy for years to come.
Latex enamel on cabinets? No way. Too soft and stays sticky for ages. You’ll find objects adhere to the paint weeks after the latex enamel is dry.
Hey Charles. We have painted our kitchen cabinets and bathroom cabinets using SW Proclassic line and now love using the Emerald Urethane Enamel (still can be washed with water). Also, our bathroom cabinets with Behr Latex Enamel have also held up. I wouldn’t use that paint for a kitchen, but we love our painted cabinets and they have held up. Obviously, there are pros and cons to each type of paint and ways to apply them. I hope you have good luck with whatever method you chose.
If my cabinets are currently white, do I need to prime them? Will the little nicks and blemishs be covered up by the new paint or do they need to be filled in with a wood filler?
Hi Joe. You may be interested in this repainting cabinet post about changing our white cabinets. We had a few spots that I wish I would have prepped a little better when using self-leveling paint. It wasn’t horrible, but there were just dings that I probably can only see. It is hard to for me to guess the condition of your cabinets to exactly tell you what to do. You could always take a picture of your cabinets into a paint store and show them to see what they say. Good uck with your cabinet painting.
Ugh…I completely messed up. I had every intent of following these instructions verbatim…BUT after all of my hard work, 2 coats of “primer,” then getting ready to paint, I realized I used my PAINT to prime the cabinets by mistake!! I’m so bummed!! Does this mean it will all peel off? Can I put a coat of primer on top of the 2 coats of paint, then another coat of paint afterward? Or is it too late for damage control at this point? These are RV cabinet doors and cheaply made, so I’m really worried about peeling. I sanded them AND used liquid sandpaper afterward, so I’m hoping that will save me a little…Let me know what you think. Thank you!
Hi Hannah. How many cabinets are we talking about? What type of paint did you use? Honestly, I would go to a local paint store (like a Sherwin Williams or Benjamin Moore) and show them pictures of your project. They will be able to advise you.
You probably have two options, you could remove the two layers of paint and start completely over with primer. Or if the paint seems to have adhered (like you can’t scratch it with your fingernail) then you could leave them and see how they wear over time. Good luck with your cabinet project and let us know what you decide to do.
I’m so glad I found this! I’ve been wanting to try for years, but have been so nervous to undergo such a huge project. I ended up following your directions and successfully painted the cabinets in my bathroom! I feel way more confident about taking on the kitchen cabinets next. Thanks for sharing!
Thank you for all the suggestions! I have honey oak cabinets that I would love to paint, but the doors aren’t just a flat surface around picture frame like trim like so many cabinet paint jobs look. Mine have a raised middle panel in the middle of the door. I don’t know if these will turn out as nice. What do you think? I can’t afford new cabinets.
Hi Lori. Without seeing the cabinets, it is hard to tell. However, paint is always a great way to change something without a complete remodel. I would say if you are willing to put in the work, you will probably be happy with the outcome! You can also look into just purchasing new doors if they really bother you. Obviously, painting cabinets will be much cheaper. You can also check out how our friends kept the honey oak in their kitchen but changed out other things for a modern look.
I have read a few of your posts and I am super impressed. I have generally left the to the pros, but you have given me the confidence to try to do it on my own this time. I will be starting tomorrow and hopefully be done before Monday. I can’t wait to share how it went.
Have you ever seen a kitchen that had just the doors/drawers painted? Leaving the base/main cabinet it’s natural oak (or whatever) color. I think this would be a great way to update a kitchen. I’ve seen full cabs done in a white then black hardware was used, so why not give a kitchen a similar look, but take less time and money?
Hi Julz. I have never seen that personally. However, if you like it then it may always be worth a try. Remember that design can always be a personal choice. You could also consider other ways you can update cabinets without painting or leave the bottom cabinets oak and possibly paint the top a lighter color.