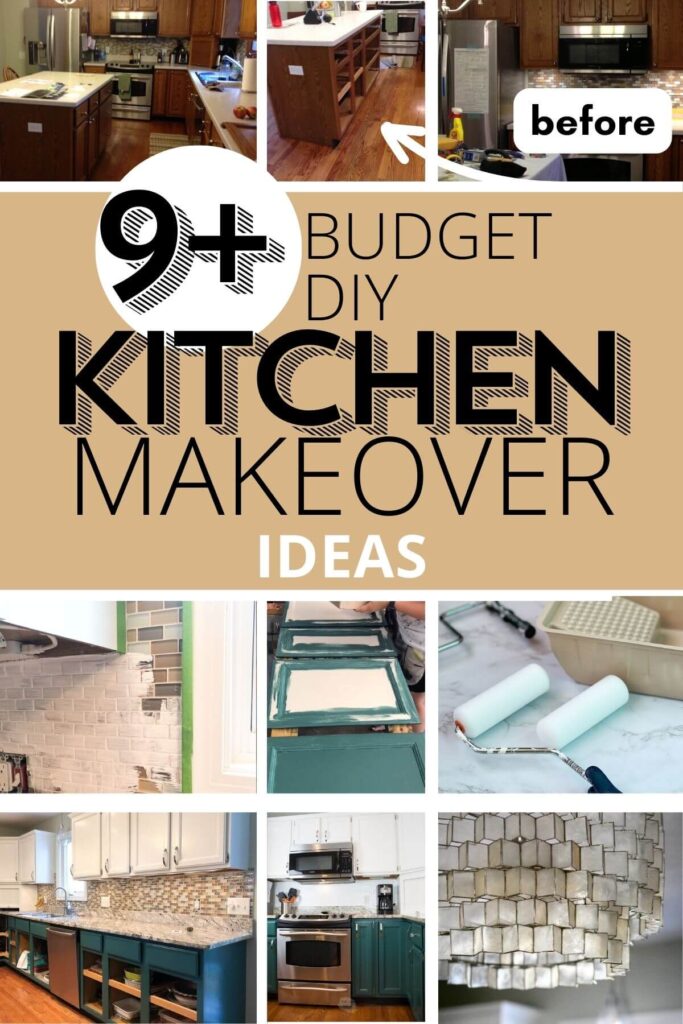
Budget DIY Kitchen Remodel Ideas To Inspire Your Makeover
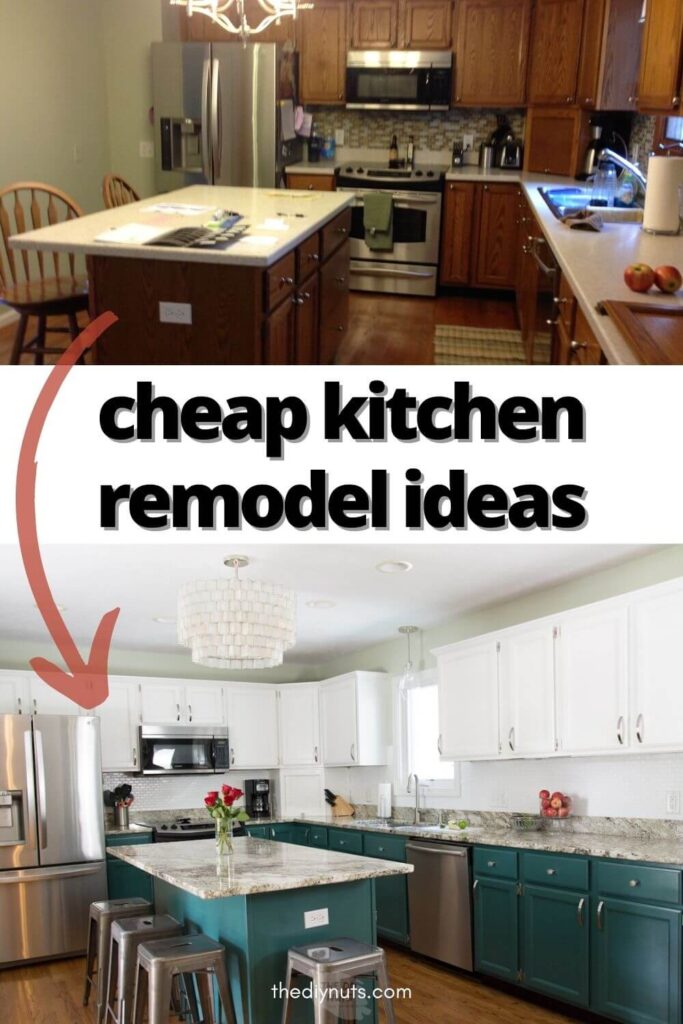
Do you have a sad and dated kitchen, but not a huge budget? That was exactly our kitchen remodel predicament. If we can bring our old kitchen into this era, you can, too – one DIY project at a time.
*Disclosure: I only recommend products I would use myself and all opinions expressed here are our own. This post may contain affiliate links that at no additional cost to you, I may earn a small commission. Read our full privacy policy.
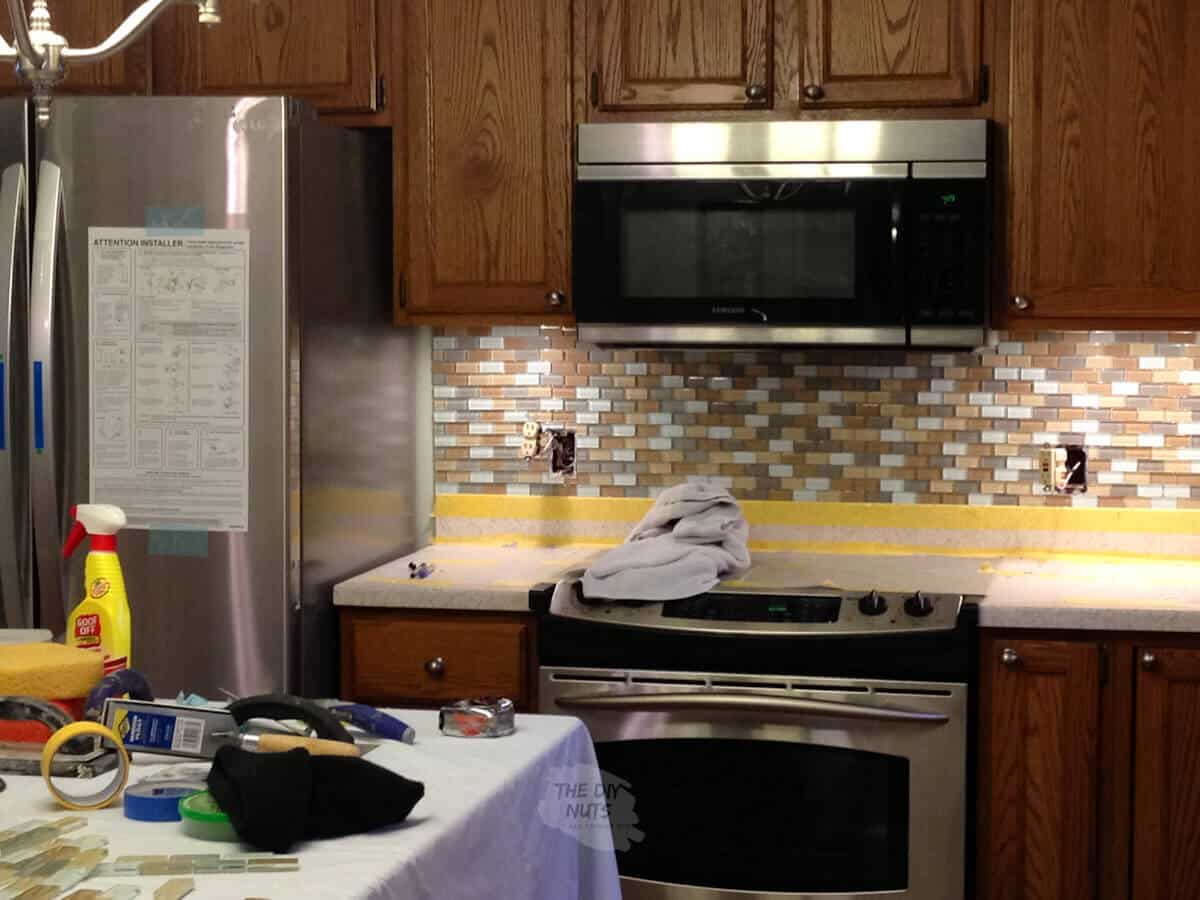
Our 90s Before Kitchen
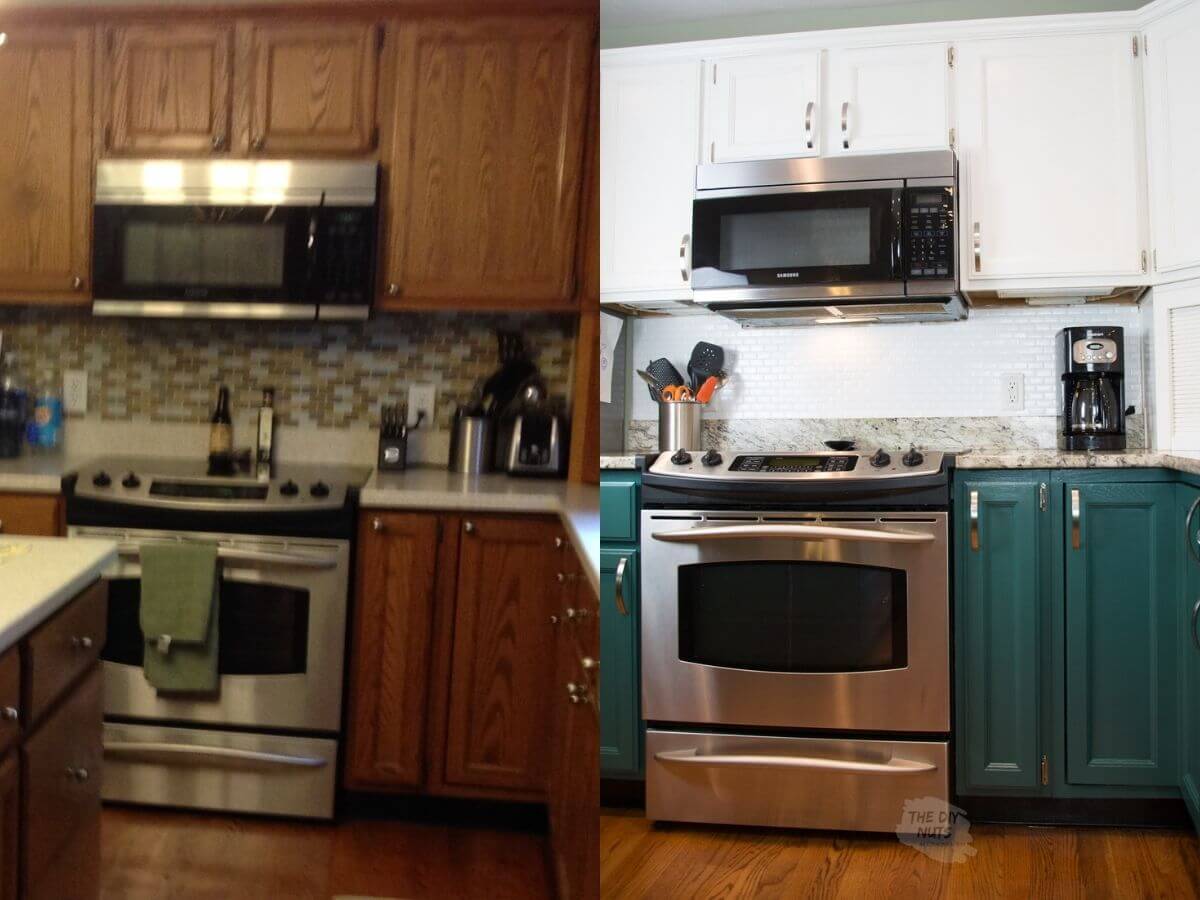
Our original kitchen was built in 1992. It had a dated oak design, and the previous owners added only a few stainless steel appliances. Over the years, we have completed several different budget-friendly kitchen DIY projects.
From adding a glass tile backsplash to some new appliances, small renovations and improvements have occurred along the way.

Home decor and personal styles (no more low-rise jeans for me :)) have changed, and it was time for a fresh, new kitchen.
We bought our house when oak was all the rage and even 8 years ago beige was still an okay color choice. We still love our favorite neutral wall color, but our style and tastes have evolved.
The good news is that we used budget-friendly DIY projects to update our kitchen again.
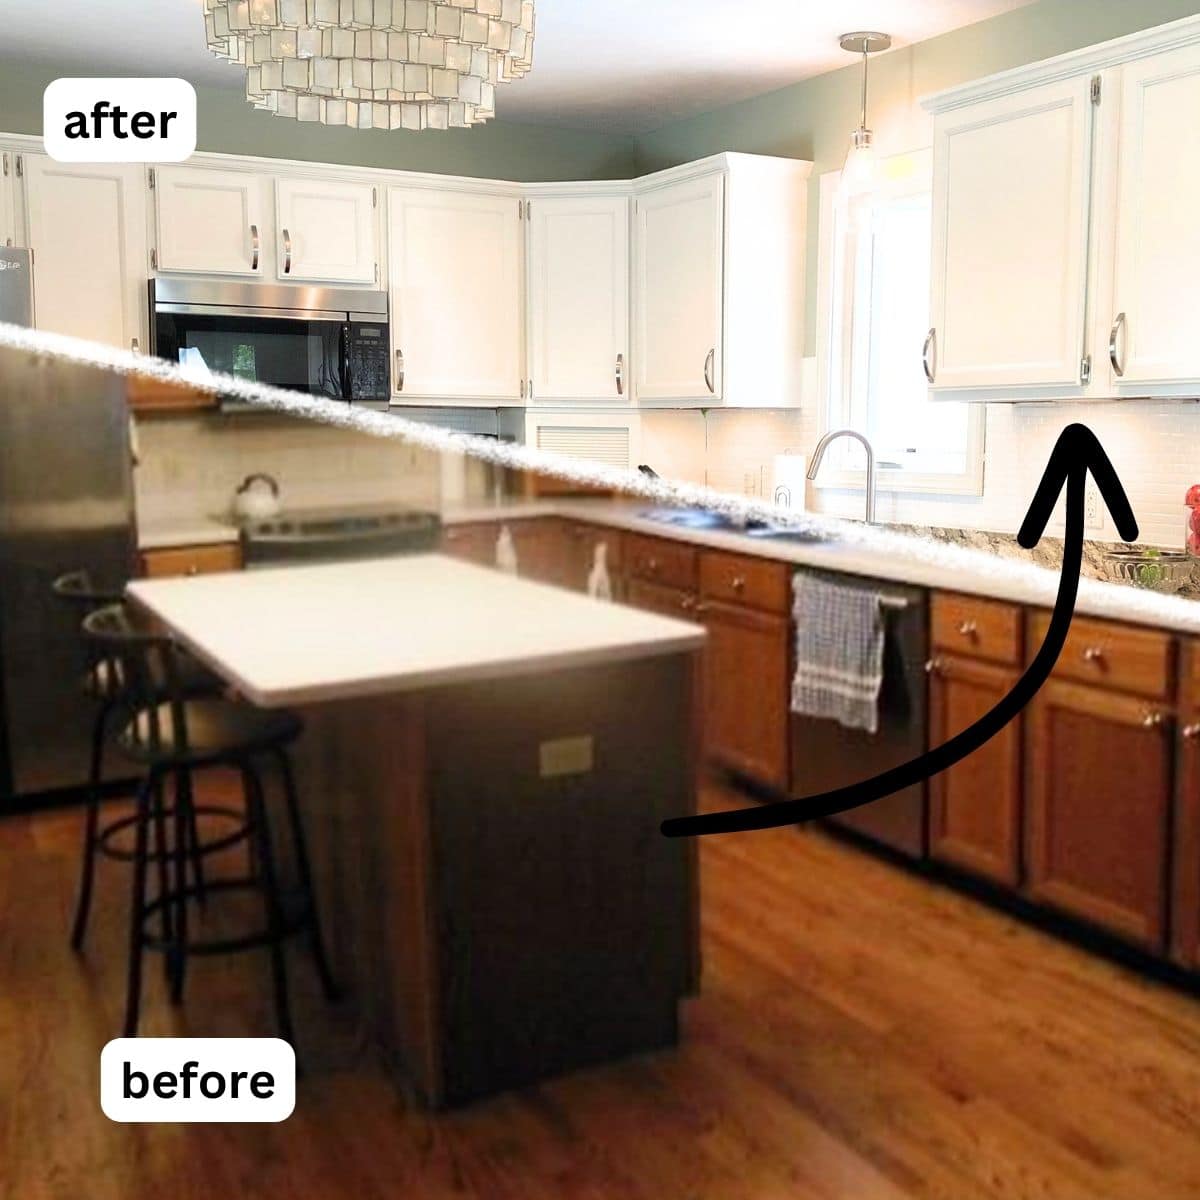
#1: Change Your Cabinets
The first significant change we took on was painting the kitchen cabinets white. A new coat of paint brightened our space for the time being.
When designing your dream kitchen, you have many options for modifying your existing cabinets to match your style.
Whether adding a fresh coat of paint, replacing doors, or completely gutting your kitchen, your cabinets are an excellent place to start.
Painting Your Cabinets
Since our oak cabinets had seen better days, we painted them a second time rather than replace them entirely. Painting them was our cheapest and best option since we could not afford new cabinets.
How much would it cost to have the cabinets painted professionally?
For reference, our kitchen has 12 upper cabinets with doors, an island with 3 levels of drawers and two cabinets and 11 lower cabinet doors, and 12 drawers. The general layout of our kitchen is 12’ x 14’=168 sq ft.
The upper cabinets are approximately 40 sq. ft and the lower cabinets are approx. 43.5 sq. ft. of the actual cabinet.
Therefore, using the above painting statistics, our estimate is that a professional paint job would cost around $2800+ to spray our cabinet.
- 12 upper cabinets/doors x 100=$1200
- 13 lower cabinet/doors X 100=$1300
- 12 lower drawers x $25=$300
According to Homeserve, the average cabinet paint price for a 200-square-foot kitchen is between $ 2,000 and $ 5,000.
How Much Did We Spend On Paint
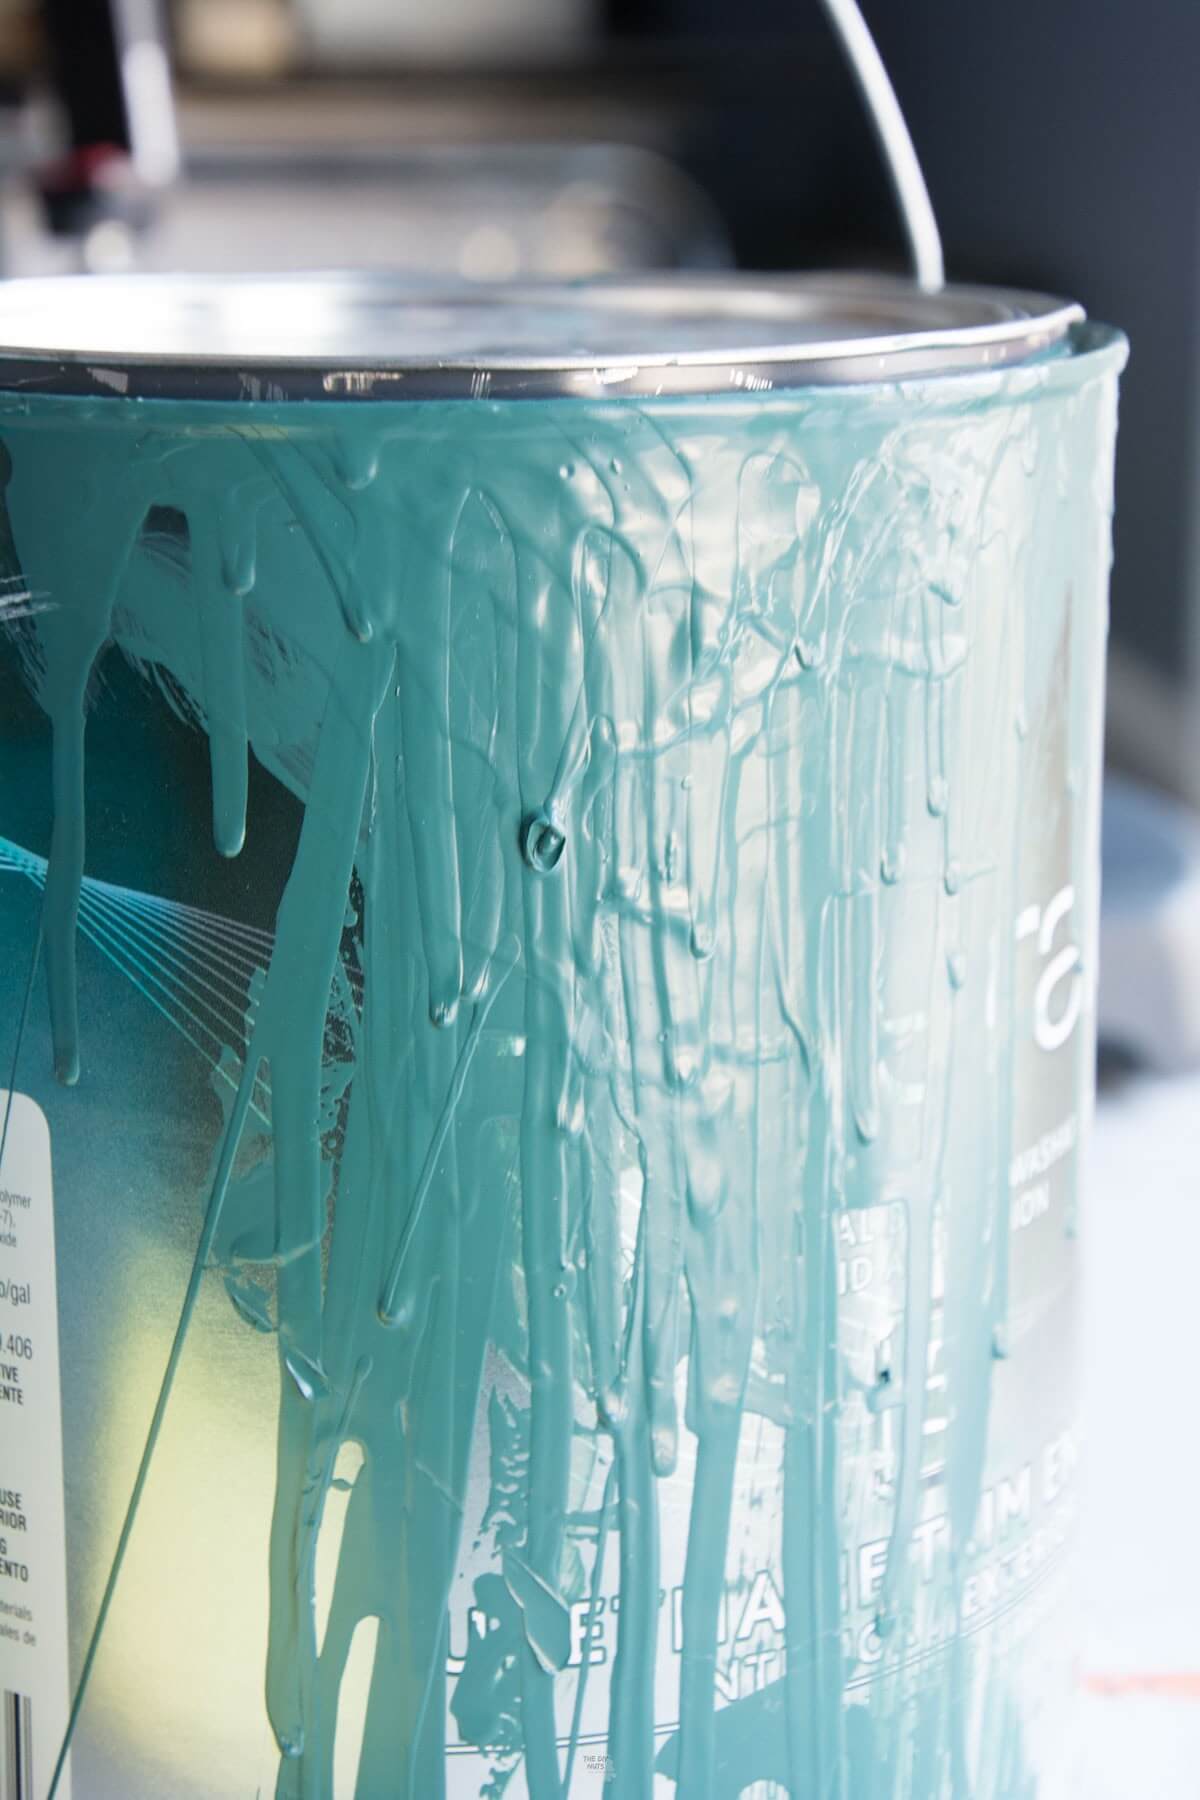
We spent about $150 on paint and supplies to repaint our cabinets. Please note we also have paint and supplies left over.
The 150ish dollars spent on paint and supplies (new foam roller, Frog tape, deglosser, paint tray) was worth it to paint the cabinets and the backsplash tile.
You can read all about our cabinet door painting process and other DIY cabinet painting tips.
Tips For Finding Your Paint Colors
- If choosing classic white, compare different white paints.
- Make sure you test out your paint colors in different lighting situations and compare them to your current paint colors on moldings, etc.
We chose the base Emerald color (High Reflective White) for a clean look that matched our already painted wood trim. We did not want to contrast with the current white on our moldings.
Ideas Without Painting The Wood
Our friends achieved a modern feel in this small kitchen makeover without painting the oak cabinets. We love the DIY design ideas like adding open shelving, new matte black hardware, and a faucet.
Read more: 13 DIY Projects To Get Rid Of That Ugly Oak
#2: Add Energy Efficiency With New Kitchen Appliances
Opting for a large French-door refrigerator with a bottom freezer will allow all family members easy access to snacks. This appliance style has served our family well. We can easily store and grab our food. This is a newer version of this LG fridge that we would buy today if we changed our kitchen design.
#4: Clean Your Kitchen
You would be surprised at the amount of gunk that can accumulate on your hands, hinges, and ridges of your cabinets. Don’t forget to wipe down the tops of the cabinets and appliances as well. Starting with a clean slate will make a significant difference, especially if you’re not doing a complete demolition.
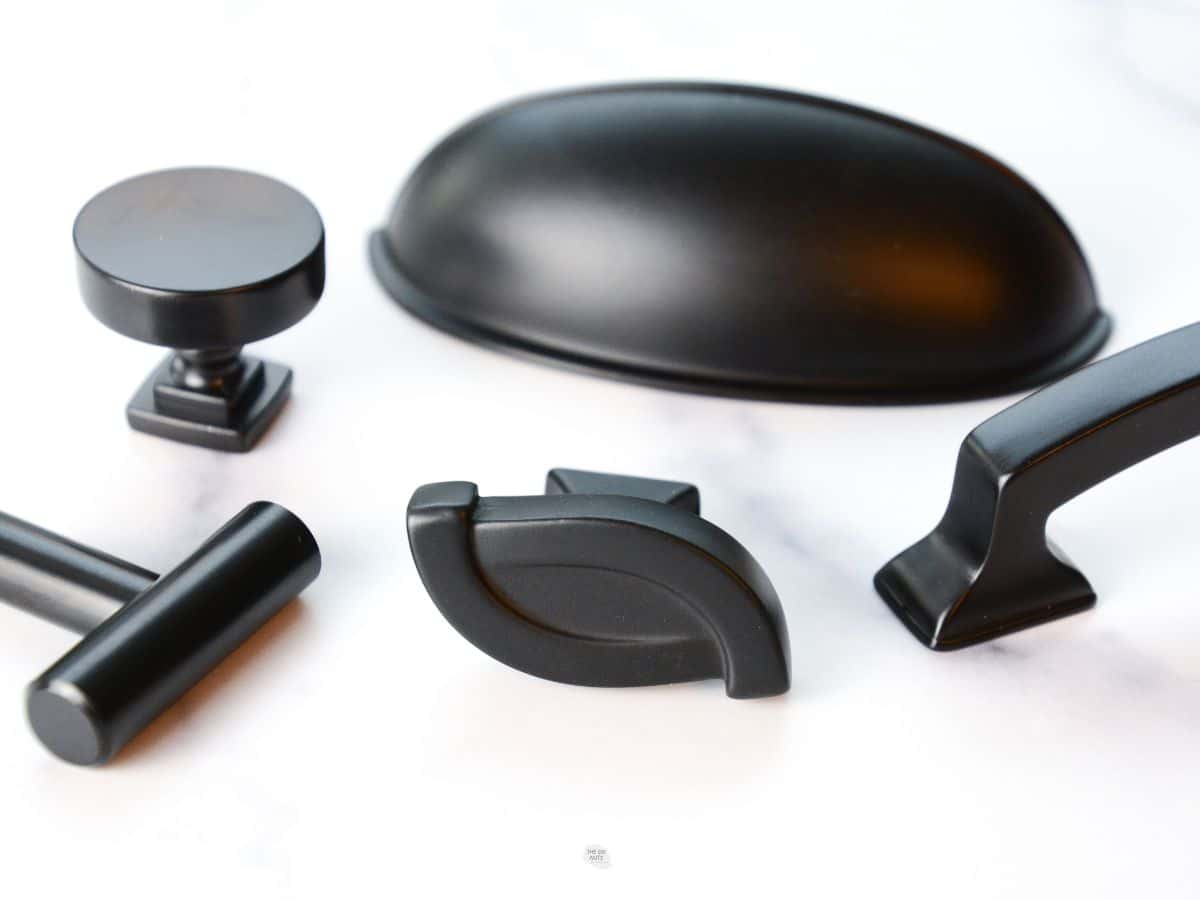
#5: Change Your Hardware
Hardware may seem like a small thing, but purchasing more modern handles or knobs will go a long way. If your budget is tight and you can’t afford new hardware, consider painting your existing hardware to match your new style.
#6: Replace Or Redo Your Countertops
There are a lot of DIY countertop ideas out there such as:
- DIY concrete countertops
- Painting your existing counters to look like marble
- DIY epoxy pour counters
- Finding remnants of real stone to add extra counter space
Mixing countertop materials is a great idea if you are on a tight budget. Consider different countertop surfaces, like a butcher-block island with quartz on the other cabinets, to help save money.
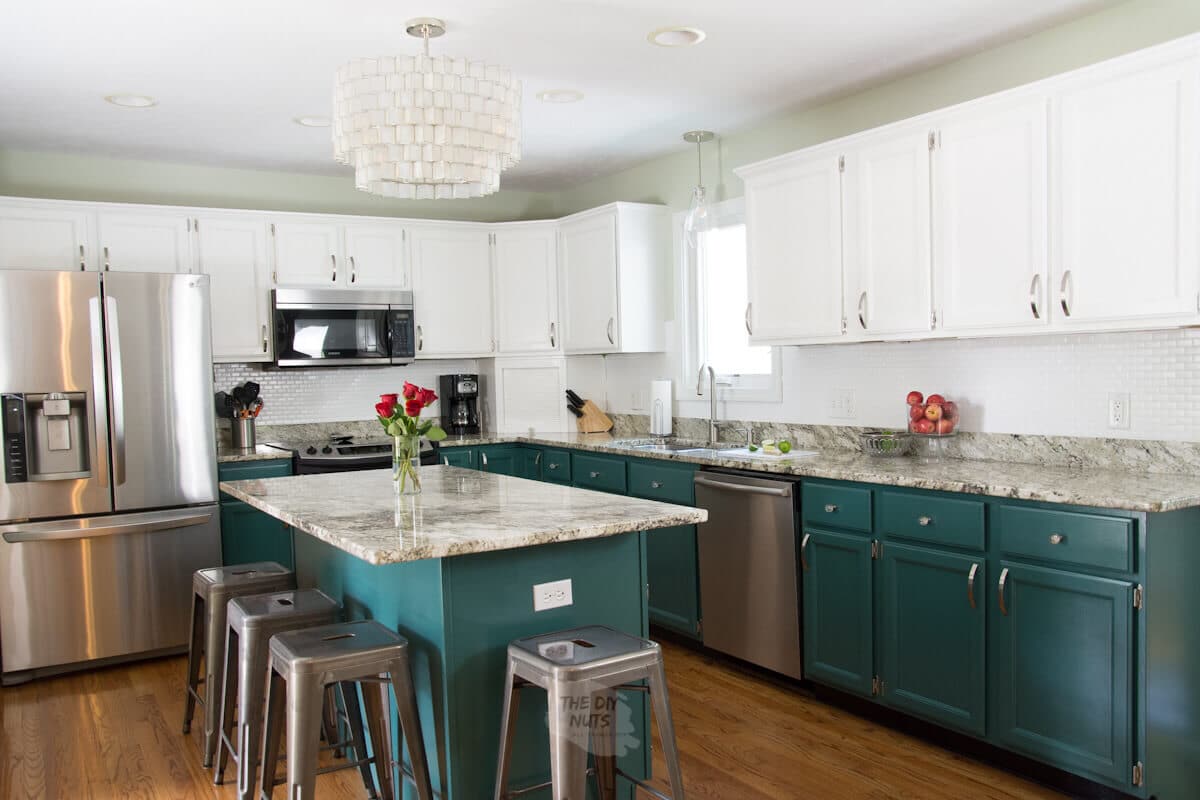
#7: Replace Old Lighting Fixtures
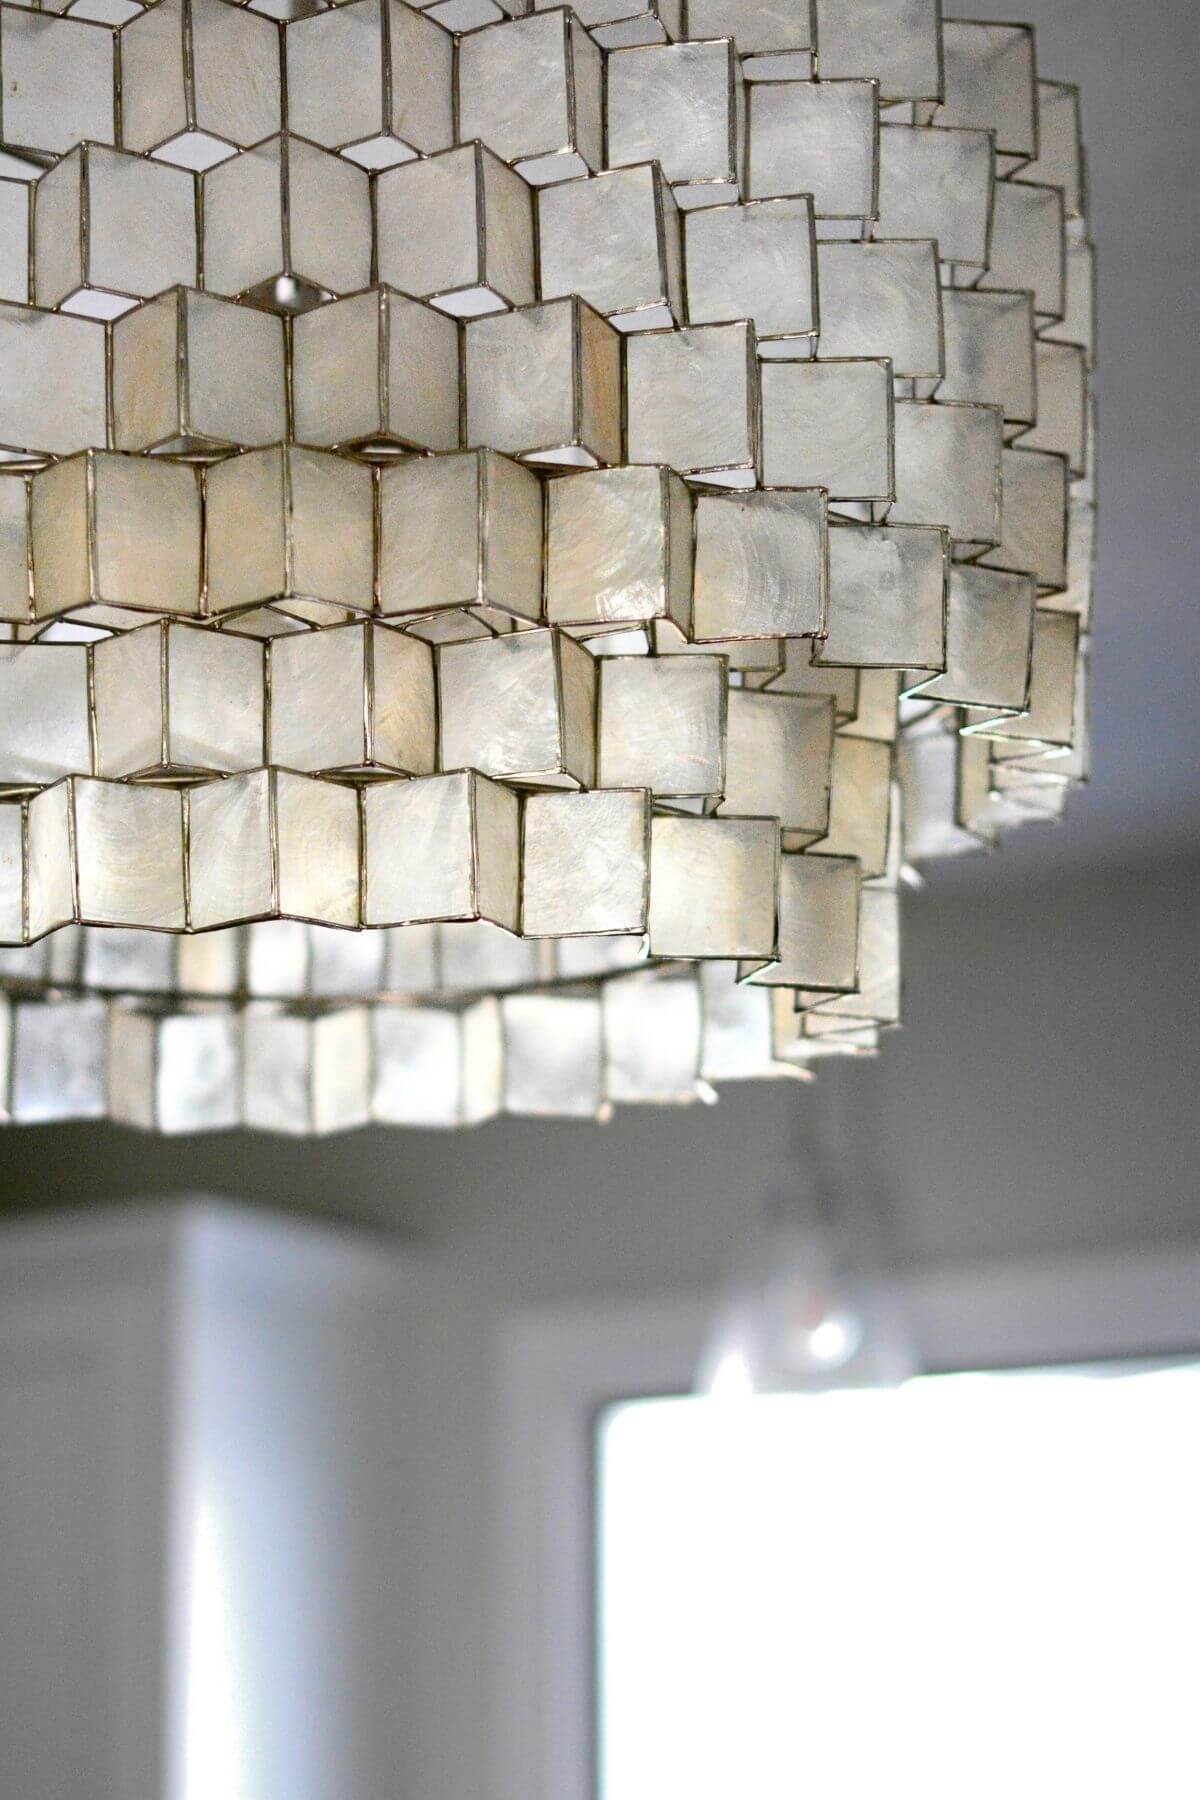
Adding a new capiz chandelier over the kitchen island helped pull our design choices together. When choosing new light fixtures, have fun adding texture, warmth, and character.
#8: Add New Seating

You can repurpose old items or buy newer, modern stools and seating for your kitchen. There is no need to replace an entire table set if new seating can give it a modern feel. Currently, we have replaced the metal stools with these and love the warmth they bring to our kitchen island.
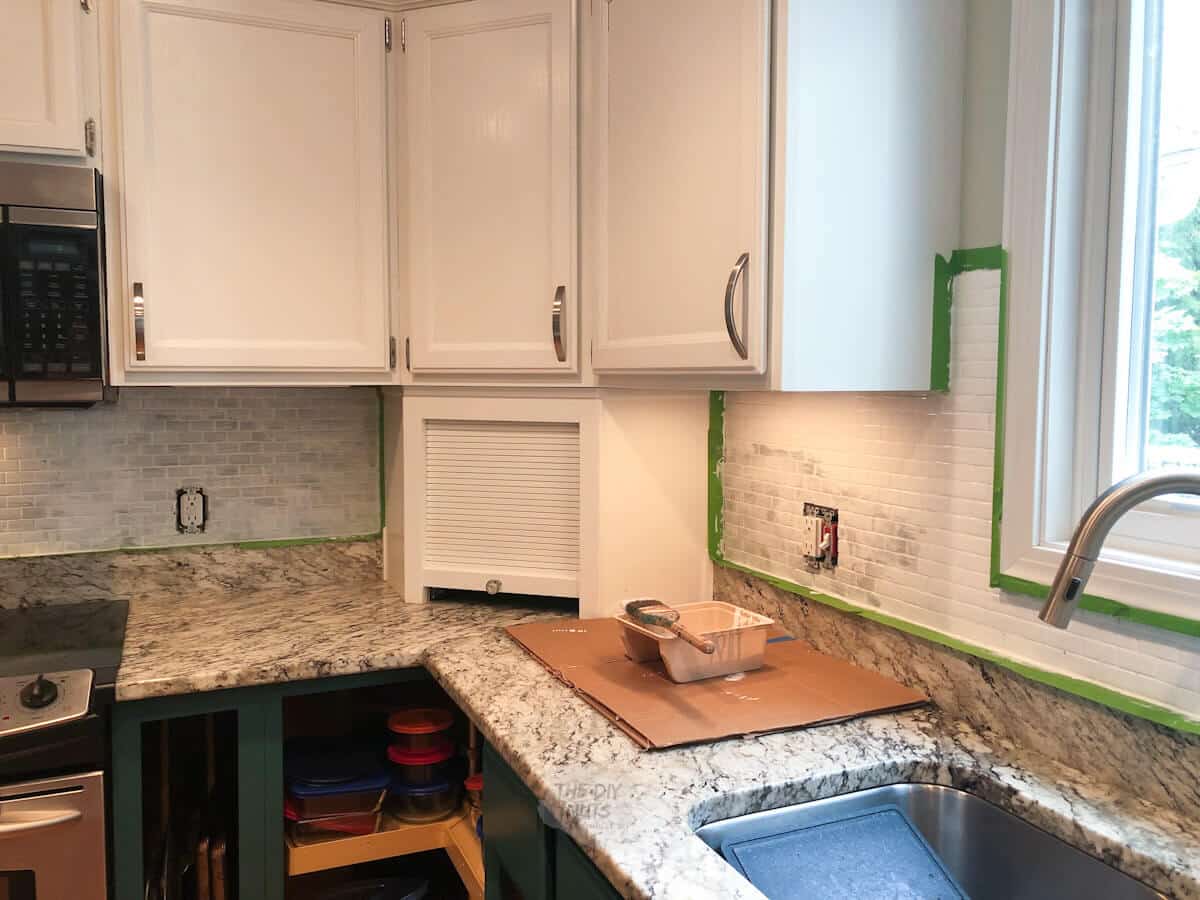
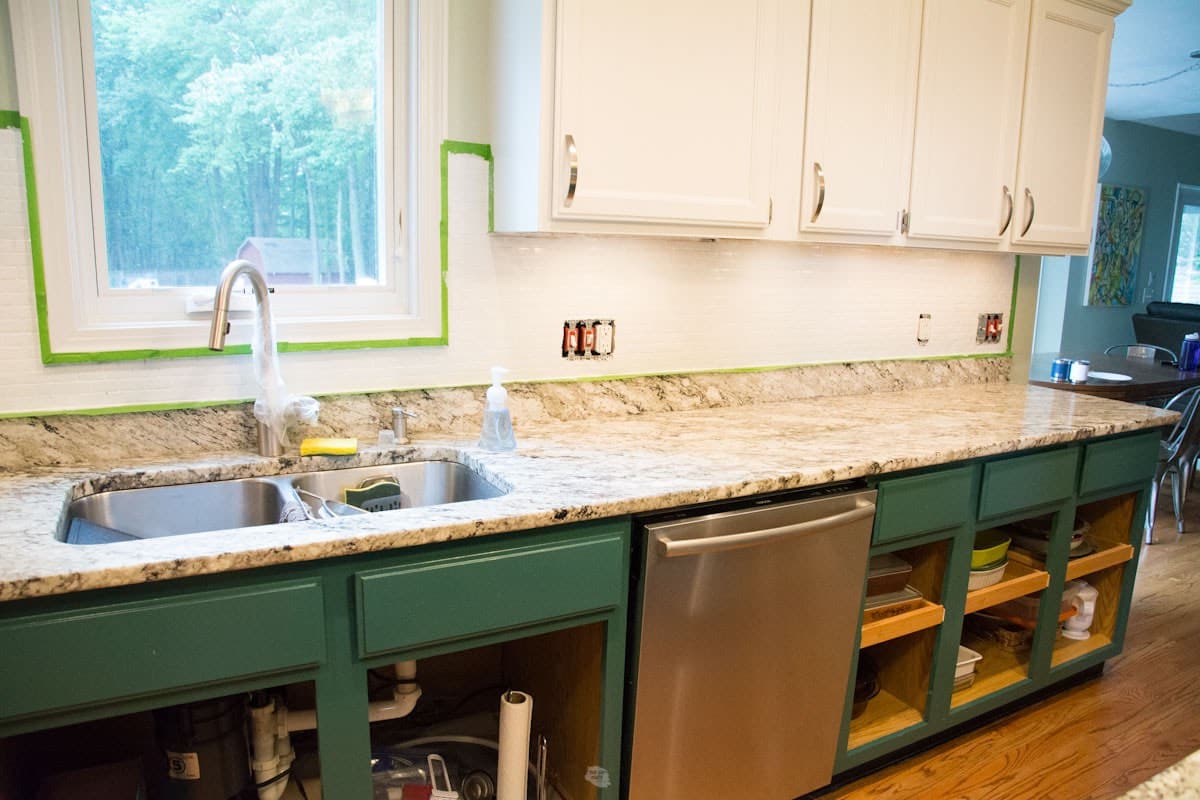
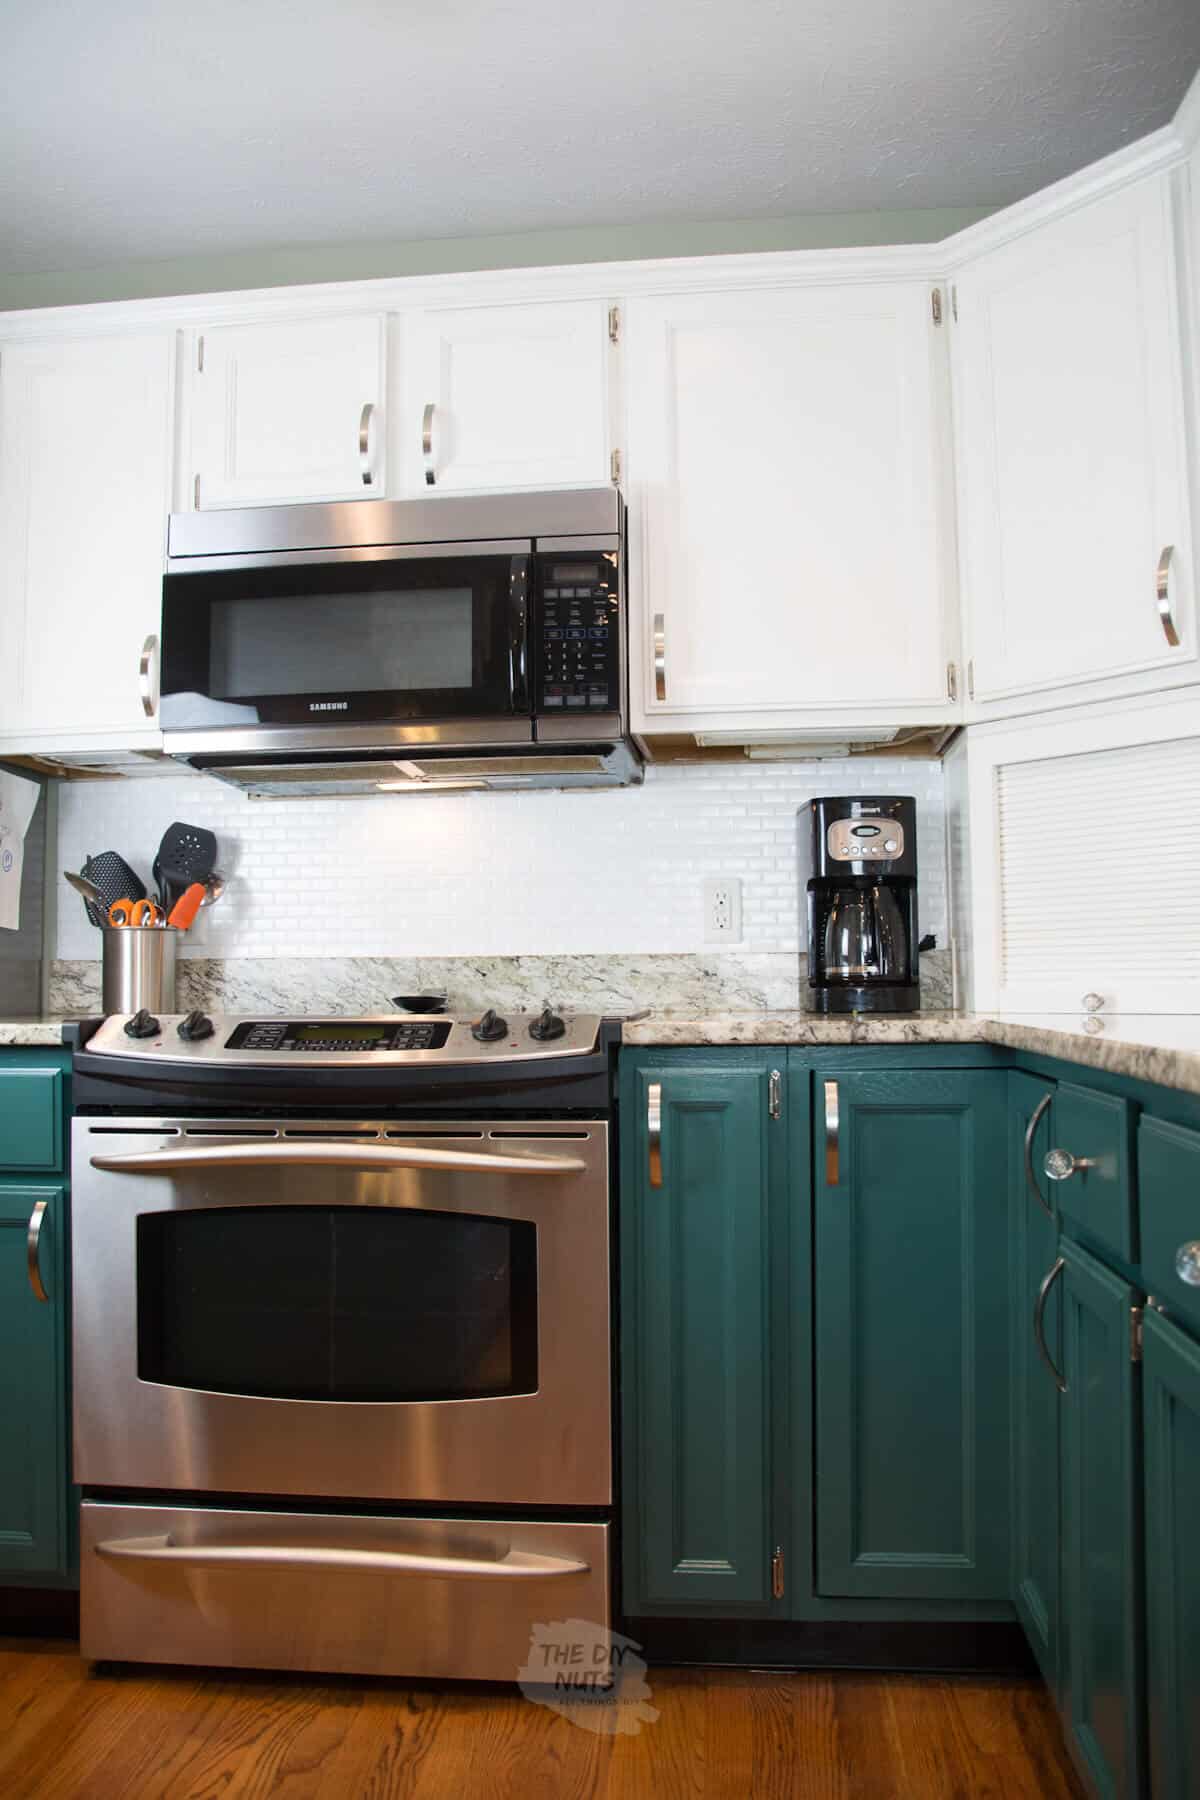
#9: Change Your Backsplash
The glass mosaic tile we had in our kitchen was truly dated. Either we had to take it off and redo the whole thing, or we had to try to paint it. By taking a chance and paying for the tile, we were willing to update the look of our kitchen without the demo.
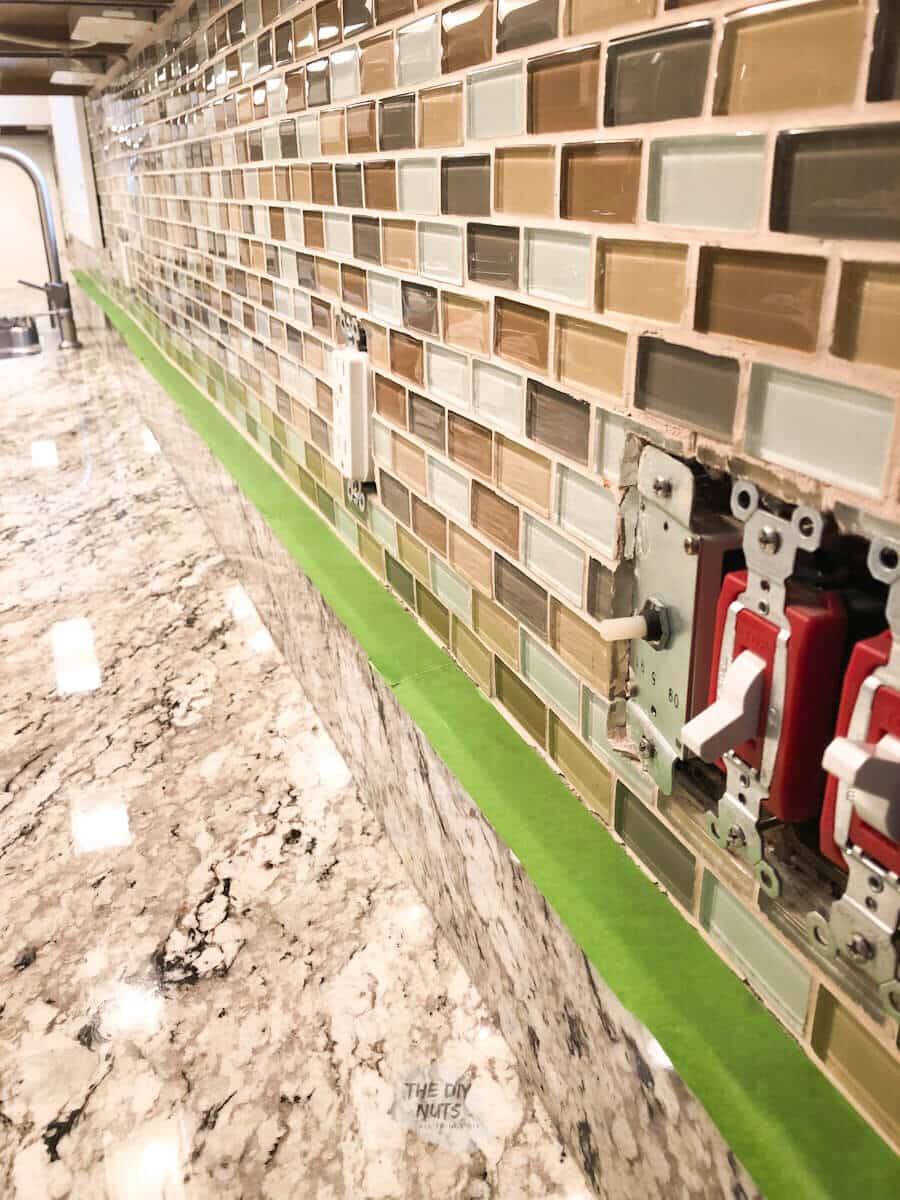
This backsplash painting project turned out much better for very little money than we anticipated. We love the clean and simple look.
Our only mistake was that the bright white paint color does not 100% match our current countertops.
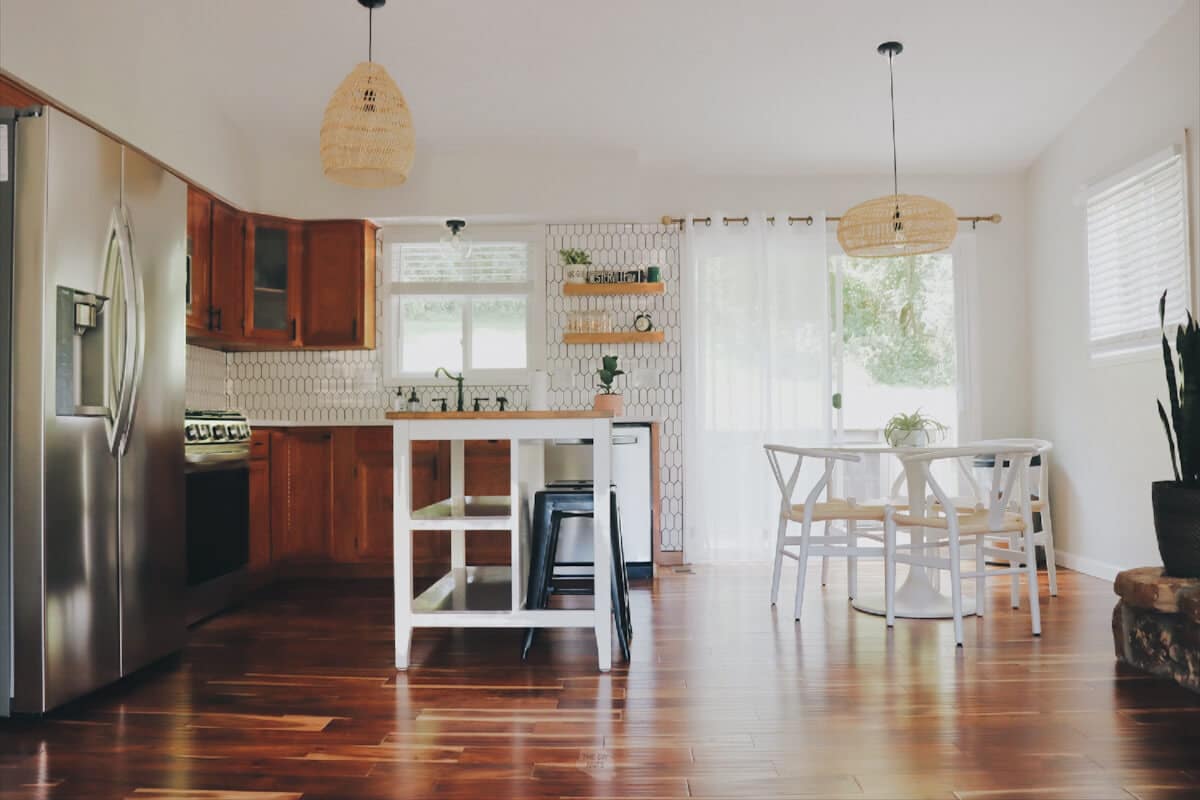
Before & After DIY Kitchen Remodel
As you can see, structurally, our kitchen never changed. By making small improvements over time, we got an overall look we are proud of while working within our price point.
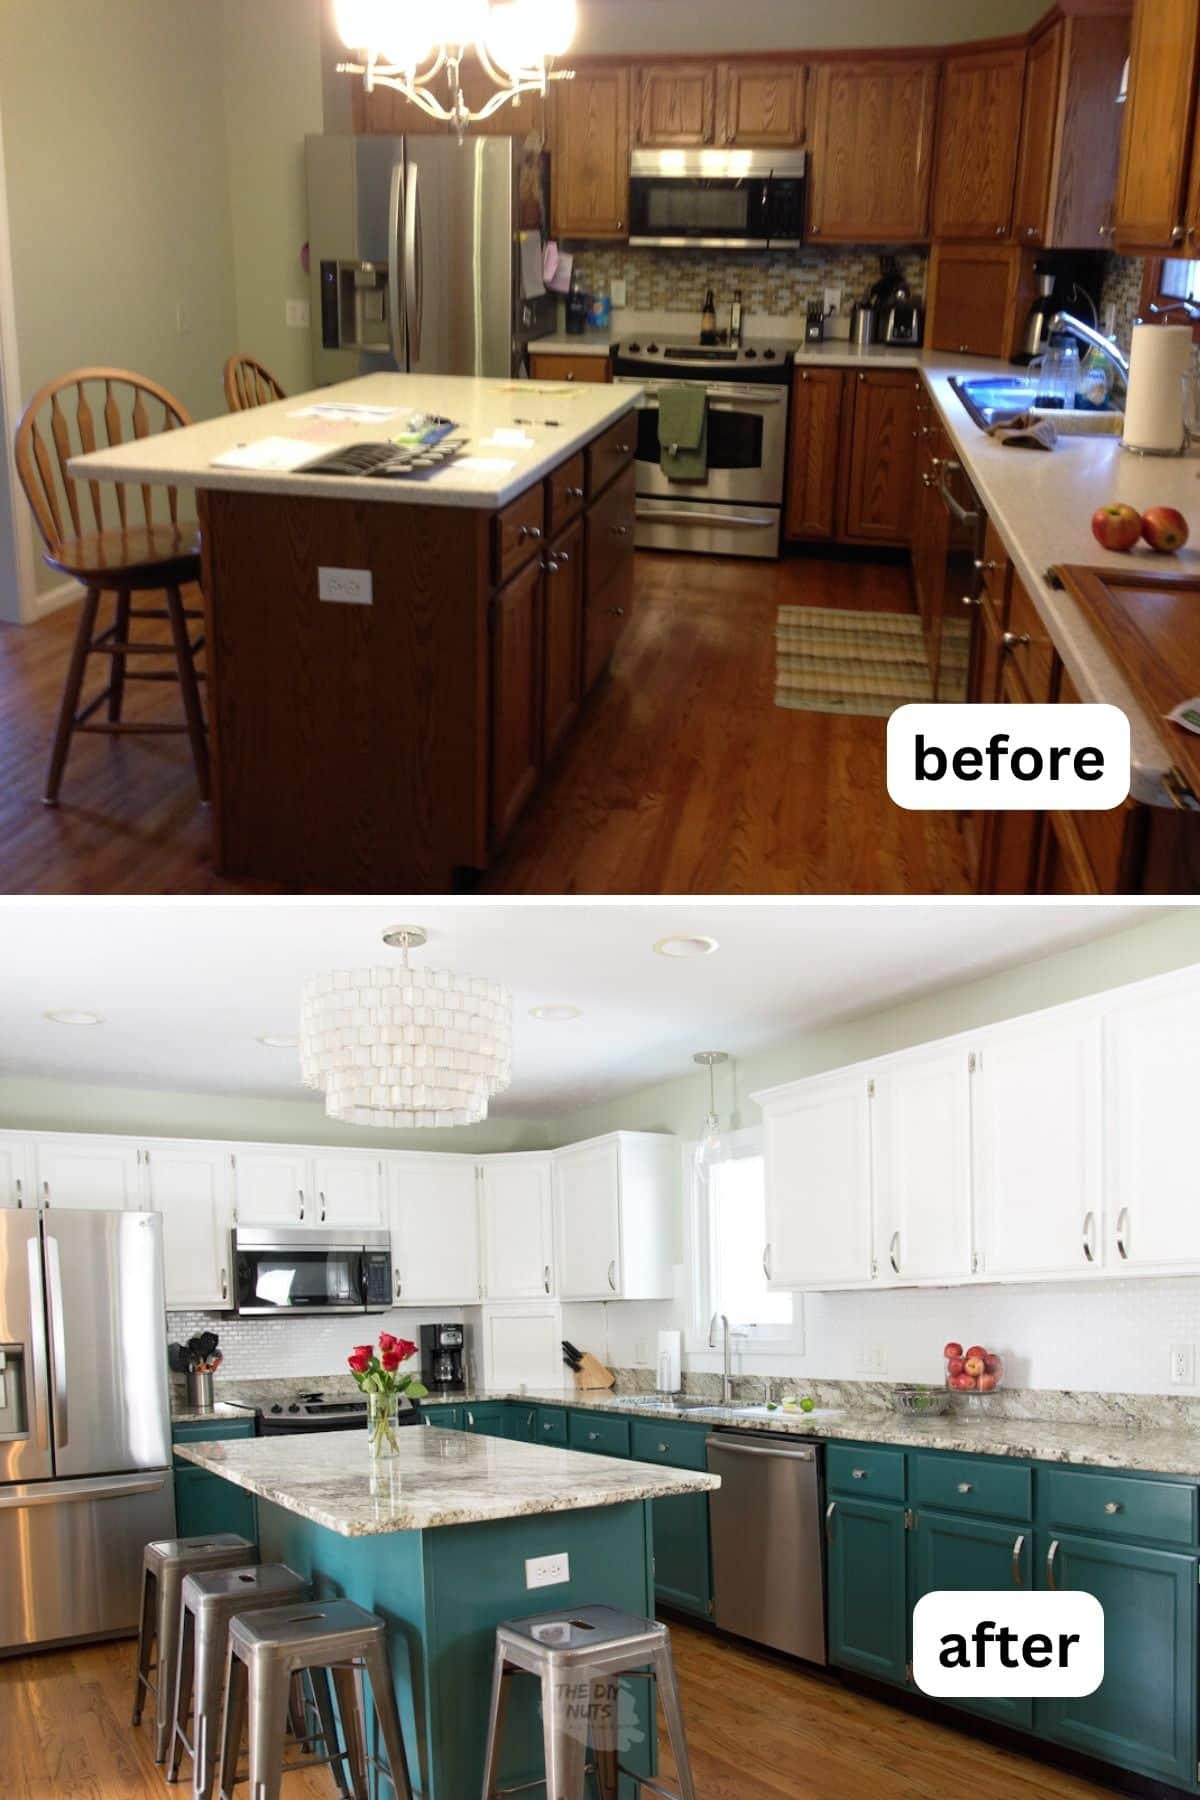
We love our two-toned cabinets. I never would have thought to do this a few years ago. But with younger kids, the idea of darker lower cabinets is super appealing. Anyone who has come over always comments on how they love this green color.
I am so happy I chose to be daring with these on-trend bold kitchen cabinet color.
Tips For Your Makeover
- It will be cheaper and easier if you can work with the layout you already have.
- Consider painting some elements, but not all.
- Don’t get overwhelmed. You can only paint the walls and keep the oak cabinets or keep the walls and paint the cabinets.
- If you are not tearing anything out, don’t feel you have to rush your makeover. Take your time and do your kitchen DIYs slowly.
Kitchen Makeover FAQs
According to Home Advisor, a professional cabinet painter may charge up to “$100 per door and $25 per drawer or $75-$150 per cabinet”. Normally, spraying, brushing, and rolling are similar in cost. Yes, you will get a better finish with a sprayer (but at what cost)?
Prices may vary by location. You can expect to pay anywhere from $50-$100 for high-quality cabinet paint. In our local store, the list price is so $95.99. Proclassic was our favorite paint (before we discovered Emerald) is 79.99. However, don’t let those prices fool you. I got 30% off of the Emerald Urethane Enamel Trim. I paid around $67 a gallon.
Yes, renovating your outdated kitchen into your dream kitchen is possible. Working with some existing fixtures and features will make your job easier. With proper planning, beginners can do DIY projects such as painting, installing a new backsplash, upgrading light fixtures, and cabinet refacing. When in doubt, call a professional because you may save money in the long run.
Since our cabinets were already primed and painted white, I did not have to prime them. We talk all about how to repaint painted cabinets here. For this cheap kitchen remodel (8 years later), I purchased a gallon of SW Rookwood Sash Green and SW Emerald Urethane Trim in the base color (High Reflective White). I have about half of a gallon left of each paint. I also used white paint to paint the backsplash.
Room Decor Sources
- Lower Cabinets: SW Rookwood Sash Green Paint Sample
- Upper Cabinets: SW High Reflective White Paint Sample
- Wall Paint Color: SW Liveable Green
- Zig Zag Capiz Shell Chandelier
- Geometric Pendant Lights
- Metal Bar Stools
- LG French Door Refrigerator (newer model than ours)
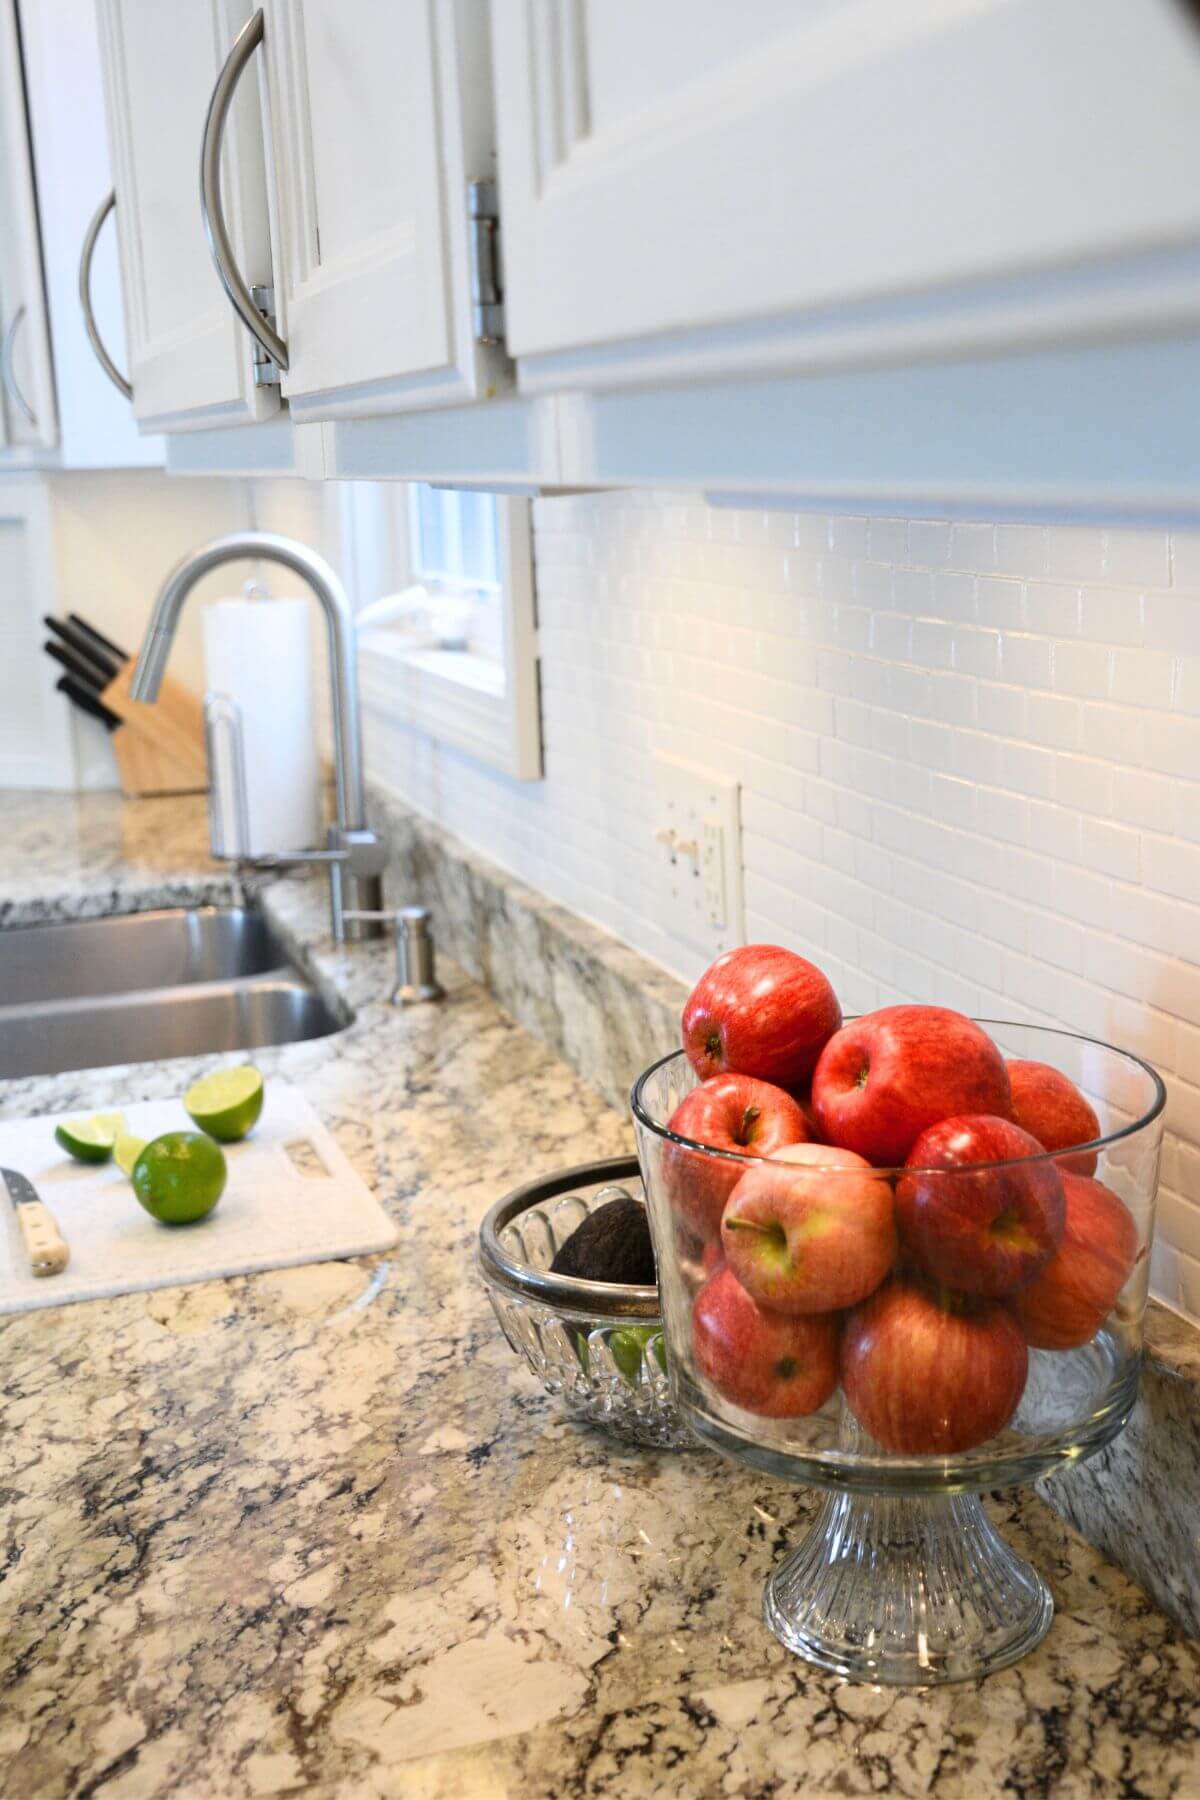
- Moen Pull-Down Kitchen Faucet (similar to the one we have)
- Curved Satin Nickel 5 1/16″ Hardware Handles
- Glass Knobs (similar to the ones we have)
Pro Tip: When shopping for paint at Sherwin Williams I always make sure to buy the paint on sale. In the past, they have had even a 40% off sale in the summer. However, my store associate told me that this year this was probably not happening due to the supply shortages they have been experiencing.
Follow us on Pinterest, YouTube or Facebook for more DIY inspiration!
Related DIY Ideas
- Easy Bathroom Remodel Ideas: You can see this whole transformation for under $300!
- How To Paint A Faucet: make sure you use the right primer!
- 46+ Unique DIY Shelving Ideas To Try This Weekend
Hopefully, my home decor tastes won’t change too much. If they do, I can try another budget-friendly kitchen renovation to fit those tastes.
Hi Thediynuts,
I really love the after images of the kitchen. I don’t even think that with some money we can impact a lot in our kitchen. Thanks for sharing this article.
Regards,
Amelia Jones
Hi Amelia. I am glad you like our budget-friendly kitchen makeover. Good luck with your future projects.
I love this! The two-tone looks and amazing and makes your kitchen feel fresh and open and I bet they look a lot cleaner with kids running around than the white ones would. Painting my cabinets has been on my to-do list for the longest time, but have never wanted to commit to starting it and need to stop halfway through or messing something up. I love the idea of painting over the backsplash to give it an update. Did you have any issues painting over the mosaic tiles? Thanks for sharing!
Hi Alex. Thanks for your comment on our two-toned kitchen cabinets. We love the green and white cabinets and the backsplash tile project was honestly one of the easiest DIY painting projects we have done.
Hello Erin, Thank you for sharing your experience. It is much appreciated. Can I ask if you could see the wood grain after painting? How much did you sand and how is it holding up? I have pretty much the identical hand rail and cupboards and google brought me to your story. Thank you.
Hi Selina. Painting the lower kitchen cabinets with Sherwin Williams Emerald Urethane Trim Enamel was a game-changer. Our painted oak in our home with SW proclassic was great but after 8 years needed some touching up. This led me to add color and repaint the white. I did not mind seeing the grain a little and the Emerald line got rid of any tannin bleed through we had. You can always use a product called Aqua coat first if you are worried about the grain. I will put a link in the post above. Good luck with your DIY kitchen remodel project.
Amazing. My wife and I have been slowly, very slowly, updating our own kitchen. most recently we did cabinet refinishing in coral springs and it went great. We are considering updating our pantry or doing new hardwood floors next.
Looks great and thanks for all the tips. So did you use a countertop kit on your countertop?
Hi Rozie. The one expensive thing we did in our kitchen was getting granite countertops put in. We have seen some awesome DIY ideas using countertop kits and wish we would have given that a try a first to see how it worked.
Wow, this is a terrific post! My family and I are planning to remodel our old kitchen in the next few months. We are debating a few things, such as the total cost, whether we should do it ourselves or hire someone, whether we need a dumpster rental and what style and color scheme we would like. Your post is helpful and we will definitely be using your tips!
Love these DIY kitchen remodel ideas! Working on a tight budget can be a challenge, but your creative suggestions make it seem so doable. The tip about repurposing items is genius – never thought about that! Excited to give some of these projects a shot and transform my kitchen without breaking the bank. Thanks for the inspiration!
I went to school for interior design and find myself as a design consultant for a lot of family & friends, though I’m no longer in the industry. Erin’s tutorials are EXACTLY what I send to clients because they’re so thorough and what they’re looking for. Thank you!
Thanks, Courtney. We love when you can do DIYs on a budget and still create a kitchen or home you love!