How To Easily Melt Crayons On Canvas For Stunning Kids Art
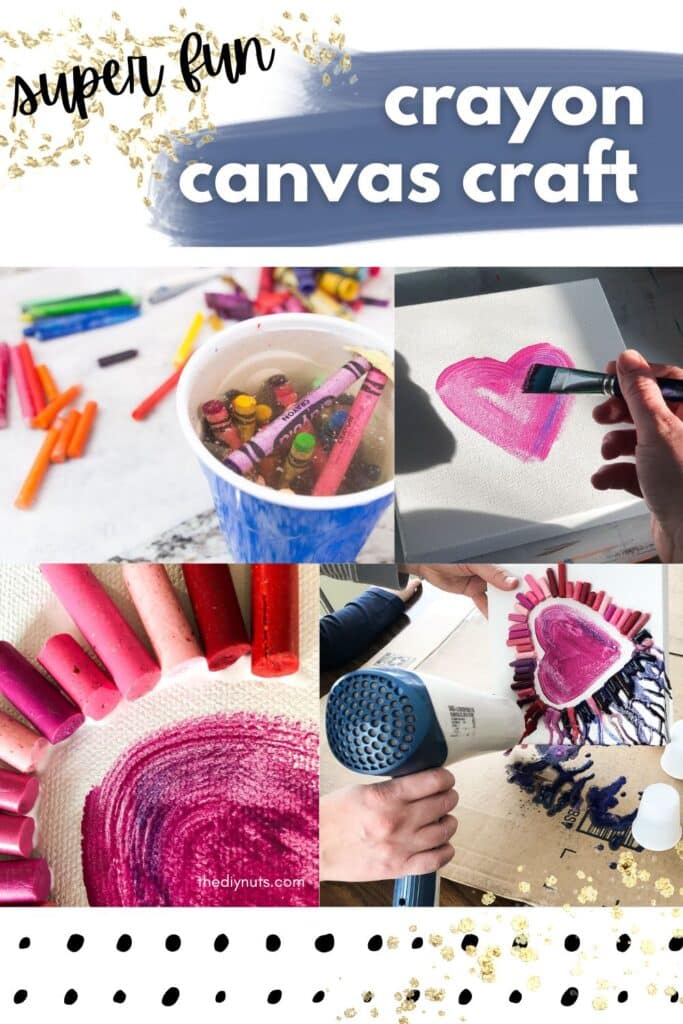
Are you looking for a family-friendly craft idea? Melting crayons on canvas is so much fun to complete on a large or a small scale. No need to buy an expensive heat gun! Children love using a blow dryer to melt the crayons on their art.
*Disclosure: I only recommend products I would use myself and all opinions expressed here are our own. This post may contain affiliate links that at no additional cost to you, I may earn a small commission. Read the full privacy policy here. *
Recommended Supplies
- Canvases or Canvas panels
- Old crayons, broken crayons or new crayons with the wrappers peeled off
- Elmer’s Glue-All
- Acrylic Paint in a variety of colors
- Blow Dryer
What canvas should you use?
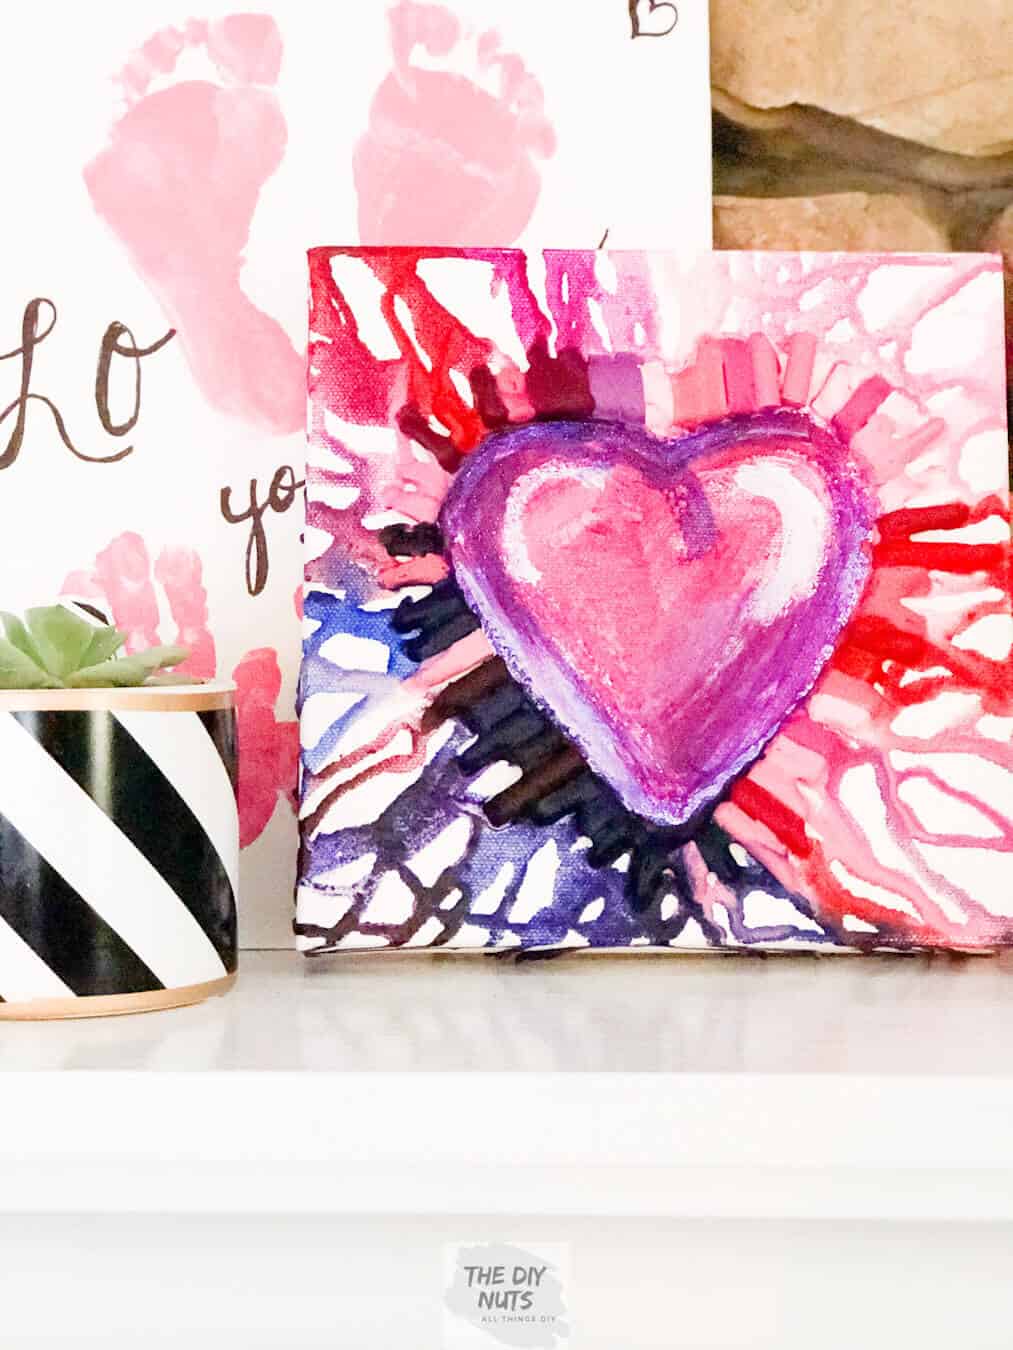
You can do these on a smaller scale (like on canvas boards) or create large canvas art on 3’ x 4’ gallery-wrapped canvas. Gallery-wrapped canvases are great because you can paint the edges. There is no need to frame and they are ready to put on display.
You could buy smaller canvases if you don’t want to do this as a large project. Buying a pack of canvases is cheaper and you will have them left over for other easy canvas ideas.
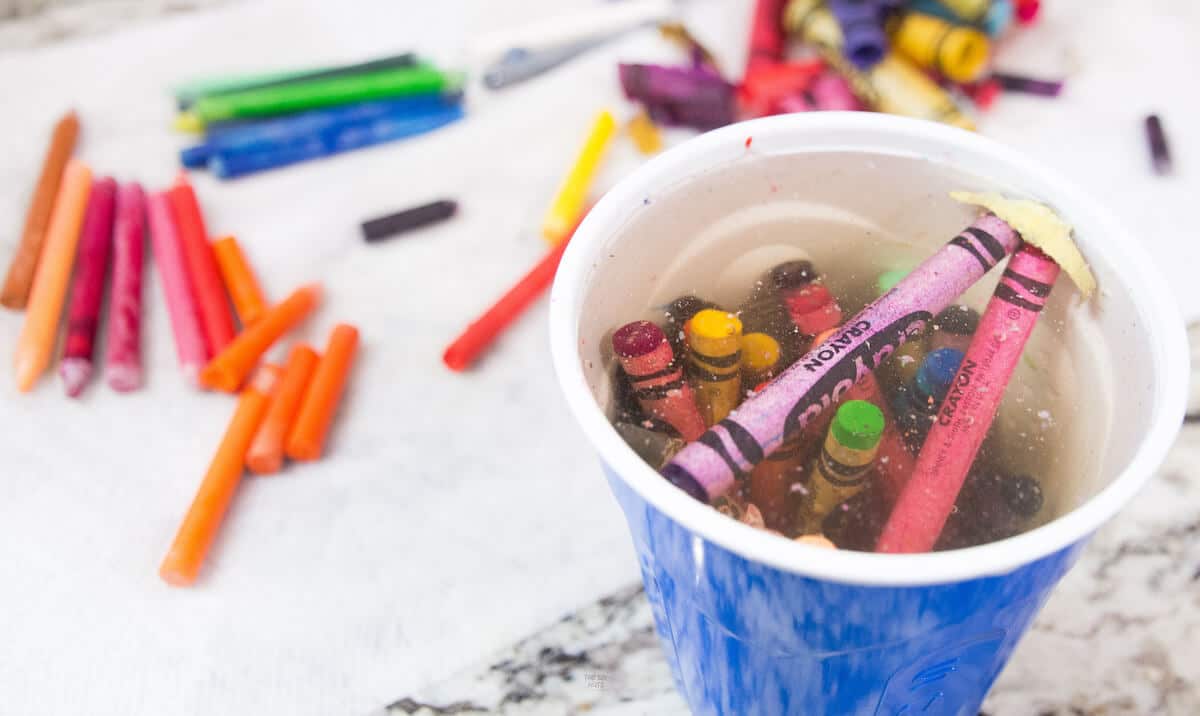
Tip To Easily Peel Crayons
Soak the crayons in warm water first. The peels on most crayons will come off very easily after 10 minutes. This will save you a lot of time in the long run. You can also use your unwrapped crayons to make DIY letter crayons as your next family craft.
Can you leave the crayon wrappers on?
Yes, we have seen a variety of melted crayon canvases where they decide to keep the wrappers on. I would recommend making sure you glue where the seam of the crayon paper is. This will make sure the paper doesn’t just fall off.
Attaching Crayons
It is important to use the right type of glue when attaching your crayons to the canvas. Elmer’s Glue-All is a great option to use. Don’t be scared to use a liberal amount of glue on the crayons. You do have to be patient and keep the canvas flat.

Crayon Art Instructions
Step 1: Plan Out Your Design
- Together decide what images you want to use. Brainstorm your ideas and sketch them onto the canvas with a pencil.
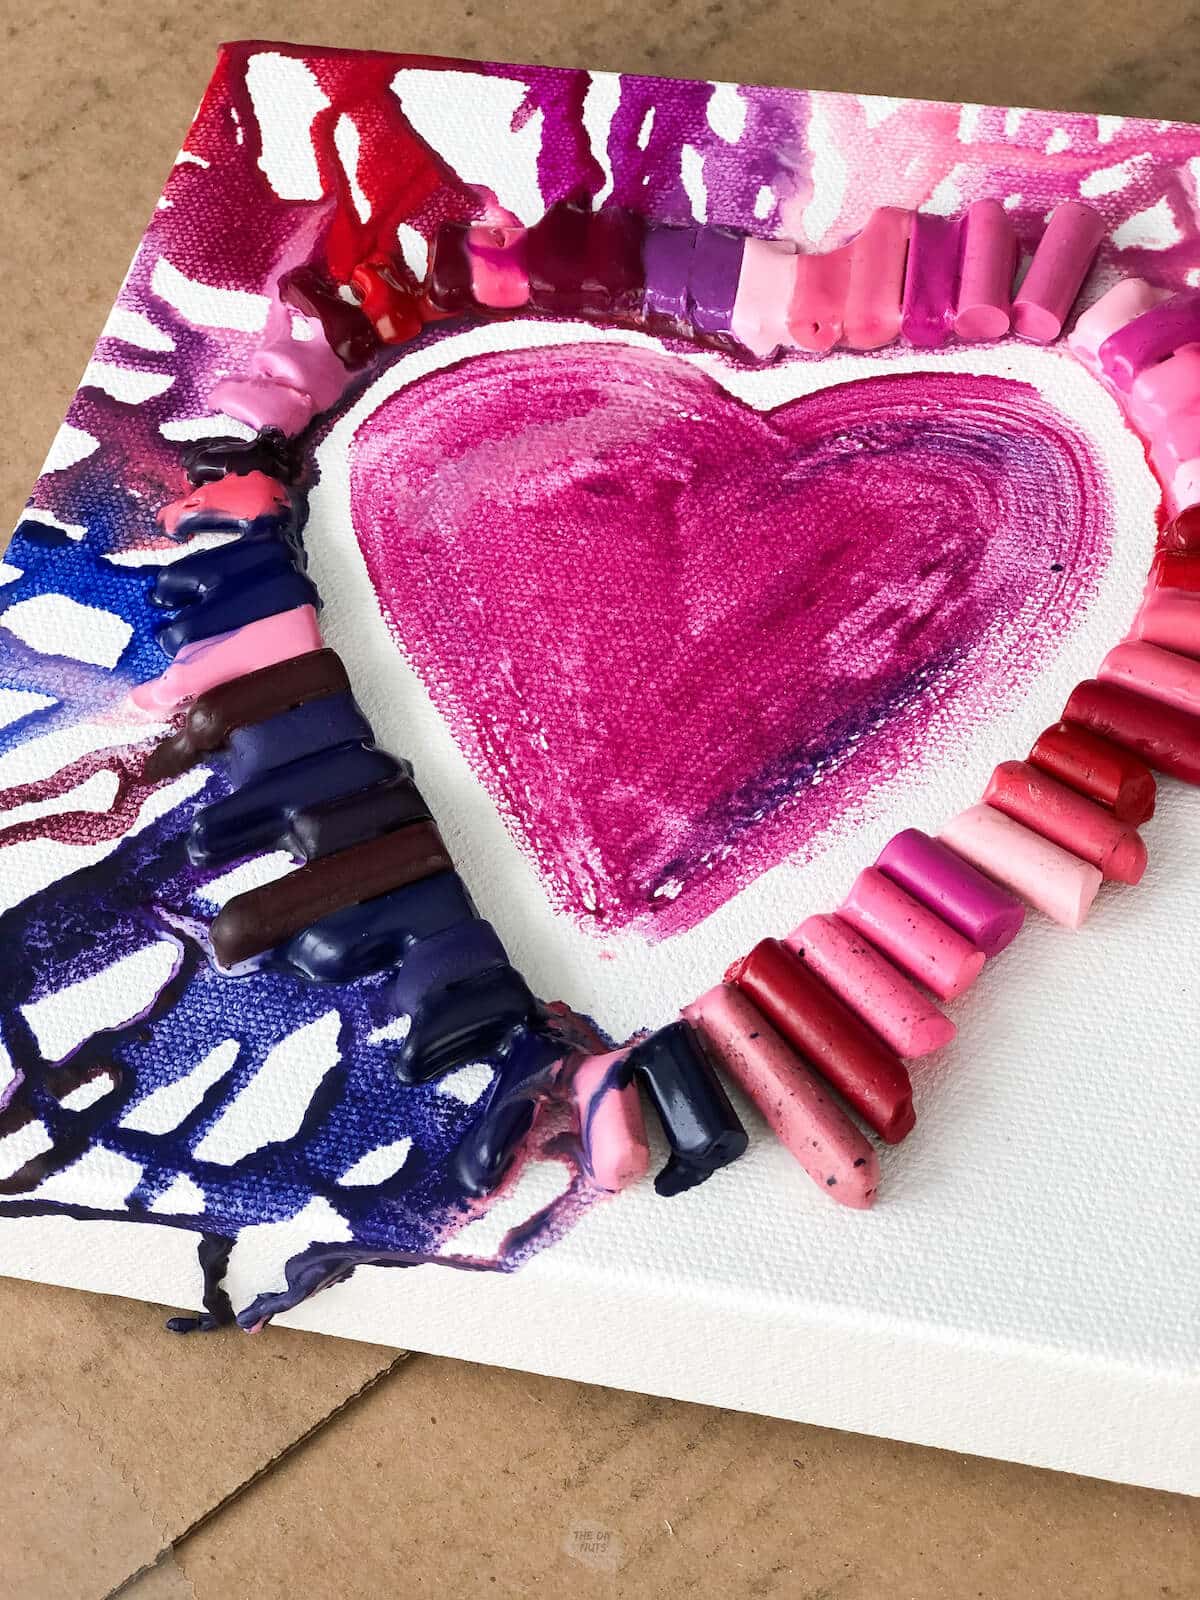
- Come up with a collective color scheme. Since it was close to Valentine’s Day, we painted a simple heart and used a variety of red, pink, purple and blue crayons.
- Draw an image or images large, but still leave space for where the crayons will be glued.

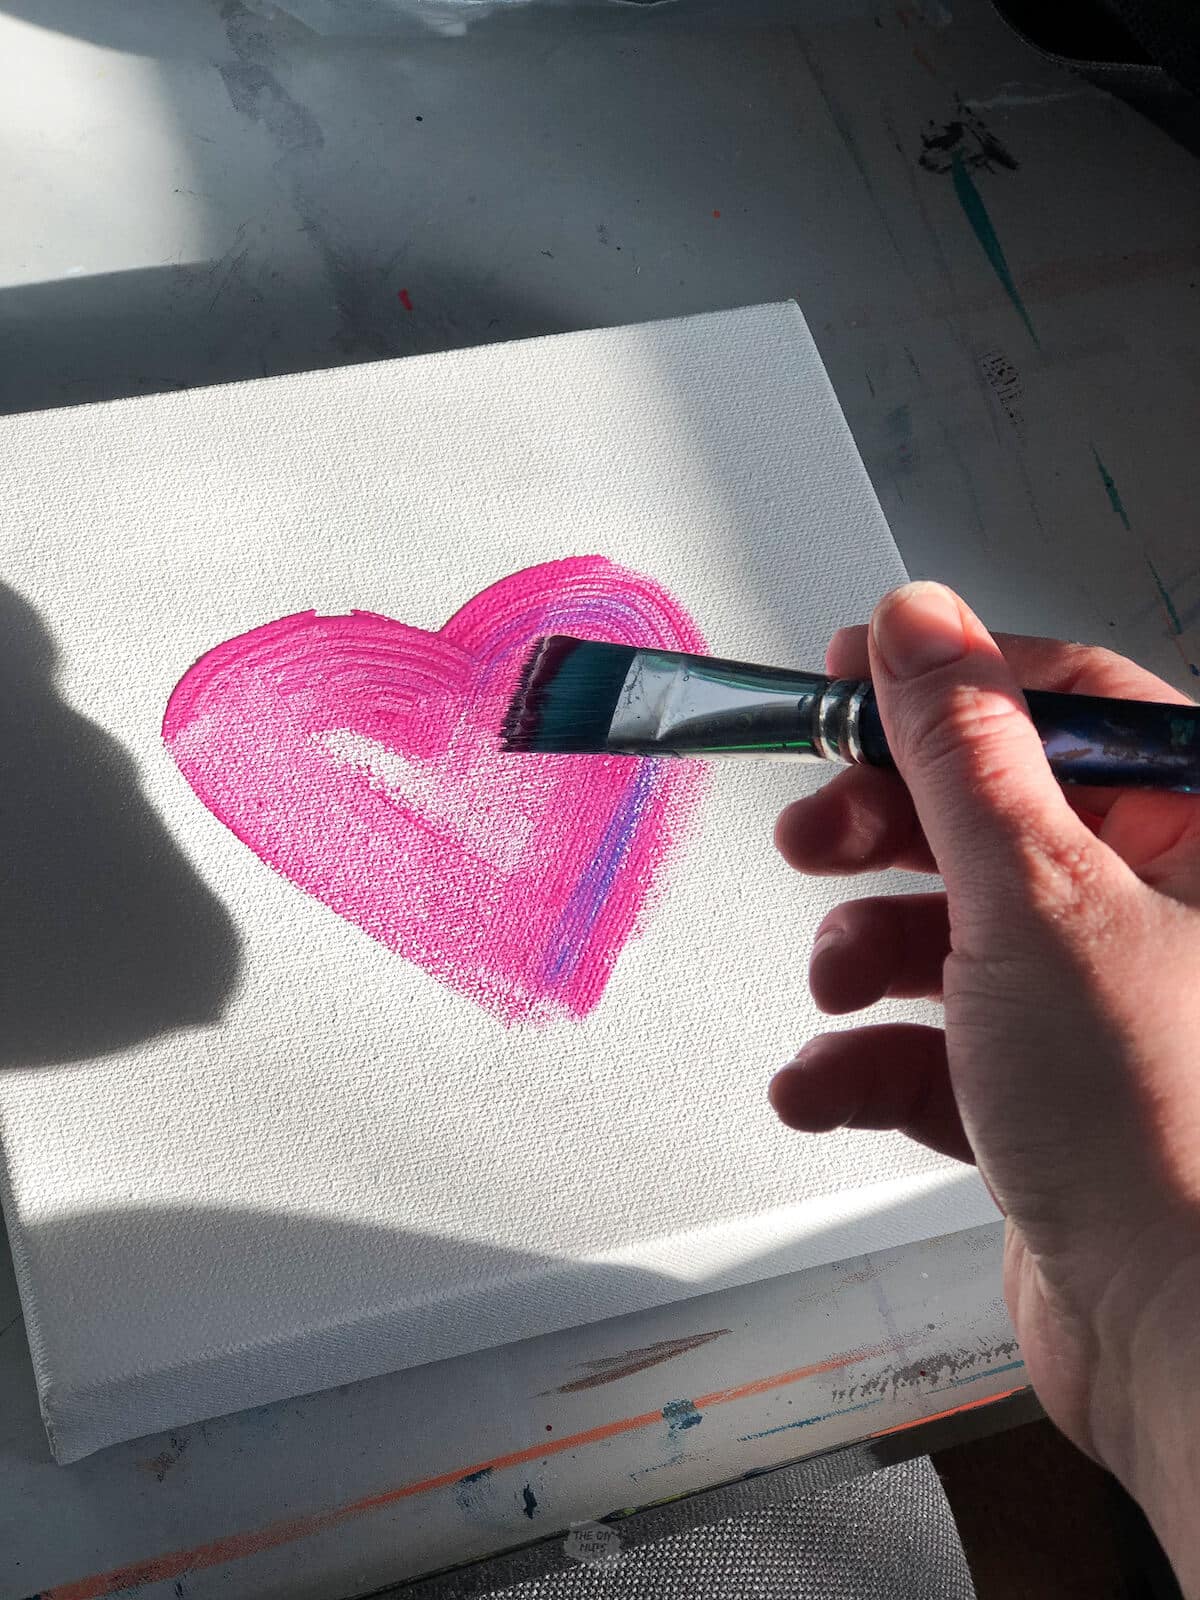
Step 2: Paint Canvas Before Adding Crayons
This step is optional. You can still melt crayons on a canvas without painting the canvas. You do not need to paint if you want a white background and only want the crayons to make the design.
Other Design Ideas
- Paint with neutral acrylic paint for the background or something that will contrast with the crayon colors you are choosing to melt. In this small example, we actually just left the small gallery-wrapped canvas white.
- Paint the image in the middle of the canvas.
- Children can also use colored and black Sharpies to make the painting appear neater.
- You can use gold and silver paint markers to add extra details and designs on top of dry paint. Paint markers help cover up mistakes and keep things looking neat. This is very important when doing group projects with several kids of all different abilities.
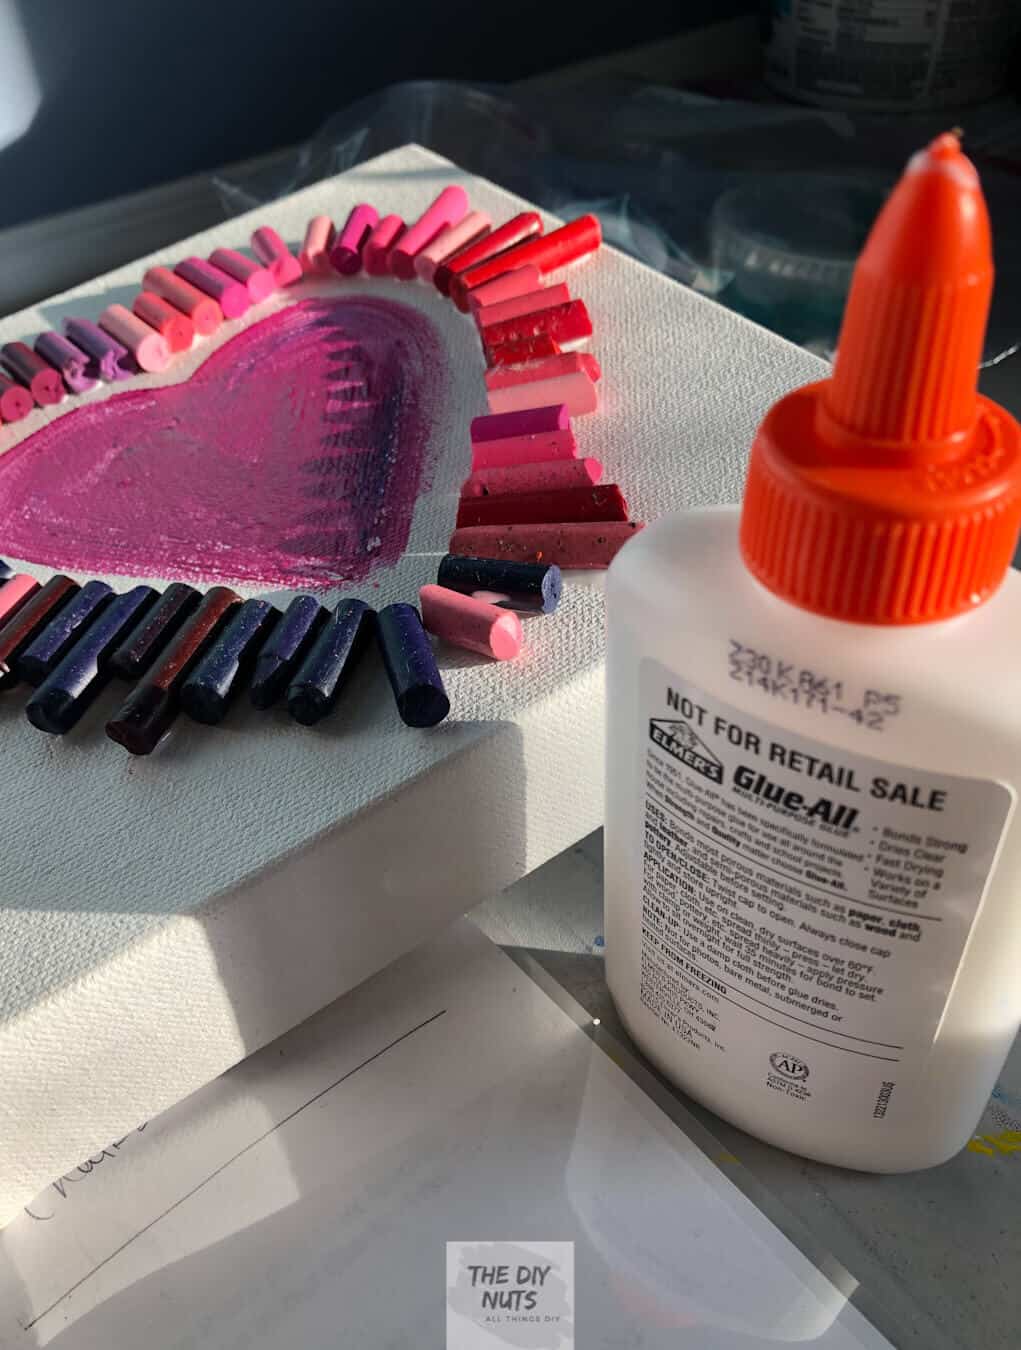
Step 3: Glue Crayons On Top Of The Canvas
After the painting is done, begin to glue crayons around the middle image. The canvas should be left flat when using glue.
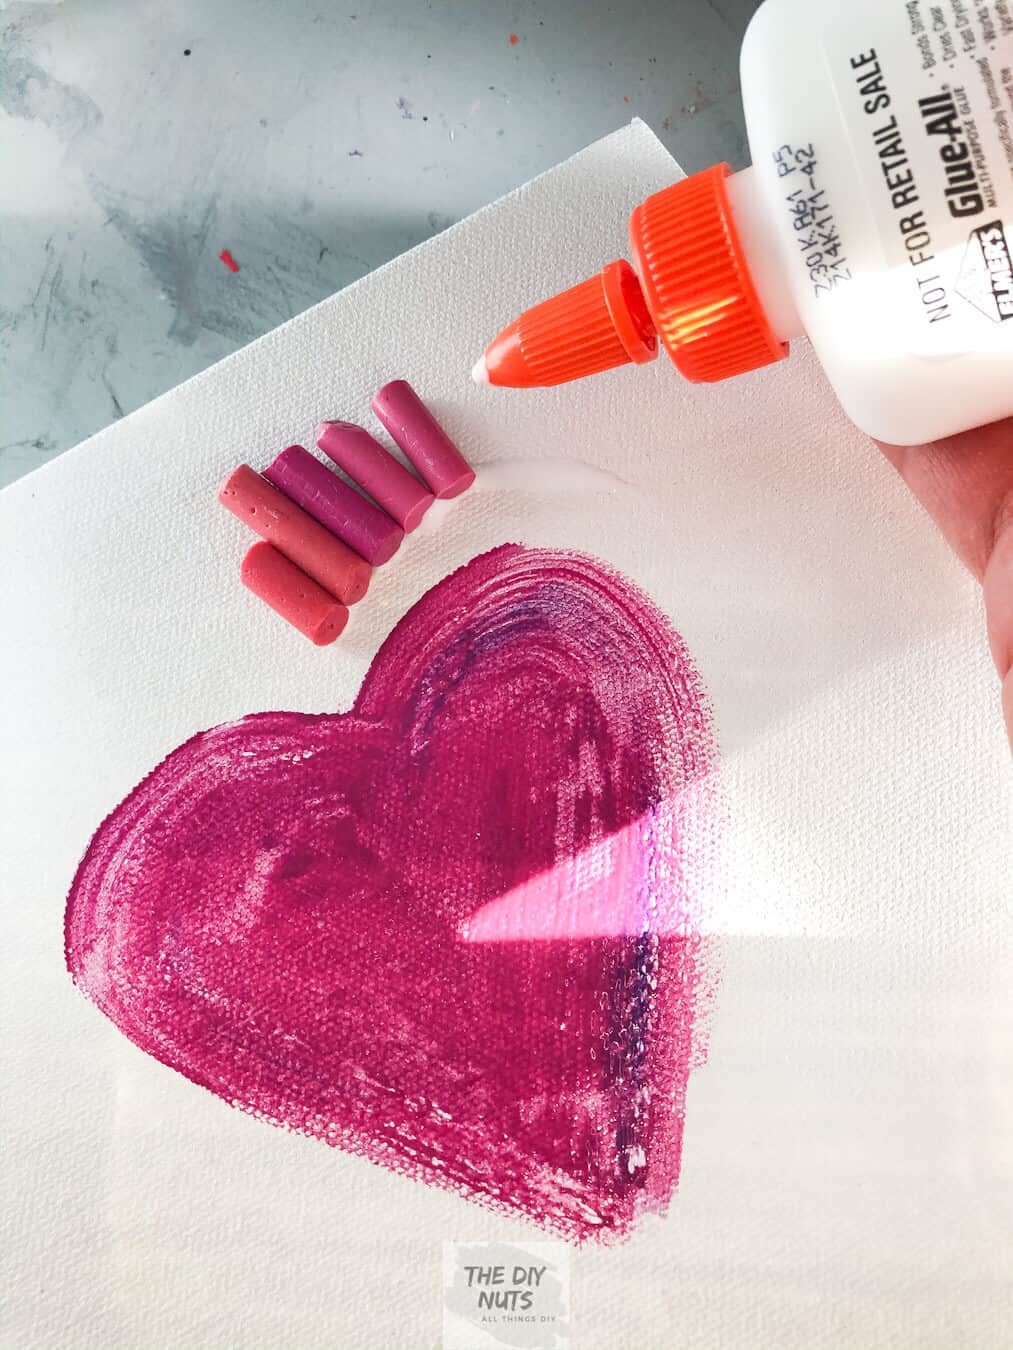
Make sure that you are placing colors that will mix next to each other. If you want to use all the colors, put them in the order of the rainbow for a really fun effect.
Step 4: Let Dry
Find a flat-drying space after you have glued the crayons onto your DIY art project.
Step 5: Set-Up Work Station
Before beginning, set up a workstation. I suggest that you make sure to have a drop cloth or newspaper down because once the crayons start melting off the canvas it can get quite messy!
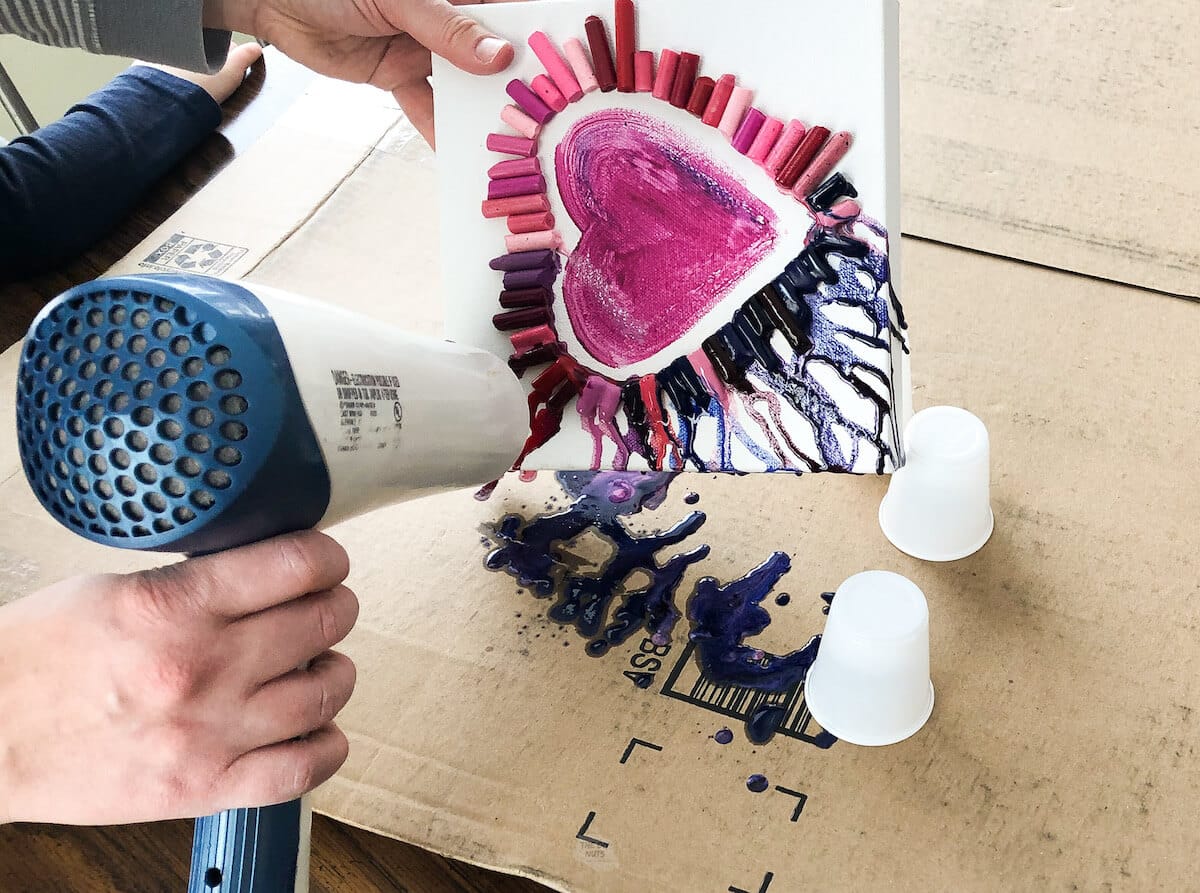
As you see in our picture while we were making our own melted crayon heart art, we just used an old piece of cardboard to protect our table.
Step 6: Beginning Blow Drying Crayons
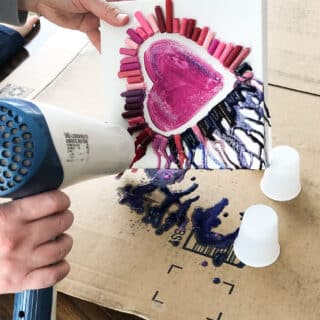
Once the glue has dried, you get to start to have fun with the blow dryer.
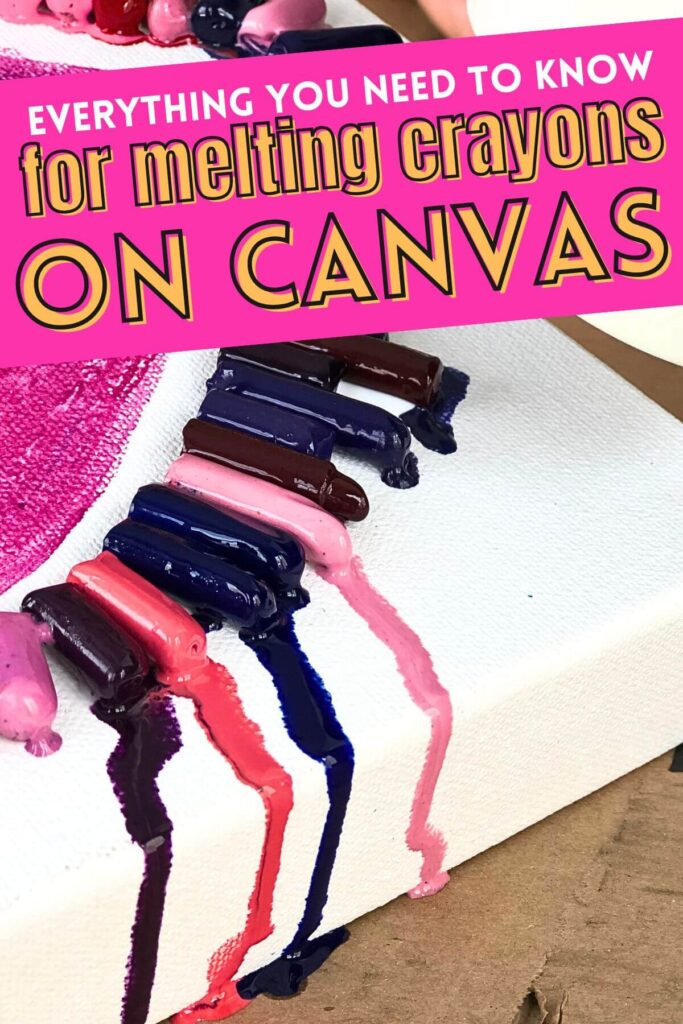
Tilt the canvas to almost completely vertical and with the crayons you want to melt pointing down. Hold the edge of the canvas and slowly rotate it during the melting process. You want to hold the hot air pointed at the tips of the crayons.
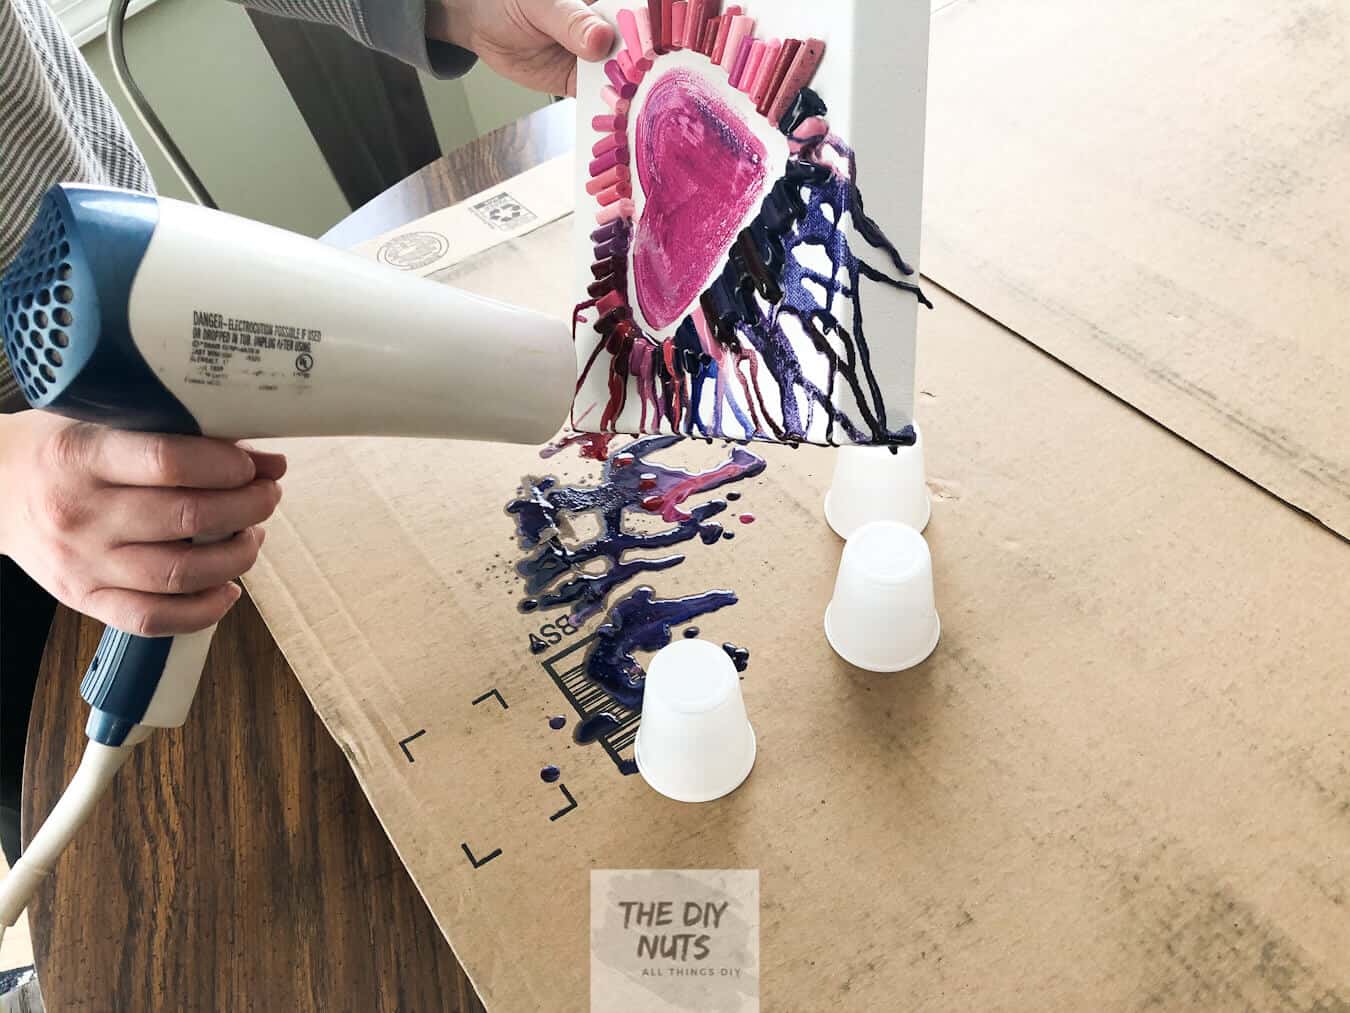
Hold the blow dryer near the ends of the crayons and see the magic happen. You will need to rotate the canvas once the wax starts flowing from the crayons.
Tip For Drying Your Canvas
Rest your canvas on small plastic cups so that the wax won’t stick as it dries. You can also place your artwork on a sheet of wax paper while it is drying.
Extra Tips About Melting Crayons
- Make sure to hold blow dryers far enough away from the crayons and do not touch the melted wax.
- The melting point for individual colors, brands and sizes will all vary. The power and heat settings of the blow dryer will factor into this as well.
- Use old blow dryers.
- Instead of using only a few colors, you can also put your crayons in rainbow order.
- For our end result, we had to go and paint the heart all the way to the edge because some of the melted wax leaked into the white spaces. Adding a few extra painterly highlights and mixed colors gives this melted crayon art a little more of a Jim Dine feel!
- Always have adult supervision. The melted wax can be hot.
- Let younger kids hold the blow dryer while an adult holds it at a slight angle. Using a low setting may take a long time, but also may make it a little safer for a young child.
Craft FAQs
Some people will say to use hot glue, but in our experience, the high-heat of a glue gun can melt the crayons. It is possible that some low-temperature glue may work, but we have yet to be successful with that. When we tried to attach the crayons with a hot glue gun, the wax melted under the temperature and would not stick to the canvas.
We think it easiest to use an old hair dryer as the heat source. However, you can also try a heat gun if you have one.
No, the crayons will fall off very easily if you use washable glue. Also, don’t try to use a glue stick. The heat of the blow dryer will melt the glue right off the project.
All crayons will work for this cool project. However, for best results use rich and vibrant pigmented colors. Some cheaper brands may not give off as much color. You should note that different brands and colors of crayons will have different melting times. We had the best success with Crayola crayons.
Follow us on Pinterest or Facebook for more DIY inspiration!

More Fun Craft Ideas
- If you end up having extra small pieces of crayons after this project, consider melting new rainbow crayons in silicone molds. The tutorial linked will show you exactly how to do this fun idea!
- Fun Spray Paint Marbling On Painted Pumpkins
- Easy Watercolor Valentine’s Day Card Ideas
I hope you enjoyed these projects, tips, and inspiration for this amazing craft idea. Our family can’t wait to try another melted crayon art soon. There are a variety of ways to make melted crayon crafts and we hope you have fun experimenting with these different techniques and ideas.
Did you have fun making this craft with your family? Make sure to leave a 5-star ⭐️ ⭐️ ⭐️ ⭐️ ⭐️ review in the comments!
How To Melt Crayons On Canvas
Equipment
- Blow dryer
- Cardboard or drop cloth
Supplies
- Canvas or canvasboard
- Old crayons with the wrappers peeled off
- Elmer’s Glue-All
- Acrylic paint in a variety of colors
Instructions
- Plan out the design. Lightly sketch with a pencil.
- Peel crayons for best results.
- Paint canvas with a base color or image like our heart.
- Use Elmer's Glue-All or strong craft glue to glue crayons to the canvas.
- Let the glue fully dry.
- Hold blow dryer at least 3 inches away from the edge of the crayons on high heat.
- Hold canvas so that the crayons melt downwards.
- Keep rotating the canvas until you have melted all of your crayons.
- Touch up any areas with paint once the hot wax has melted.
Oh wow! This is so creative. My son would like this. Thank you for sharing. Art is so important for the brain.
Hi Andrea, Thanks for visiting the DIY Nuts site! Yes ART is so important and kids can be so creative!
These are really visually beautiful and a great addition to any school. Also thanks for the helpful tips!
Hi Marna! Thanks for visiting The DIY Nuts site and for the nice comment.
These are gorgeous and look like a ton of fun! Thanks for sharing!
Hi Monica! Thanks for stopping by our site. I hope you have fun being creative!
These are so beautiful! I did these years back in a summer camp with my students– I can’t say they were as visually stunning as yours!
I was just going through my blog looking at melted crayon projects! I love how crayons can make such beautiful art! http://thekriegers.org/2016/02/melted-crayon-rocks/
I love melted crayons and kids to do! Looks like your kiddos are very happy experimenting.
These are amazing! I may have to use this idea for my daughter’s 13th birthday! She and her friends love creating art. I’m sure I will create one for myself while I’m at it! 😉
Awesome! If you are doing them on a smaller scale, you can also do these on smaller canvas boards (would be cheaper). Have fun being a DIY Nut and being creative.
I’ve never seen anything like this before. What a cool idea!! I would love to do this with my son! Thank you so much for sharing.
I hope you have fun trying and being creative with your son! Thanks for visiting our site!
AH!!!!!!!! I adore, adore, adore these ideas. I’m borrowing them for my own inner artist! Thank you for sharing!
Please do. I am glad we were able to inspire you. Thank you for visiting The DIY Nuts site!
Oh my goodness. As a former second grade teacher, I am certain that your students love coming to your class. What gorgeous projects you had them create!
Thank you! We do have fun and thank you for visiting my site.
Wow this is an awesome take on they melted crayon craft. I love the collaborative piece
Hi Sara! Thank you for visiting our site and for the nice comment! Kids do really love working together.
This looks so fun! Definitely saving this for when the boys are older. I’m not crafty at all so love stuff like this that makes it look possible.
Thanks for visiting my site. I am sure you would be able to pull it off! Enjoy being creative with your boys!
These are so beautiful and creative. I must try this!
Hi Anh! Thanks for visiting our site and have fun being creative!