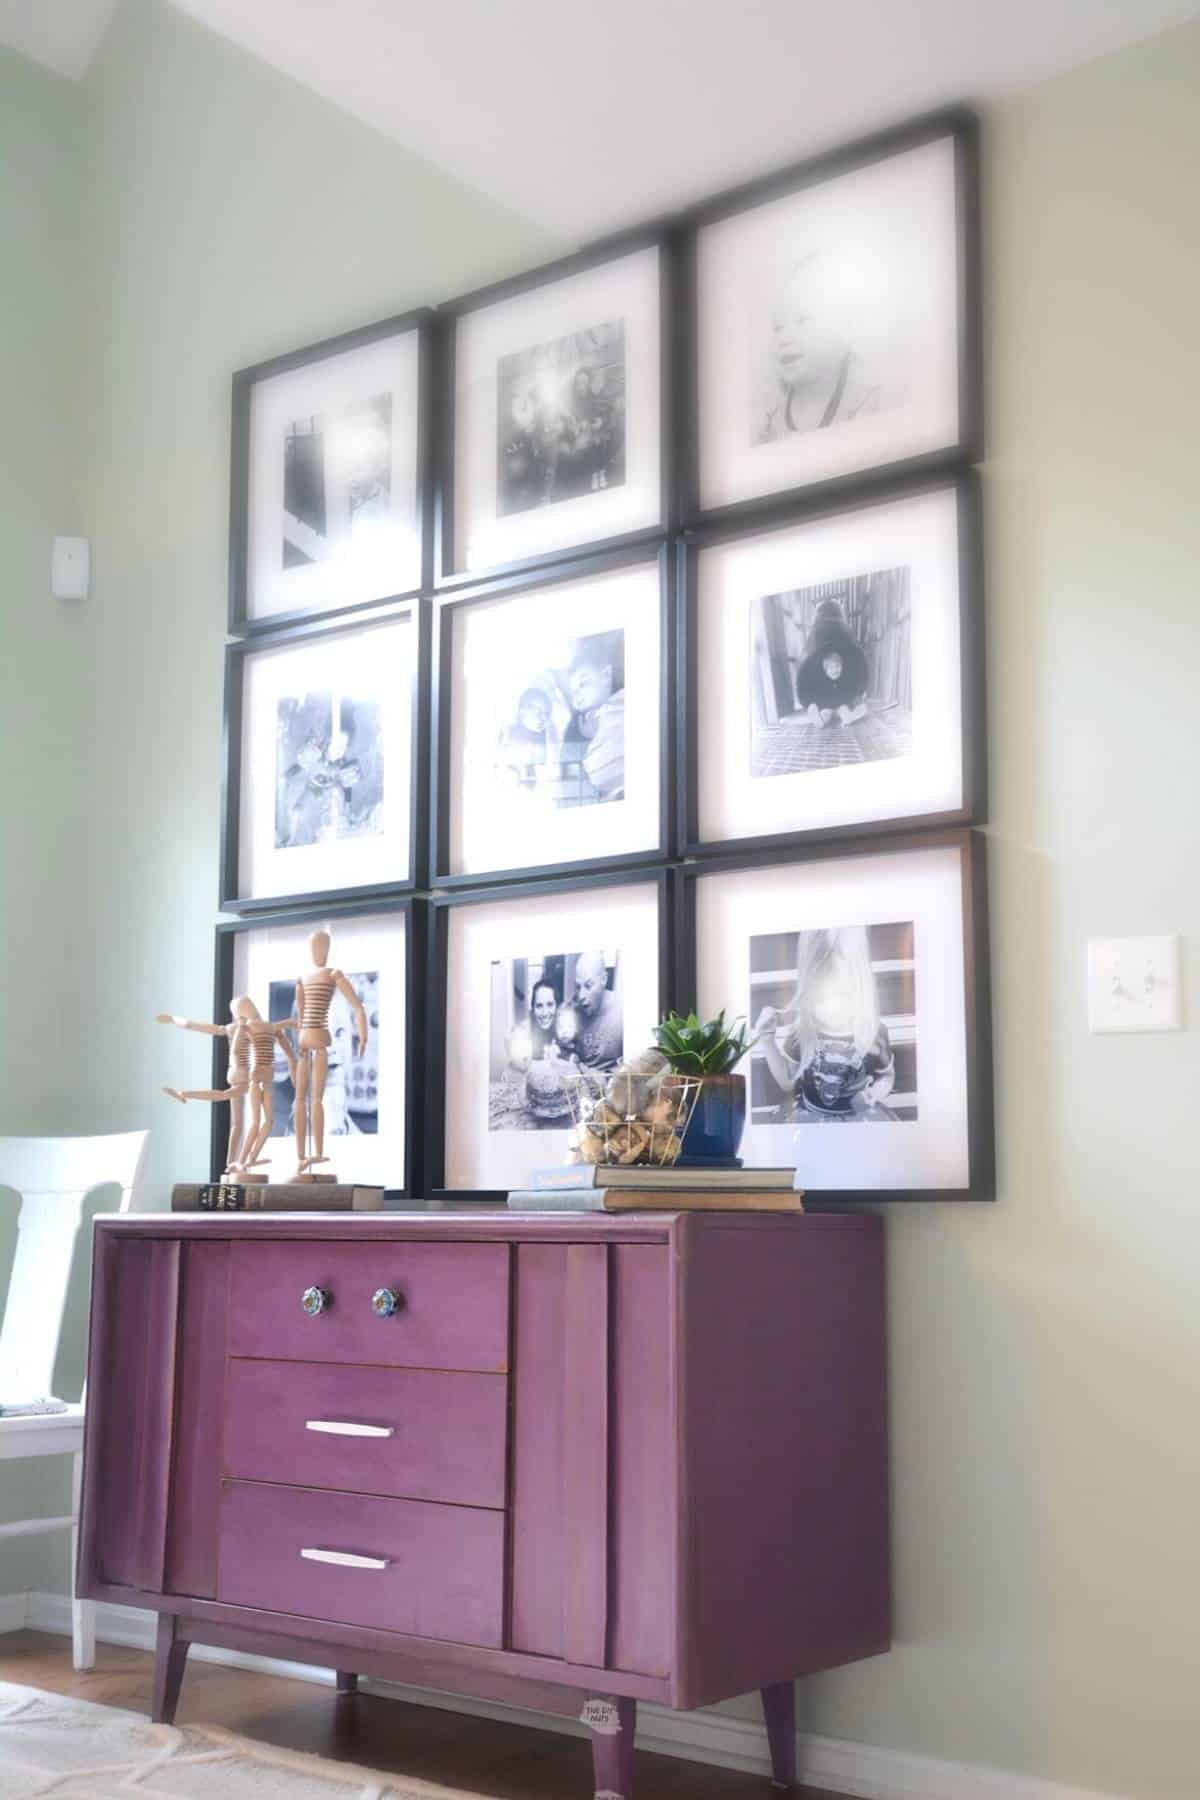
How To Easily Hang 9 Frame Grid Picture Gallery Wall
Have you seen all of those fabulous framed art walls and just thought there is no way you could achieve this wall art idea? While I am here to tell you that it is easier than you think to hang your gallery wall. Follow our step-by-step guide to hang a 9-picture layout for your family photos.

*Disclosure: I only recommend products I would use myself and all opinions expressed here are our own. This post may contain affiliate links that at no additional cost to you, I may earn a small commission. Read our full privacy policy.
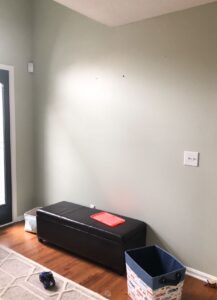
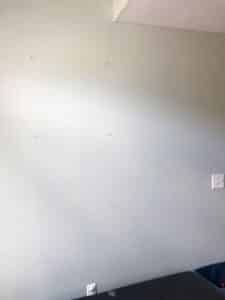
Our Empty Wall
Here is our empty entryway near our front door. It is the perfect place to display family photos. We searched how and low to find the best frames for our grid layout.

Recommended Tools and Supplies
*Disclosure: This post may contain affiliate links that at no additional cost to you, I may earn a small commission. Read our full privacy policy.
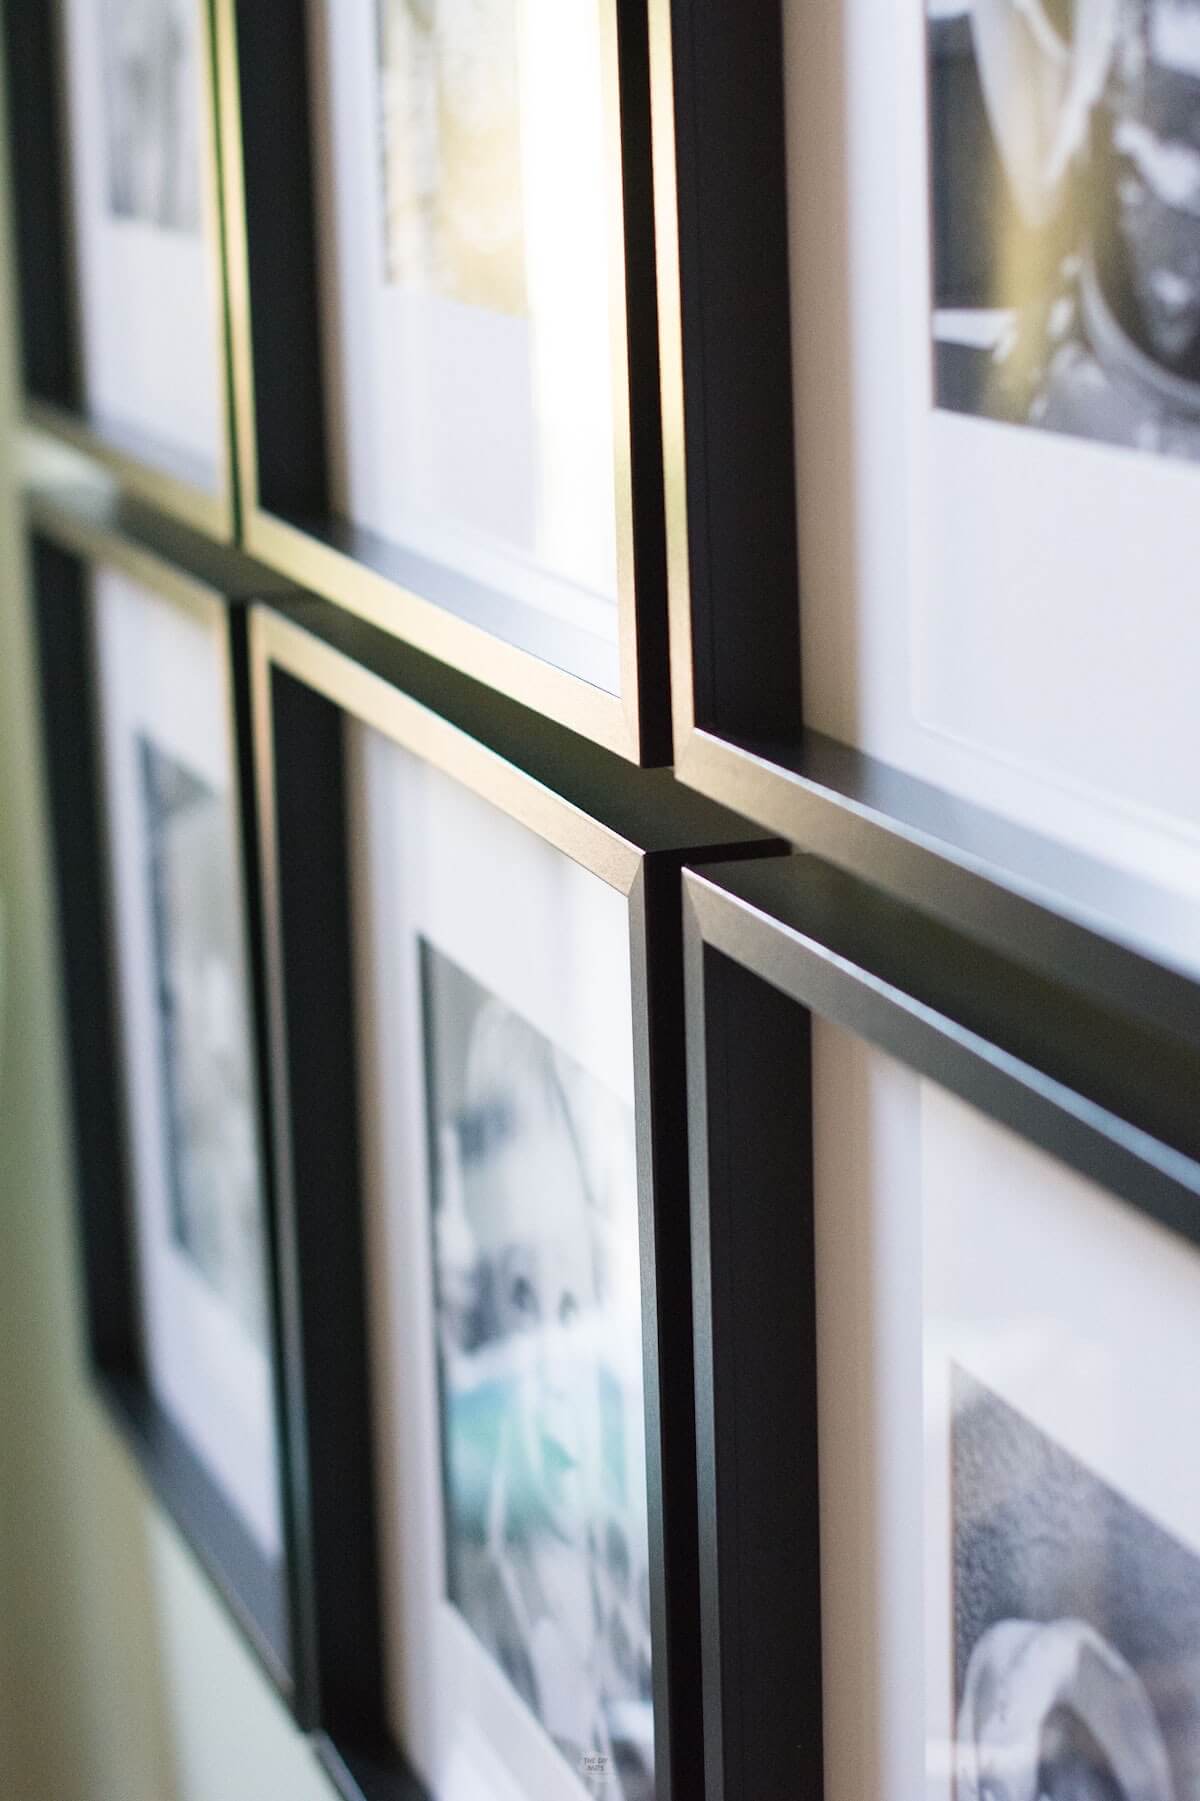
Why Did We Choose Large Square Frames?
We knew large square frames in a matching color with black and white photos would create a unified look. If you do not want square frames, most of the frames I considered come in different sizes within the links to the retailers.
Square Wall Frames You Can Buy
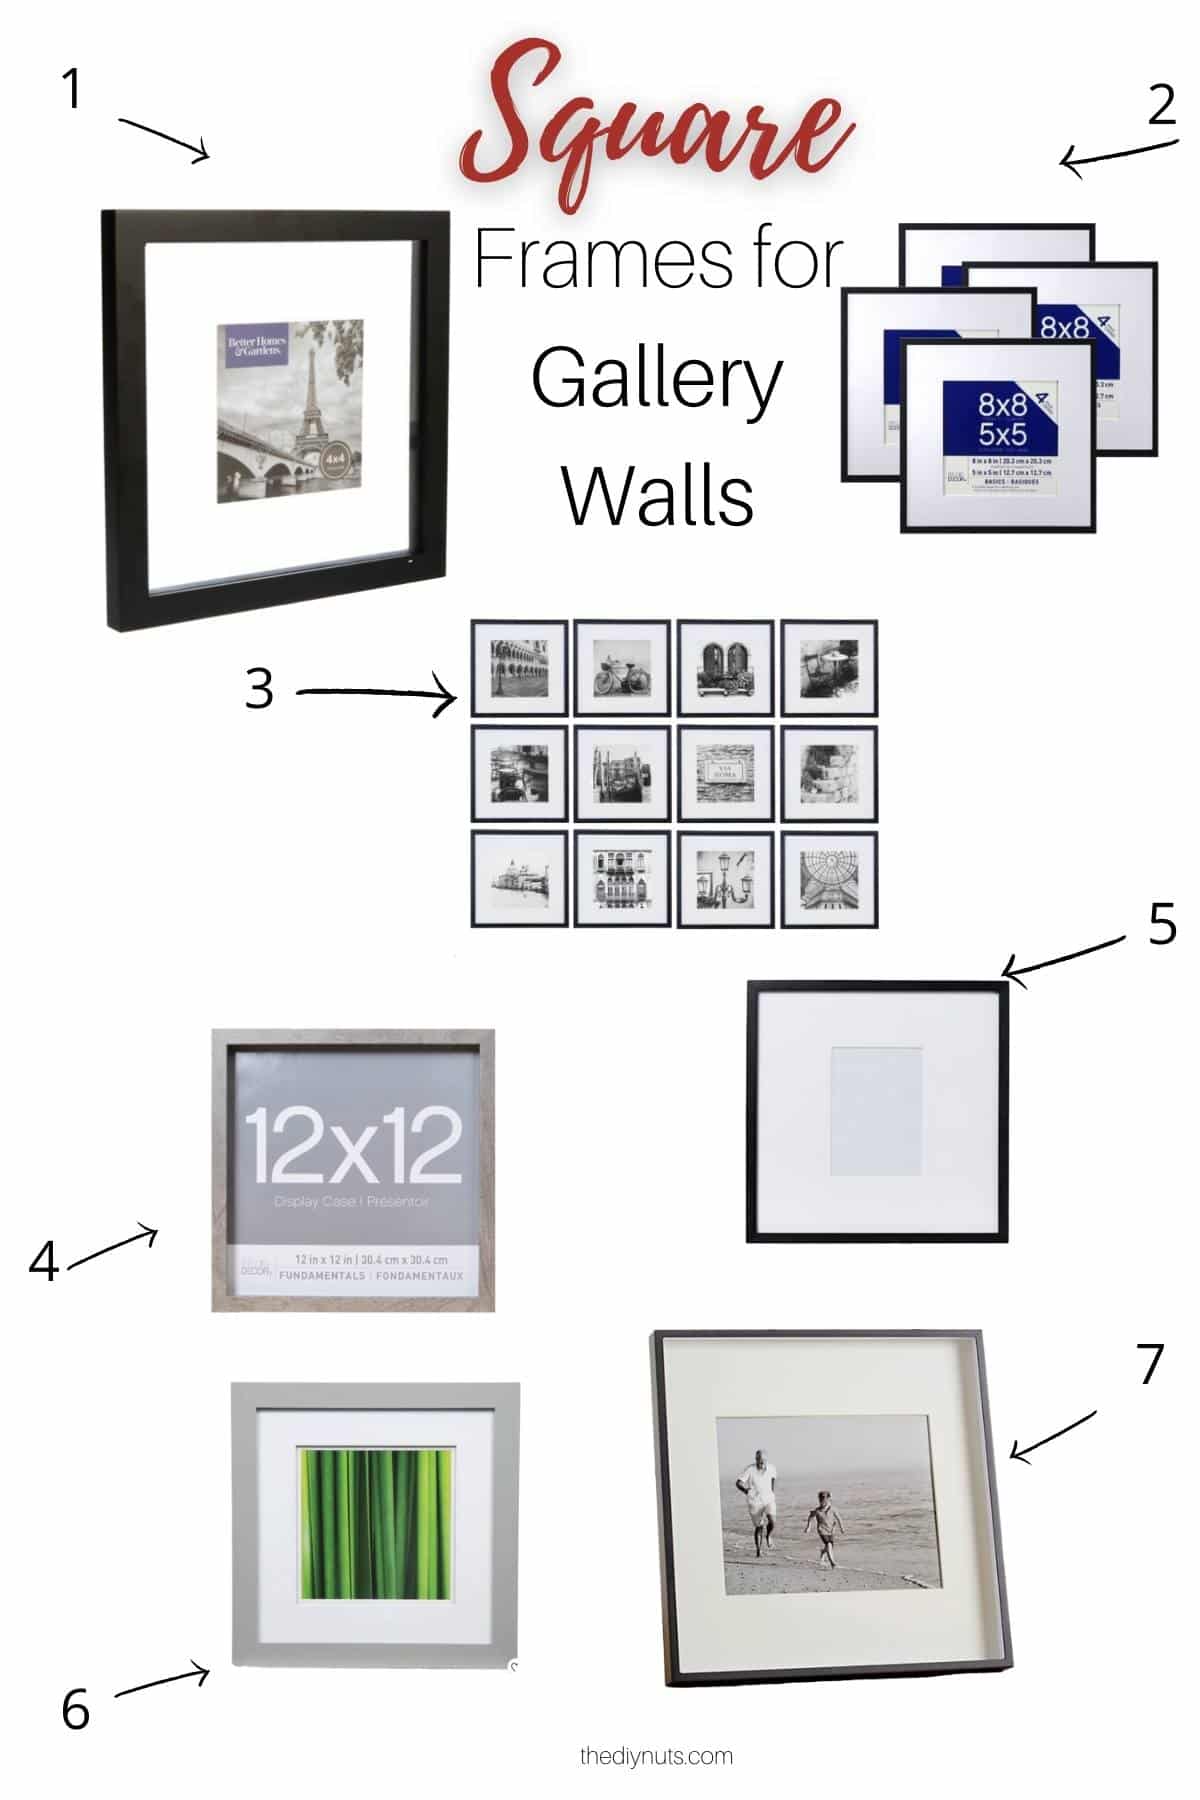
- Better Homes and Garden Floating Frame 8″ x 8″ Walmart 2. Basics Wall Frames by Studio Decor Michael’s 3. 12″ x 12″ Black Frame Kit Target 4. 2 Pack Gray Fundamentals Shadow Boxes Michael’s 5. Gallery Frame, Black Lacquer West Elm 6. 8″ x 8″ Double Matted Gray Frame Target 7. Brushed Silver 8″ x 10″ Frame Crate and Barrel
Hopefully, this will save you some shopping legwork as you look for the best frames for your space.
Large Square Wall Frames We Used
Most of the frames I had found were just too small. There was one more for me to consider and it is relatively inexpensive compared to other frames.
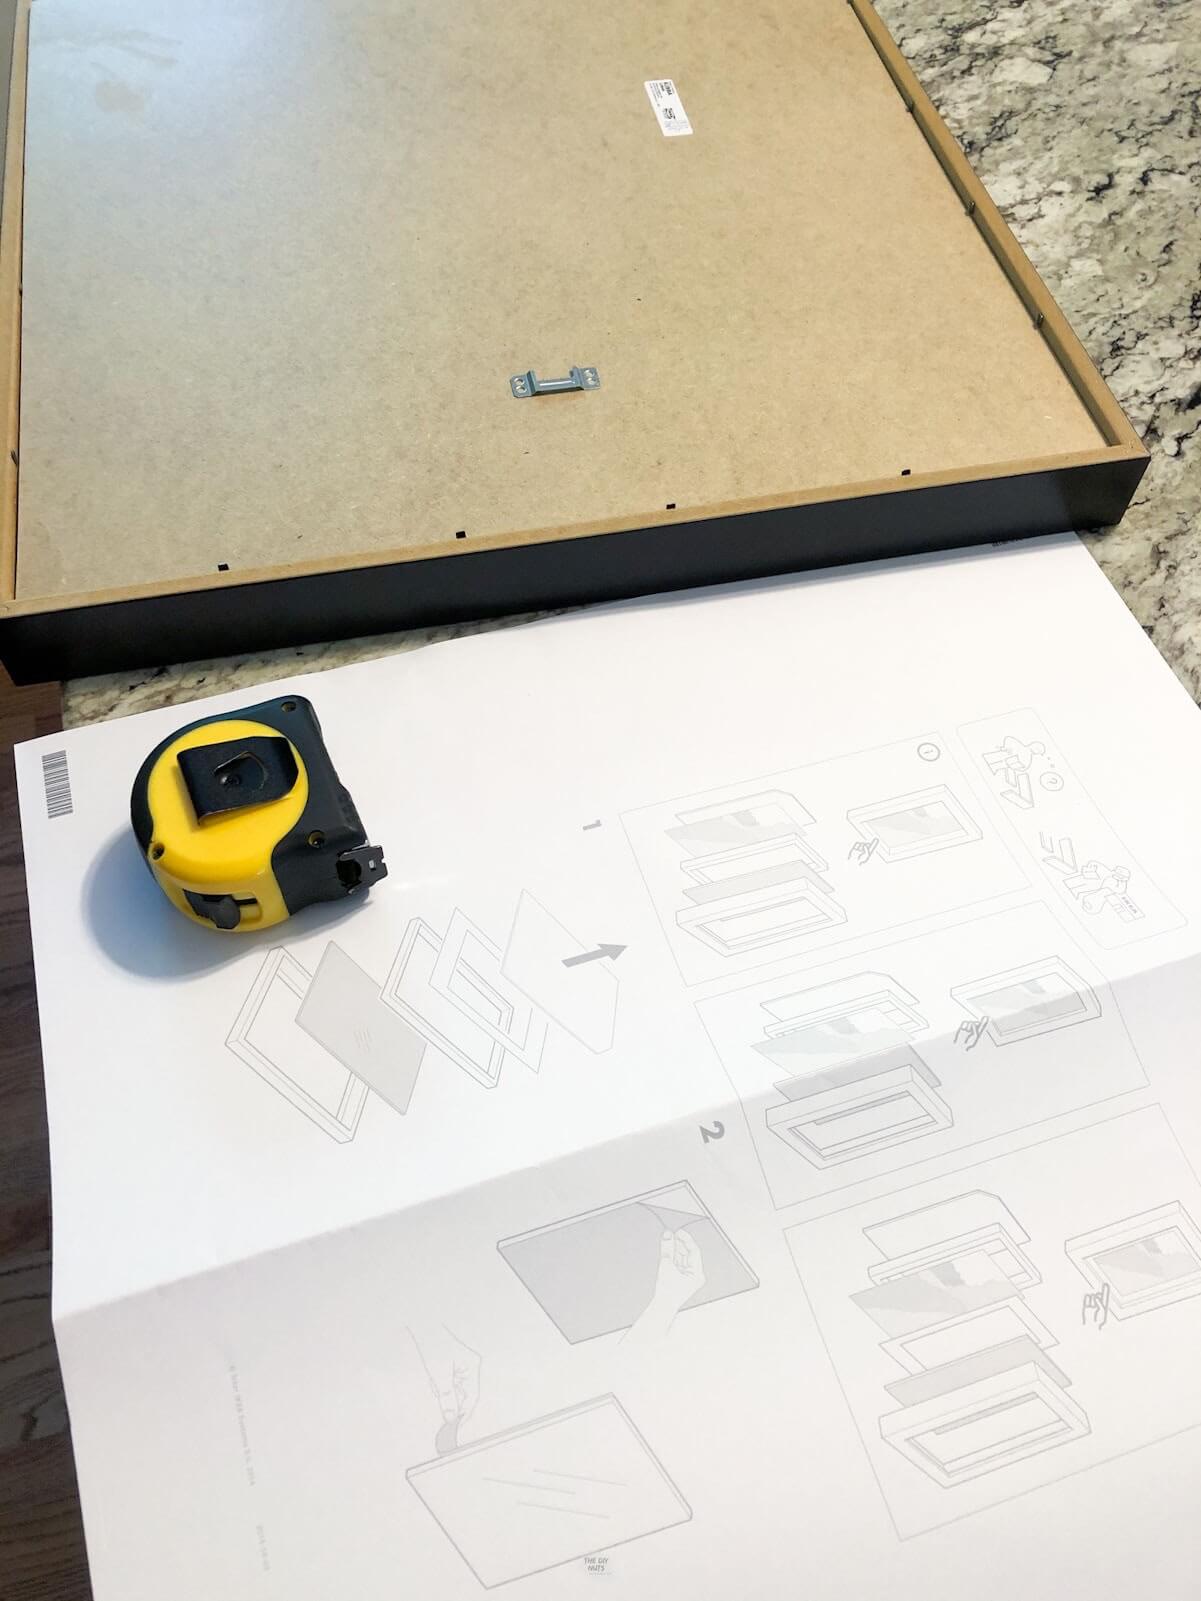
Ikea Ribba Large Square
- Has more depth than other frames
- Has plexiglass on the front which is better than glass for a young family
I do not live particularly close to an IKEA, but I was able to ship all 9 frames that I needed. For the size of these gallery wall frames, they are actually pretty inexpensive.
In addition to having to have to ship these large square frames, I was nervous that one would be damaged or broken, and then I would be delayed even longer. Luckily, they came very well packaged together.
(I am not even an affiliate for these frames, just telling you what I used).
Before You Begin
Plan Your Design
You can modify this 9-square grid pattern with any frames or art prints. Our tips will work for any wall design or different-sized frames.
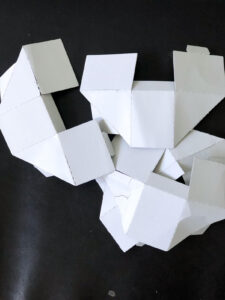
Don’t Throw Away Packaging
- No matter what type of picture gallery you are trying to create, you can use the paper in the frame as a guide.
- Don’t throw away the corner cardboard square protectors. These can act as spacers.

Most frames come with corner protectors. If not, you can easily make a spacer out of cardboard or other paper.
You will be able to see if you like your set-up before doing anything permanent. I was nervous that these large frames were going to be too much for our space or too low on the wall. Once I saw the paper on the wall, I knew it would do just that.
How To Hang 9 Picture Frames In A Square
Step 1: Take Frames Apart
Take apart the back of the frames and take the paper out. If you have your family photos or art pieces ready, you can add them to the frame then and get them set up.
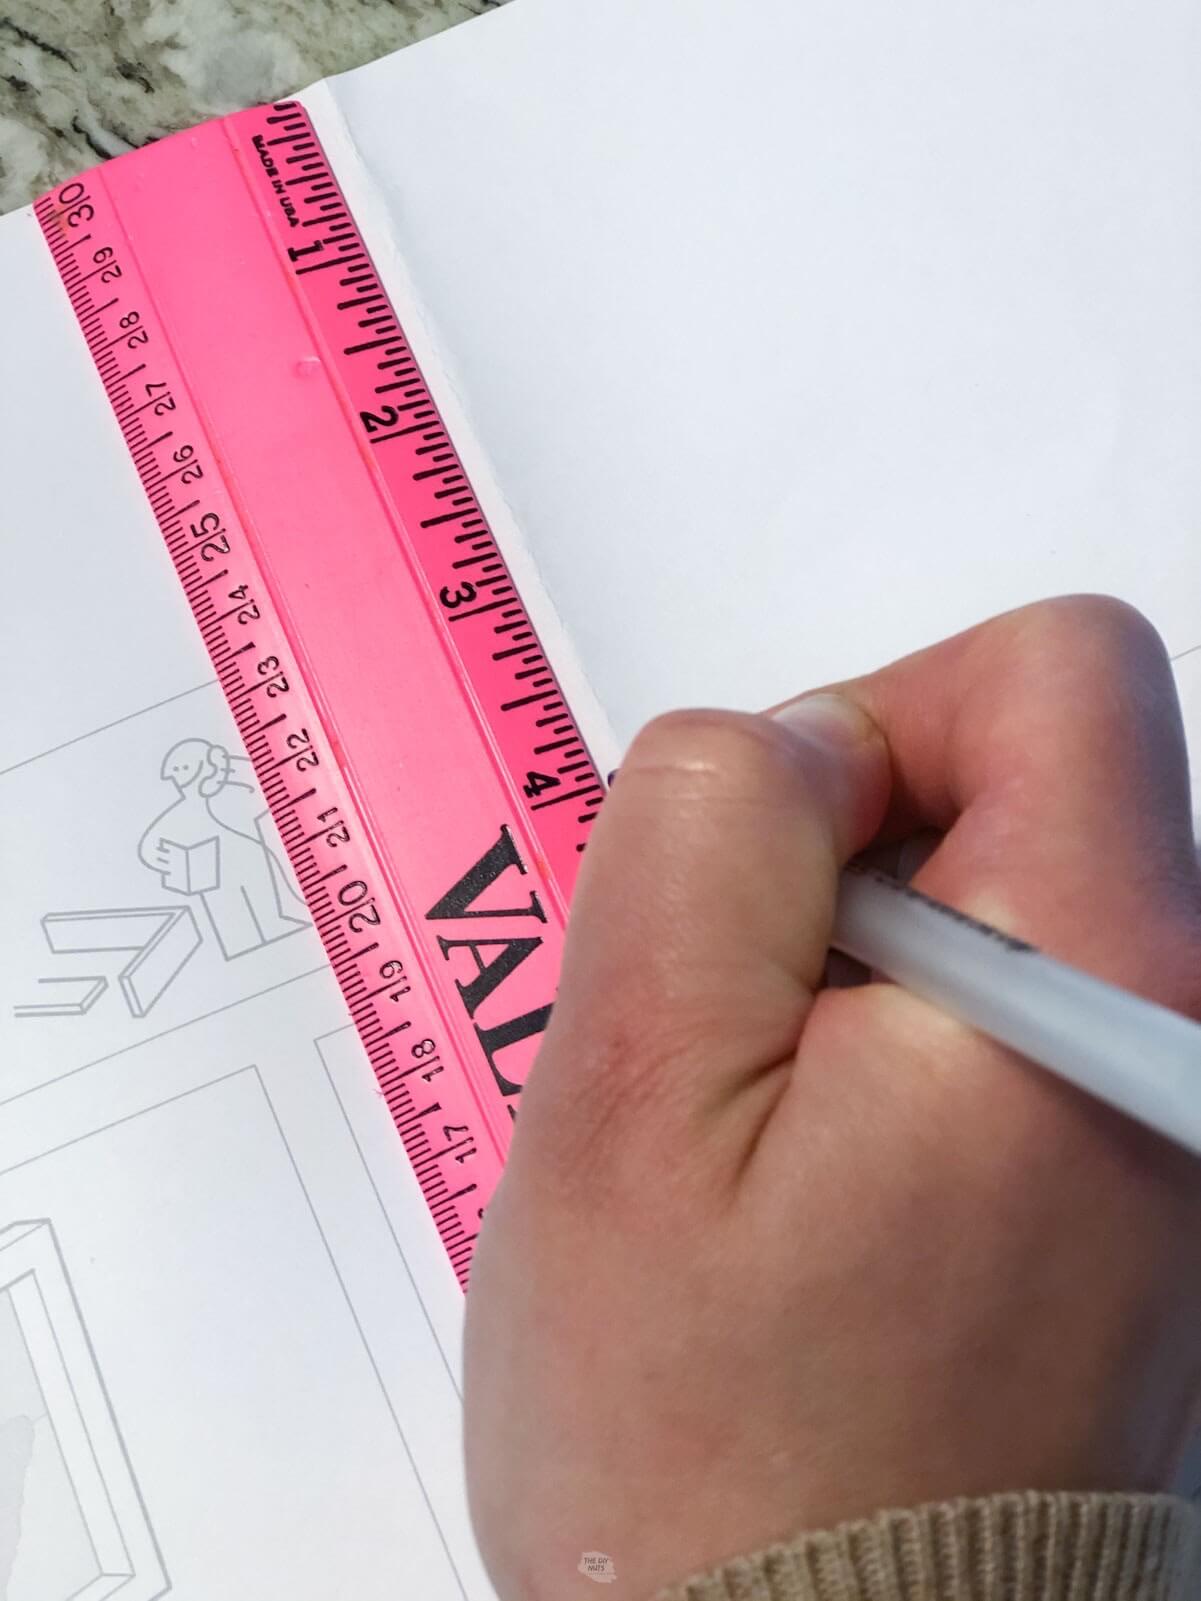
Step 2: Mark The Paper Where The Nail Will Go
- Put frames aside.
- Fold frame paper in half, assuming that your hang mechanism is in the middle (you would think they all would be).
- Open the paper templates back up.
- Measure how far down the hanging hook is on the back of the frame.
- On the Ribba frame, it was 4” down from the top. Mark 4” down on the fold.
- You will need to repeat this for all frames now or as you need them.
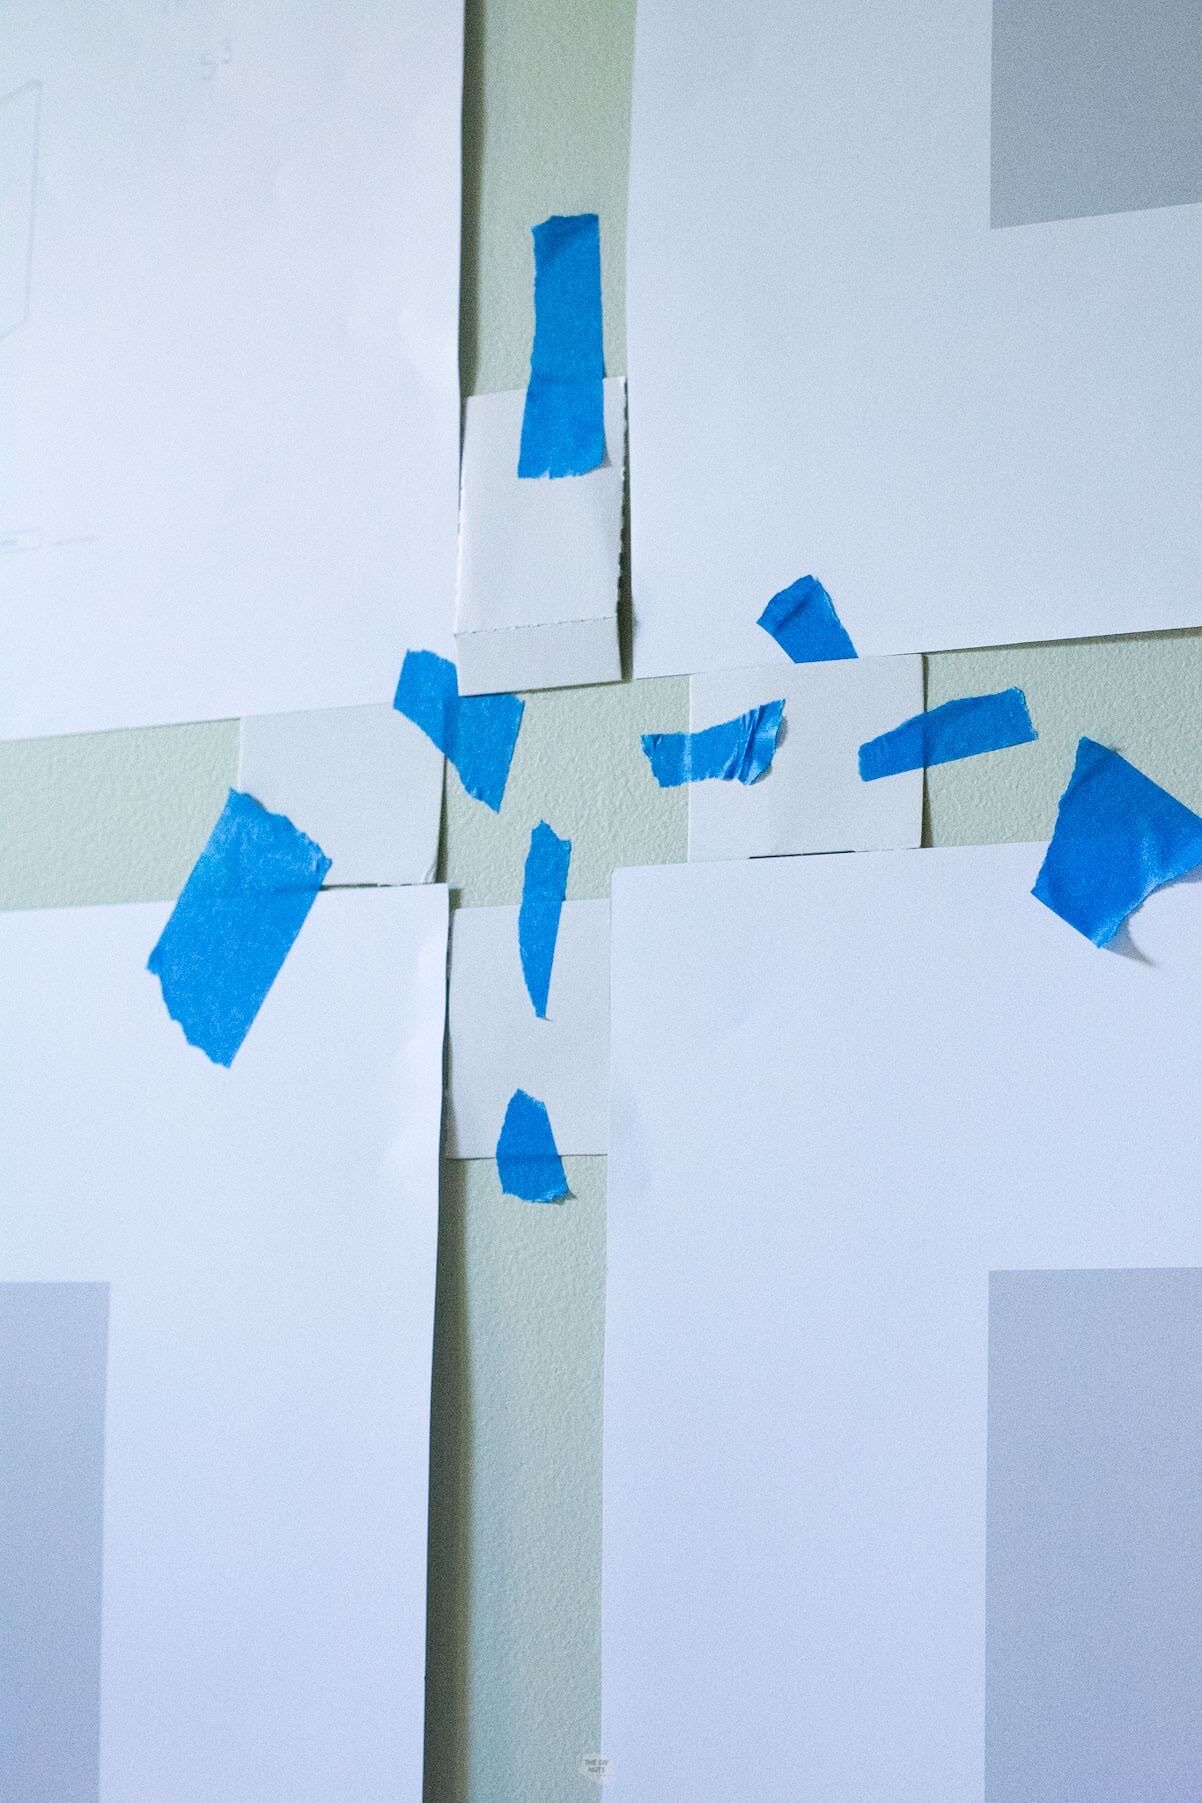
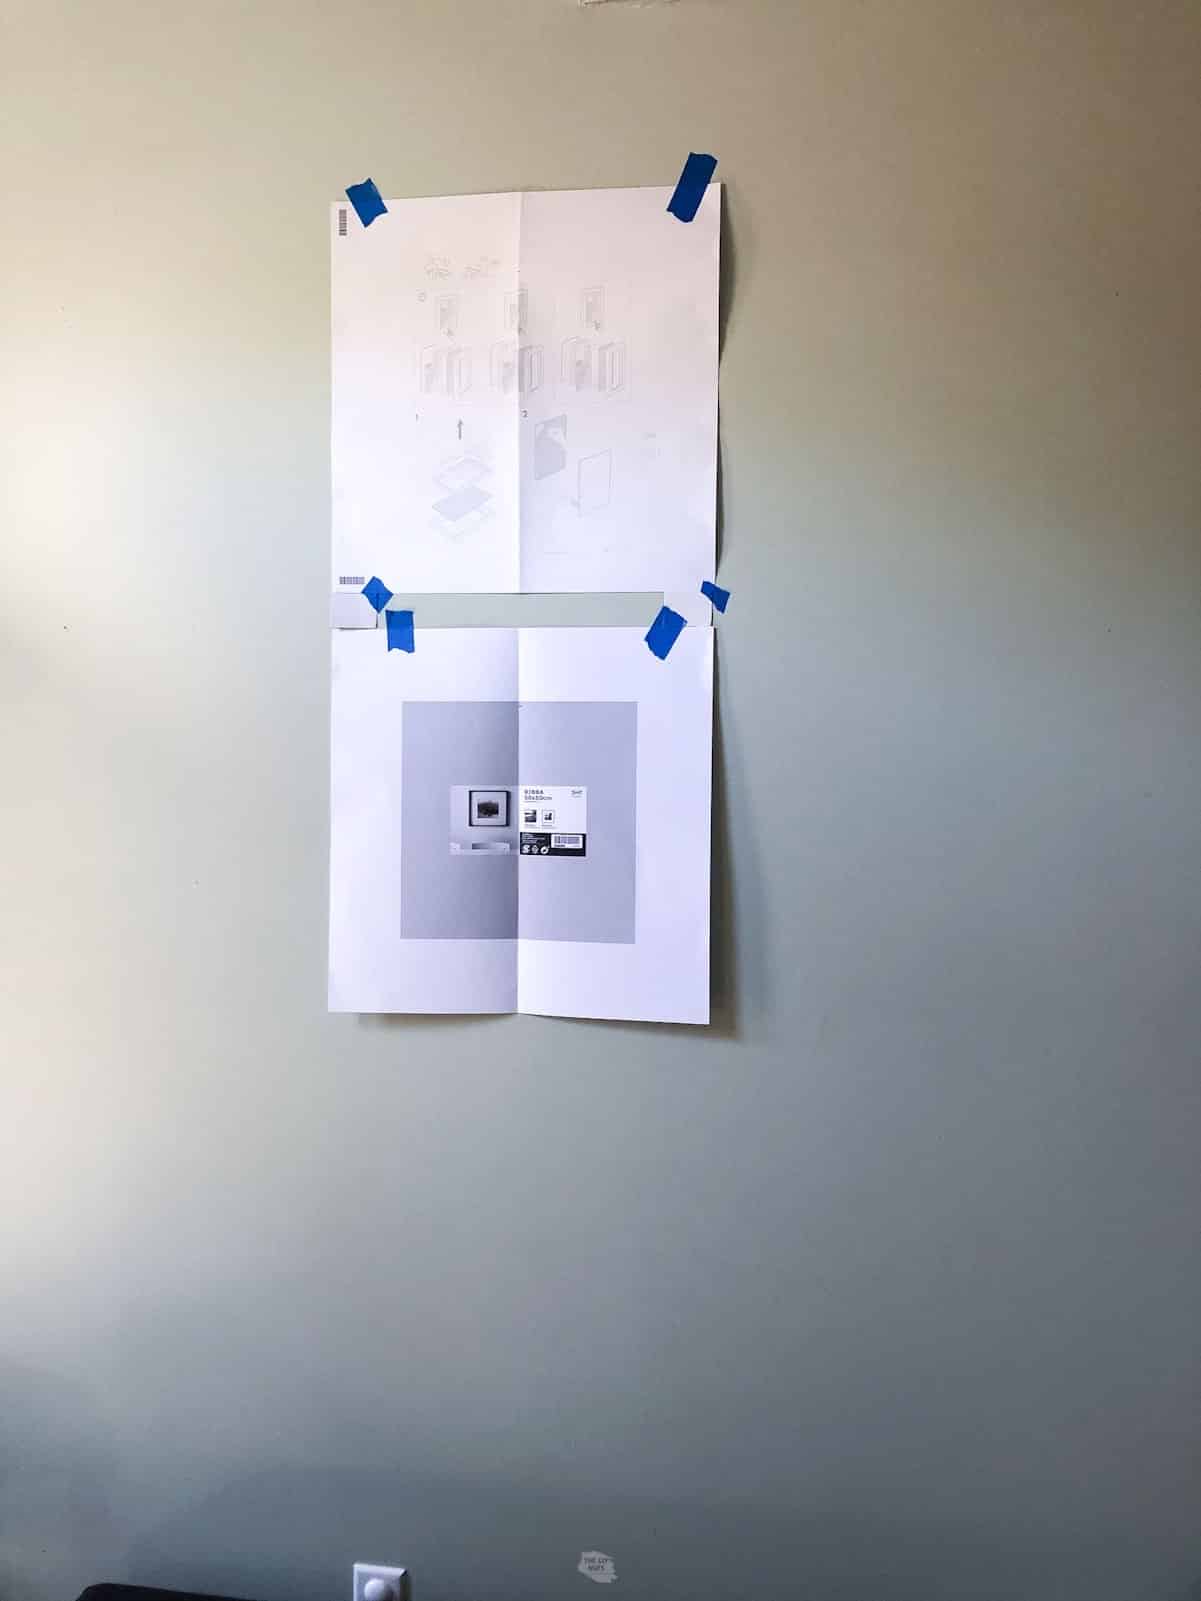
Step 3: Add A Paper Square To The Center Of The Wall
- Use a measuring tape to find the center point of your wall.
- Put your first piece of paper up at desired height.
- I “eyeballed” to make sure it was level, but you could use an actual torpedo level to check. I could not do this because our ceiling is two different heights, but you could also measure down in 2 spots and mark the distance.
- Line up the paper and tape it up on the wall.
Step 4: Add Spacers Around Square Paper
Take apart the corner square pieces. These were the perfect 1.5” width to use as my separators to make sure the distance was equal between all frames.
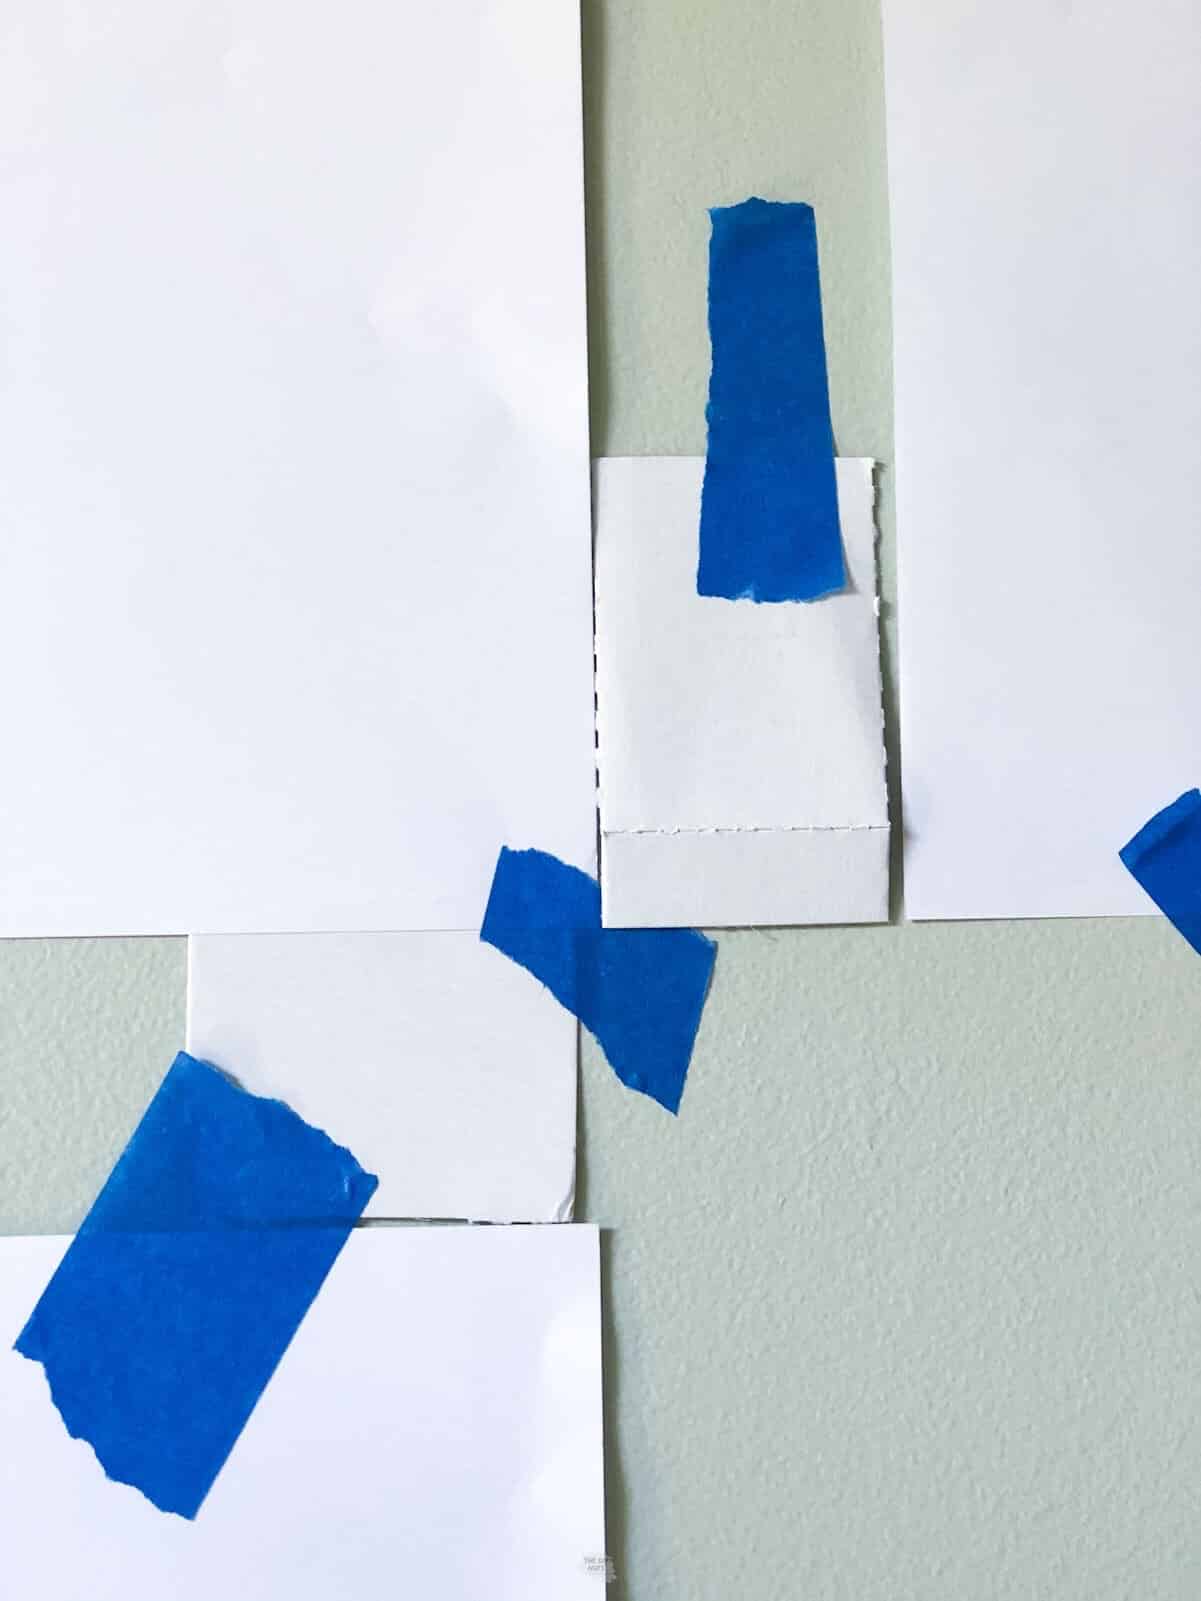
However, if you do not want that distance, you could always cut cardboard, tagboard or paper to your desired width to use.
Tape two separators next to the bottom of the paper square.
Step 5: Continue To Add Spacers And Square Papers
Line up the next frame’s paper square (it should already be folded and marked). Use painter’s tape to put that square paper on.

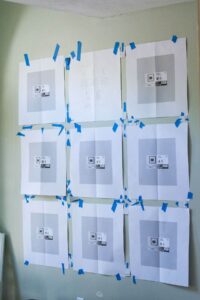
Step 6: Work To Get 9 Squares Taped To Wall
Keep adding 2 cardboard separators around paper squares before adding another paper up.
Step 7: Look At The Plan From A Distance
Repeat these steps until your picture wall gallery looks how you want it. Step back and look at the wall. Double-check that it looks right to you and adjust anything accordingly if needed.

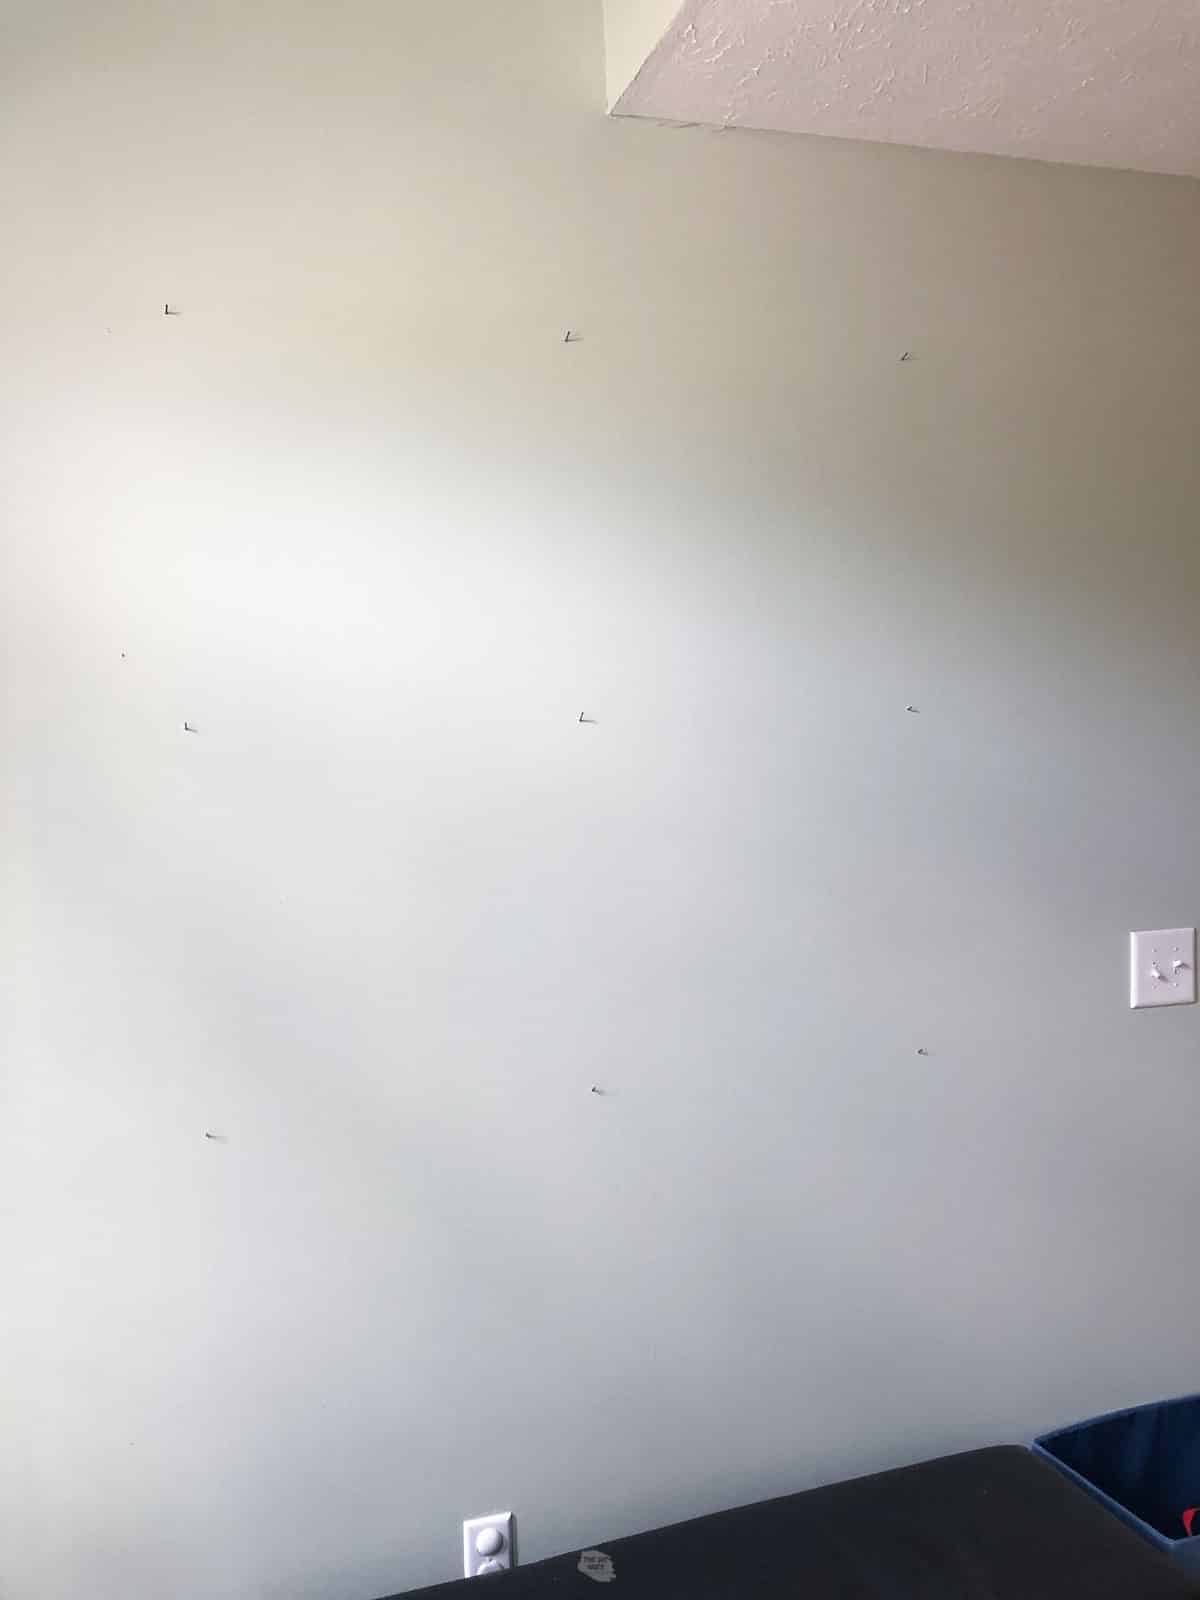
Step 8: Hammer Hanging Nails In Marked Spots
When you are completely sure, use finishing hanging nails. You simply can hammer right on the spot you are already marked on the paper.

Step 10: Carefully Remover Paper, Tape & Cardboard
Once the nail is in, carefully pull paper and cardboard separators off the wall. Make sure to have the nail slightly pointing upward.
Step 11: Hang Frames On Nails
Hang finished frames. You can adjust them to make sure they are level.
Tips On Adding Photography To Frames
- These frames had a clear film stuck on both sides of the plexiglass. Before, carefully peeling off make sure that your frame is dust-free.
- Also, try only to touch the corners. You really don’t want your fingerprints showing.
- When assembling the frames, I placed them on a soft, dust-free comforter on our bed. This helps keep everything in one place. One time I tried to do frames on the carpet and instantly regretted it. Can anyone say carpet fuzz?
- Check that the image is the right way before closing the frame and that it looks clean to you. The worst is when you think you are all set and flip over only to find that you put everything upside down. Or a huge piece of lint stuck in there. Trust me, just check it right before closing your frame.
Photo Printing Tips
- No matter where you get your photos printed, I recommend getting the photos printed on matte paper instead of glossy. I just think that the photos appear richer on that paper.
- Also, make sure that edit your photographs before uploading. I have never really found the edit options within these printing services to be worth it.
- Here is a link to the photoshop settings I added to my black-and-white photos to make sure that our large photos turned out clear and not blurry.
- A lot of our pictures were even done with our phones. You can YouTube about any edit settings you may use to ensure you have high enough resolution in your photos.
- Using natural light outside will also help with the precise nature and focus in your images.
Where To Print Large Photos
- Shutterfly: Will run promo codes all the time so that you can get prints of any size.
- Walgreens: We printed our prints from here this time. We need 12″ x 12″ designer prints (it is what they call them at that size).
- CVS: They also offer a variety of print options and you should be able to find coupons to get some percent off.
- Amazon Print: I have yet to try their printing service, but have read that they are rated pretty high.
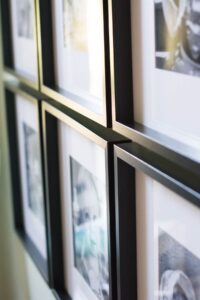
Please note: I purposely tried to make the black and white photographs appear fuzzy in this image to protect our privacy. I was very happy with how our prints came and how clear our black and white photo wall is. I am so happy that I finally paid for matching frames to create this uniform look in our foyer.
Read more about our ideas: DIY Creative Art Display Ideas
Picture Hanging FAQs
Depending on the weight of your frames, you may be able to use command strips, small hanging nails or you may need to use drywall anchors.
Command strips are awesome for small pieces if you do not want extra nail holes. Just make sure you are following the weight limit guidelines.
Our frames ended up being about 3/4″ apart to create the 9-square frame grid. If you want your frames farther apart we recommend making your own spacers or using a ruler to mark the distance you want.
When you use the frame paper the width of the frame is not shown with the template. If you are concerned then you will want to trace the frames on kraft paper or wrapping paper to make your templates.
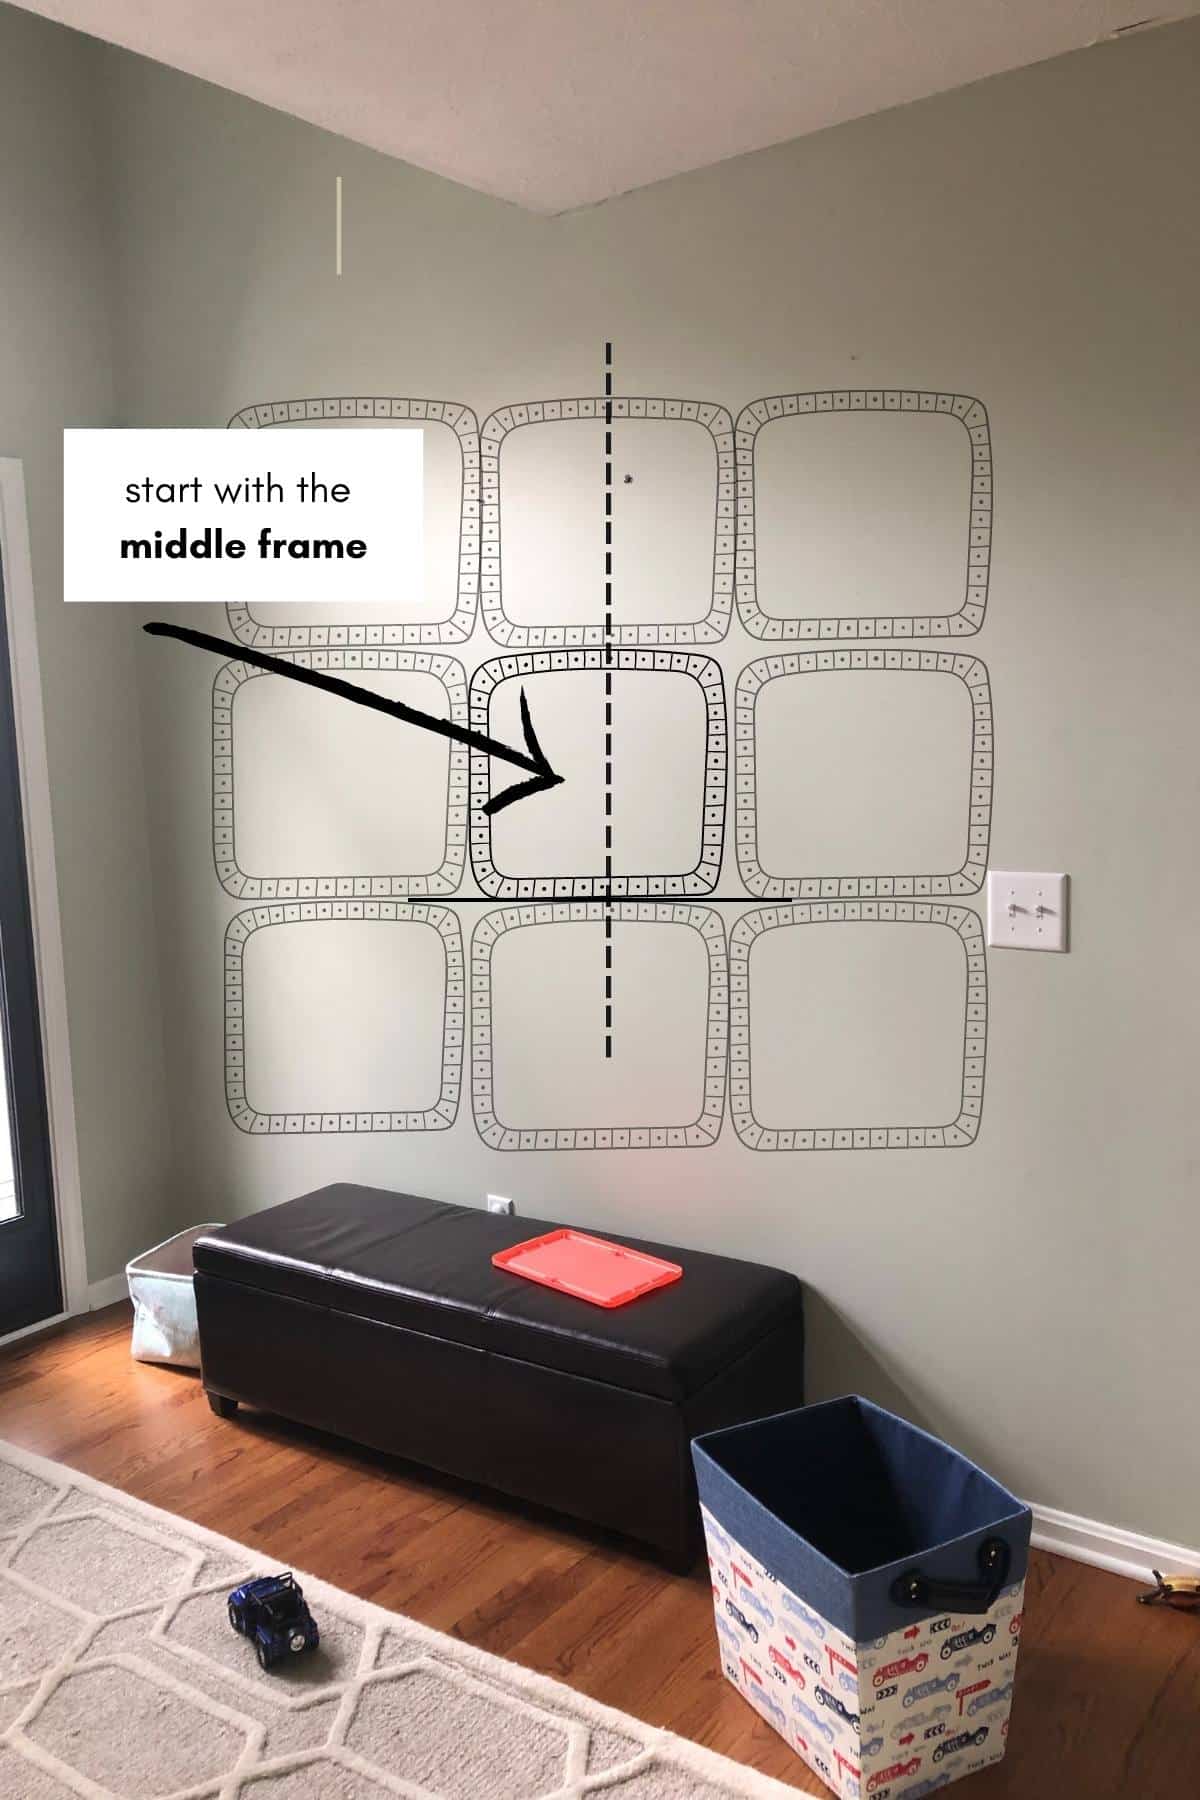
You should start with the middle frame in your layout or design and work outwards. This will ensure that you are keeping your wall balanced.
If you are doing different-sized photo frames and artwork, you may want to consider starting with the largest piece and filling in the entire wall from there.
It appears you can get a 16″ x 20″ Ribba frame still at IKEA. However, at this time it doesn’t look like the square frames are available anymore. There are similar looks but different styles available like the Sannahed line from IKEA.
A good rule of thumb is to start at eye level and add your pieces from there. A common mistake people make is hanging their new gallery wall too high.
Related Ceiling and Wall Posts
- DIY Painted Herringbone Bathroom Wall
- DIY Ombre Hexagon Wall
- 40 DIY Home Ideas For This Weekend
- DIY Chalkboard Wall
Follow us on Pinterest, YouTube or Facebook for more DIY inspiration!
We absolutely love our picture gallery and are so happy that I was able to hang it in a few hours!
If you like this tutorial, please give it 5 stars below 🤩🤩🤩🤩🤩. Your support helps us continue to provide unique and budget-friendly DIYs.
How to Hang A Picture Gallery Wall

Equipment
- Hammer
- Painter’s Tape or Masking Tape
Instructions
- Take the backing off of the square frame.

- Put frame aside.
- Fold frame paper in half.
- Open the paper back up and measure 4 inches down from the top.
- Find the center of your wall and mark it with a pencil.

- Use painter’s tape and a level (if you want) to tape the first frame paper on the wall.
- Take corner piece of the frame apart and use it as even separator.
- Tape two separators next to the bottom paper square.
- Line up the next paper from the frame next to the separators.
- Tape the paper square with painter’s tape.
- Repeat until all paper from the frames is up in the design you want.

- Right through the paper, hammer a hanging nail on the marked spot.

- Remove paper.
- Add photos in the frame and hang on the nails.
- Now you have the perfect grid picture gallery wall with square frames.


Notes
- You may need to prep the wall before adding your picture frames. This could include removing old nails, patching holes or even a fresh coat of paint.
- You could use this method to create any pattern or gallery wall design. Just save those frame papers to help you figure out your picture frame layout.
- If you don’t want to use the frame paper, you could make your own templates out of butcher paper.
- You can eyeball or use a small torpedo level to make sure frames are level.
I love this! I want to renovate our living room some day and this would be such an amazing addition to our one blank wall ????
Hi Jenn. I really love how the polished this gallery wall makes our entryway work. I am glad I spent the money to buy all of the same frames.
It’s great to learn that you should keep the corner cardboard square protectors to measure a picture frame. My wife and I are preparing to move into a new home and we were wondering how we could hang up pictures on the wall easier. I’ll be sure to tell her that we should keep the corner cardboard square protectors to hang pictures easier.
Hi Aaron. Yes, the corner protector worked as a spacer when planning out our wall gallery. You could also make a few one out of tagboard to any size of your choice. Good luck.