DIY Chalkboard Paint Wall Idea For Kids
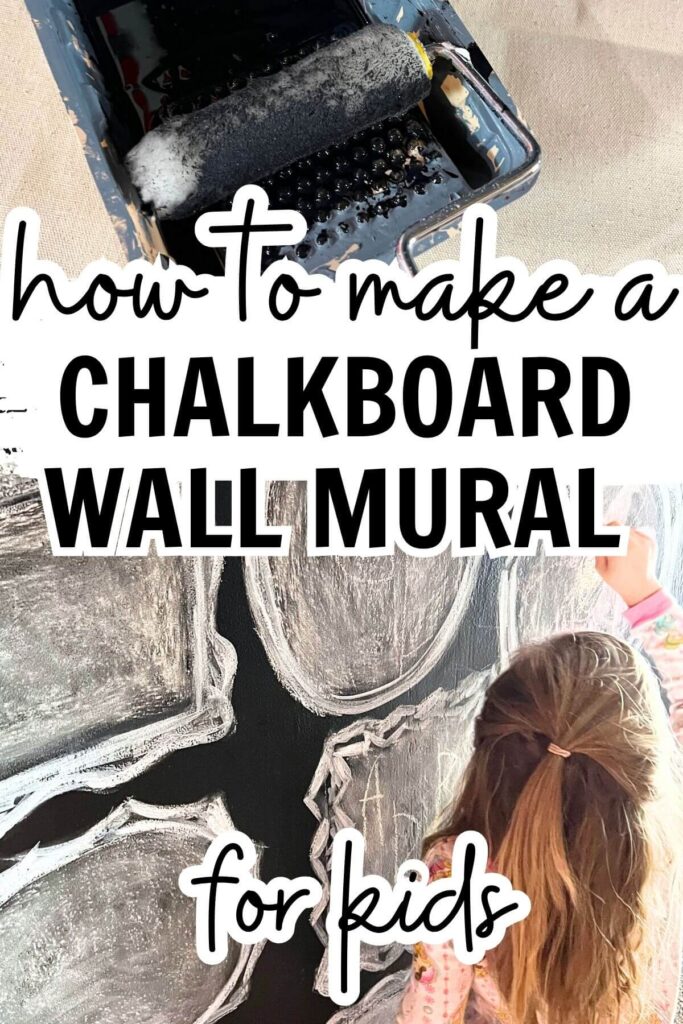
Are you looking for a creative wall or interactive element for your child’s room, playroom or even kitchen? Chalkboard paint is the perfect way to create a unique feature in your home. Learn how to paint a chalkboard wall mural for kids that doesn’t turn into a huge mess.

*Disclosure: I only recommend products I would use myself and all opinions expressed here are our own. This post may contain affiliate links that at no additional cost to you, I may earn a small commission. Read our full privacy policy.
We loved the idea of chalkboard paint but didn’t want it to just turn into a big mess once we let our children start showcasing their masterpieces. This DIY chalkboard wall idea was an awesome solution to that problem.
Where to put a chalkboard wall?
Kitchens, kid’s rooms, and basements are great places to put a chalkboard wall. Using chalkboard paint is a semi-permanent accent wall that can add a lot of character to any space.
We recommend using chalkboard paint in a small area first to see if you like the look. The good news is that if you don’t like your design, you can always just repaint it!
Other Factors To Consider
- How smooth is your wall?
- Is it for kids?
- What kind of floor is there? Will chalk dust easily clean-up?
- What is the purpose of this wall? For kids or another decorative purpose?
- Do you want this wall to be magnetic as well? Check out magnetic chalkboard paint or primer before.
- Chalkboard paint doesn’t have to be black, so consider different color options.
Our Painted Chalkboard Wall
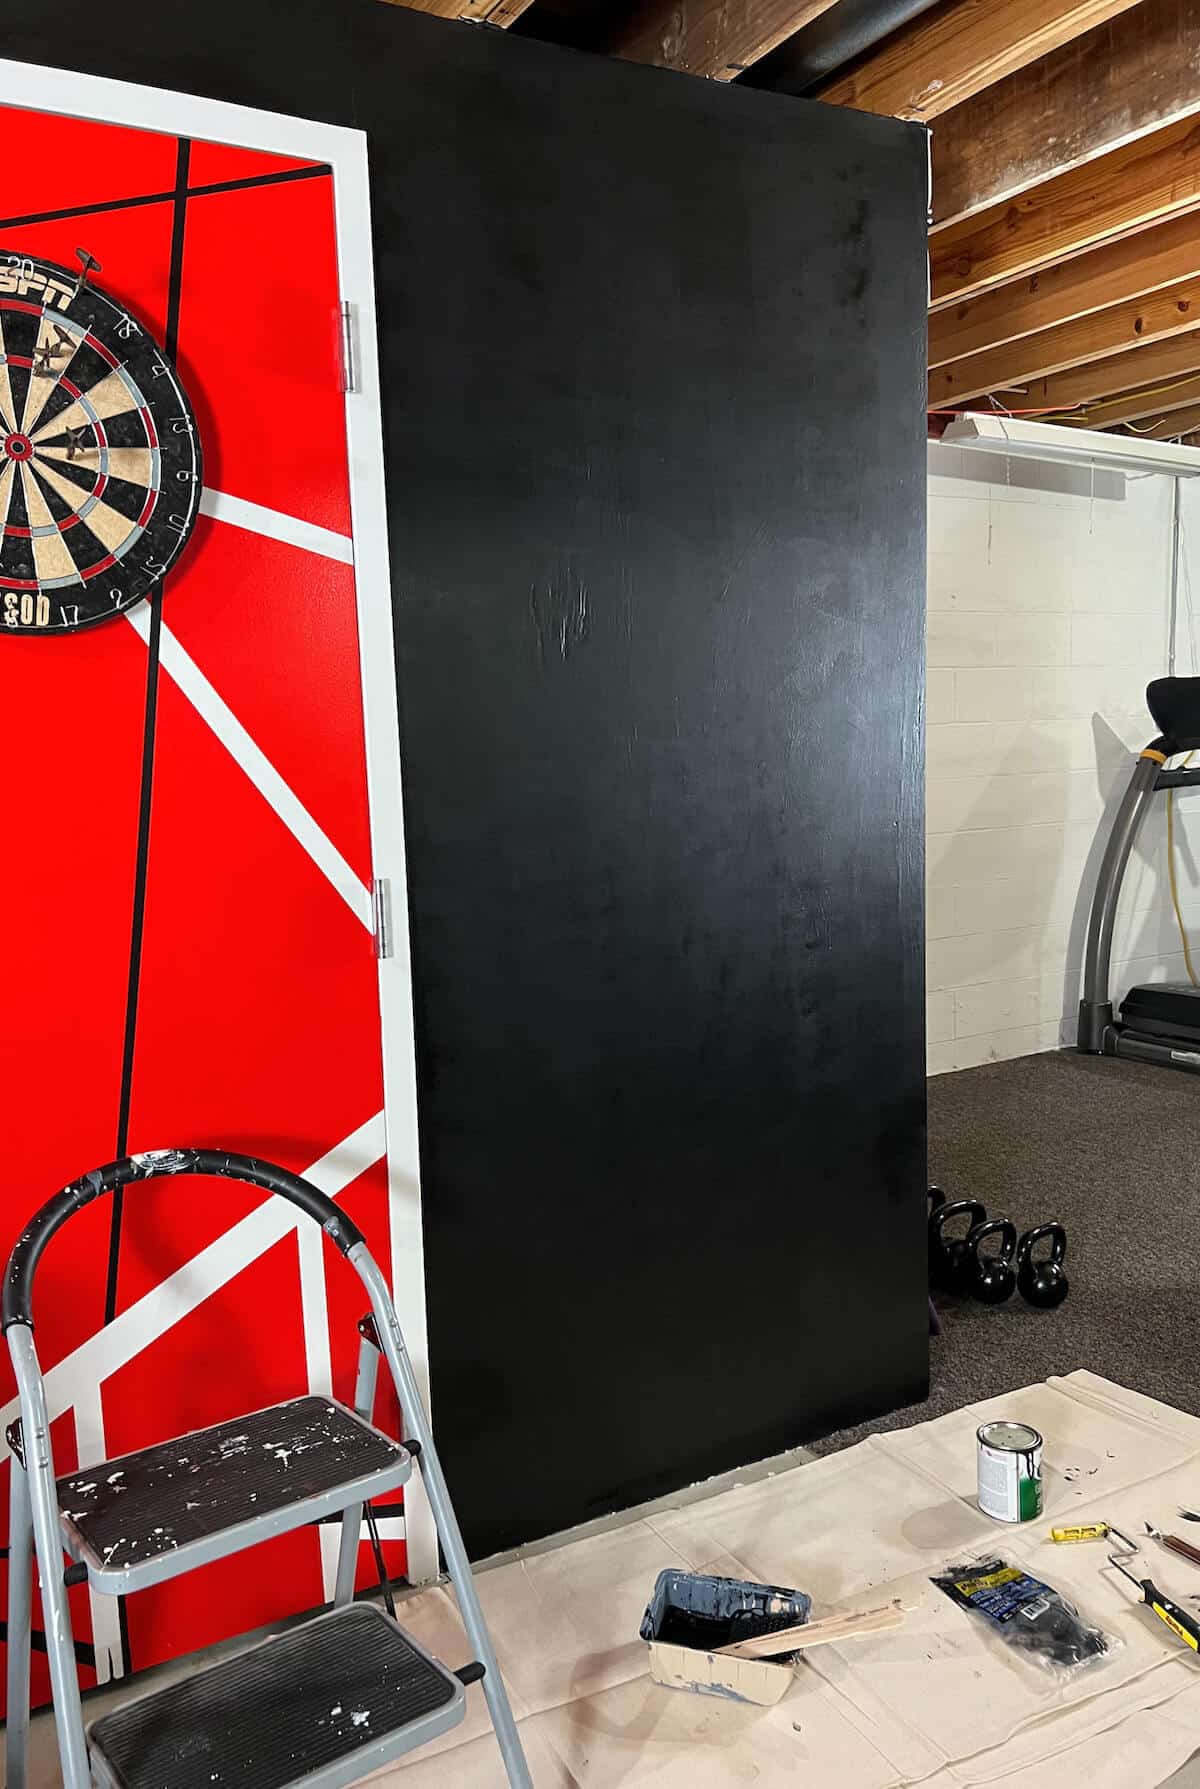
Our chalkboard wall is a small room around our sump pump in our basement. We have even added a metal door that truly showcases my husband’s love for Eddie Van Halen (Google his frankenstrat guitar to see the door inspo).
This DIY chalk mural will also eventually double as a scoreboard for the dartboard and a fun place for the kids to create artwork.
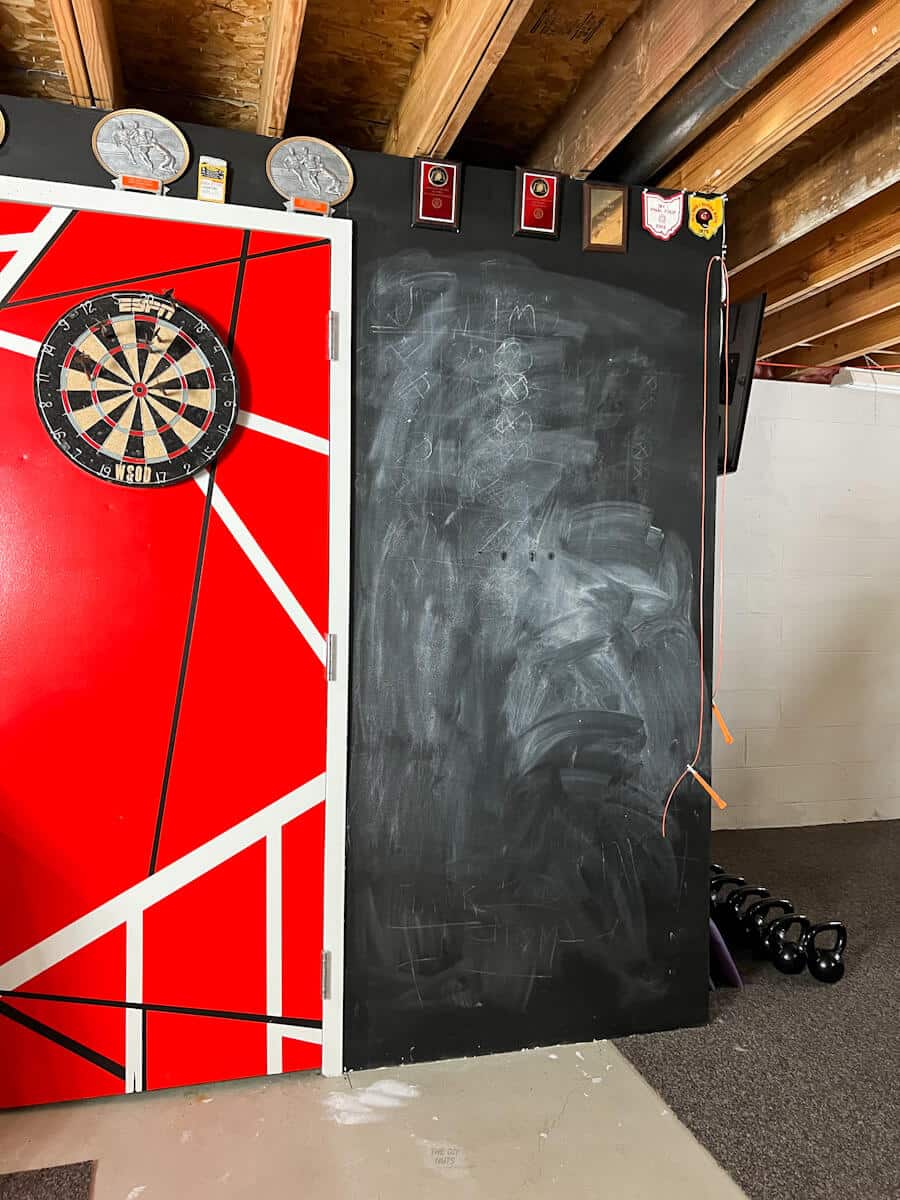
You very easily could have frames go all the way up the wall for your children to design in. Or make a more permanent design element to the mural by adding a quote or hand-drawn wall design.
Can Plywood Walls Work?
The room is built with simple plywood and is a place we honestly don’t care too much about. Therefore we didn’t really sand the wood or anything to have a completely flat surface.
Smoother Walls Will Be Easier
Make sure if you want a pristine chalk wall (if that is such a thing) that you start with a super smooth surface. However, kids will love chalking on any wall you allow them to.
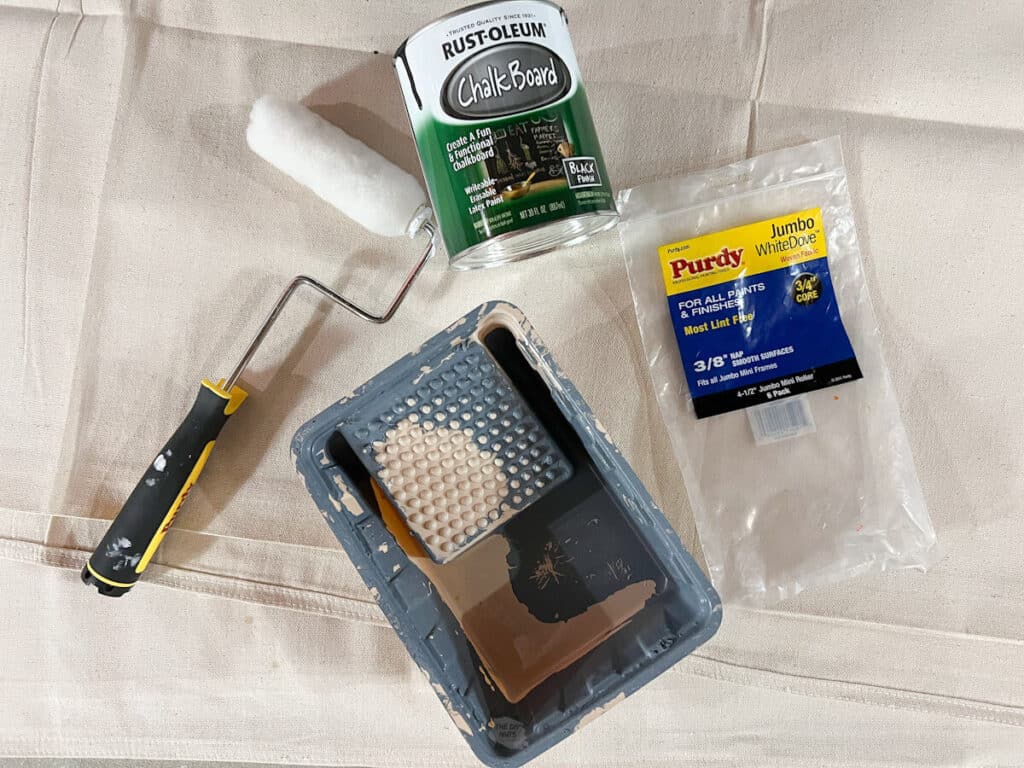
Recommended Supplies
- Chalkboard Paint
- Small Roller and handle
- Small paint tray
- A small brush (not pictured)
- White Chalk
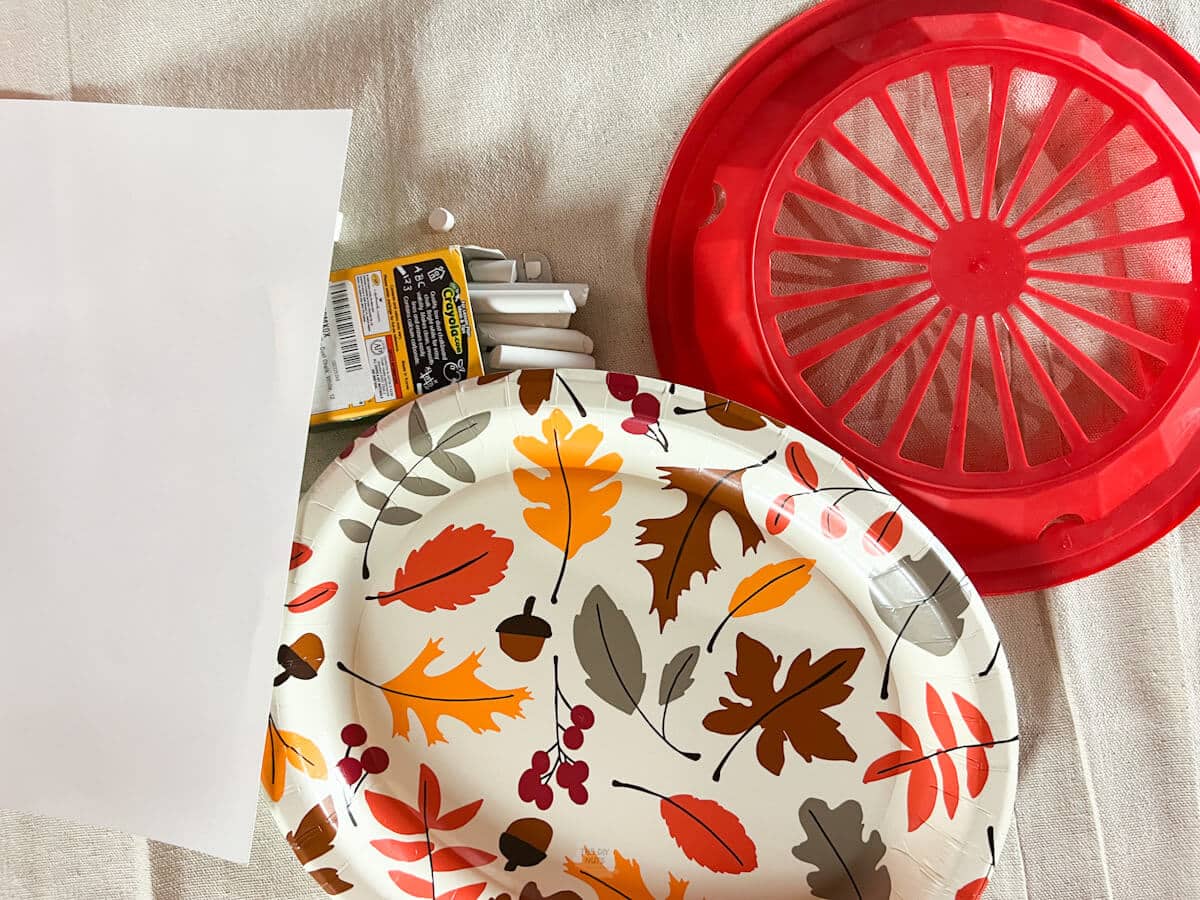
- Found objects to trace for frames
- Watered Down Acrylic or Latex White Paint
How To Make A Chalkboard Wall
Step 1: Start With A Smooth Surface
Sand the wall for the smoothest surface you desire. The smoother the wall the easier. However, our wall is plywood and still works.
Wipe the wall to get rid of extra dust.
Step 2: Prep Areas Not Getting Painted
Measure and tape out the work area if need be.
Step 3: Paint The First Layer Of The Chalkboard Paint
Use a small or large roller to apply the chalkboard paint.
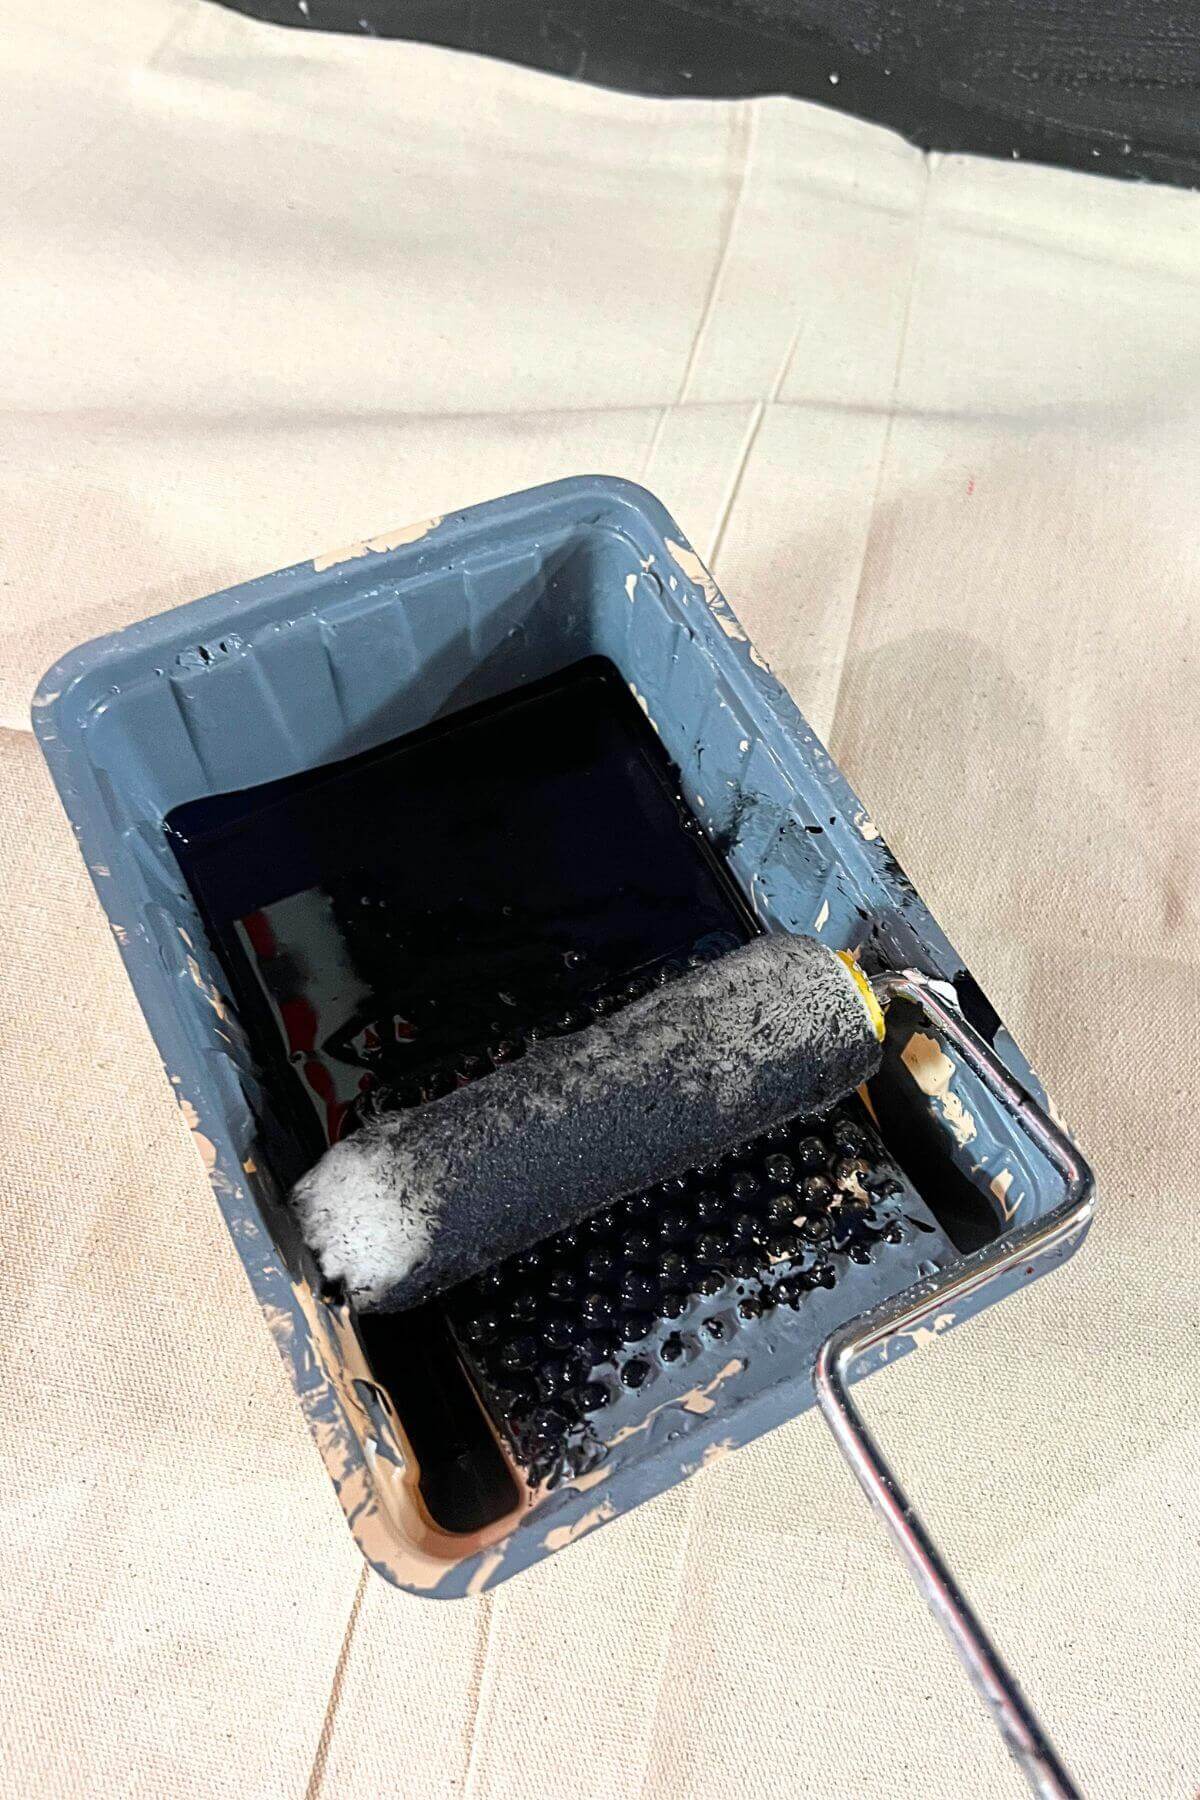
We used a small 3/8″ nap roller and a small synthetic brush to trim out areas. We chose a 3/8″ nap roller instead of a foam roller because we were painting plywood.
Rustoleum recommends painting on a smoother surface with a small foam roller.
Step 4: Let dry.
Step 5: Add Another Layer
Paint at least 2 coats of chalkboard paint.
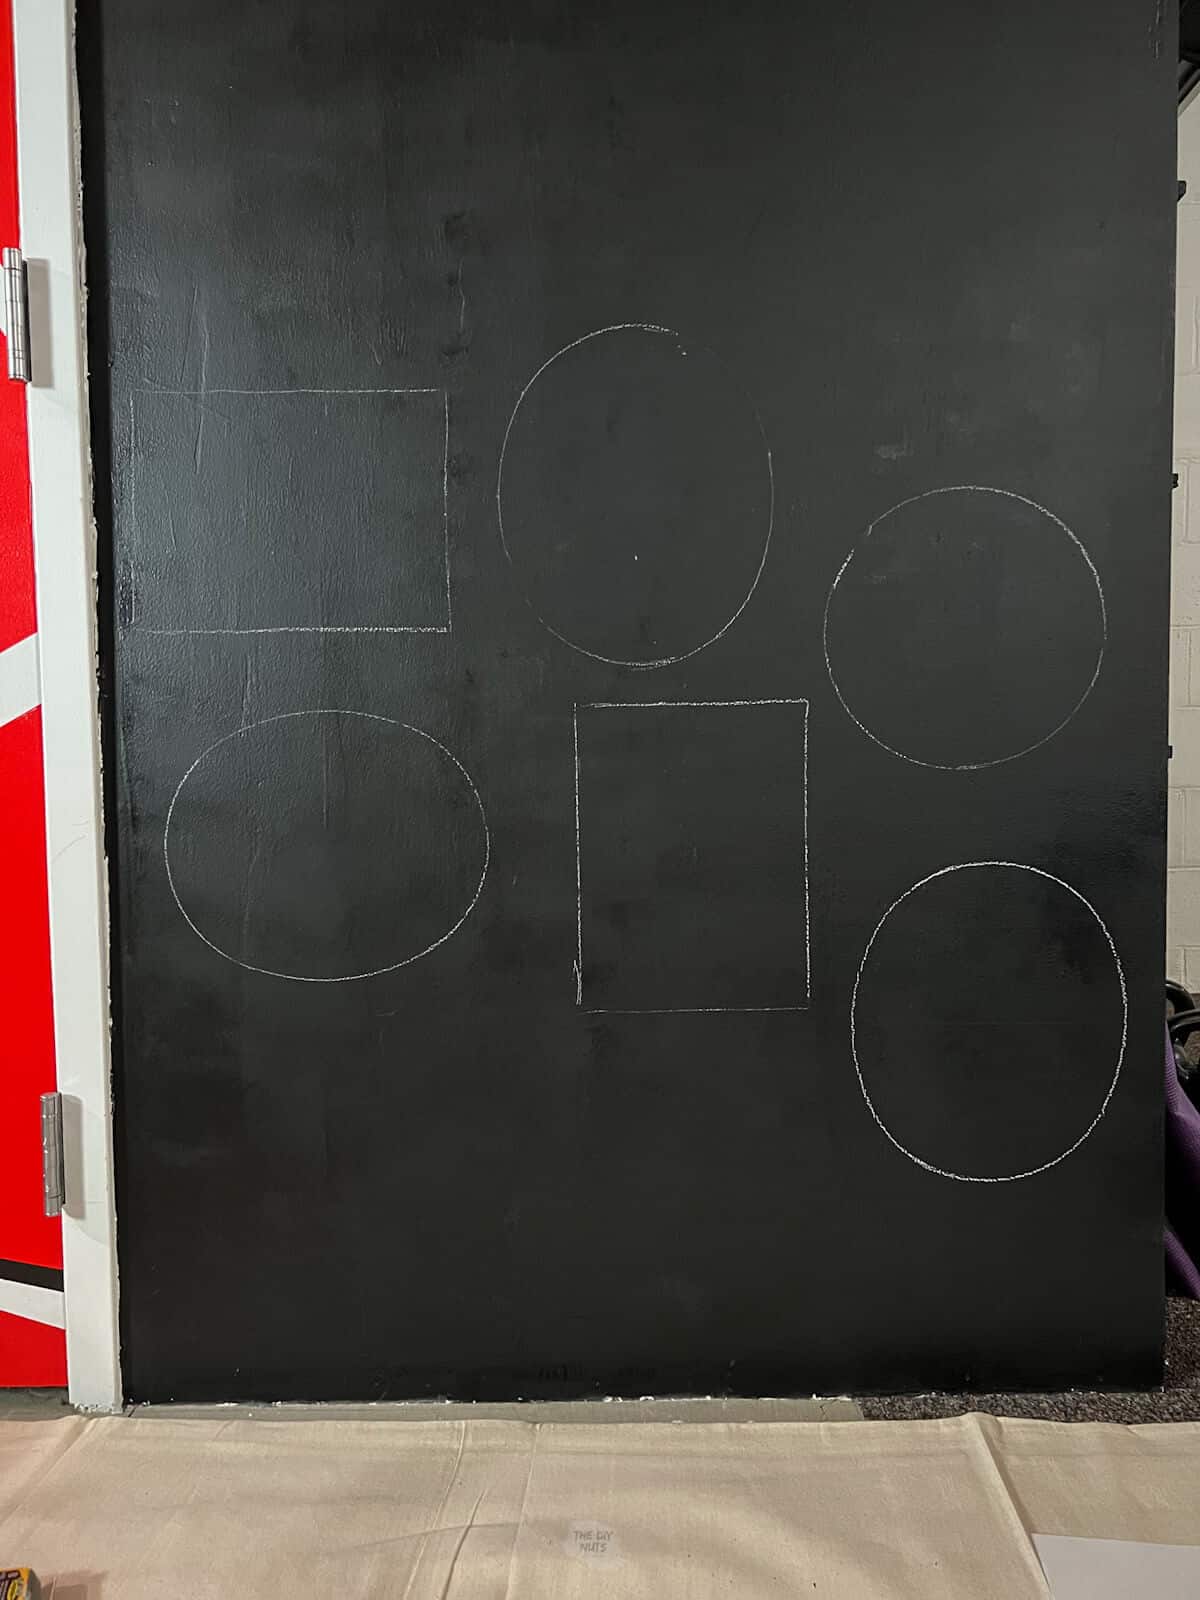
Step 6: Plan Out Mural
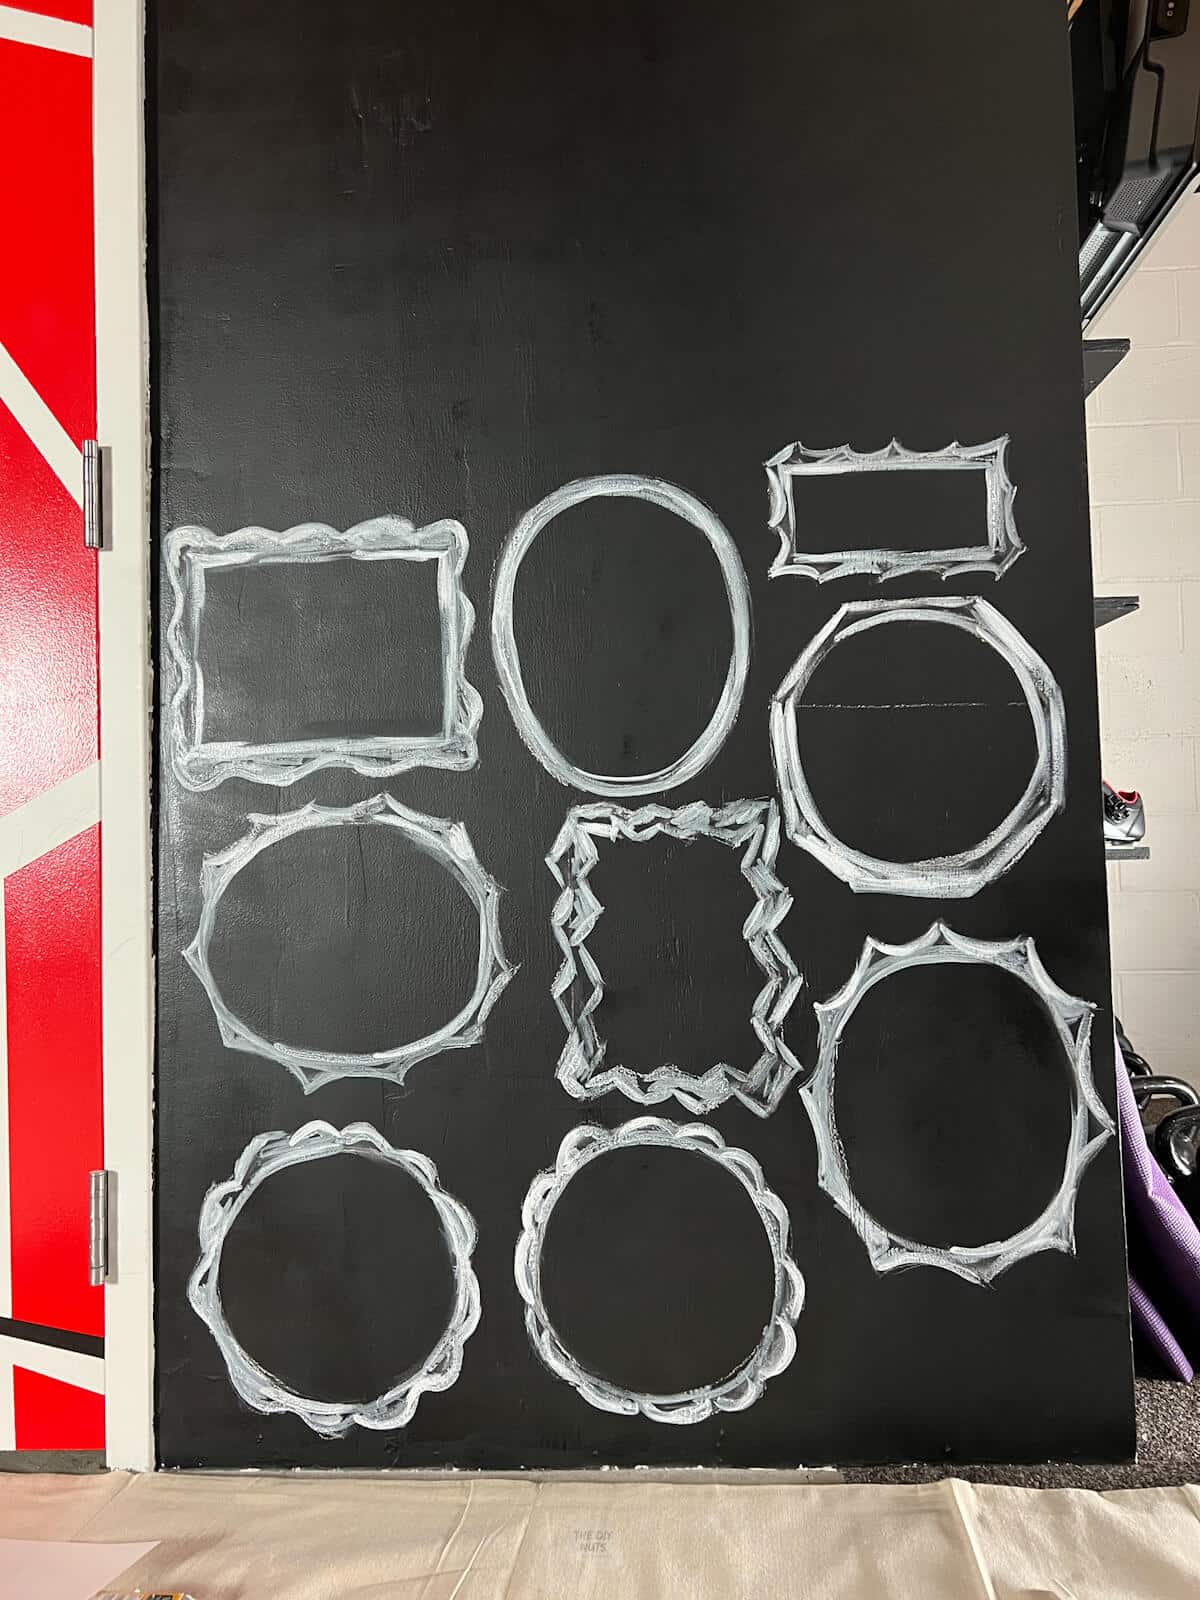
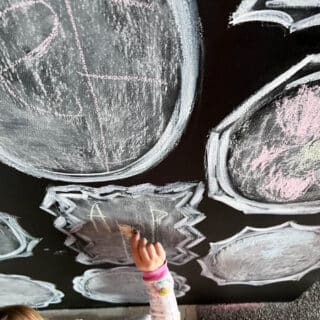
Plan out your design. You could measure everything, but I just found the middle of the wall and went from there.
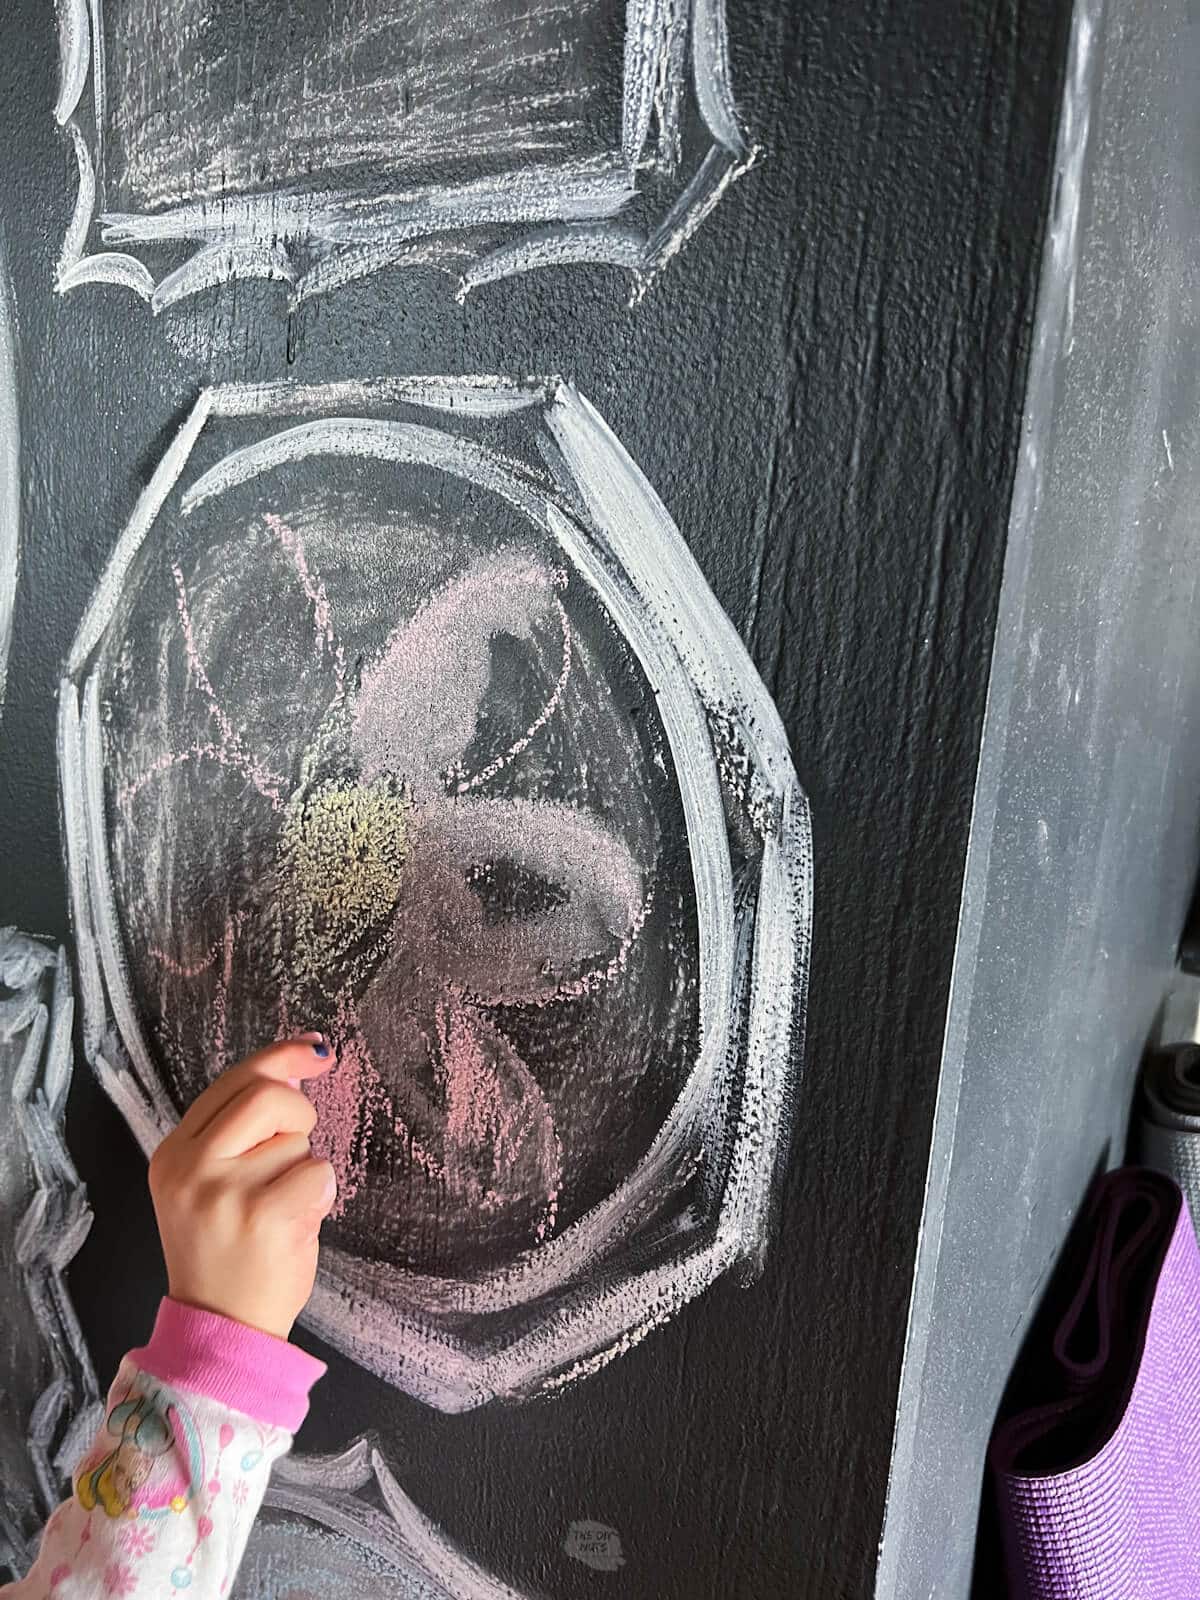
Find objects that can be traced to create the frames. We used an oval paper plate, a piece of tagboard and a plastic circle that holds a paper plate.
Step 7: Trace Frame Items
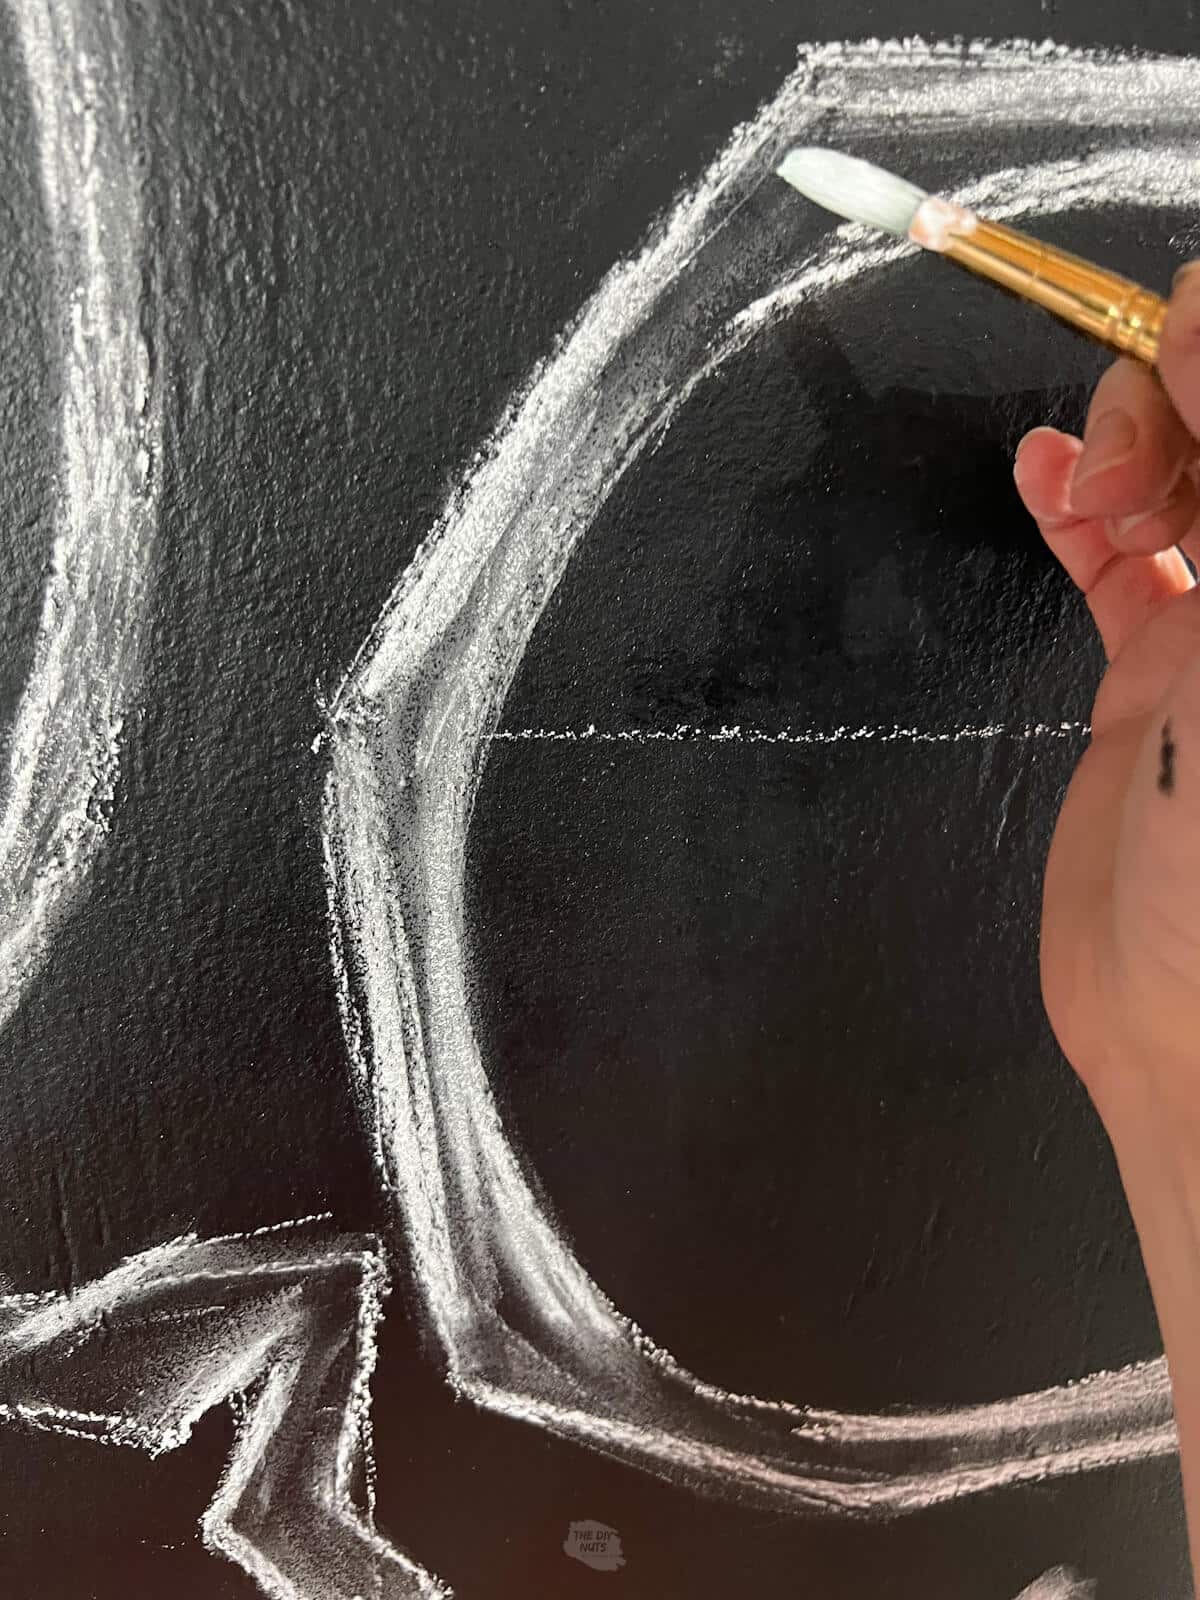
Use a white piece of chalk to lightly sketch out the placement of your frames.
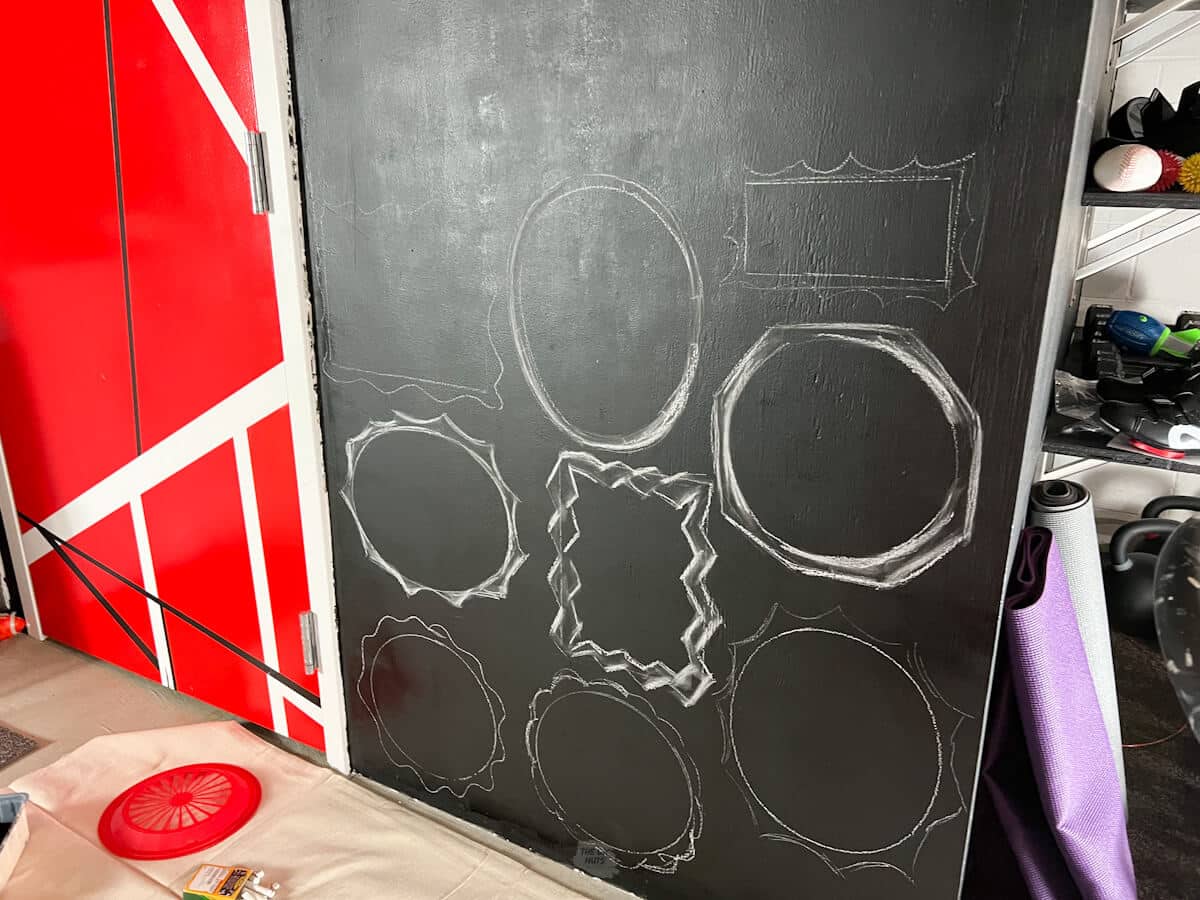
Step 8: Keep Adding Details
Continue using chalk to design frames. You can be super precise or just kind of wing it. Repeating different simple lines will do the trick to create a frame-type feel.
Step 9: Paint Frames With Watered Down Acrylic Paint
Once you like your design, go over some lines with watered-down white acrylic paint (about 1/3 water to 2/3 paint). You really won’t need much paint.
Watering down the paint gave a “chalky” look of the paint mixing with the chalk on the wall.
Step 10: Let The Paint Fully Dry
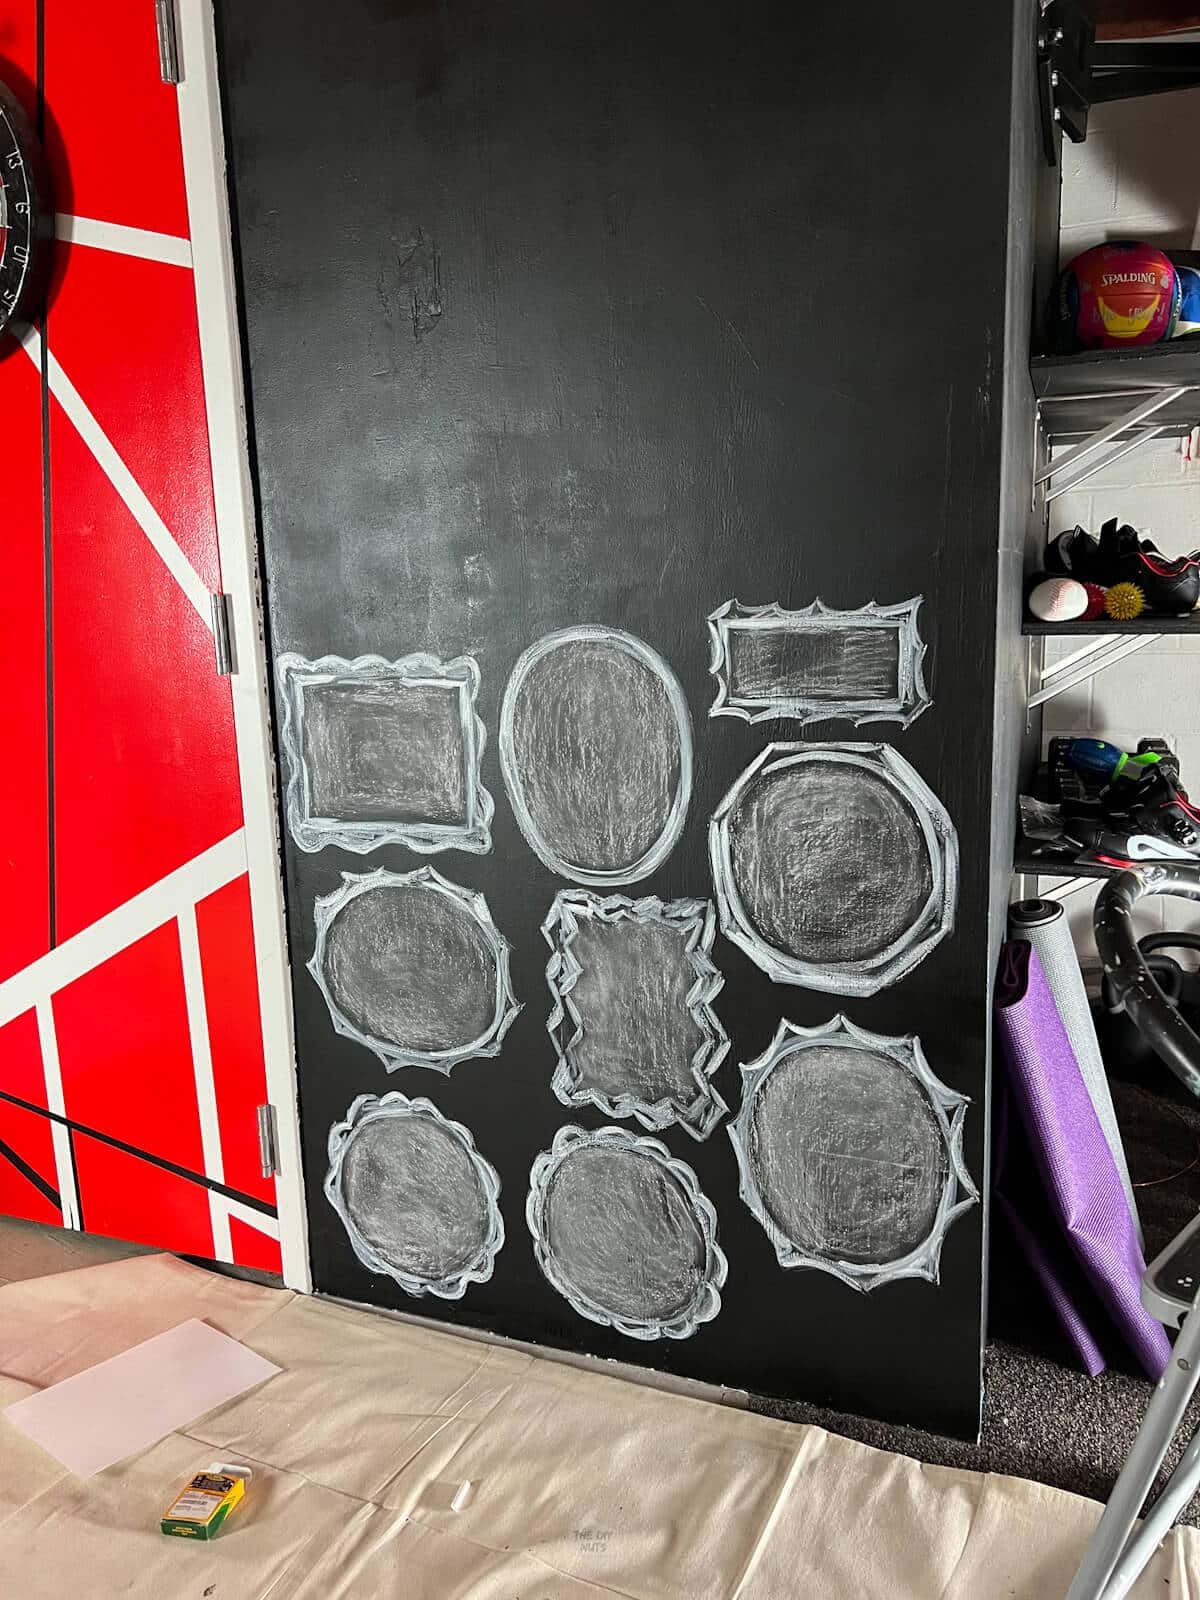
Step 11: Prime The Chalkboard Wall Inside The Frames
Rub the side of the chalk in the area that will be chalked on.
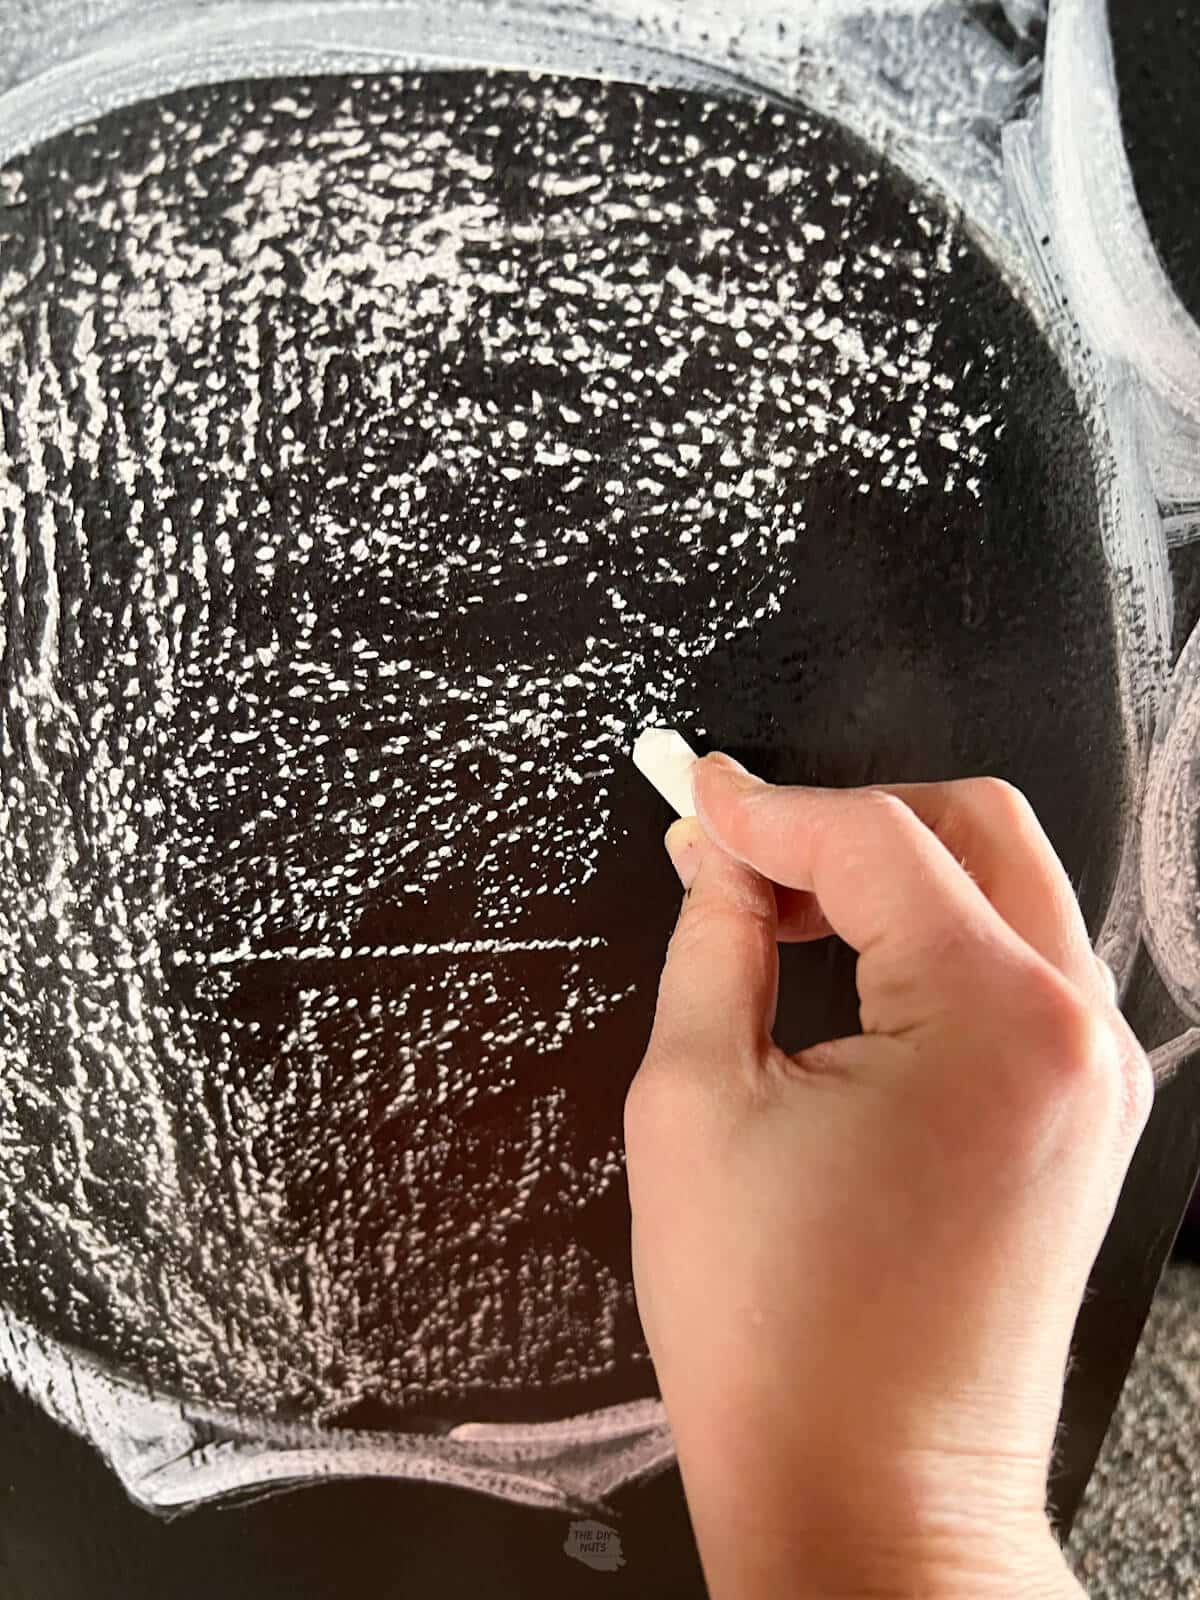
Use your fingers to rub the dust into the texture of the wall.

Step 12: Start Creating!
We recommend waiting at least 3 days before you start drawing on your freshly painted walls. Let your little ones start creating. We love this colored chalk for more vibrant colors.
Optional Step: Add A Quote
Use paint chalk markers to come up with more permanent designs. You could use an easy letter transfer method with chalk on the back of my printout instead of graphite.
Other Tips
- Read the instructions carefully on the chalkboard paint you use. Each brand will have specific dry times and other tips.
- Most chalkboard paints will say to “prime” the wall before drawing. Do not skip this step! This helps ensure that your drawings will not be permanent on the wall and can be erased.
- Do not overdo it when deciding where to place your mural.
- Use chalk paint markers to add extra details to your chalkboard mural.
Chalkboard Mural FAQs
If you do not add a base coat of chalk to your chalkboard wall, you may not be able to clean it. Yes, chalk is temporary but will get stuck in any wall texture. By priming the wall, you are making it easier to change your drawings, lists, or writings.
Yes, they now make specific magnetic chalkboard paints.
Yes, especially if you have properly primed the wall first. Regular and colored chalk can provide your child with endless creative options.
A regular damp cloth should work to wipe chalk drawings. Just remember to prime the wall again before starting a new drawing. You could avoid using abrasive materials on your wall. Worst-case scenario, you can repaint the areas that are not coming clean with a fresh coat of chalkboard paint.
Follow us on Pinterest, YouTube or Facebook for more DIY inspiration!
Other Creative Wall Projects
- DIY Ombre Hexagon Wall
- How To Paint A Herringbone Accent Wall
- 15+ Painted Accent Wall Design Ideas
- Black and White Paint Pen Mural
This chalkboard wall idea was such a fun and easy DIY project. Now you just have to find the right wall and start planning your mural today.
If you like this tutorial, please give it 5 stars below 🤩🤩🤩🤩🤩. Your support helps us continue to provide unique and budget-friendly DIYs.
Chalkboard Wall Mural For Kids
Equipment
- A small brush (not pictured)
- Small Cup
- Found objects to trace for frames
- 3/8″ Nap Small Roller and handle
Supplies
- Chalkboard Paint
- Watered Down Acrylic or Latex White Paint
- White Chalk
Instructions
- Sand the wall for the smoothest surface you desire. The smoother the wall the easier it will be to paint, draw and clean.
- Wipe the wall to get rid of extra dust.
- Prep surrounding areas. Measure and tape out the work area if need be.
- Use a small or large roller to apply the chalkboard paint.
- Let dry.
- Roll another layer of chalkboard paint. You need to have at least 2 coats (possibly 3 for full coverage).
- Plan out your design. You could measure everything, but I just found the middle of the wall and went from there.
- Find objects that can be traced to create the frames. We used an oval paper plate, a piece of tagboard and a plastic circle that holds a paper plate.
- Use a white piece of chalk to lightly sketch out the placement of your frames. You can trace items you found in the previous step.
- Continue using chalk to design frames. You can be super precise or just kind of wing it. Repeating different simple lines will do the trick to create a frame-type feel.
- Once you like your design, go over some of the lines with watered-down white acrylic paint (about 1/3 water to 2/3 paint). You really won’t need much paint.
- Let the chalkboard paint fully dry.
- Prime inside the frames in the mural. Rub the side of the chalk in the area that will be chalked on. Use your fingers to rub the dust into the texture of the wall.
- Let your little ones start creating.
Optional
- Use paint chalk markers to come up with more permanent designs. You could use an easy letter transfer method with chalk on the back of my printout instead of graphite.
Notes
- Rustoleum recommends painting on a smoother surface with a small foam roller. Our plywood wall is not nearly as smooth therefore we used roller with nap.
- Watering down the paint gave a “chalky” look of the paint mixing with the chalk on the wall.
- We recommend waiting at least 3 days before you start drawing on your freshly painted walls.
- Priming before drawing is one of the most important parts. By adding a layer of chalk you are allowing the drawing on top to be erased easily.
Simple but amazing DIY ideas Erin. I will try with my kiddo for sure 🙂
Hi Supriya! Thanks for the nice comment! I hope that our site helps people be inspired to be creative and spend time together as a family.
This is such ac cool idea! Love it! I totally wanna try this out at home with my toddler. He already likes scribbling on walls so why not give him an actual designated space where it’s okay LOL. Great job 😀
Hi. Thanks for visiting our site. We have a small wall in our basement that the toddlers are allowed to use! They love it!
I so want to paint one of these walls in my home. We have a chalkboard that the kids write on, but it would be great to have an entire wall! Love your ideas!
Hi Sherry! Thanks for the kind words and encouragement! Kids do love good old fashion chalk!
Love this! We have a very small.. it is about 2 foot wide by 8 foot tall awkward wall in between our kitchen and living room that I have made into a chalkboard wall. It is so much fun, but not near as pretty as yours!
Love this and it came at the most perfect time. I just told my partner last night that I want to chalkboard pain a door in my office and keep a list of blog ideas on it. That way I can always see inspiration and also add and subtract.
Love the idea of doing a chalkboard wall! I just never thought of having a plan to keep it from being messy. Thanks for the tip.
Hi Amber! Thanks for visiting our site. I am glad we were able to give you a helpful tip!
Wow! This is such a creative and cool idea. I have never seen this before. If we have the space in our next home, I would definitely do this.
Thanks for visiting and for the kind words! I am glad this was a unique take on a chalkboard wall!
OMG, I love this! We are able to paint our walls at my townhouse and I have been itching to do a chalkboard wall!
Have fun! Thanks for visiting our site!
oh man i LOVE a chalkboard wall! This one is awesome!
This is absolutely amazing!!! I might have to give this a go seeing my toddler thinks drawing on the walls is amazing. I’m sure i’m not alone in this. This is the perfect solution. It’s also stunning!
This is perfect! I was considering doing a wall of frames BUT….this gives me the flexibolity to swap out “frames” as I see fit. Thanks for Sharing! xoxo Lani
Love this. I’ve heard of it, but never actually seen it before.
I love this idea, but I think I would be too OCD for the chalk dust to be everywhere!!
This such an amazing idea for creativity! I’ve only used chalk paint directly on wall in my home. I used it to create a space for our grocery list next to our pantry. I created a stencil with my silhouette to give it a fancy frame. I think my girls would love this in their room!
Amazing idea I wish I had done this when my kids were young. I would love to share this with my readers too. Happy Spring, Kippi
Such a cool idea! My brother has been looking into this for his kids, I’ll have to share this post with him!
Great ideas here! I have had the chalk paint bought was a little weary to do it … after reading and seeing this I can’t wait to set up my chalkboard wall for my kids!
Awesome! I am glad this post provided inspiration for you! Let me know if you have any questions!
I am so glad that this post will helpful for your brother! Thanks for sharing.
this is a great idea. I like the frames part because it creates order.