Creative Stained Glass Craft for Kids
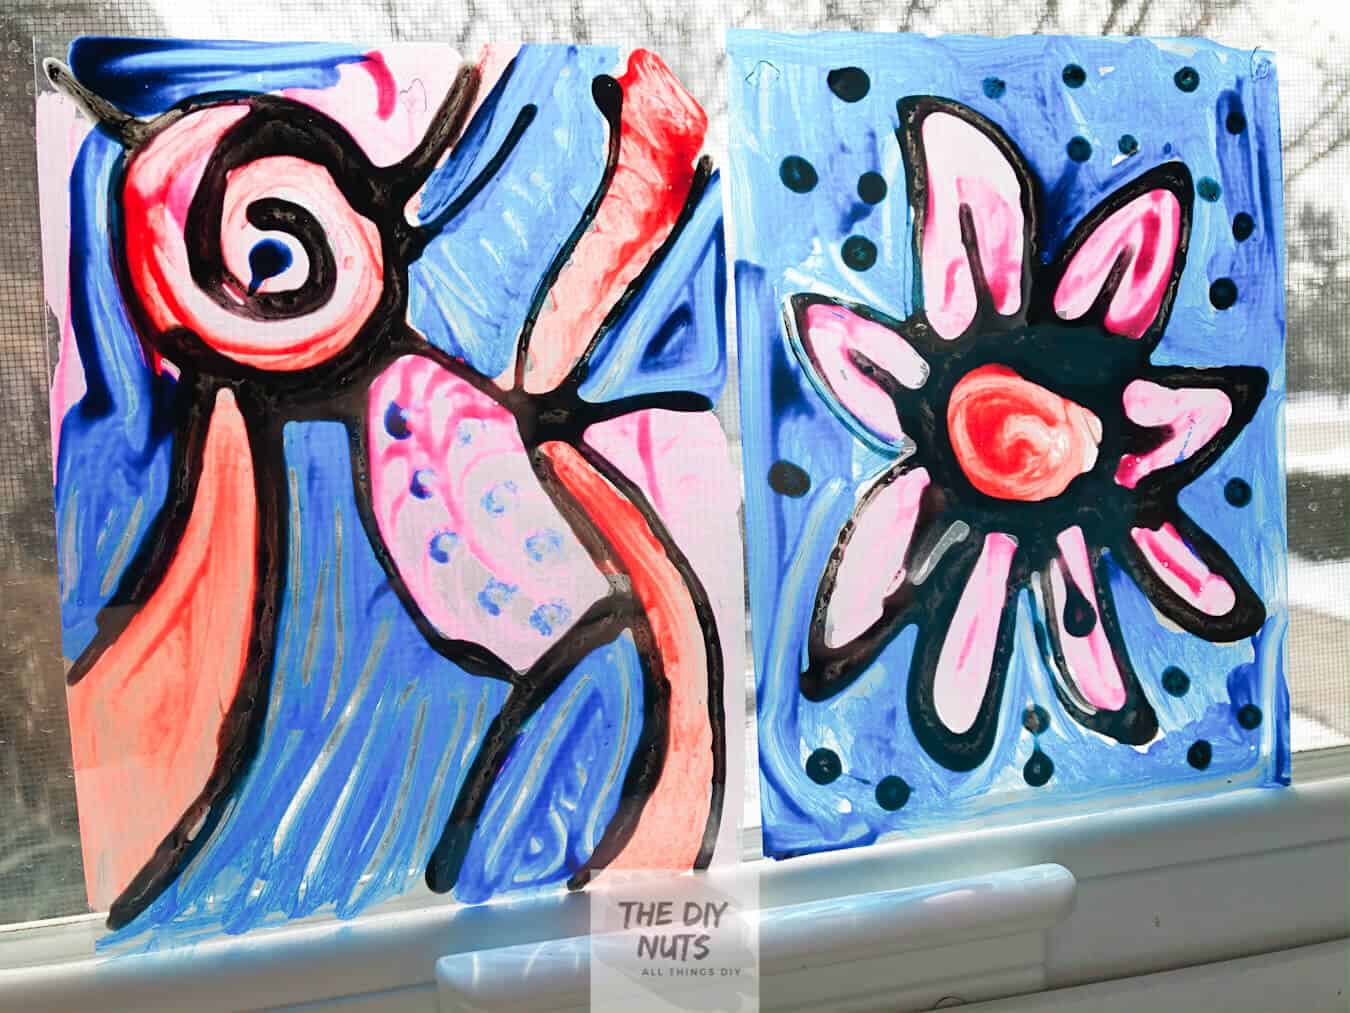
I cannot wait to share this amazing stained glass art project for kids. It is an awesome individual project or can be displayed together to create a wonderful sight! Even the youngest kids could do this stained glass art project with some extra adult assistance.
*Disclosure: I only recommend products I would use myself and all opinions expressed here are our own. This post may contain affiliate links that at no additional cost to you, I may earn a small commission. Read our full privacy policy.
This project is perfect to put on display for all to see in your neighborhood. It is amazing what sidewalk chalk, art projects in windows and colorful drawings can do to your neighbor’s spirits. Keep reading to begin to learn how to spread joy with this stained glass craft!
Recommended Supplies
- Clear Transparency
- Glue Bottles (This is the type I use for all projects)
- Black acrylic paint
- Variety of colored acrylic paint
- Small craft cups with lids
- Q-tips
Before You Begin
Make A Template
- If I were doing this project with older kids, I would make a template for them to draw on first. Trace an 8″ x 10″ transparency on a large 12″ x 18″ paper.
- Consider adding a border on the inside by using the width of a ruler.
- Students can do this, however, if your copier takes 12″ X 18″ paper, I found it was just easier to have the templates pre-made.
- If using a drawing template then have children sketch out ideas for this stained glass project for kids. First, have students create thumbnail sketches (small sketches).
- Children should take their favorite idea and draw on the pre-made template. Encourage students to not draw too much, since they will have to outline these drawings with glue.
Some of the images you will see are me working with my young preschool-aged children. They loved designing inside a “stained glass” window and therefore I didn’t need to have them sketch out their ideas first!
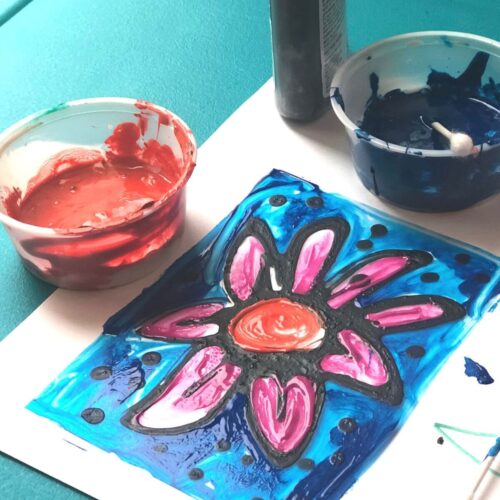
How To Make Glue and Paint Mixtures
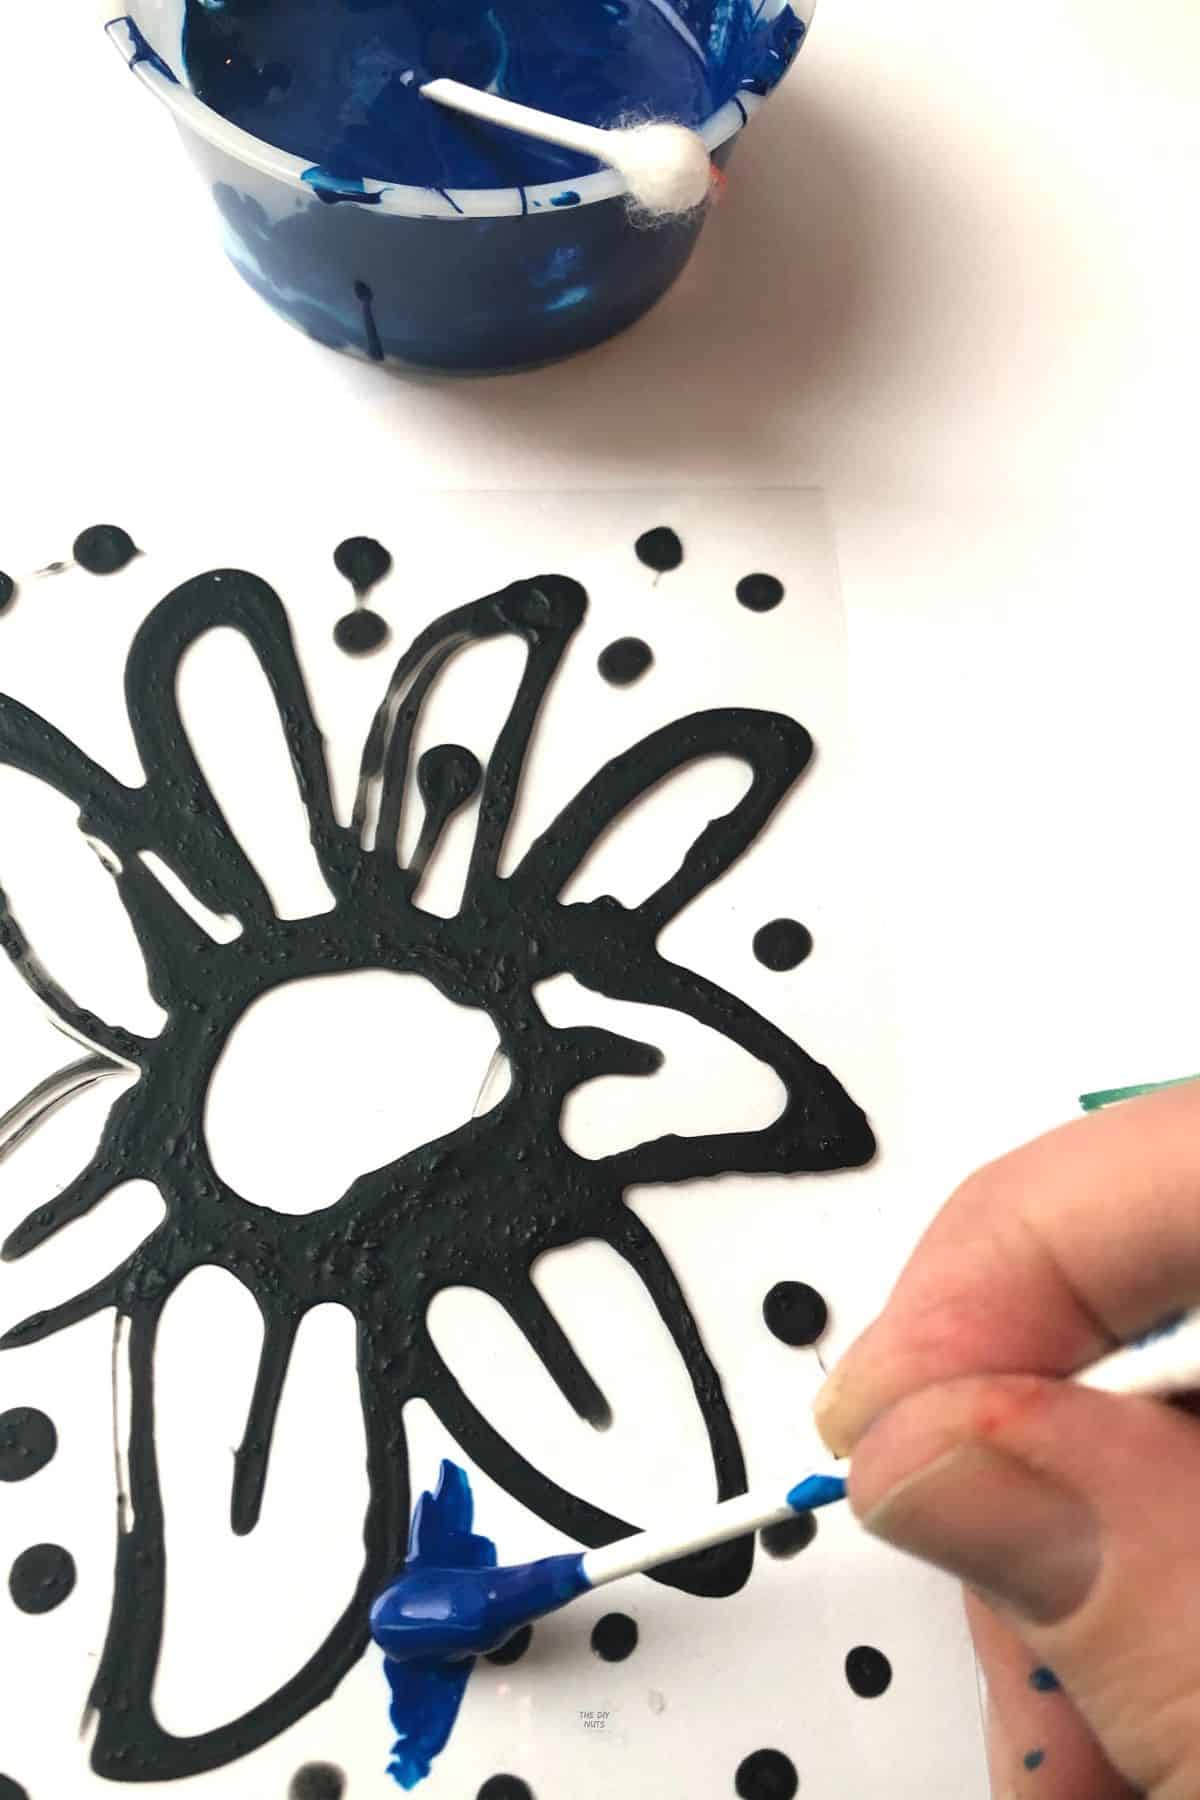
Step 1: Make Black Glue & Stained Glass Colors
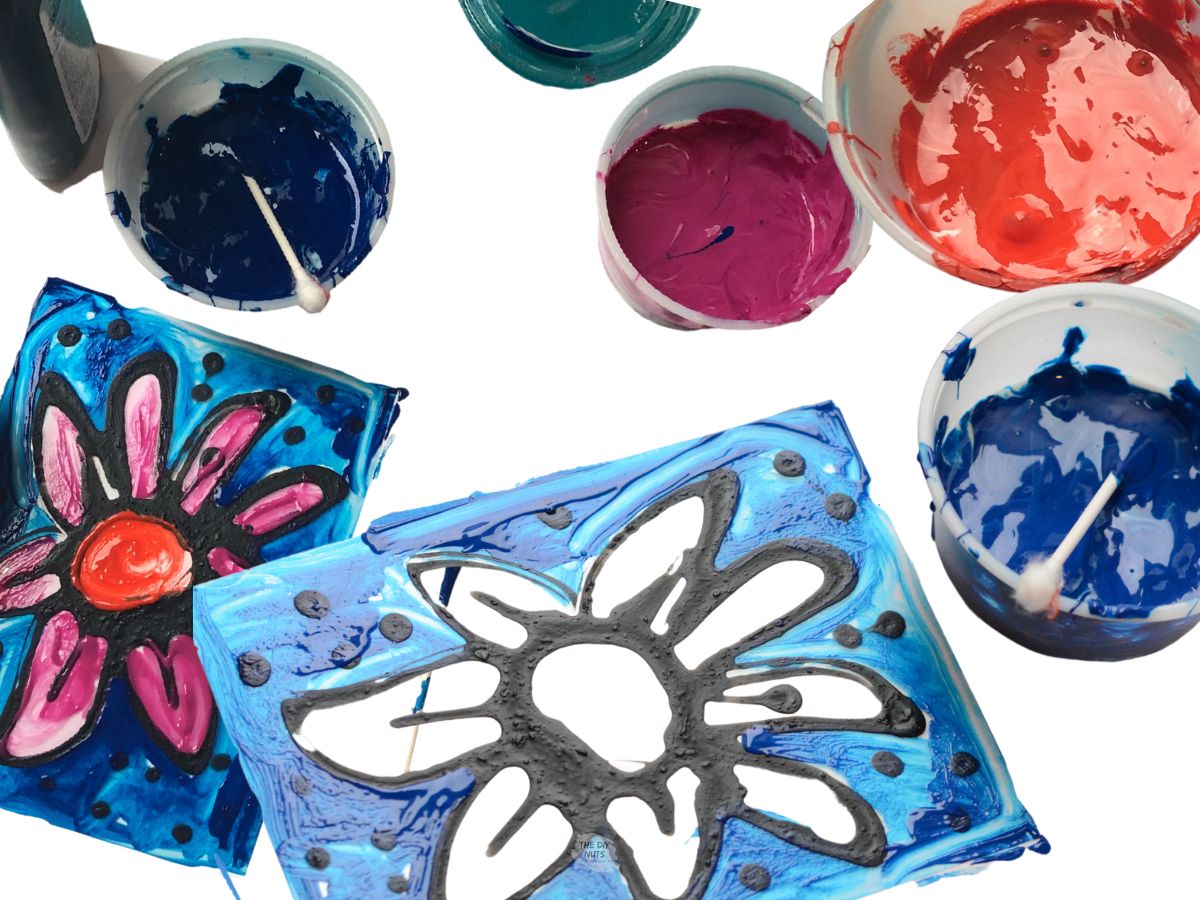
In partially empty glue bottles, mix 1/3 part black acrylic paint and 2/3 parts glue. Shake well to create black glue. I would test this on a transparency sheet to make sure that you have a mixture that will stick.

I had a few mixtures that seemed to peel off after a very long time, so making sure you have enough glue is important.
For the colors, use the same strategy as above, however, I made the colors in small cups with lids. Students will use q-tips to add color since you won’t want to ruin all of your paintbrushes.
How To Make Stained Glass With Transparencies
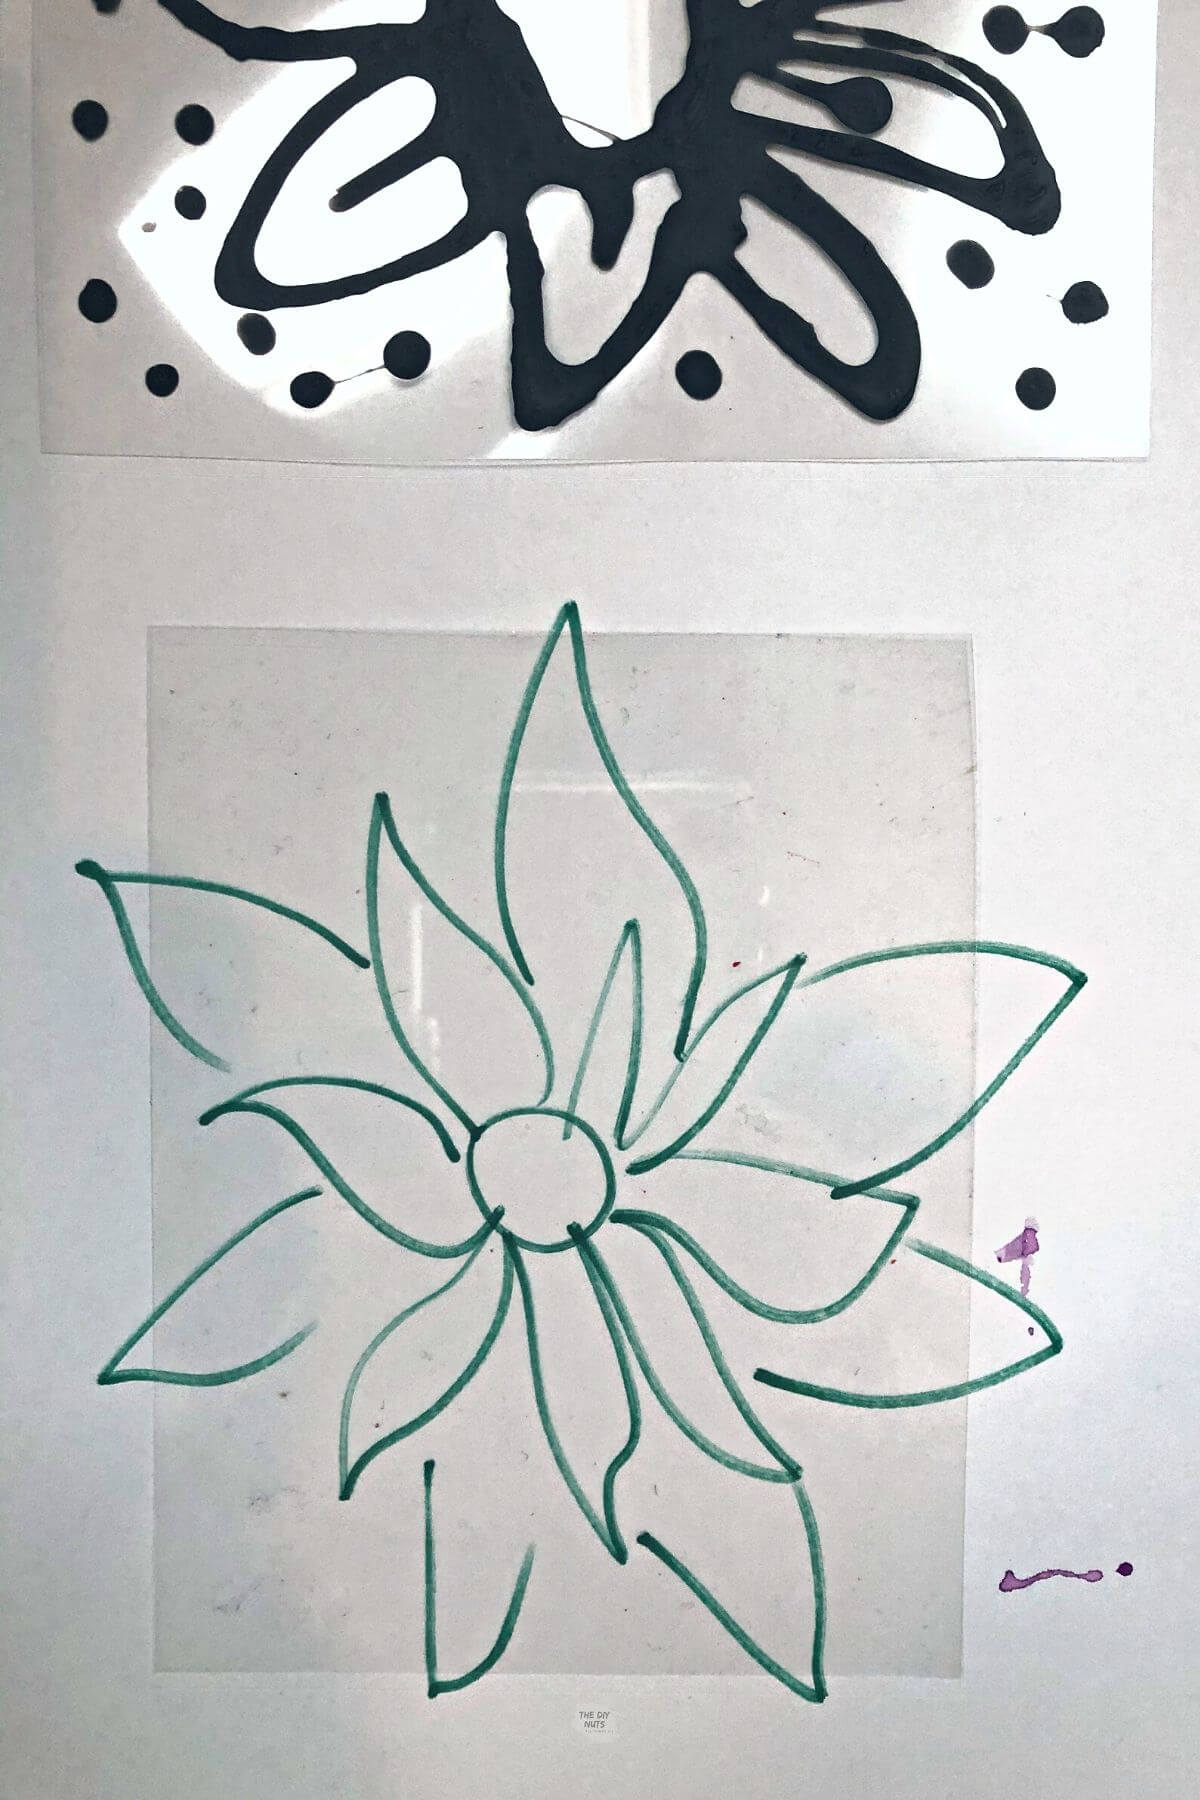
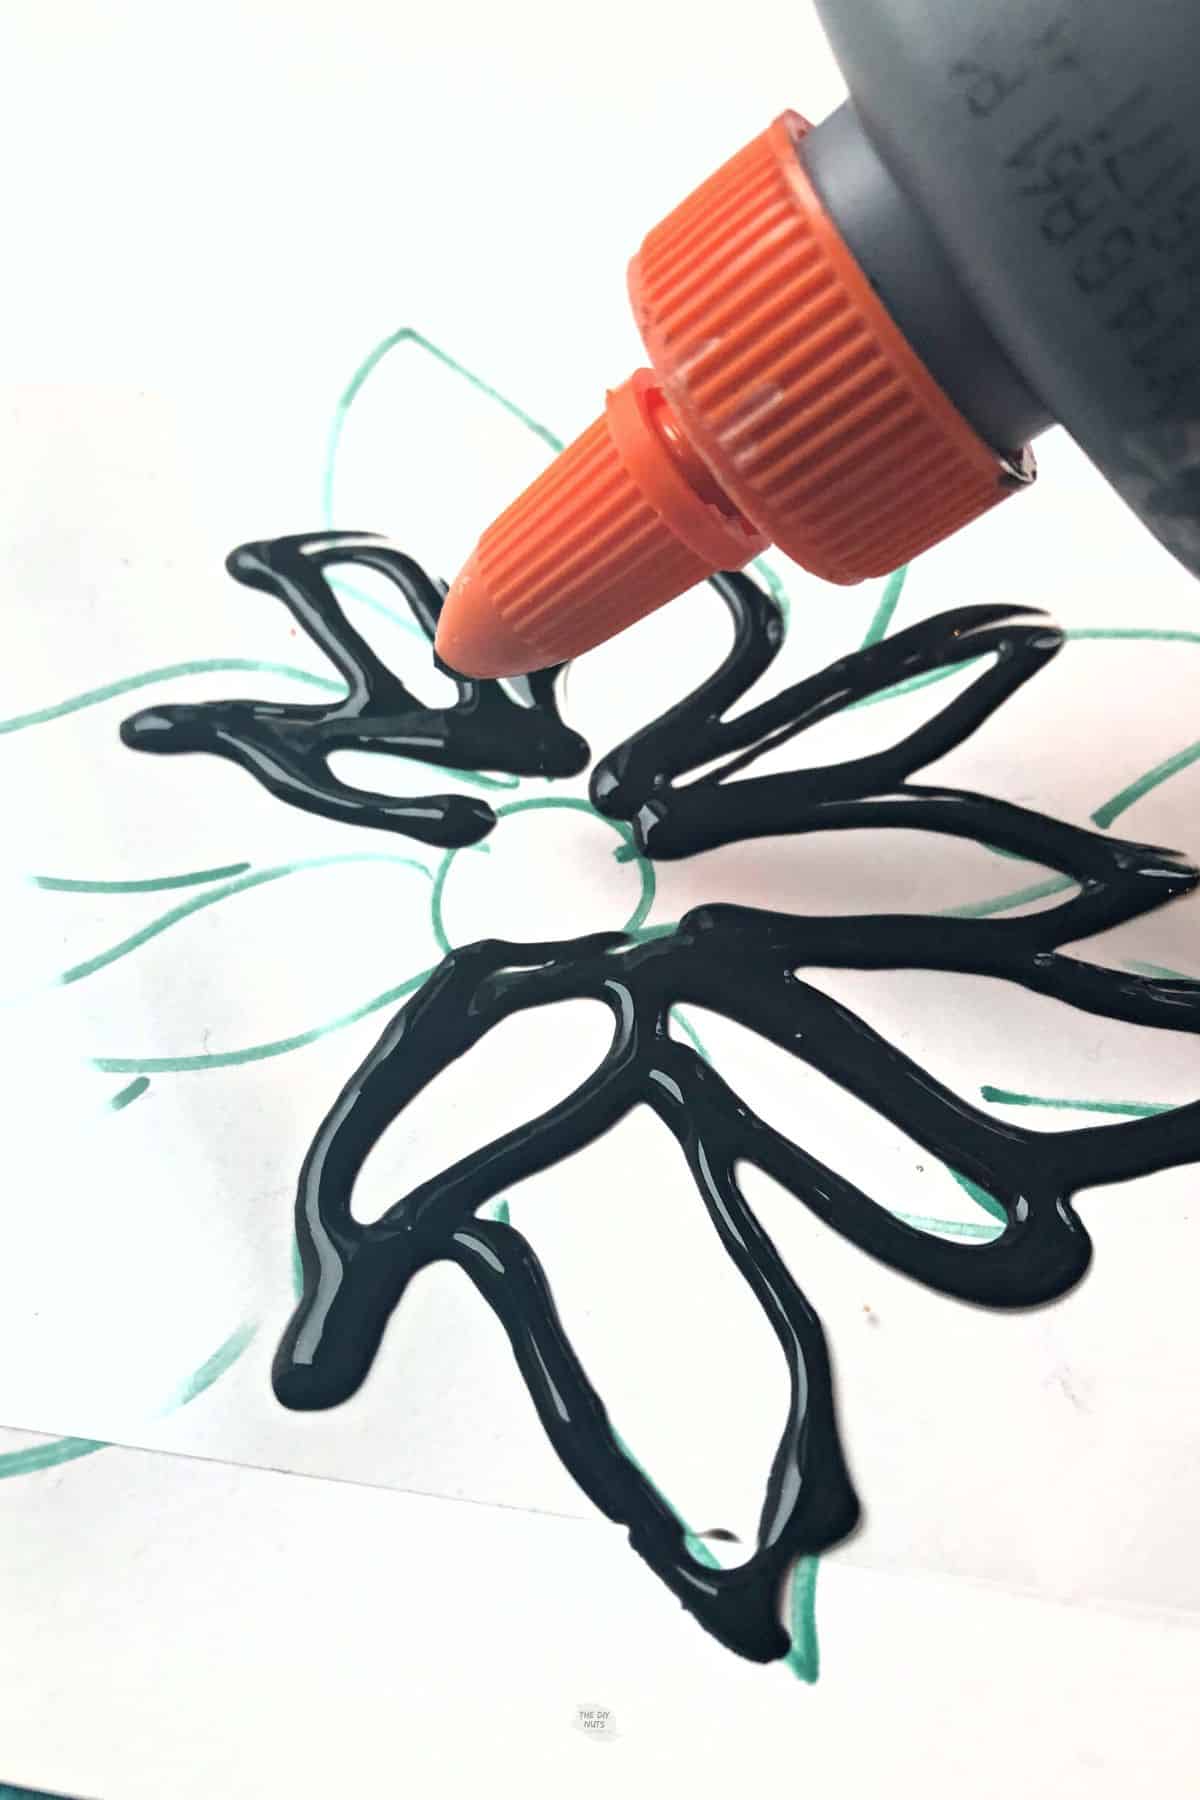
Step 2: Tape Transparency To Sketch and Trace With Black Glue
Once the drawing is complete, tape transparency onto the template. They will then use the template and trace their own design with the black glue mixture. These will need to be placed flat to dry.
Step 3: Let Black Glue Dry
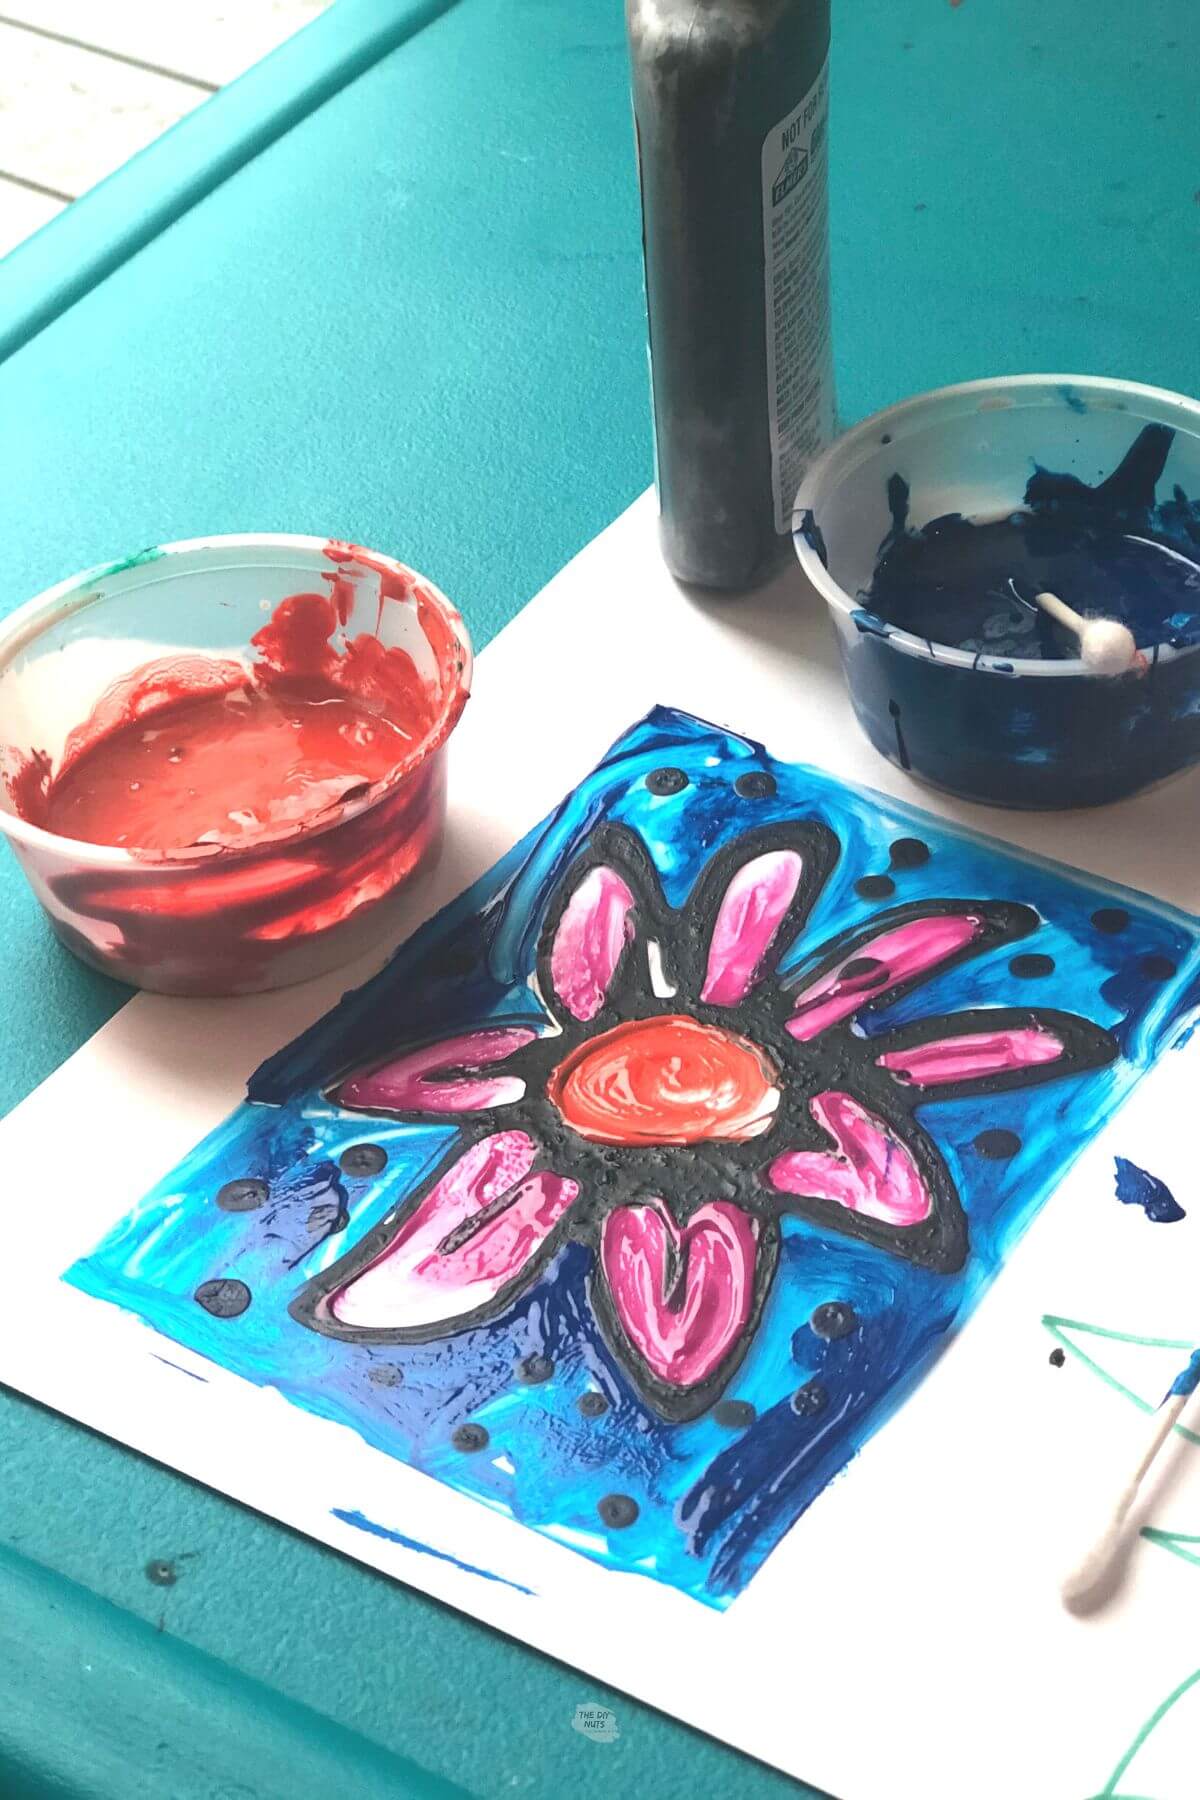
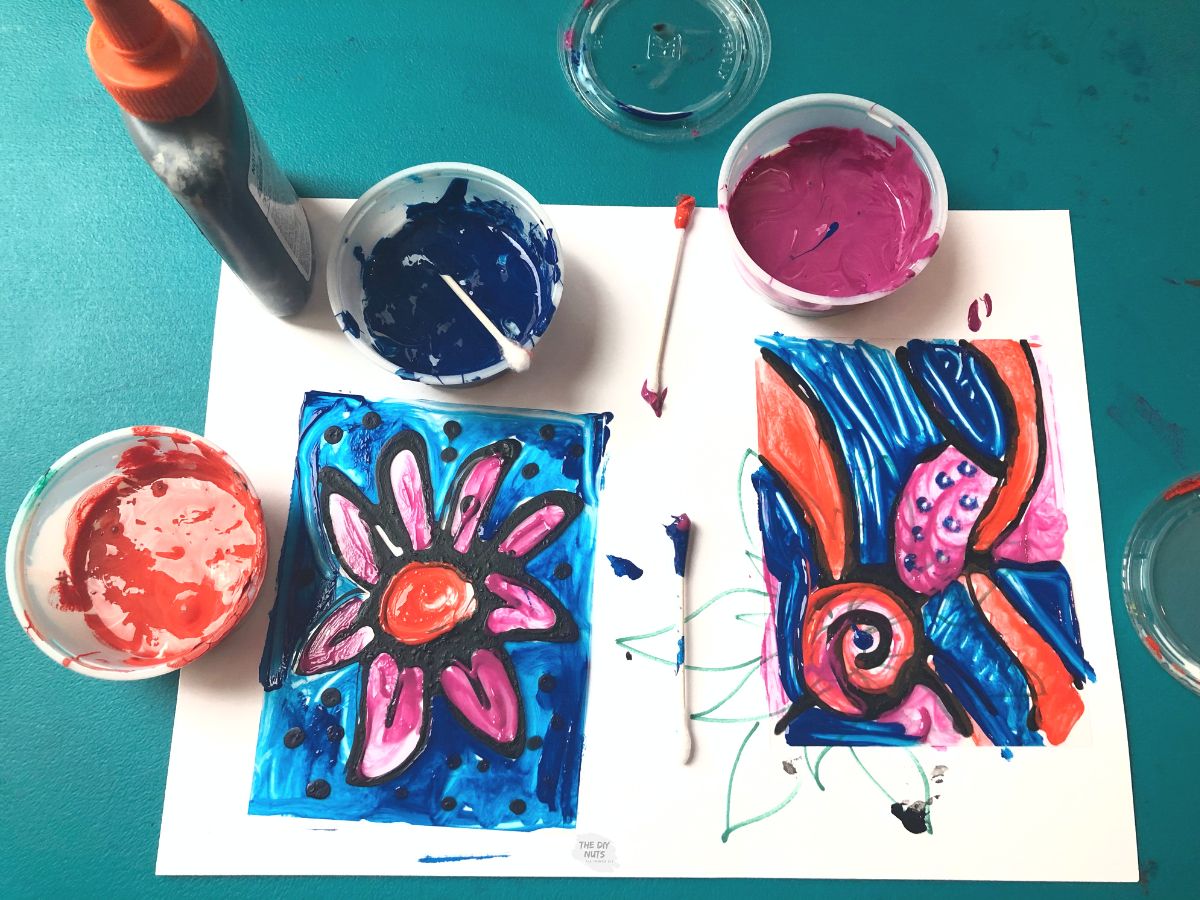
Step 4: Add Colors With Q-Tips
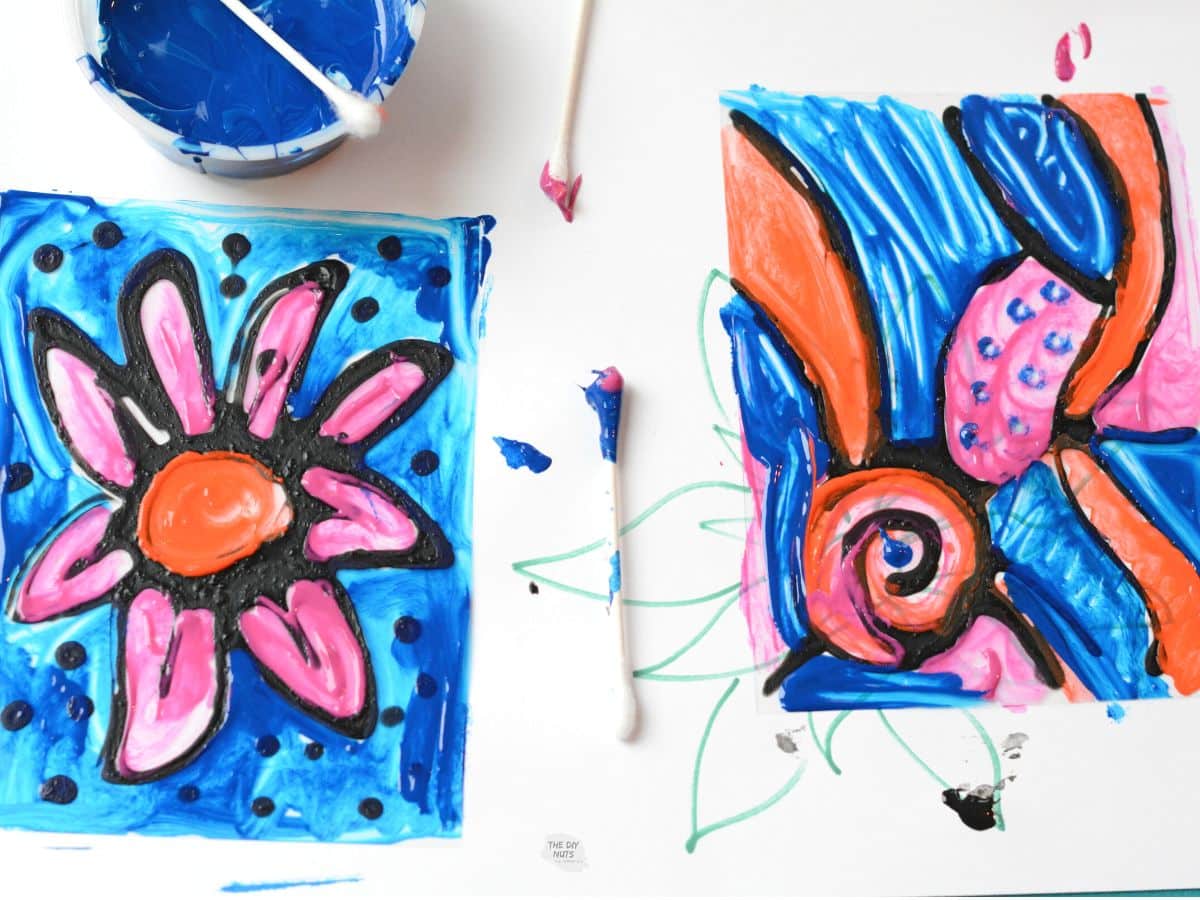
Once black glue is dry, young artists can begin to add color.
Using pre-made color cups, students can use q-tips to design their stained glass. Even my preschool-aged children were encouraged to look at different textures and to experiment when making their projects.
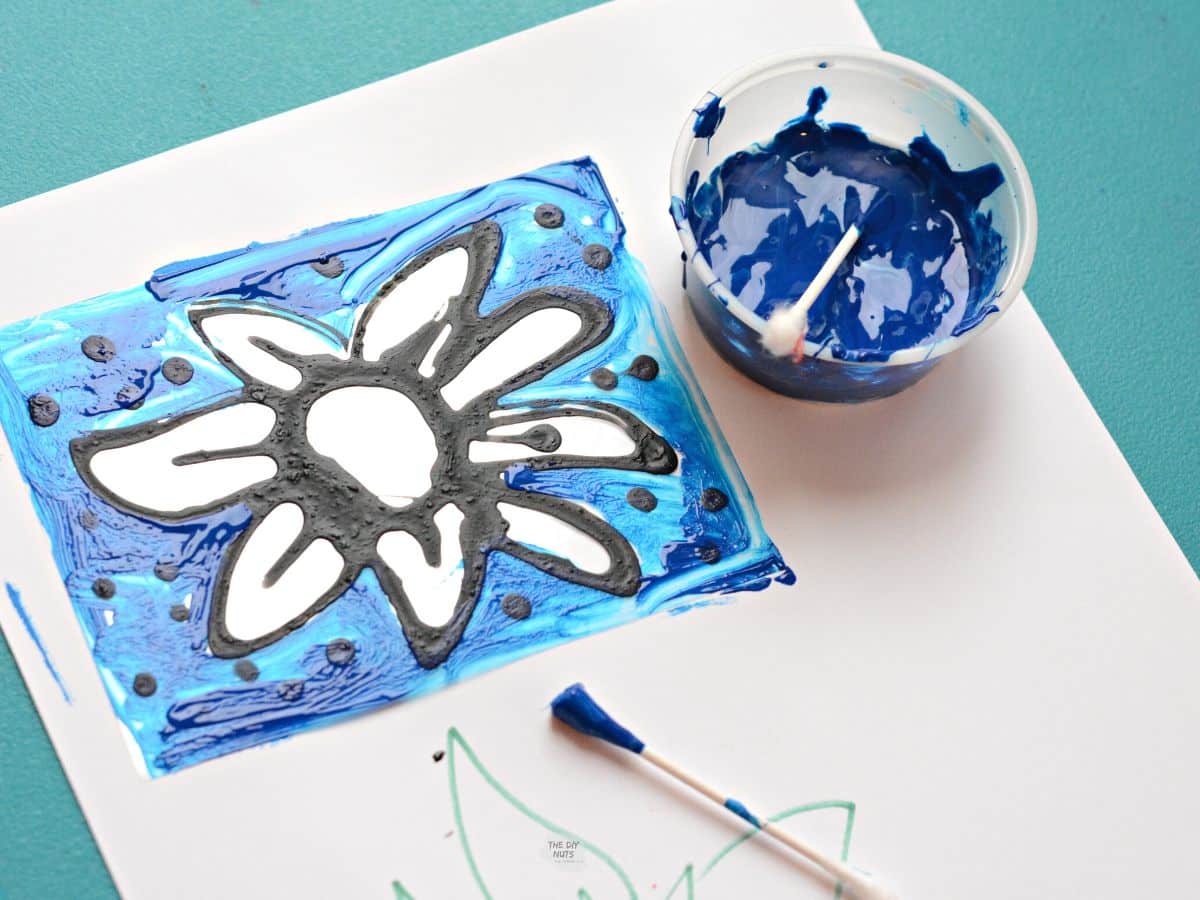
Step 5: Continue To Add Color
Continue to fill faux stained glass art projects with colored glue mixture and Qtips. We just used one Qtip for each color.
Step 6: Lay Flat To Dry
What about a store-bought stained glass kit for kids?
Trust me, I get that sometimes you just want your kids to be creative, but you just simply can’t find the time or energy to organize one more mess.
Stained Glass Kits To Buy
- Melissa and Doug Stained Glass Kit: This kit is highly-rated on Amazon. Kids will use pre-made “stickers” and have to match them into the sun-catcher like a puzzle. This is a great NO mess alternative to our DIY stained glass window project.
- Klutz Color-In Stained Glass Kit: This is also very highly rated and uses markers to create up to 18 make-it-yourself stained glass windows.
- Made by Me Stained Glass Kit: Here is a highly-rated stained glass kit for kids that involves paint (but all the paint and plastic templates) are already done for you
I absolutely LOVE when people can’t believe kids created artwork. What is your favorite way to add color to your space?
How To Easily Display
Instead of using tape, try using glue dots. This product is awesome for displays on windows and other clear surfaces.
Here are some tips and DIY art display ideas. Sometimes art projects from children can look completely different when they are displayed in a different way.
Craft FAQs
I have done this project with all ages of children. It would be suitable for any age that can successfully squeeze a glue bottle.
One of the best parts of this art project is creating an amazing display. Any place that has a window will do. I found that this product really helped to showcase the work.
Make sure you are using Glue-All mixed with acrylic paint. You can test it on your transparencies first.
No…you will not actually paint on the window for this faux stained glass art project
I have seen stained glass projects where kids are allowed to paint right on the window. While I approve of this from a creative standpoint, it would be quite messy.
You will love that this stained glass art project looks like you did that, without as much mess.
Related Crafts
- How to Create a Melted Crayon Canvas
- Easy Shrinky Dink Instructions and How-To: Learn how to make cute state charms.
- Large Rainbow DIY String Art Tutorial
- DIY Shaving Cream Art
This DIY stained glass art project for kids (or any store-bought kit) can really be fun and an easy way to spread joy around your neighborhood!
Did you have fun making this craft with your family? Make sure to leave a 5-star ⭐️ ⭐️ ⭐️ ⭐️ ⭐️ review in the comments!
Stained Glass Craft For Kids
Equipment
- Small craft cups with lids
- Q-tips
Supplies
- Clear Transparency Sheets
- Elmer's Glue All
- Black Acrylic Paint
- Variety Of Colored Acrylic Paint
Instructions
- Create a template or sketch for your stained glass window.
- MIx the black glue and colored glue cup mixtures. For the black glue black acrylic paint to the bottle ans shake well. You want a 1:3 ratio of glue to paint.Make the cups of colored glue by mixing Glue All and Paint in the cup.
- Tape clear transparancy to the sketch.
- Use black glue mixture to trace design.
- Let completely dry.
- Add colors into empty spaces with a Qtip.
- Let completely dry and display on a window.
Notes
- Test your glue and paint mixture to see that it sticks when it dries. If you have too much paint and not enough glue it may peel off.
- You could also use colored sharpies instead of colored glue for this stained glass art project.
This is such a fabulous idea!
I will be sharing this post with some of my friends – their kids would LOVE this.
Beautiful!
Thank you! I really appreciate it the sharing love! I hope they have fun being creative.
My 3 year old would enjoy this so much! I definitely have to try. Good article!
I love this! I’m going to have to try this with my girls. My older two have done similar projects at school (more of a suncatcher than stained glass, though). Thank you for sharing this!
LOVE this! I will definitely have to try it out with my kids! 🙂
Awesome! Let me know how it goes!
So pretty, we’ll have to give this a try! Thanks 🙂
So cool I’d love to try this with my crew when they’re a bit older. They still try to taste things and nobody wants that.
Yes, good idea! I guess I should have said you can do this project with little ones that can squeeze a bottle and won’t eat the supplies!
Wow! These are gorgeous! Will definitely be trying this soon!
Absolutely beautiful! I’ve heard of the contact paper technique, but I think the transparencies would definitely be more affordable! Thanks!
What a fun activity for a rainy day! Thanks for sharing.
Thanks! This is a great art project for kids!
I don’t commonly comment but I gotta say thank you for the post on this great one :D.
I love DIY art projects! I’ve been working on line portraits and expect to hang a few 🙂
Nathalia | NathaliaFit
Thank you for this idea! I teach Grade 8 but we partner with our Kindie buddies. I thought this would be a neat craft to do with them. I’m just curious, would we be able to use a washable paint? Like liquid tempra? I just know how the acrylic paint stains and I don’t want to do this to the parents of our kindie friends. Thanks!!
Hi Carolyn. I would test transparency to see if your mixtures and materials would work. My initial gut is that the paint/glue mixture would chip off, but the Glue-All may be strong enough and work.