DIY Shaving Cream Art Cards
This paint & shaving cream craft is so much fun for the whole family. The amazing marbling technique creates such fun designs that are perfect for easy and cheap Christmas and birthday cards.
*Disclosure: I only recommend products I would use myself and all opinions expressed here are our own. This post may contain affiliate links that at no additional cost to you, I may earn a small commission. Read our full privacy policy.
Children of all ages will love making these shaving cream artworks. The best part is that you can’t do it wrong. Just have fun and be creative when doing marbling crafts!
You can also use similar steps to dye Easter eggs using shaving cream (or cool whip).
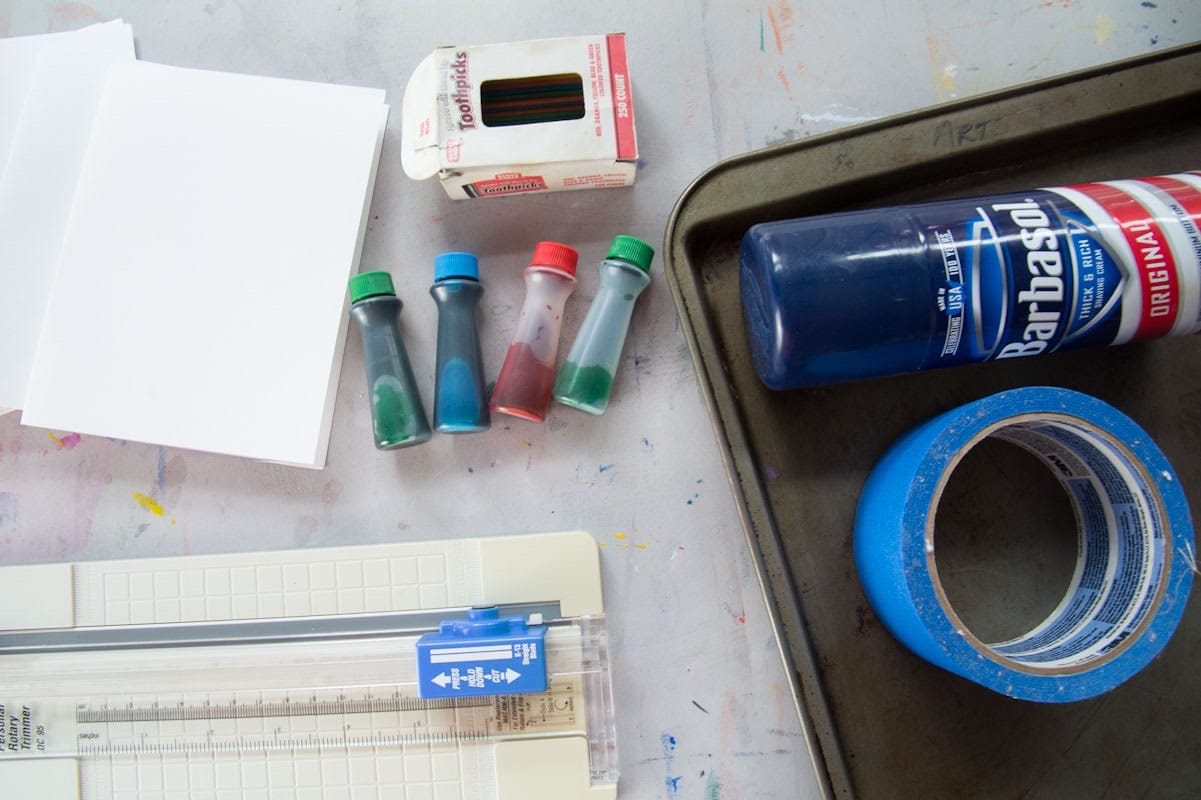
Recommended Supplies
- Shaving Cream: the cheapest will work
- Heavy White Drawing Paper or Premade Cards
- Cookie Sheet (or surface to work on)
- Food Coloring or Liquid Watercolors
- Toothpick
- Cardboard Scraper
- Optional: Gold Paint Markers, Black Marker or Painter’s Tape
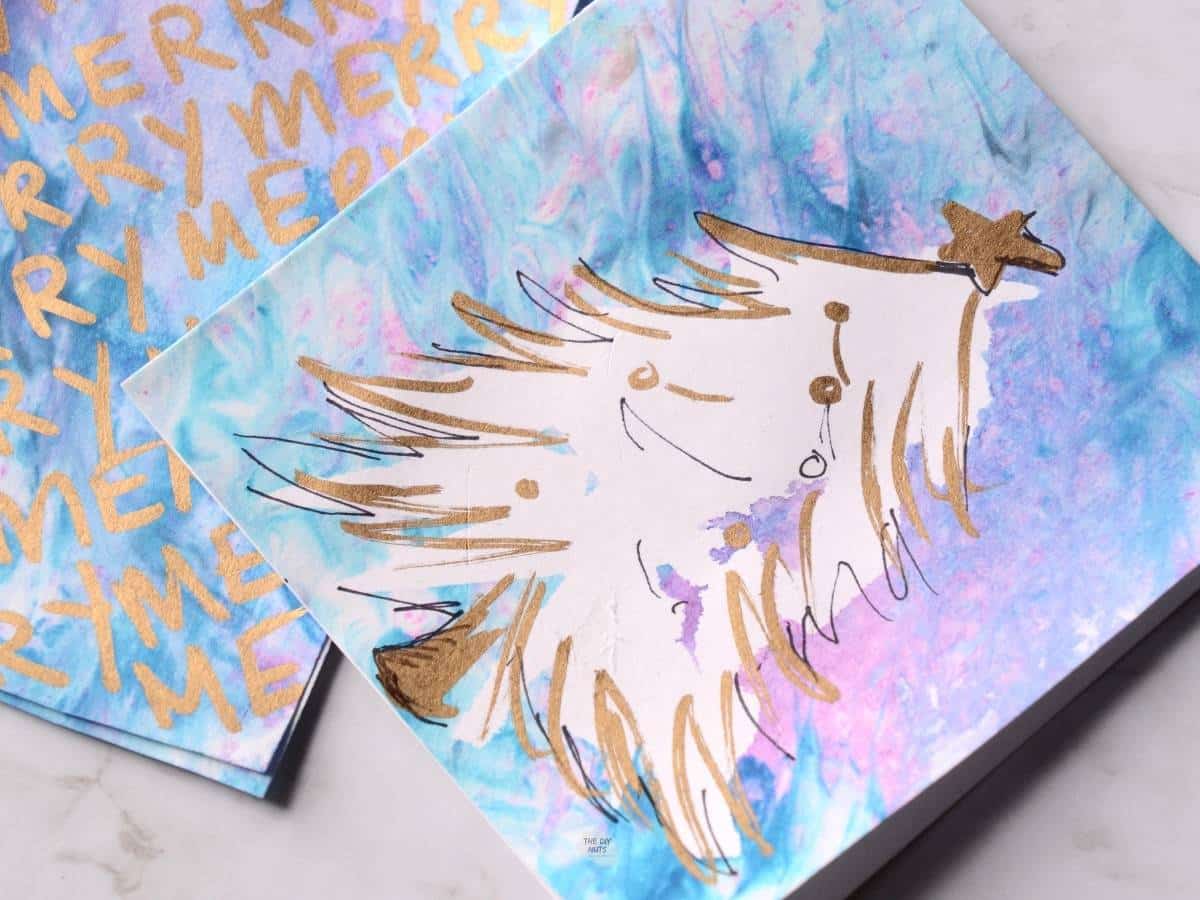
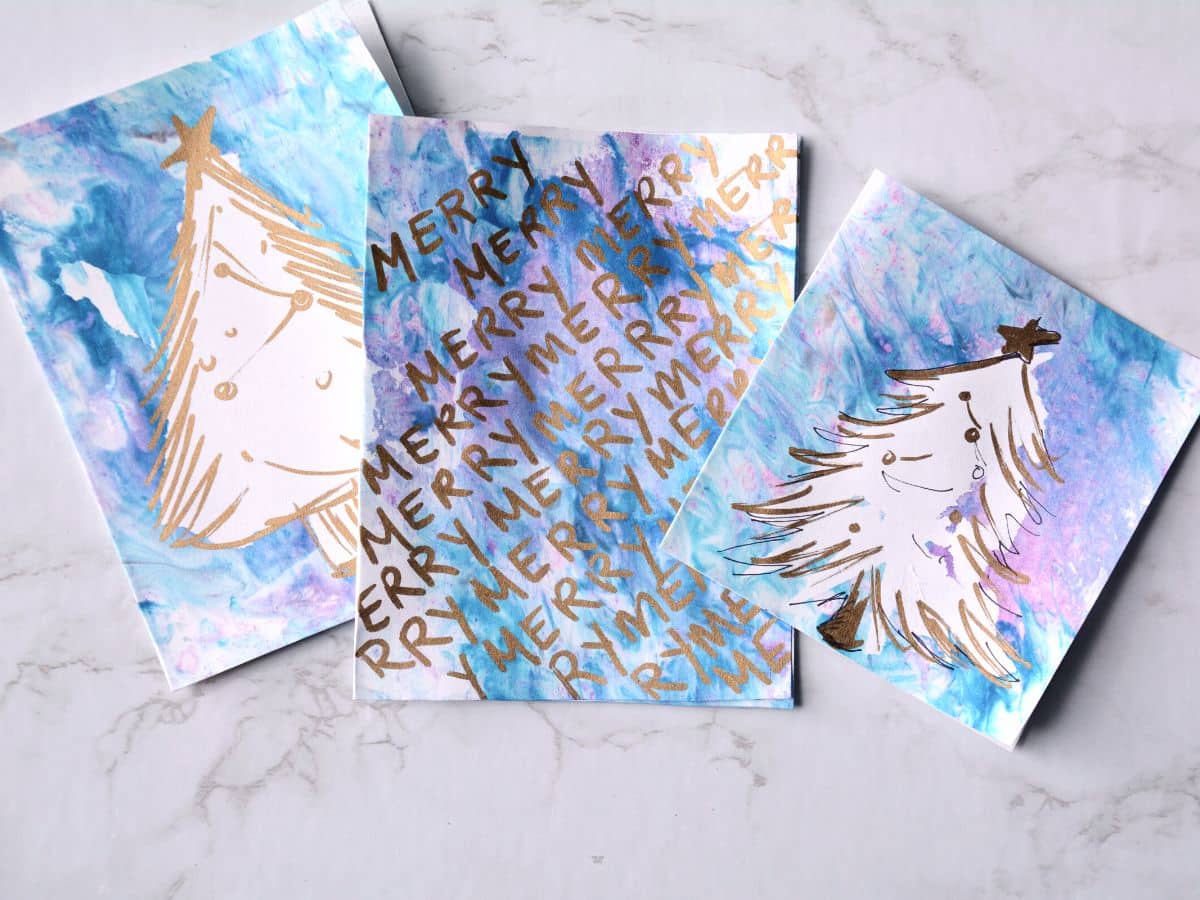
Card Design Options
Here are two different DIY card options you could try. You can modify these designs to fit your needs. Instead of taping out a Christmas tree try a simple birthday candle.
- Christmas Tree Design with Painter’s Tape
- Merry Design with Gold Paint Marker
How To Make Shaving Cream Marble Paint Cards
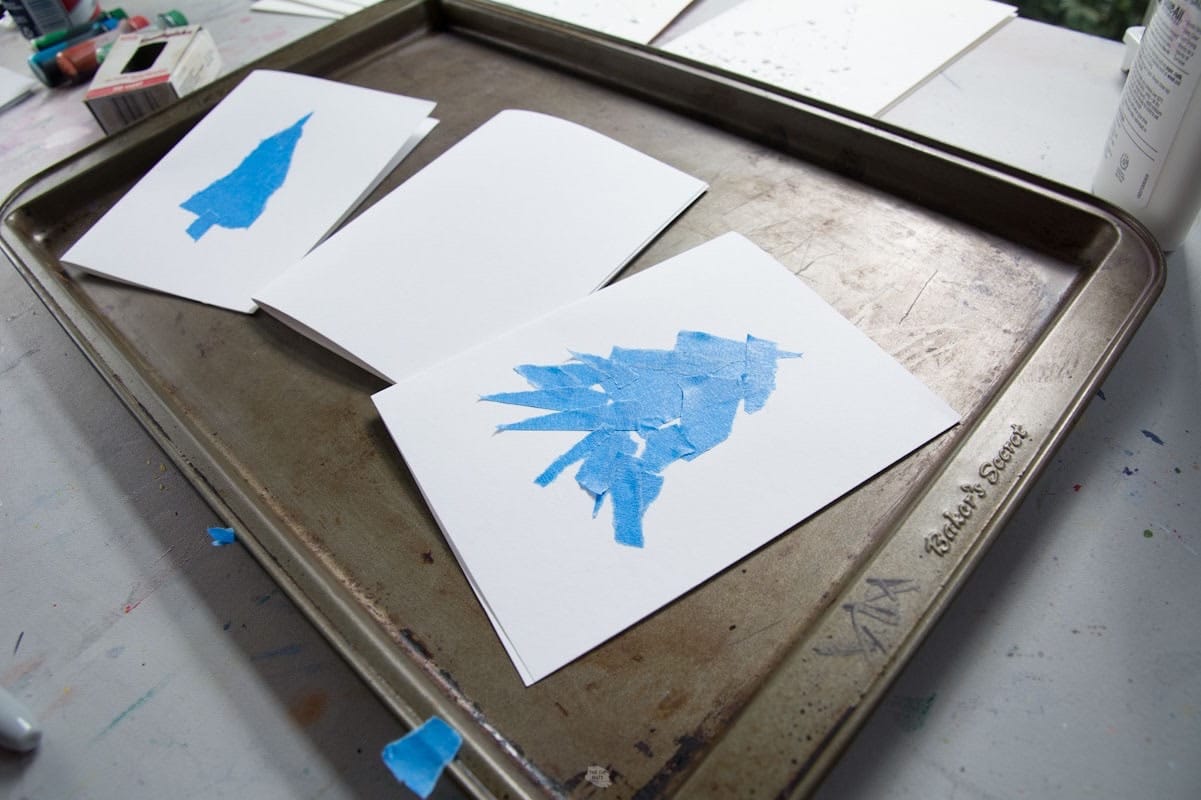
Before You Begin (Optional)
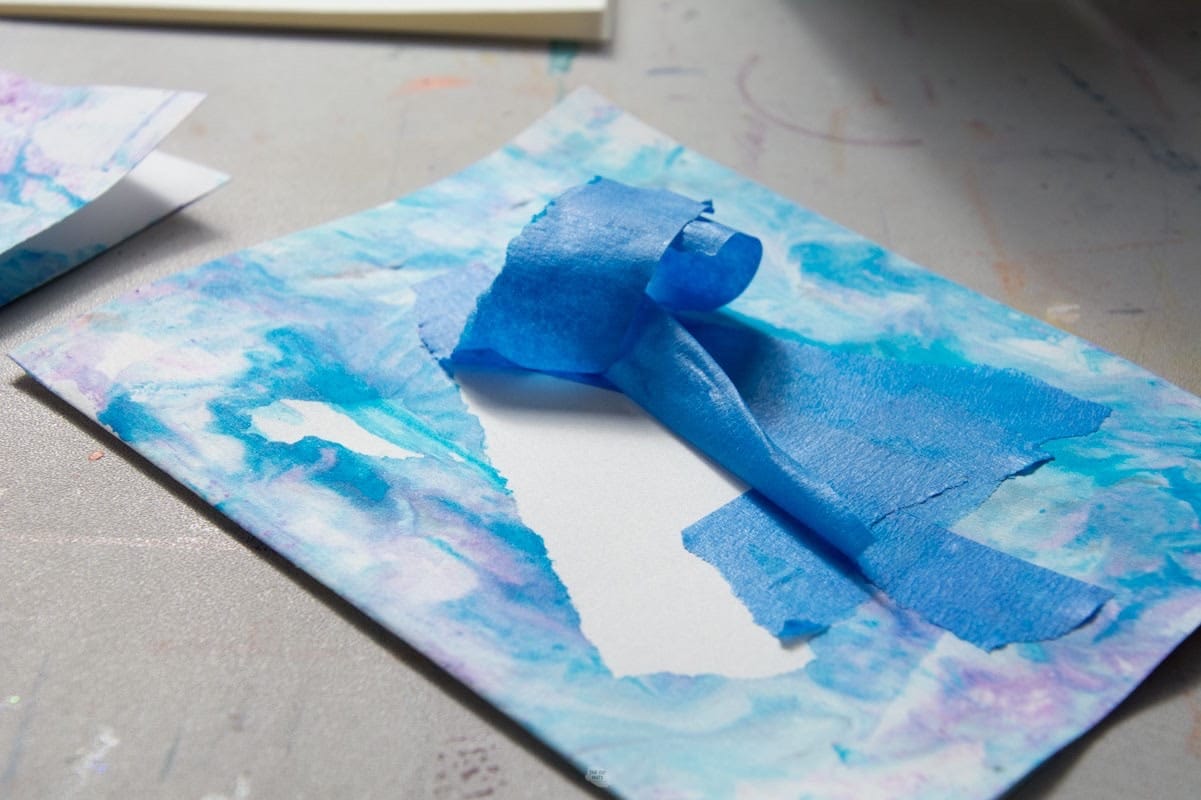
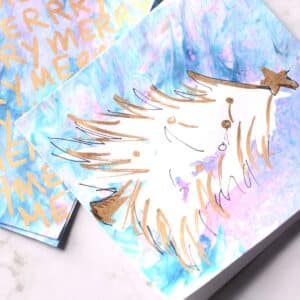
Tape out a design if you would like something to stay white. For example, we taped out a Christmas tree before starting the marbling art.
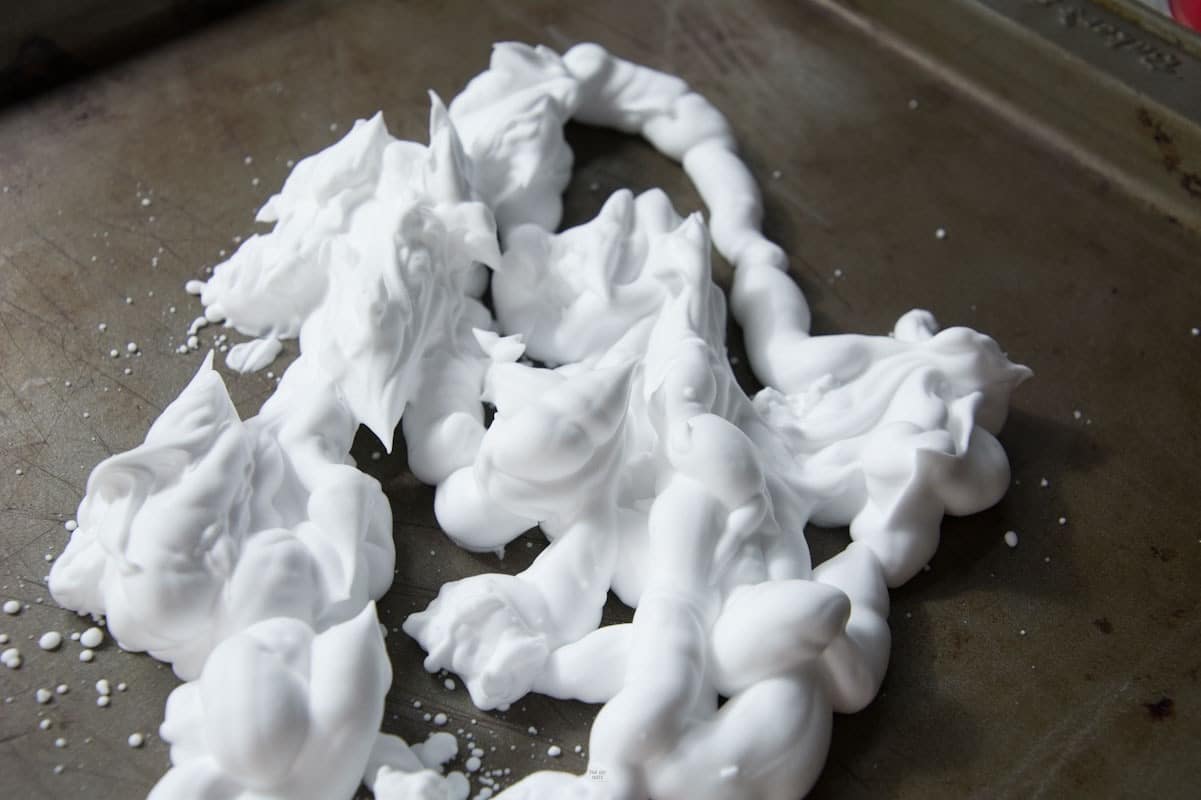
Step 1: Put Shaving Cream On Cookie Sheet or Tray
Spray a light layer of shaving cream larger than the paper or card you are printing. You can use a spatula or your piece of cardboard to help smooth it out to a light layer.
No need to fill the whole tray. Especially because we like to experiment with different color schemes and it is easier to rinse and repeat if you have less to clean.
Step 2: Add Color
Add a few drops of food coloring or liquid watercolor to the shaving cream. You can even water down watercolor paint from a palette and spray from the brush into the mixture.
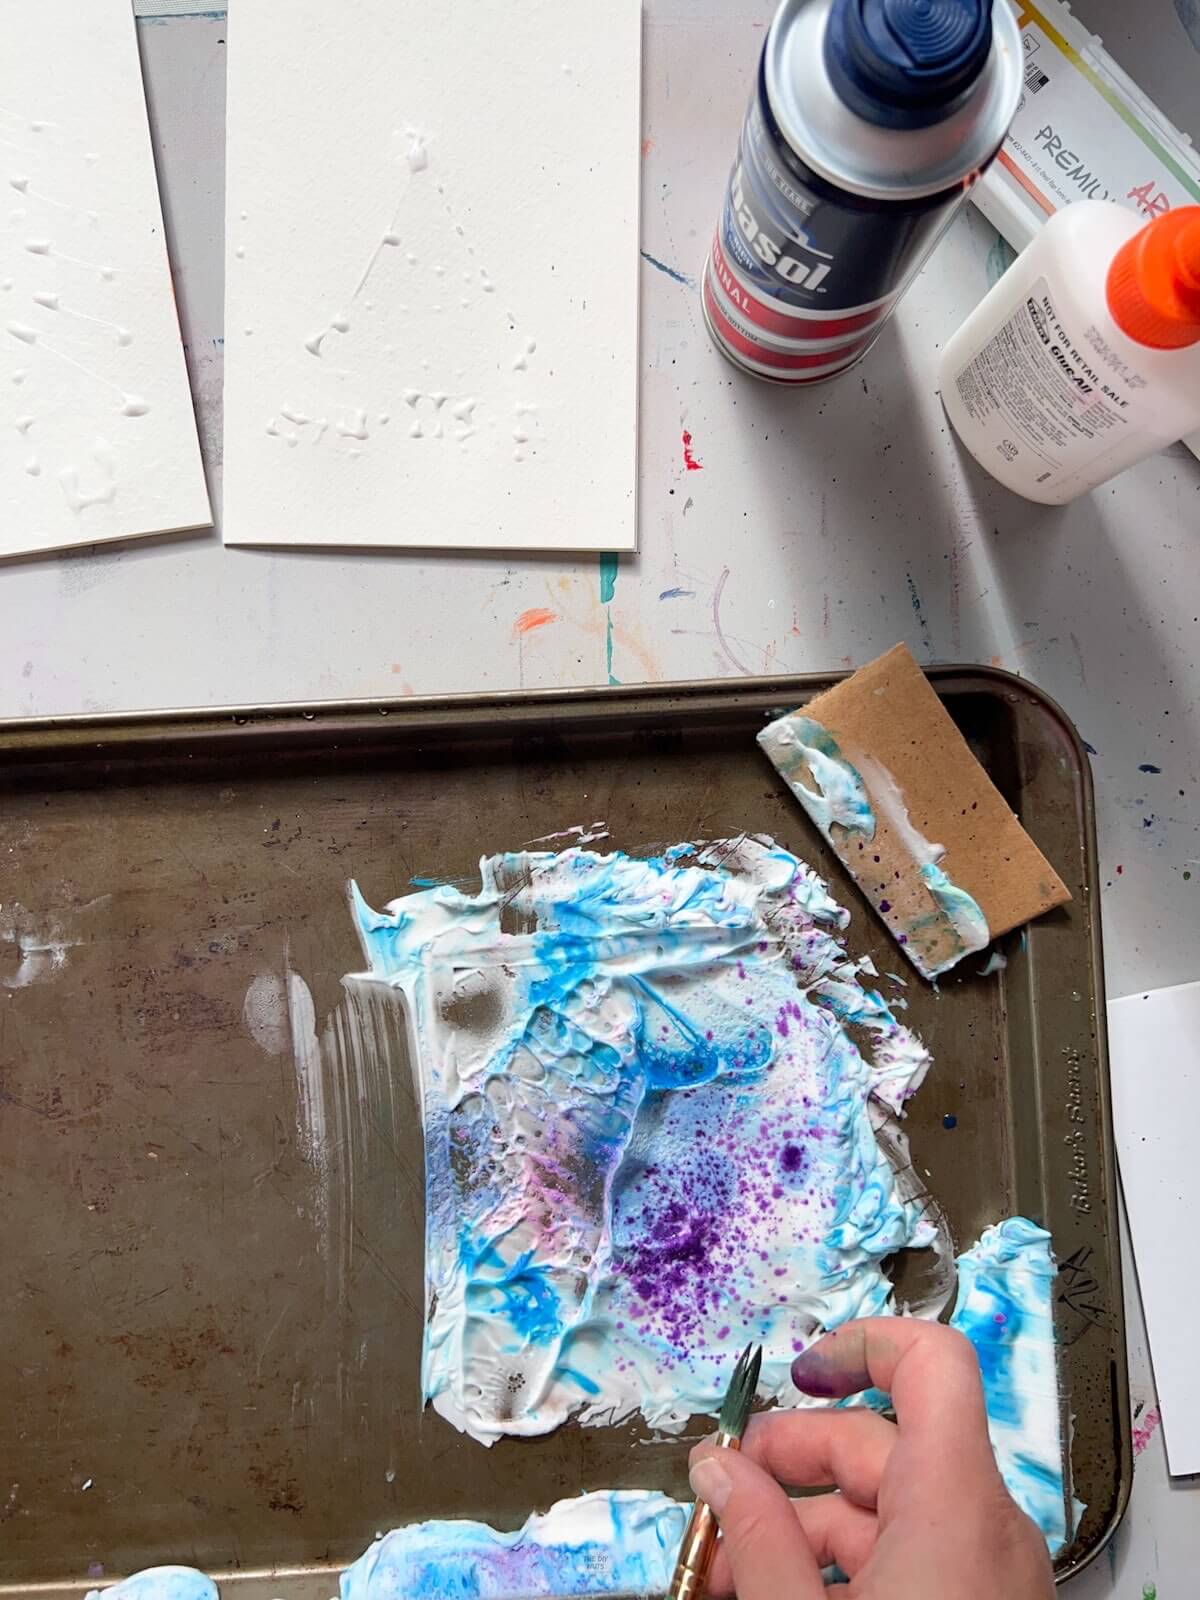
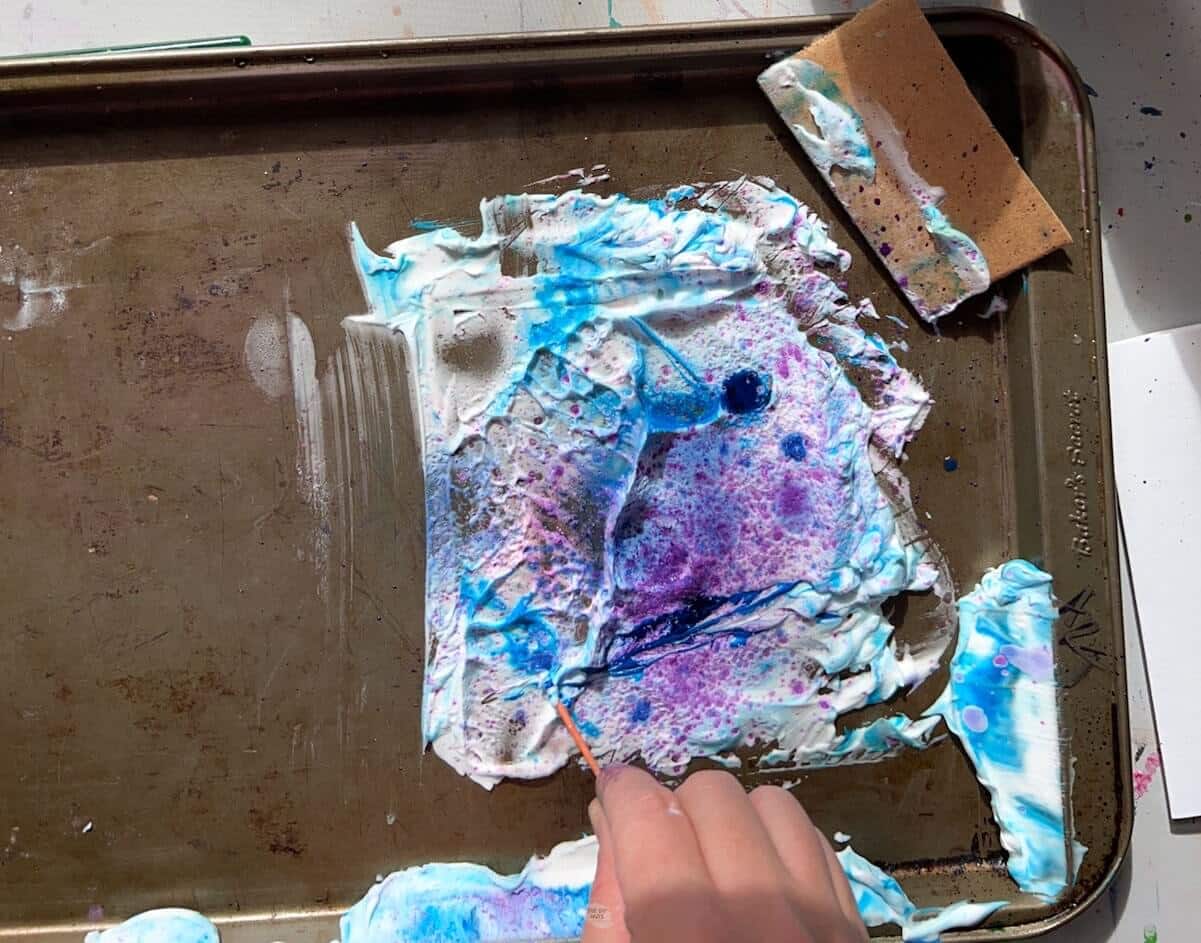
Step 3: Swirl Colors Around
Mix colors around, but don’t overdo it because you will not get a variety of colors.
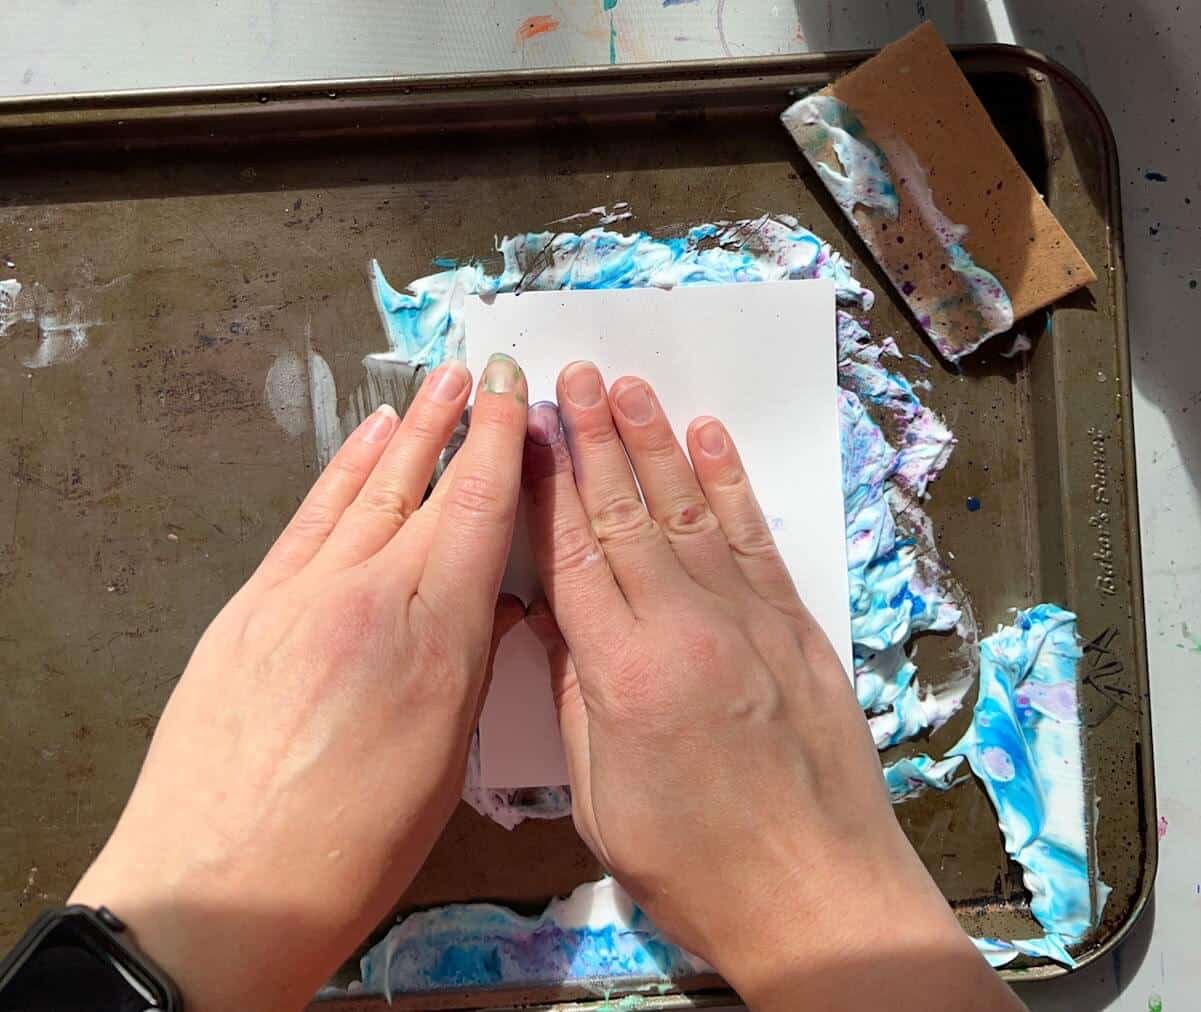
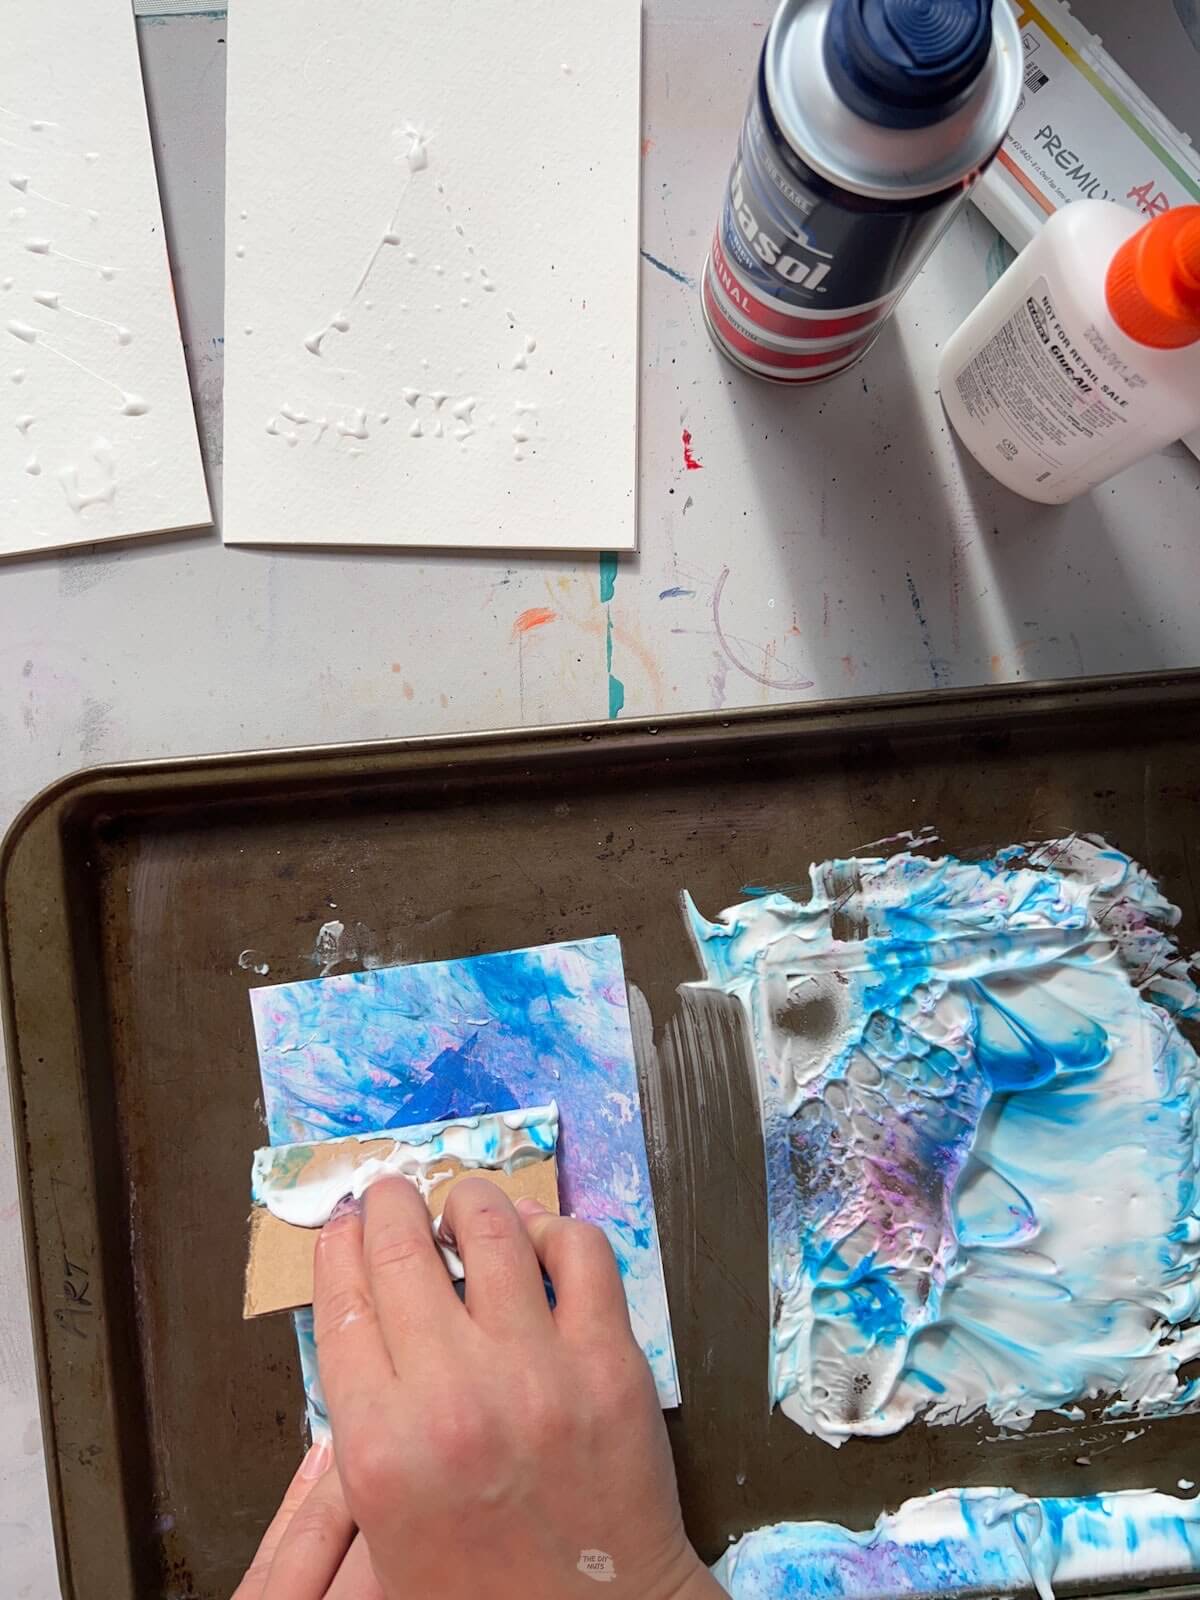
Step 4: Place The Card On The Shaving Cream Mixture
Print shaving cream colors by placing the card down in color and gently rubbing the back.
Step 5: Pull Card Off
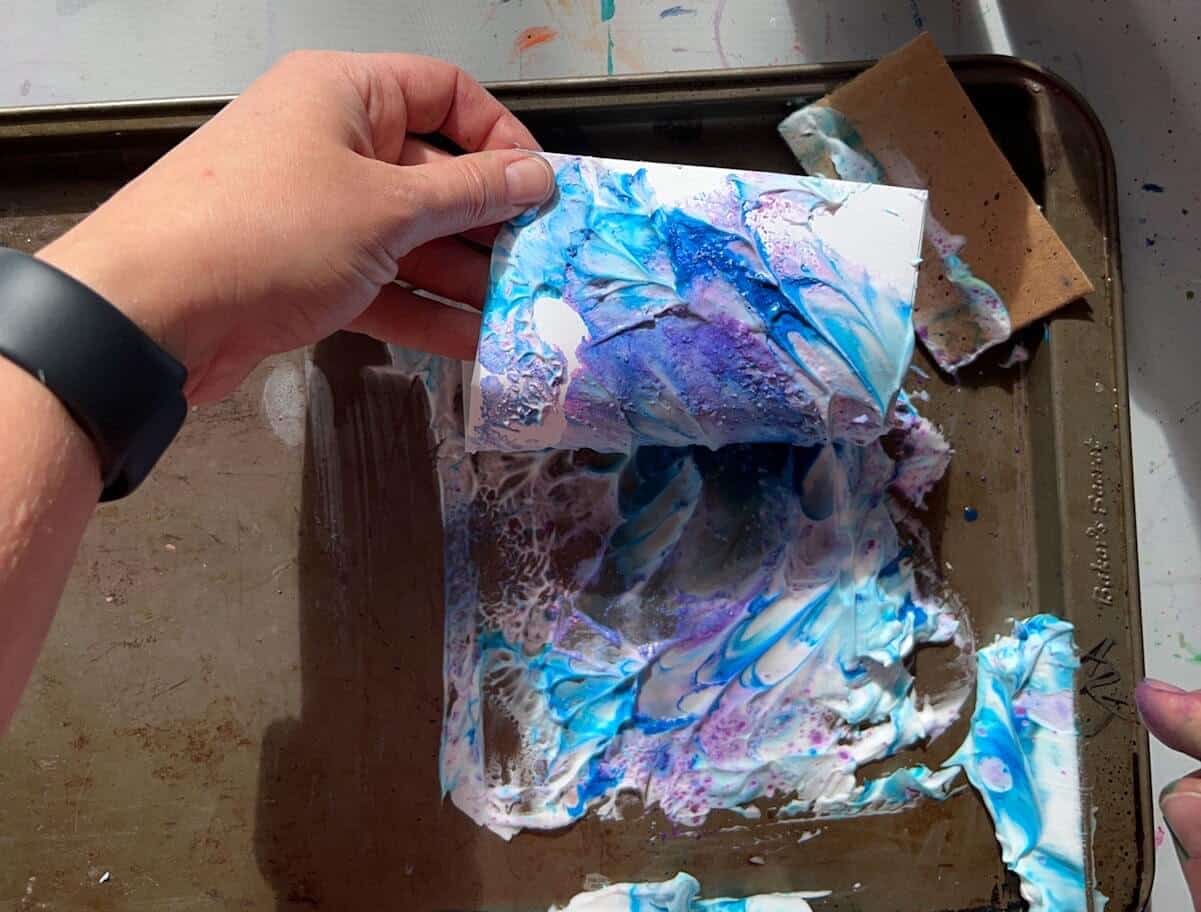
Step 6: Scrap With Cardboard
Hold the paper with one hand and use the other to carefully scrape off the shaving cream paint.
Step 7: Let Dry

Step 8: Remove Painter’s Tape
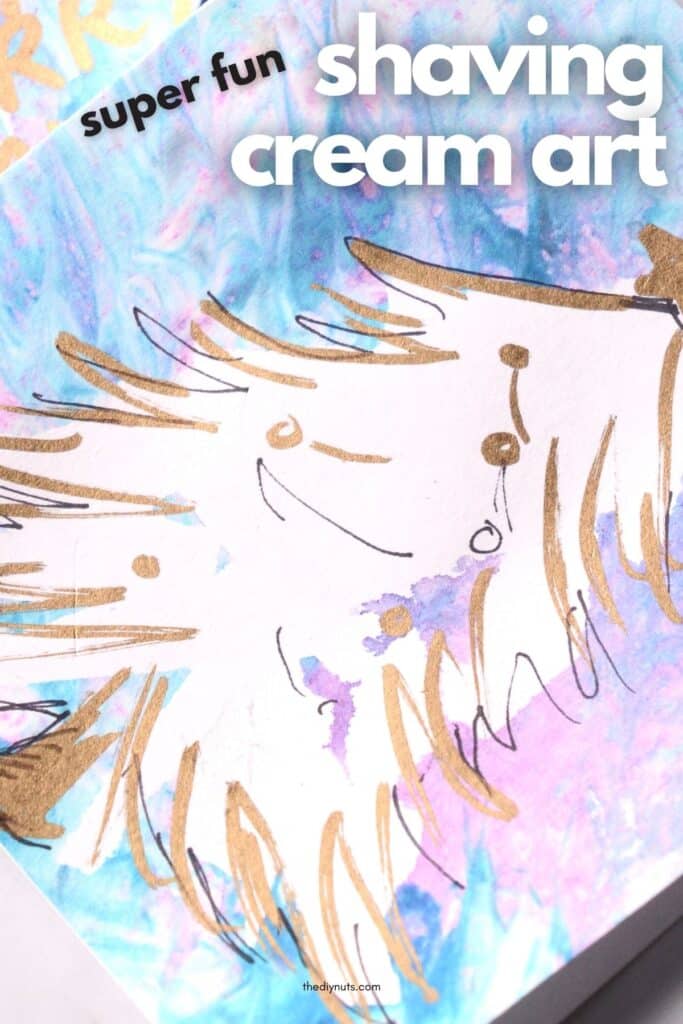
Step 9: Add Tree Details
You can outline with a gold paint marker and add a few other details with a permanent marker pen. Keeping your design sketchy will make it easier to not be perfect, but still, look modern.
Craft FAQs
Yes, any water-based paint should work. You may need to dilute the acrylic paint to help it mix with the shaving cream before printing.
Liquid watercolor paint will give you the most vibrant and fun colors. As always, try to use colors that will mix well together to avoid getting a mucky brown mess.
Children of all ages can help with these cards. They will love designing their own tree with the paint markers.
You can marble as many as you want. However, if you add too many colors they may end up mixing together too much to create a brownish color instead of nice vibrant colors.
Sax Liquid watercolor paints are great because they come in a variety of vibrant colors. You can dilute them for different shades and they will last you a long time. Just be careful because they are very concentrated and can stain hands and clothes if they are not diluted.
Follow us on Pinterest, YouTube or Facebook for more DIY inspiration!
Related Posts
- 9 Easy Watercolor Christmas Card Ideas (including this one)
- 17+ Fun DIY Christmas Gift Wrap Ideas: Our favorite is #8. You won’t believe what they wrapped with.
- Save Money & Wrap Your Gifts With Brown Paper Bags: Learn how to easily recycle brown bags to create fun DIY wrapping.
- DIY Hydro Dipped Marbled Pumpkins: Learn how to use spray paint for a fun marble effect with this painted pumpkin decor idea.
- Fun DIY Crayon Letters: Add these personalized letter crayons as a fun stocking stuffer idea with your holiday cards.
Did you have fun making this craft with your family? Make sure to leave a 5-star ⭐️ ⭐️ ⭐️ ⭐️ ⭐️ review in the comments!
Equipment
- Toothpick
- Cookie Sheet or surface to work
- Cardboard Scraper
Supplies
- Shaving Cream the cheapest will work
- Heavy White Drawing Paper or Premade Cards
- Food Coloring or Liquid Watercolors
Optional
- Gold Paint Markers Black Marker or Painter’s Tape
- Painter's Tape
- Black Pen Sharpie
Instructions
Before You Begin
- Decide on your design. Tape out anything on the card that you wnat to be white.
How To Make Shaving Cream Art
- Spray a light layer of shaving cream larger than the paper or card you are printing. Use a spatula or your piece of cardboard to help smooth it out to a light layer.
- Add a few drops of food coloring or liquid watercolor to the shaving cream.
- Swirl colors around with a toothpick fo fork.
- Print shaving cream colors by placing the card down in color and gently rubbing the back.
- Pull the card up carefully.
- Scrape the shaving cream paint mixture off the card with a piece of cardboard.
- Let dry.
Optional Designs
- Remove painter's tape.
- Add extra drawings with paint marker or pens.
Notes
- Acrylic paint can also work to make shaving cream art. You just made need to dilute it a little to get the look you want.
- Don’t overmix the shaving cream and paint. You want to see the marble look.
- You can use as many colors as your want. Just be careful to not use so many that they will not mix well together.
- You can print from the same mixture a few times before needing to add more color.
- If there is a spot that you would like more marble paint on, just reprint that area.