How To Paint A DIY Herringbone Bathroom Accent Wall Pattern
This DIY tutorial will show you how you can make a huge impact by creating a herringbone wall design with just a little paint. Our DIY small bathroom makeover started with a simple beige bathroom and over the years involved to a more modern space. Use our step-by-step guide to make your bathroom accent wall this weekend.
*Disclosure: I only recommend products I would use myself and all opinions expressed here are our own. This post may contain affiliate links that at no additional cost to you, I may earn a small commission. Read our full privacy policy.
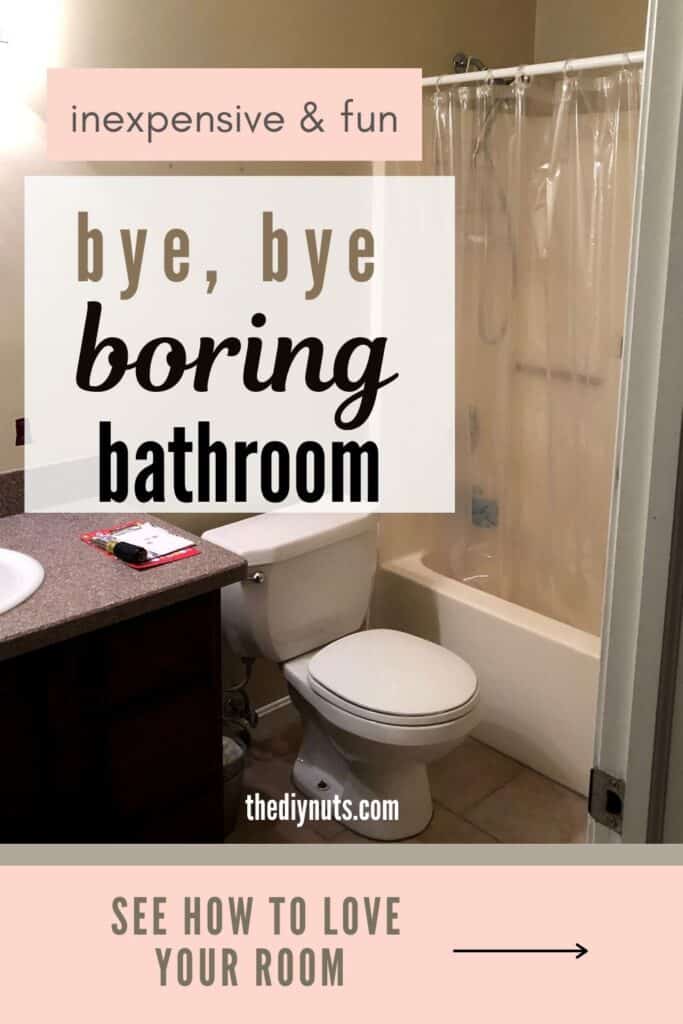
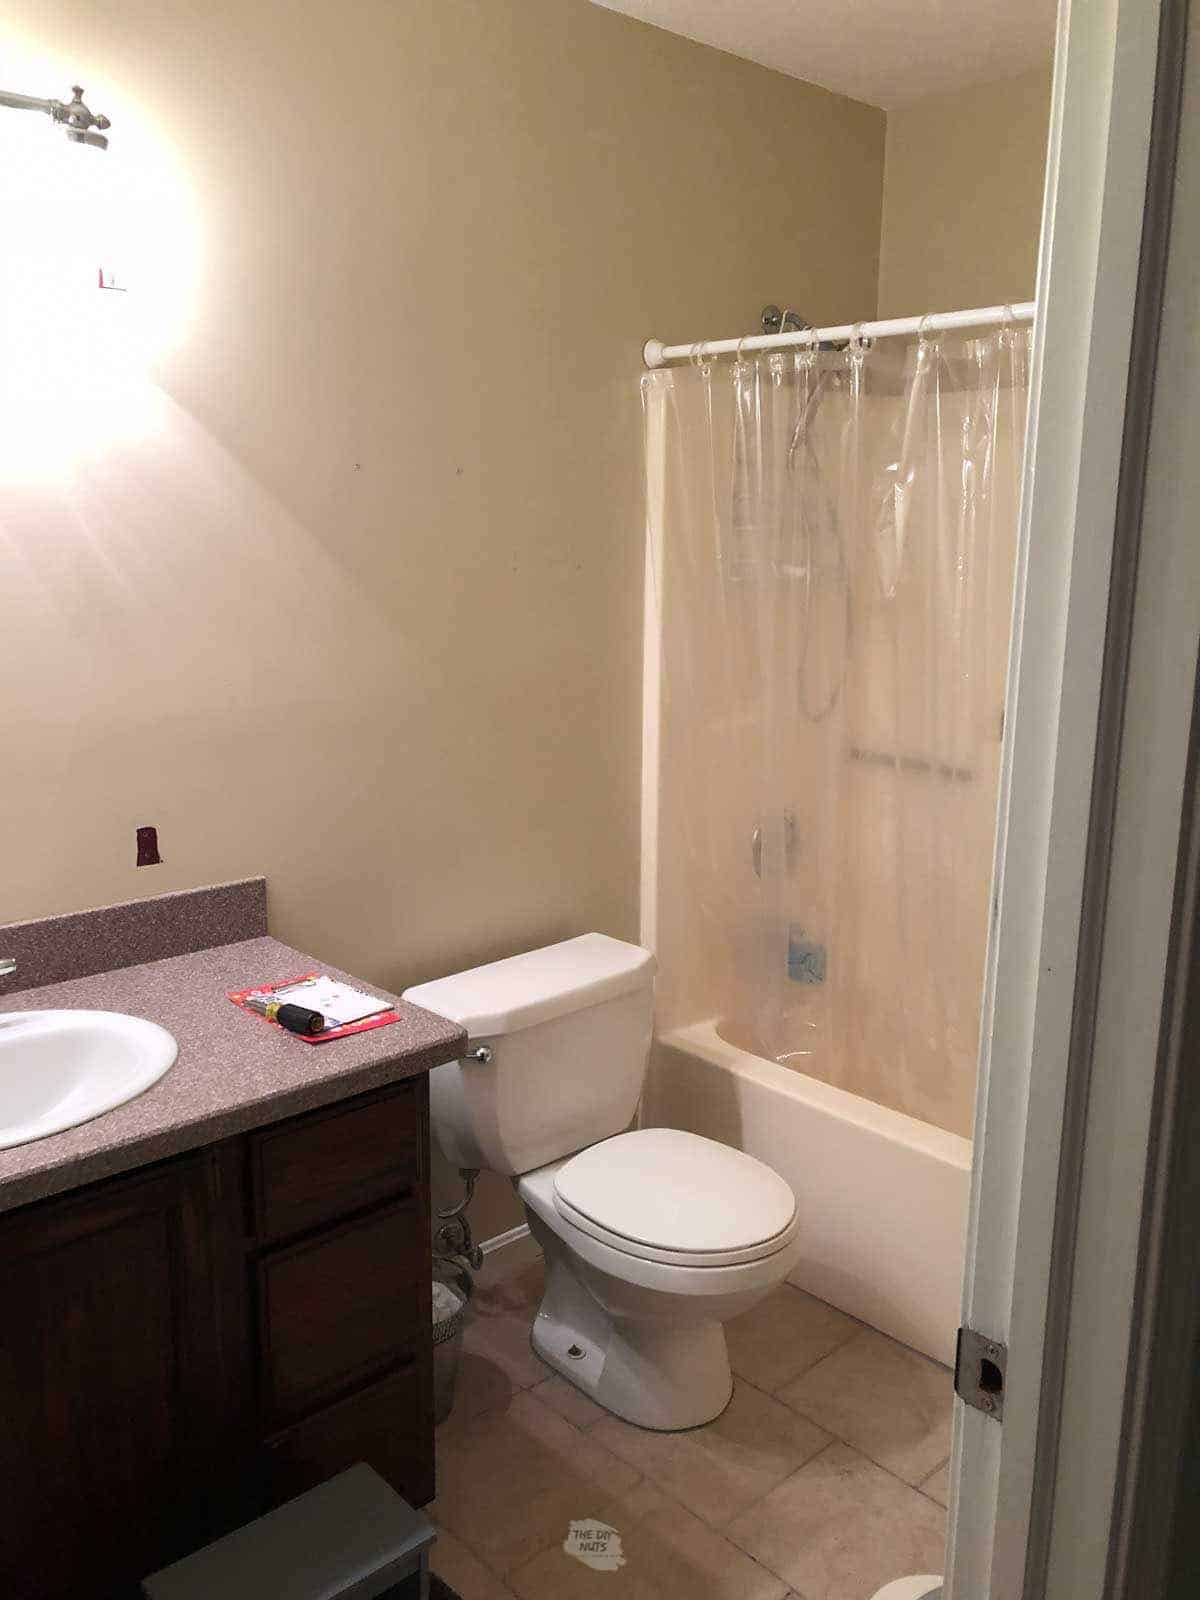
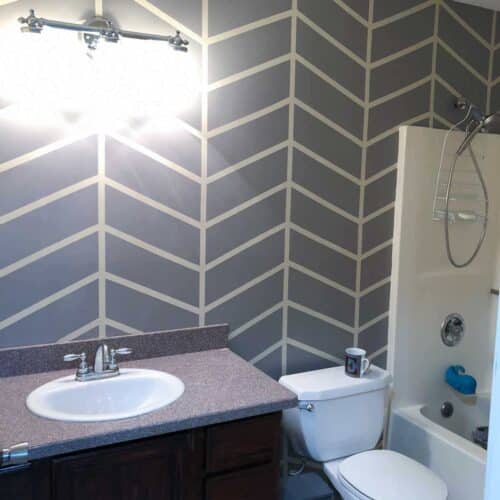
The “Before” Small Bathroom
This is a great example of why dark walls don’t really work in small spaces that do not get natural light. Yes, there are exceptions to this rule but our bathroom was not one of them.
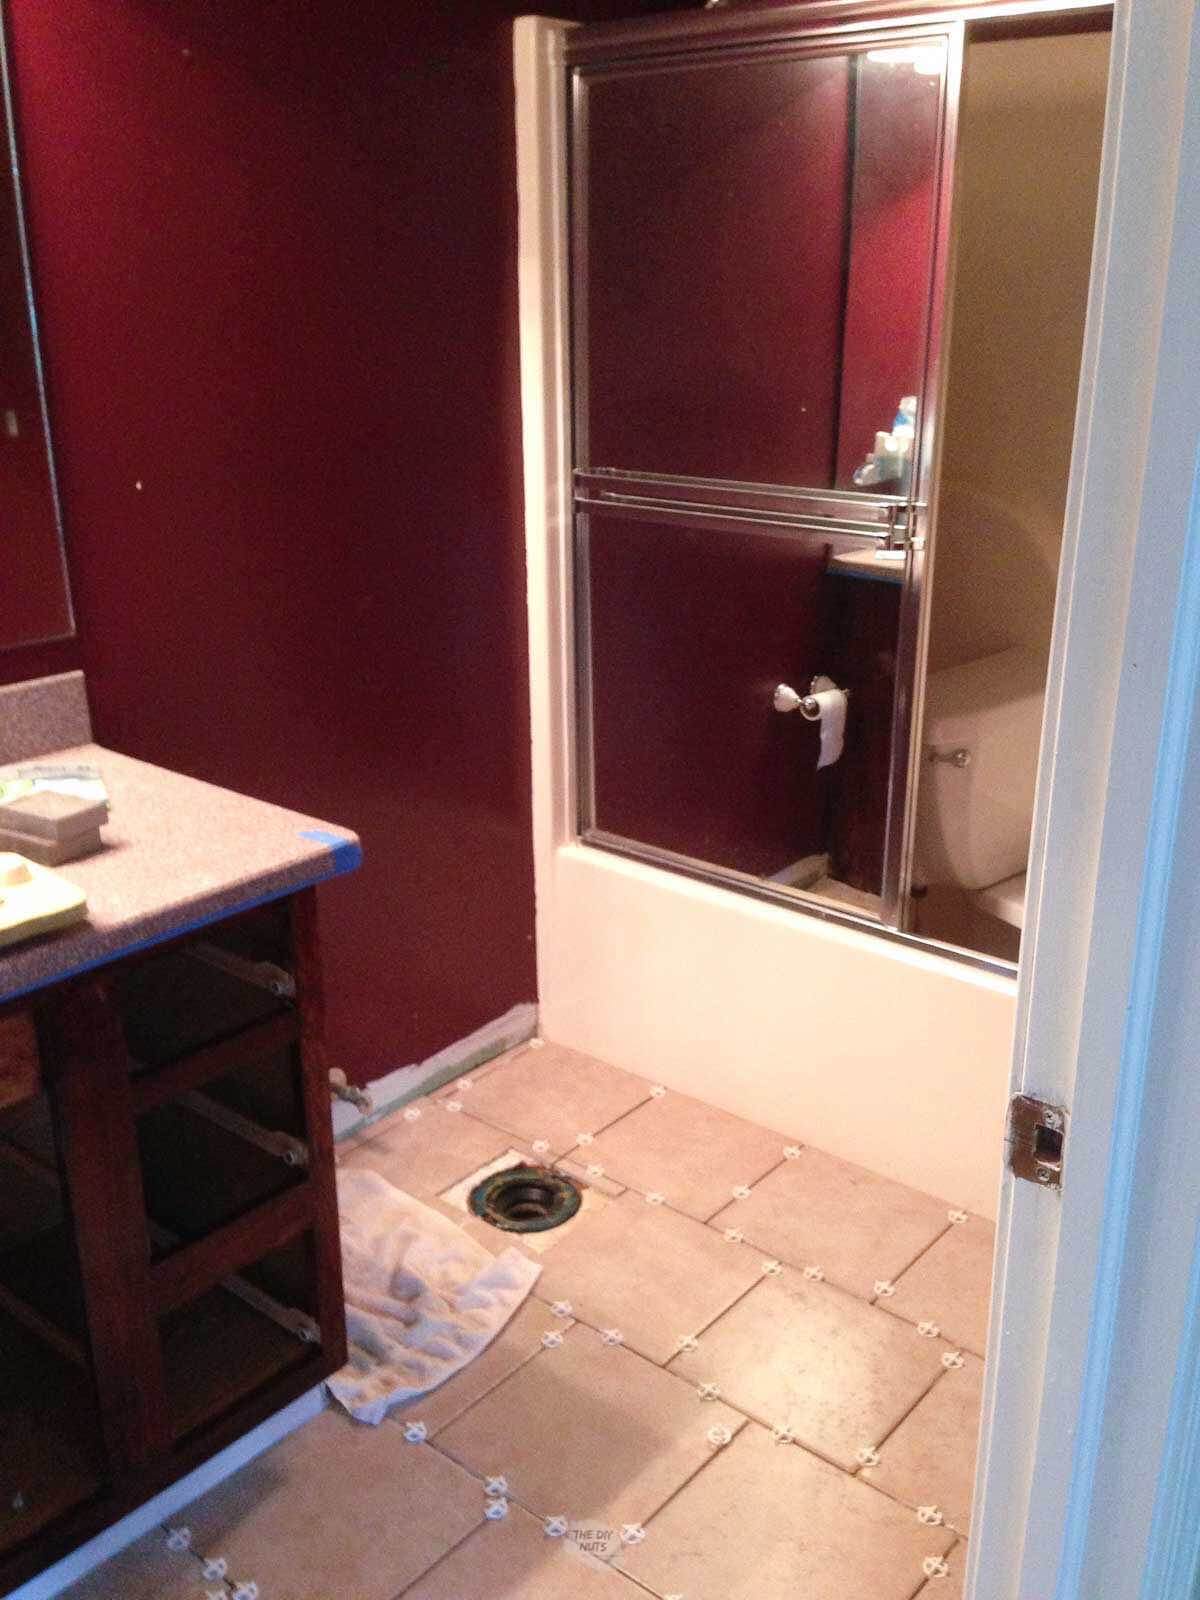
Our First Bathroom Makeover
We had done a simple bathroom remodel when we first moved in. The previous owners had carpet in the bathroom and the cabinets were construction-grade oak cabinets from the ’90s.
- Removed carpet and laid neutral tile (this was ten years ago so that is why we went with beige)
- Painted the walls a neutral, lighter color
- Used gel stain on the honey oak cabinets to update the vanity
- Added a new light fixture
- Added a newer shower curtain
- Removed glass doors but kept the original tub
Choosing An Accent Wall Idea
After the initial small bathroom makeover, our bathroom still felt pretty blah. It was better than the dark dungeon from the previous owners, but we knew we still needed to add a little something special with paint.
Why did we choose to paint?
Honestly, at the time, a painted accent wall design was the cheapest solution for us and it wasn’t going to take much paint. I could also do this when our newest baby was napping. Anytime we can take advantage of nap time that is a win!
We love painted geometric accent walls and knew a chevron or herringbone pattern in a nice gray color would work out well.
Recommended Supplies
- 1″ Painter’s Tape (this is the brand I ALWAYS use for detailed work)
- Small Paint Roller
- Paintbrush for trimming
- Ruler and/or tape measurer
- Pencil
- Paint Color of your choice (We used Sherwin Williams Polished Concrete)
- Paint Tray or liner (I love these small & cheap liners)
- Drop Cloth
Buying Paint Tips!
Always buy your paint on sale. You can take an older gallon of untinted paint that was purchased at 40% off sales and get it tinted at a later date in time. If you know that you are going to have an upcoming project but are unsure of the color this may be a solution for you.
Do you need help deciding what color of paint to use?
We recently just tried Samplize and it totally beats having to buy individual paint samples. These 9″ x 14.75″ samples will get shipped directly to you and save the hassle of clean-up (we loved that).
Check out the brands you can get here. See our review and hopefully get the answers to those frequently asked Samplize questions.
Step-By-Step Instructions
Before You Begin
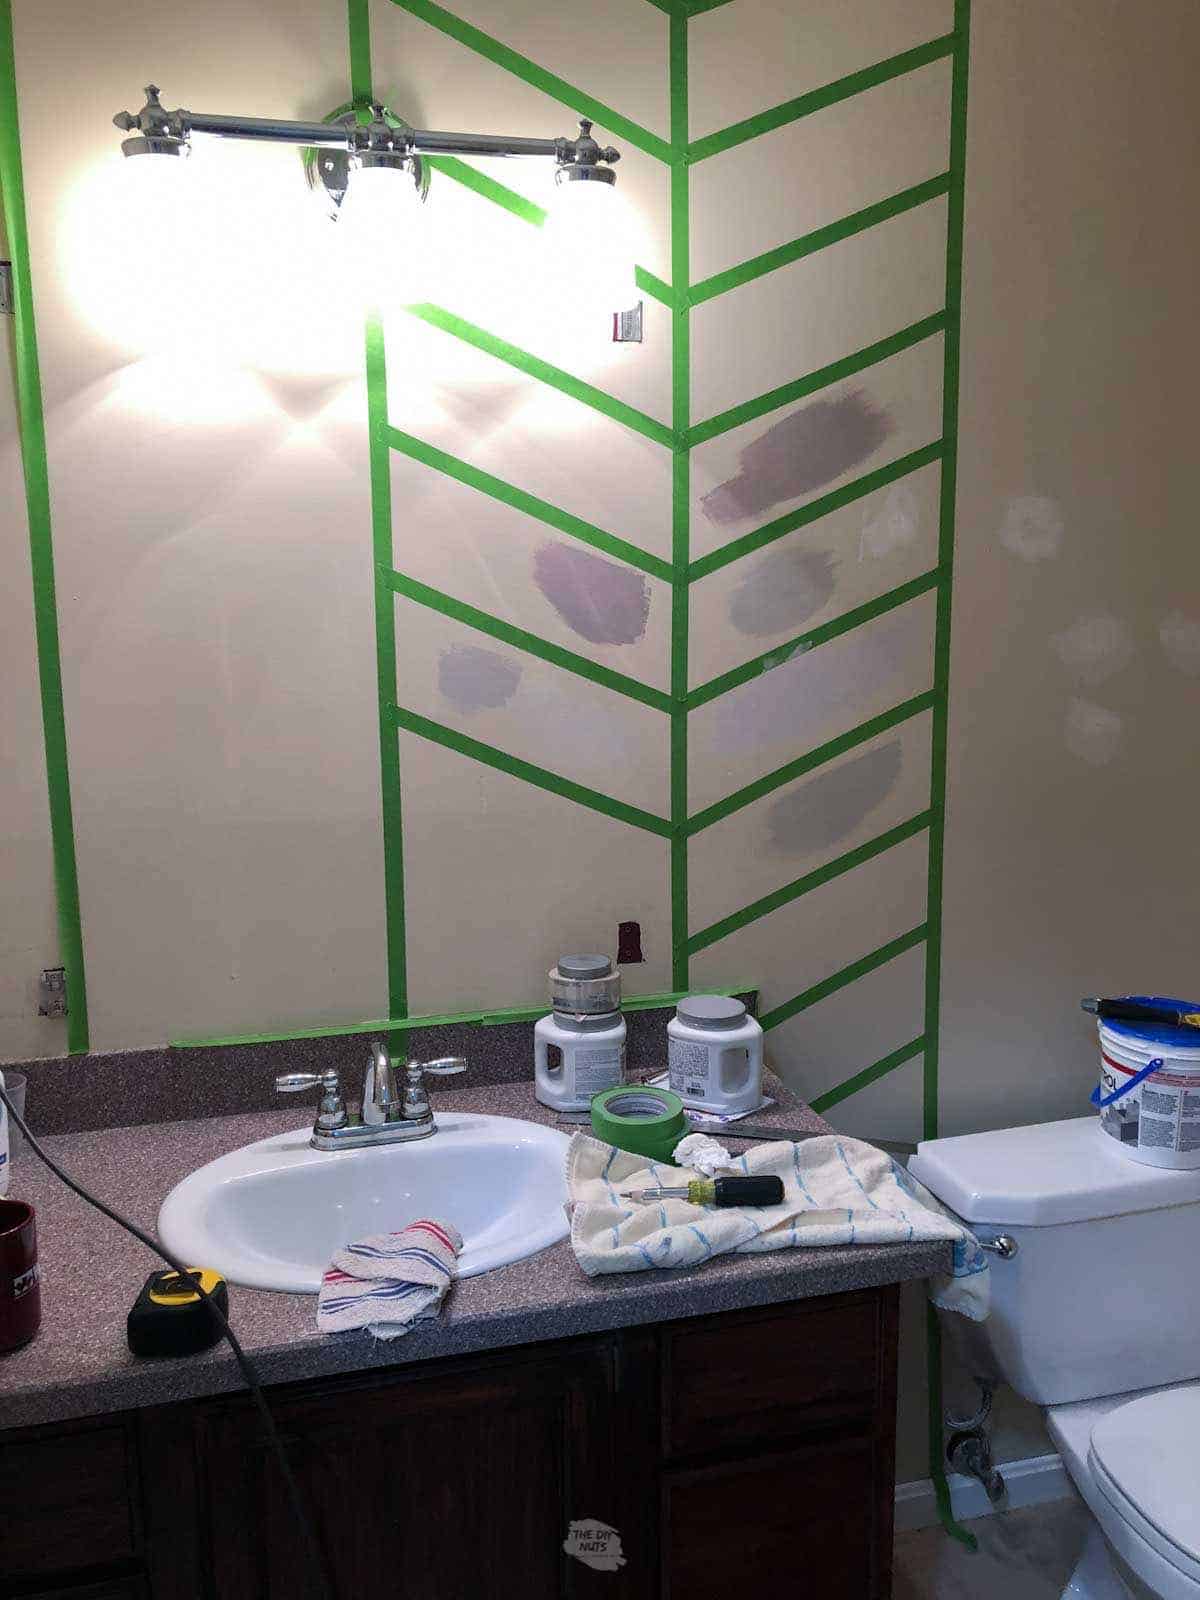
If you want to have a different color than the current wall for your tape lines, you will need to paint a new base paint color on the entire wall. After you have your base coat, you are going to tape out your herringbone design.
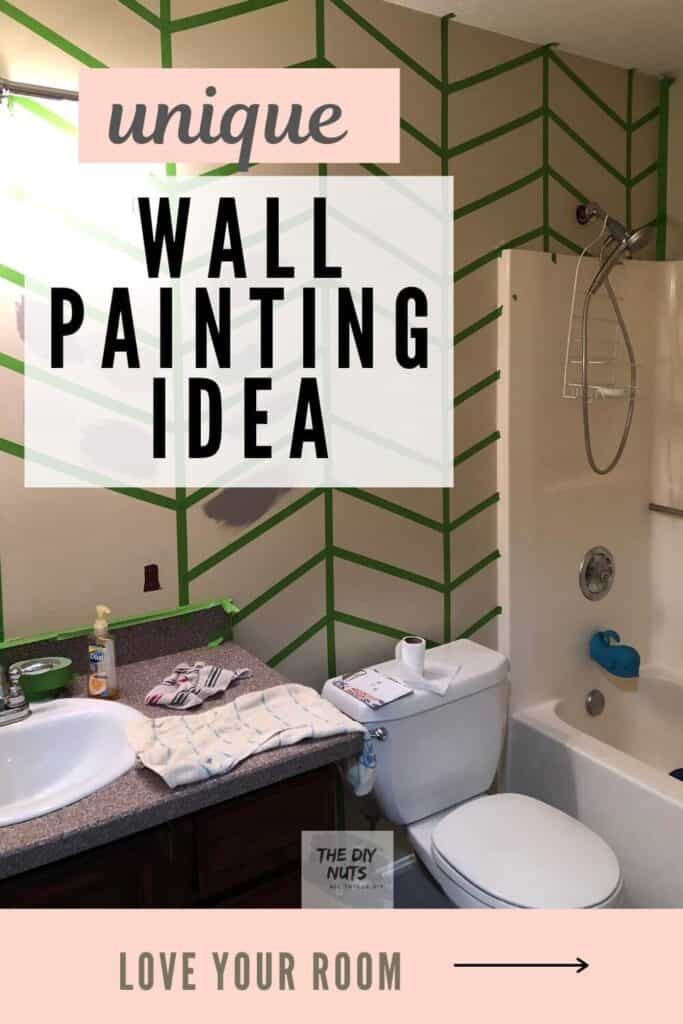
Step 1: Measure Your Wall & Sketch A Design
Decide on how far apart you would like your designs. Our lines in my herringbone design come together at the point every 7″ down and 12″ apart.
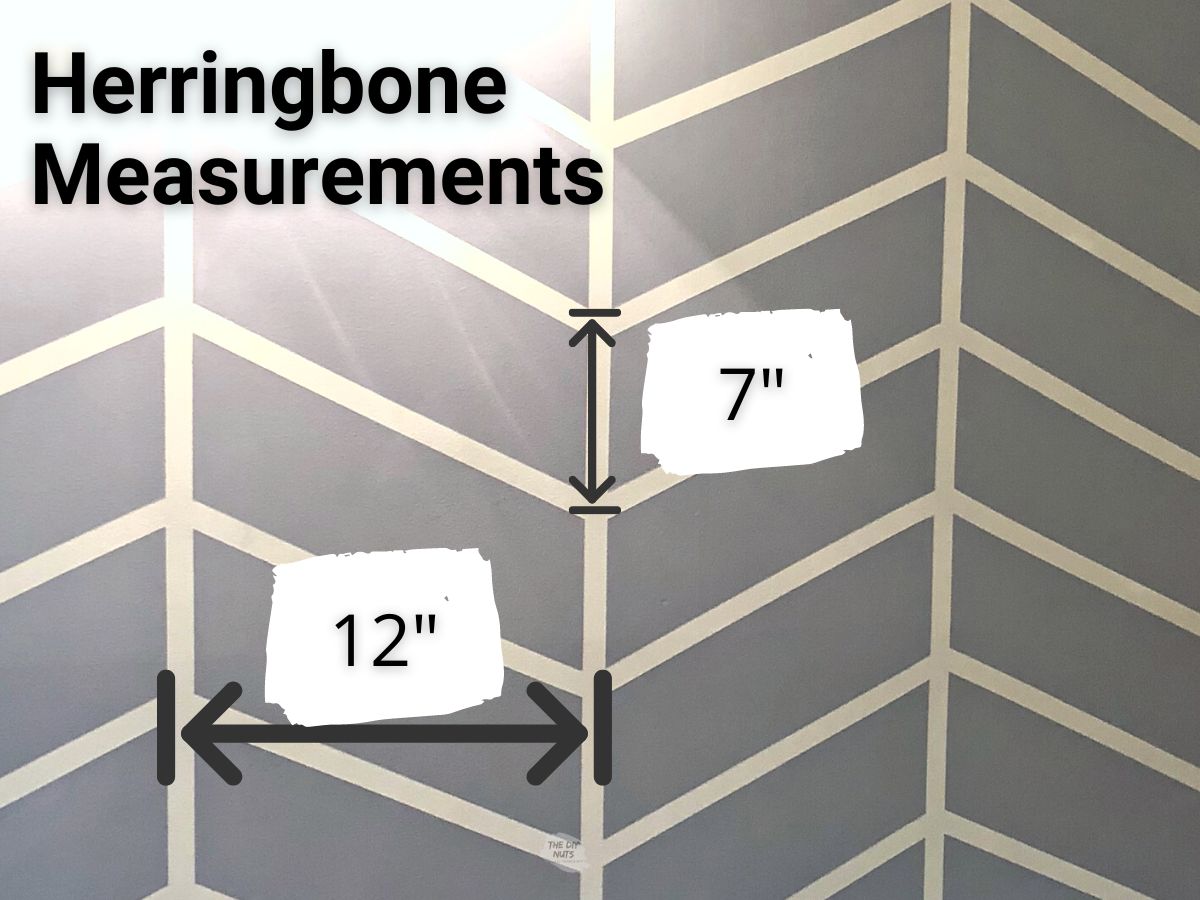
Step 2: Tape Out Vertical Lines
Find the center of your wall. Tape that vertical line first. Then measure 12″ from the center line. Mark in 3 places or use a 4′ level to ensure a straight line. Line up the frog tape in order to get straight lines vertically.
Keep the line of tape straight and pull it tightly when mapping out your herringbone design on your bathroom wall. This will help you get clean and crisp lines.
Step 3: Tape Diagonal Lines
For each line, measure 7″ down and tape diagonally from one to the other. So your first diagonal line starts at the ceiling and goes down to the 7″ mark on the next line.
Step 4: Continue Taping All Diagonal Lines
Keep repeating to make the herringbone pattern. Press the tape line fully.
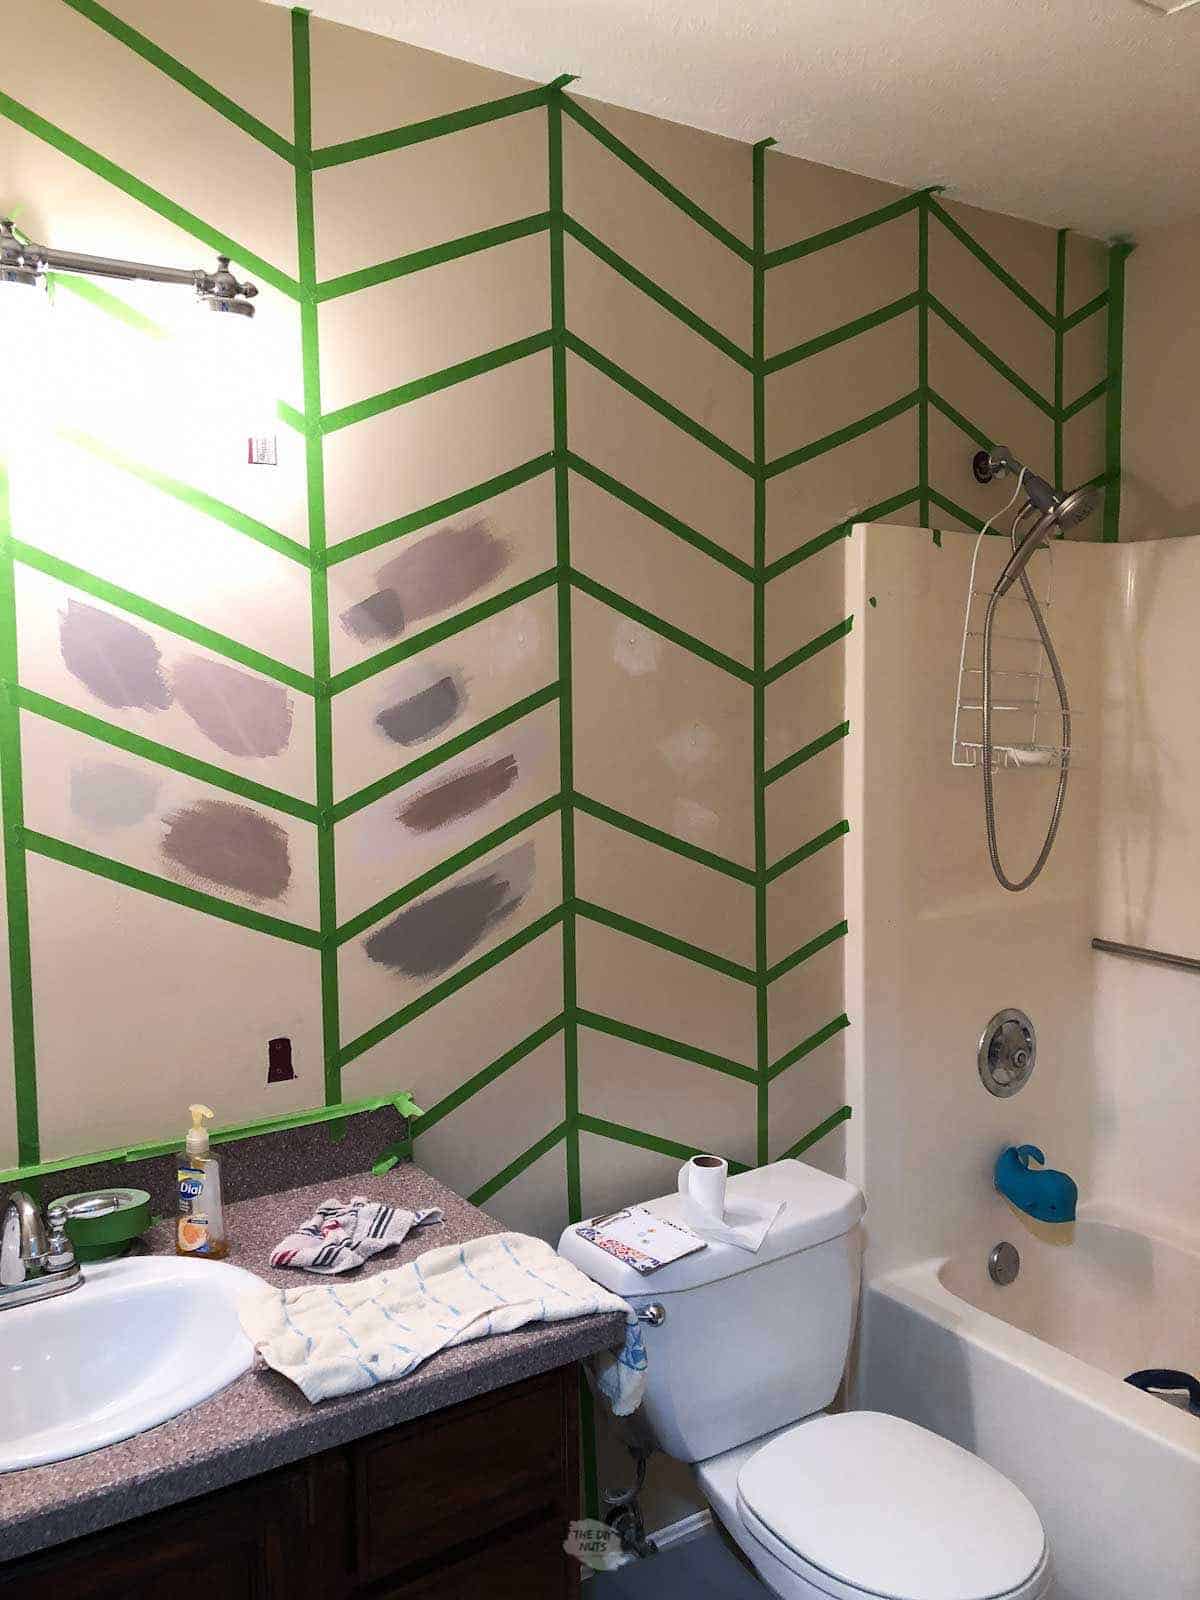
Use your fingernail to really make the tape stick. You can also seal the painter’s tape by painting a thin layer of the base color (beige) on top of the tape.
Other Ways To Get Painter’s Tape To Seal
- Use a foam roller (without paint) and run it over the tape.
- Use an old credit card before pushing the tape on nice and flat.
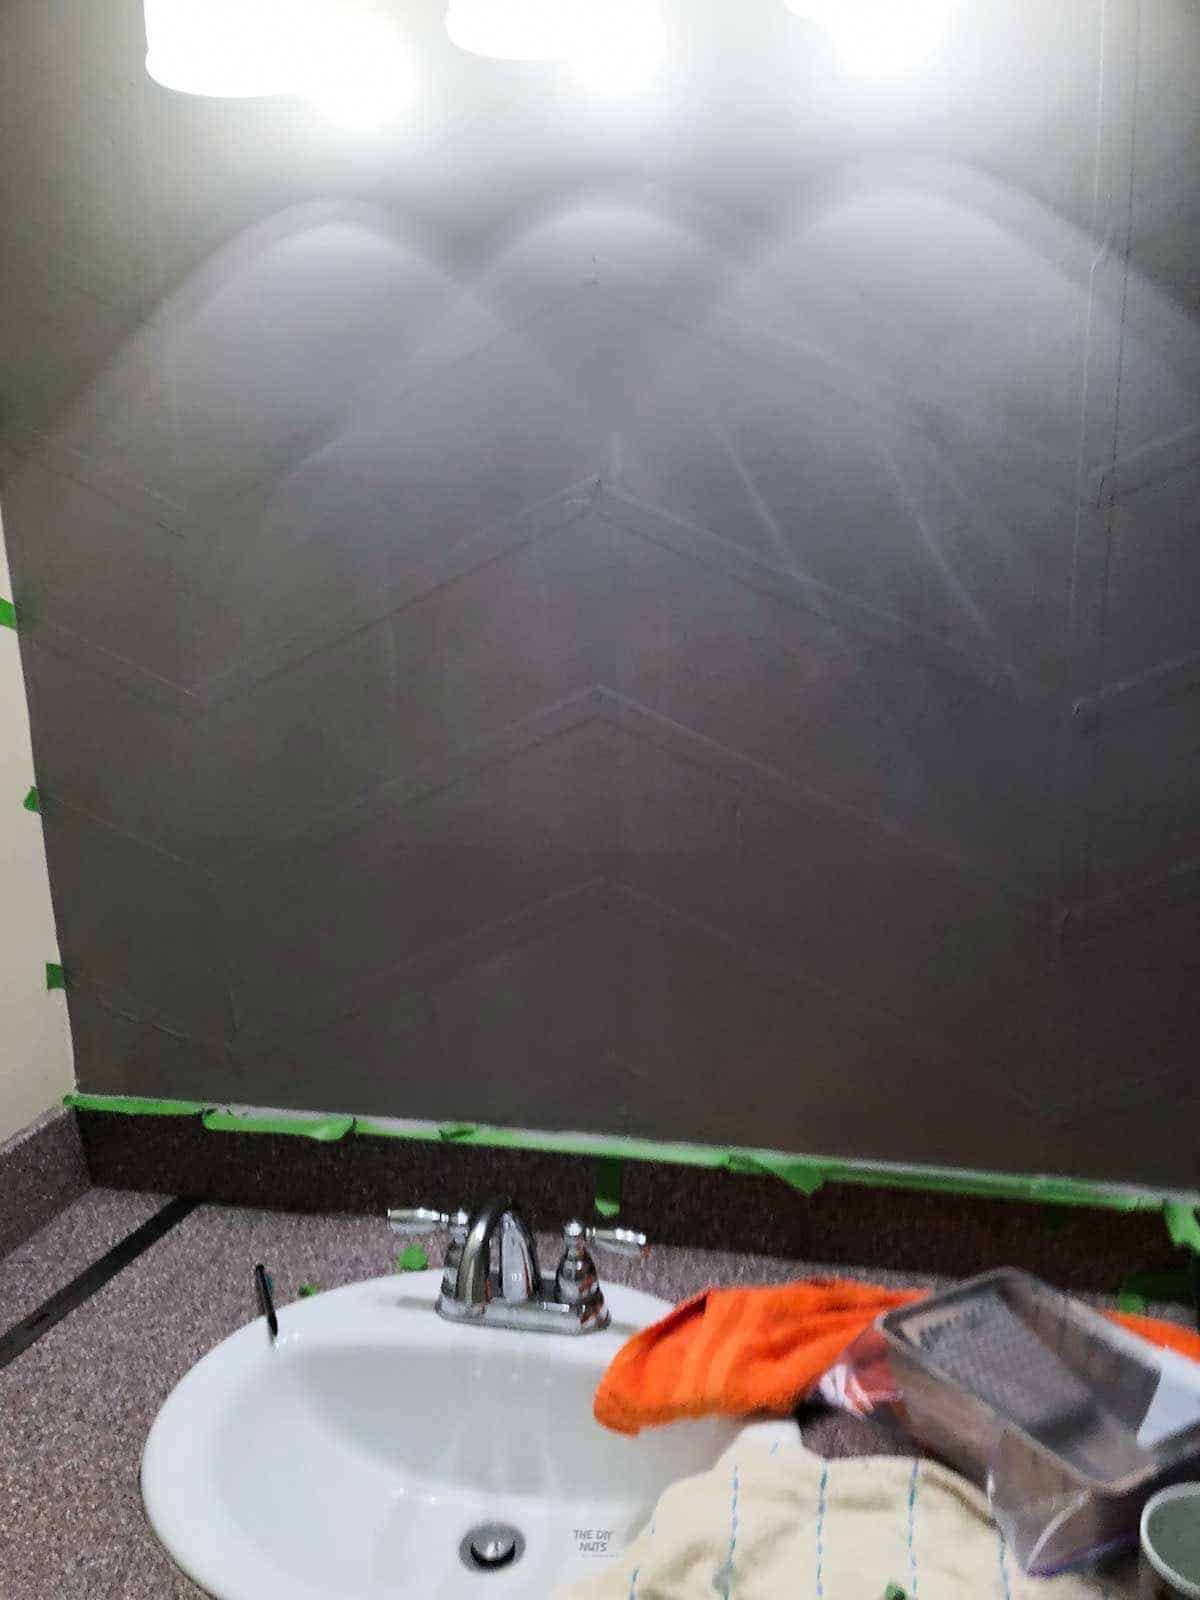
Step 5: Paint The Wall
Once the herringbone design is completely taped, use a roller to paint the whole surface and a brush to trim out the edges. You may need two or three coats.
Step 6: Peel The Tape
Once rolling and trimming are done, it is time for the fun part!
I like to peel the tape when the paint is dry, but not too dry. Some painters will want you to wait a day, but I am just too impatient for that.
Pulling straight out with design can help. If there are any bleeds, you can always touch up the design with the base coat. I did have to touch up a few spots, especially along the ceiling.

Step 7: Clean-up And Touch up
Once you have removed the tape, you may see that you have some spots to touch up.
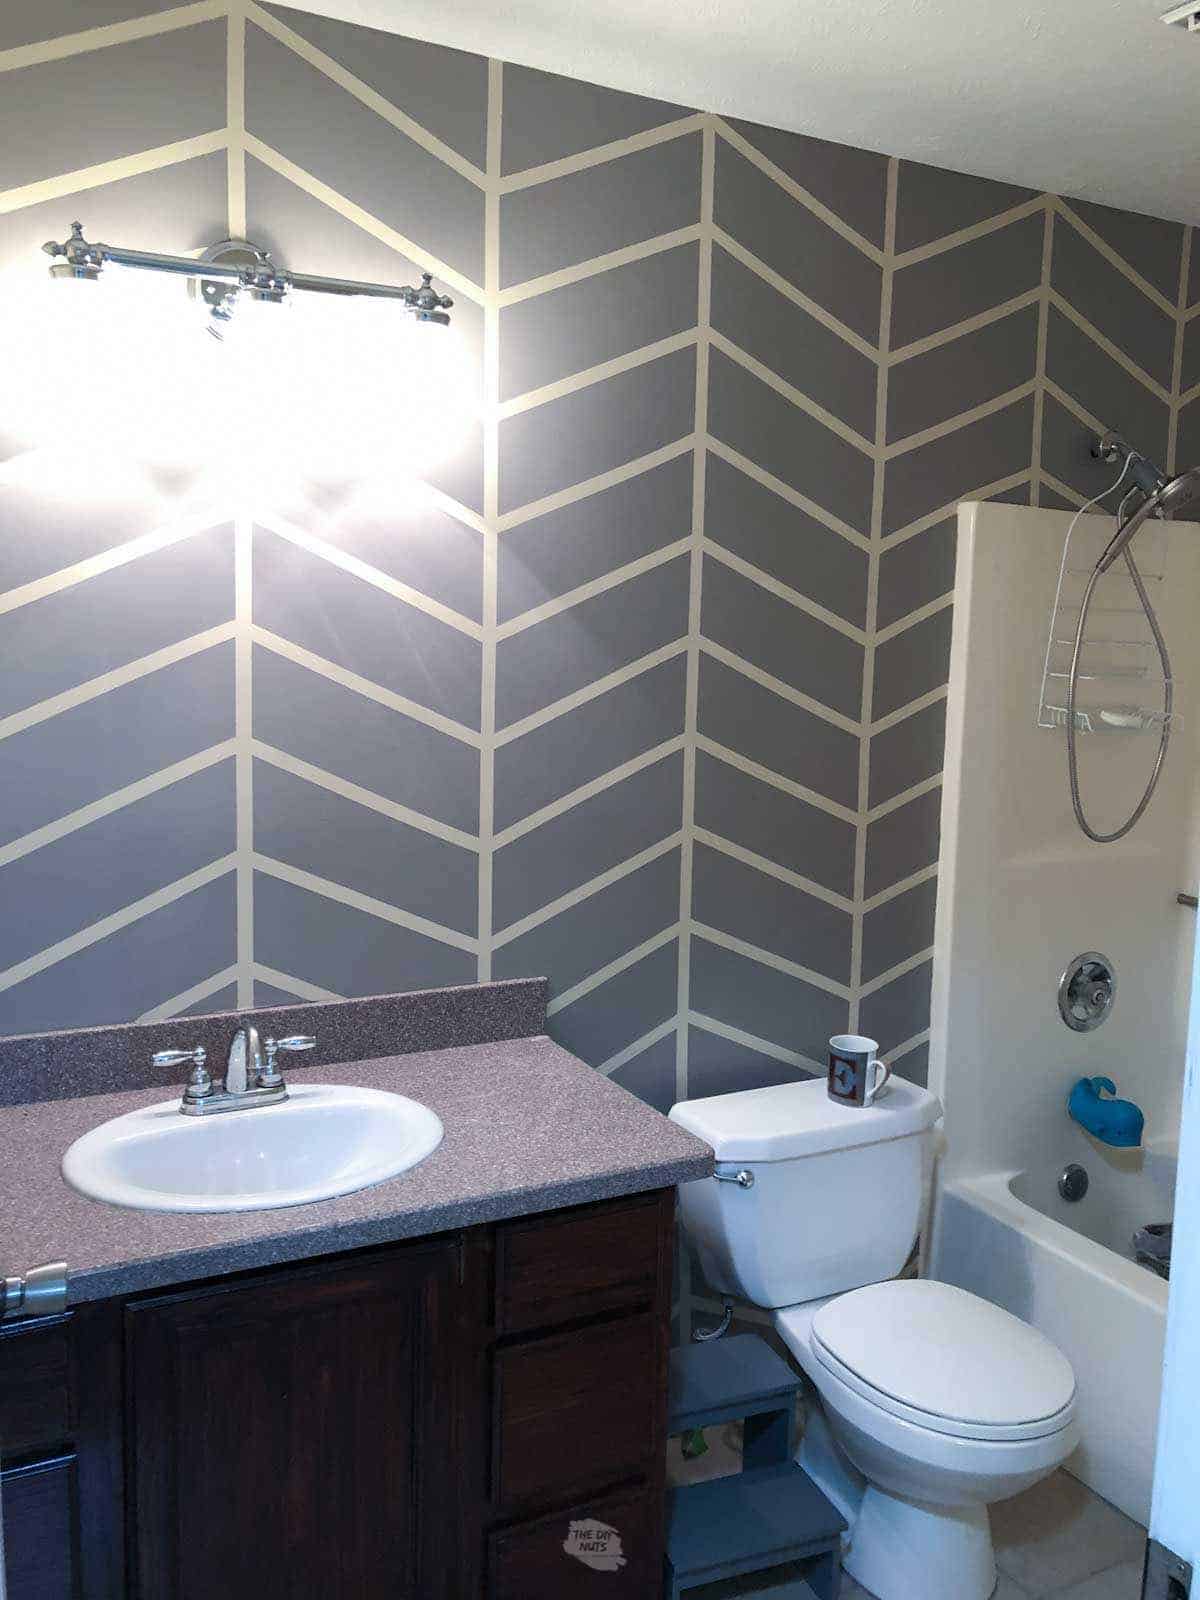
Before and After
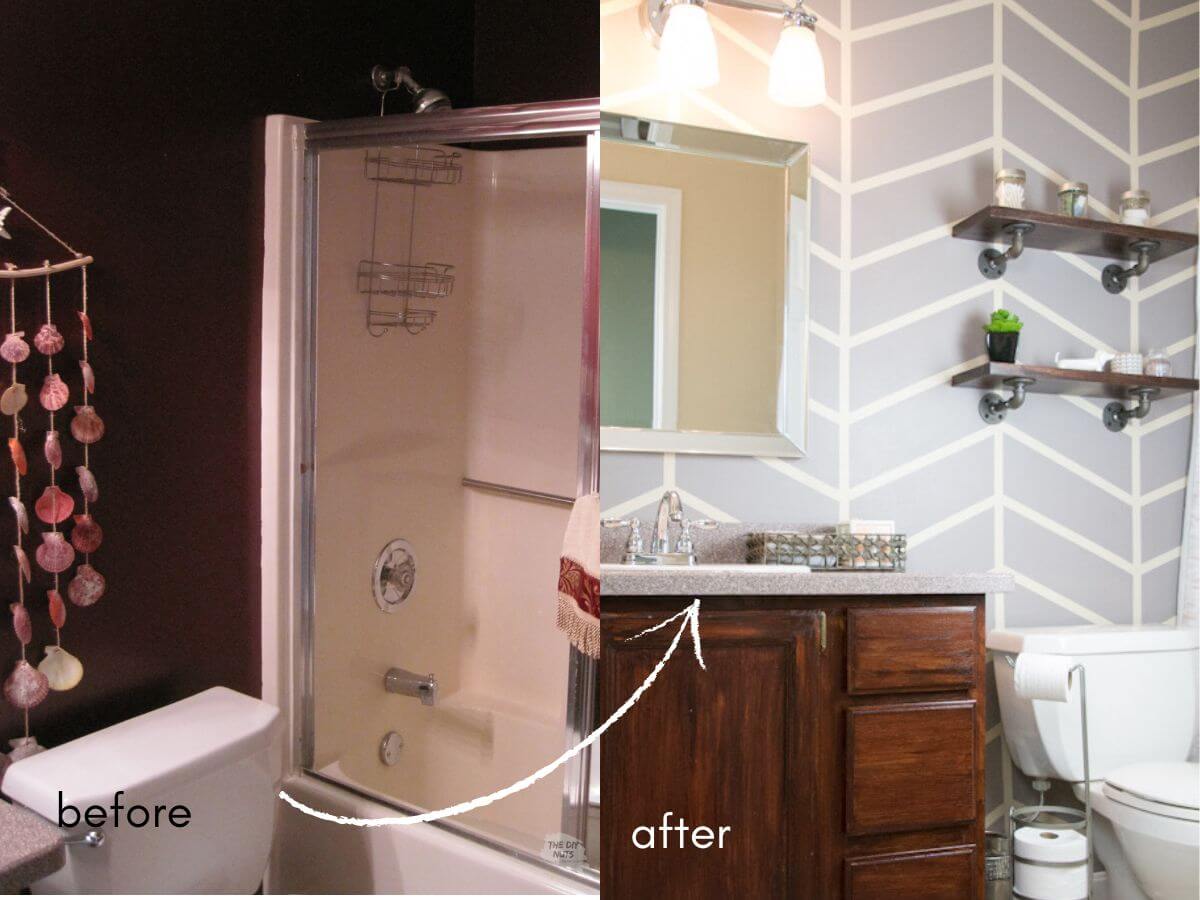
We love comparing spaces to their old counterparts. DIY doesn’t always have to cost a ton of money for a new feel.
Tips
- Hold the tape tight when taping to help get a straight line.
- Step back and look at your project or whole bathroom from a distance as you are working to double-check your faux herringbone wallpaper design.
- Make sure to give yourself enough time to complete the project.
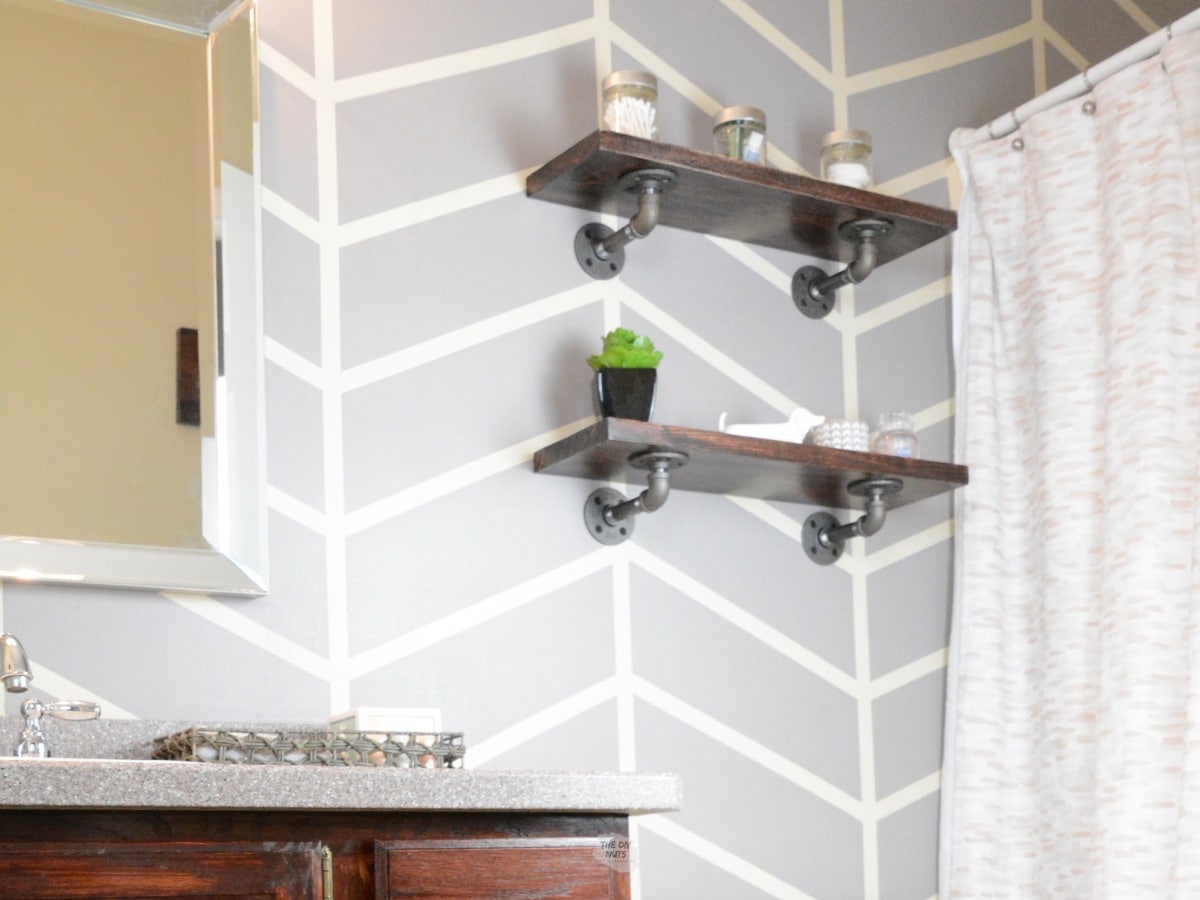
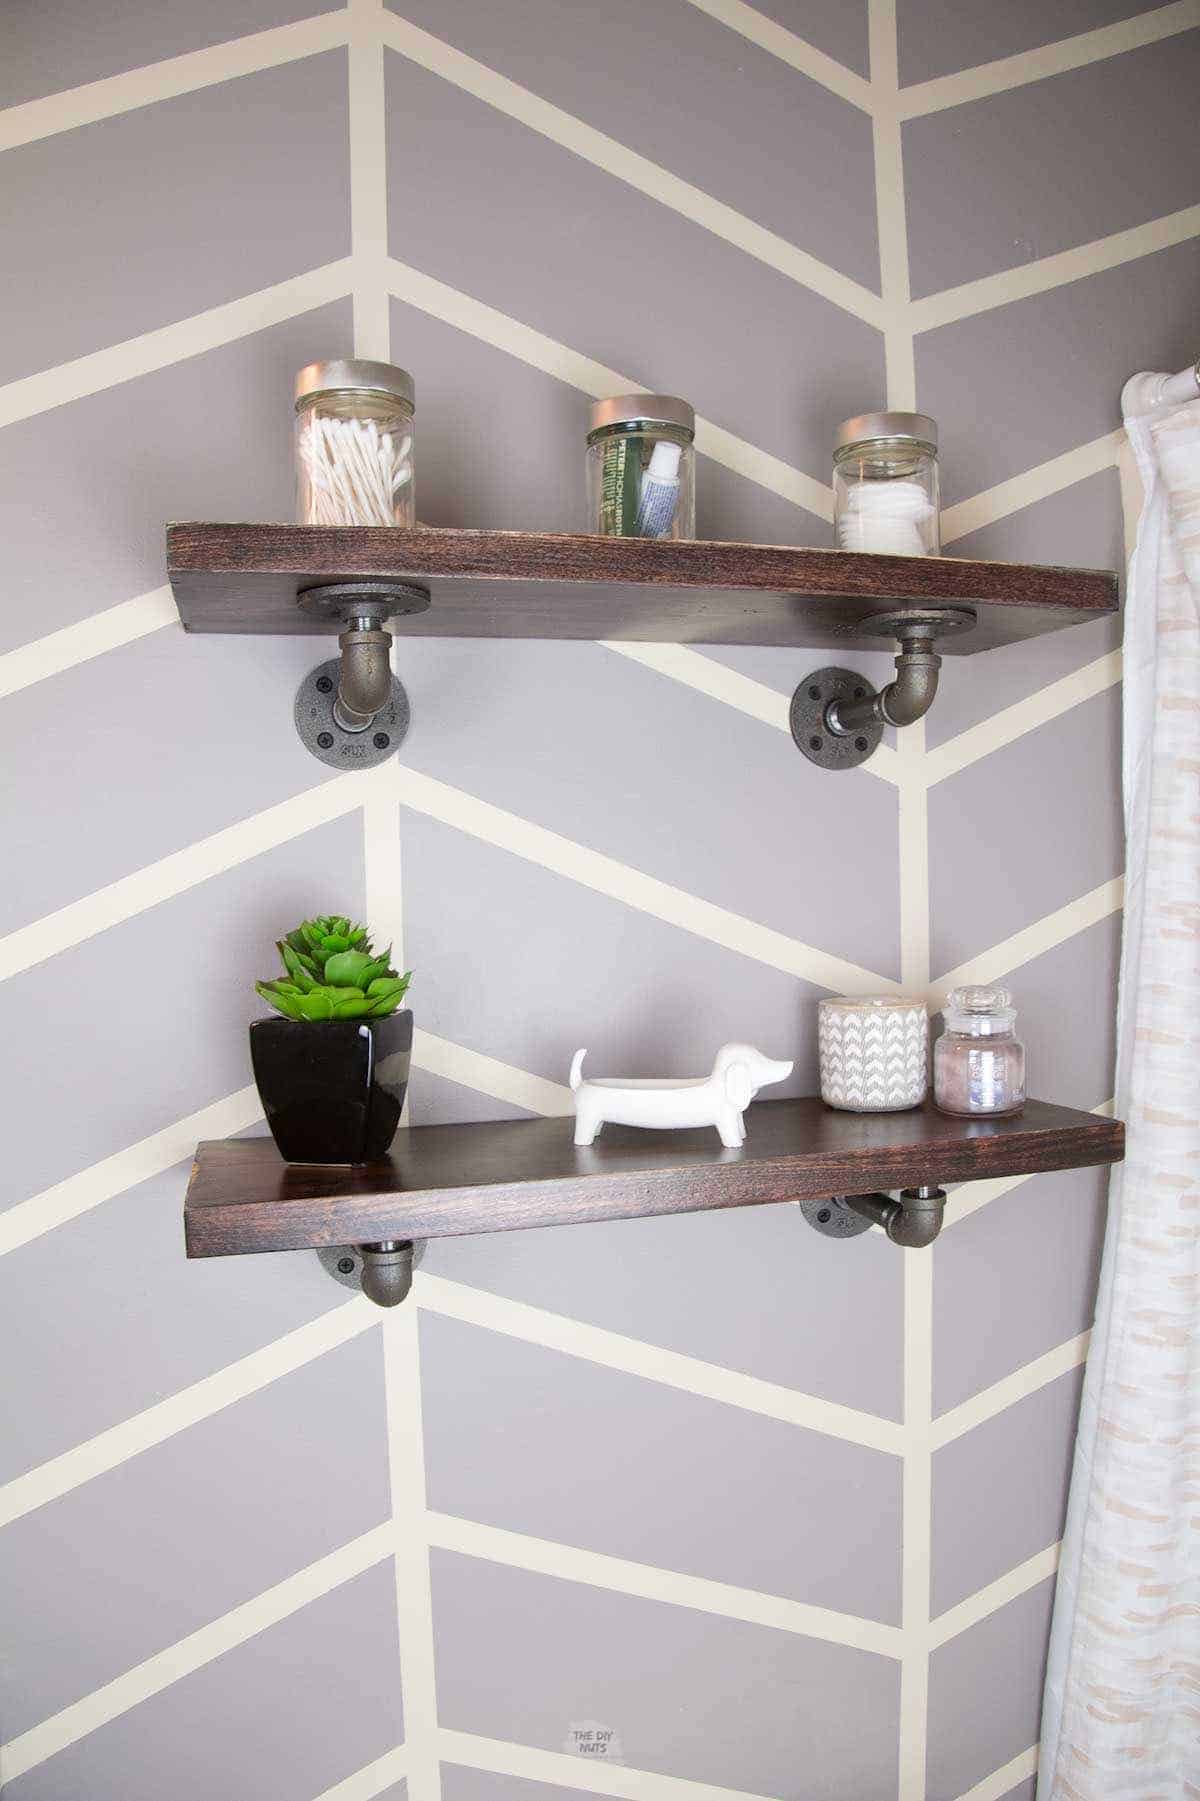
Decorate Your Bathroom
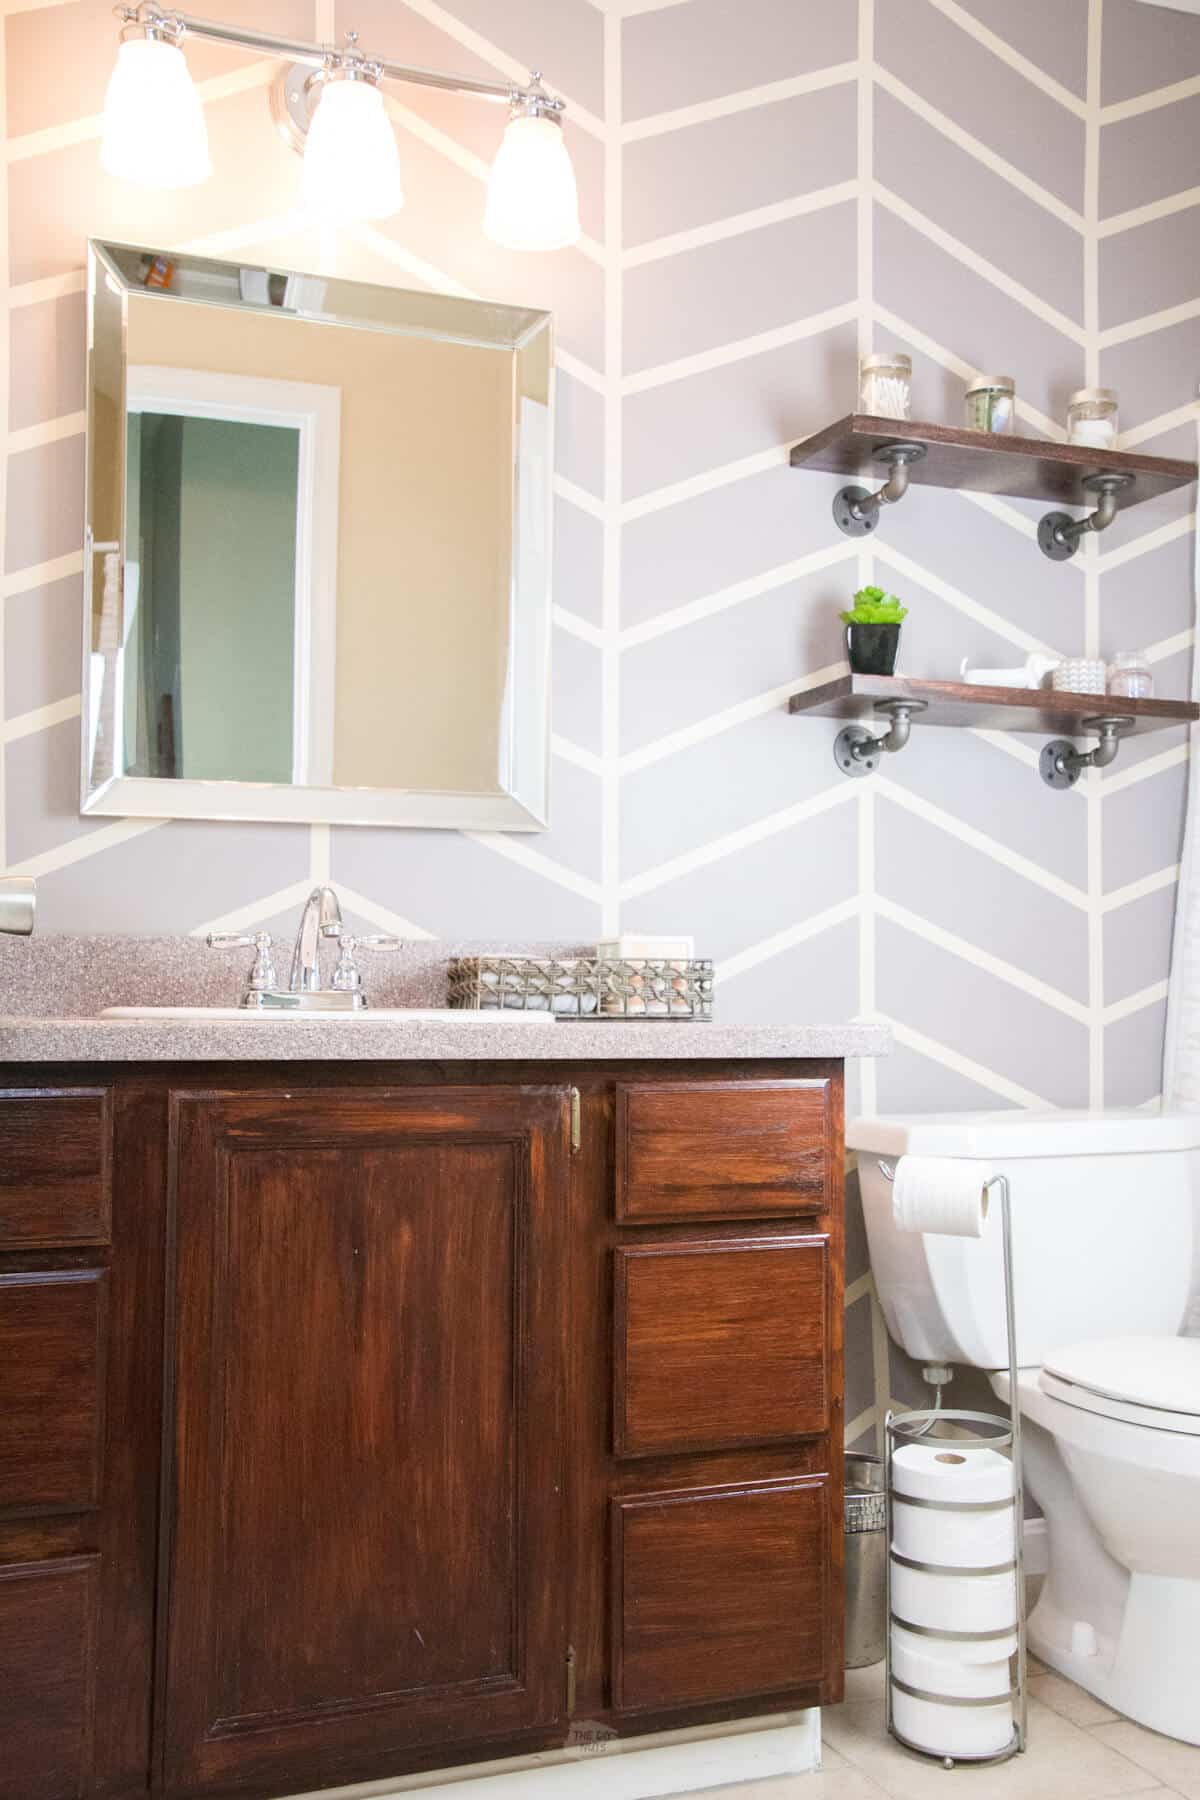
Here we made these industrial bathroom shelves with a bit of help by buying these industrial pipe flanges from Amazon. I love how they look against our DIY herringbone accent wall.
How-To FAQs
There are a few different ways you can try to “seal” your tape on the wall. One of the most common ways is to paint a thin layer of the base color over the paint. You can also try to use an old plastic card, clean foam roller or your fingernail to make sure the painter’s tape is on well. The type of tape will also factor in. Make sure to use high-quality painter’s tape for the best finish.
There are a few ways you could make a herringbone accent wall using paint. You could tape guidelines stamp smaller diagonal lines with a piece of cardboard or sponge within that shape, buy a herringbone stencil, use painters tape to make a herringbone design or draw vertical and diagonal lines with a paint pen.
Yes, accent walls can add a new dimension to any space. Whether it is just simple paint, wallpaper or a type of wood accent wall, builders and designs are still adding these to different spaces.
Follow us on Pinterest, YouTube or Facebook for more DIY inspiration!
Related Reading
- 40+ DIY Shelving Ideas For Any Home Decor Style
- 11 Painted Bathroom Vanity Ideas
- 20+ Budget DIY Accent Wall Ideas You Have To See
We love the painted accent wall in our small bathroom (as well as all the other bathroom DIY projects)! It is always amazing how some elbow grease and little paint can makeover a space.
If you like this tutorial, please give it 5 stars below 🤩🤩🤩🤩🤩. Your support helps us continue to provide unique and budget-friendly DIYs.
DIY Painted Herringbone Accent Wall
Equipment
- Pencil
- Ruler or Tape Measurer
Supplies
- 1″ Painter’s tape this is the best brand to use for these designs.
- Wall Paint In The Color Of Your Choice
Instructions
- Decide on your design and the dimensions between the lines.
- Tape vertical lines 12" apart. Use a level or measure in 3 spots to make sure you are taping a straight line.
- Measure 7" down from the ceiling on every other line and mark with a pencil.
- Continue to measure 7" down from the mark or ceiling.
- Create a diagonal line from each 7" mark. Repeat until design is complete.
- Press the tape on with fingernails, old credit cards or clean foam roller.
- Use a color of your choice and a small foam roller to paint at least 2 coats of paint. Use a paint brush to trim out the edges of the wall.
- Once the paint is dry, pull the tape off the wall starting with the diagonal lines.
- Continue untill all the tape is off. Touch up the paint as needed.
Notes
- Make sure you use high-quality painter’s tape for clean and crisp lines.
- To help with bleeding paint, there are a few different ways you can try to “seal” your tape on the wall. One of the most common ways is to paint a thin layer of the base color over the paint. You can also try to use an old plastic card, clean foam roller or your fingernail to make sure the painter’s tape is on well.
- You can modify this design to fit your space and personal preference. Practice tape on a floor or tagboard first to get the spacing you like.
Great job. I love it❣️
Omg, that wall made a huge upgrade! I love it. Thanks for the inspiration.
Thank you for visiting our site and the nice comment!
The love that went into this project!! Nice work. Th last time my husband and I taped and paint my god it almost ended in divorce! ??
Luckily I did this one on my own when my husband had the other kids at Grandma’s! Thanks for visiting my site and noticing the DIY love that I put into my projects!
Erin, I love, love, love your herringbone wall paint job! What a fun way to add a little accent to your bathroom. I just love doing fun paint colors and patterns in the bathroom to jazz it up a bit 😉
Hi Sarah! Thank you for visiting. The best part about this project was that I already had a can of paint and so it really didn’t cost much at all and really made a huge difference. Thanks for visiting our site!
Hi Sarah! Thank you for visiting. The best part about this project was that I already had a can of paint and so it really didn’t cost much at all and really made a huge difference.
Holy smokes, that made a huge difference. I love it!!!
Thanks for visiting and for the nice comment!
I always have trouble with running under my paint. I’ll definitely have to try this frog tape. I can’t say how much I love the transformation this wall has made. Absolutely love your shelves. I’ve been wanting some so bad. Would you believe they don’t sell flanges around here sigh. Thanks for the great tutorial I’m going to have to find a wall and give it a try.
Hi Jenn! I spent some time in our big box store, trying to figure out if I was going to buy the “right” parts for the industrial shelves. Amazon to the rescue and I didn’t even have to worry about spraying them. It was worth it in my opinion!
This came out amazing! We already redid our bathroom with wall planks, but I may have to do this in the other bathroom! We love our industrial shelves too, great job and so easy!
Hi Anitra! I do love plank walls, too! This painted accent wall will be much cheaper to do! Glad you are a DIY girl like me!
I envy your patience to do this! It turned out amazing!
Hi Brittany! I do love DIY projects and LOVE that feeling when an art project or DIY project finally is finished. I ALSO love that it doesn’t cost me too much money. Gotta love DIY on a budget!
That looks amazing! We will have to try that in our bathroom!
Good luck Claire. Just be patient when using the painter’s tape. I am sure you will be able to have an amazing bathroom accent wall!
This one turned out great. I’m so impressed that you all are able to do this stuff yourself!
Thanks Bethany! I love DIY projects, especially ones that involve painting!
I LOVE that accent wall I was totally looking for something like that for my house!
I am glad that you loved this accent wall! It really does makeover a room!
This is gorgeous and you make it look so easy! I feel like something like this would take me forever but I am inspired by your patience and attention to detail 🙂 Great job!!!
Hi Annie! Thanks for the kind words about this DIY painted accent wall! I really love how it changed our boring bathroom on a budget!
I just came across this, looking for ideas on Pinterest. Your bathroom looks just like mine..well, mine is ugly right now. The other wall, is it just plain?
Hi Shirley. I am so happy you found our blog on Pinterest. Yes, I debated about painting the whole bathroom a lighter gray or even more white, however, I just kept it the cream color. Only the wall that you are seeing has the gray design on it. At first, my husband wasn’t sure my accent wall idea would work, but when it was done he really liked it. I hope that helps! Good luck in your small bathroom makeover.
Erin, Love your DIY bathroom wall and I think I may try to do this in our small bathroom that is set up just like yours. To get behind the toilet….did you take the tank off? I have a hard time just painting behind any toilet.
Hi Gail. I am so happy you love our bathroom makeover. I actually was able to get the small foam roller behind the toilet. As for taping the lines, it was awkward and I am sure that they are not perfect, but I was able to do it well enough. You will want to take the lid off on the toilet in order to be able to reach as much as you can. Good luck with your bathroom makeover!
like what you did on the wall, however this is a chevron pattern not herringbone.
Hi Monique. Thank you for that information. I guess I should say “faux” herringbone design or chevron wall.
But that’s not Herringbone. That’s Chevron. Herringbone has off-set line and intersections.
Thanks for the design terminology and for clarifying the difference between the two types of designs.