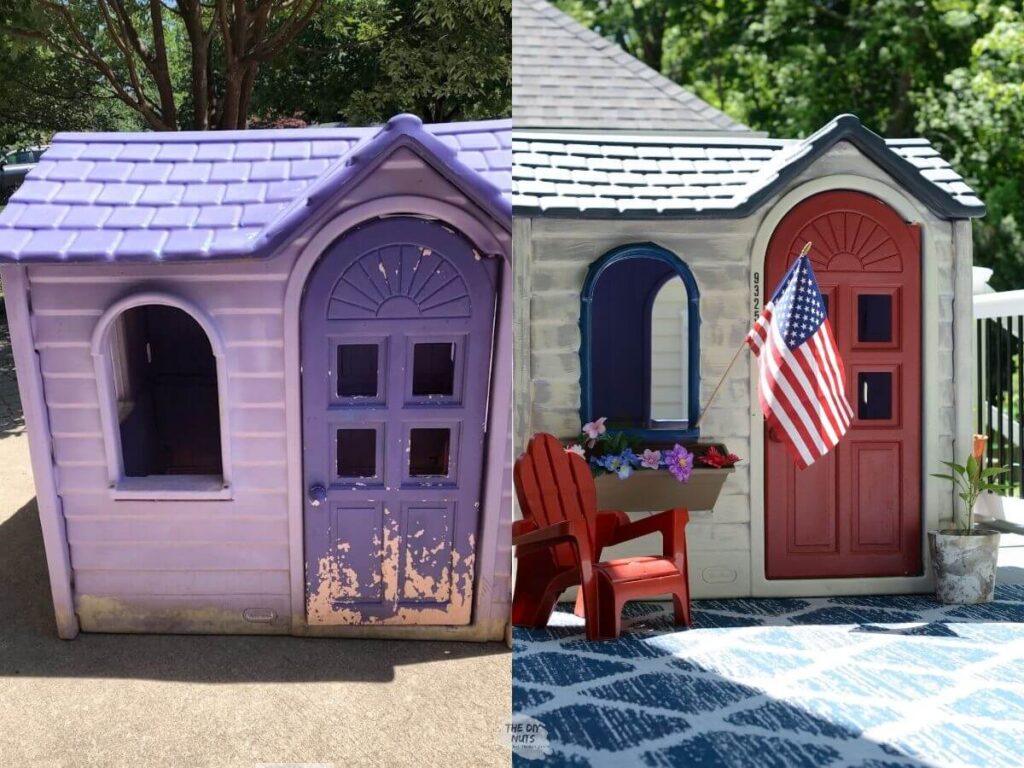
How to Paint A Plastic Playhouse

We are ecstatic when we get something for free! I guess you could say I am somewhat of a junk finder and this DIY Playhouse makeover fits right into that category.
*Disclosure: I only recommend products I would use myself and all opinions expressed here are our own. This post may contain affiliate links that at no additional cost to you, I may earn a small commission. Read our full privacy policy.
It is fabulous when things can get a wonderful makeover for next to nothing. My last free find was this Midcentury modern dresser that we have in our guest room!
Toys That Are Worth It
As far as children’s toys and outdoor toys go, if you can get a Little Tikes toy for close to FREE, jump on it now! Even if it isn’t in the best condition, it will save you a ton of money.
Check out how much this playhouse would cost as a new purchase! I don’t want to brag, but I didn’t pay anything, because my DIY playhouse makeover used supplies I already had.
How to score free or cheap items for DIY makeovers?
We go into a lot more detail in this post about the lingo used to make and save money using BST groups in Facebook. Hopefully, the tips and abbreviations we talk about can help you score some amazing items for your DIY projects.
This wasn’t found like I normally find things. This awesome Little Tikes playhouse was in someone’s garbage at the end of their street. I wish I could take the credit for snagging it, but my mother is the one that knew my kids would LOVE to play in here.

Two Different Times Painting
I guess it is worth noting that this plastic toy redo was done in two different summers. The first time I painted the playhouse it did not cost anything. We used supplies we already had.
The second makeover of the playhouse only cost a little because I had to buy a plastic flower planter box. I honestly had all the other supplies at my house.
Recommended Supplies
- Hose
- Dish Soap (is there any other kind that works like this brand?)
- Sponge
- Paint Brush
- Spray Paint (make sure you are using spray paint specifically for plastic)
- Paint that can be used on Vinyl Siding
- Other Colors of Indoor/Outdoor Latex Paints (we used leftover samples and cans)
- Drop cloth
- Painter’s Tape (optional, but here is my favorite brand if I need crisp lines on any of my DIY projects, like my painted accent walls)
- Optional: Spray Sealer (2 cans will be needed for the whole house)
What paint to use on plastic toys?
You can use a combination of spray paint and exterior paint. Spray paint will be easier, but your set-up may take longer.
- Spray Paint meant for plastics-you may need to also use a primer beforehand if the paint doesn’t have one built in.
- Vinyl Siding Paint-you can purchase small containers in the color of your choice and use it as a base to get the other colors you want. We mixed regular latex paint with a little of this to get a red door.
How To Paint Plastic Toys
1. Thoroughly clean the playhouse. Use dish soap, a hose with a nozzle and my favorite type of sponge. The sponge will help get grim off pretty easily.
Make sure that you try to get off any loose paint chips and that the house is as clean as possible.

2. Choose your colors of spray paint. Make sure it is spray paint that will work on plastics. Here are the spray paints that I used.
I sprayed the moldings, roof and details. I did not worry about using painter’s tape because I knew I was going back and using vinyl siding paint and a brush.

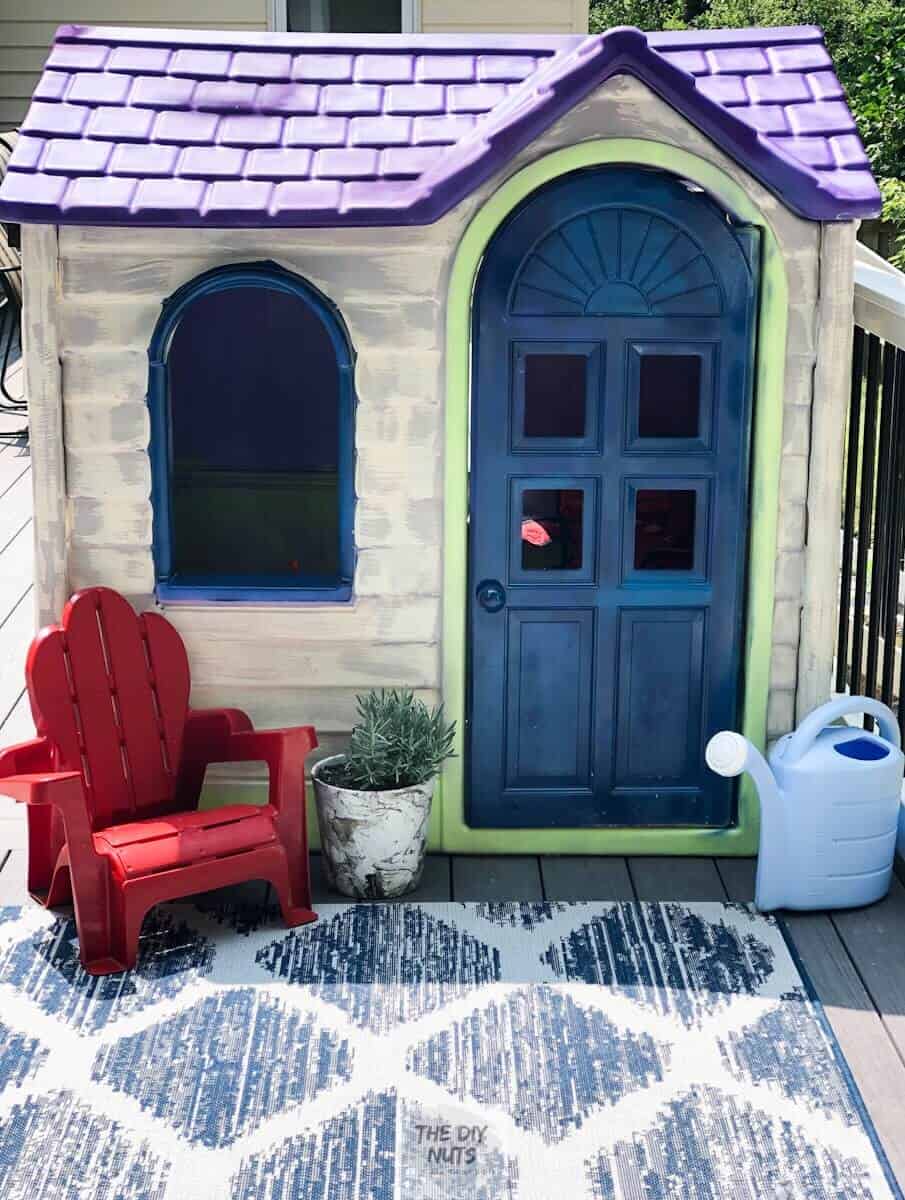
UPDATE: After one year, I am in the process of giving a second makeover to this plastic playhouse where I am not using spray paint. See the extra additions to this playhouse makeover at the end!
Please note that my blue coat of spray paint wasn’t as even as I would like on the door. I ran out of that color and really didn’t want to purchase more paint. It is just an outdoor playhouse after all.
Other DIY Spray Paint Projects
If you are looking for other DIY projects that involve spray paint, check out my office desk remake and how to use spray paint to create a really cool marble effect.
3. Begin painting siding with a brush and vinyl siding painting. This actually took longer than I anticipated because of all the bumps. The reason I used this paint, is because I had it from touching up deck stain spots from previous owners of my real house.

Create A Siding Texture
Once I had put the cream vinyl siding paint, I realized that I would need two coats to really make it look okay. I did not want to have to do that since it did take me longer than I anticipated for the first coat.
Mix a little regular gray latex paint with my cream siding paint. Use this new color to do a dry brush technique on the siding. This covered up any imperfections and made my DIY playhouse makeover become a shabby-chic DIY playhouse makeover.
As you can see in the picture below, it would have been okay to leave with one coat, but it definitely needed something else.

DIY Plastic Playhouse Makeover: 2nd Edition
As I stated at the beginning, after one winter of being stored outside, I needed to give a little refresh to this Little Tikes Playhouse. Last year, I did not paint the roof.
The purple plastic roof had to go. The cream siding color really had stayed, but I needed to update the color of the door.
Using the same cream outdoor latex paint and mixing other latex paints with it (even if they were not meant for outdoors) seemed to do the trick.

In this picture, you can see I mixed these two types of paints in an old cashew jar.
For the plastic door of the playhouse, I mixed a red-based semi-gloss paint (we had leftover from painting a door) with the outdoor latex (cheaper version linked here) to allow it to work on the plastic.
Extra House Details To Add
There are a lot of things you could consider adding to a plastic playhouse after painting. You could consider adding a mailbox, door mat, house numbers, personalized signs or even window coverings.
Here are two extra accessories we added to our playhouse.
Plastic Flower Window Boxes
We added a plastic flower box by screwing it into the playhouse and adding fake flowers that were bought on clearance at a local store for $3.
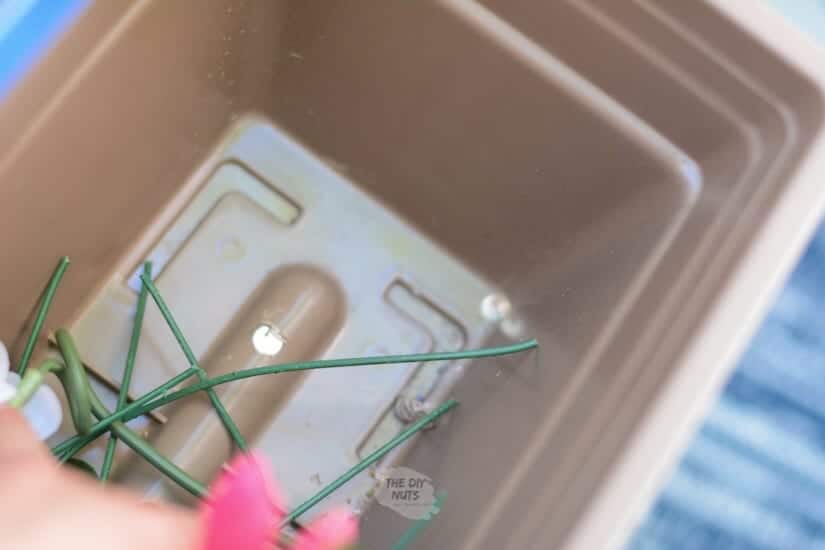
My husband even drilled holes in the plastic container so that any water would drain easily.
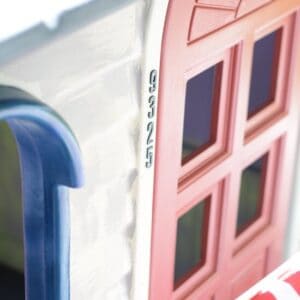
Add Playhouse Address
Originally, we were going to add metal house numbers. We knew when we saw how big they were that it just wouldn’t really work. 4″ numbers were pretty much the standard size we could get and that would have taken up the whole side of the door.
I really was excited when I found these smaller metal numbers, but my local store didn’t have them and I didn’t want to have to pay for shipping.
After searching around and not really liking the mylar numbers or other options, I decided wooden numbers would work. The wooden letters and numbers I used in our DIY word canvas art project worked out perfectly.
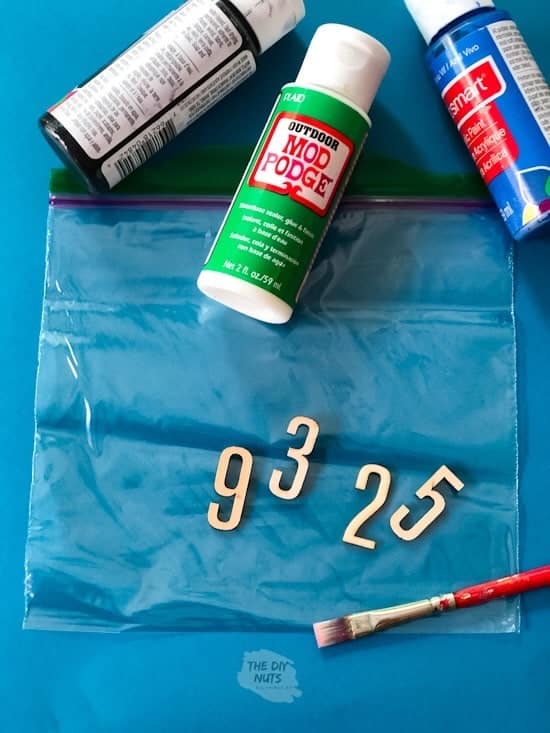
Painted the small wooden letters with cheap craft acrylic paint, seal and glue onto your house.
How to seal wooden numbers?
When they were dry I added this type of mod podge. It is supposed to protect things in the outdoors. You only need a small amount. We applied around 3 coats with a brush and let dry in between. I will have to update this next year to let everyone know how the numbers hold up.

***Wooden letters used for the address***
And when completely dry, we used our favorite super glue to carefully attach the numbers to the house.

How-To FAQ’s
If you so desire, you can spray inside the Little Tikes playhouse. I actually just sprayed one coat in the bottom half to give it an artsy feel, without wasting too much paint. I didn’t want to be inhaling spray paint inside the plastic box of a playhouse for too long!
Around 4 hours total. Even though I say this took longer than I expected, this DIY playhouse makeover was mostly still done while my kids were napping. I was working hard, but it definitely was worth the few hours it took to redo the eyesore of a playhouse.
Taking it apart will give you the best results. However, we painted ours while it was still assembled together because we used a brush and spray paint.
Other Related Outdoor Posts for Kids
It amazes me every time I am able to do a DIY transformation or DIY makeover for nearly nothing
This house is perfect for our younger children to play with, while the older ones can play on their DIY wooden playset. We have so much fun in our backyard.
My children love using their imagination and playing in our playhouse and they do not care that it was a DIY upcycled toy makeover!
How To Paint A Plastic Playhouse
Equipment
- Hose
- Dish Soap
- Sponge
- Paint Brush
- Drop cloth
Supplies
- Spray Paint Make sure you are using spray paint specifically for plastic
- Paint that can be used on Vinyl Siding
- Other Colors of Indoor/Outdoor Latex Paints We used leftover samples and cans
- 2 cans Optional: Spray Sealer 2 cans will be needed for the whole house
- Wooden Numbers
- Outdoor Mod Podge
Instructions
- Clean plastic with sponge and soapy water.
- Let plastic throughly dry in the sun beofre painting
- Use spray paint in large sweeping motions to paint details such as trims, molding and roof. You can also paint the whole house this way.
- Use vinyl siding paint and a brush to cover house completely.
- Mix some gray latex paint with vinyl siding paint in cup.
- Use this darker color nd dry brush on to get a siding texture.
- Let house completely dry.
What a great project! I love how it turned out. We actually had gotten one of these free too, years ago while we were in the city. Dump fees are so high it is much easier on the pocketbook to give it away. I did a full front lawn of free this year and it went so fast, It was awesome! You did a great job remaking yours Erin I wish I had thought about doing their free set years ago. I will definitely see what I can do with their little tikes picnic table! Thanks for another inspiring post!
Hi Jenn! Thanks for the kind words. I do agree sometimes it is just easier to post an item for Free than have to get rid of it yourself. One woman’s junk is another’s treasure! Thanks and good luck with your little Tikes table. Spray paint meant for plastic did seem to do the trick. We will see how it holds up over the different weather cycles we have here.
The impact of the dark blue door with the little red Adirondack chair is fantastic. So great that you could pull this off for free (well, apart from the elbow grease).
Thanks Rachael! I ALWAYS LOVE free DIY projects. You can imagine that I have quite the collection of paints and other DIY supplies!
Excellent tips on FB groups!
Thanks, Trina. When I first started looking at things in the Facebook groups I had to do a little research. I figured that might help some people acquire FREE items for their DIY projects!