Build A DIY Playset For Your Backyard
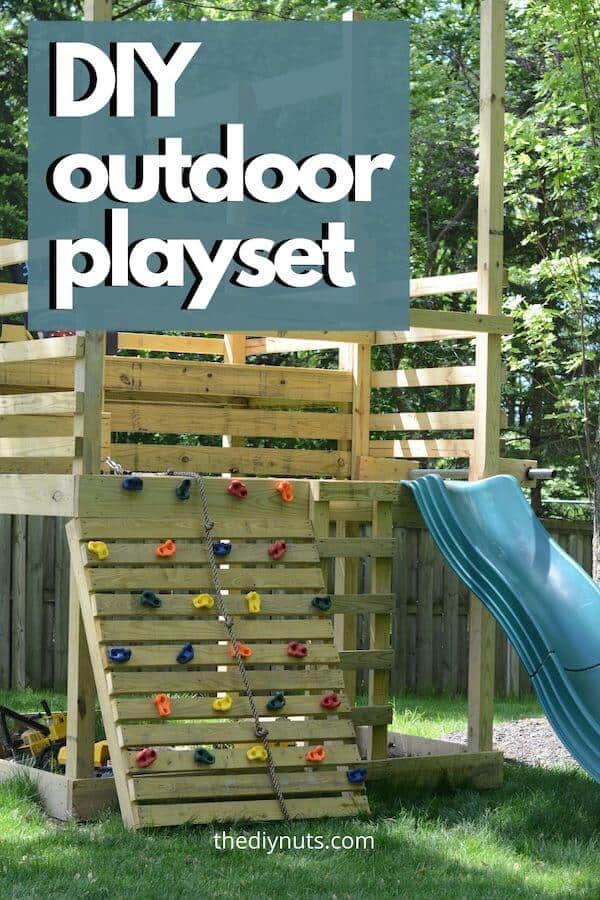
Learn how to build an outdoor playground or playset that is higher quality and cheaper than you can buy at a store. No need to be on a waitlist for those backyard wooden playsets because you can start building one this weekend.
*Disclosure: I only recommend products I would use myself and all opinions expressed here are our own. This post may contain affiliate links that at no additional cost to you, I may earn a small commission. Read our full privacy policy.
DIY projects are perfect for outdoor spaces. You can make it completely yours by adding fun activities for the kids and even a special outdoor space for adults like a screened-in porch project. Our family was so excited to build an “outdoor treehouse” and DIY playset in our backyard.
Why not just buy an outdoor playground for our backyard?
After examining all the premade treehouses, playsets, and playgrounds, we concluded that they were either too cheaply made or too expensive overall.
My husband wanted to get the main playsets from places that don’t even list the prices in their catalogs (what does that tell you about price??!) Therefore, this DIY family decided to build our own DIY outdoor children’s playset.
At the end of this post, I will list the cheaper outdoor playsets that we considered buying.
Considerations When Building Your Own Homemade Playset
- How much do you want to spend? Pressure-treated quality lumber and/or natural wood for the outdoors is not necessarily cheap.
- Where will you be putting your playset?
- How long do you want this to last? What age range do you want your playground to accommodate?
- What safety concerns will you address? You will need to build features to make sure that your DIY playset is safe.
- What other accessories may you want to purchase?
Extra Swingset Accessories Used
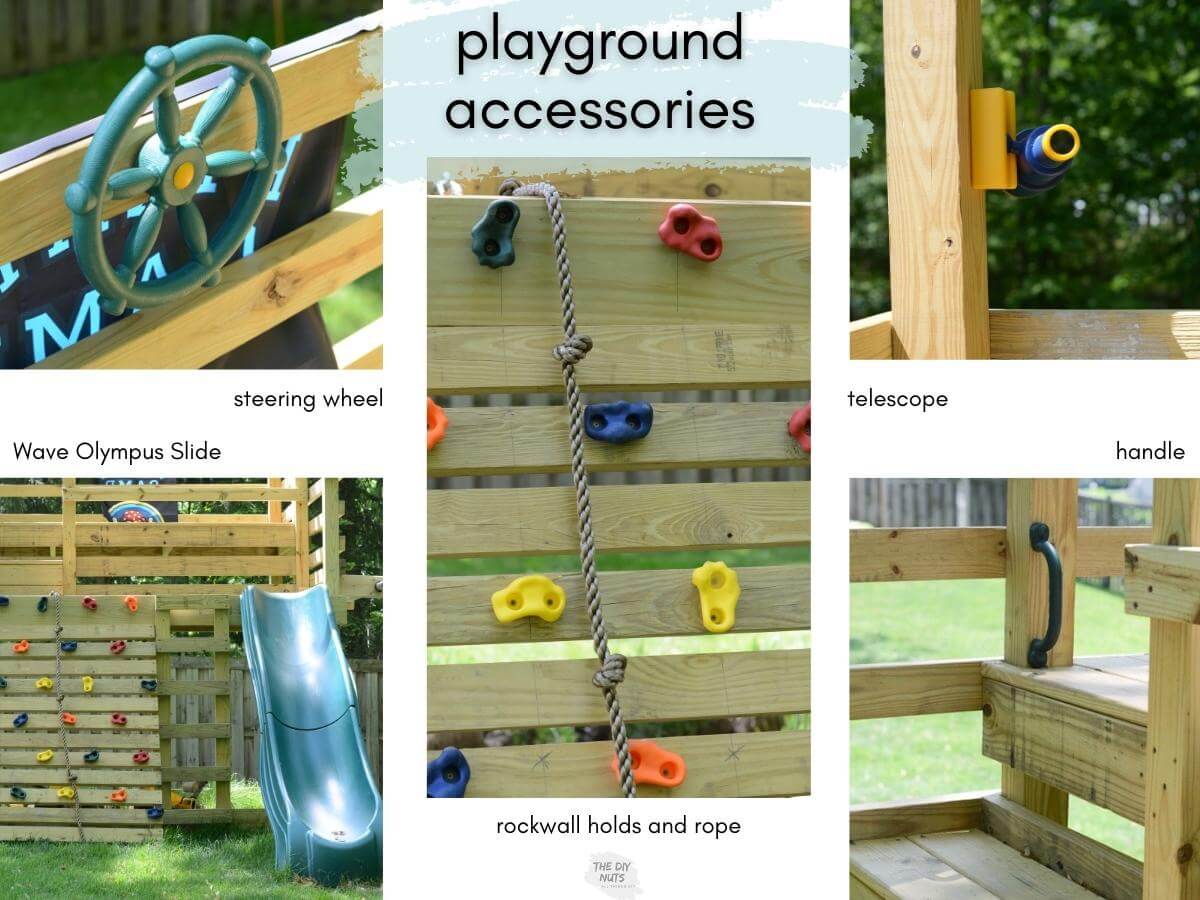
We built the main structure for our playground but bought a few additional items. Here is a list of the playground accessories we purchased.
- 5′ Deck Slide: We used an Olympus Wave Slide, but another 5′ slide option is also available.
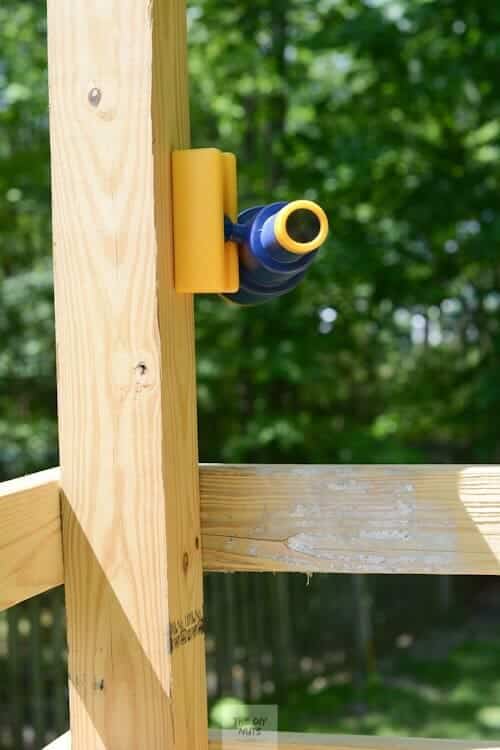
- telescope
- pirate flag
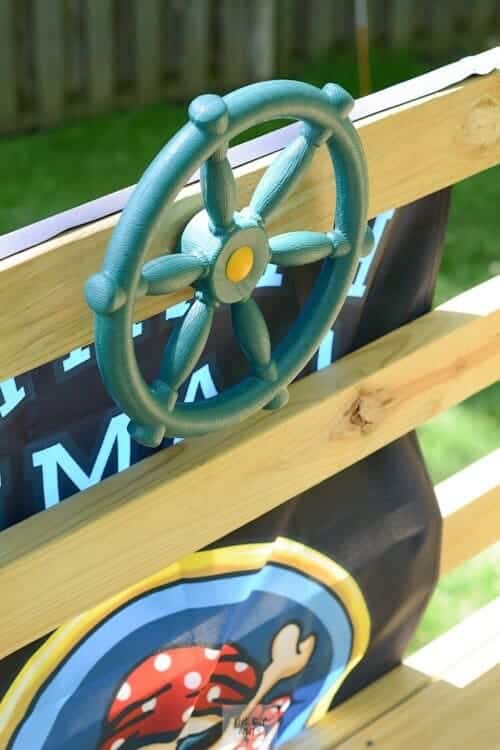
- steering wheel
- climbing rope and climbing rock holds.
- In addition, we have a spot to add a swing or long rope to climb.
Unfortunately, the slide (Olympus Wave Slide) that we ordered is sometimes not available. You may have to shop around to find a different slide from another highly-rated brand like this one.
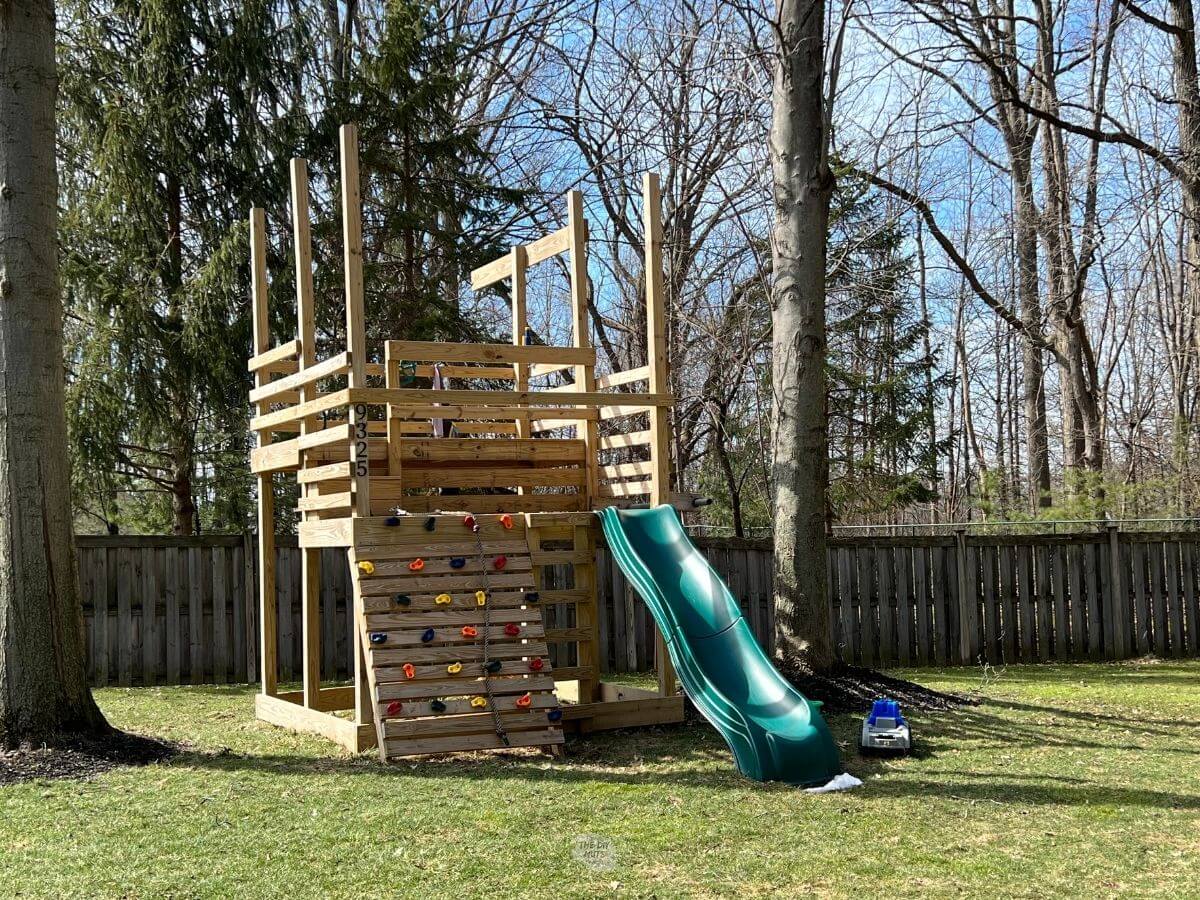
Designing Your Playset
- We decided to put ours between two trees for the shade
- Ours is 8’ x 8’ because this makes the least amount of waste – most bang for your buck in using 16’ long pieces
- Our major limiting factor for height was the pre-made slide we bought from Amazon. It is designed to be mounted 5’ off the ground.
- Sketch everything out and take the sketch to your local lumber store to bounce ideas off of them. It never hurts to have a second opinion.
Did we need a building permit?
We did not apply for a local building permit. Each municipality has varying rules for structures like this. Please do your own research.
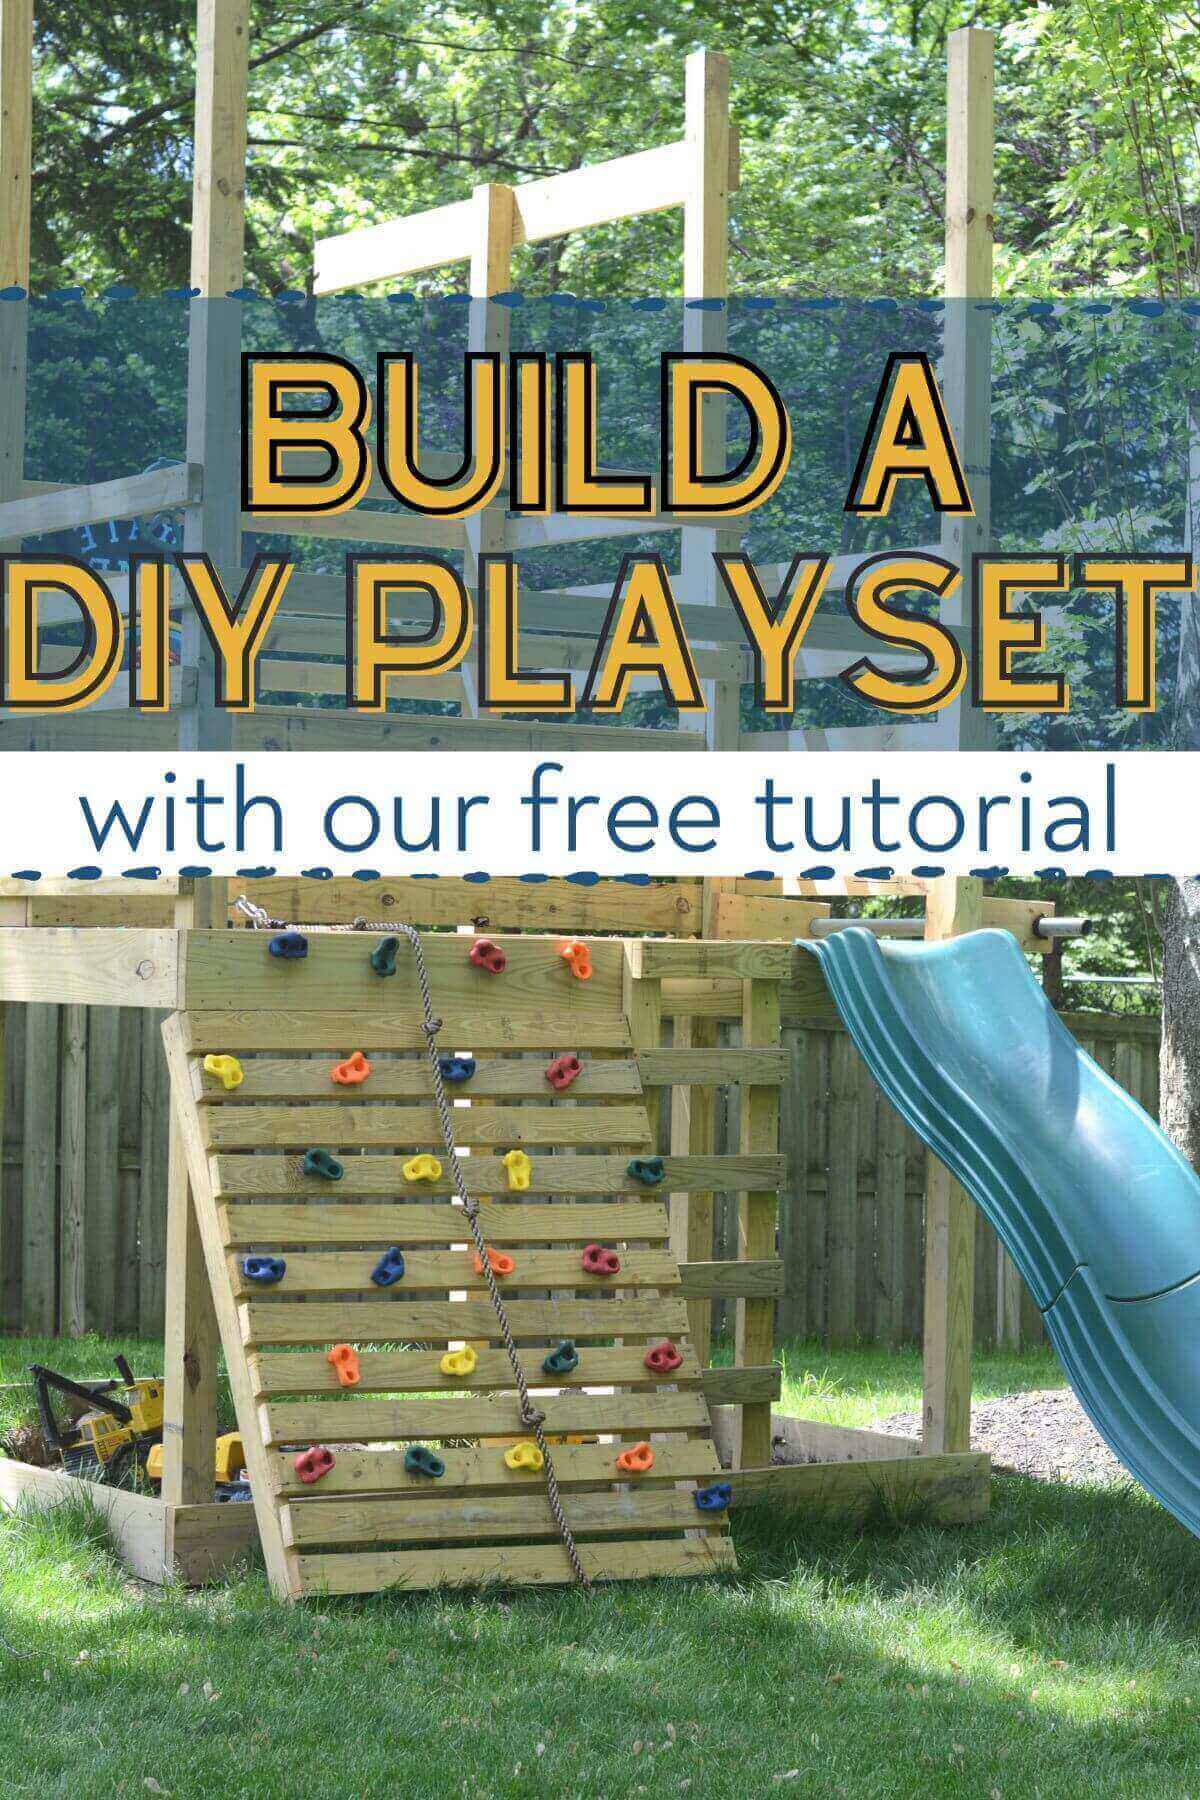
Outdoor Playset Plans
Recommended Tools and Materials List
- Six (6) 4″ x 4″ x 16′ posts pressure-treated
- 2x6x16’ – pressure-treated
- 2x4x16’ – pressure-treated
- 2x10x16’-pressure-treated
- 1x6x8 – pressure-treated deck boards
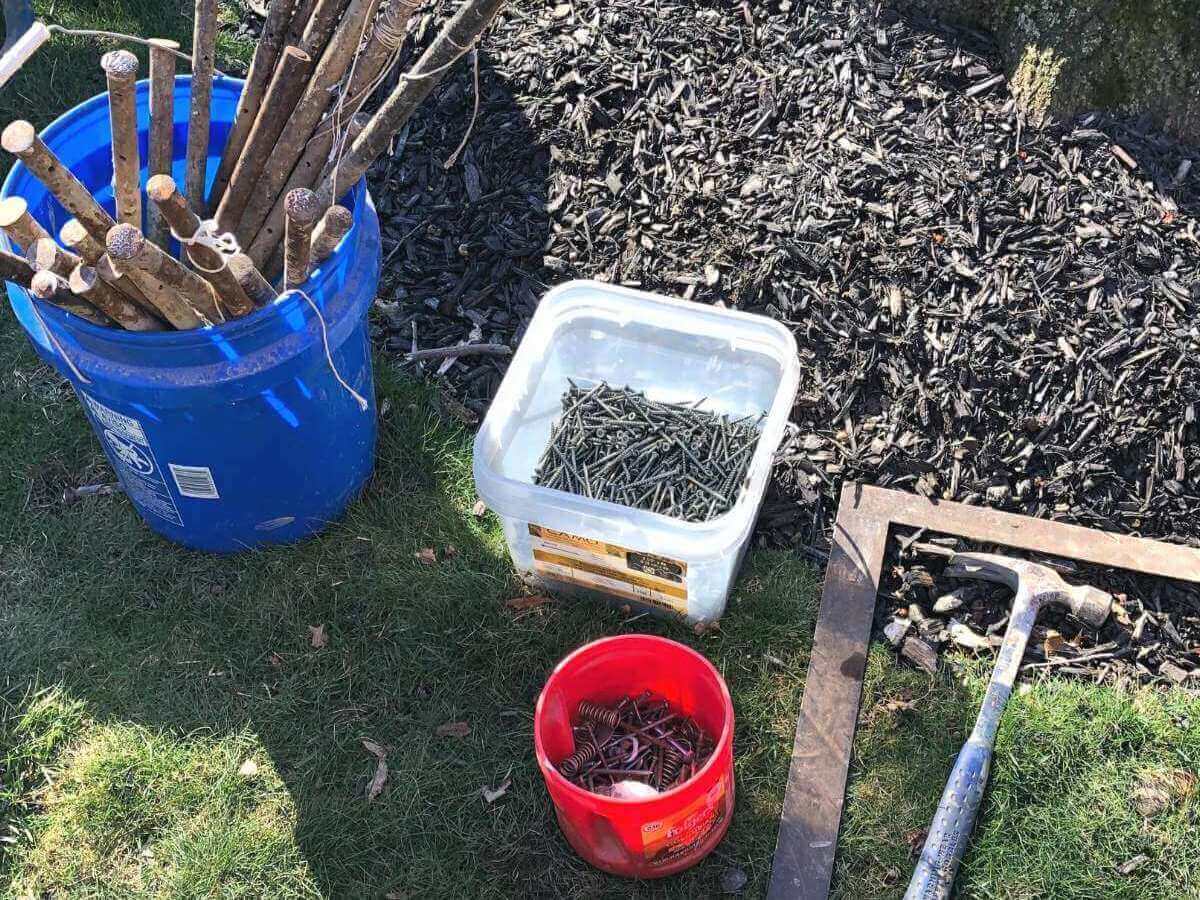
- 18 bags of Quickcrete (bagged concrete) – 3 bags per hole/post
- Exterior deck screws
- Double head #16 nails
Any playground accessories you want to add (see our list above)
Where To Buy Lumber
Full disclosure: Our local lumber store delivered all of wood and lumber to our driveway. Local lumber stores are a great resource for this and all other types of projects. Above, I have linked to the items at big box stores so that you can see them specifically since our local lumber store doesn’t even have a website I could link to.
You will want to do research on whether you are comfortable using pressure-treated wood for a child’s playset. The pressure-treated wood of today (after 2003) seems to be safer, but you need to make that choice based on what you feel comfortable with.
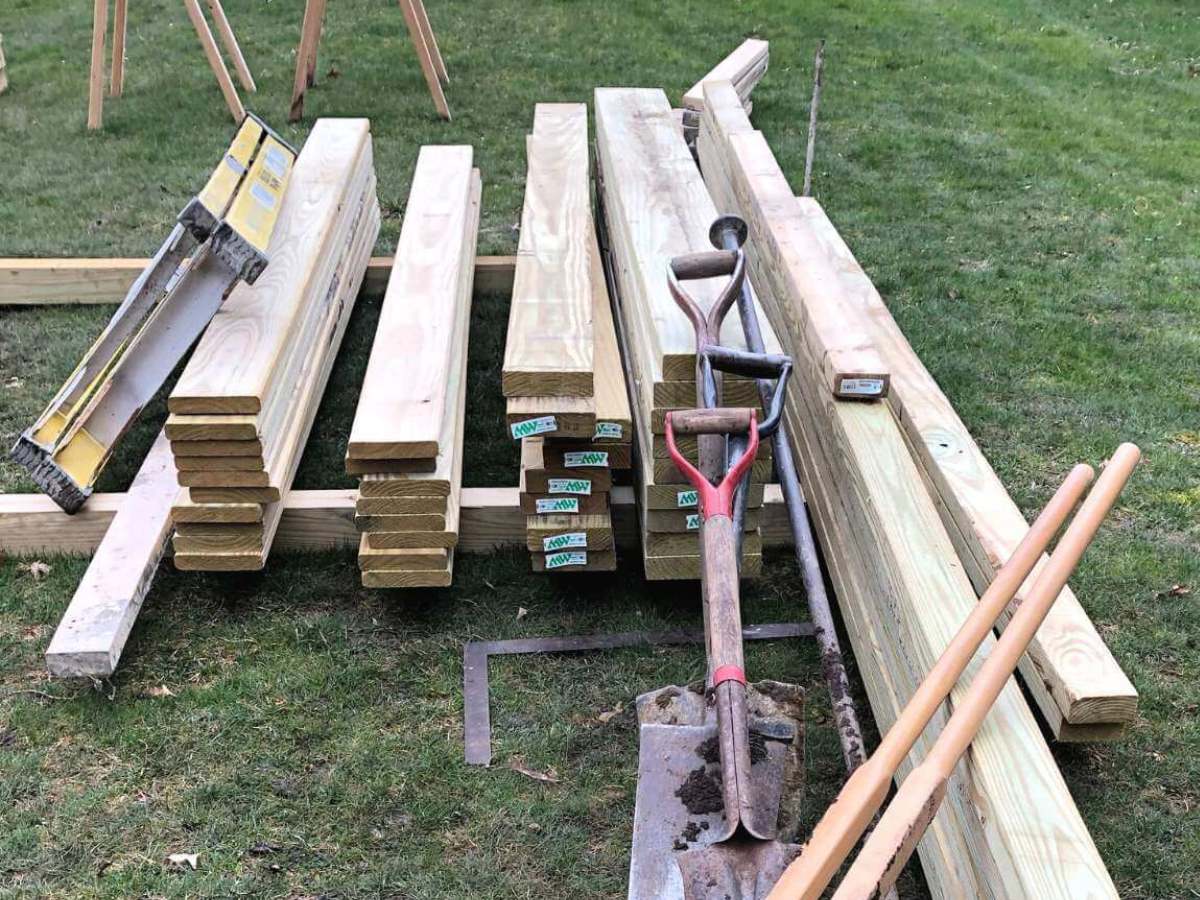
Tools Needed
- Shovel
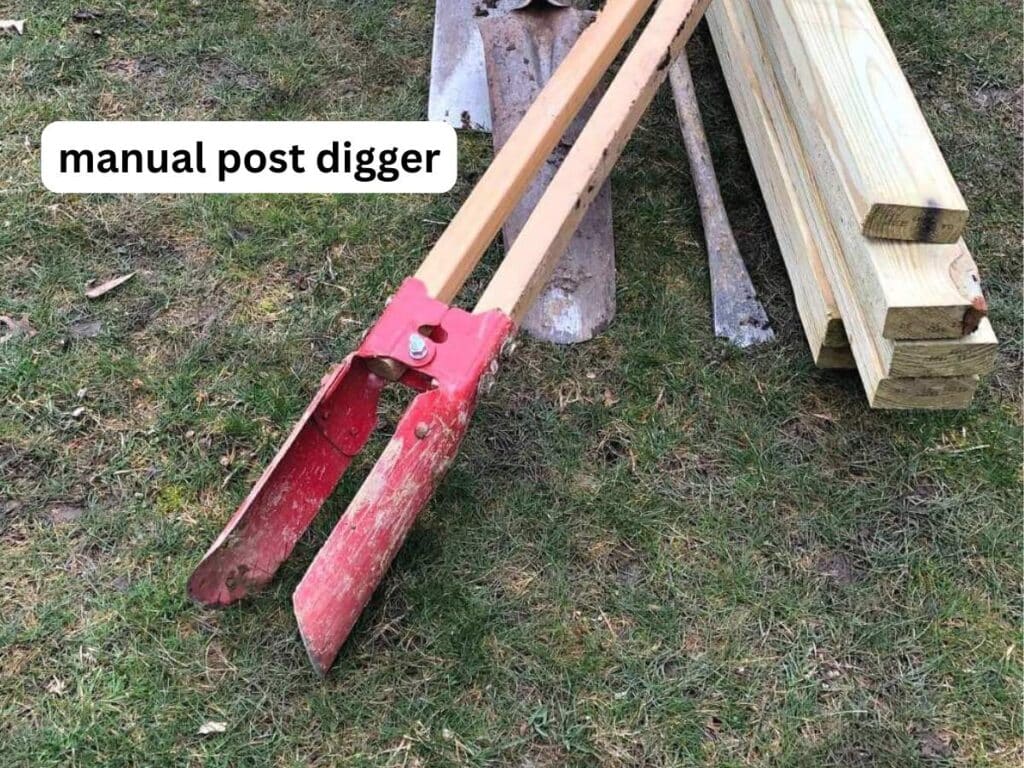
- Post Hole Digger
- Wheelbarrow: you will be mixing concrete in this so if you have an old one, we recommend using that.
- 4’ Bubble Level
- Screw Gun
- Circular Saw
- Sledge Hammer
- Tape Measure
- Spud Bar
- Garden Hoe (for mixing concrete)
- Vice Grips
- 36” long nail stakes
- 6’ step ladder
Building Your Outdoor Playset
Step 1: Design Your Playset
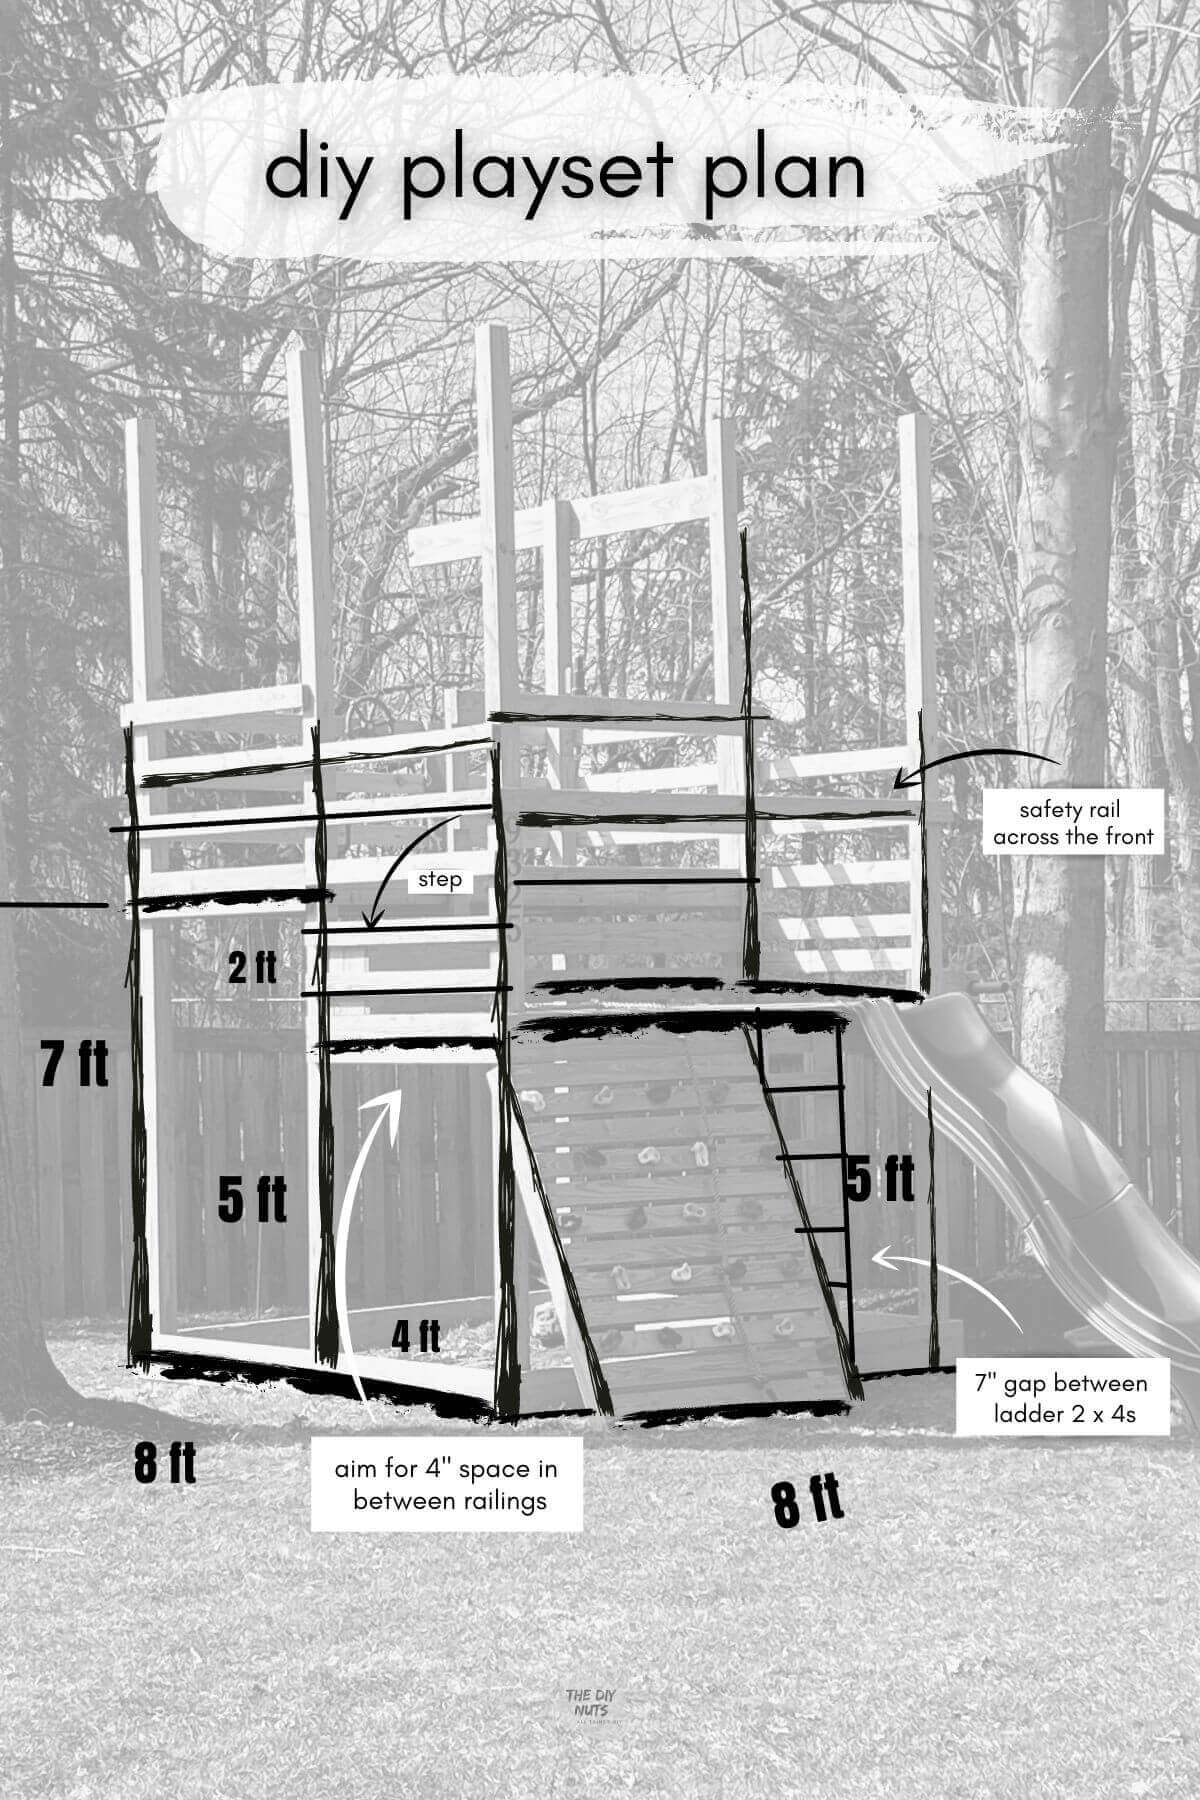
Choose the footprint and size of your playset structure. See the above sketch and dimensions of our playset.
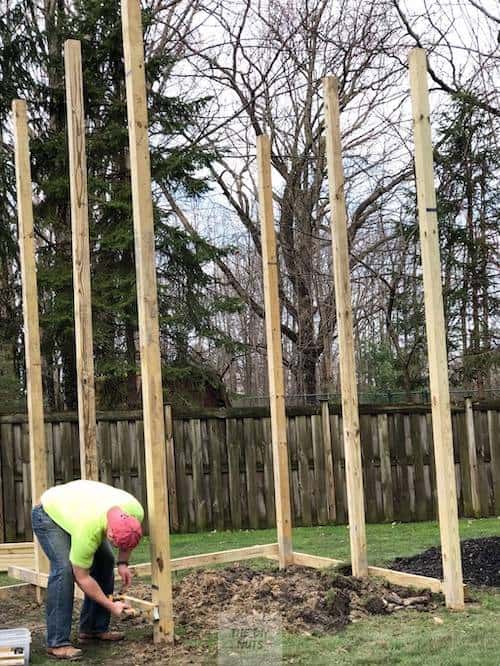
Step 2: Layout Post Design
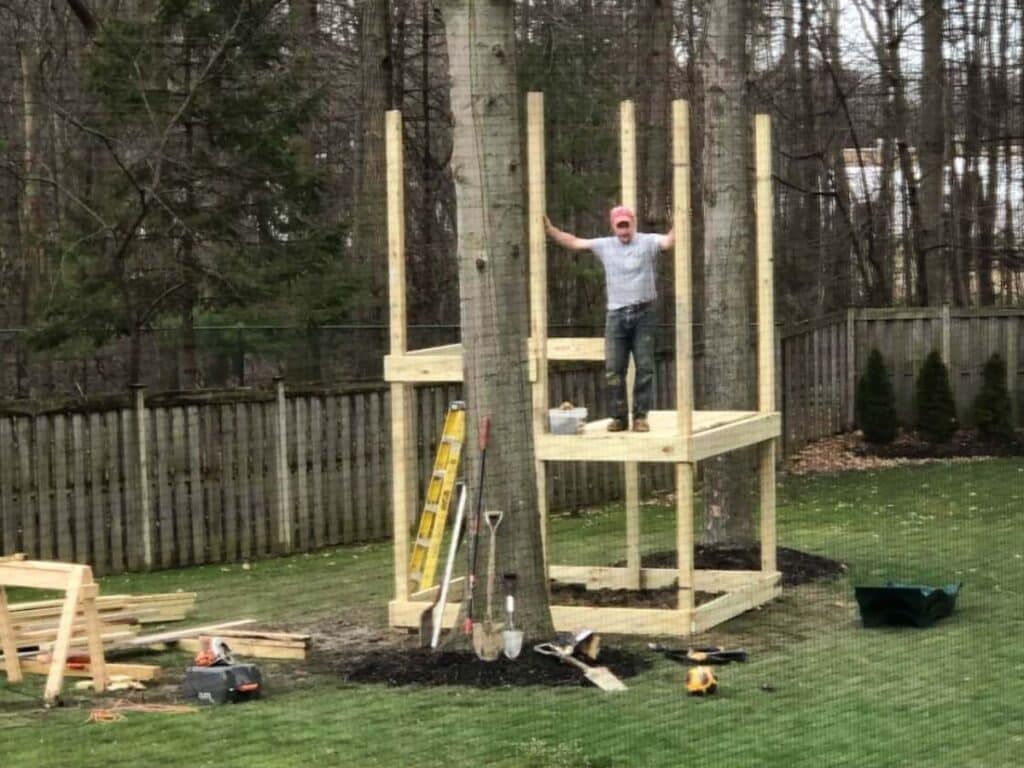
Layout post locations at corners of the structure. This playset has two levels so 6 wooden posts were marked out.
If you only are going to have one level for your “treehouse”, then you may only need 4 posts depending on the size of your structure.
Step 3: Look At Your Layout From A Distance
Take a step back and make sure the orientation is how you want it. This might seem silly, but it is important that you take some time and really make sure you are building this playset in the right location for your yard.
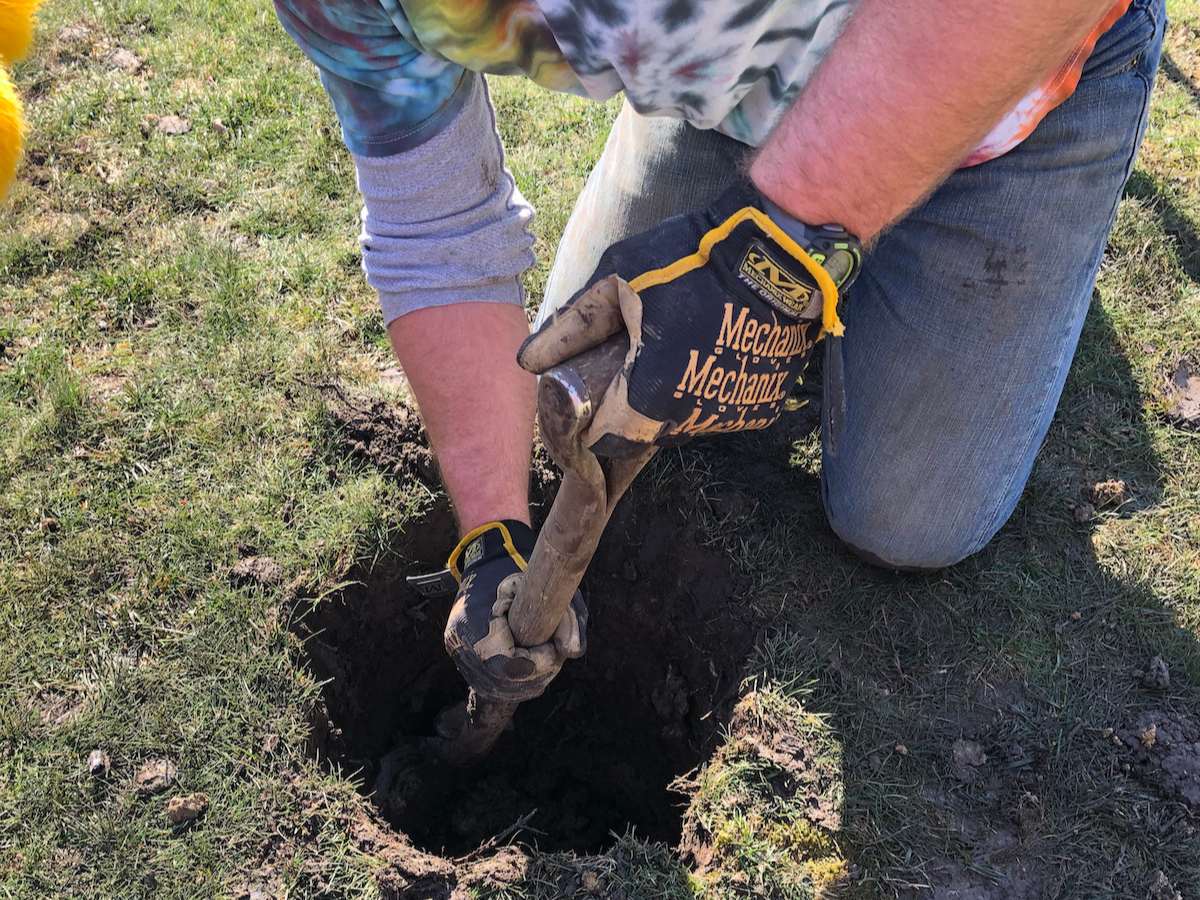
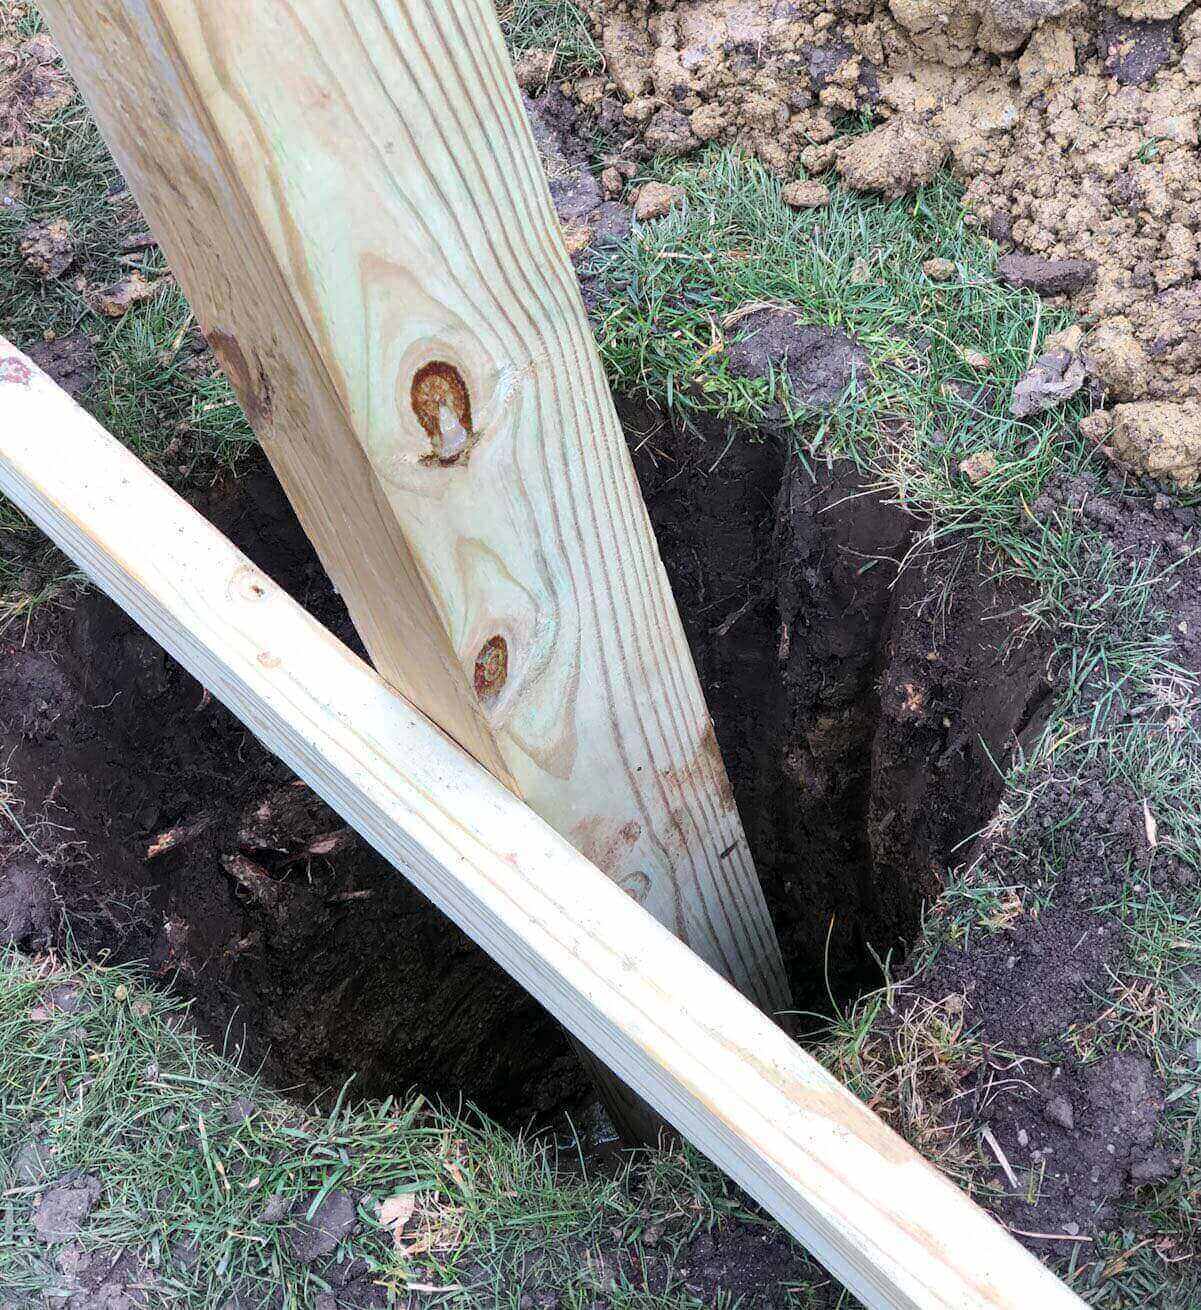
Step 4: Dig One Corner Post Hole
Use a shovel and a post-hole digger to dig down below your locale’s frost line (36” to 42”) depending on where you live.
Post Digging Tips
- This first post will act as the structure’s benchmark. This means that everything else will be laid out off of it.
- Dig and set one post then cut an 8’ 2”x 4”. At the end of the 8’ 2” x 4” mark and dig for the next post hole (verify initial measurements).
- With such a small number of holes to dig, a rentable electric auger from a home improvement store is not really needed. However, here is a link to rent one at Home Depot (because not everyone wants to do this manually).
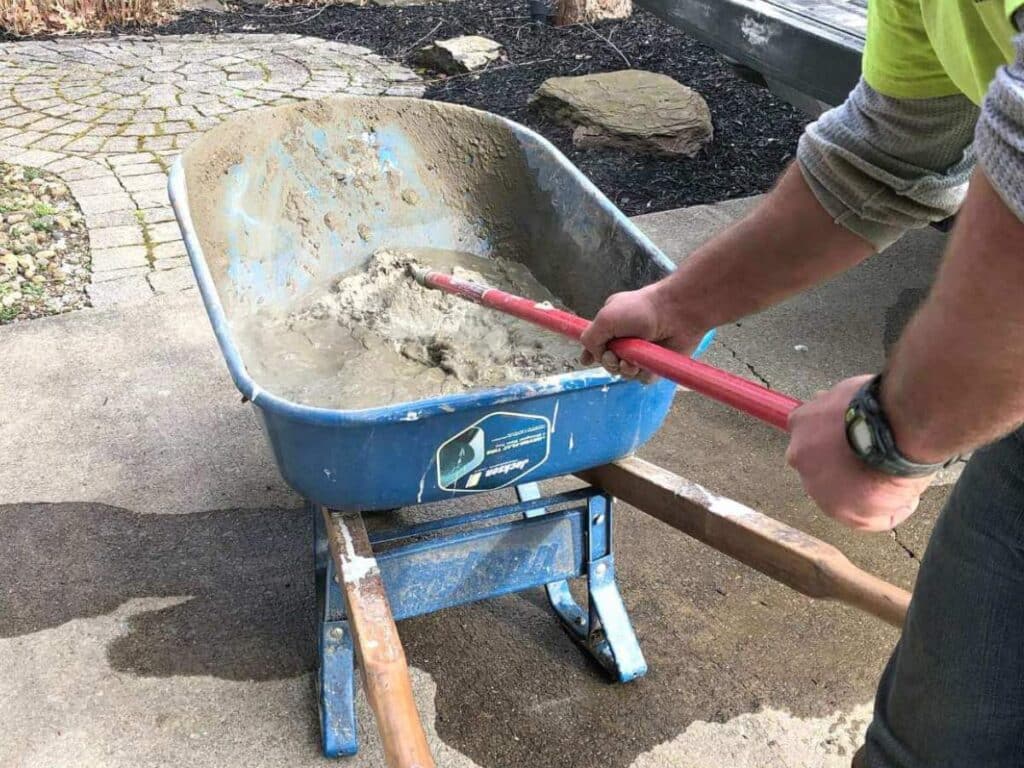
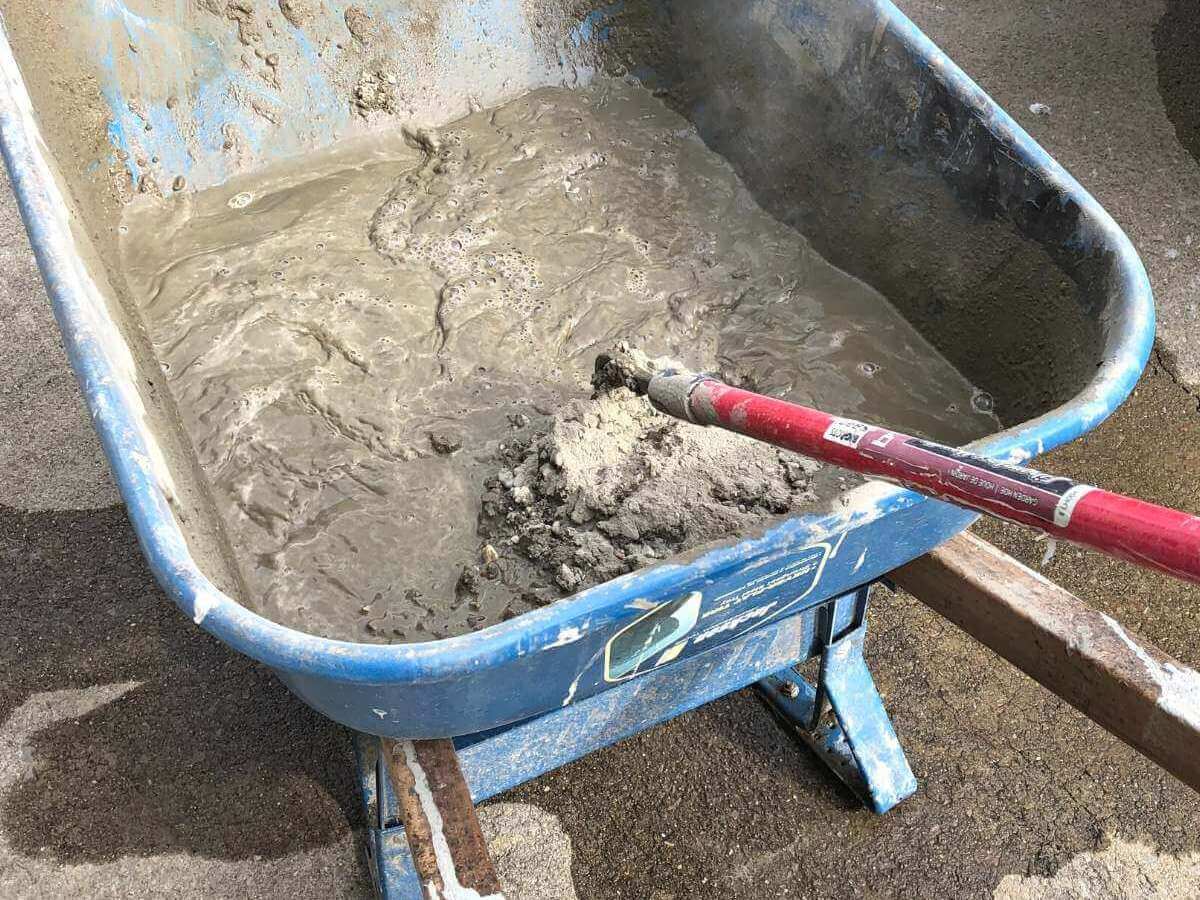
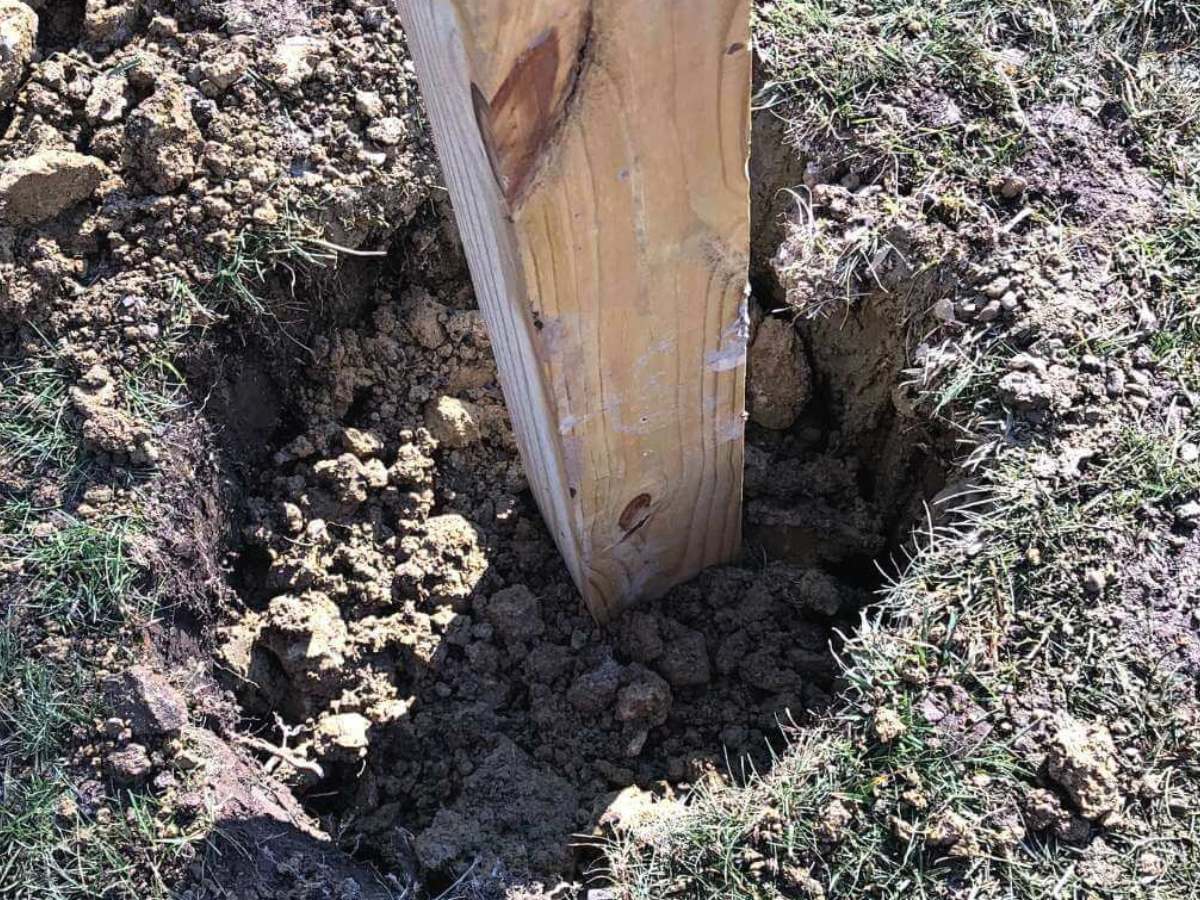
Step 5: Mix Bagged Concrete And Set First Corner Post
Once the post holes are dug mix bagged concrete in a wheelbarrow and pour it around the post. Leave concrete at least 6” below grade (below the existing grass) so new topsoil and grass can grow.
We used a similar post technique when we created our DIY raised garden boxes on a hill. We completed both of these backyard projects within weeks of each other.
By the time you are done, you will have an approximately 12” wide (diameter) hole for the post.
Step 6: Make The Post Plumb
Make sure each post is plumb by putting a 4’ level on it (in both directions). Plumb means that the post is level on a vertical surface. You want your posts straight!
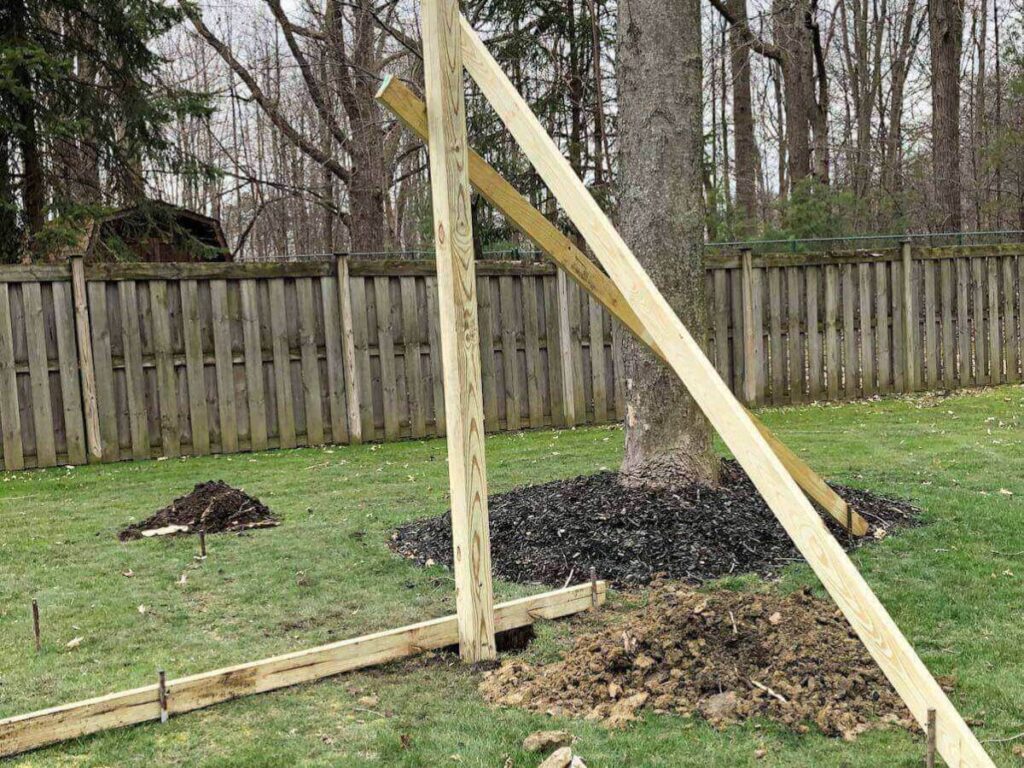
The post will be appx. 12’ to 13’ out of the ground so you will need to “kick” the post back to the ground to make it plumb (see above pictures).
What does it mean to kick the post?
When you “kick” the post, it means that one of the 4”x 4” x 16’ long posts will be 42” in the ground (42″ down in the ground with appx. 12.5’ out of the ground) and needs to be supported in two directions until it can be attached, by additional lumber to the other to be set posts.
To do this you “kick” the post back to the ground at approximately a 45-degree angle. At the post, you will screw a 2 x 4 to it. At the ground level, you put a nail stake into the ground and then attach the other end of the 2 x 4 to the nail stake with a nail to the stake.
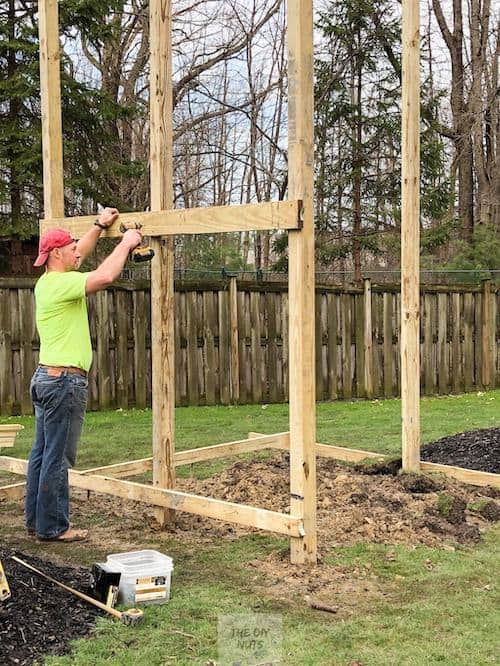
Step 7: Make Sure Post Location Are Square
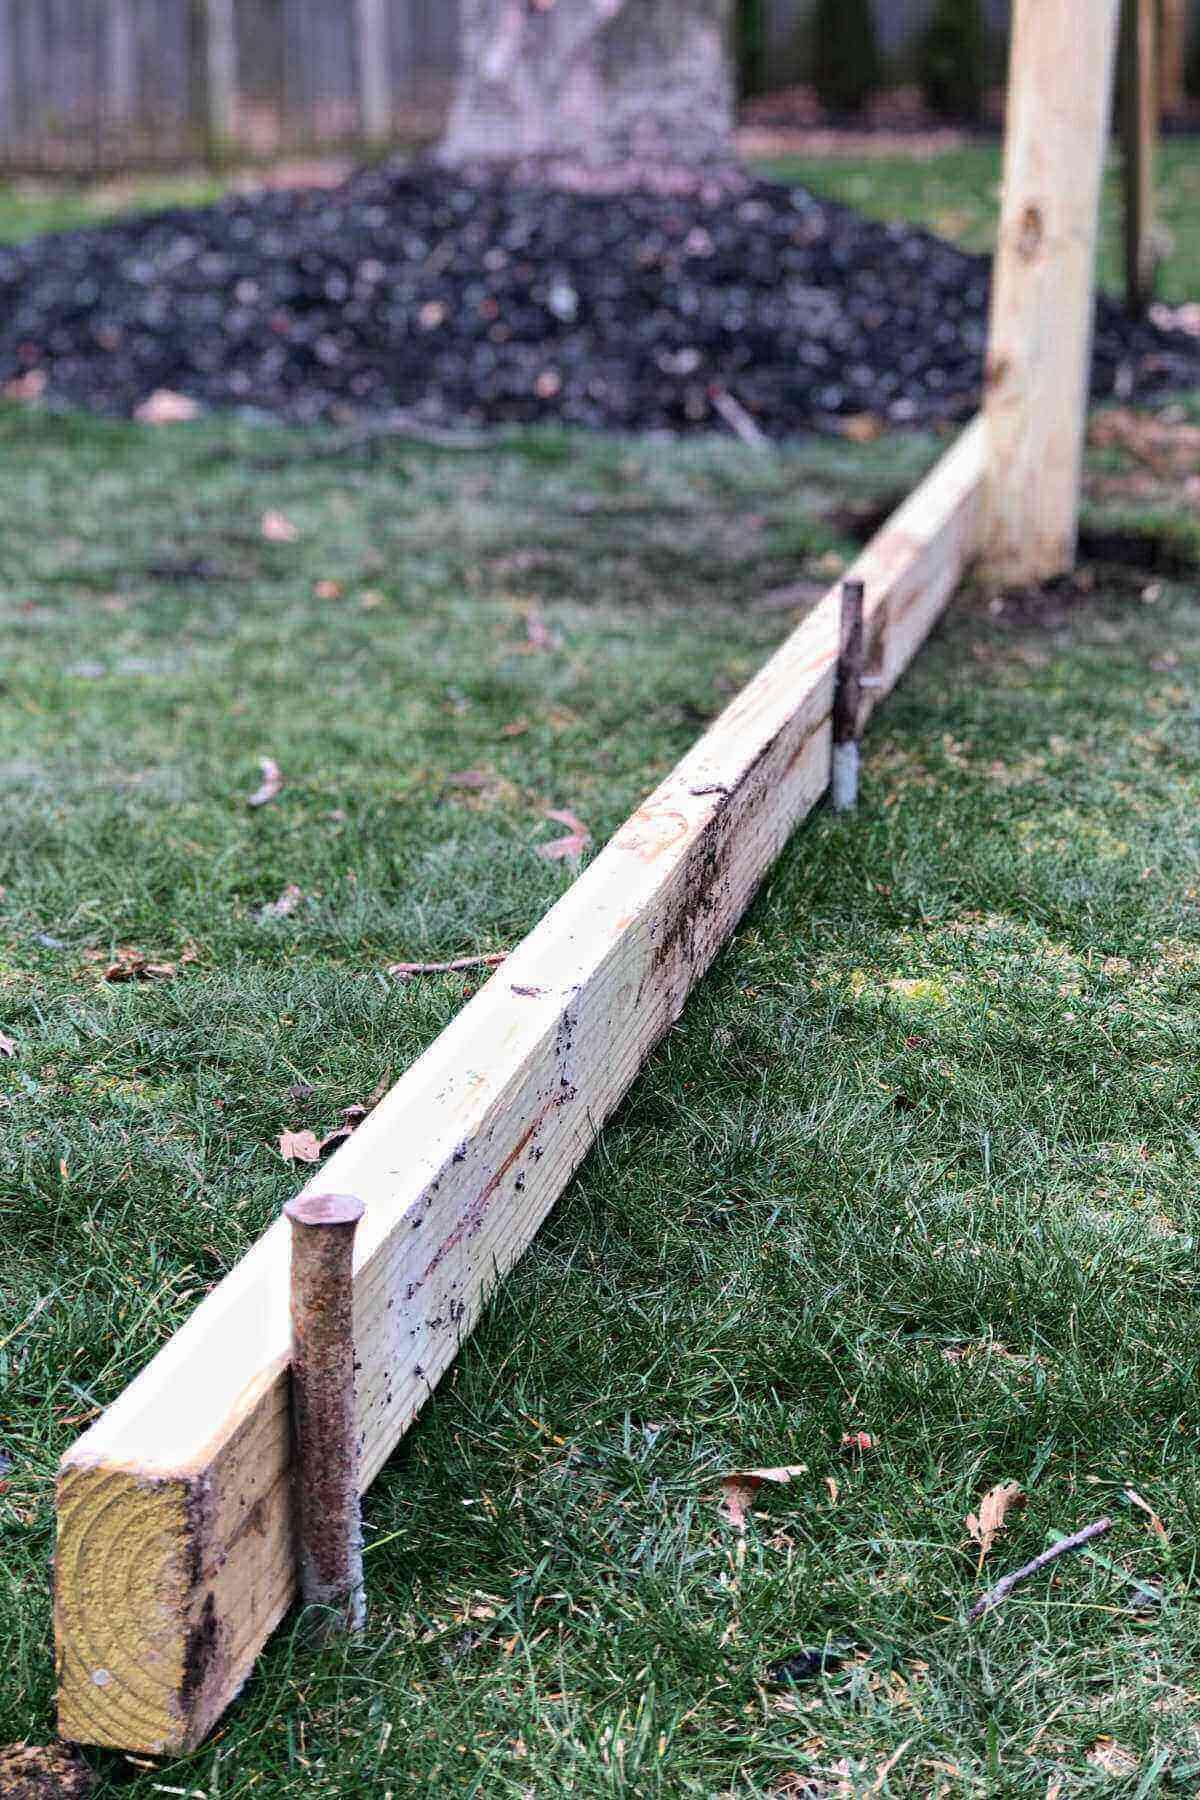
To make sure you have correctly marked your post location, we set one post first and then use batter boards to help lay out the other corner post locations.
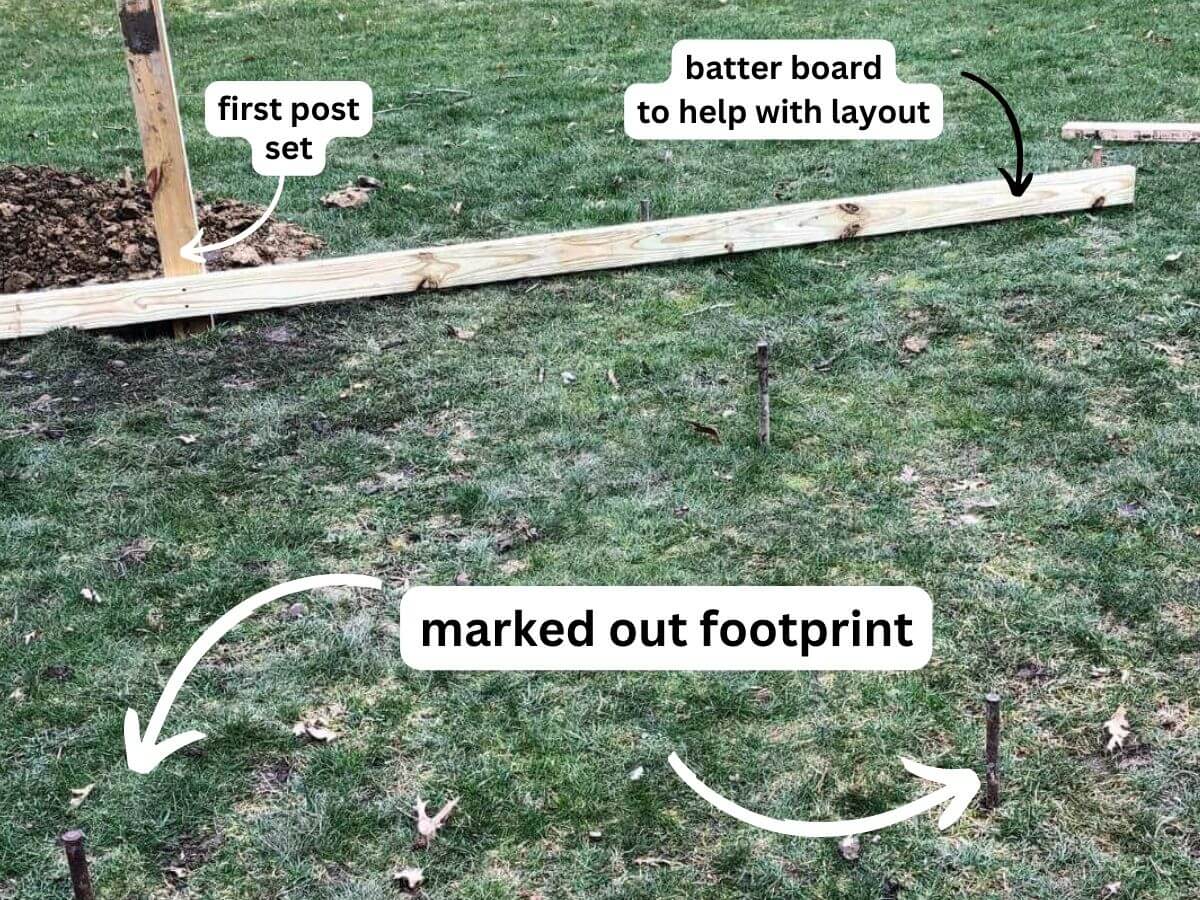
Here you can see an old 2 x 4 and nail stakes helping to lay out the other post locations.
Step 8: Repeat Steps For All Posts
Once posts are marked you can verify the post location will be square by measuring the hypotenuse of the triangles created. Your measurements should equal C^2=A^2 + B^2.
Once you have confirmed your layout is square, follow the above steps to dig and set all 4 or 6 posts.
Step 9: Attach 2 x 4 To Bottom Posts
Attaching a spare 2 x 4 to the posts prior to placing the concrete in 5 remaining post holes.
Step 10: Attach 2 x 4 In The Middle
Once the first post is set, cut 2 x 4s and attach them at the correct dimension to the next post at ground level and approximately 10’ off the ground. This will keep the structure square based on the first post.
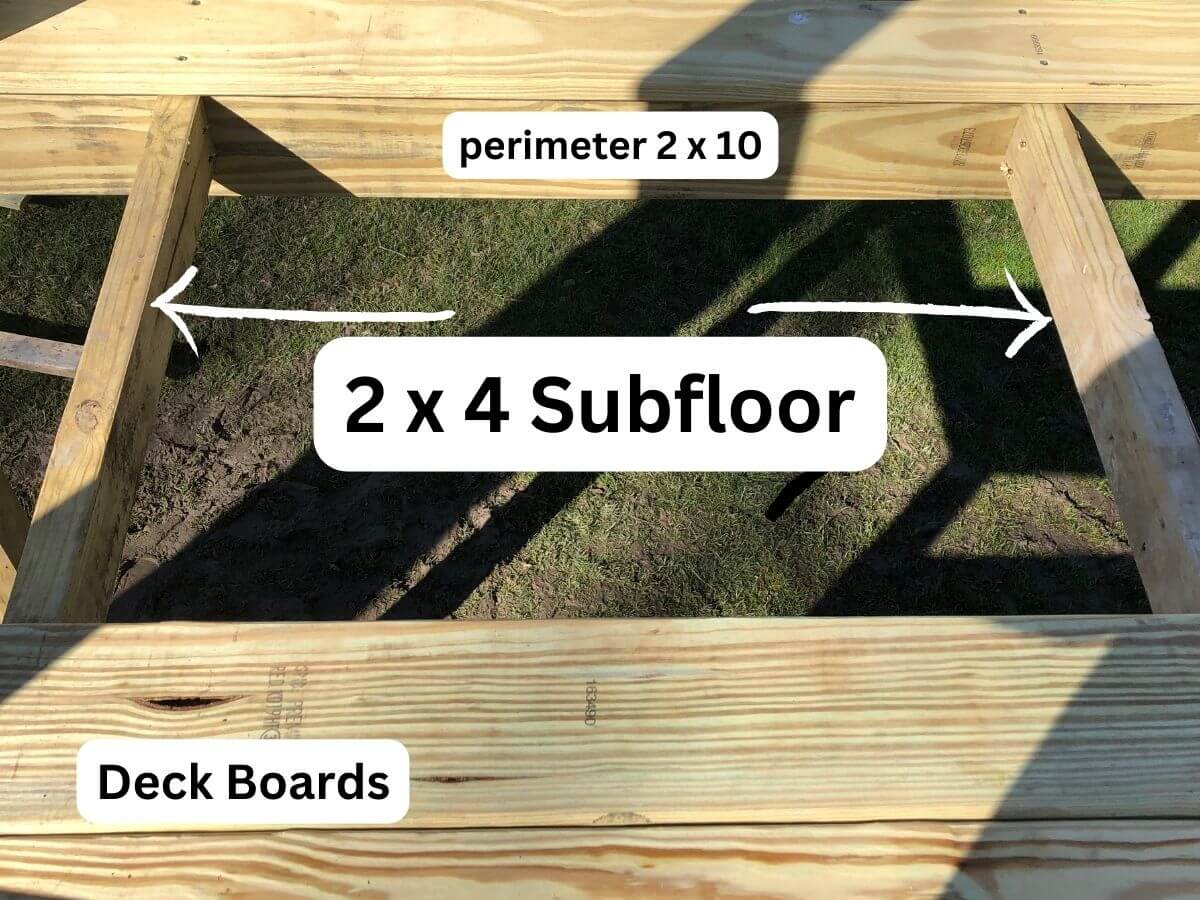
Step 11: Attach 2 x 10’s At Base And Platform Base
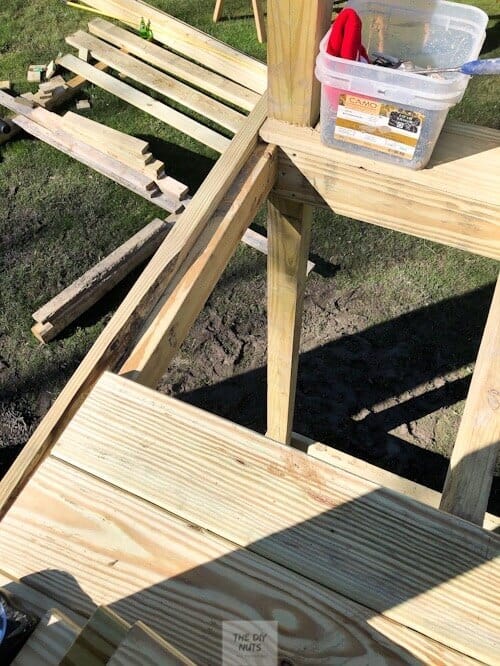
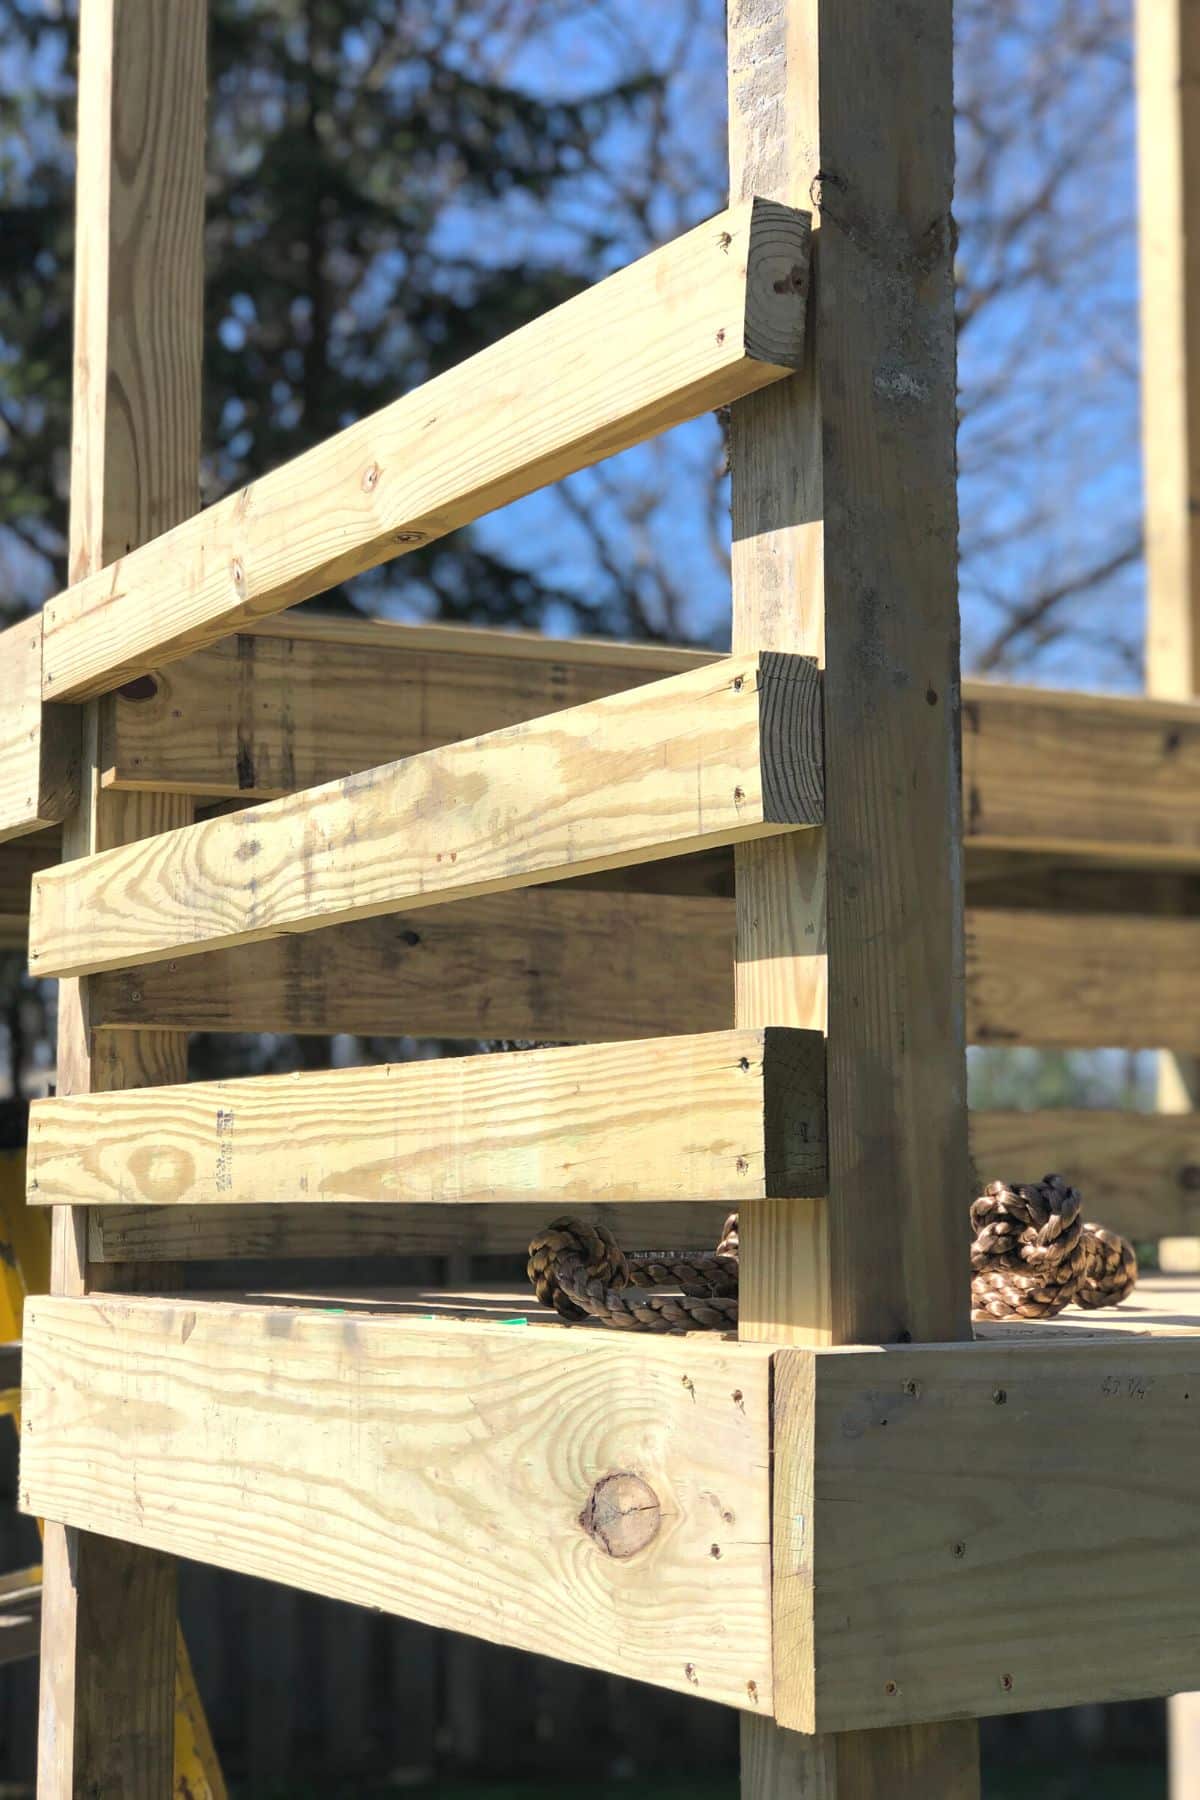
Once all posts are set remove the 2 x 4s. Cut, and attach a 2×10 board at the base (ground level) and at the height of your desired platform(s). We used exterior wood screws to attach the lumber.
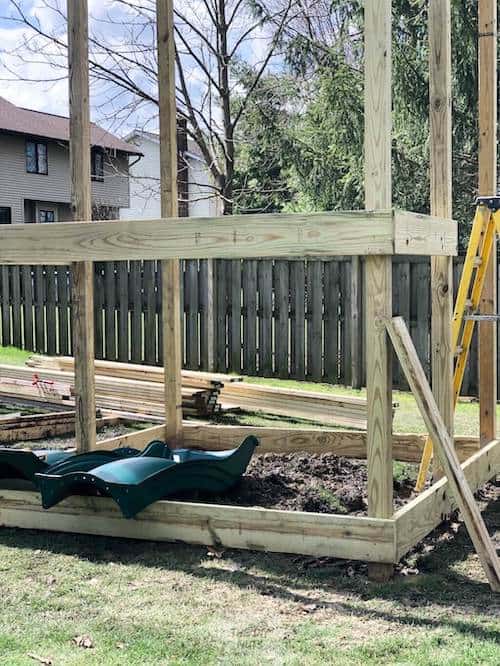
Once these boards have been attached the structure should be very sturdy. If not something is wrong.
Step 12: Create Subfloor From 2 x 4s
Once 2 x 10s are attached to the base, cut and attach 2 x 4s for the subfloor. The deck boards will go on top of the 2x4s.

Step 14: Build The Second Level Step
If your playset has two levels and six posts. you will follow the above steps to attach 2 x 10s around the perimeter and add a 2 x 4 subfloor in that area with decking boards on top.
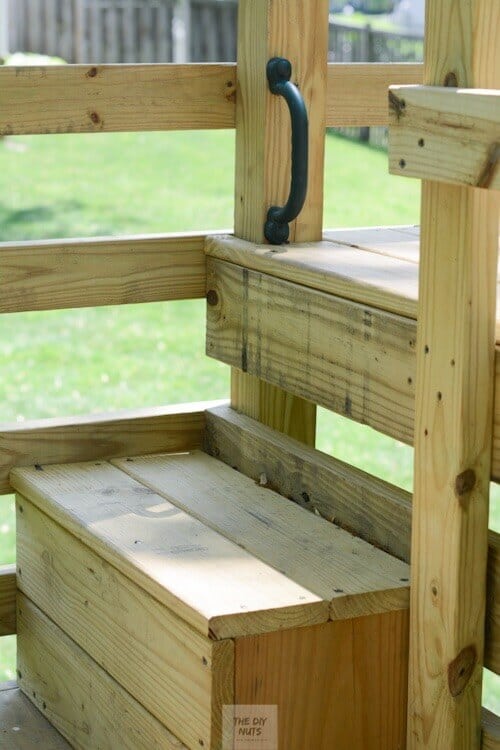
If making two levels, you may need to consider building a simple set of stairs or one step. We also added a handle to help kids get quickly up.
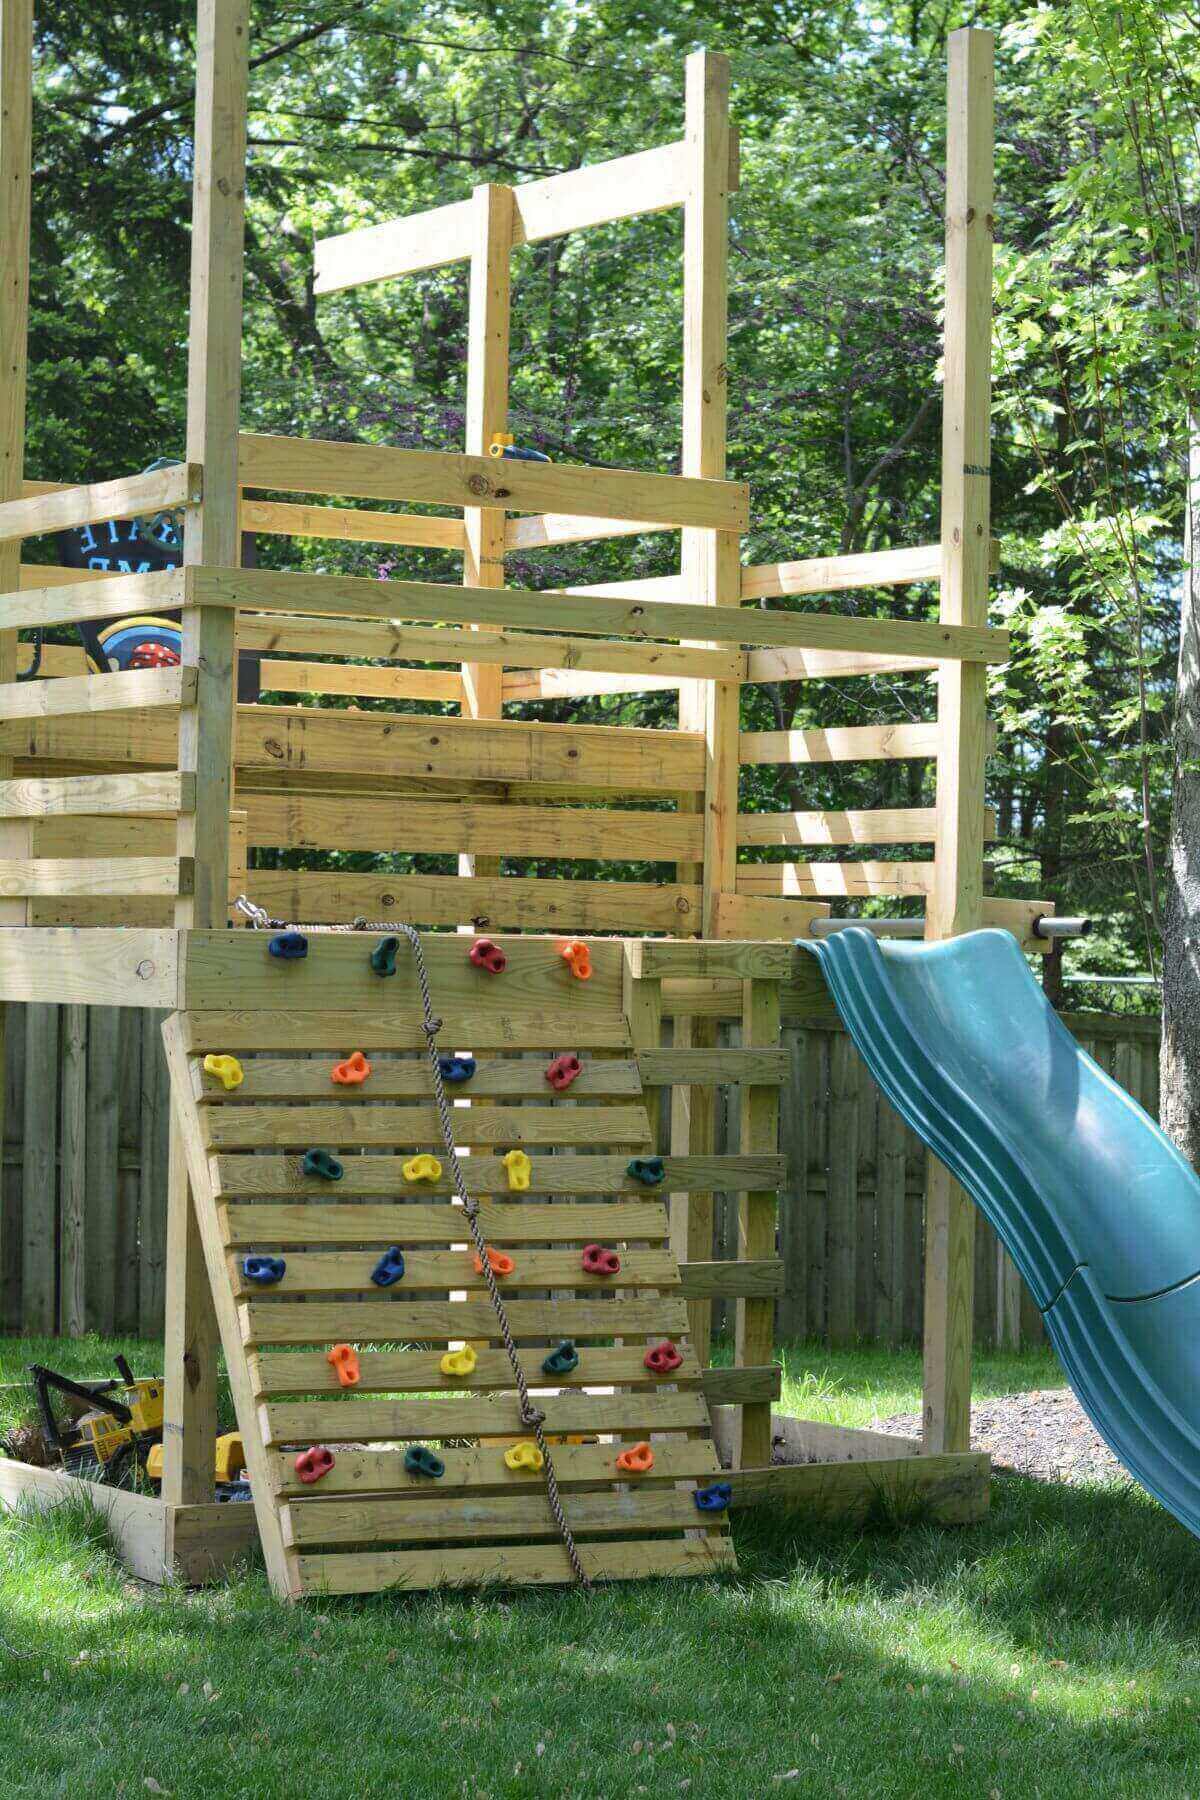
Step 15: Attach Slide
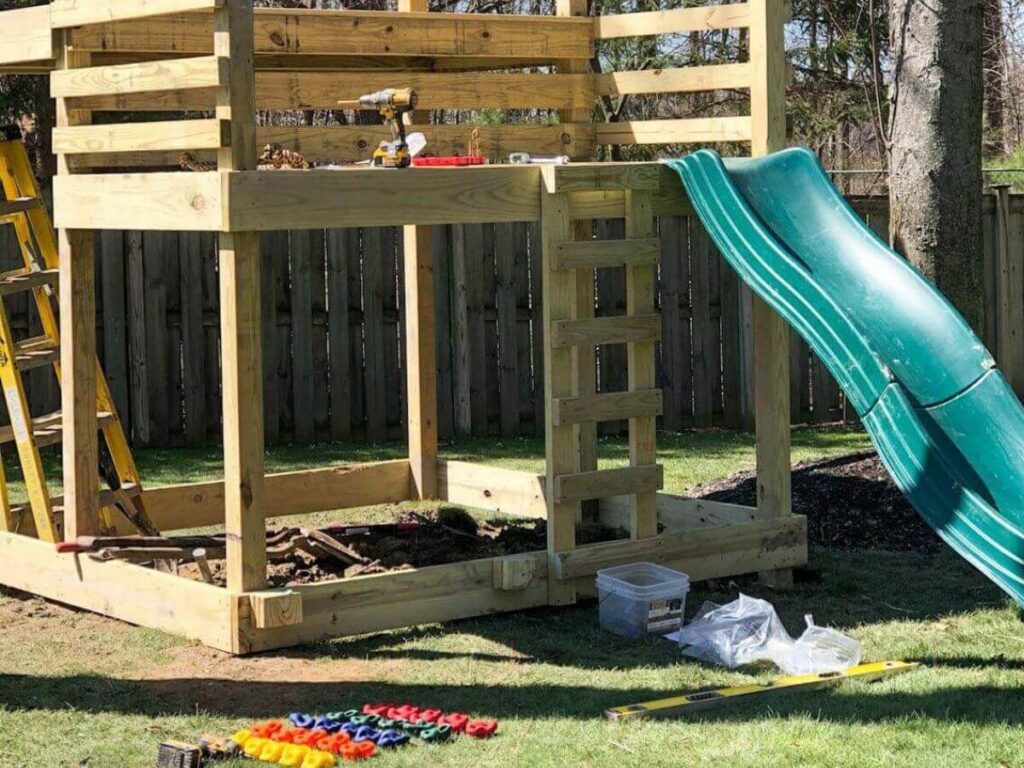
Step 16: Build and Attach Accessories
After the deck boards are attached, you will need to determine what you want to be attached to your playset. You will need to consider where you may want something attached on the outside or inside of your structure.
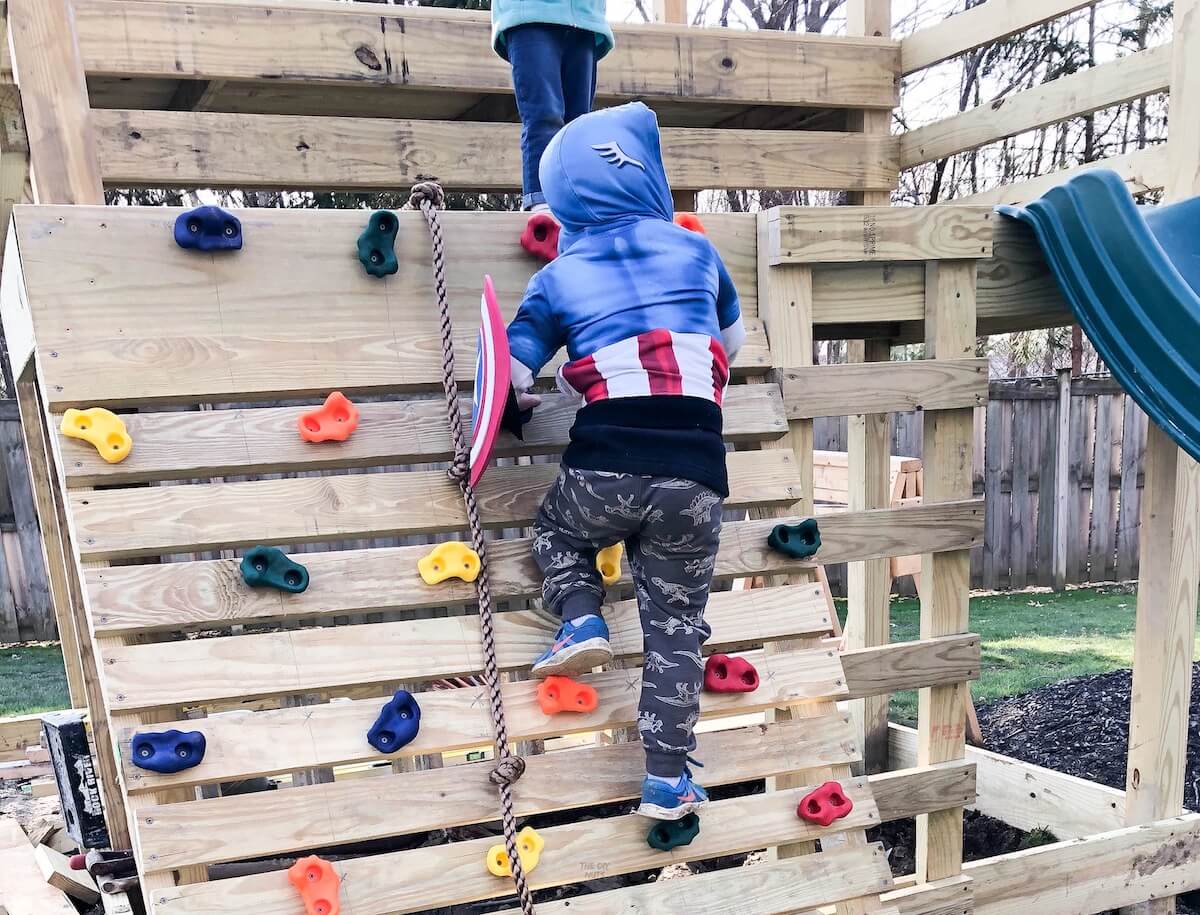
Here the rock wall is being built and a wooden ladder is to get up to the first platform.


See the full tutorial and materials used to build the DIY climbing wall.
Add Rockwall Holds and Rope
We have a slide, a DIY ladder built with 2 x 4s and a Rockwall coming off of one side. We were pleasantly surprised with the heavy-duty rope and holds that came with the set we ordered. Additionally, we have a pull-up bar coming off the other side (another DIY project that we made).
You (like us) can add a telescope, pirate flag, steering wheel, climbing rope and climbing rock holds. We even have a spot to add a swing or long rope to climb.
Step 17: Add Extra Safety Precautions
Once you figure out how and where kids will be able to climb in and out (up and down) you will have to build a safety handrail in the other spots
Build Handrail and Handles
When building a handrail, you need to consider the building code. For handrails that means no space larger than 4”s can occur. We also added a 2 x 4 across the open area where the rockwall and slide are. This way kids could climb under, but hopefully will not fall out!
Our playhouse has a top rail, mid-rail, and toe board (we are comfortable with this). Each parent needs to put serious thought into the fall protection measure taken or not taken.
Again, you may have to have a permit and meet your city’s guidelines. Always worth stating, we are not liable for your playset design or treehouse design. You can see our full disclaimer.
Once all items are attached, you can truly enjoy your DIY playset! I know our children have already started to create many memories in our backyard.
Other Playhouse Design Options
- Underneath the playhouse, we currently have dirt or (as we call it) a mud pit. Our kids currently really like playing in the mud and dirt but there are other options.
- You could put a ground cloth down and turn this area into a sandbox or have river rocks or rubber mulch, etc.
Our Future Plans
- Cover the bottom floor with deck boards
- Add a small picnic table
- Maybe add swings to the side where we currently have a board hanging off. I even love the idea of a climbing rope, dual swing seat or tire swing. We will have to make sure it is safe before we add that, hence why I am thinking a rope may be better.
- Add safety handle to go on the 2 x 4 above the slide.
- We also have plans to buy an outdoor fabric or canopy that could be attached to the tops of the posts.
Outdoor Playsets or Playgrounds To Buy
If after reading this, you might realize that there is just too much that goes into doing this as a DIY project. So here are some of the playsets we considered buying before deciding to make our own outdoor treehouse or playground.
Backyard swingsets to purchase
- The cheapest or Economy Choice for a Playset is Kidkraft Arborcrest Deluxe. My sister-in-law has this one. Her kids have loved it, but she thinks it will only last a few years.
- Highly Rated Playset: Gorilla Playset
- Best Bang for your Buck: Backyard Discovery Skyfort in Cedar or the same set on Amazon.
However, due to the time of year, some playsets are very hard to find in stock. Just another reason to try to build a playground in your backyard yourself. Our kids thought this was the best gift ever and have had so much fun over the years.
Follow us on Pinterest, YouTube or Facebook for more DIY inspiration!
Tutorial FAQs
Your playset price may vary depending on the layout and current materials prices. We spent around $700 on materials to build our playset.
Cedar, redwood, or a mix of pressure-treated wood and decking boards can be made to make an outdoor playset. Each homeowner should do research on the pros and cons of the building materials they choose to use outdoors with children.
Our playground has held up well since we built it. Like any outdoor project, the color of the wood has changed over time, but structurally it is the same as when we built it. Staining or sealing your wood would help protect the playset for years to come.
What DIY projects have been so great for your family over the years? We love that this backyard playset will grow with our families for years to come.
Hi, wondering how much you would say this cost you to build? Also how long did it take?
Looks wonderful and you did a great job.
Thanks!
Hi Cheryl. A rough estimate would be around $700-$800 in materials. Some of the playsets we were looking at buying were around $3000 (we just couldn’t do that and knew we could build something ourselves). We were also building our raised garden boxes and had the lumber delivered at the same time. In addition, we already had the tools needed to build this playset. Good luck.
Looks great! I’m building one very similar right now (deadline is Christmas). Now that you’ve had it up a few months, is there anything you would’ve done differently?
Hi Matt. As I stated in the post, we were nervous about our playset design with the big opening, but honestly, my children have been fine. We only wish we could have found a bigger slide (but anything bigger than the one we have would have been pretty expensive). After the fact, we thought about using large drainage tubing to create slides, but that is an expensive material as well. There is a playground in our area that has that and the kids love the tunnel slides. The angle our slide is at makes them go pretty fast, but now that they are used to that they love it! Good luck with your playground building!
Is pressure treated lumber safe for kids to play on?
Hi Bethany. You will want to do research on whether you are comfortable using pressure-treated wood for a child’s playset. The pressure-treated wood of today (after 2003) seems to be safer, but you need to make that choice as to what you feel comfortable about. You could always consider using natural cedar.
I ended up doing something very similar, after reading your blog post! Mine was a bit smaller (city living, smaller yards!), with a 5′ x 5′ platform, and a 10′ tall climbing wall that was removable, so they can use it to access the fort, and a nearby tree. I bought redwood, for durability (and smells nice!). There were no appropriate 1×6 deck boards (thanks COVID!), so we ended up using 2″ thick deckboards (2x6s and 2x12s). I also didn’t sink the posts into the ground, it’s so heavy I didn’t feel we needed to worry about this. And the fort is SOLID! 🙂 The whole thing cost just under $1,000. I made sure to get as much of the lumber cut to size at the local big box hardware store.
Hey Matt! This is awesome to hear! I am sure if you were to have bought a brand new playset it would have been at least 3x the amount and not nearly as nice. We would have loved to use redwood, but just wasn’t in the budget at the time. I would love to see your playset and maybe share with our readers on our email list. Feel free to email us some pictures at erin@thediynuts.com.
Have you ever considered making a 3rd half platform going up? It looks like there is plenty of room to do so with the post heights.
I am sure you can modify this to build it however you want. Just make sure you take proper safety precautions!