Build A DIY Climbing Rock Wall For Your Backyard
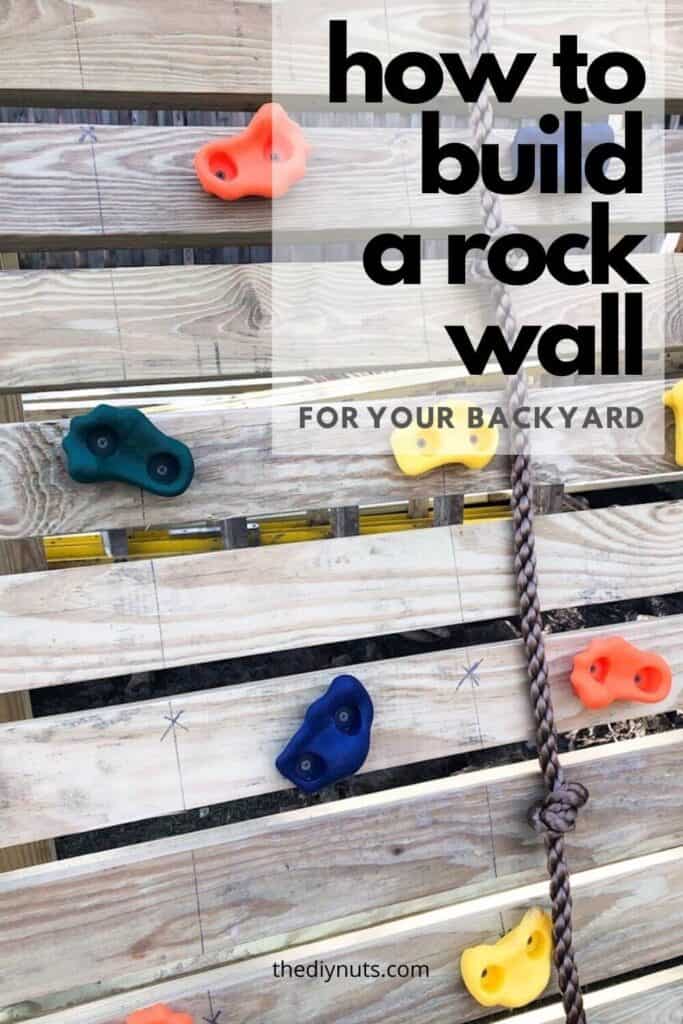
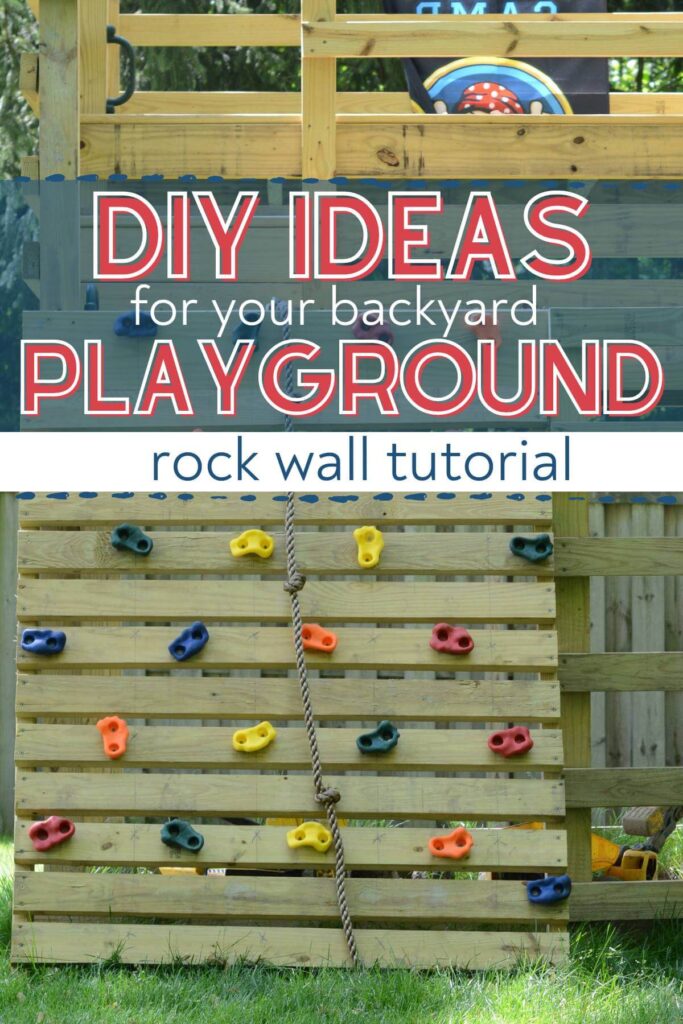
Have you been looking for a way to add excitement to your backyard? Get all of our tips for how to build a DIY rock wall for your children. Your children will love spending hours climbing in your backyard.
*Disclosure: I only recommend products I would use myself and all opinions expressed here are our own. This post may contain affiliate links that at no additional cost to you, I may earn a small commission. Read our full privacy policy.
Again, we are safe at home and trying to come up with ways to keep our sanity and have our children continue to be healthy and thriving. If you have been following some of our DIY projects, you know we have been doing a lot of DIY outdoor projects.
As soon as we knew we would not be able to even go to a public playground, we knew we needed to build our outdoor playground with a DIY climbing wall.
Factors To Consider When Designing Wall
- What should be the height of the wall?
- Should it be just vertical? Or have a slant?
- What types of holds should we buy? How will you create climbing routes?
- Make sure to factor in safety measures for your space (whether an outdoor or indoor climbing wall)
- What materials are good for outdoor use?
Recommended Supplies
- 2″ x 4″ x 16′ Pressure-Treated Lumber (We needed 4)
- Rock Climbing Wall Holds with rope
- Stainless Steel Construction Screws (Make sure you order deck screws that are meant for outdoor use)
- Circular Saw
- Sawhorses
- Power Drill
Purchasing Rock Climbing Holds
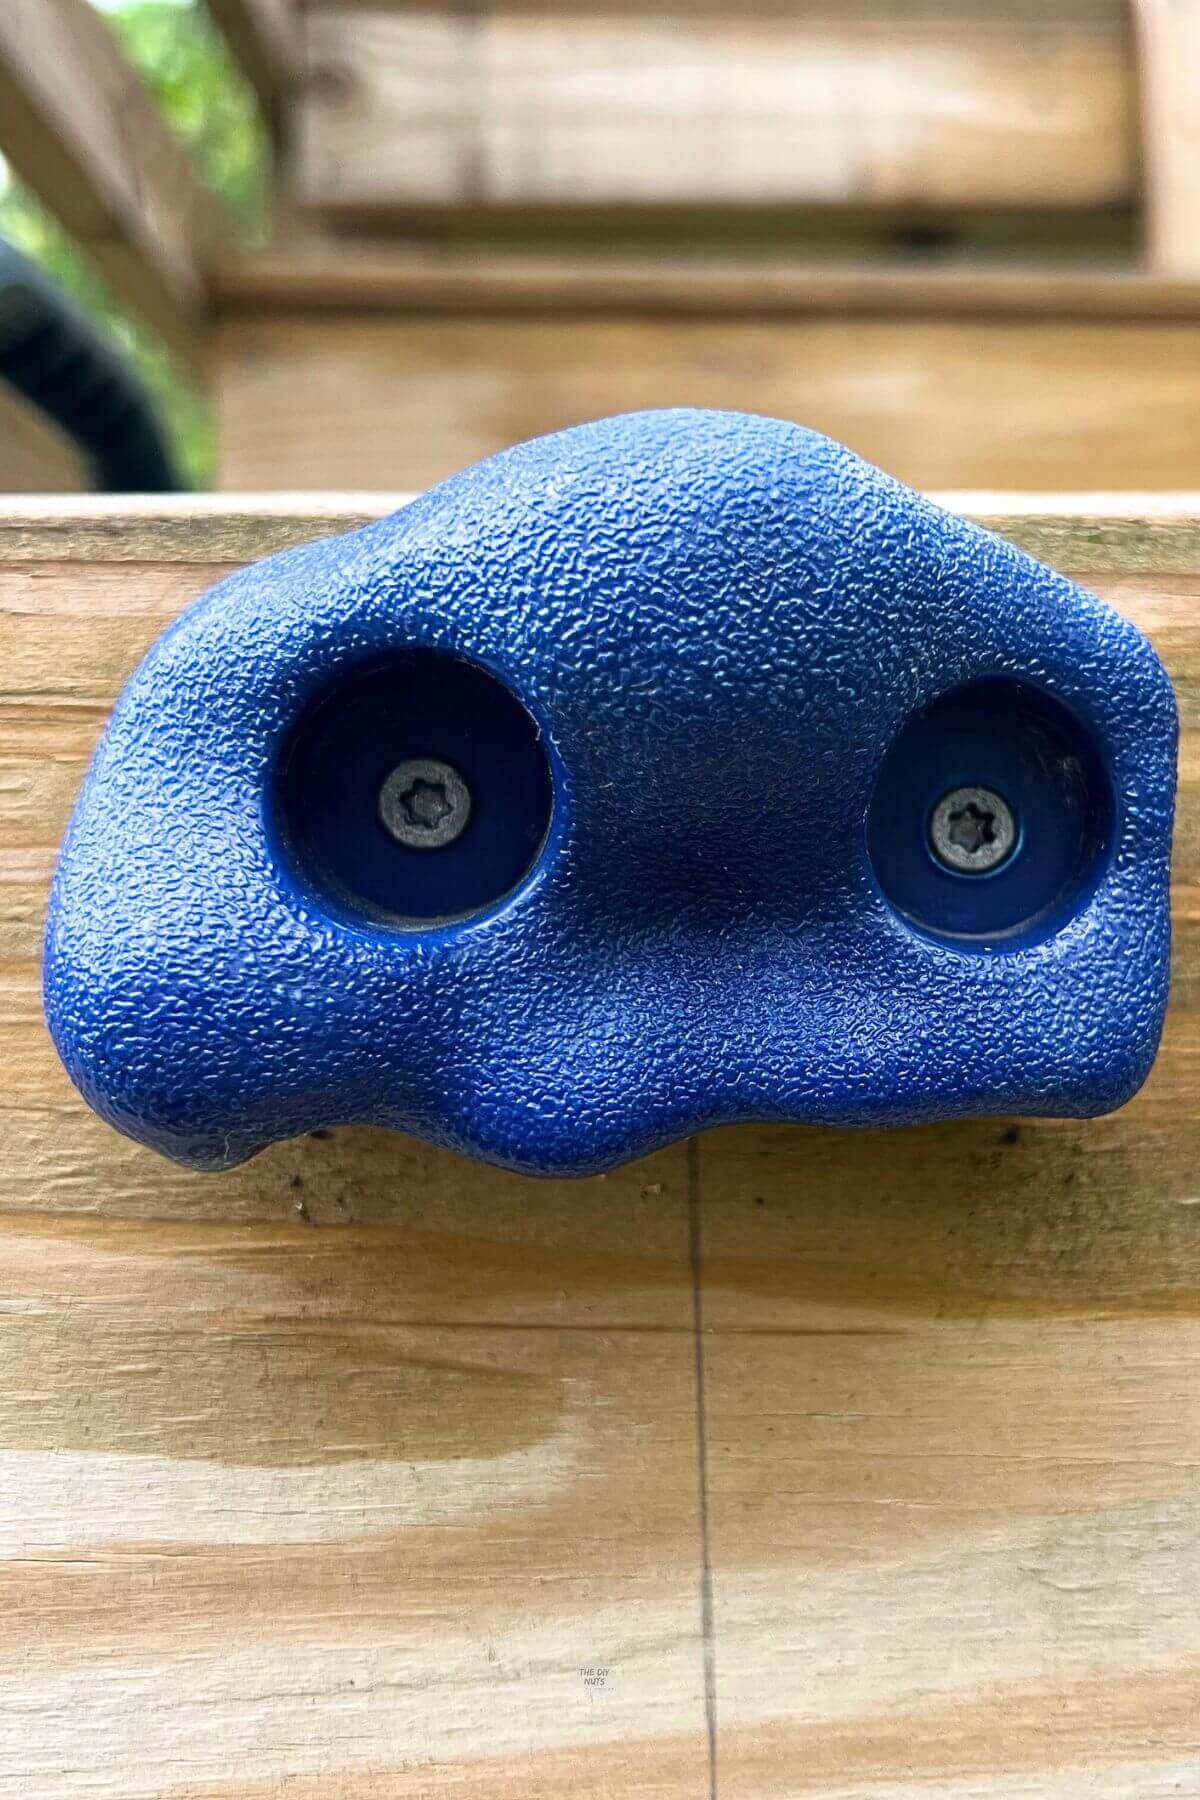
We chose these children’s rock wall holds because they could be shipped right away and were highly rated. We figured we could try them out and always return them if they did not work well. Not to mention, this kit came with a pretty sturdy climbing rope that we attached to the playset.
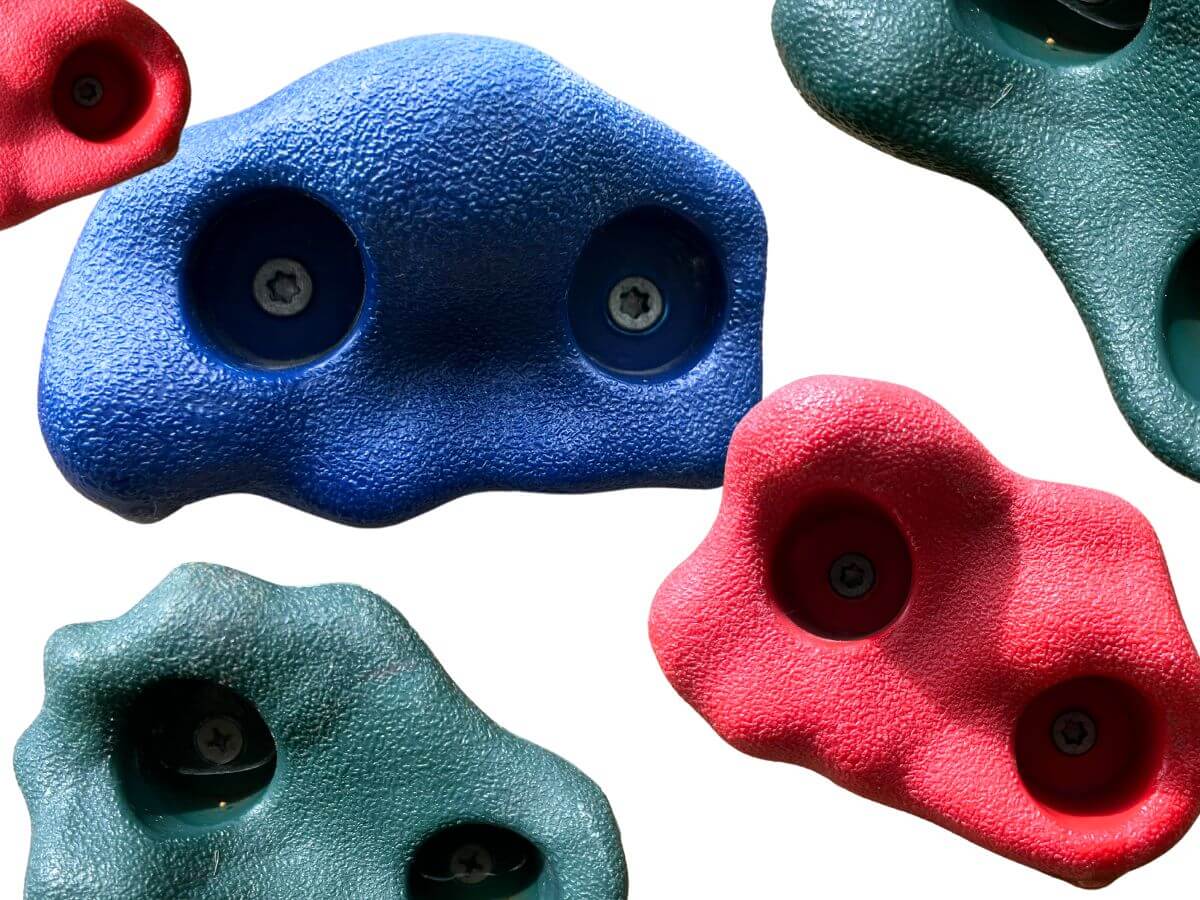
These colorful climbing holds were also very easy to install. My husband was able to add them to his rock wall structure within 30 minutes. We love when DIY projects don’t end up taking a lot of time!

Note: We did not use the standard sizes of anchors that came with these rock holds because they were not long enough. They were 1.25” long and a 2×4 plus the rock hold is too thick for that. We attached these climbing rock wall holds with 2.5″ decking screws.
Other Rock Holds With Longer Anchors
Here is a different brand with longer anchors that appears to work with 2x4s and we wish we would have tried instead.
Cons To Rock Holds
There are 2 biggest cons to these rock wall holds.
- Size Of Hand Holds: not ideal for an adult, but they are perfect for a child’s hand. My husband wishes they were a little larger, but our children seem to use them easily. He secretly wants to have his own outdoor climbing wall, but these are too small for his hands.
- Use Different Hardware: due to the thickness of the wood, we couldn’t use the anchors provided but had to use 2.5″ screws to attach them to the 2 x 4s.
How to Build A Kid Climbing Wall
As we have stated, our rock wall is attached to our playset. Depending on where you are putting your rock wall, you may need to build more of a structure to support your DIY rock wall.
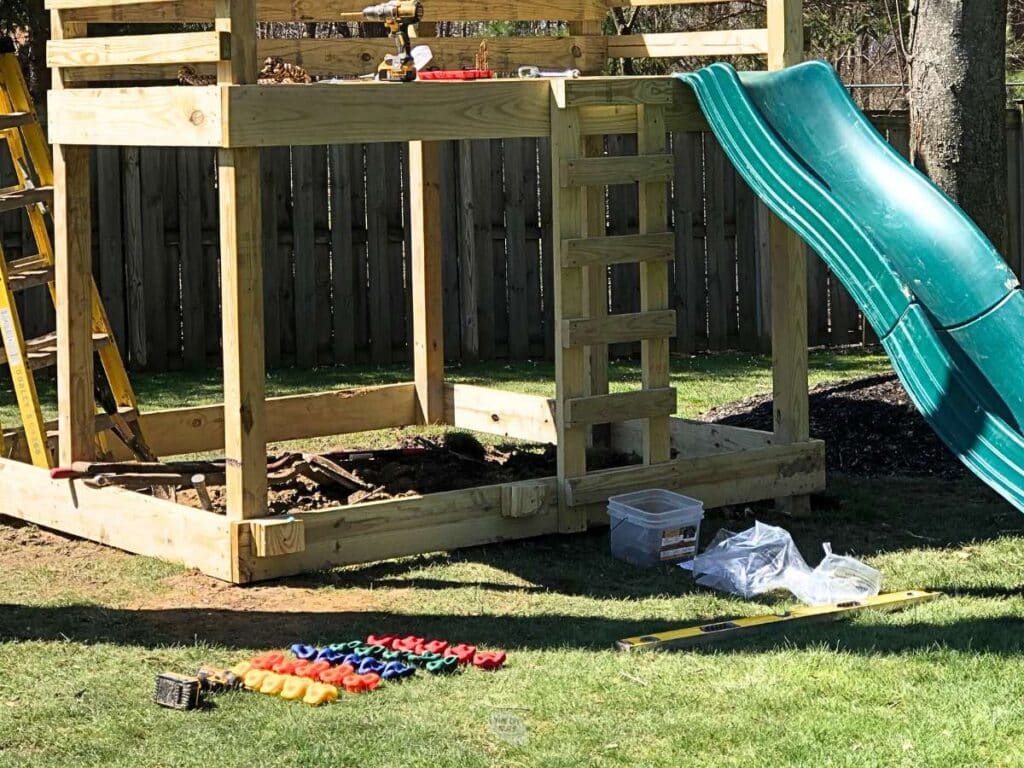
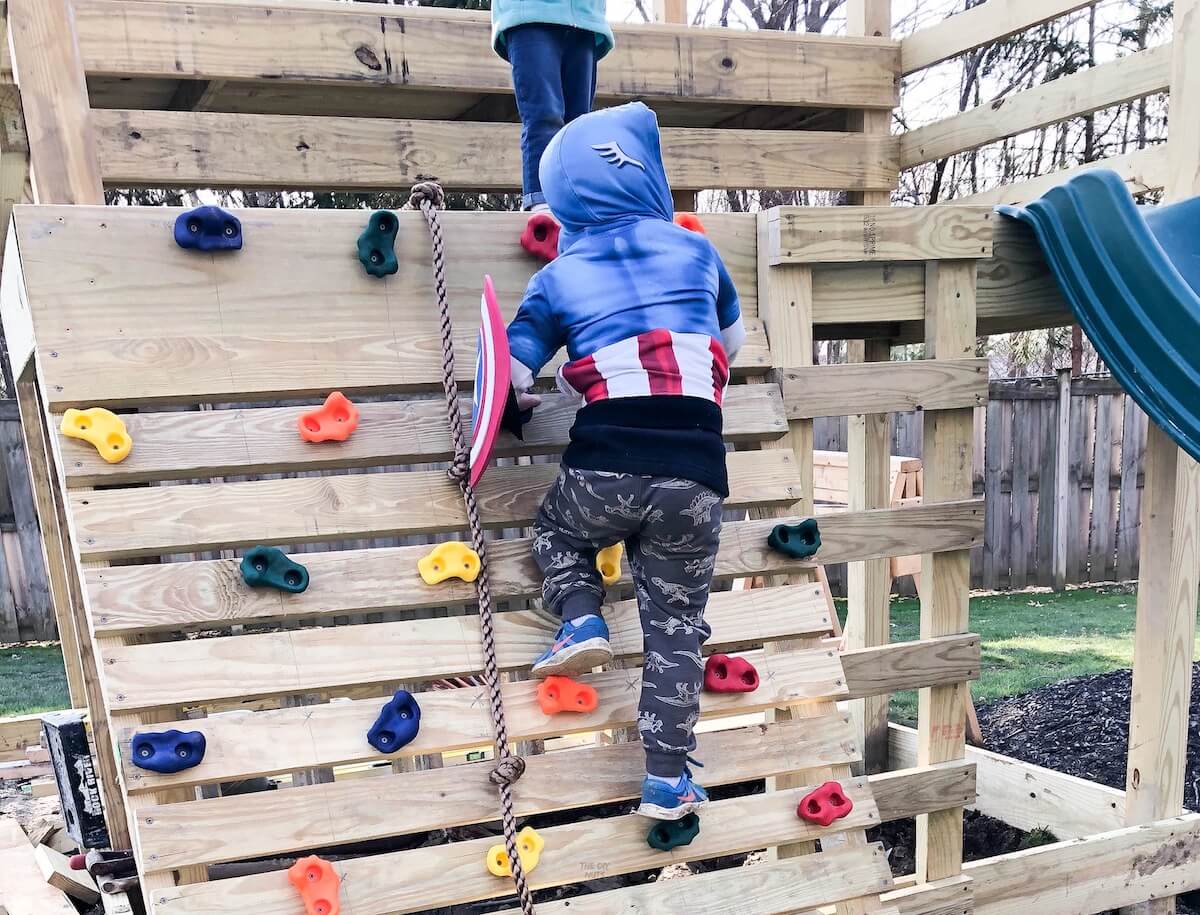
At first, my husband was just going to make ours a completely vertical wall. Luckily, he realized young kids would need an angle to be able to fully get up the wall. The wall angle made it so much easier for our children to get to new heights.
Step 1: Design Your Base
Our first “landing” is 5’ above the ground. If you want to figure out your climbing angle, use the good old Pythagorean Theorem to help you decide the distance your base is away from the side. You should draw a triangle and do the math to determine the climbing angle you want.
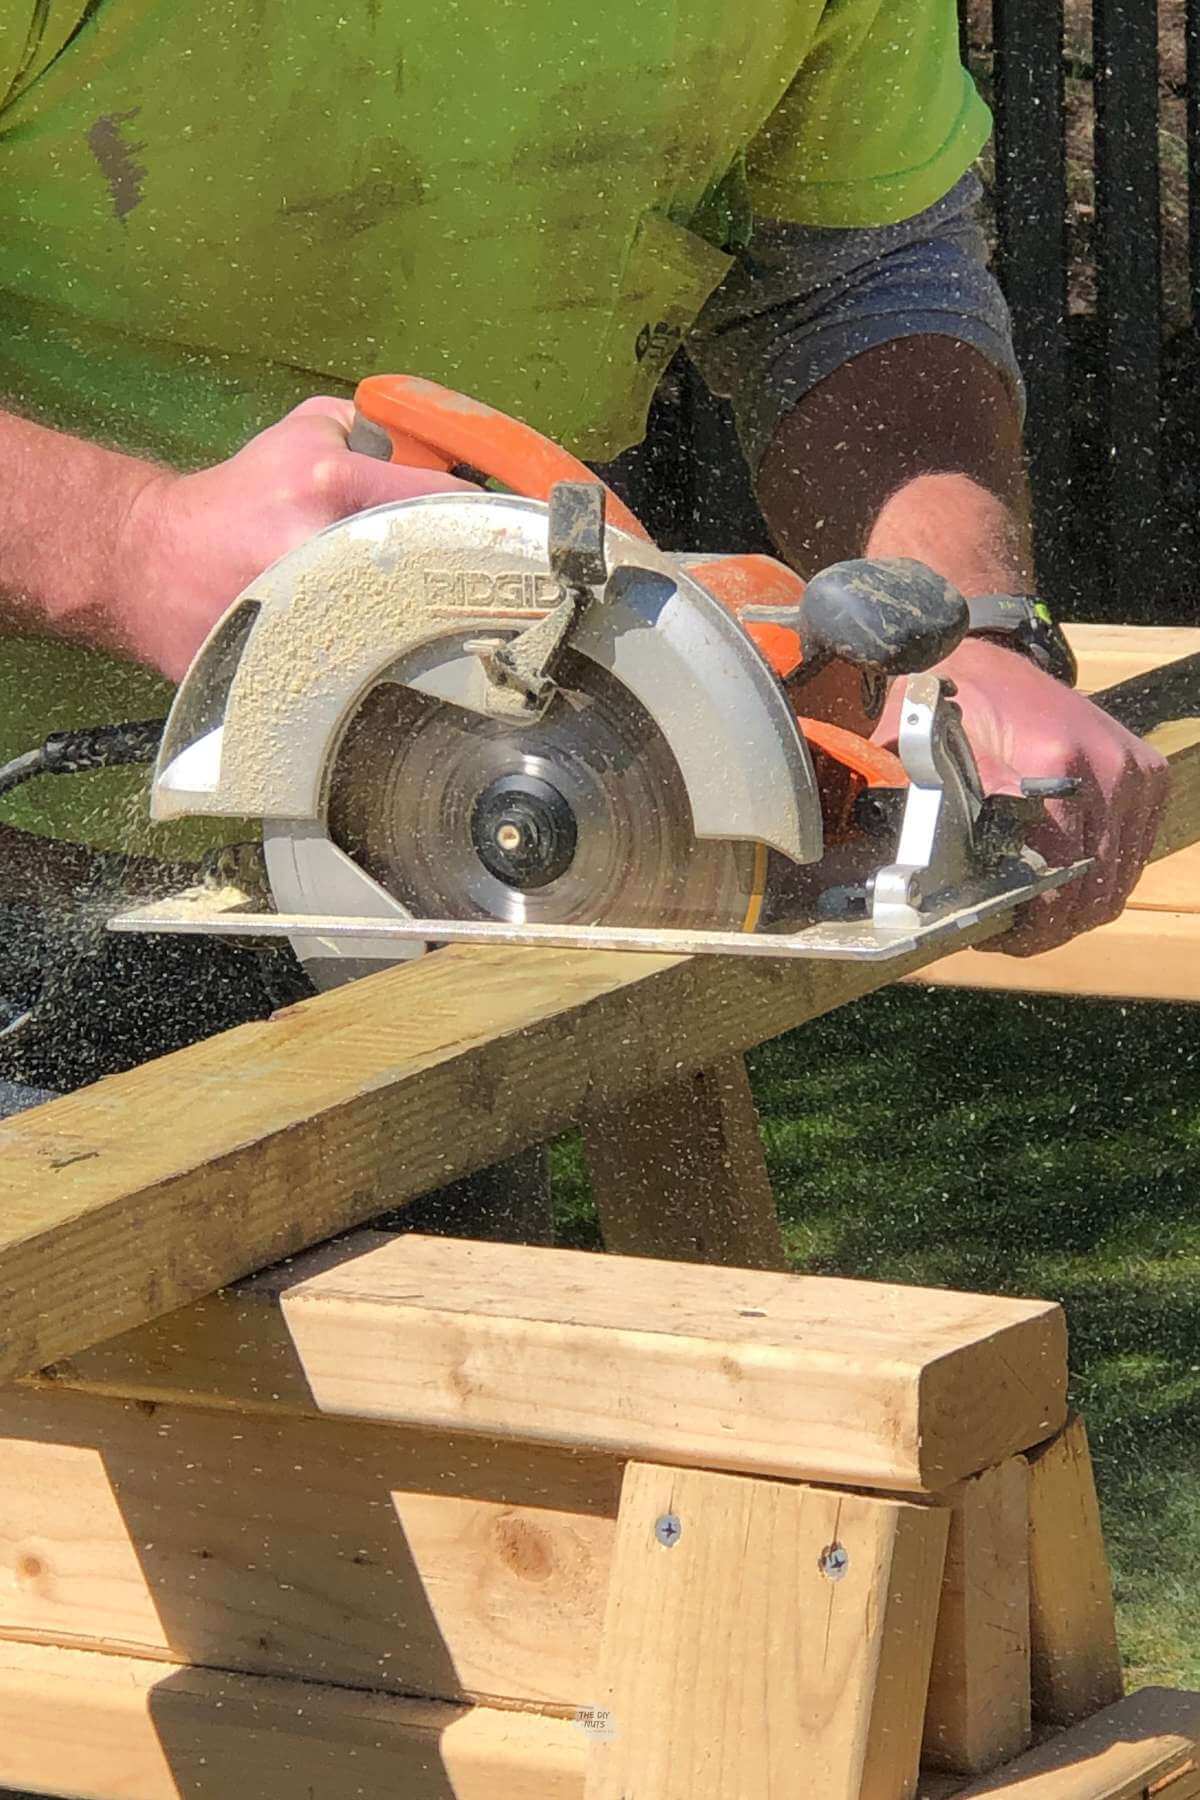
Step 2: Cut 2 X 4s
Cut two 2 x 4 boards at the size you decided to be the hypotenuse or angled part that will be climbed on.
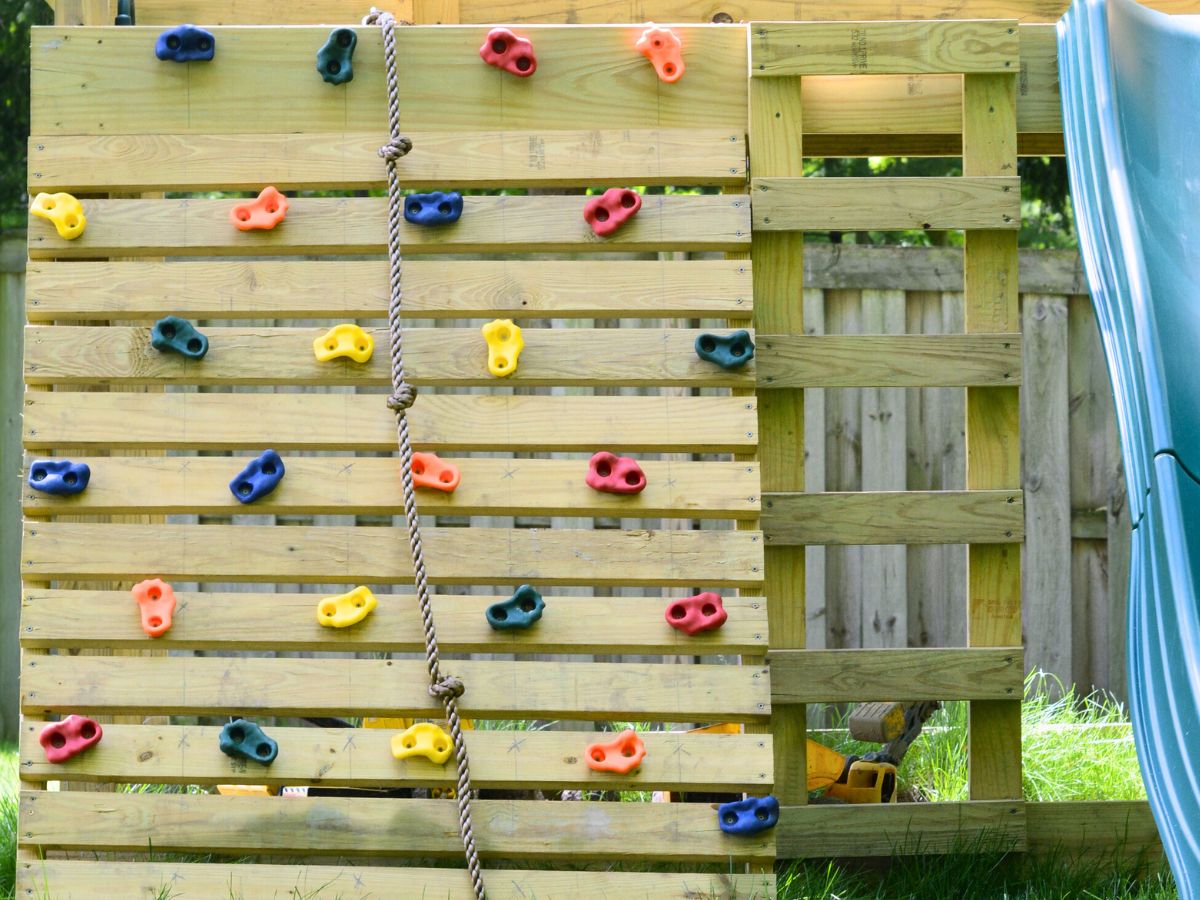
We placed our diagonal hypotenuse boards 42” apart so that our DIY climbing rock wall would be 42” wide.
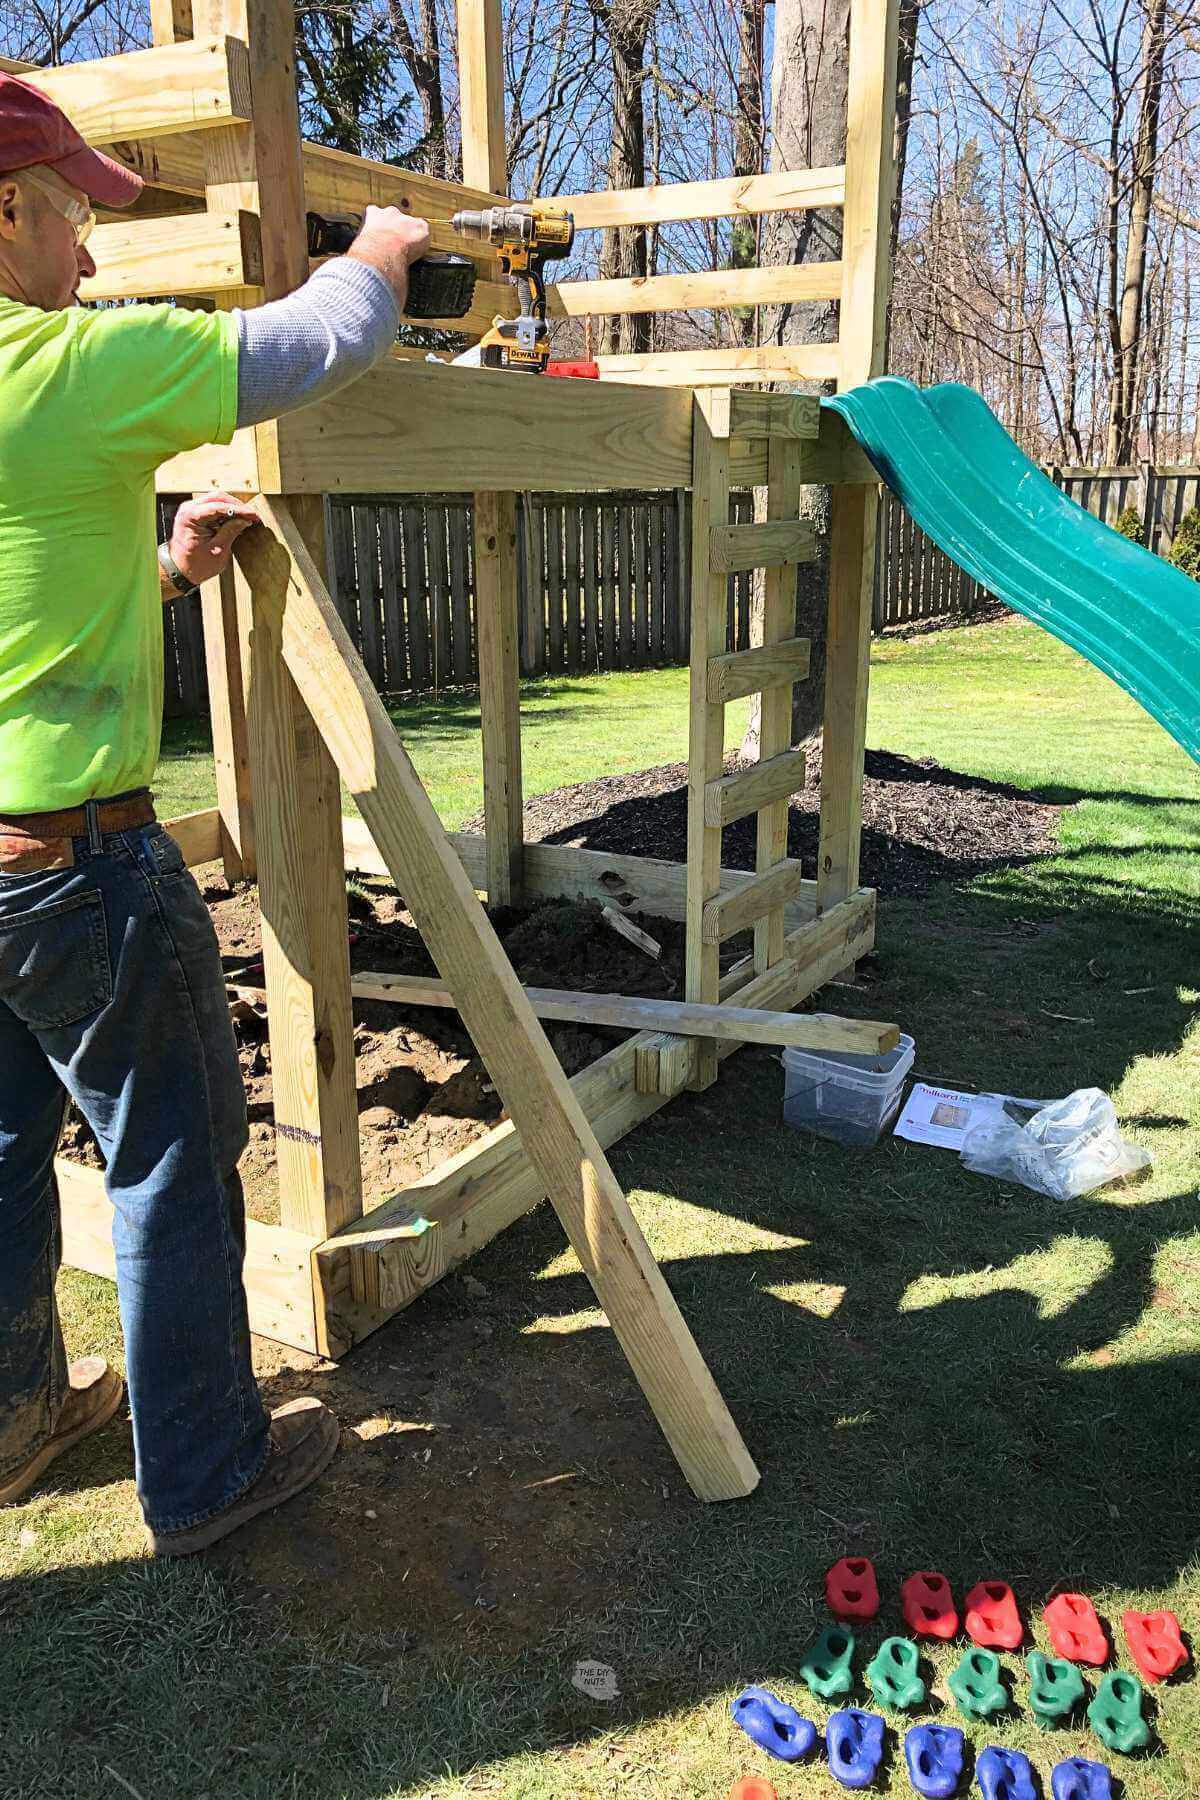
Step 3: Attach Cut 2 x 4s To Your Structure
Attach angled base 2x4s to your existing structure.
Step 4: Cut Climbing Boards To Width
Cut 2 x 4 boards to the desired width (again, ours was 42” apart). The number of 2 x 4s that you use will depend on how much space you want in between the climbing boards.
Cut more 2 x 4s to create your climbing rock wall for your children. Each board had a small gap between 1.5 inches to 2 inches apart.
If you space the rock wall holds further apart, it will act more like a ladder it will be (in addition to the rock wall handholds). If you only want the rock wall, try to get the boards as close together as possible.
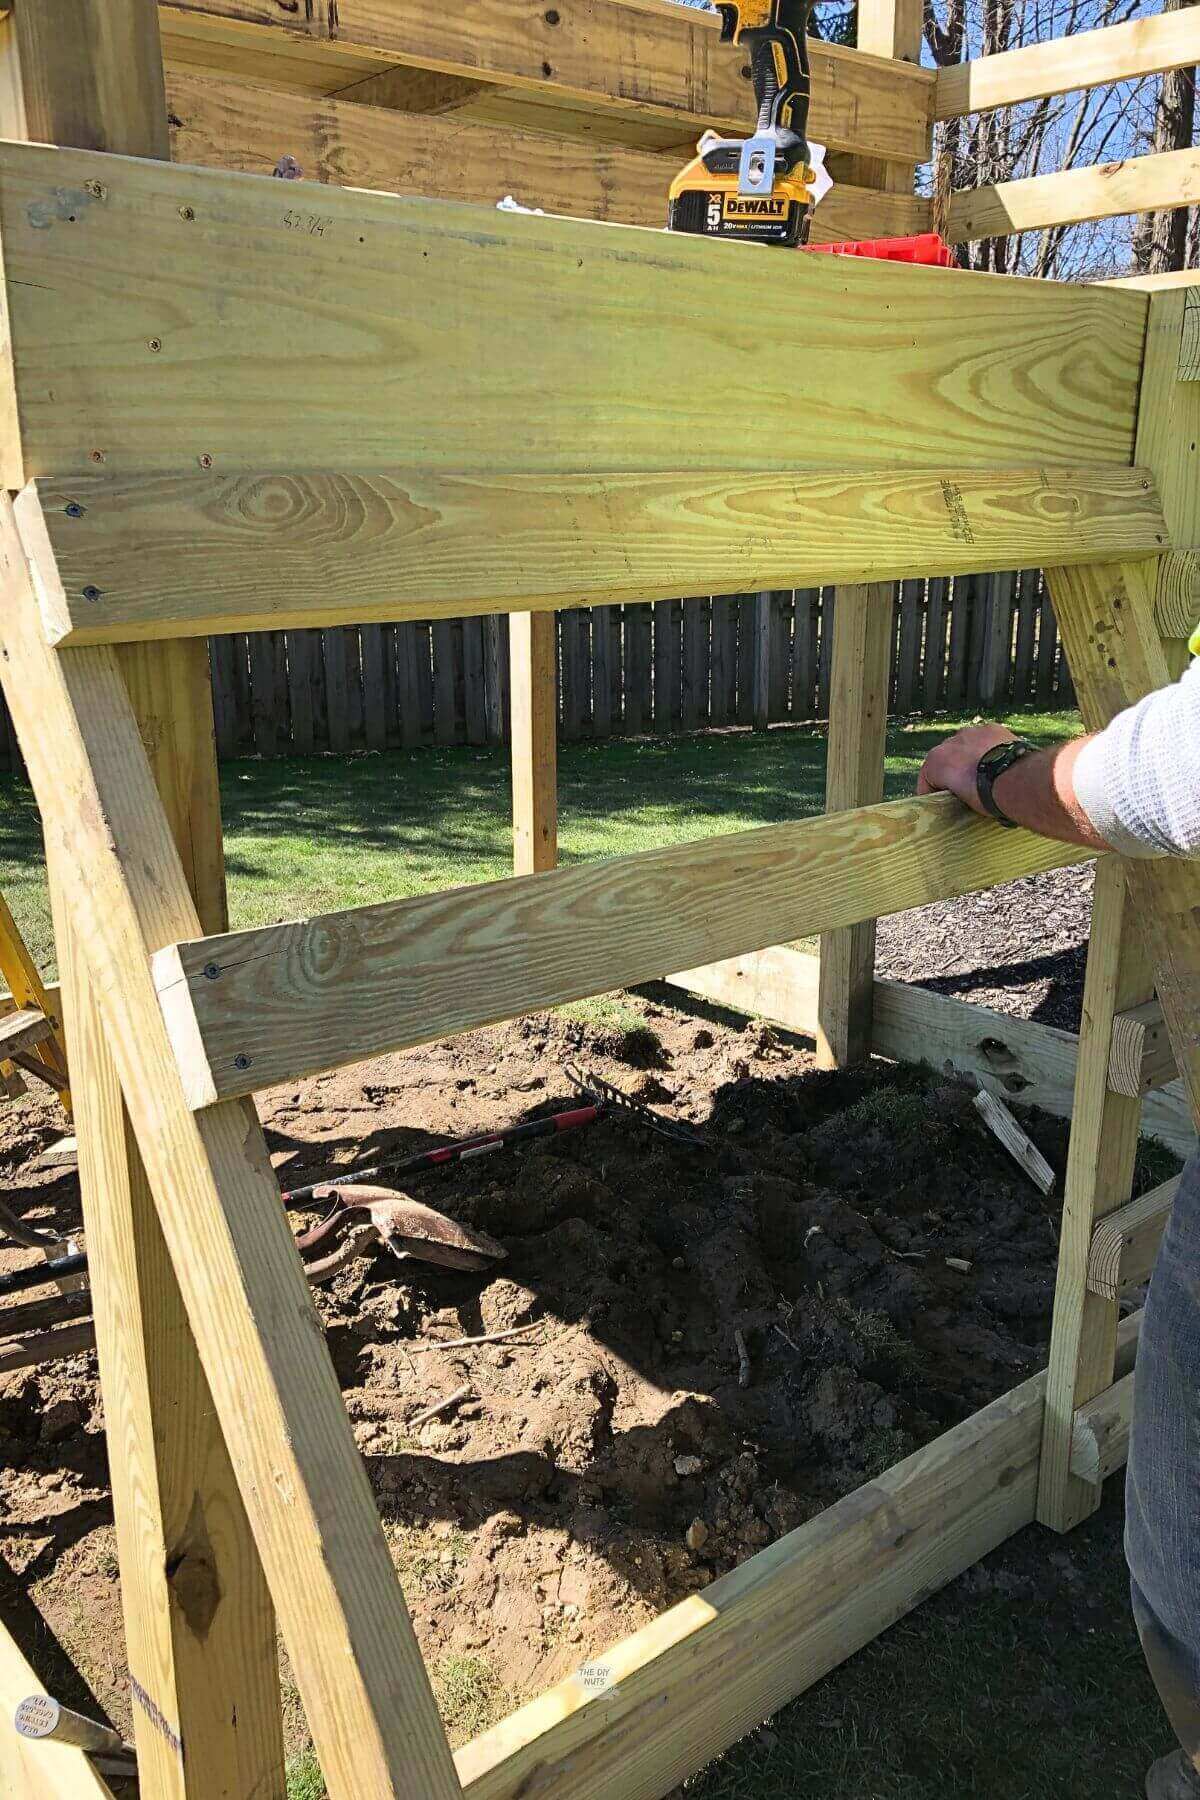
Step 4: Attach Boards To Base
Attach all cut rock wall 2 x 4s boards to the two angled 2 x 4s using deck screws.
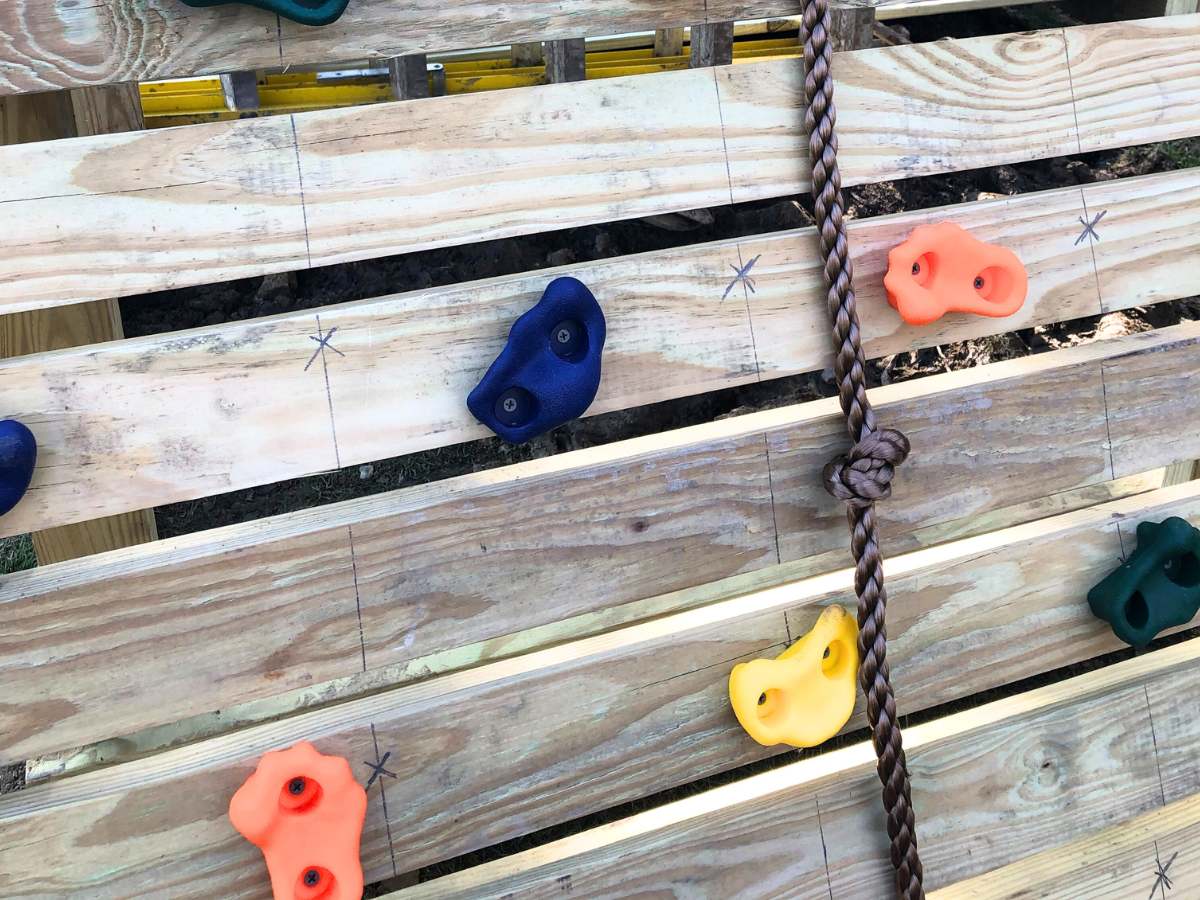
Step 5: Plan Rock Holds
The easiest way to plan your climbing route is to draw a grid on the boards and mark the amount of holes you will need to drill. A good idea is to put one rock hand hole every 10 inches to 12 inches somewhere in the grid.
Step 6: Attach Rock Holds
Pre-drill holes with a drill bit where you plan to attach the holds. Drill and attach rock holds in desired spaces using 2.5-inch screws.
Tips For Spacing Out Holds
As you can see in this picture, we measured across to put the rock wall holds on. We figured these distances would work for two children to climb up at a time if they wanted. Our wall holds are about 10-12″ apart and have worked well for even our youngest child.
You can vary the distance a little depending on the size of your climbers.
Added Safety Measure Considerations
First, we are not liable for our or your playset design. Please read your local guidelines when creating a DIY playset for your children. We just love to share what we do for educational purposes only. We knew we needed to add some safety measures to make sure our children were safe.
Our rock wall is 5 feet off the ground because that was how high the slide we ordered could go. Now, when I went to the link, our 5-foot slide was not an option, so I have linked it to the 4 ft. version of what we have.
We did make one error when planning our rock wall. We put the slide, rock wall, and ladder all on one side. This caused a little bit of a safety dilemma that we solved by adding a pressure-treated 2 x 4 across the top.
Add A Safety Rail At The Top
We had safety rails everywhere else and we knew we needed something to keep kids on the top of the platform. The bar is high enough that the kids still can duck under. We may end up adding one more right under after we see how our children use the playset safely.
If we were to design this differently, we would probably have the ladder, climbing wall and slide on all different sides so that we could have more full railings with smaller openings.
Other Factors To Consider
- Check local zoning laws & building codes
- Obtain necessary permits (if needed)
- Consider safety standards
- Consider the liability of your structure: you may want to build this in a fenced-in area.
- Consult with a professional rock wall builder
- Consider any potential environmental impacts
Indoor Rock Climbing Wall Idea
If you are looking to build an indoor rock wall for adults, go ahead and check out this blog post from Home Depot. If building an indoor wall you could consider using different materials such as a smoother sheet of plywood of MDF boards with a floor mat to help create a home climbing wall.
Other Kid Climbing Rock Wall Options
If after all of this DIY talk, you are more interested in just purchasing climbing items for your DIY playground or outdoor space, here are a few we considered before building our own DIY climbing rock wall.
- Plastic Rock Wall
- Climbing Cargo Net
- Inflatable Rock Wall/Water slide: I want to get this to play with! Not just for the kids!
How-To FAQs
Because we had all of the tools needed to build this rock wall we were able to build it as part of our outdoor play set for under $100.
Yes, instead of attaching to the playground base, you could build triangle support as a great way to have your own climbing wall without being on a playset.
The most common mistakes when building a kid’s rock wall are poor planning, using incorrect materials and inadequate safety measures. Before building a rock wall, it’s important to assess the location to ensure that it can handle the weight of the wall and to ensure that there are no underground pipes or wires that could be damaged during construction. Plan ahead, use the right material and take safety precautions seriously.
Related Outdoor Projects
- DIY Outdoor Dining Table Made From Composite Decking
- DIY Spray Painted Marbled Flower Pots
- How To Paint Plastic Toys
Follow us on Pinterest, YouTube or Facebook for more DIY inspiration!
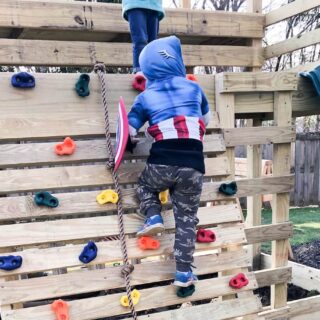
Building your own rock wall on your playset can be a fun and challenging project that adds a unique element to your playset. With careful planning, proper materials, and attention to safety, you can create a rock wall that provides hours of entertainment and physical activity for your children. Whether you’re a seasoned DIYer or just starting out, this project is sure to be a rewarding and enjoyable experience for the whole family.
Equipment
- Circular Saw
- Sawhorses
- Power Drill
Supplies
- 4 pieces 2" x 4" x 16' Pressure-Treated Lumber
- Rock Climbing Wall Holds with rope
- Stainless Steel Construction Screws
Instructions
- Design your base: Determine the height of your rock wall and the angle you want it to be at. Use the Pythagorean Theorem to calculate the distance your base should be from the side.
- Cut two 2 x 4 boards at the size you decided for the hypotenuse or angled part of the wall.
- Attach angled base 2x4s to your existing structure.
- Cut 2 x 4 boards to the desired width (we used 42" for our wall).
- Use deck screws to attach all the cut climbing boards to the two angled 2 x 4s.
- Draw a grid on the boards and mark the amount of holes you will need to drill. Place the rock hand holds every 10-12 inches in the grid.
- Pre-drill holes with a drill bit where you plan to attach the rock holds. Attach the rock holds using 2.5 inch screws.
- Test the wall for stability and safety. Make sure the wall is stable and all the holds are secure before allowing children to climb on it.
- Optional: Add safety measures, such as a landing pad or protective padding, to ensure a safe climbing experience.
Notes
- The number of boards going across your climbing wall will depend on how much space you want between the climbing boards.
- A good rule of thumb is to place holds about 10-12″ apart. 1 hold per square foot will create a good climbing route.
- Depending on the thickness of the wood you use, you may be able to use the screw-on bolts or anchors that come with the holds.
Looks like such great fun for the kids.
Thanks, Clara. Our children absolutely love this DIY climbing rock wall. We are so lucky to have this in our backyard!