How To Build DIY Raised Garden Boxes and Beds
Learn how to build large DIY wooden planter boxes for all of your vegetable growing needs. This outdoor DIY project is the perfect way to test out your green thumb.
*Disclosure: I only recommend products I would use myself and all opinions expressed here are our own. This post may contain affiliate links that at no additional cost to you, I may earn a small commission. Read our full privacy policy.
As we have talked about in previous posts, we really have been trying to update our backyard. We have added a DIY playset with a rock wall, a new porch and now had a great idea to add DIY raised planter boxes and raised garden beds.
Even though we are not professional gardeners, we thought container gardening would be a good idea for our yard. We hoped planter boxes would be a great solution to help grow our tomatoes, pepper, herbs, and whatever else we want to try our green thumb at.
Why build raised garden boxes?
- Boxes provide better drainage
- Great way to add to your backyard landscape or decor in your outdoor space
- Contain your plants (we have had years when our Mint has just taken over the bed on the side of the house)
- Looser soil allows room for roots to grow
- Easier on your back and knees
- Keeps animals out
In our backyard, we wanted a space that was specifically for growing vegetables and for our herb garden. We also knew that the looser dirt in a raised garden bed would help our plants thrive.
In the past, our traditional garden has been on the side of the house. It was really hard to maintain and take care of. Adding planter boxes to our backyard would make it easier to take care of our garden while our kids were playing.
These raised garden beds or boxes also will make it easier on our backs this year. This is a huge plus.
And hopefully, that means my husband may actually weed and help take care of things.
Can you build raised garden boxes on a hill?
This was our biggest planter box design challenge. The place we wanted to build our raised garden beds was on a slight hill. Some of the steps we took (like setting the posts) would not have to be done if you are on a flat surface.
Our DIY planter box plans & dimensions
First, you will need to decide on the dimensions of your planter boxes. Here will talk about ours that were 7’0” long x 42” wide x 33.75” tall cedar planter boxes.
How To Build Cedar Planter Boxes & Beds
Recommended Supplies
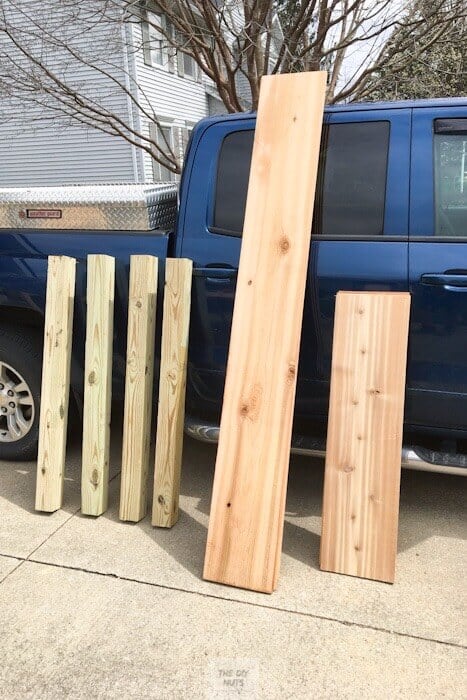
- (3) 4” x 4” x 8’ Cedar posts (for our updated design)
- (10) each 1” (thick) x 12” (wide) x 8’ (long) Cedar boards
- (1) Cedar 2 x 4 x 8’
- 2.5” stainless steel screws
- Weed fabric
- Aggregate – #57 washed river rock or #57 limestone
- Bagged concrete (is setting posts because your boxes are on a hill)
Tools Needed
- 4’ level
- Speed square
- 1/8” drill bit
- Screw gun
- Drill
- Circular saw
- Sawhorses
- Wood clamps
- Staple gun
- Wheelbarrow
- Shovel
- Post Hole Digger
Note for our updated design you would need 6 posts.
Notes about actual measurements for posts and boards
- Posts really measure 3.5 ” x 3.5” x 8’
- Boards really measure 11.25 wide x 0.75” thick
- We purchased ours from the lumber yard, but here is a similar board
Why did we choose cedar for our planter boxes?
We chose to use cedar for our outdoor raised vegetable garden beds. Some people will use pressure-treated wood (as explained in this HGTV article), but we wanted our wood to be as natural as possible when dealing with growing vegetables that would be feeding our family.

Is there a cheaper cedar that you use to make your garden planters?
Instead of kiln-dried cedar boards, you could get a much more rustic look using cedar fence pickets. This is such a great option as it is a much cheaper way to create DIY planter boxes with untreated wood.
These fence pickets would still also naturally be rot-resistant. You would just need to cut the dog-earred fence part off to get an even board.
Can’t you just buy raised garden boxes?
Before we decided we were going to make this a DIY outdoor project, we did look into purchasing raised planters, boxes, and garden beds.
- Smaller Raised Garden Box on legs: This Amazon best-seller is a great starter planter box that you could fit in multiple places.
- 4ft Vertical Garden Bed-5 Tiers for Indoor and Outdoor Growing-This gardening item was very intriguing.
- Unfinished Cedar/Natural Raised Garden from Lowe’s-This would be great if you only wanted a smaller raised garden box.
- 4 ft. x 8 ft. Original Raised Garden Bed from Home Depot-Depending on the height you want for your raised garden beds, this one might be a good option.
- 20″ x 7″ Wood Box Planter Stand from Target- I love the look of this smaller and modern raised planter. I am not sure if it can go outside, but it sure would look cute on my screened-in porch with herbs in it!
Need more DIY outdoor inspiration? Here are 22 unique and fun DIY planters to add to your backyard.
Step-by-step instructions for creating a large planter box
One thing to note is we built a 3rd garden raised box and tweaked the design a little to add two more posts in the middle.
You will see “updated design” throughout this post to include those instructions and plans.
Our third planter box or updated design is 2 ft. longer and we wanted to ensure the stability of the box. We think this is the way to go now for even the smaller boxes (even though ours have held up for the past 3 years).
You can see more information about this at the end of the post.
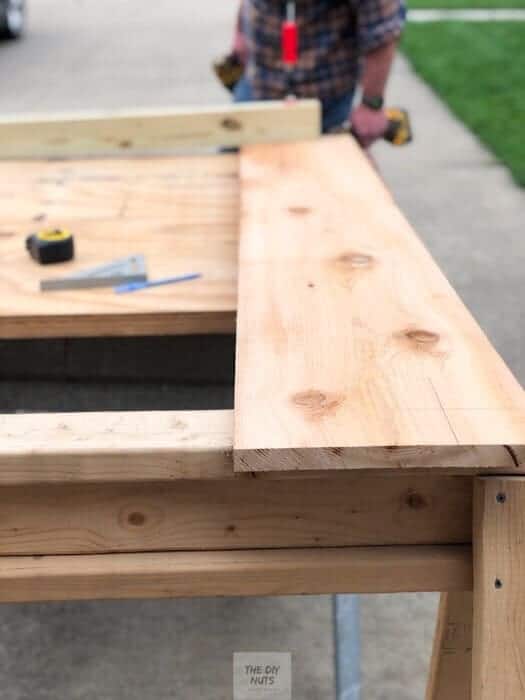
1. Cut boards to size. Our posts were 4’ long, our long sideboards were 7’ 1.50”, and our short sideboards were 42”.
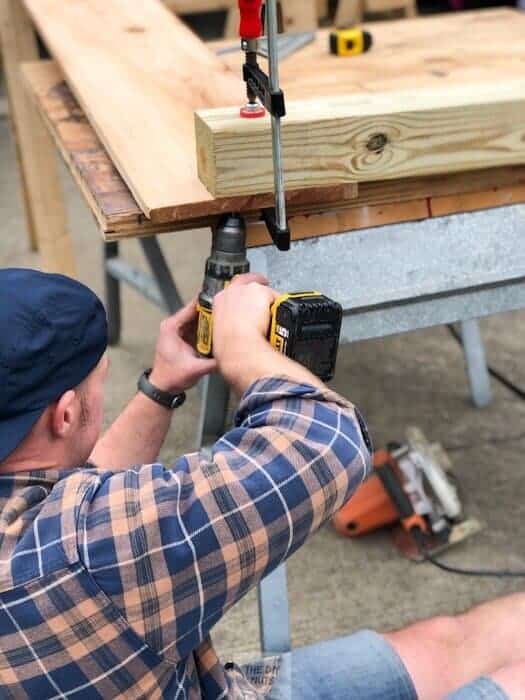
2. Pre-drill pilot holes in your 1 x 12 boards. Attach a clamp to the post and cedar board to help keep wood in place while building your raised garden boxes.
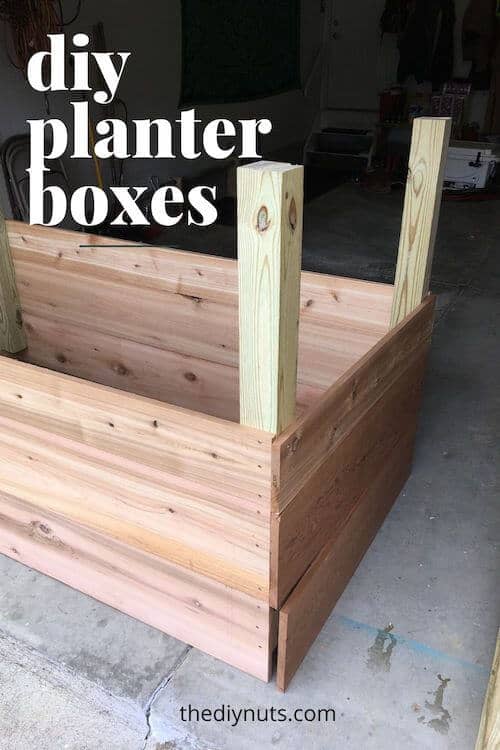
3. Screw long sides standing upright. You will need to determine if you want the finished (smoother) side facing out or in. You will repeat this step two times. Our 1 x 12 boards are 3”s above the top of the posts to leave room from the top of the board to the top of the dirt and mulch.

4. Flip screwed boards upside down, on a flat surface with the bottom of posts facing up. Updated design: Add another set of posts in the middle of the wooden boards for extra strength.
5. Attach 42” section. Try to make sure the connection is square (we know that is easier said than done)!
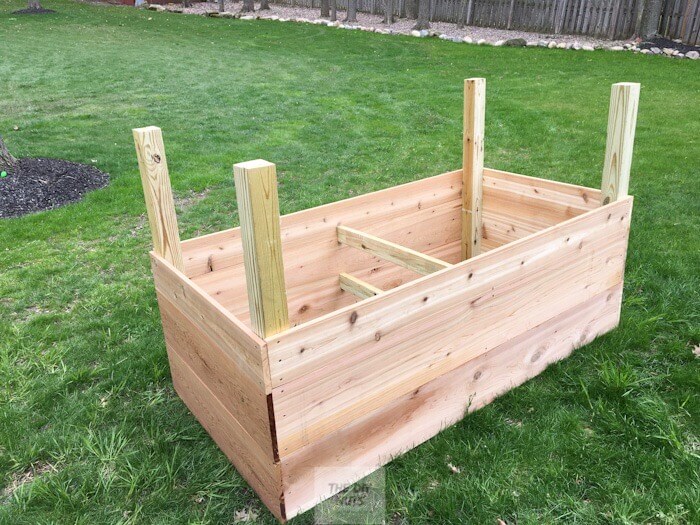
6. Flip assembled rectangular garden box right side up with the boards on top.
7. Attach cedar 2x4s inside face splitting board joints in half. This will also allow one person to be able to move the planter boxes.
Updated design: attach the 2 x 4’s to the posts in the middle.
8. Dig four post holes using a manual post hole digger or a shovel. Or if you know you will be doing more outdoor DIY projects, you may want to get an electric post hole digger.
This does take some time, but if you build large boxes as we did you will want to do this.
Update design: Dig six post holes for the extra cedar post you added in the middle.
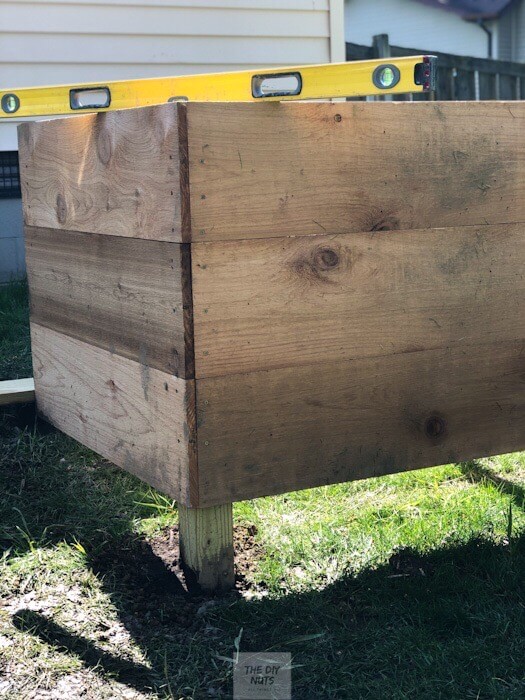
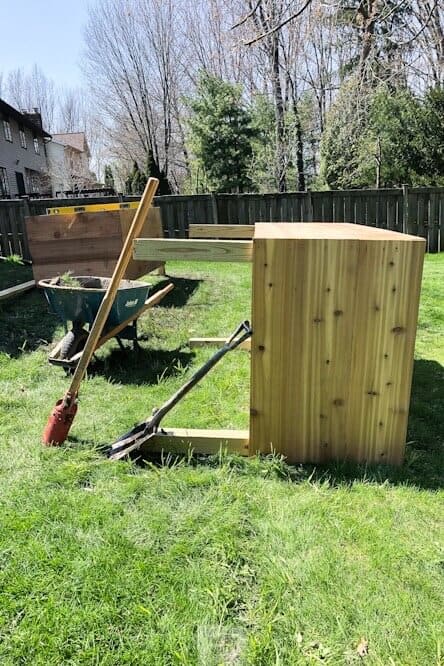
9. Set the planter box in holes. Since we are placing our garden boxes on a slight incline in our backyard it was important that we set the posts so that the box would not tip over. This also will help them stay level.
10. Place 4’ level on top of the boxes and level by raising and lowering the boxes in the post holes.
11. Mix and place bagged concrete in or by a wheelbarrow. Follow the instructions on the pack of ready mix concrete.
12. Fill holes to set posts in the ground with the mixed concrete to set the post. Make sure to let the concrete cure overnight.
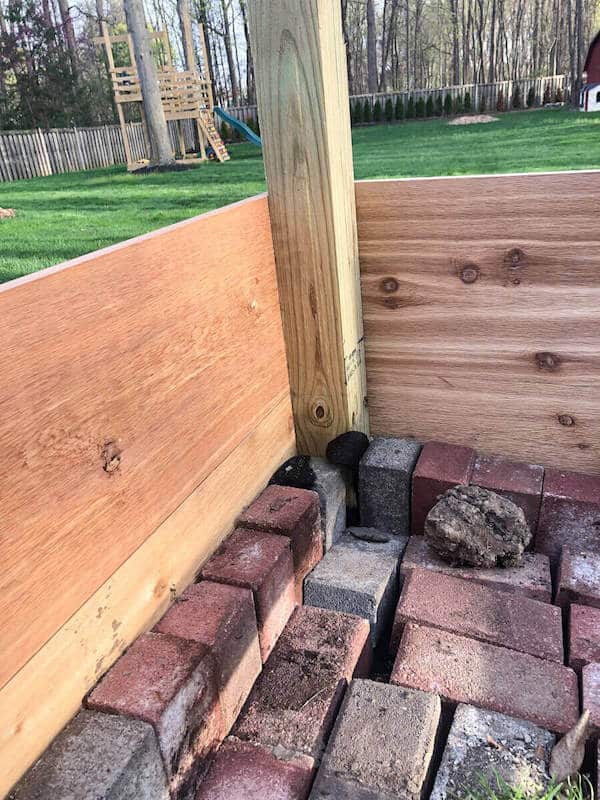
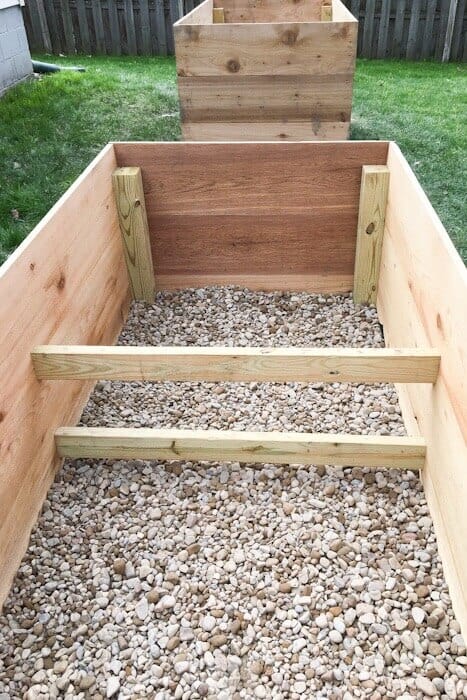
13. Rip extra cedar wood to fill empty spots if your ground is uneven like ours was and attach it to the posts.
*****Please note, from the comments we have received we believe that people are not doing this step. I am sorry that we did not have a picture up of this until now, but hopefully, this will help. You have to create a barrier for the dirt to not come out. The weed barrier alone will not be able to handle the weight of dirt, etc on its own.
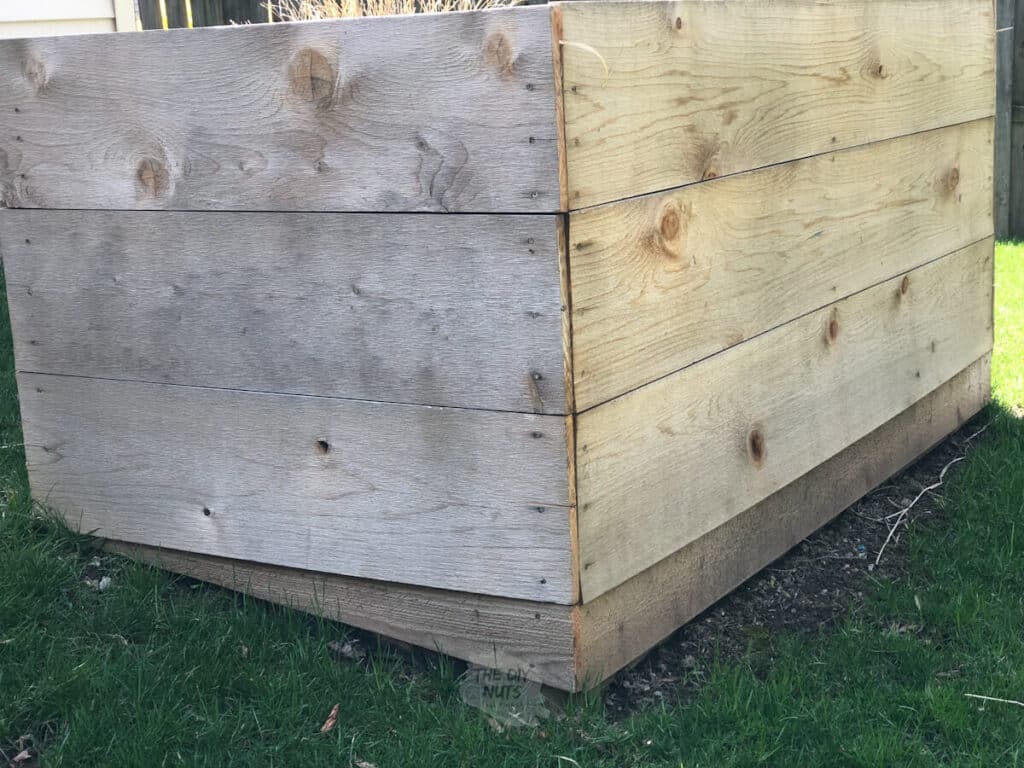
Optional: You could figure out how to build some sort of base inside your box to help hold the dirt. We just felt we could rip the wood to fill that empty space and hold the materials inside the box.
Tips for using ready mix concrete to set posts
- When mixing concrete, do not add too much water. It is better to be a little dry than too wet.
- Wear gloves when mixing concrete in order to avoid getting concrete burn.
Do your planter boxes have to be as big as ours?
No, definitely not. We would have still gotten the benefit of having a simple design even if we would have made them two boards high instead of 3.
My husband really wanted to make sure that it was easy to reach everything and keep the animals out. In two years, we have been lucky that we haven’t had any extra nibbles on our vegetables.
How to prepare raised garden boxes for plants
1. Put the weed barrier inside the bottom of the box.
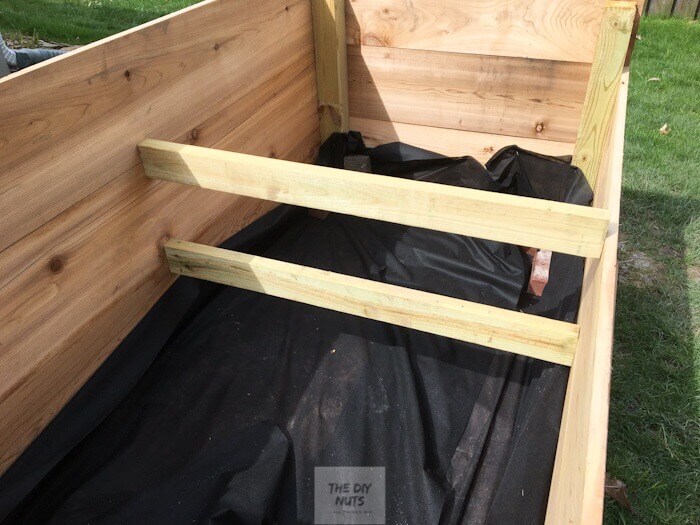
2. Roll up the inside face 6 inches and staple it to the inside of the bottom of the box using a staple gun.
3. Place 11 inches high of materials that promote drainage. We used old bricks in one and landscape pavers and #57 washed river stones. We have seen other garden bloggers use other organic materials like logs to help fill their planter boxes.
4. Place 24 inches of topsoil and garden mix soil. Our son sure loved helping with this process. It does take time, but we love doing things ourselves. Depending on the size of your boxes, will depend on how much soil you need.

Tip: We used a local landscape supply company as you need a lot of dirt to fill your planter boxes. Most areas should have a company willing to deliver soil right to your driveway.
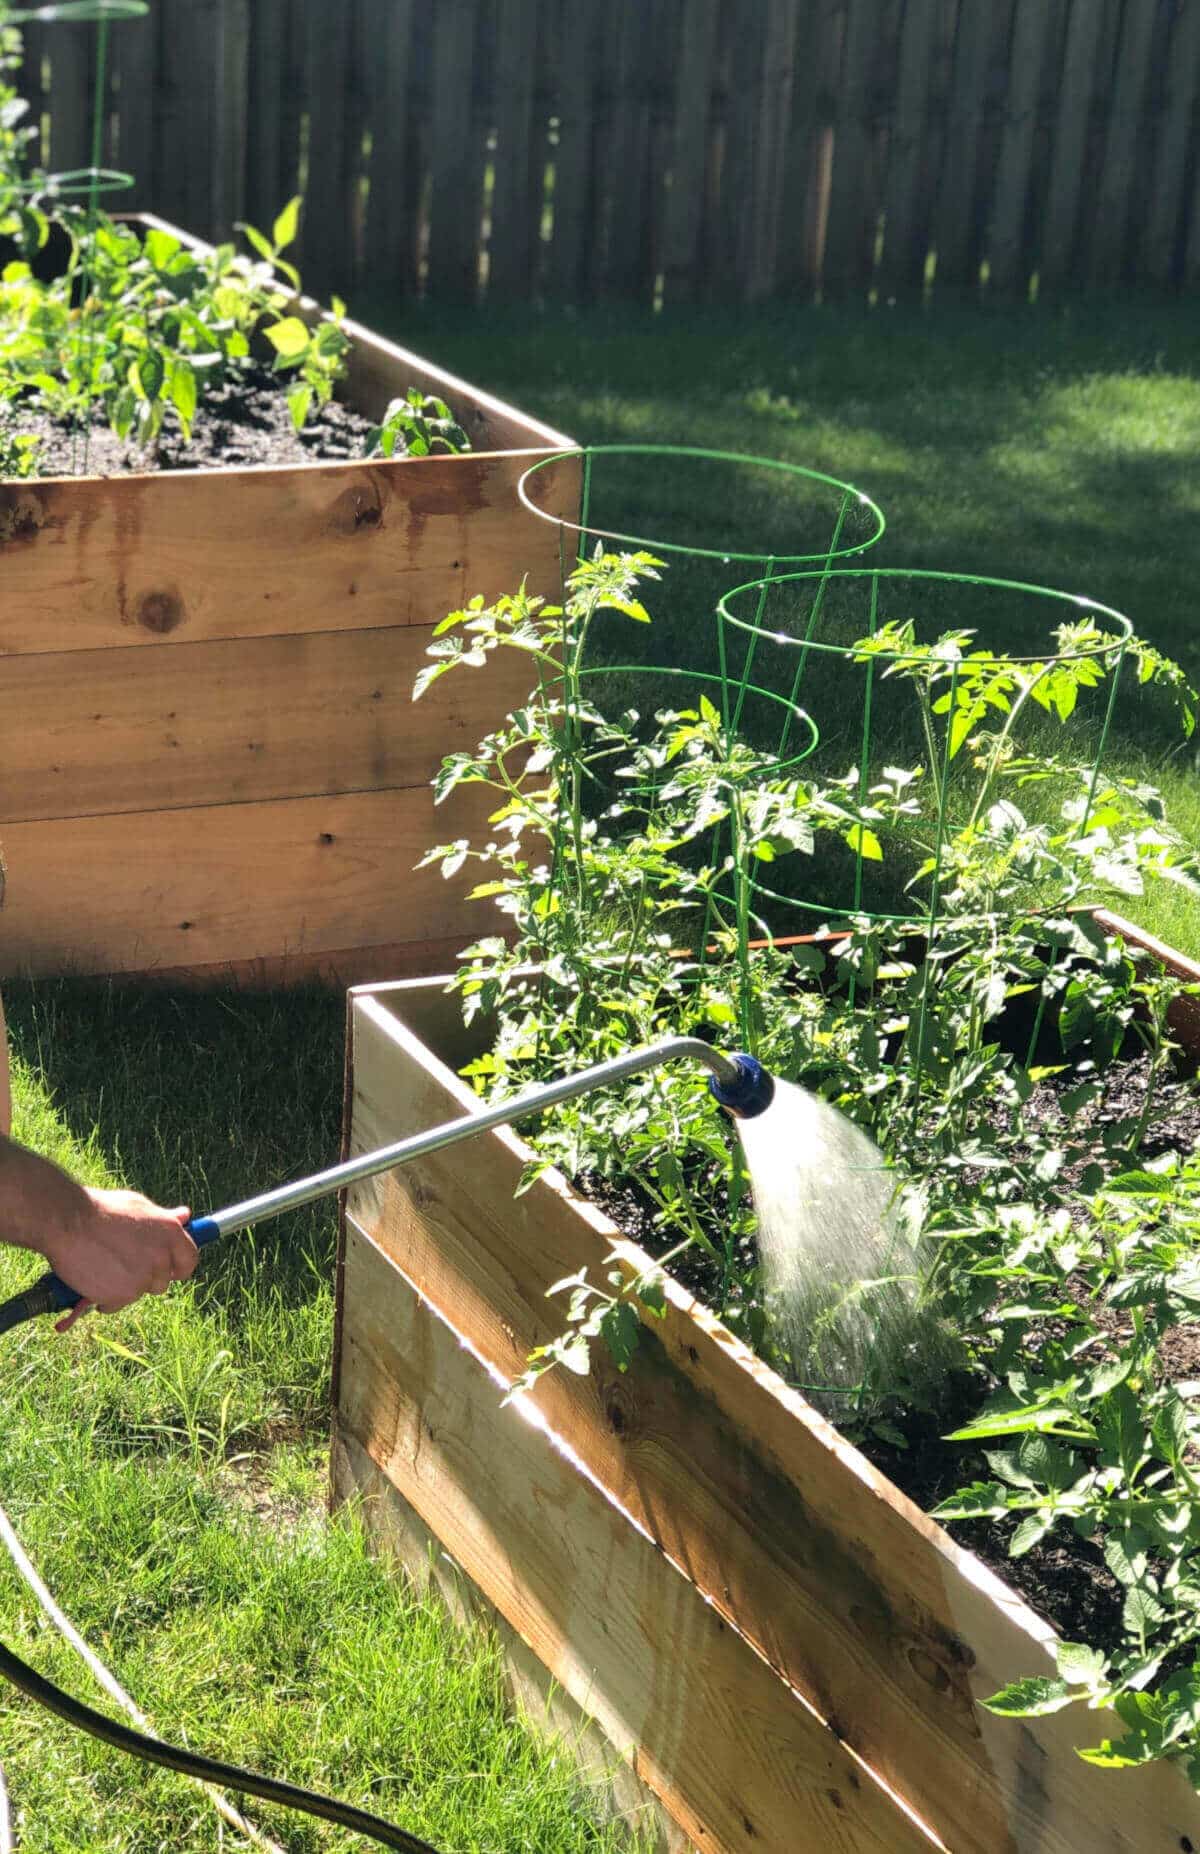
5. Place 2 inches of hardwood natural mulch on top of the dirt in your raised garden box.
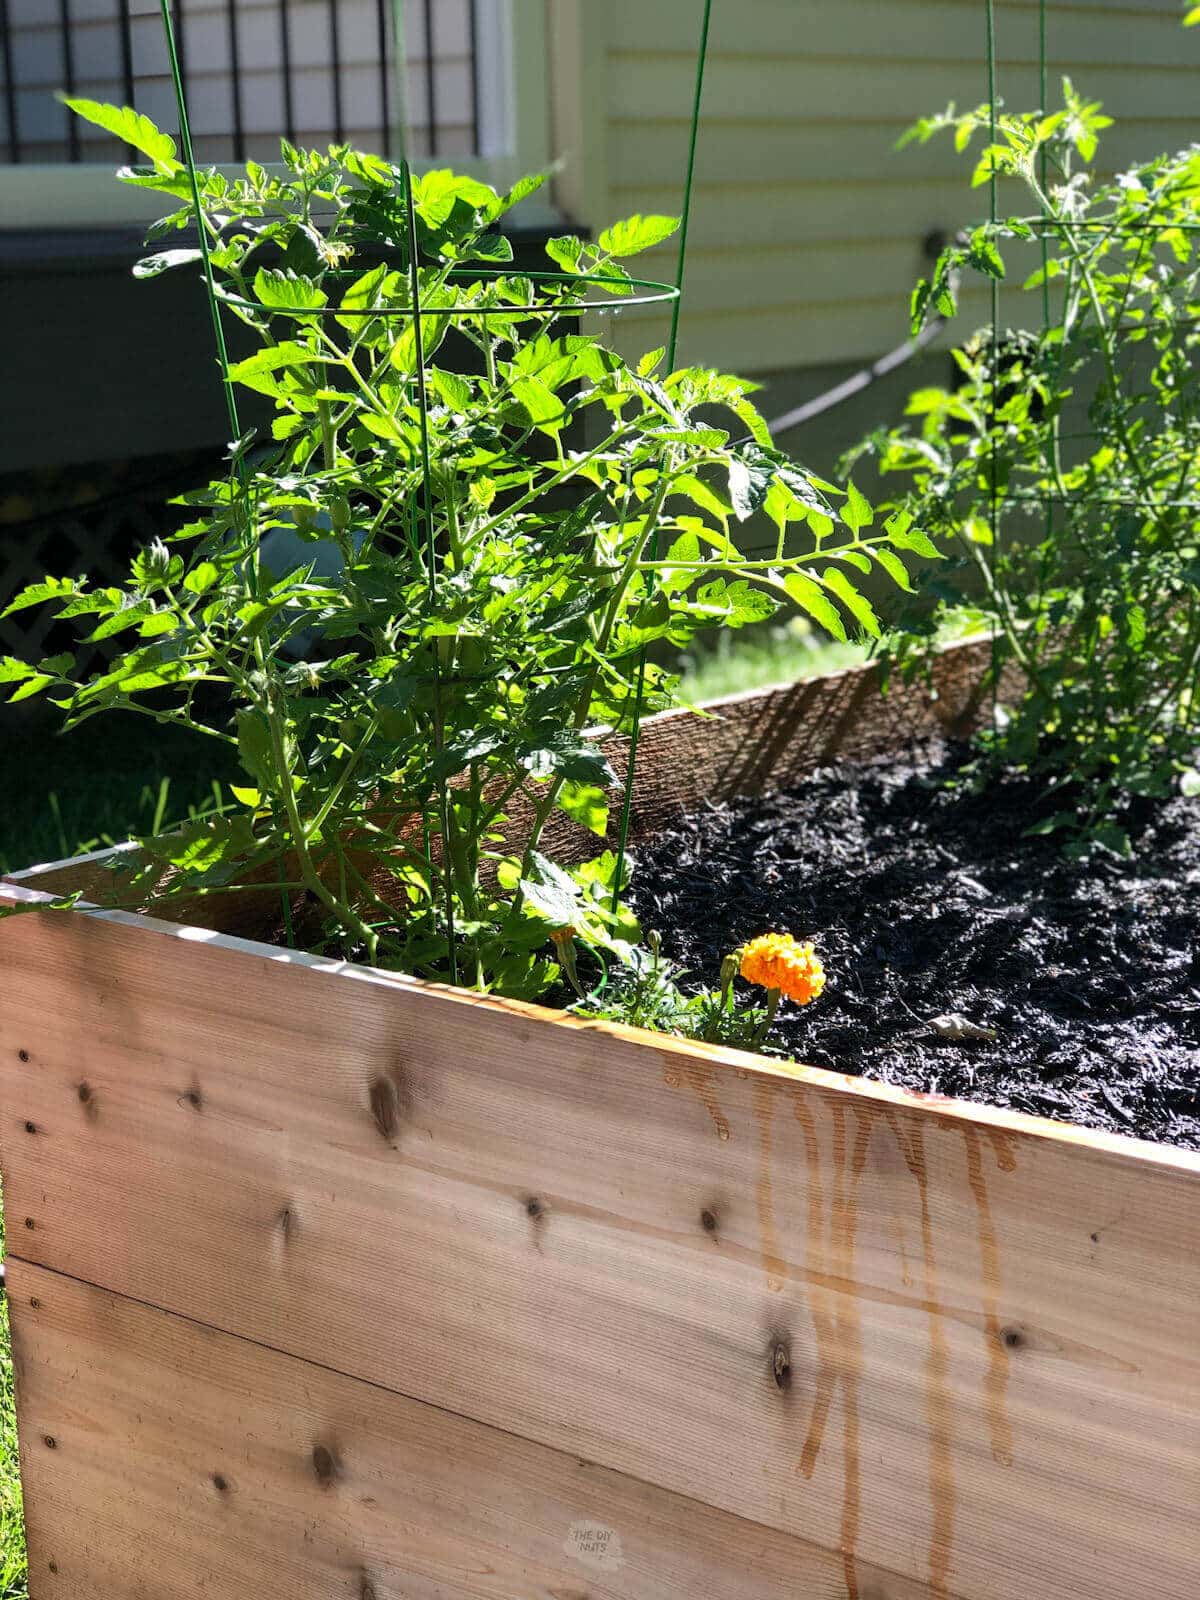
6. Plant your garden accordingly. We plan on planting tomatoes, green beans, pepper plants and herbs in our raised garden beds. You will have to check back and see how our plants do this year!
Companion Gardening
You may want to check out this article about companion planting from the Farmer’s Almanac and how to choose what to plant next to each other in your garden boxes.
Or check out this post from DIYDanielle about easy plants to grow outside. If our vegetables don’t do well this year, I may need to revisit this list next year!
Future Plans
Next year we hope to try to start composting and add another raised garden bed. We will test our green thumbs out this year and see how we can add and improve our garden each year.

How did we improve on the original DIY planter box design?
- Add a post in the middle of your boxes and not just in the corners.
- Attach the middle 2 x 4’s to the middle posts for extra stability.
- Used bricks on top of the weed barrier to help contain any materials leaking out. Our old boxes never had anything come out, but we really ripped the diagonal cedar to match our hill.
- Built this garden box on-site in the backyard instead of in one piece in the garage and carrying back to the site.
Follow us on Pinterest, YouTube or Facebook for more DIY inspiration!
We just love our new DIY planter boxes and can’t wait to see how much fun we can have growing in our own garden!
Beautiful! Thank you for the step-by-step. These will make a wonderful gift for my daughter. She loves to garden!
I am so happy that you found this DIY tutorial. I hope your daughter has a lot of success growing in her planter boxes.
Question about the raised garden box – what is the construction of the bottom of the box to hold all the weight of the drainage material and dirt? I see instructions for the sides of the box with only weed fabric inside? There must be some bottom?
We actually did not create a bottom of the box. The fabric is just stapled around the garden box edge. Good luck with your outdoor garden box.
These are great instructions, and so detailed! I am tempted to start building immediately. ?
I am glad you like our raised garden box tutorial. Thank you for stopping by our DIY site.
My mom and I are looking into making raised garden beds for our small garden! This will definitely help us tremendously!
Yes, this garden box tutorial should help you out. Just note our raised garden beds are HUGE, so you will be able to adjust accordingly to your size.
Wait this is PERFECT! We are literally building a new garden in the coming weeks once quarantine is lifted and we can finish our new home. Love it!!
Hi Christina! I am glad you loved our tutorial of how to build raised garden boxes. Good luck with your new home.
These will make a wonderful gift for my daughter. She loves to garden. We are literally building a new garden in the coming weeks once quarantine is lifted and we can finish our new home. We plan on planting tomatoes, green beans, pepper plants, and herbs in our raised garden beds. You will have to check back and see how our plants do this year.
Hi Corten. Yes, our tomatoes did amazing last year! This year we are even going to build another raised bed just for our young daughter as well! Good luck with your veggies!!
Love the detail and the design. I saw another person’s question around what was used on the bottom. I am curious as to how well this had held up with just the weed fabric as that is a lot of weight and more so when you water. I am looking to do this but for large split leaf’s behind our pool.
Hi David. I do need to take an update picture of how my husband added finished ripped wood to fit the angle of the ground on the sides. Currently, this has worked and we are about to start a new planting this season. We did not have any soil or anything leaking out of our raised boxes. I am glad you like this design and good like with your planter boxes.
Can’t wait to build a couple boxes! How much dirt did it require to fill?
Hi Lauren. We had layers of other materials (paver stones, river rock and then dirt). We used 1 cubic yard of dirt per box. Good luck with your raised planter boxes.
I built this last spring and used 1″x4″ cedar for the bottom, before putting in the landscape fabric, and all the soil. Held up great until this spring, and the whole bottom collapsed. I’ll have to rebuild it this spring and put in some 2″x4″ bracing underneath as well. I don’t see how this could possibly hold up with just a fabric bottom.
Hi Randy. I am sorry this happened to you. I just added a picture in step 13 about how we ripped diagonal boards to help contain the dirt. Up until today I never had added the picture and I know that step might have gotten overlooked. Good luck with your planter boxes and again sorry for your experience.
If I missed it, I do apologize. However, I guess my most important is did you save on the unit cost of making your own planter box versus buying an equal version from one of the ones you listed?
Hey Chris. With the lumber prices right now, a small raised garden kit may be better. My husband wanted large and tall boxes to fit in the space in front of our deck so we built ours due to the fact that he wanted them a custom size. Good luck with your planter boxes!
hi! I’d like to build a few of these, but can’t put anything in the dirt. can i build this with a bottom and stand it on my stone patio?
Yes, I would think you could build these raised garden boxes with a bottom. However, you may want to make them smaller and not as tall in order to make sure that the legs you add can support this and that your patio can also withstand the weight once dirt is in. Good luck with your DIY garden boxes.
I am very obliged to you that you have shared this important information on raised garden bed ideas with us. I got some different kinds of knowledge from your webpage, and it is helpful for everyone. Thanks for sharing it once again.
Aaron, you could have prepped the ground level and placed box on top. You would have eliminated the angled fill in pieces. I would also recommend radishes and watermelon for your garden.
Hi Steven. Yes, that would have worked as well. Thanks for the tips.