Chalkboard Wall Mural For Kids
Learn how to make a fun chalkboard wall idea kids will love.
Print Tutorial
Equipment
- A small brush (not pictured)
- Small Cup
- Found objects to trace for frames
- 3/8" Nap Small Roller and handle
Supplies
- Chalkboard Paint
- Watered Down Acrylic or Latex White Paint
- White Chalk
Instructions
- Sand the wall for the smoothest surface you desire. The smoother the wall the easier it will be to paint, draw and clean.
- Wipe the wall to get rid of extra dust.
- Prep surrounding areas. Measure and tape out the work area if need be.
- Use a small or large roller to apply the chalkboard paint.
- Let dry.
- Roll another layer of chalkboard paint. You need to have at least 2 coats (possibly 3 for full coverage).
- Plan out your design. You could measure everything, but I just found the middle of the wall and went from there.
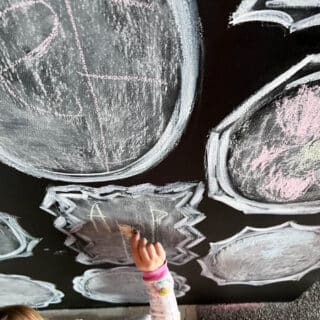
- Find objects that can be traced to create the frames. We used an oval paper plate, a piece of tagboard and a plastic circle that holds a paper plate.
- Use a white piece of chalk to lightly sketch out the placement of your frames. You can trace items you found in the previous step.
- Continue using chalk to design frames. You can be super precise or just kind of wing it. Repeating different simple lines will do the trick to create a frame-type feel.
- Once you like your design, go over some of the lines with watered-down white acrylic paint (about 1/3 water to 2/3 paint). You really won't need much paint.
- Let the chalkboard paint fully dry.
- Prime inside the frames in the mural. Rub the side of the chalk in the area that will be chalked on. Use your fingers to rub the dust into the texture of the wall.
- Let your little ones start creating.
Optional
- Use paint chalk markers to come up with more permanent designs. You could use an easy letter transfer method with chalk on the back of my printout instead of graphite.
Notes
- Rustoleum recommends painting on a smoother surface with a small foam roller. Our plywood wall is not nearly as smooth therefore we used roller with nap.
- Watering down the paint gave a "chalky" look of the paint mixing with the chalk on the wall.
- We recommend waiting at least 3 days before you start drawing on your freshly painted walls.
- Priming before drawing is one of the most important parts. By adding a layer of chalk you are allowing the drawing on top to be erased easily.
Cost: under $40