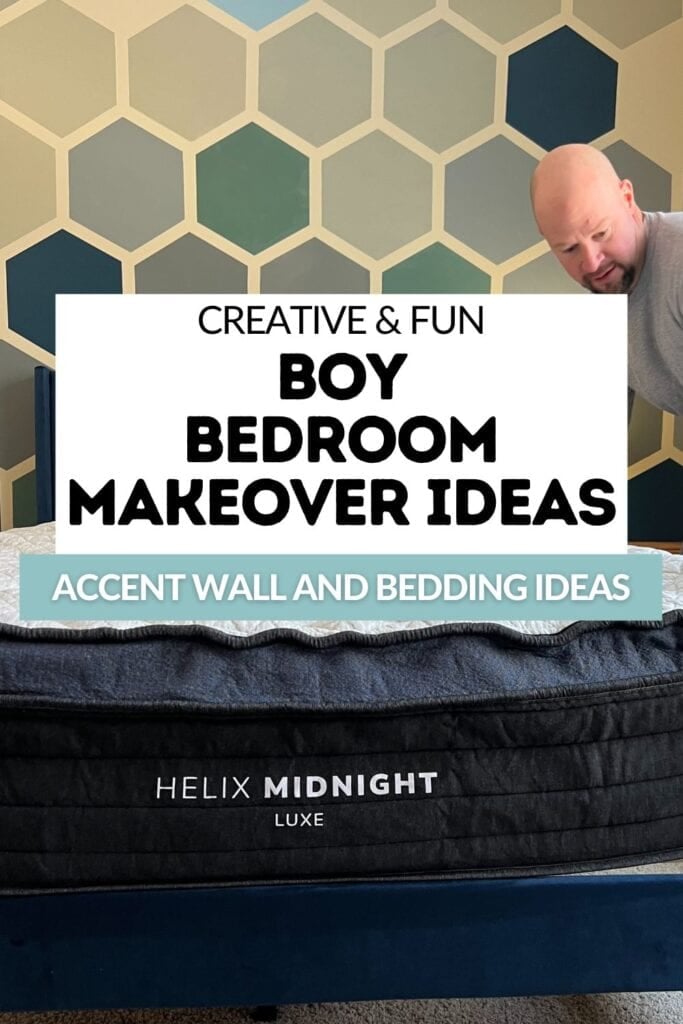
Our DIY Boy’s Bedroom Makeover
When our children were switching bedrooms, we knew we needed to do a few DIYs to makeover our son’s room. We changed one of our first DIYs, and I am so happy I did it in one afternoon!
The Bedroom Plan
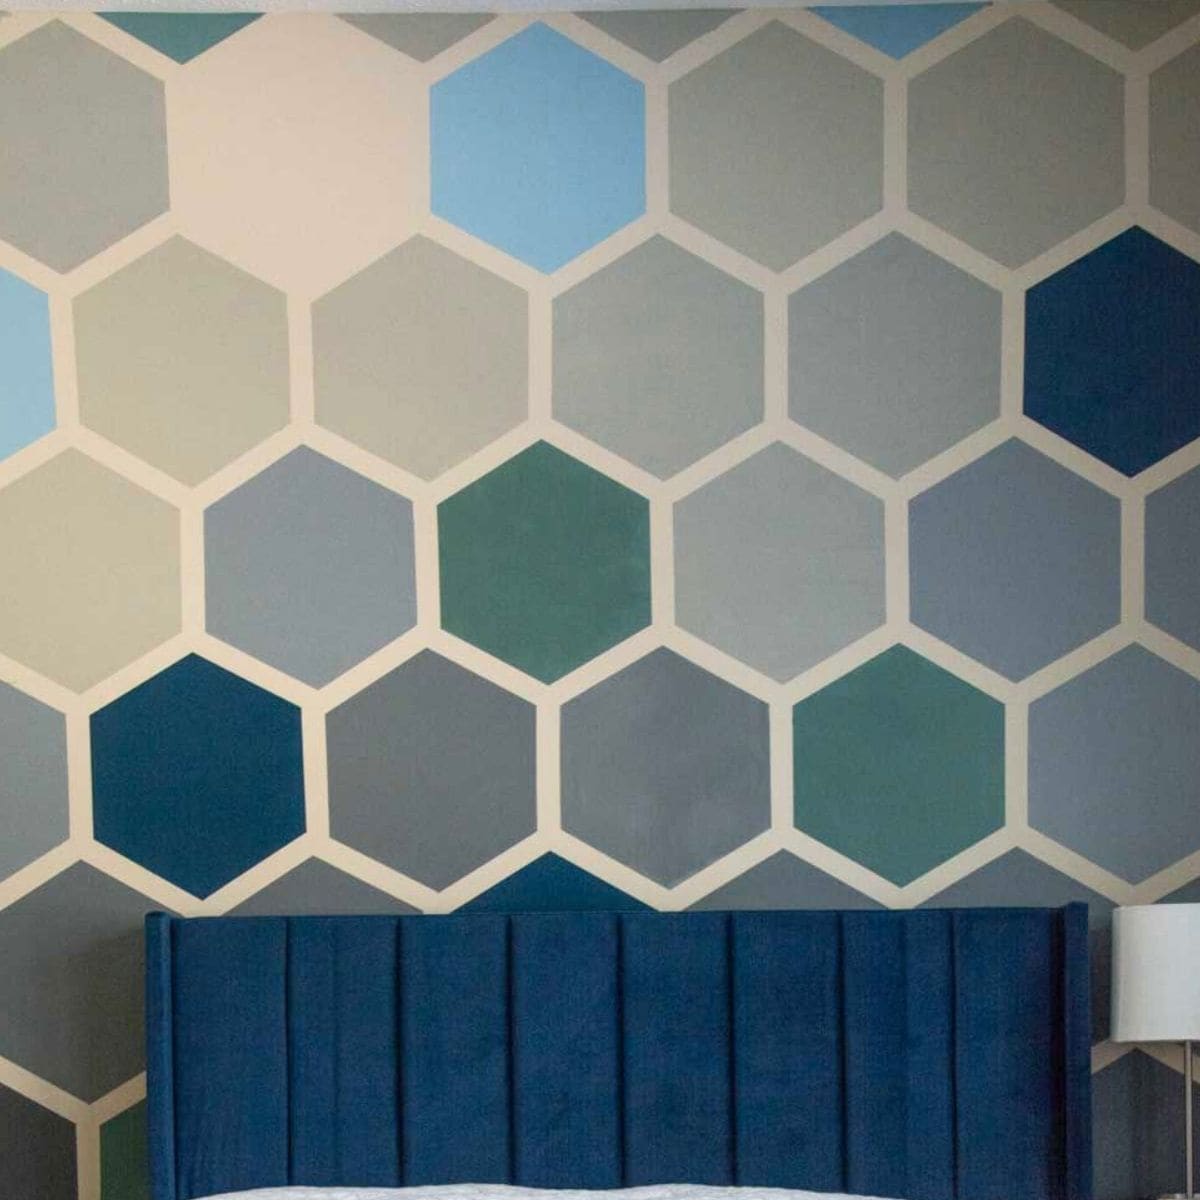
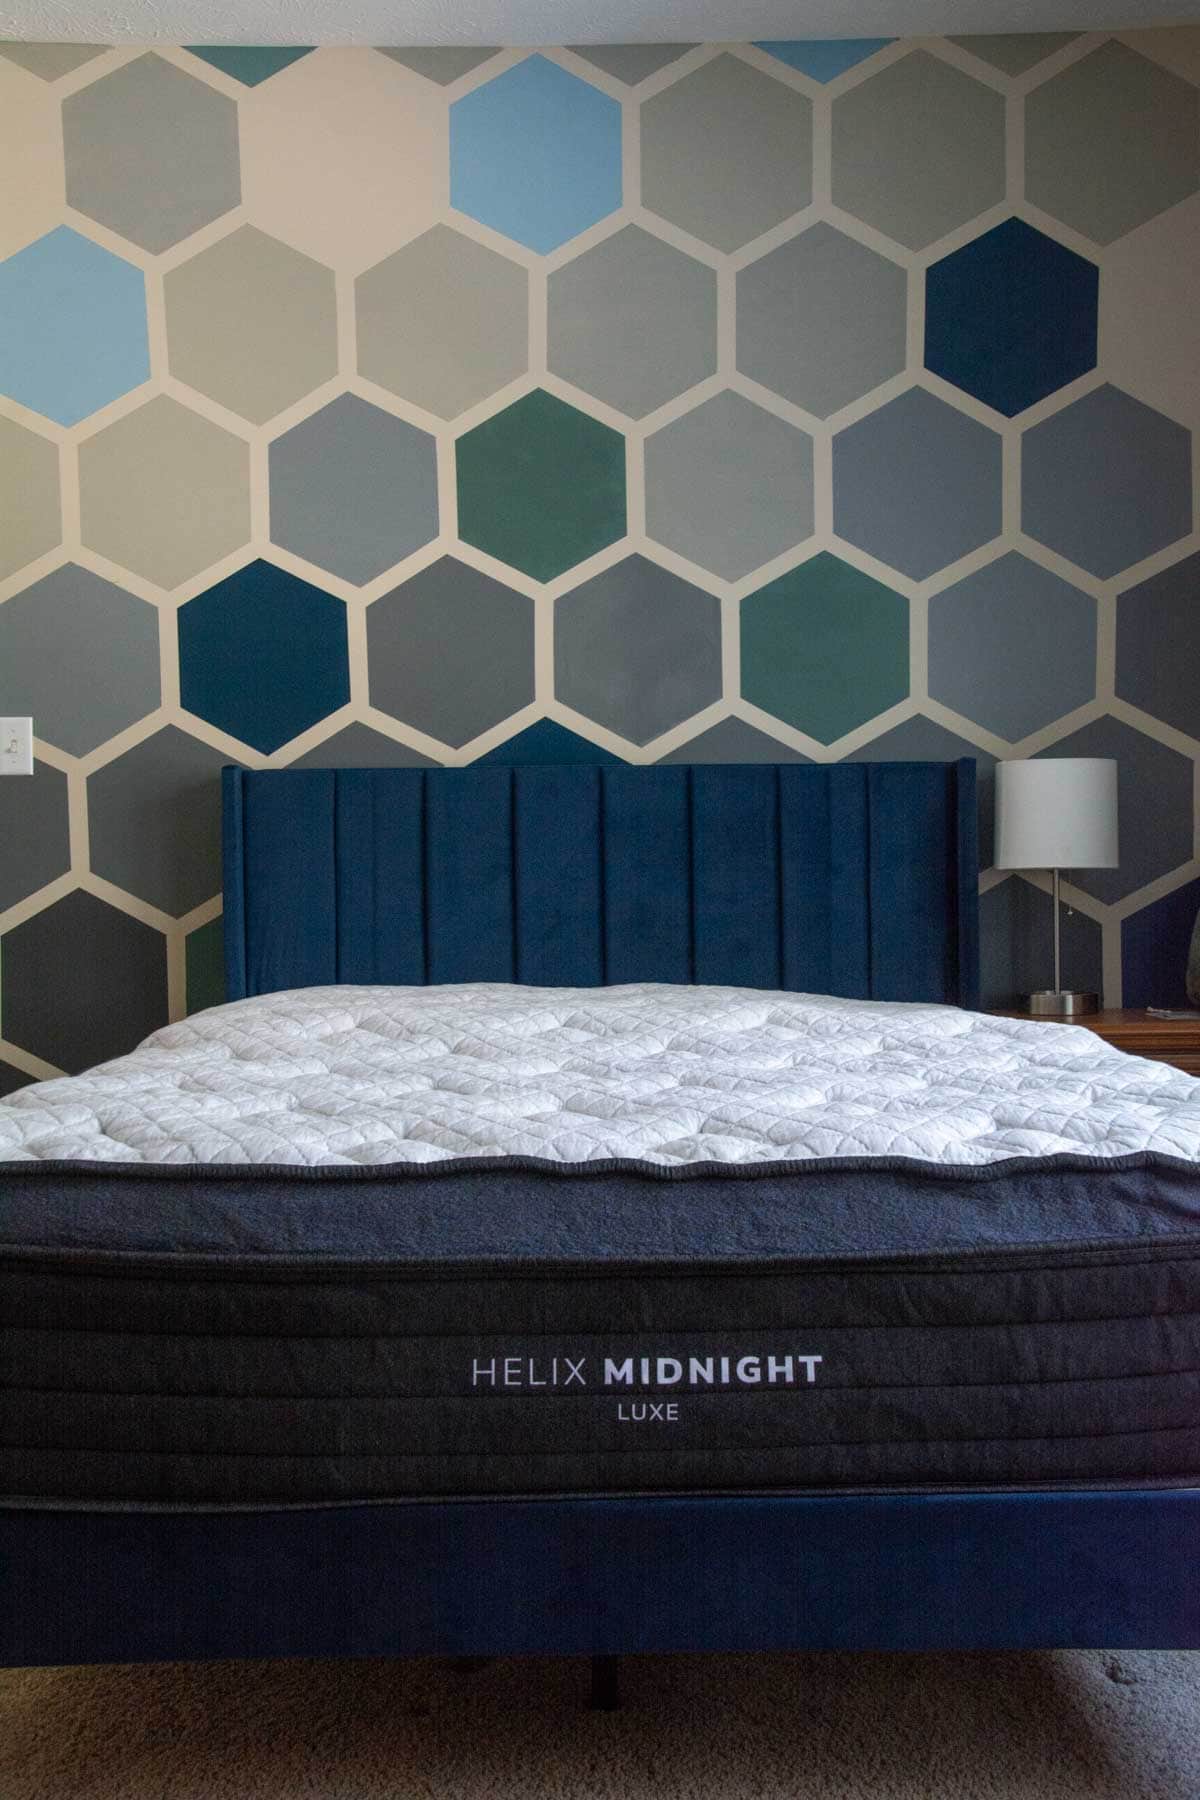
Back in 2019, I had painted a DIY hexagon accent wall for a fun kid’s bedroom idea. The original wall was painted in a pink-and-gray color scheme. While we love this wall, we knew we needed to change it for our son!

Supplies You’ll Need
*Disclosure: This post may contain affiliate links that at no additional cost to you, may earn a small commission. Read our full privacy policy.
Notes On Supplies
- This multi-surface paint gives the best clean lines.
- Since we were only painting the pink hexagons, we were able to use mostly 2 colored paint samples from Lowe’s
- Picking colors from the same swatch may make them more cohesive.
Hexagon Accent Wall Makeover

Step 1: Plan The Color Scheme
For this wall painting project, we used 2 paint samples and extra white paper we had.

Step 2: Tape The Hexagon Shapes
Since the design was already there, we retaped around the pink hexagons. Press your fingernail along the inside edge of the tape to help seal it to the wall.

Step 3: Paint Darker Colors
Using a small foam roller, paint 1 coat. Repeat for 2-3 coats of paint, allowing proper drying time between coats. I started with the darker hexagons at the bottom.
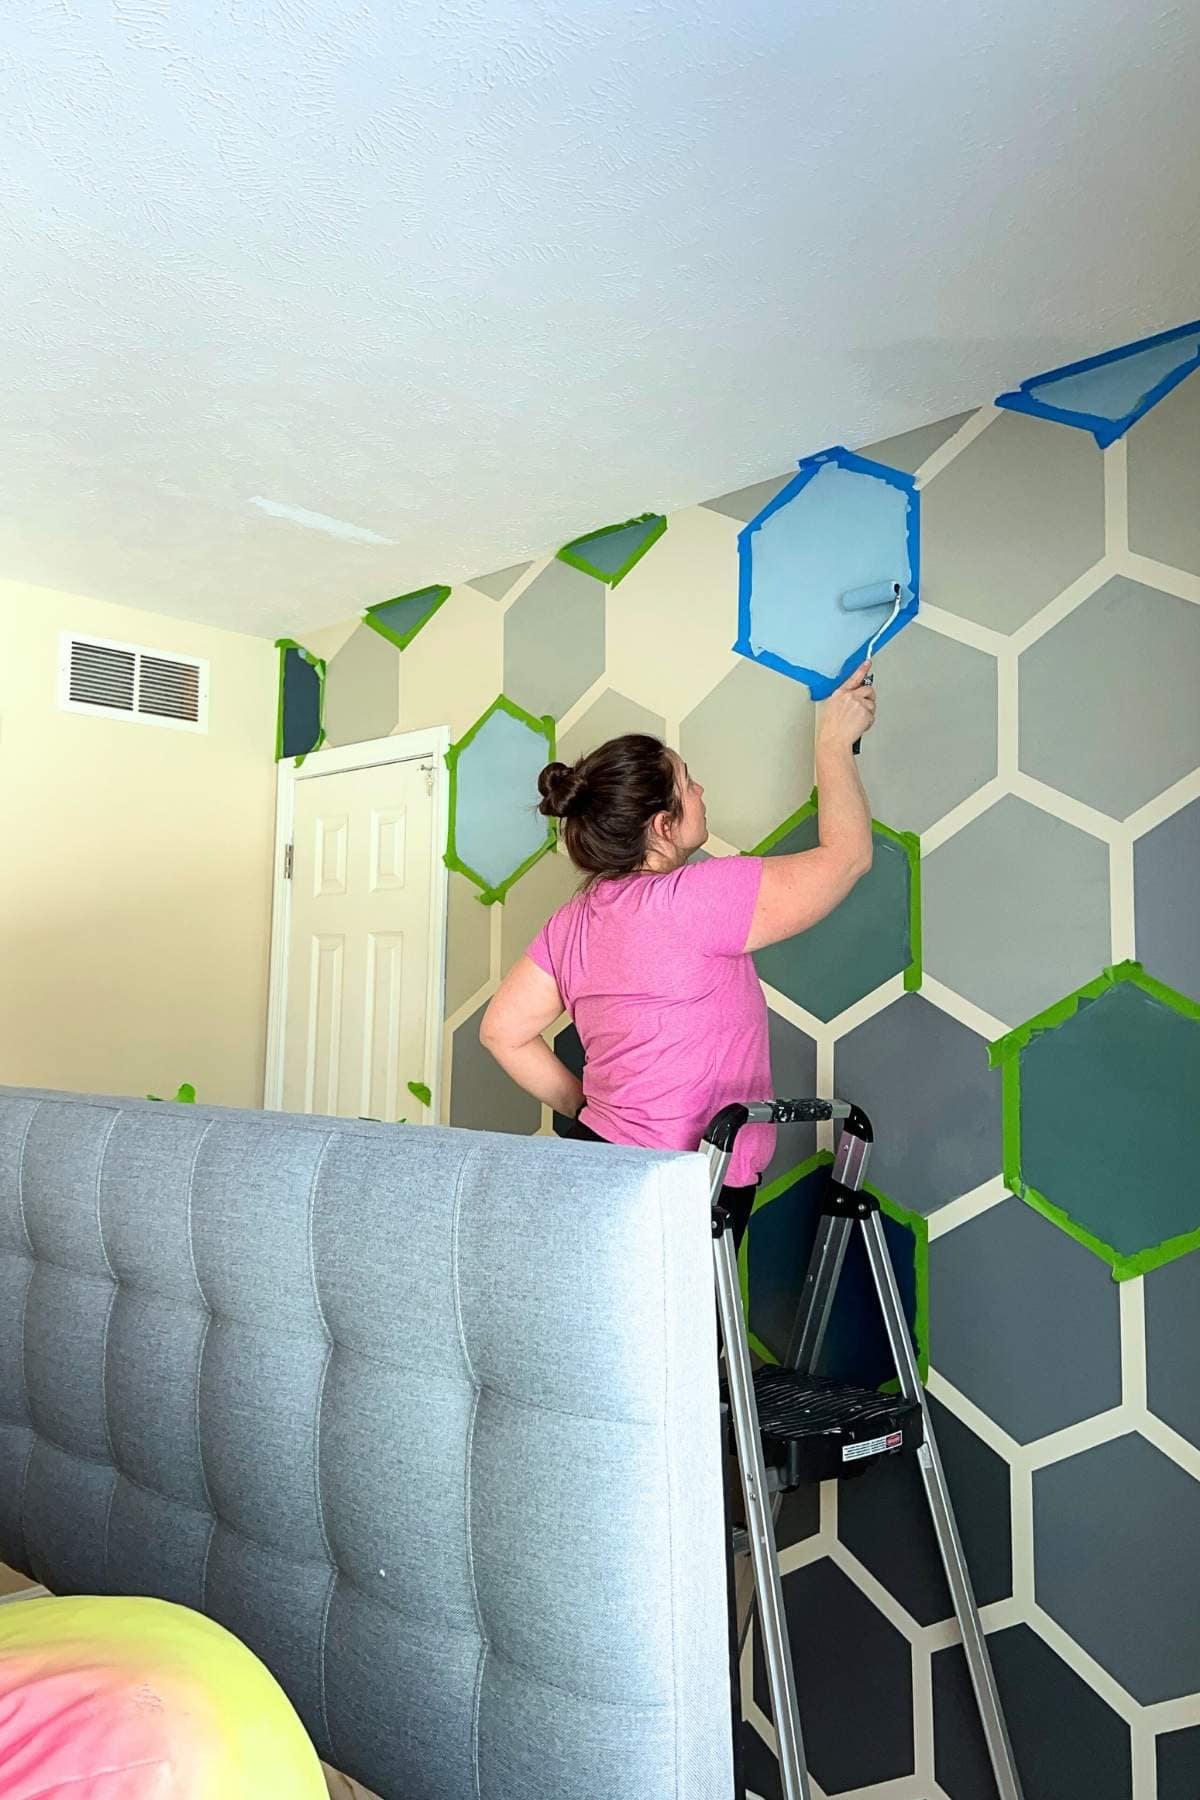
Step 4: Repeat For Lighter Hexagons
Mix the paint to achieve the colors you want, or buy an extra sample and use it as your lighter color.

Step 5: Pull Off Tape
Once I was happy with the paint coverage, I carefully pulled off the tape. I actually prefer to remove the tape while the paint isn’t completely dry.

Step 6: Repeat
Repeat all steps until the hexagons are completely painted to your liking.
Bedframe and Mattress
MATTRESS – For the mattress, we chose Helix Midnight Luxe with the Eroalign layer. The mattress was delivered promptly, was easy to get upstairs, and inflated quickly on the frame. We love the medium firmness and support the mattress provides.
HELIX SLEEP PROMO CODE: Use code: ERIN to get 27% off your Helix Sleep purchase.


BEDFRAME – We actually purchased this bed frame and headboard in gray for our daughter’s room makeover and thought it was a pretty good find. Sturdy, looked nice, and was budget-friendly.
Follow us on Pinterest, YouTube or Facebook for more DIY inspiration!
MORE
Related Painting DIYs
We are so happy with the outcome of our afternoon bedroom makeover. Our son felt super special to finally have a room customized for him and a new comfy bed!