Easy DIY Memory Boxes To Organize Keepsakes

Is your home overflowing with all the precious artwork, school pictures, and everyday items that come with having kids? If so, you are not alone. These DIY memory box tips are great ways to start cherishing those memories and declutter simultaneously.
We know how overwhelming it can be to keep everything organized and neat. And if this is the first time your child is going to school, be ready for all the papers and projects! Creating these DIY memory boxes for each child now will save you time!
Finding The Right File Cabinet Container
- Setting these memory boxes up the right way now will only make it easy to add essential keepsakes as things come home.
- Consider a portable option so you can physically give it to my kids when they are older.
- Make sure you can hang files for easy organizing.
Supplies You’ll Need
*Disclosure: This post may contain affiliate links that at no additional cost to you, may earn a small commission. Read our full privacy policy.

Shopping For Plastic File Container Boxes
If you are like me, you will price shop around to find the best value for a plastic file container that works for you. Here are several that I would have considered buying.
- BANKER’S BOX – I like the idea of a clear bin; however, items may fade more quickly.
- STERILITE 18.5″ x 14″ CLEAR PLASTIC BOX – This is an excellent clear option, but it does not have a handle. Compare prices at Target.
- STERILITE BLACK BOX (Walmart) – This is the box that we used.
Before placing things in these bins, you may be interested in other ways and tips to display artworks before they permanently find their home in the keepsake box.
You can personalize these by simply adding my child’s name, which was all that this needed.
How To Hand Draw Name Easily
You can use my easy letter transfer technique to place each of my kids’ names on their keepsake boxes. If you are a Circuit user, that would also be a great way to make a name decal.
You will see how easy it is to personalize each box below.
- Print out their name in a font and size you like.
- Scribble with a pencil on the back of the printout where the words are.
- Neatly tape the printout on the box and use a pencil or pen to trace the design.
- Take the tape off to see the graphite you transferred.
- Use a paint marker (our favorite brand) to fill in the lettering.

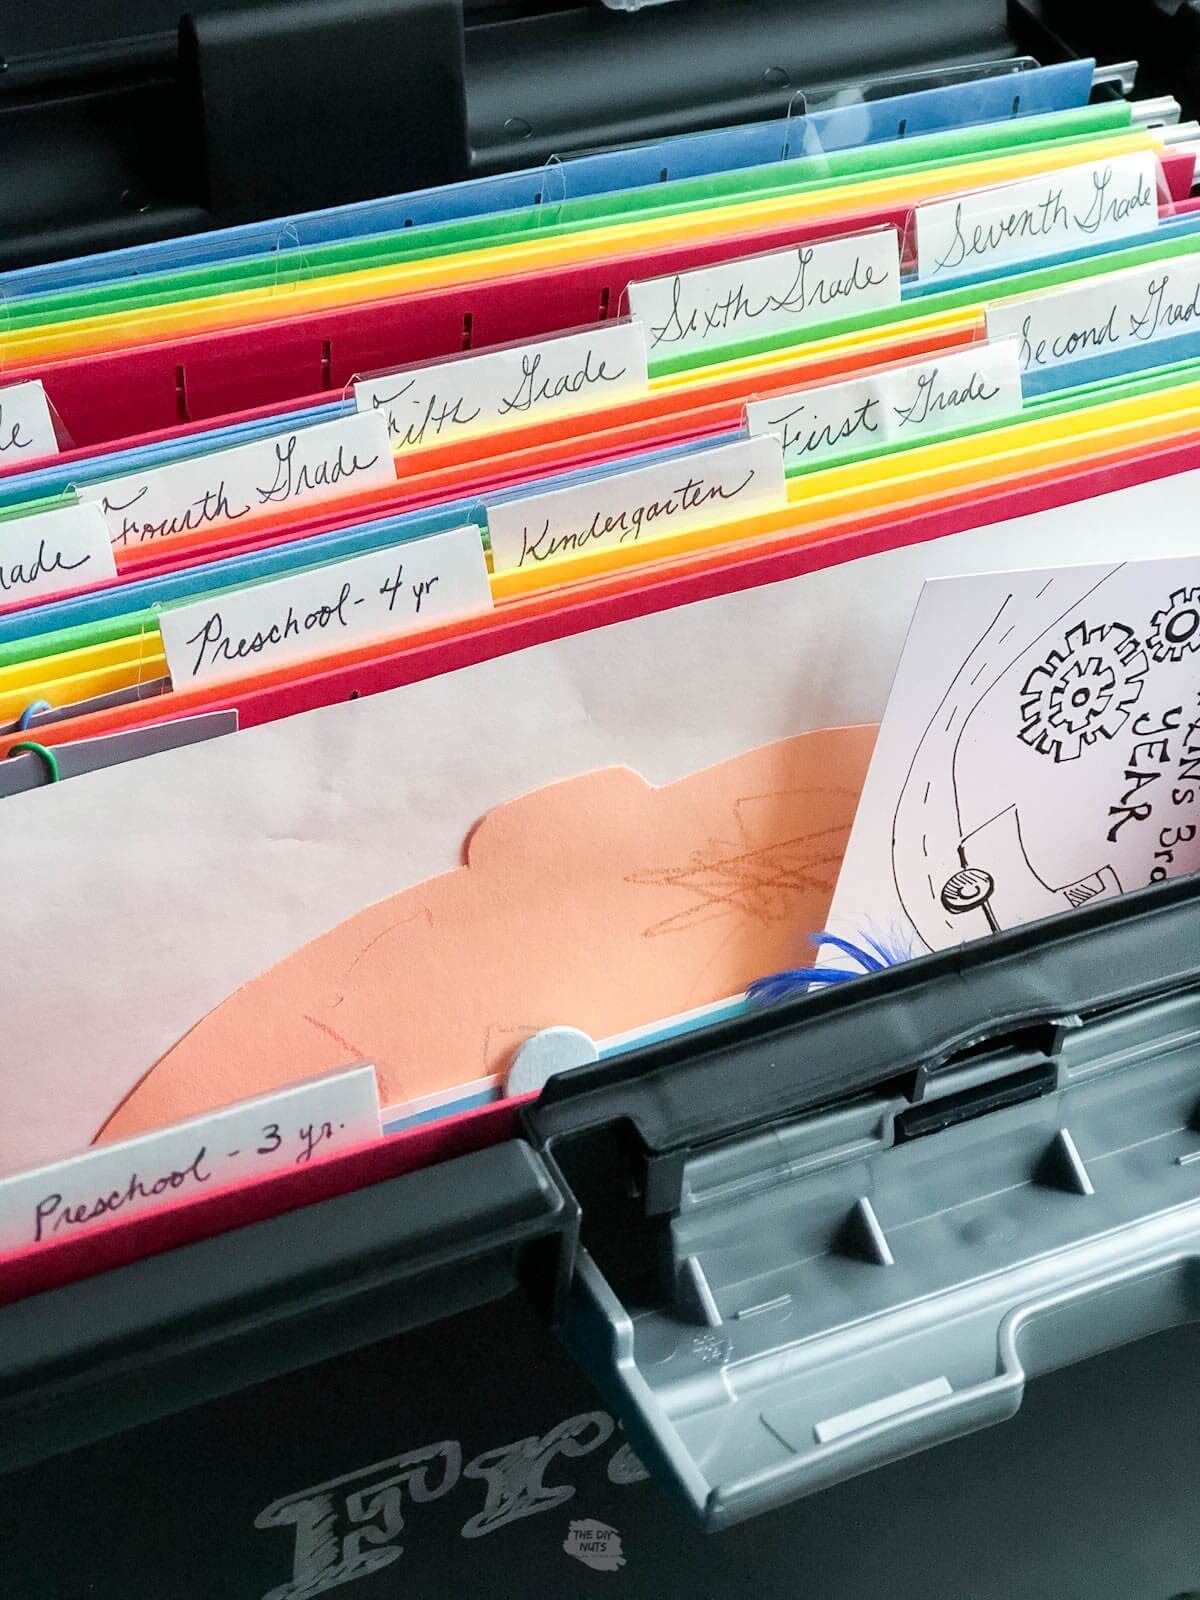
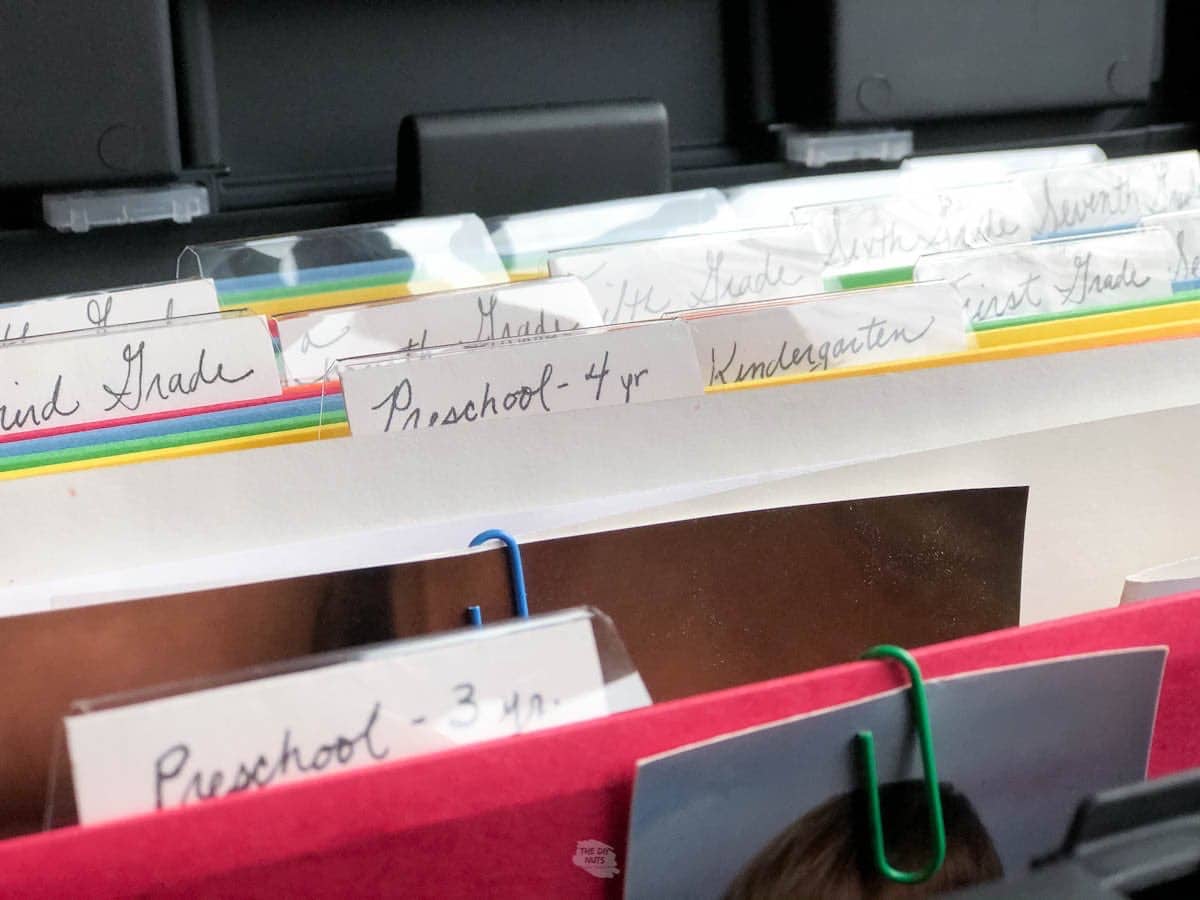
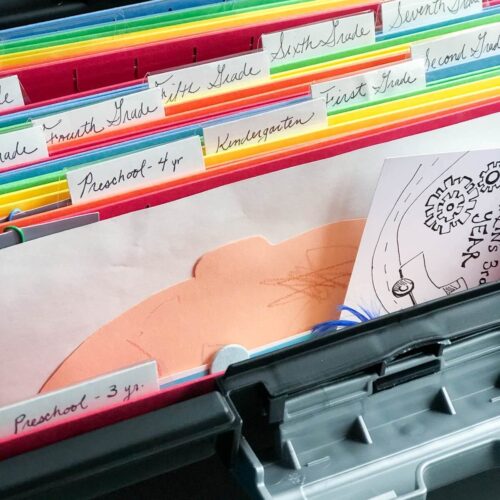
Create File Folders By Age
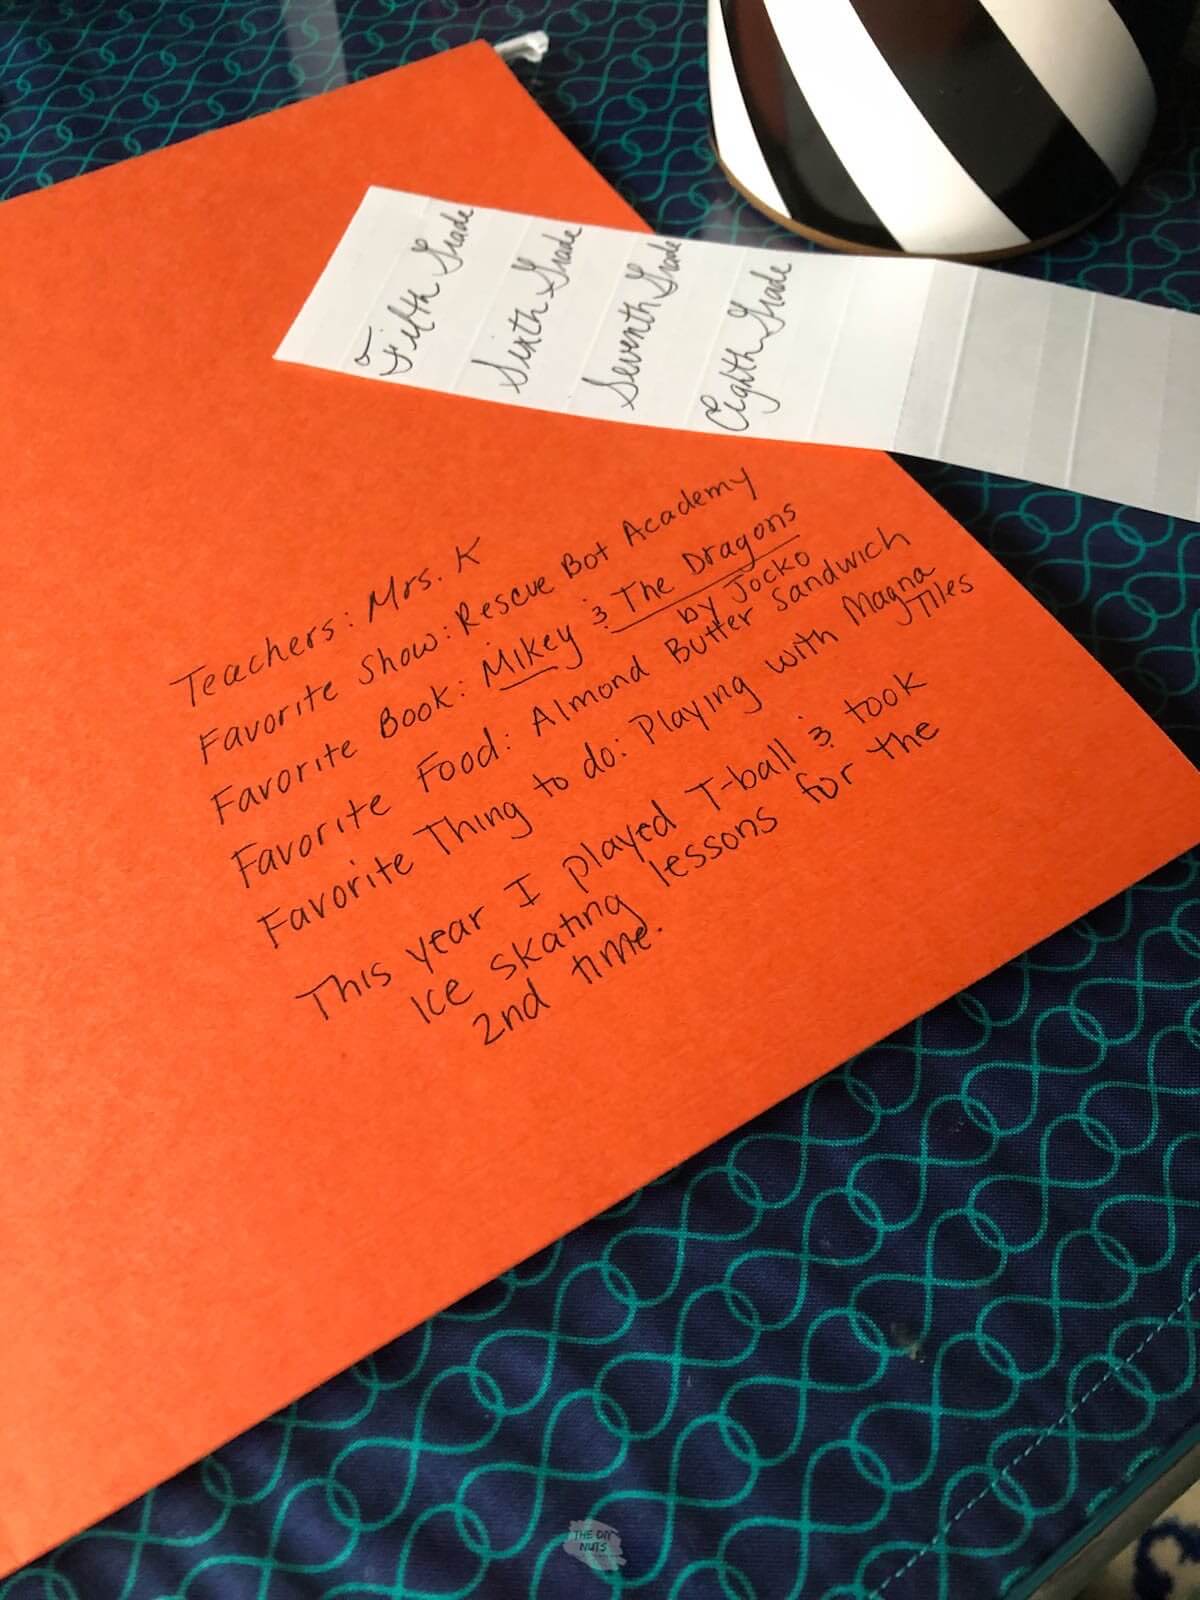
- On the outside of each age file, put the year, any important facts, and a small school picture.
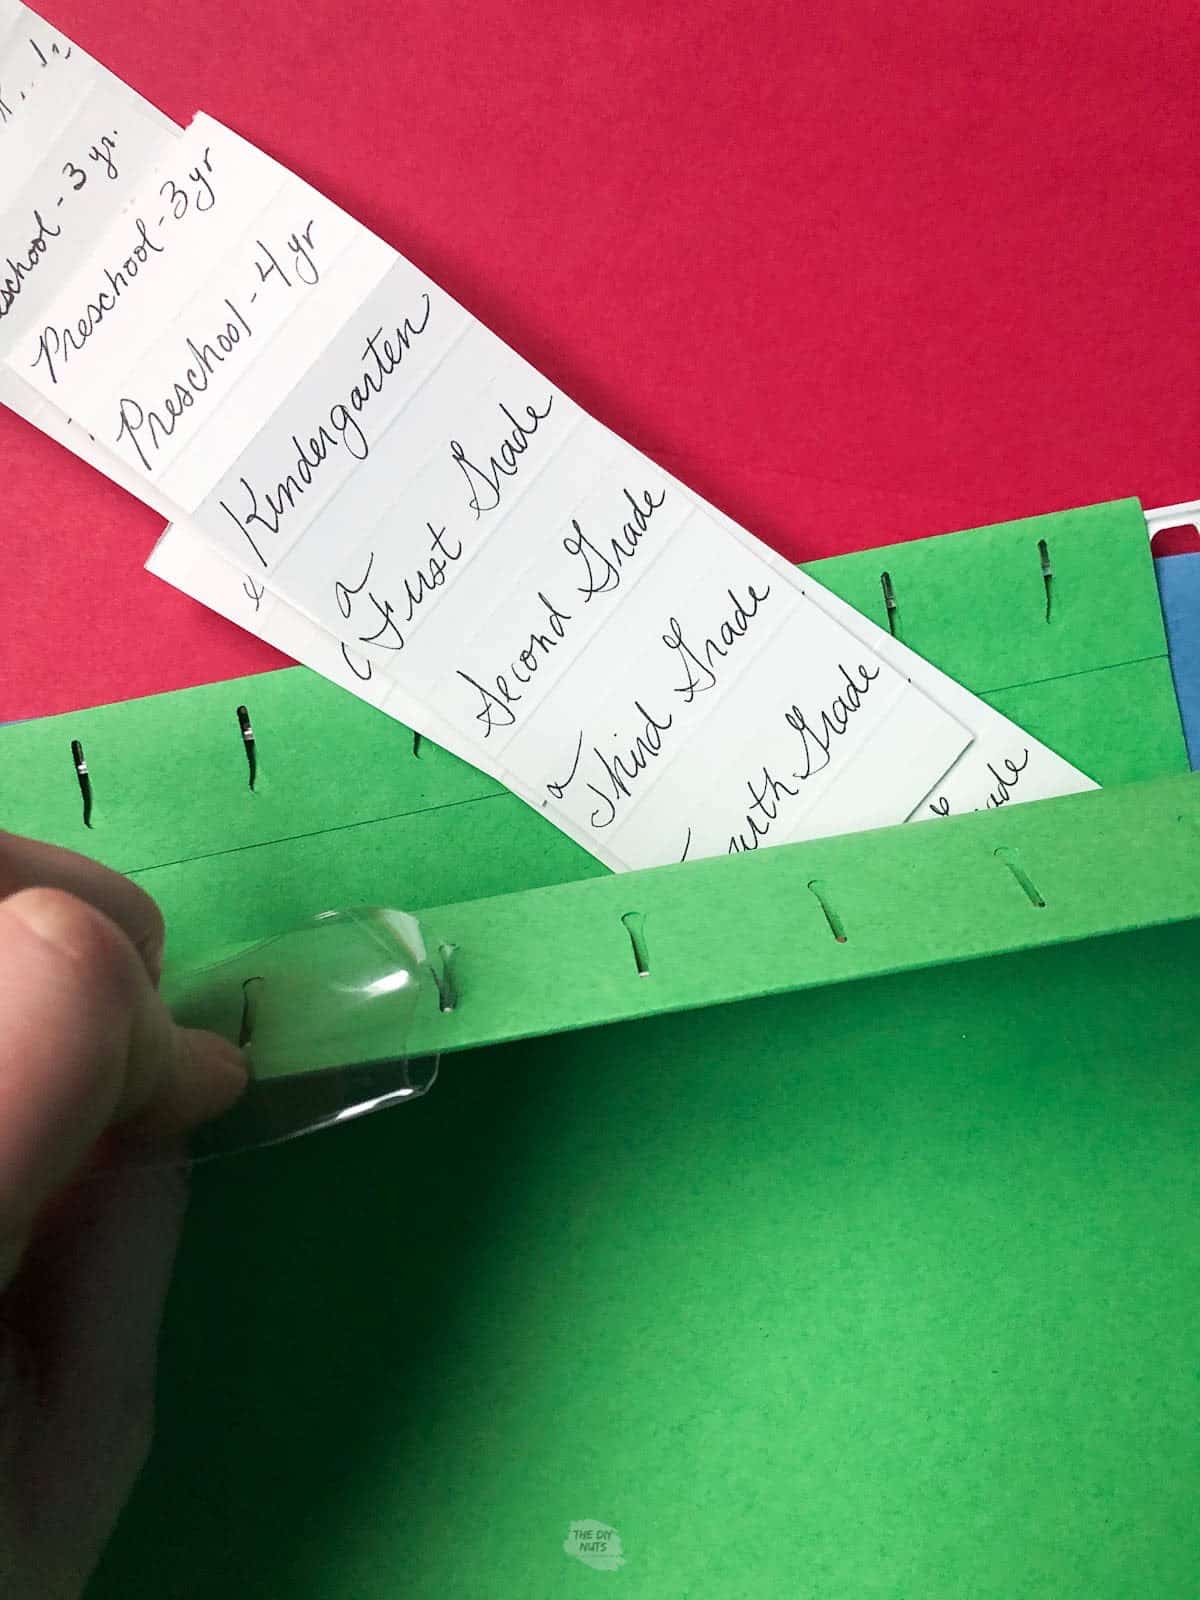
- Prewrite out labels for each folder by the grade/school year.
- When attaching the plastic label holders, I also found that attaching the next label two slots over creates a nice look in the box. This allowed us to see each age when the hanging folders were in the keepsake boxes.
Questions For The Outside Of Each Folder
- Teachers:
- Favorite Food:
- Favorite Thing To Do:
- Best Memory From This Year:
- Favorite TV Show:
Note: Make sure to purchase enough hanging folders for each grade or age you want.
Looking at the school projects, report cards, and drawings is fun and heartwarming. Not to mention our kids love having a place to put things they think are really important at the time.
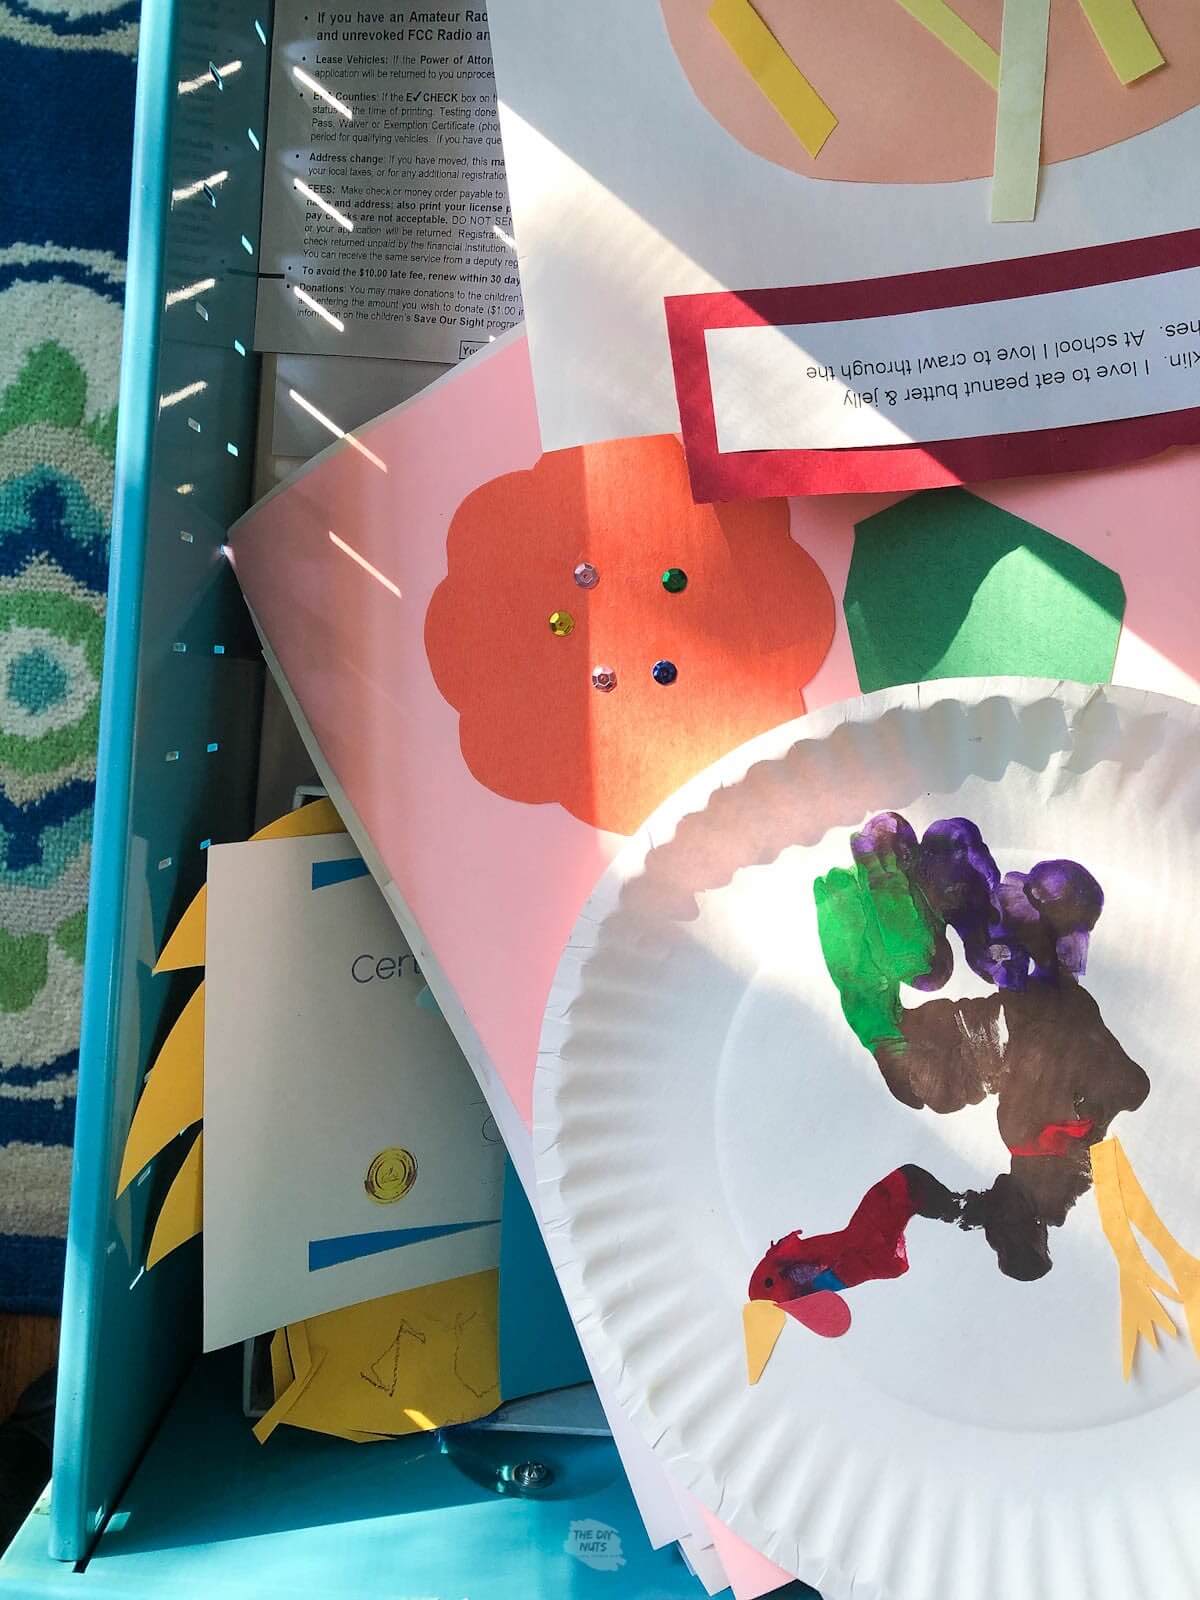
11 Things To Add To Your Memory Box
- Drawings and special school projects by Age and Grade
- Report Cards
- Sports Folder
- School pictures and certificates
- First locks of hair or first tooth
- Baby books (I make one of these books for each of my kids to keep all of the precious pictures from the first years!)
- Extra photographs
- Old Birthday Invitations
- Notes from teachers and other adults in their lives
- Hospital Bracelets
- School Year Books
Follow us on Pinterest, YouTube or Facebook for more DIY inspiration!
There are so many different things to add to a memory box. Involve your child in helping you pick which items they want to save and enjoy looking back on this priceless memory box in future years.
If you like this tutorial, please give it 5 stars below 🤩🤩🤩🤩🤩. Your support helps us continue to provide unique and budget-friendly DIYs.
Easy Memory Keepsake Box For Children
Equipment
- Pen
- Pencil
Supplies
Instructions
- Find a file cabinet box that works for you.
- Decorate box. Consider using a simple drawing transfer technique to apply child's name to the box.
- Place rainbow file folders in box.
- Use tabs to label each folder by grade or age.
- Add extra questions and answers to the outside folder.
- Place keepsakes in proper folder.
Notes
- You can use a Circuit to personalize the box or use our easy drawing technique.
- Consider adding a photo to the front of each folder.
- Other items you may consider adding: Drawings, Special School Projects, Report Cards, Sports Pictures, Rosters, Certificates, Notes from teachers and other adults in their lives, Hospital Bracelets
Omg I have done this first years with my kids’ stuff and I use those EXACT same file boxes!!! They are so perfect! I obviously love this post ?
Hi Megan! Yes these file boxes seem to be perfect. I even love that they have a lid on top to be able to store some keepsakes as well.
GREAT idea!!!! I wish I had started something like this when my son started school. He’s in third grade now and everything is all jumbled.
Thanks, Desiree. I’m hoping that because I have somewhere to put things then I will be able to keep all the art projects, school papers and pictures organized.
I need to make this! I’ve been wondering what to do with all the little things my kids have made. Such a good idea!
Hi Audrey! This was a simple and easy DIY project to save all those memories. Good luck!
This is such a cute idea! Totally saving for when my kiddos are bigger and start bringing home endless art projects!
Hi Sarah! I am so happy that I finally made these DIY memory boxes to help me stayed organized. Hopefully it will be easy now!
What a lovely idea. I put my son’s school work in plastic containers for every grade, but adding the categories and fun questions will make storing them even more fun. Fun memories for years to come. Thanks for sharing.
Thanks, Kam! I am glad you like the extra ideas that I have added to my children’s memory boxes. I think it will be fun to look back on.