Don’t Tear Out Your Kitchen Backsplash! Paint It

People said this DIY project wouldn’t work or would look tacky. Luckily for us, we didn’t listen. Not only was painting our backsplash easy, but it was also a super budget-friendly way to update our kitchen.
I honestly cannot believe how easy and quick it was to paint glass tiles. Proper cleaning, prep, and using the right materials will make your painted tiles last. I wish I would have done this DIY years ago.

What You Need To Know
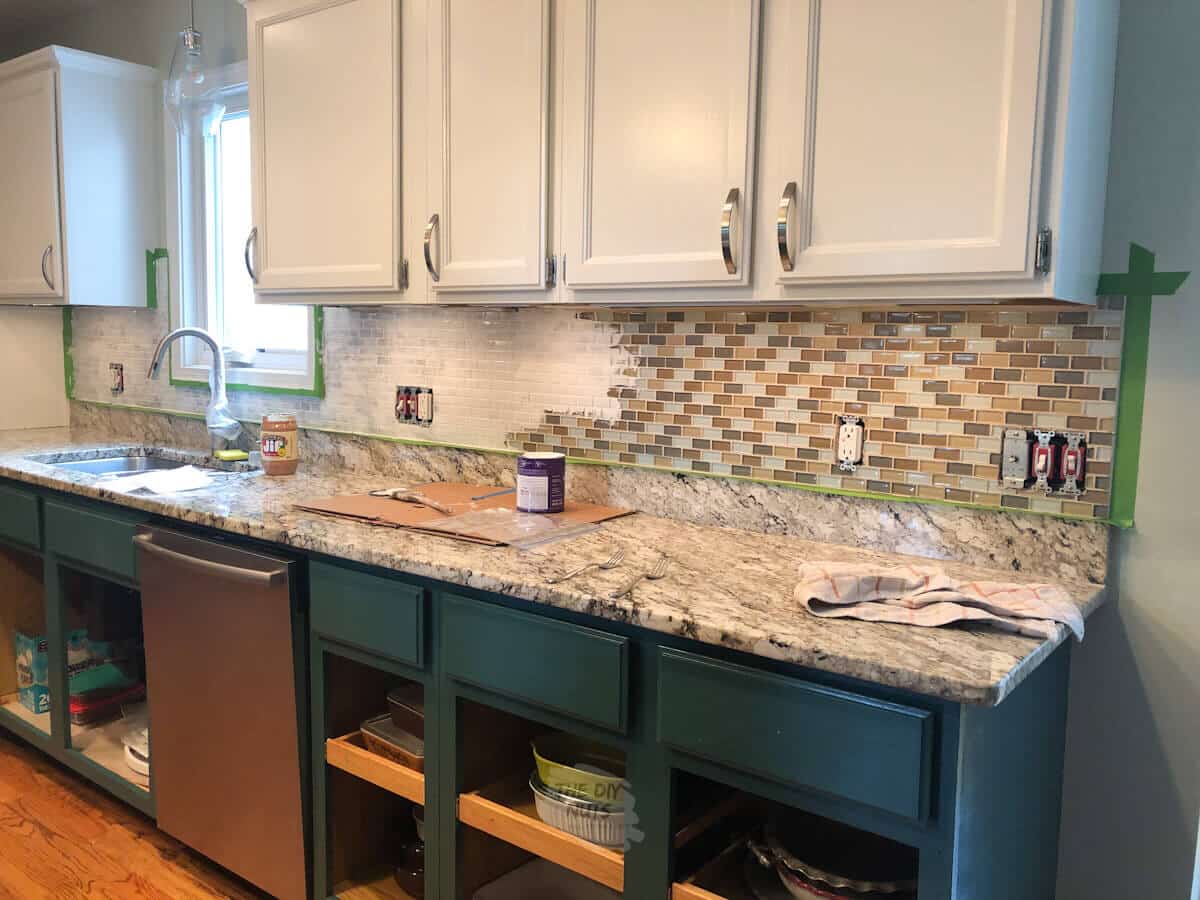
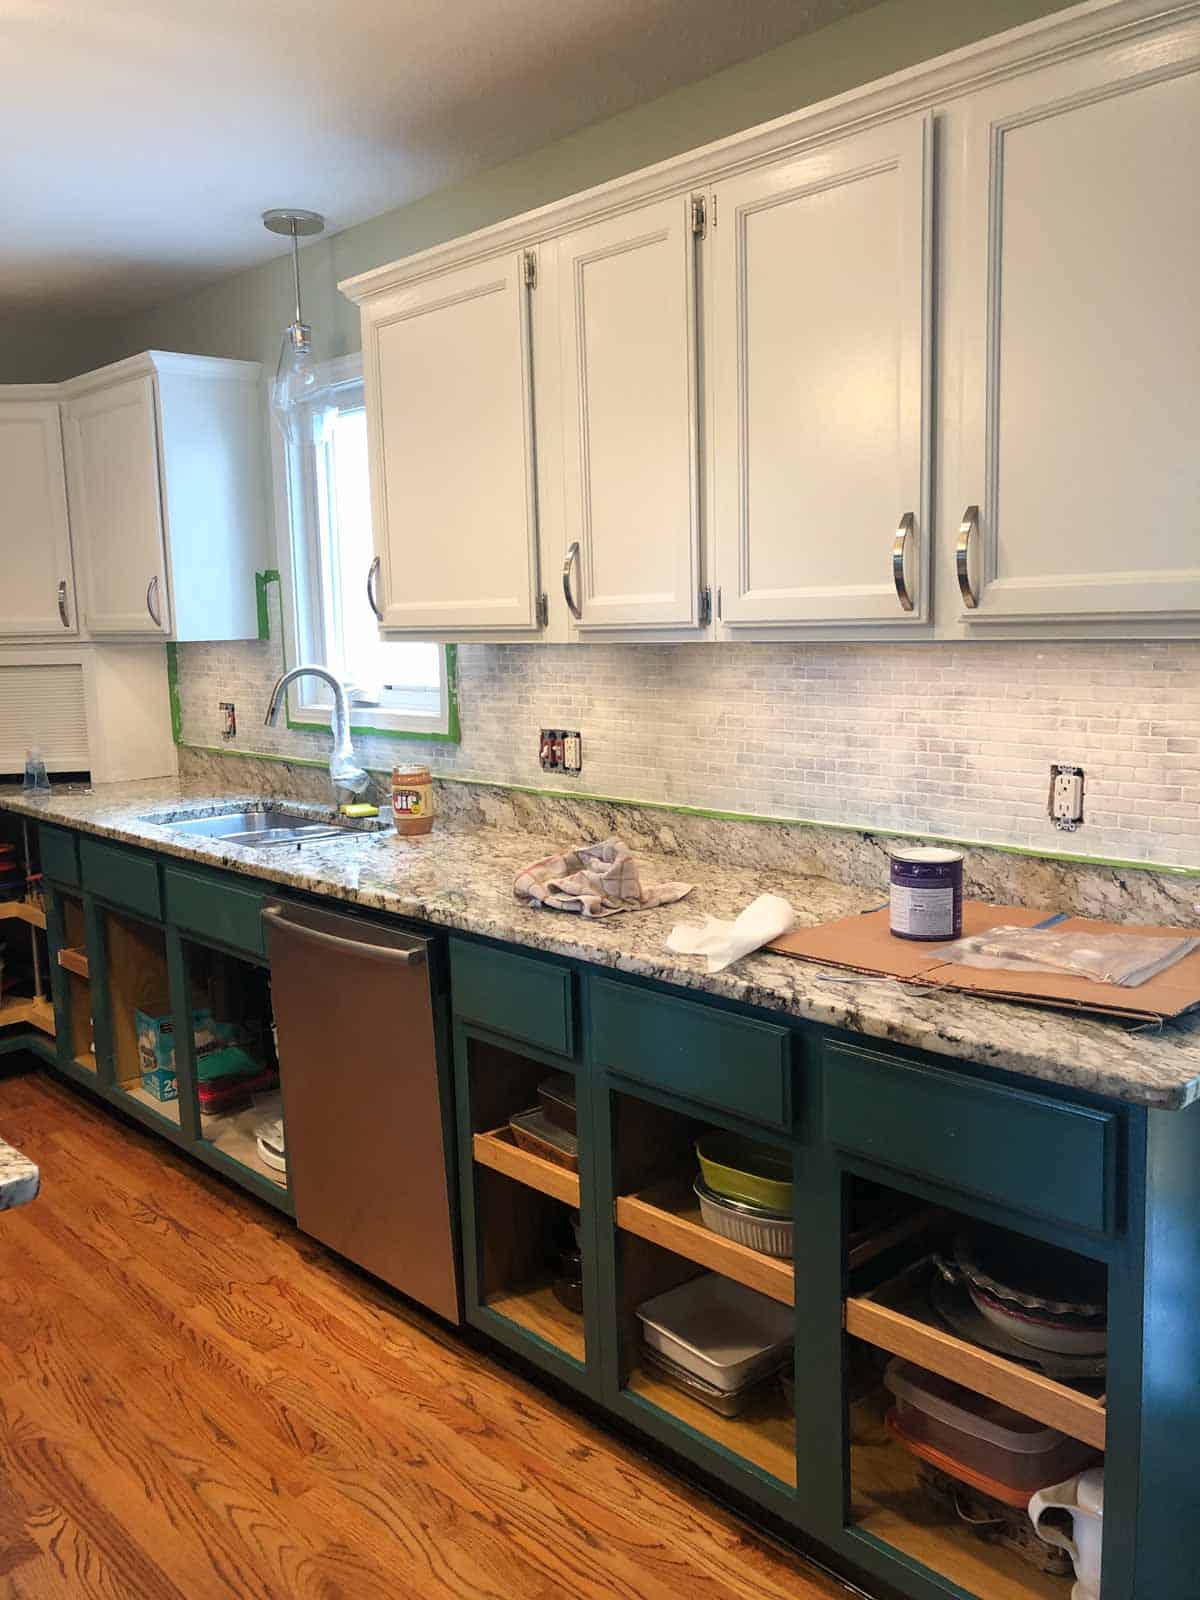
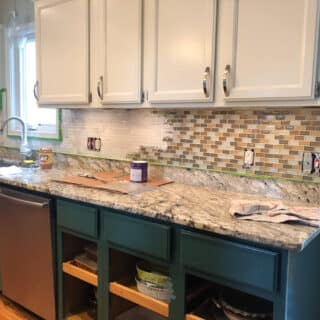
Our “Before” Tile
When we first moved into our house we knew that the kitchen needed some updating (you can see what our kitchen cabinets looked like before painting). Over time, we painted and repainted the oak cabinets white and added a glass kitchen tile backsplash and new counters.
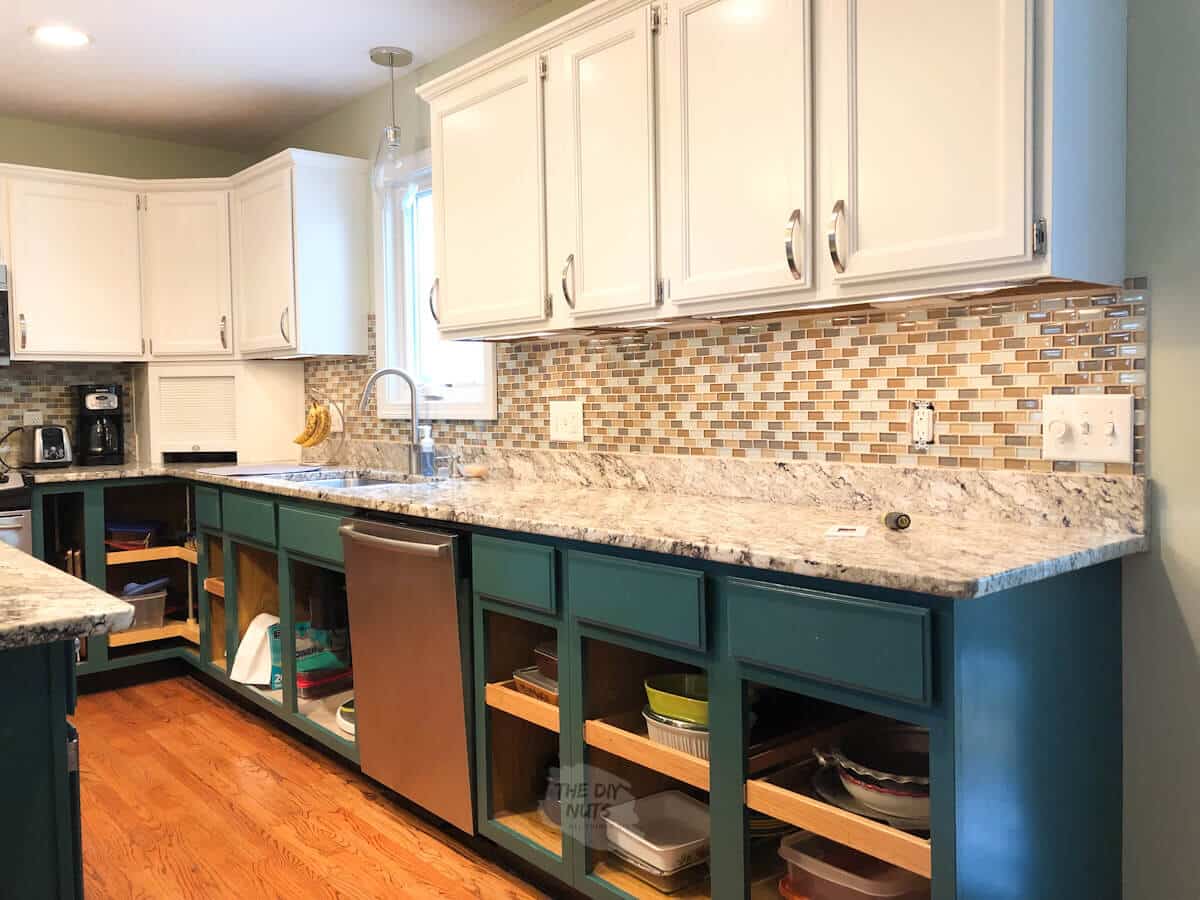
However, 8 years later, the glass mosaic backsplash dated our kitchen. Our kitchen has around 20 square feet of tile. This DIY painting makeover was done in a few 20-30 minute sessions. Waiting for the paint to dry took the project the longest.
Supplies You’ll Need
*Disclosure: This post may contain affiliate links that at no additional cost to you, I may earn a small commission. Read our full privacy policy.
*We used High Reflective White paint for a bright, crisp color.

If you are trying to decide between paint colors, you may want to check out Samplize. You can buy larger peel-and-stick samples to see how they look in your light and space.
Simplified printable instructions are at the bottom of this post.
Before You Begin: Decide On Your Paint Finish
- Semi-gloss was the perfect choice for us because it gives the tile a slightly glossy look. We also like semi-gloss for the trim and cabinets as well.
- You may want to note that a few readers have told us they wished they had used high-gloss paint for a little more contrast to their cabinets. It is a personal preference on what look you prefer. The only con to using gloss paint is that it will show imperfections a little more than semi-gloss paint.
Other Considerations
- Some people may suggest using epoxy paint. However, this kind of tile paint can be smelly, and who really touches a kitchen backsplash compared to other areas in your home? We felt there was no need to use this type of paint.
- If you use a kit, you will also have to compare the different white colors. Remember that not all white paints are equal. By buying a gallon of the High Reflective White (not tinted) from Sherwin Williams, I knew I could use that paint to make everything match in the future.
- You can use Stix primer instead of the one we used. Our local paint store recommended this to stick to the tile’s slick surface, but we could not get it in time.
Painting Our Backsplash Tile
See the video in this post as well.
Step 1: Clean Tiles
Clean the tiles with Dawn dish soap and a sponge. You want to make sure that you are cutting the grease and grim.
Put extra elbow grease into areas more prone to grime, such as around your stove. This is where it tends to be a little dirty and greasier (hello, bacon at our house). Proper prep and cleaning will allow the primer to adhere better.

Step 2: Let Dry
Wipe dry.
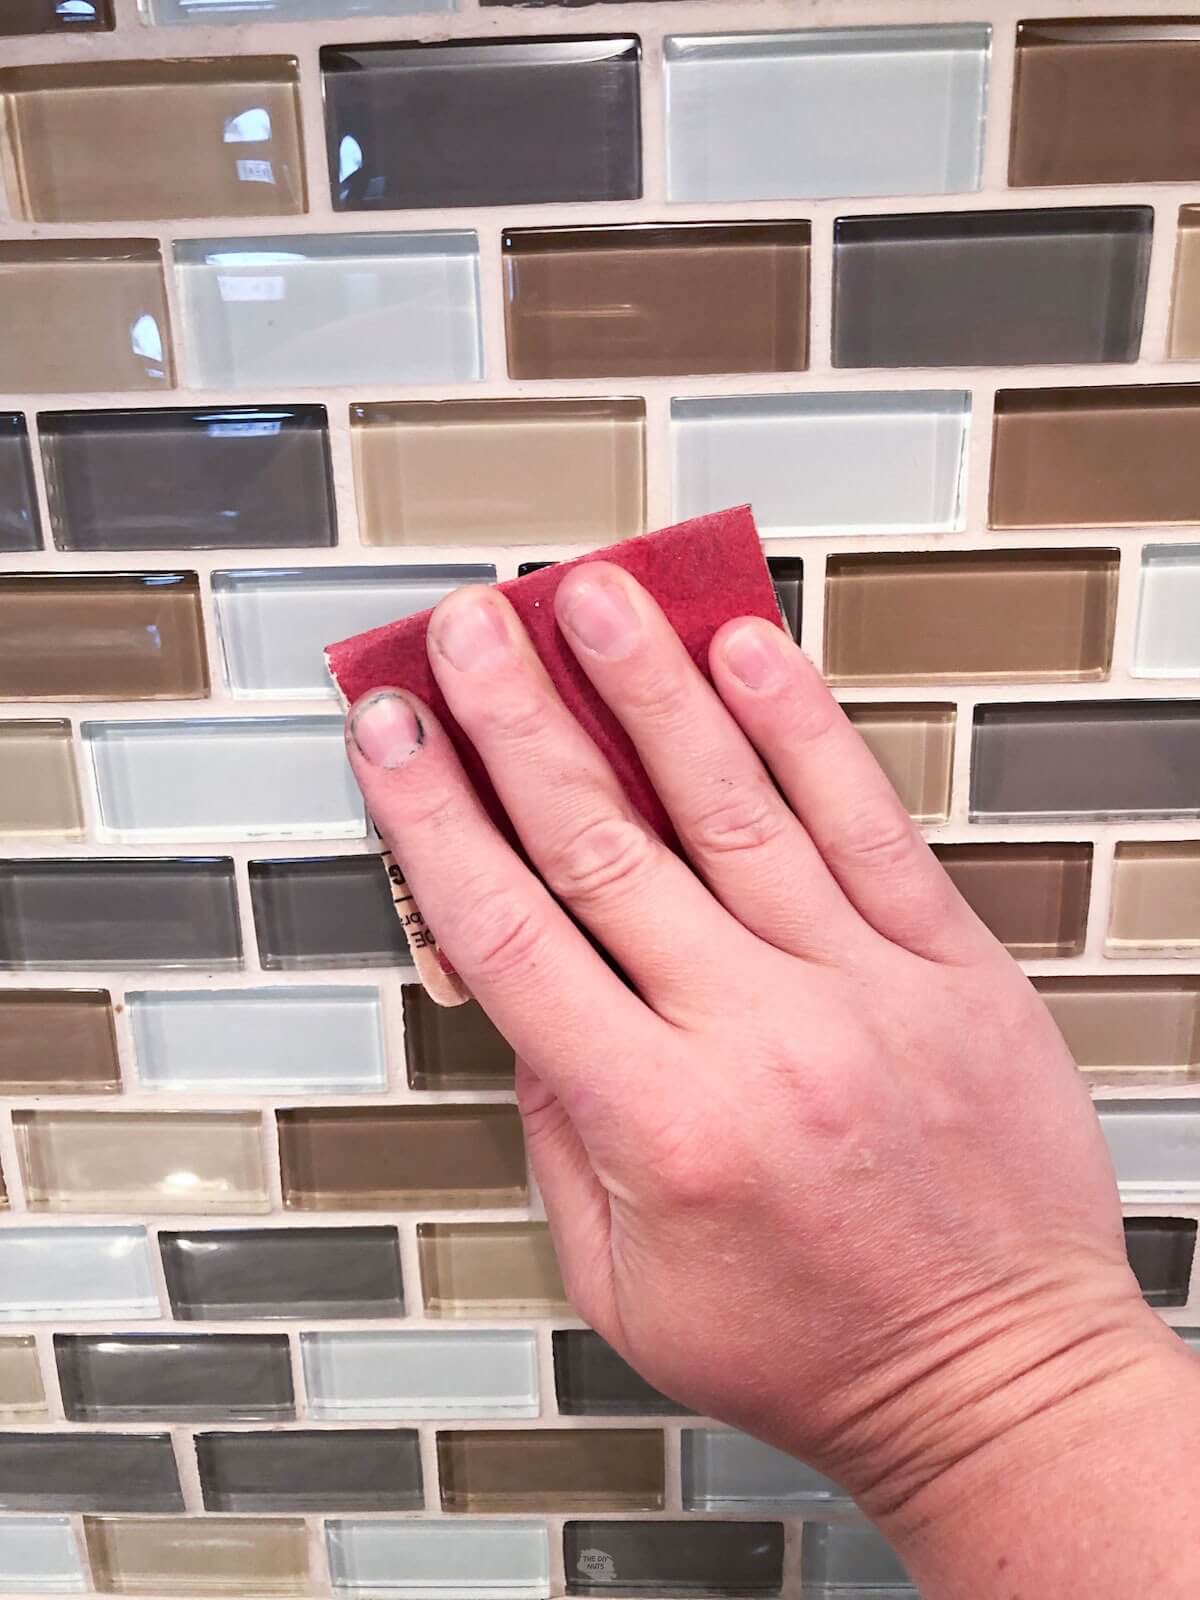
Step 3: Lightly Scuff Surface
Use extra-fine sandpaper to scuff up the tile. I did not do a ton of this, just enough to give the primer something to stick to.
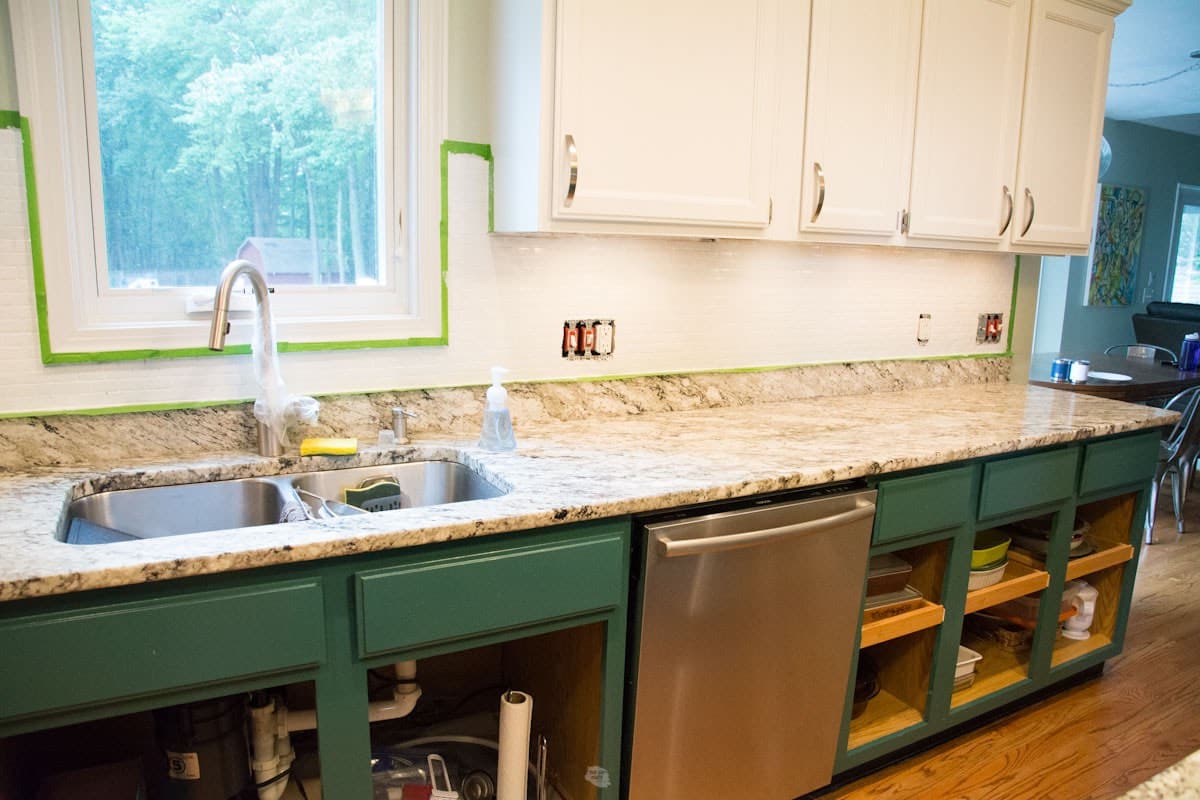
Step 4: Prep Areas With Painter’s Tape
Wipe areas you don’t want to be painted, like the counters and window frames. Add painter’s tape to the areas. Press your fingernail in the seam between the counters and the tile.
Depending on the condition and type of backsplash, you may need to caulk before or after you paint.
DIY PAINT TIP: Use Press N’ Seal Wrap to protect things you don’t want to be painted. The faucet is wrapped below.
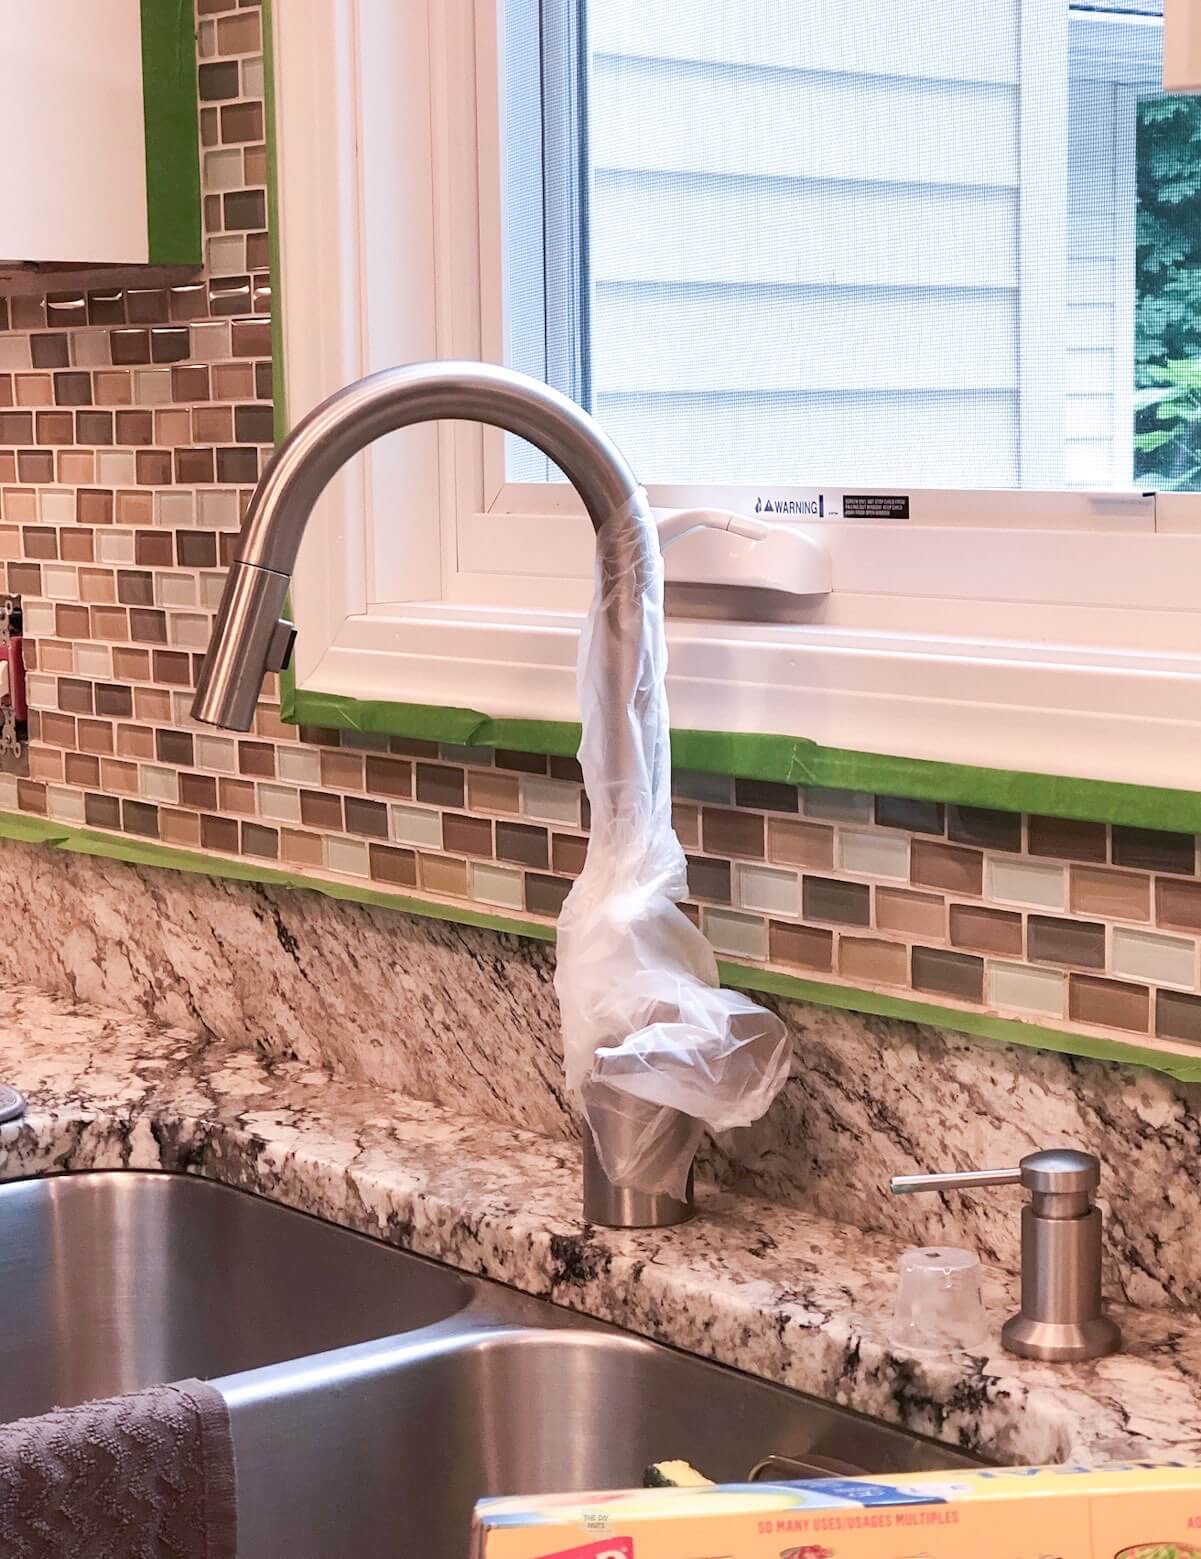
If you wrap it loosely enough, you can still use the faucet! We did this painting of our oak railing using two different colors.
Step 5: Use A Deglosser
Wipe down tiles with Krud Kutter on a rag. Wear gloves to protect your hands from the chemicals.

Step 6: Apply Primer
Use a quality paint brush to prime grout lines and areas that a roller cannot reach. Work in small areas.
If your tile is larger, you may use a roller after the brush in the grout lines. Since our glass tile is so small, I only used a brush for the primer. This might leave a slight texture, so beware as you are working.

You can see how we used the same primer and paint to paint a laminate bathroom countertop. We love it when we can use the same supplies for different DIY painting projects.
Step 7: Check For Drips
Make sure to lightly brush away drips. This is probably the trickiest part of a good paint job. If you do end up with a few bumps, you can always sand them before the next coat.
Step 8: Let Primer Dry
Read the instructions on the primer you chose. This primer was dry to the touch within 30 minutes to 1 hour. It really was, so this helped with the overall length of the project.
Don’t let the splotchy priming job worry you. The most important part about priming anything is that you have completely covered the tile surface. You can see how the white color is much more solid once you start using paint.
Step 9: Start Painting
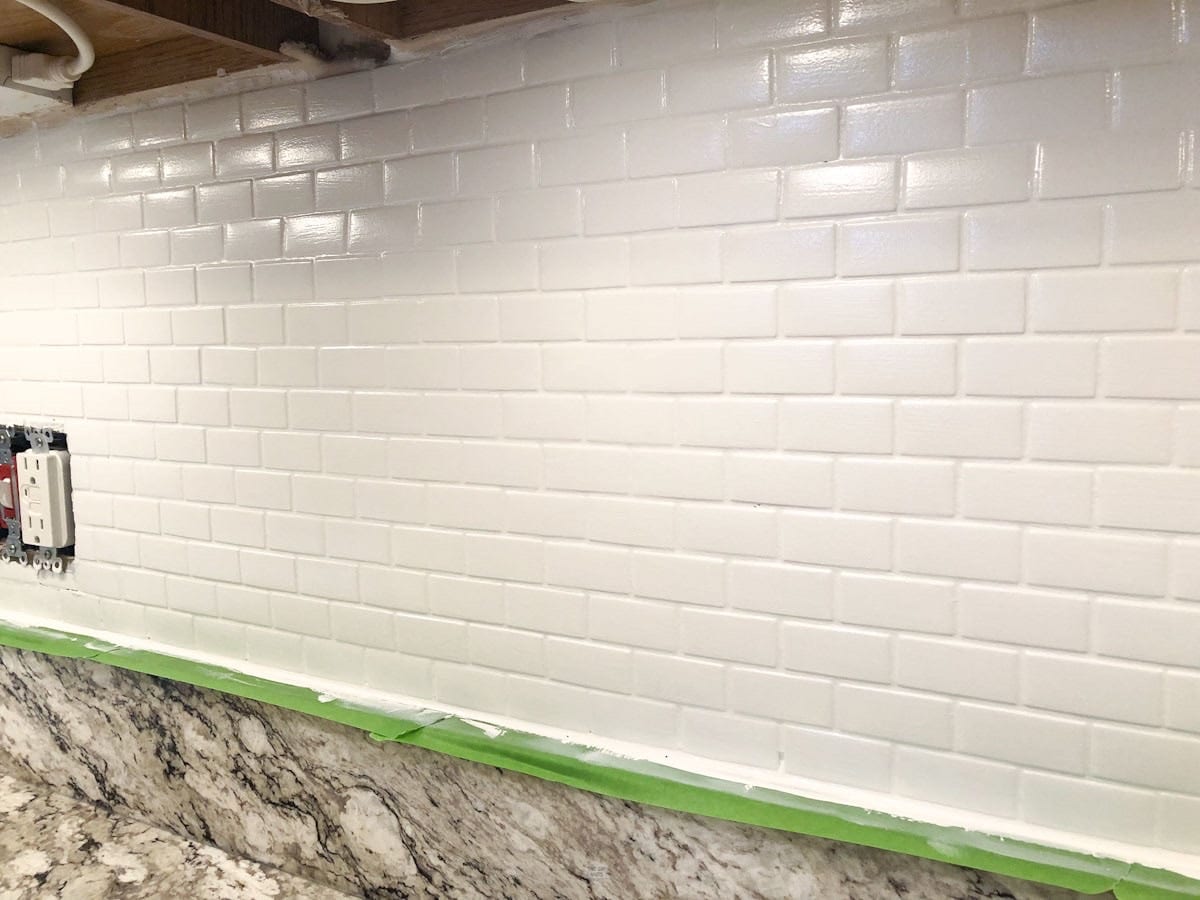
Once the primer is dry, you can repeat the brush painting with your paint. We used Sherwin Williams Urethane Enamel in High Reflective White.

After the first coat of paint with the brush, the next two were done mainly using the small foam roller. This allows for more even coverage. Make sure your grout is completely painted to your liking as you work.

Step 10: Allow Each Layer Of Paint To Dry
Allow proper drying time between coats of paint.

You may need 2-3 coats of paint, depending on how dark your tiles were to begin with. You may also need to lightly sand away any imperfections with 220-grit sandpaper. We used 3 coats of paint with light sanding in between.
Step 11: Remove The Tape
Remove painter’s tape and caulk any areas for a clean look.
Tips
- The most time-consuming part of this DIY is the prep work and allowing for proper dry time. Each layer of primer or paint took 30-40 minutes to complete.
- Some DIY painters recommended using an electric sander and a cleaner called TSP. Since my tiles were not greasy, Dawn dish soap, deglosser, and light sanding worked fine.
- Using a brush to cover all the grout lines before the small foam roller will ensure a smooth finish. Using the same color on the tiles and grout lines will also give the job a clean look.
- After painting our kitchen island with Sherwin Williams Urethane Trim Enamel, I knew this was the paint I wanted to use. You will not be disappointed in this self-leveling paint.
Follow us on Pinterest, YouTube or Facebook for more DIY inspiration!
Tutorial FAQs
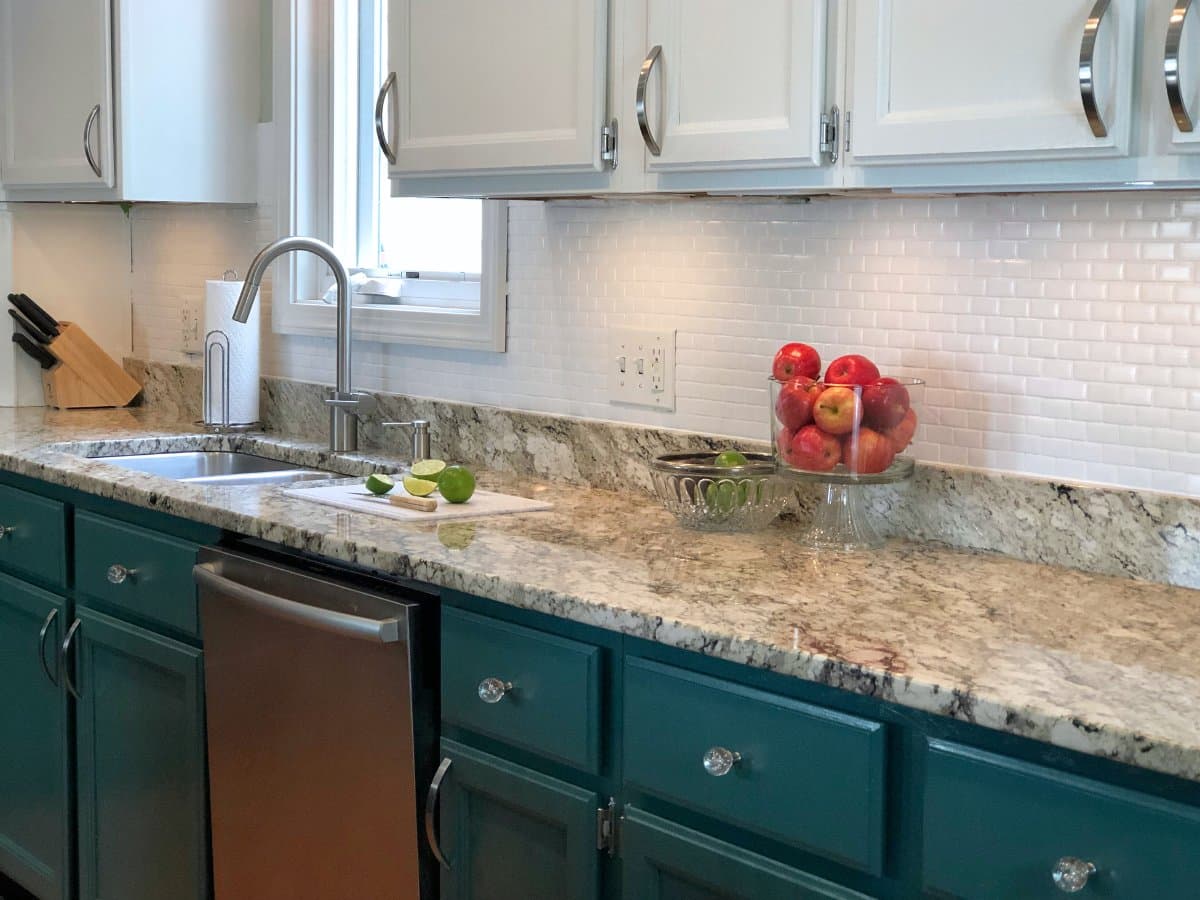
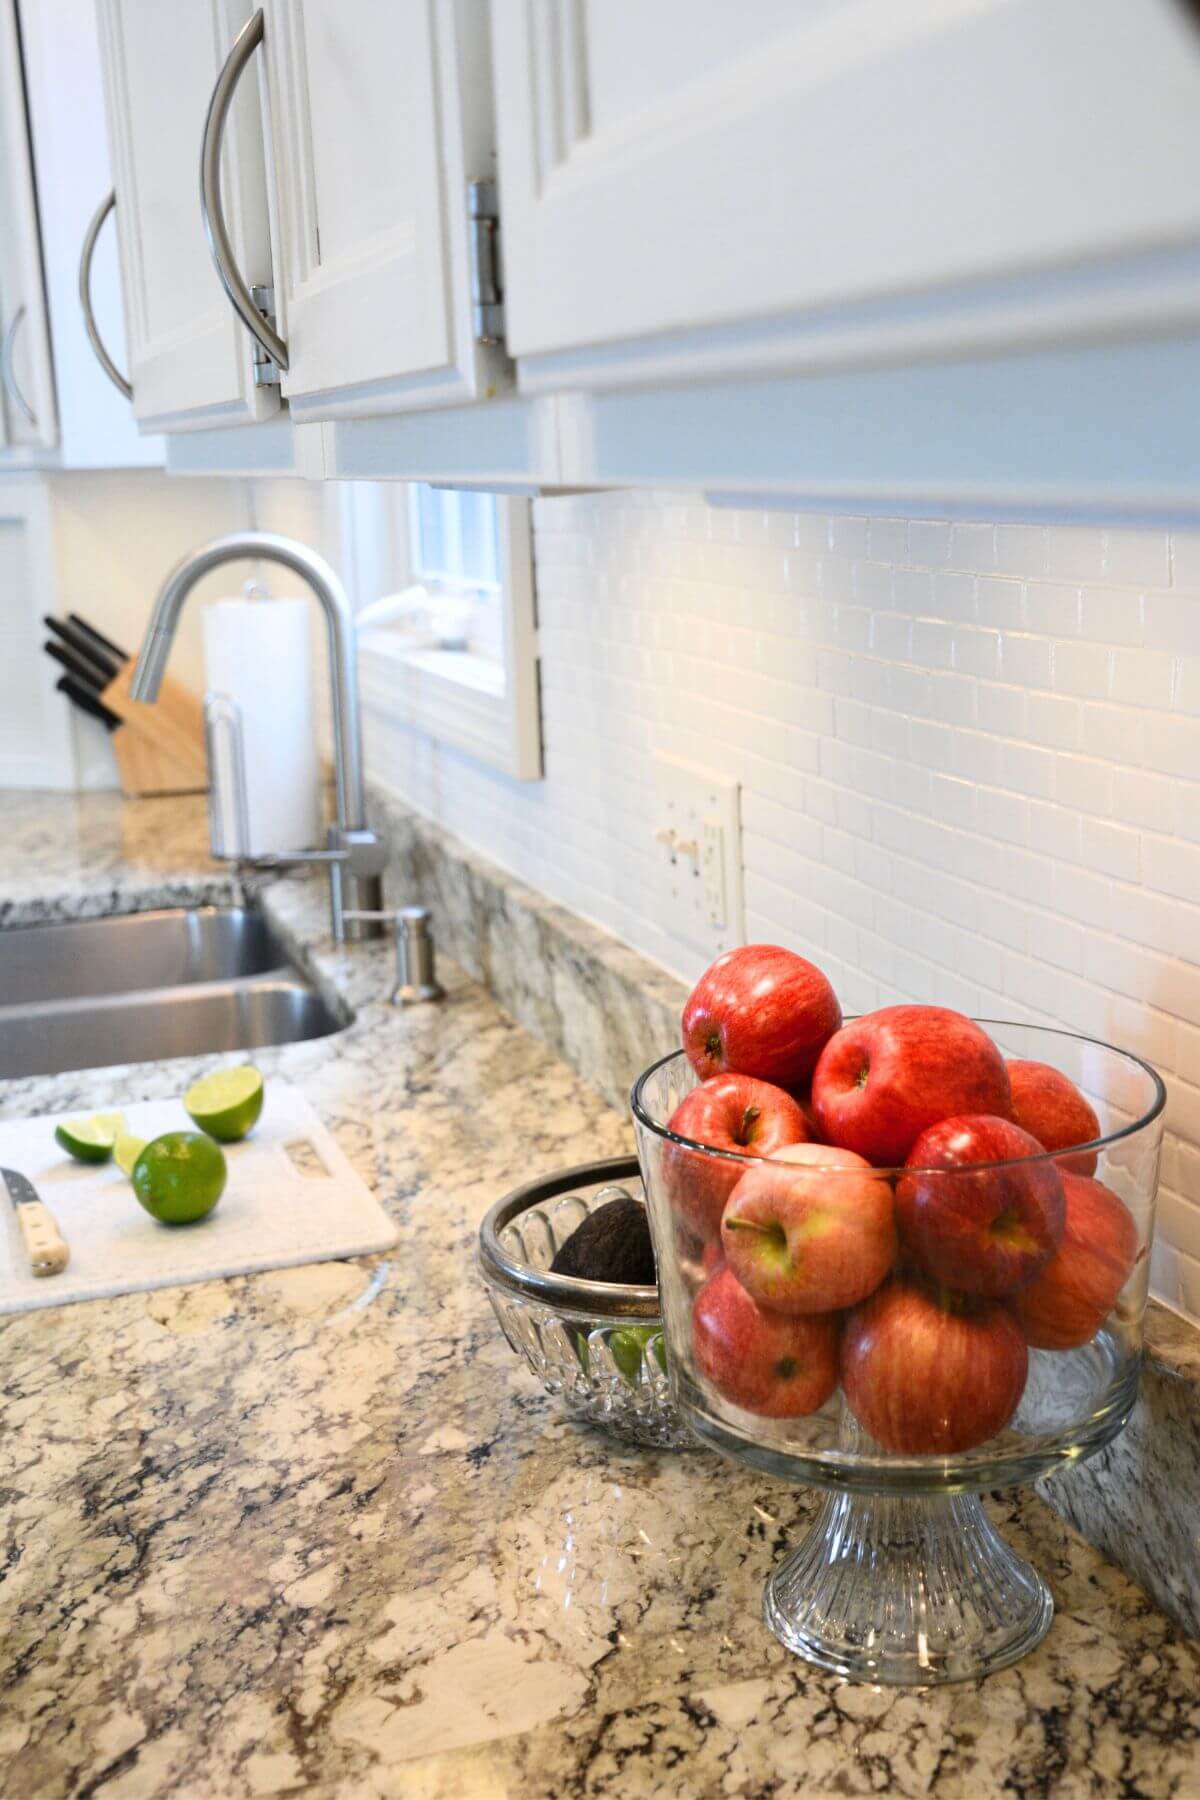
Our Before and After Kitchen Backsplash
At first, we thought this would be just a great temporary fix. However, it has been three years since we completed this project. We still haven’t torn it out just yet.

More Painting DIY Projects
- How To Easily Paint Bathroom Cabinets
- 7 Mistakes To Avoid When Painting Cabinets
- How To Whitewash Brick: get the scoop on all the supplies we used to upgrade a brick wall fireplace.
We absolutely can’t believe the huge impact our painted backsplash had on modernizing our kitchen. If you hate the look of your backsplash and don’t want the hassle of tearing out the old tile, go for it! We are still happy we did.
If you like this tutorial, please give it 5 stars below 🤩🤩🤩🤩🤩. Your support helps us continue to provide unique and budget-friendly DIYs.
How To Paint A Kitchen Backsplash
Equipment
- 2.5″ Angled Brush
Supplies
Instructions
- Clean tile with dawn dish soap.
- Wipe dry.
- Use extra-fine sandpaper to scuff up the tile.
- Wipe away dust.
- Tape out areas you don’t want painted and cover counters with cardboard, drop cloth, or butcher paper.
- Optional: Use Press and Seal to protect the faucet handle.
- Wipe down tiles with deglosser.
- Use a paintbrush to paint grout lines and a small foam roller with primer. Make sure to wipe away any drips that are occurring when painting before it dries.
- Let dry (read instructions on paint cans for your dry time).
- Repeat with Urethane Trim Enamel paint in the color of your choice.
- Paint at least 2 coats with proper dry time in between.
- Remove painter's tape and clean up any areas.
Video
Notes
- Test that your primer adhered to your tile by painting a small area and letting it dry. Use your fingernail to make sure you cannot scratch away the primer.
- Semi-gloss or high gloss paints will mimic the look of real tiles.
- Continue to check for drips as you are working. You can always sand with extra fine sandpaper in between layers if needed.
I’d love to know how it has stood up to cleaning over time. any pealing or issues?
Hi Kelly! Our painted tile still hasn’t chipped or peeled in any spots. We also have to clean it regularly especially around the stovetop! I am actually shocked how well it has held up. We thought we would replace it by now, but it still works for us. Good luck with your kitchen DIY!