How To Make A DIY Wooden Shoe Rack
If you are looking for an easy shoe organizer idea then this DIY project is for you. Learn how to build this easy DIY garage shoe rack for your garage.
*Disclosure: I only recommend products I would use myself and all opinions expressed here are our own. This post may contain affiliate links that at no additional cost to you, I may earn a small commission. Read our full privacy policy.
Build This Shoe Organizer This Afternoon
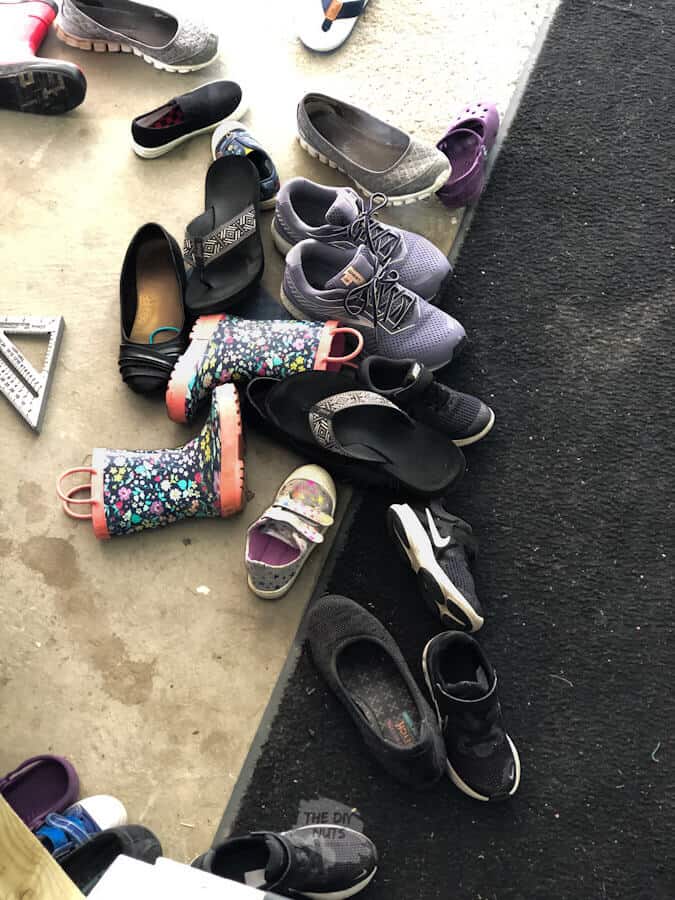
Is your home overflowing with shoes? If so, here is a DIY shoe organizer that helped us keep our garage somewhat organized.
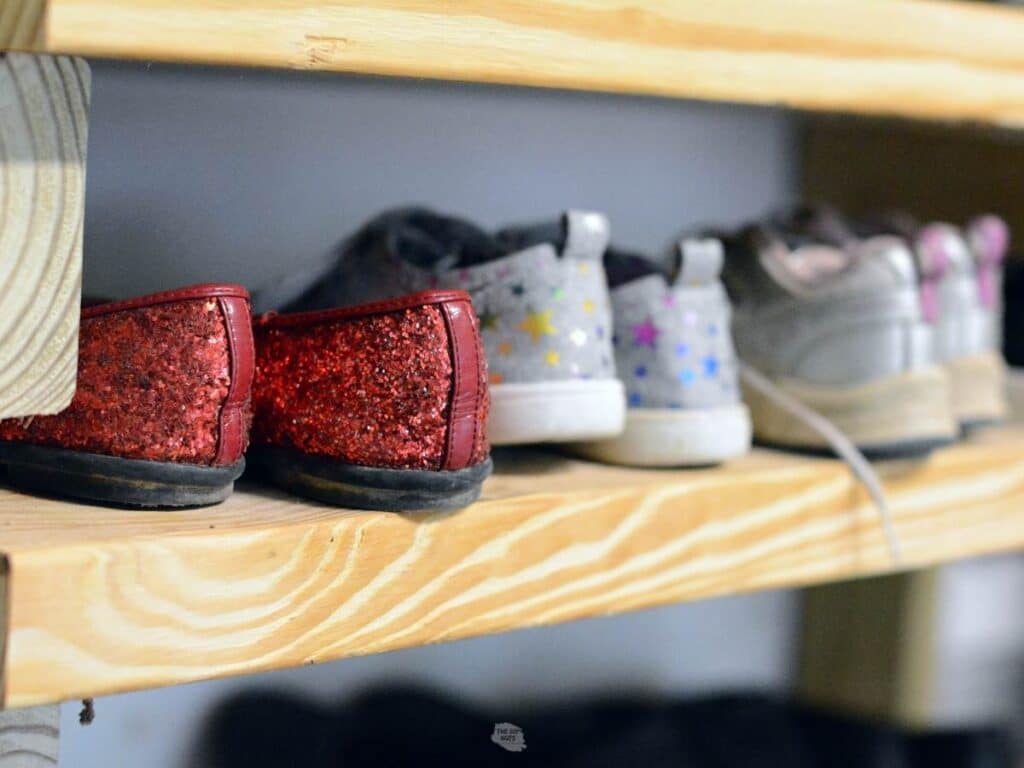
If you are looking for a polished shoe organizer, then this is not it. This simple wooden DIY shoe rack is “industrial” as my husband described it. But it totally helps keep our garage organized. Our children now know exactly where to place their shoes before coming into the house.
Before You Begin
Design Of Your Rack
You will need to decide on the design of your shoe rack. The bottom of our design is meant to store our boots outside.
What Type Of Wood
This wooden DIY project can be created using nicer wood or finishing touches. However, our garage is more of a utilitarian space so simple basic wood was just fine.
What Height
We ended up making this shoe organizer taller than a bench seat. You could make this at only the height of a bench, but we decided we wanted boots and as many shoes as possible to fit.
Need more decluttering ideas? See how we used old cardboard boxes to help organize our pantry.
Recommended Tools
- Hammer Drill (for drilling into the concrete floor)-if wood floor then a regular drill and bit will work
- Drill (for pre-drilling holes)
- Screw gun
- Torpedo level
- Tape measure
- Circular saw
- Speed square
- Pencil/pen
Need a new circular saw or screw gun? Check out some of the combo deals you can have shipped right to your home.
Recommended Supplies
- Tapcon concrete screws and drill bit
- 3” long wood screws
- 2x4s (use pressure-treated if the area will be wet)
- 2x10s (use pressure-treated if the area will be wet)
DIY Shoe Rack Tutorial
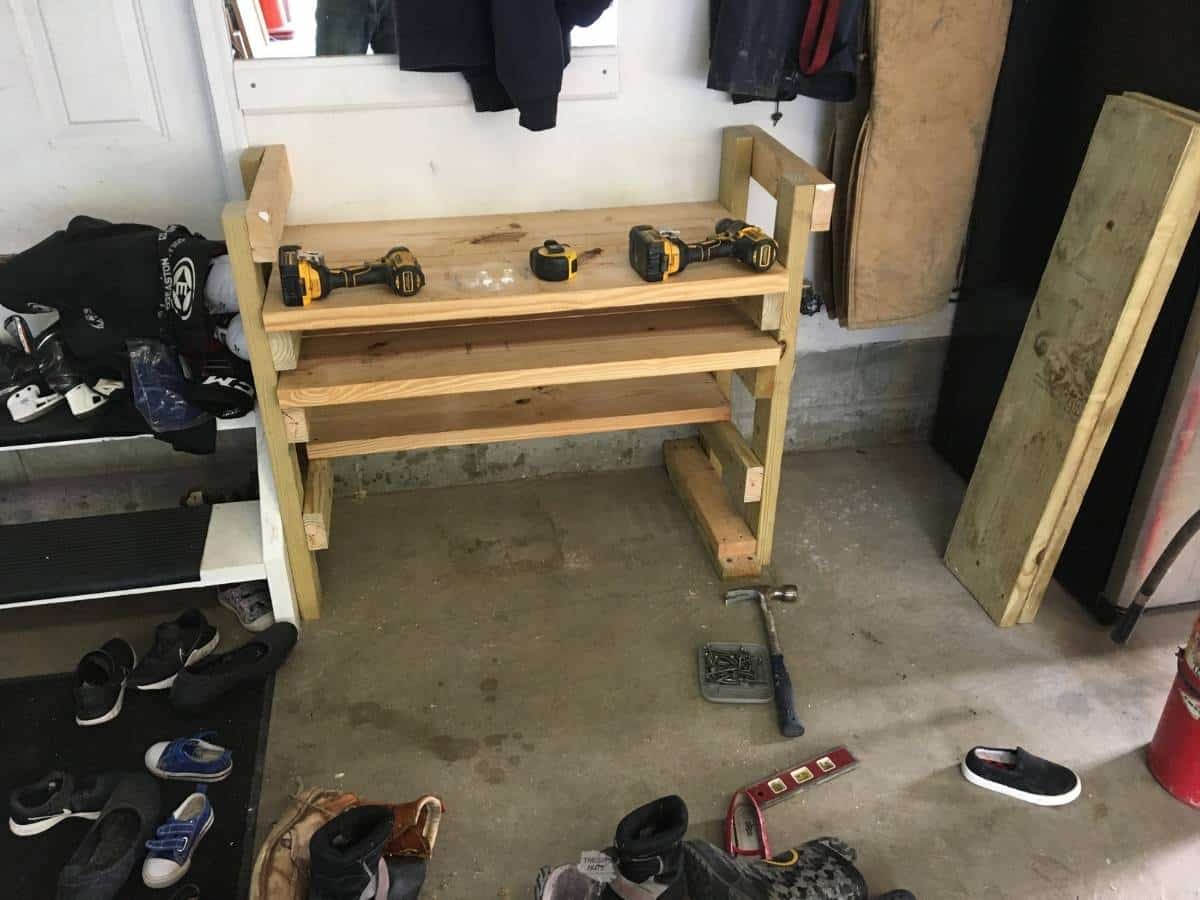
Step 1: Plan Lumber Sizes
On a piece of paper, draw and plan the desired size. Once the size is known make a list of corresponding board sizes to pre-cut the lumber.
Step 2: Sketch Out Footprint
Layout (draw on the ground) the location and size of the shoe rack’s overall footprint. For reference, our shoe rack is 18” deep (wide) x 38” long x 36” tall.
Step 3: Precut Lumber
Precut all of the lumber to match the design.
Optional: Attach Base To Concrete Floor
Using the hammer drill, drill into the concrete floor. We attached ours so that it would be sturdy enough to stand on to reach wall cabinets above.
How To Attach Wood To Concrete
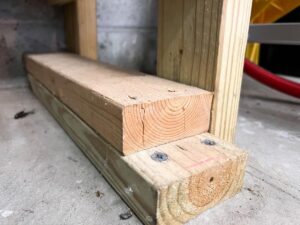
- Use the tapcon concrete screws to screw through the first 2×4 into the concrete floor.
- At the end of the 2 x 4s you should drill a pilot hole with a regular drill bit first. Drilling a pilot hole at all locations will keep the ends of the lumber from splitting.
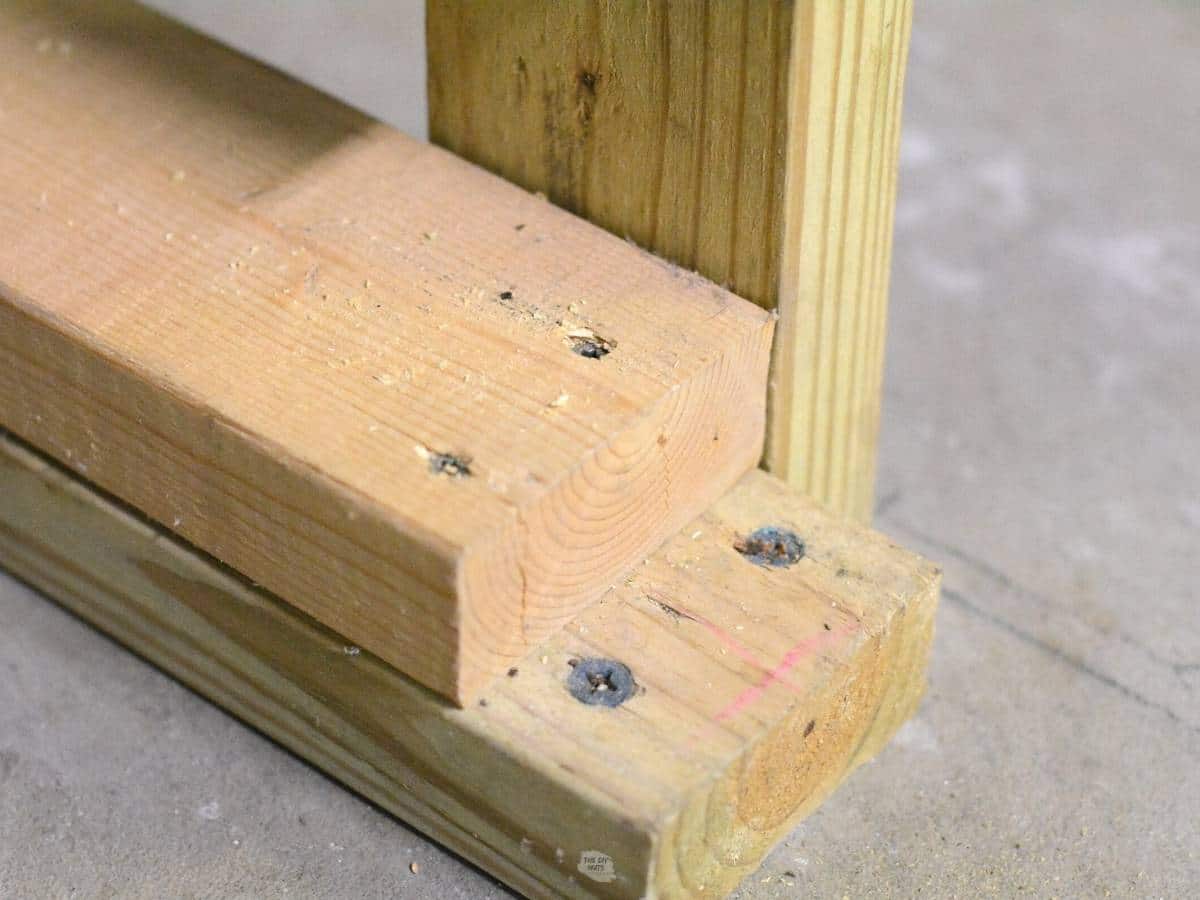
Step 4: Continue Building The Base
Once the 2 boards are secured to the concrete floor put another 2 x 4 directly on top of the boards attached to the tapcons. Use wood screws to attach this new 2 x 4.
The two 2x4s will each be 3” tall at this point and will provide a secure base to which to attach the vertical 2x4s.
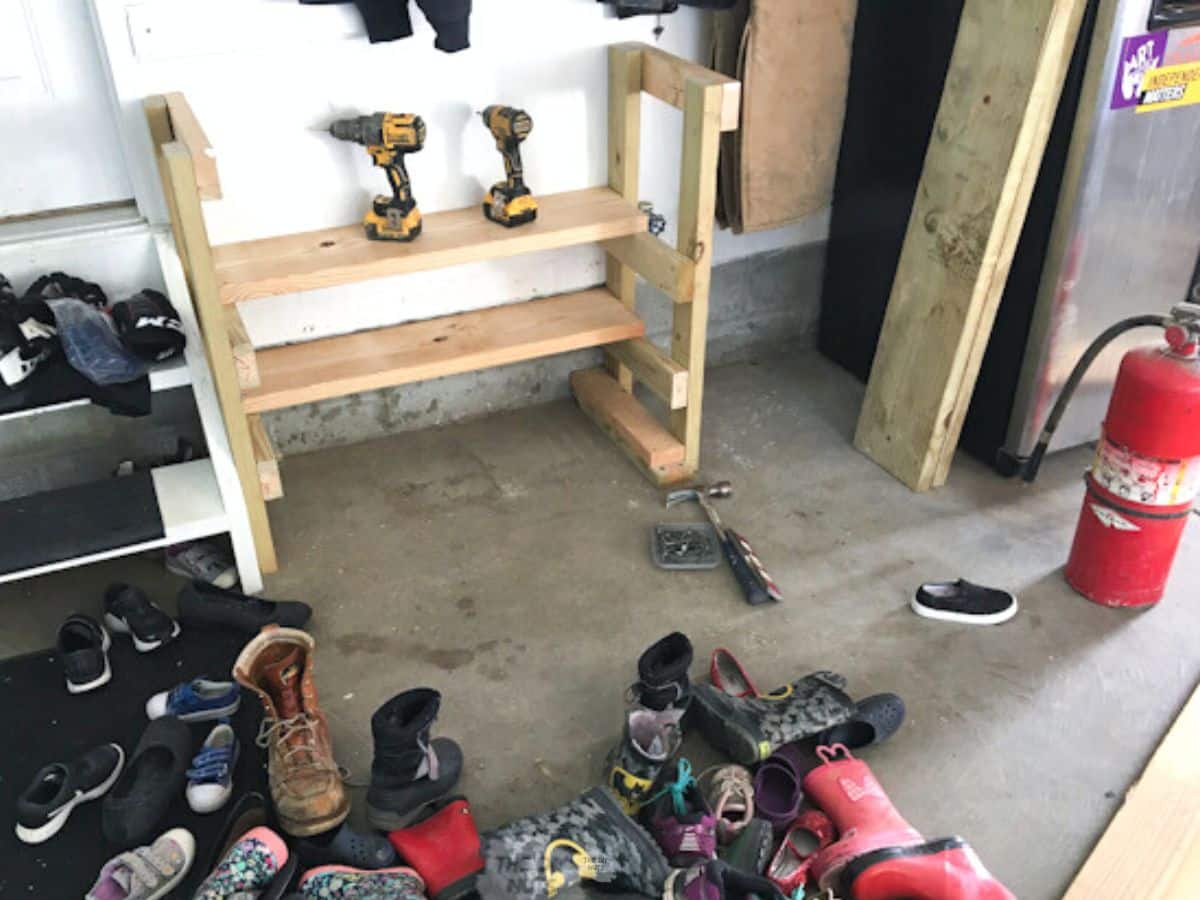
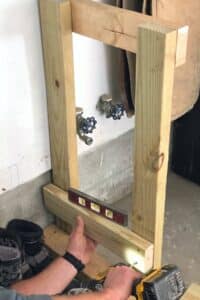
Step 5: Add Vertical Supports
Next using wood screws attach the vertical 2x4s that will determine the height of the overall structure.

Step 6: Add 2x4s Supports On Vertical Boards
On the inside face of the now attached vertical 2×4 install two small 2x4s that will support the base of the first rack. Our lowest 2x4s at installed at 10.5” off the ground.

Step 7: Add Shelves With 2x10s
Put two 2x10s on top of the inside face 2×4’s for the first shelf.
Step 8: Continue Building Shelves
The three top shelves are made by attaching 2 2x10s.

Repeat the above steps until the shelf is finished.
Related Organization Posts

Tutorial FAQs
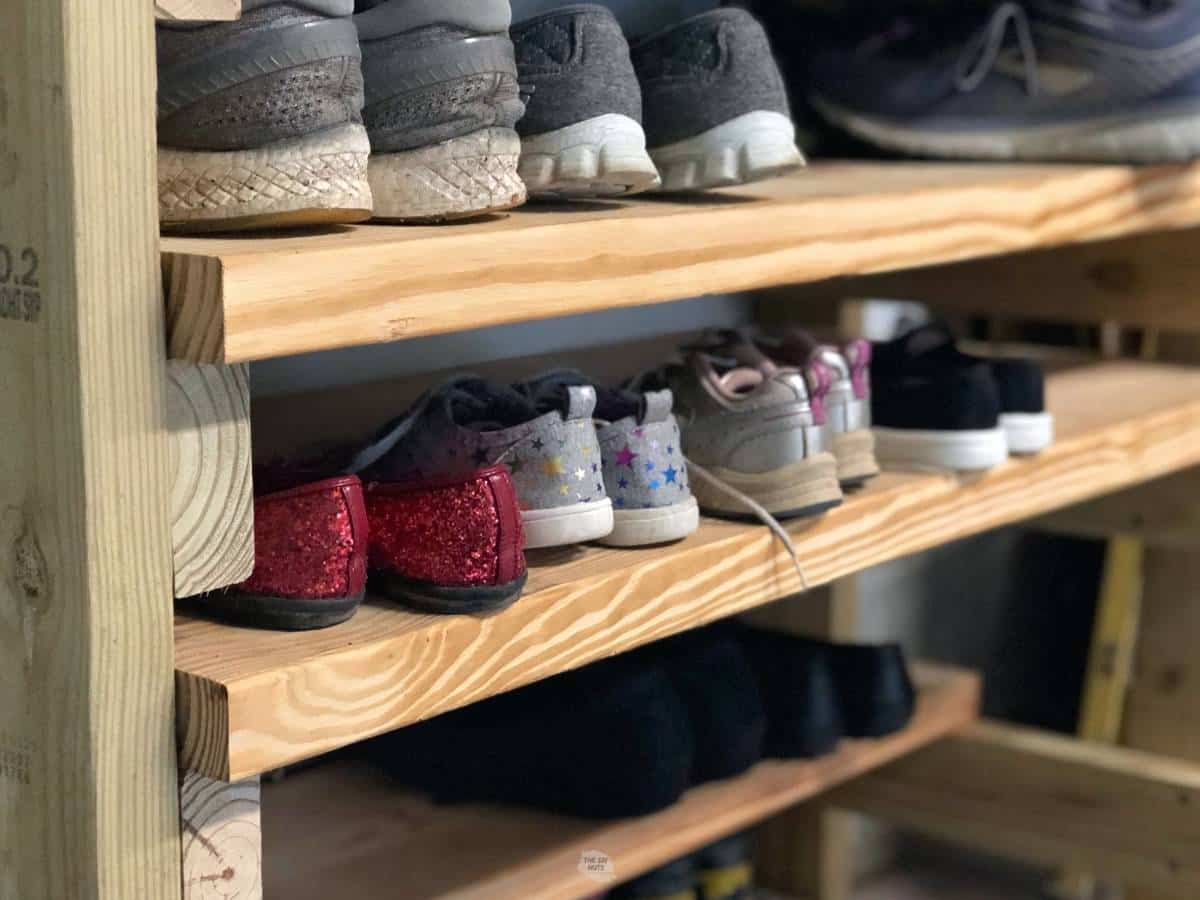
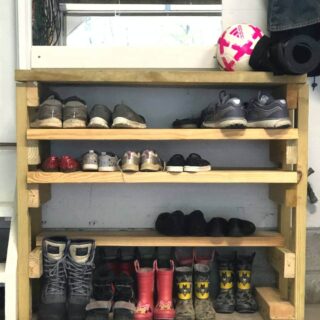
My husband thinks that we are able to fit around 30 pairs of our family’s shoes neatly in our rack. We have younger children, so some of those pairs are not that big. You could build this to fit any space in your garage.
The next time I decide to clean-up our garage steps with some paint, I may end up priming and painting this shoe rack as well.
Large PVC pipe shoe rack can be a great option to help organize shoes. We built one for our laundry and love having more shoe storage.
No, you could build this to be freestanding. Ours is attached to the concrete so that we could stand on it to get into wall cabinets we hung for extra storage.
My husband was able to complete this project in one afternoon since we already had all of the scrap wood and supplies on hand.
Follow us on Pinterest, YouTube or Facebook for more DIY inspiration!
I am so happy that the pile of shoes that used to lay in the middle of our garage floor is now nicely organized in our DIY wooden shoe rack!
DIY Garage Shoe Rack
Equipment
- Hammer Drill if drilling into concrete floor
- Drill
- Screw gun
- Torpedo level
- Tape Measure
- Circular Saw
- Pencil/pen
Supplies
- Tapcon concrete screws and drill bit
- 3” long wood screws
- 2x4s use pressure-treated if the area will be wet
- 2x10s use pressure-treated if the area will be wet
Instructions
- Design shoe rack for your space.
- Precut lumber you need.
- Optional: Attach the base to concrete by using a hammer drill and tapcons to secure 2 x 4.

- Once the 2 boards are secured to the concrete floor put another 2 x 4 directly on top of the boards attached to the tapcons. Use wood screws to attach this new 2 x 4.
- Add vertical supports. Next using wood screws attach the vertical 2x4s that will determine the height of the overall structure.
- Add 2x4s to the inside face of vertical 2x4s. Put these at the height of your shelves.

- Add shelves with 2 x 10s on small 2 x 4s.
- Continue building shelves until your garage shoe rack is complete.


Notes
How To Attach Wood To Concrete
We attached our shoe rack to make it sturdy so we could stand on it.- Use the tapcon concrete screws to screw through the first 2×4 into the concrete floor.
- At the end of the 2 x 4s you should drill a pilot hole with a regular drill bit first. Drilling a pilot hole at all locations will keep the ends of the lumber from splitting.