Easy DIY Cloth Storage Boxes From Old Cardboard Boxes
Have you been looking for a simple way to add extra storage and organization without breaking the bank? I am all for organization, but I also hate spending hundreds of dollars on bins and baskets. DIY cloth storage boxes are the perfect (and cheap) solution.
*Disclosure: I only recommend products I would use myself and all opinions expressed here are our own. This post may contain affiliate links that at no additional cost to you, I may earn a small commission. Read our full privacy policy.
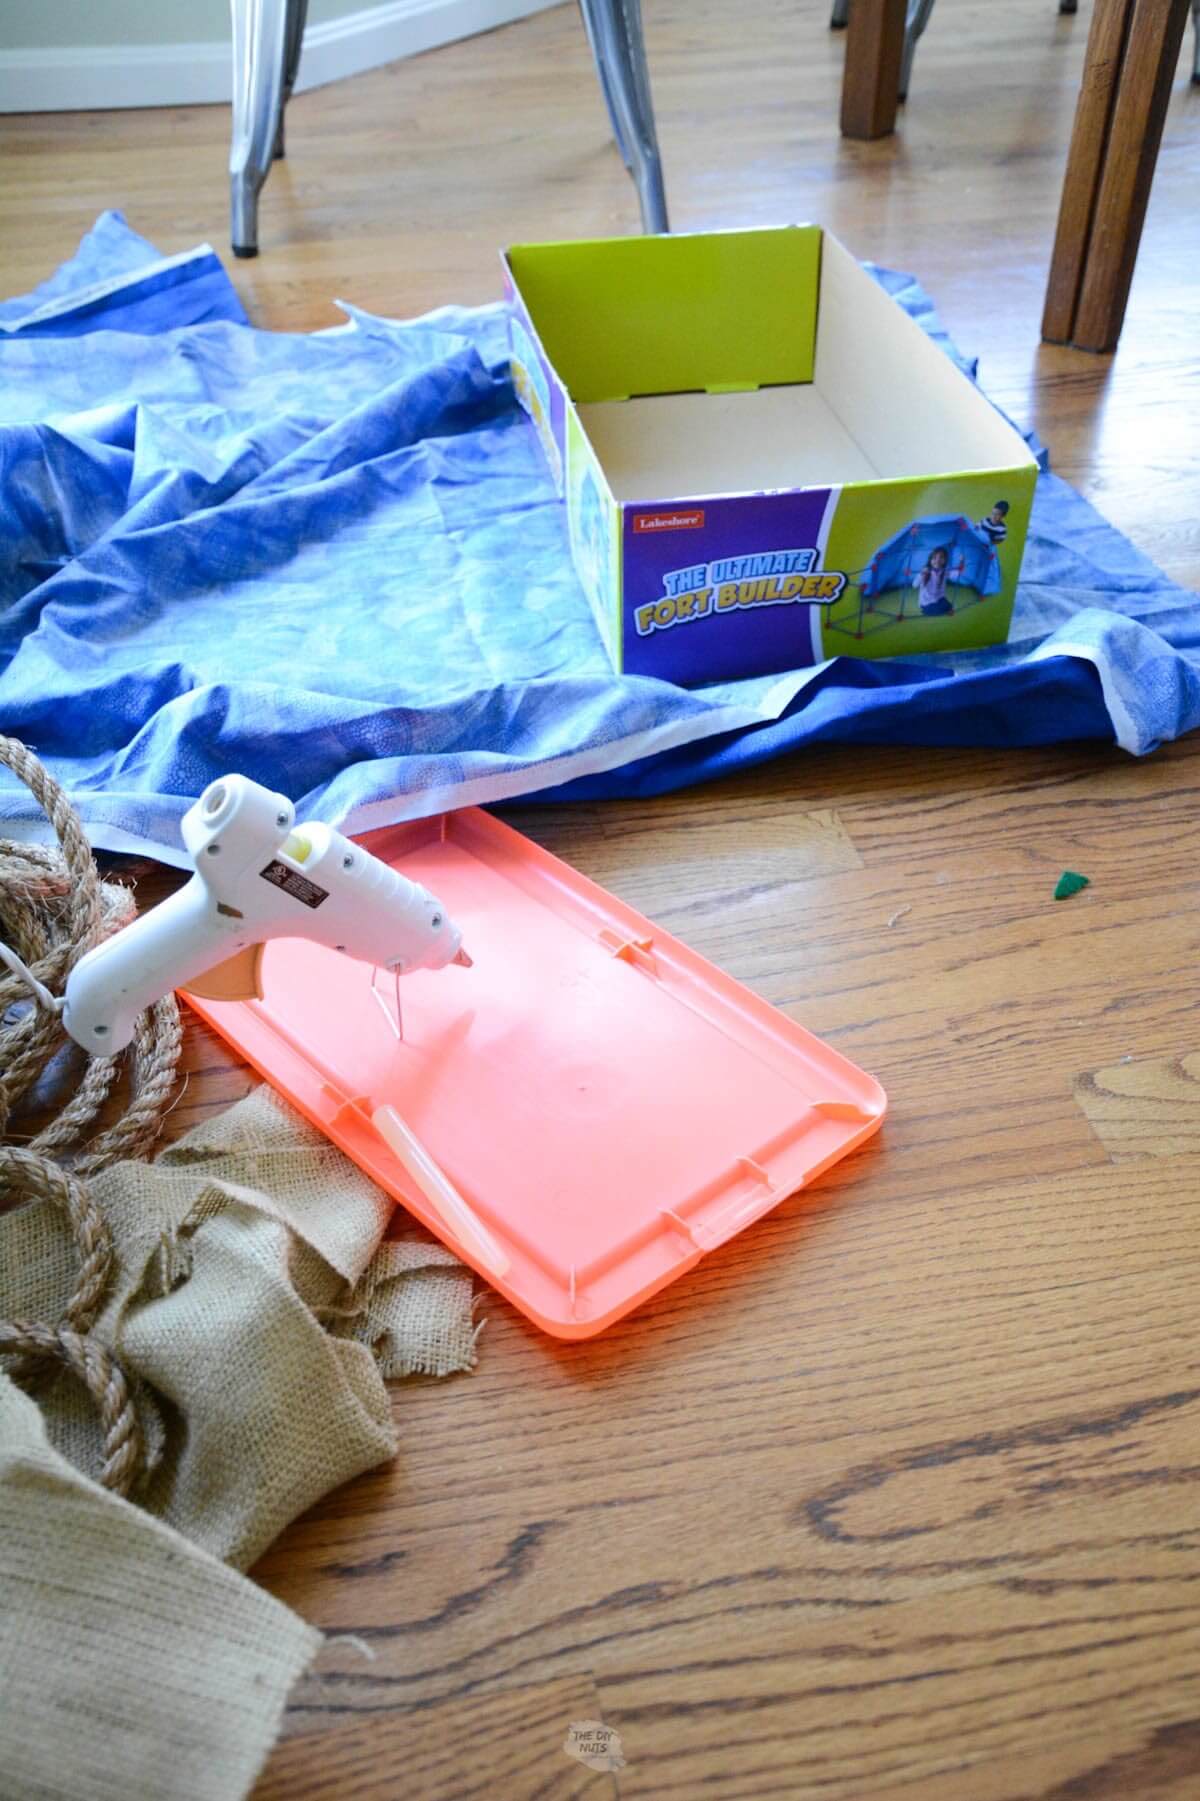
This DIY no-sew storage box project was perfect for this month’s installment of a DIY project challenge that I am part of with other AWESOME DIY bloggers! I had two empty box lids lying around, fabric and rope. I was trying to do this as cheaply as possible.
Each month a few of my DIY friends work to create a fun project around a theme. This month’s theme was to create a DIY project using cloth.
Our projects always have to come in under $50! It is always so cool to see what other creative people do with the same challenge. However, you could really create these storage boxes for a few dollars, depending on the fabric you want to use.
Recommended Supplies
- old cardboard box or lid
- fabric
- Rope of twine if you want to try to recreate a basket look
- Glue Gun (I wish I had this cordless glue gun)
- Scissors (these scissors are a MUST-HAVE for any “DIY-er”)
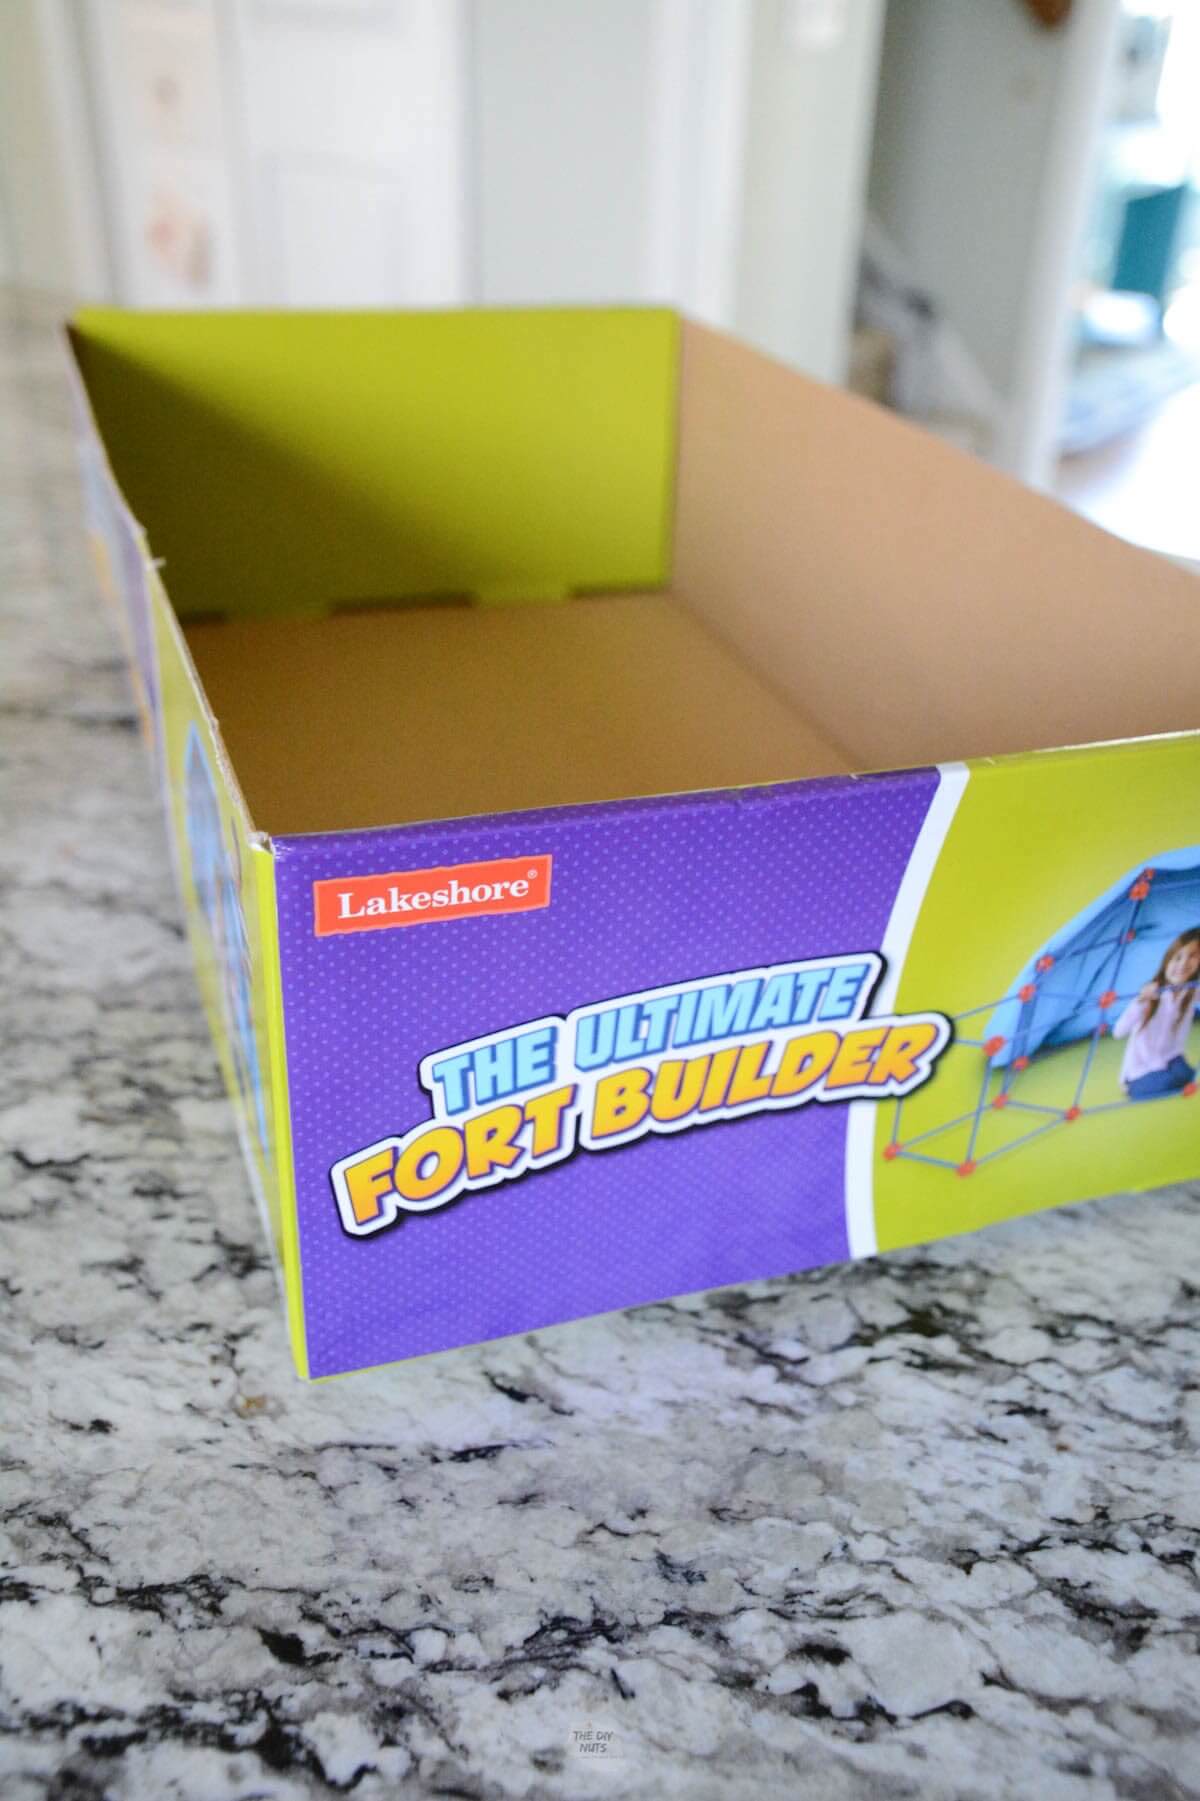
The “Before” Box
Make sure that you are using a structurally sound box. The last thing you want to do is spend time covering a bad box.
How To Make DIY Cloth Storage Box
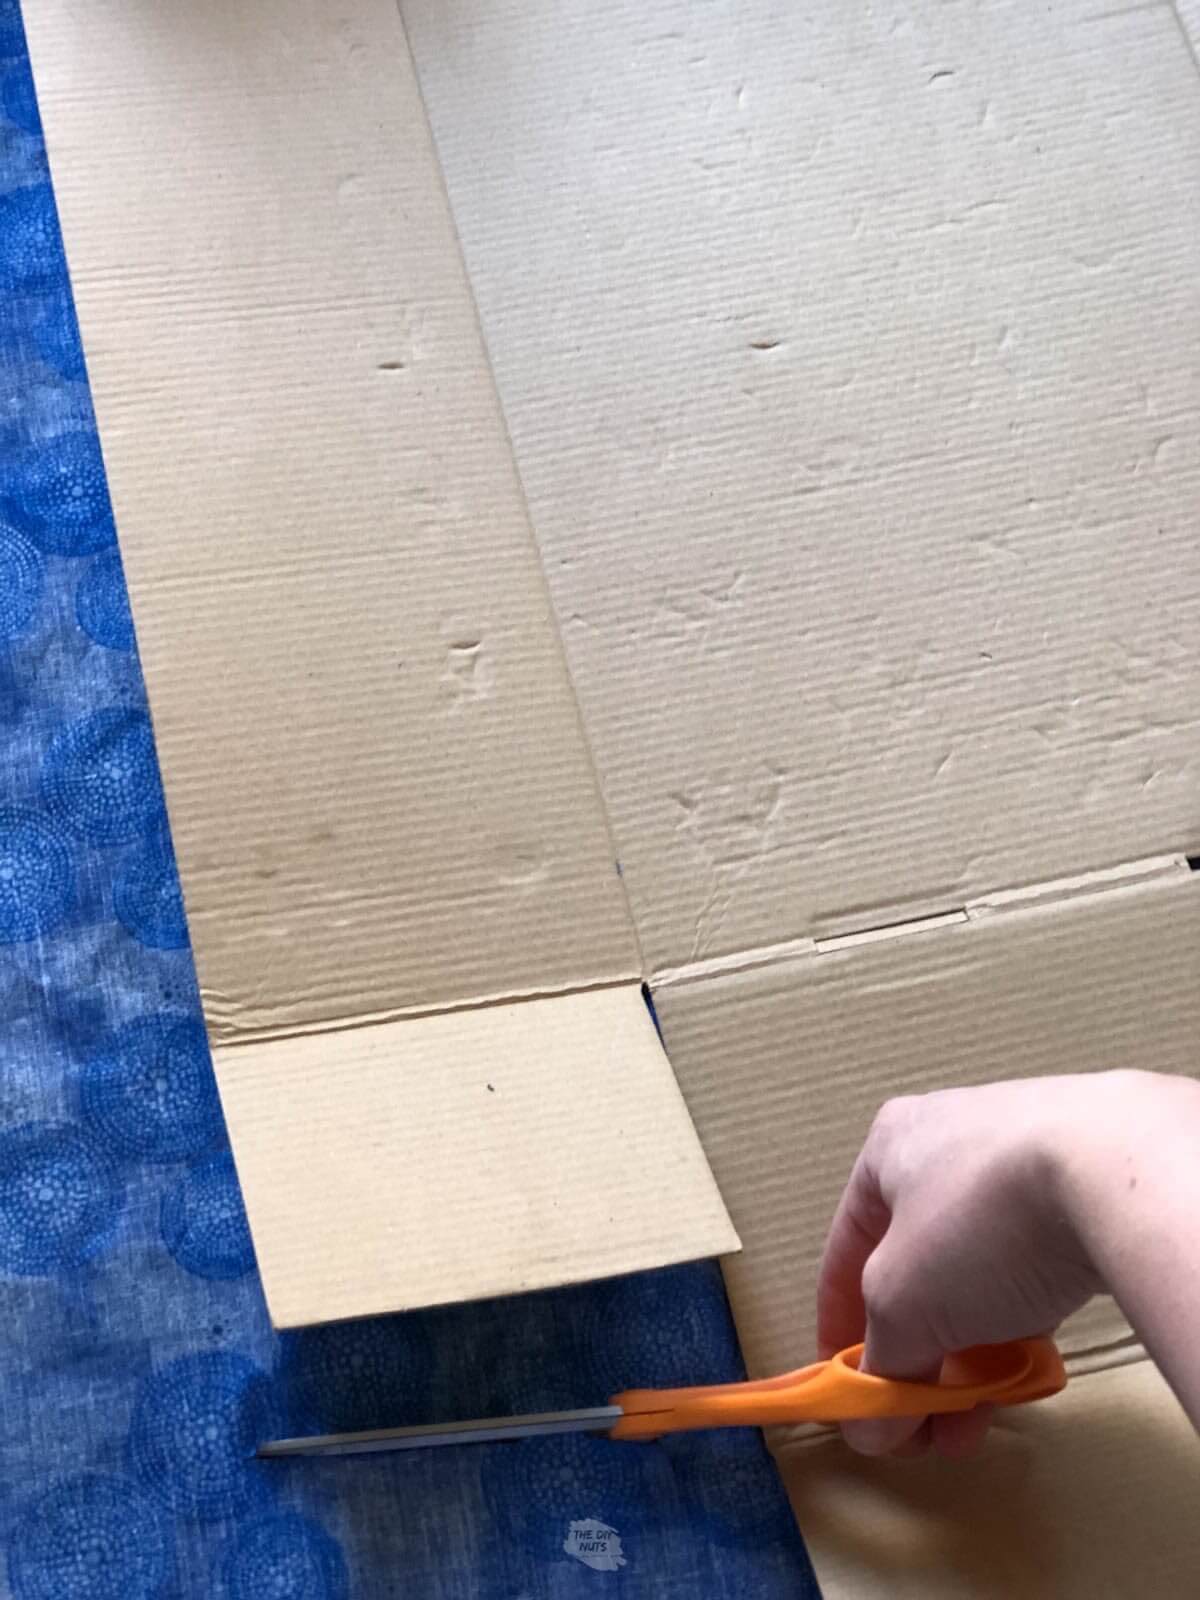
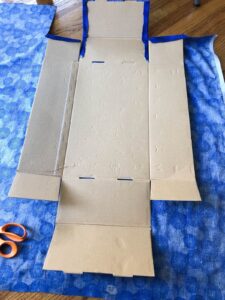
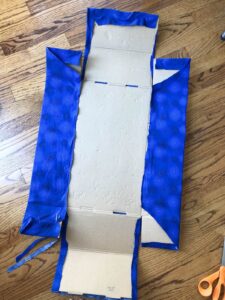
Step 1: Open The Box Up To Be Flat
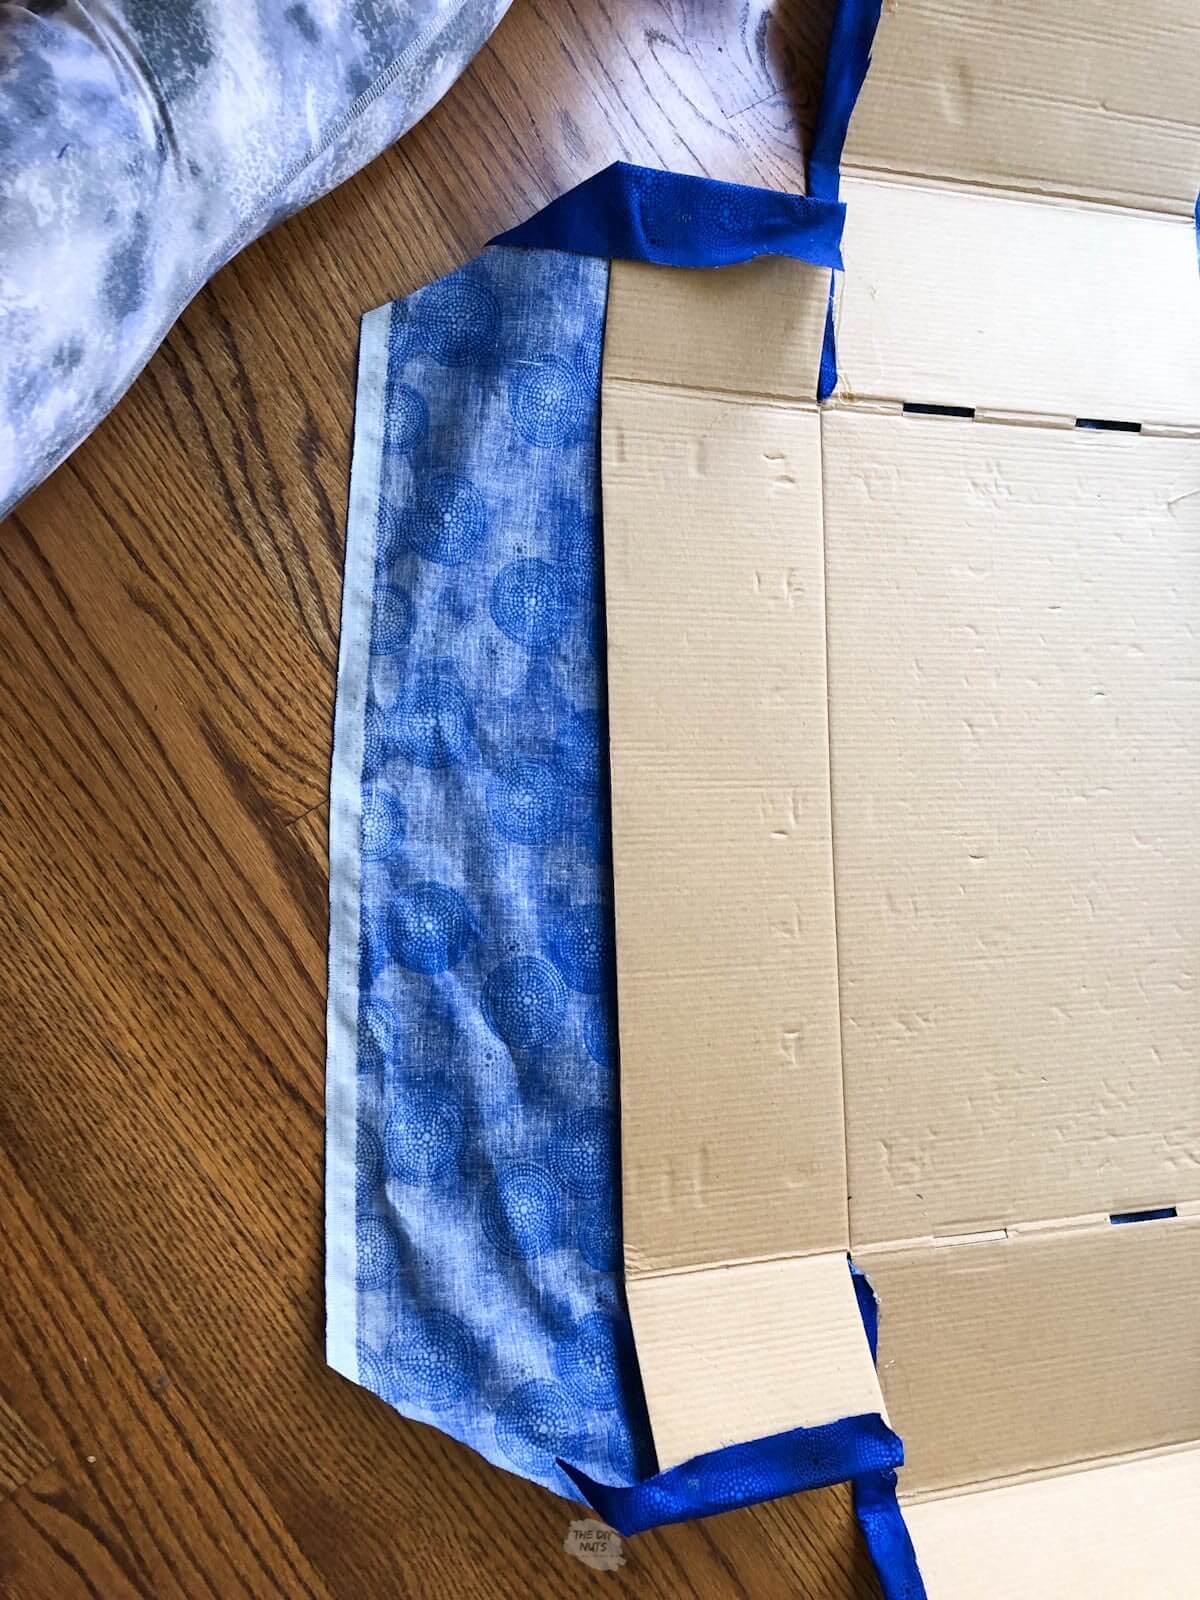
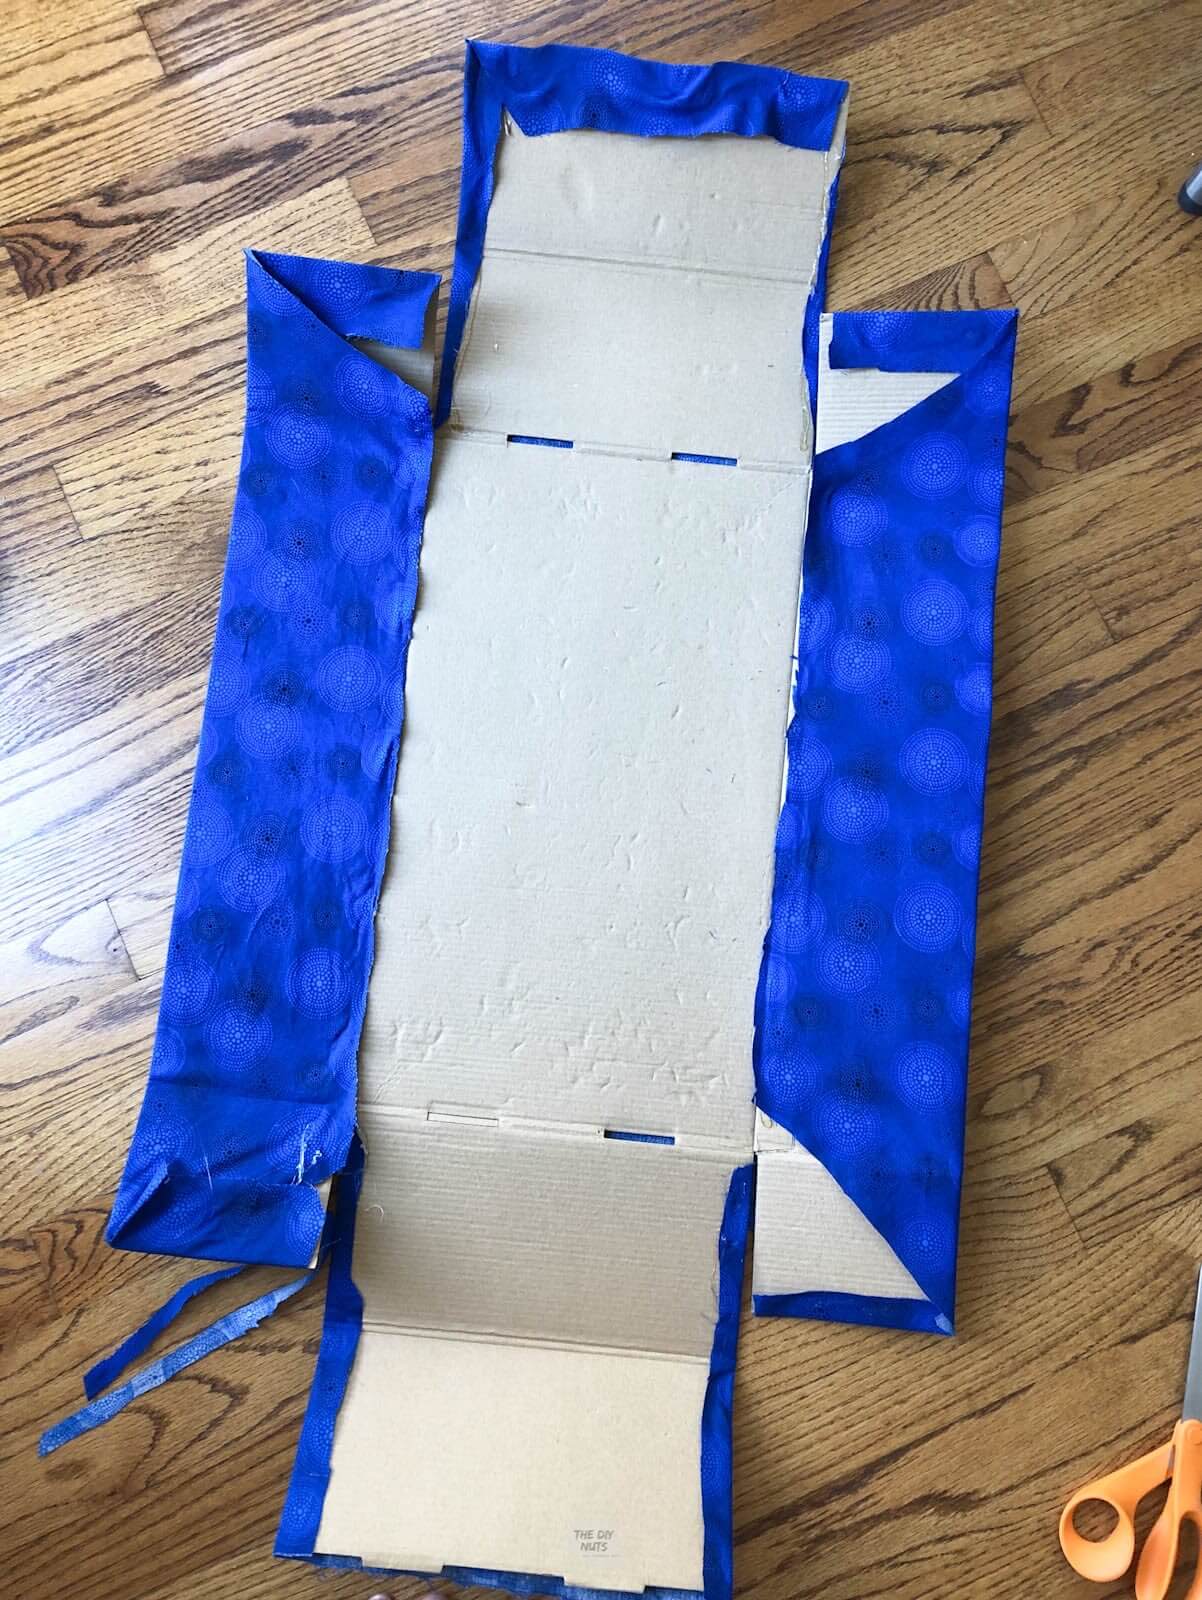
I was lucky enough to have two box lids that I could open completely to “wrap” with fabric and then put back together. I simply laid the opened cardboard box down and began cutting the fabric around it.
When cutting your fabric make sure to leave 1/2″ so that you can wrap it around the edges.
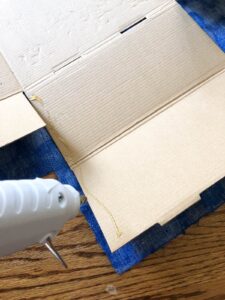
Step 2: Start To Glue Edges
Use a hot glue gun to add a line of glue on the edge.

Step 3: Fold Over Edge
Then use hot glue and fold the fabric like you would a birthday present! Continue working on all the edges.
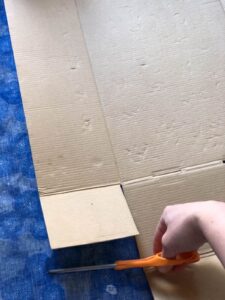
Step 4: Fold Corners and Glue Down
After you have wrapped the whole box and glued all the edges, you may have to snip the corners a little to make them fit nicely together.
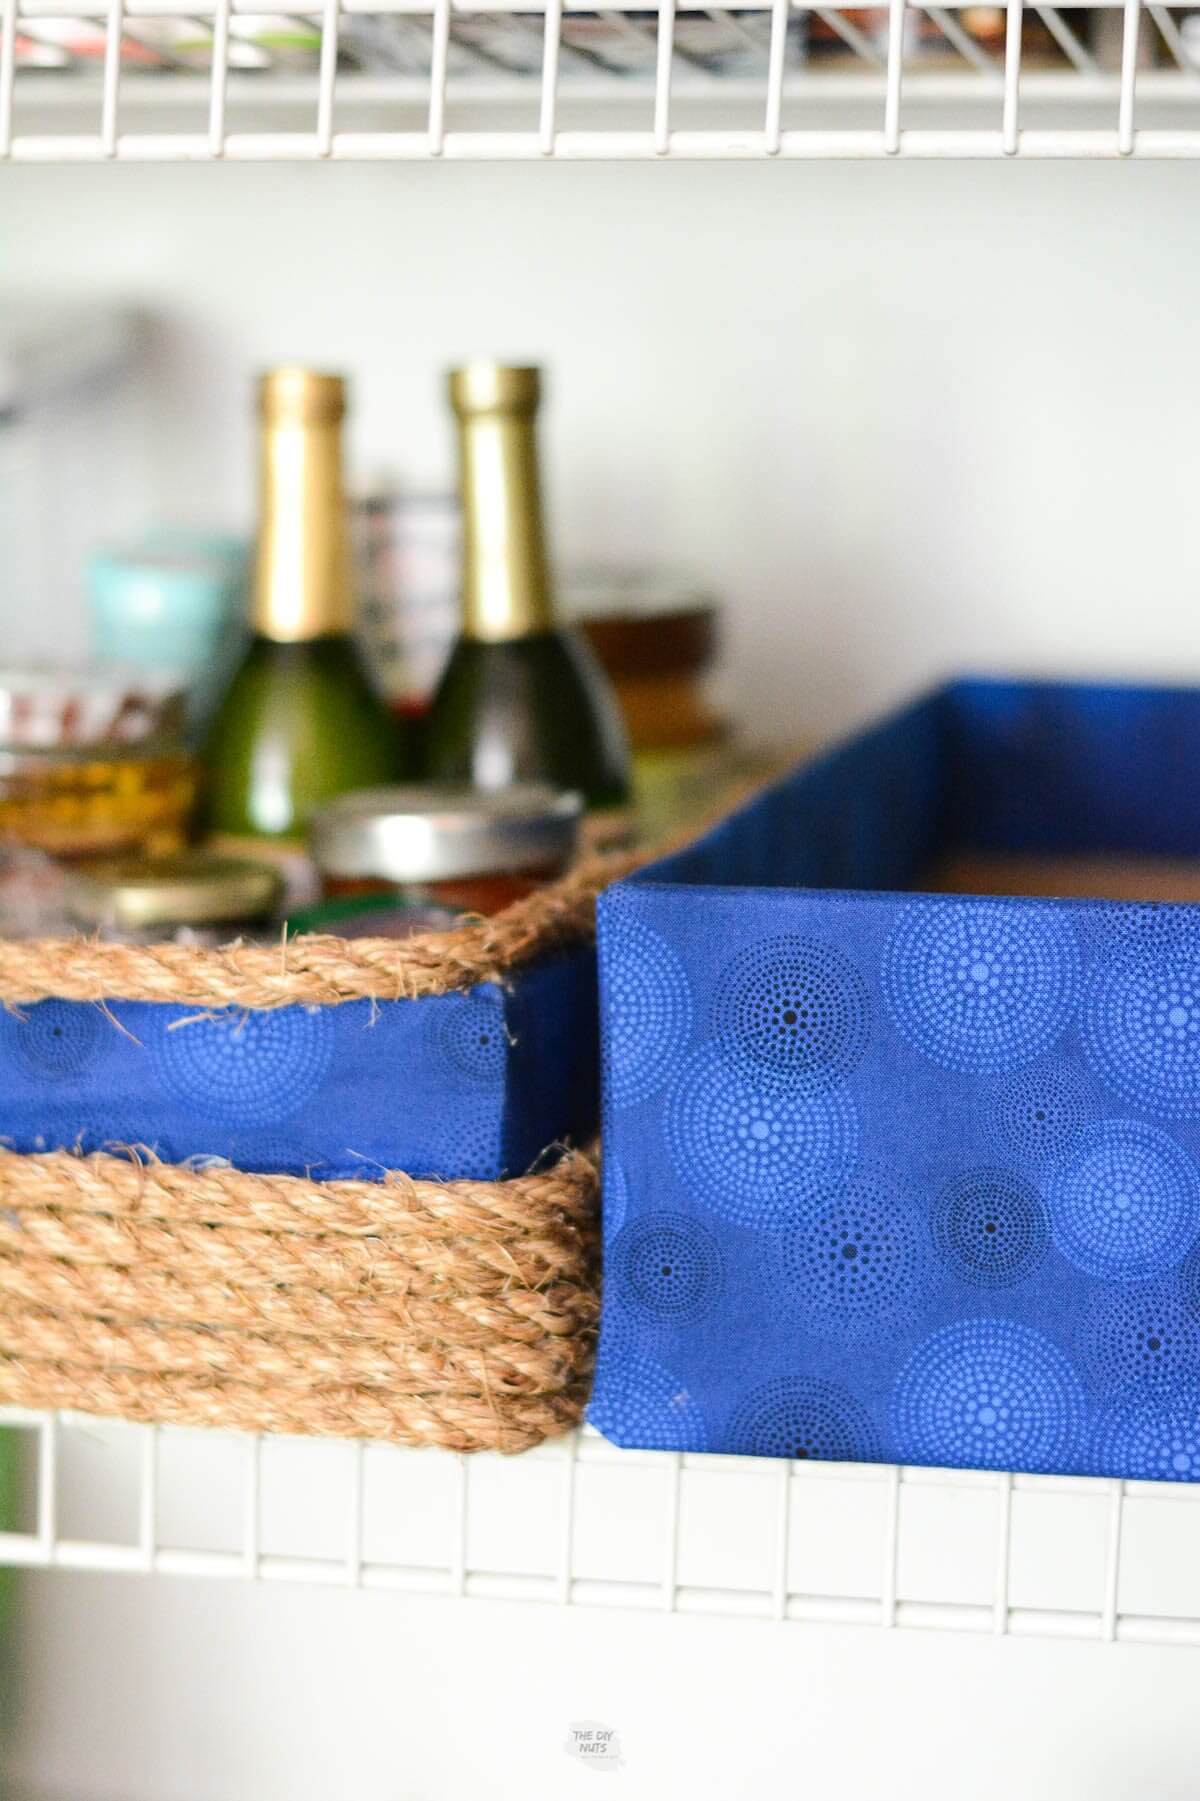
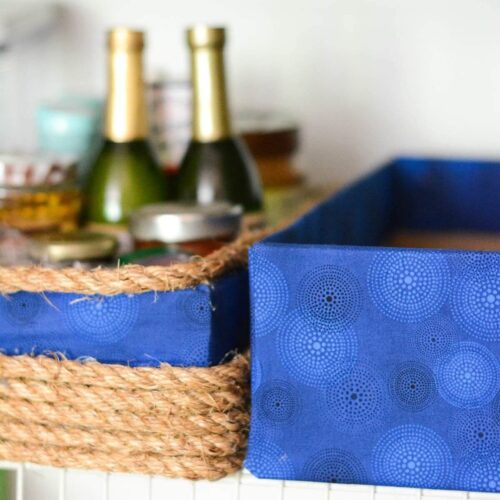
If you notice in the picture below, I wrapped my cloth to the edge of the inside of the bottom of the box. I knew I was putting smaller boxes on top and did not need to cover the inside of the box completely.
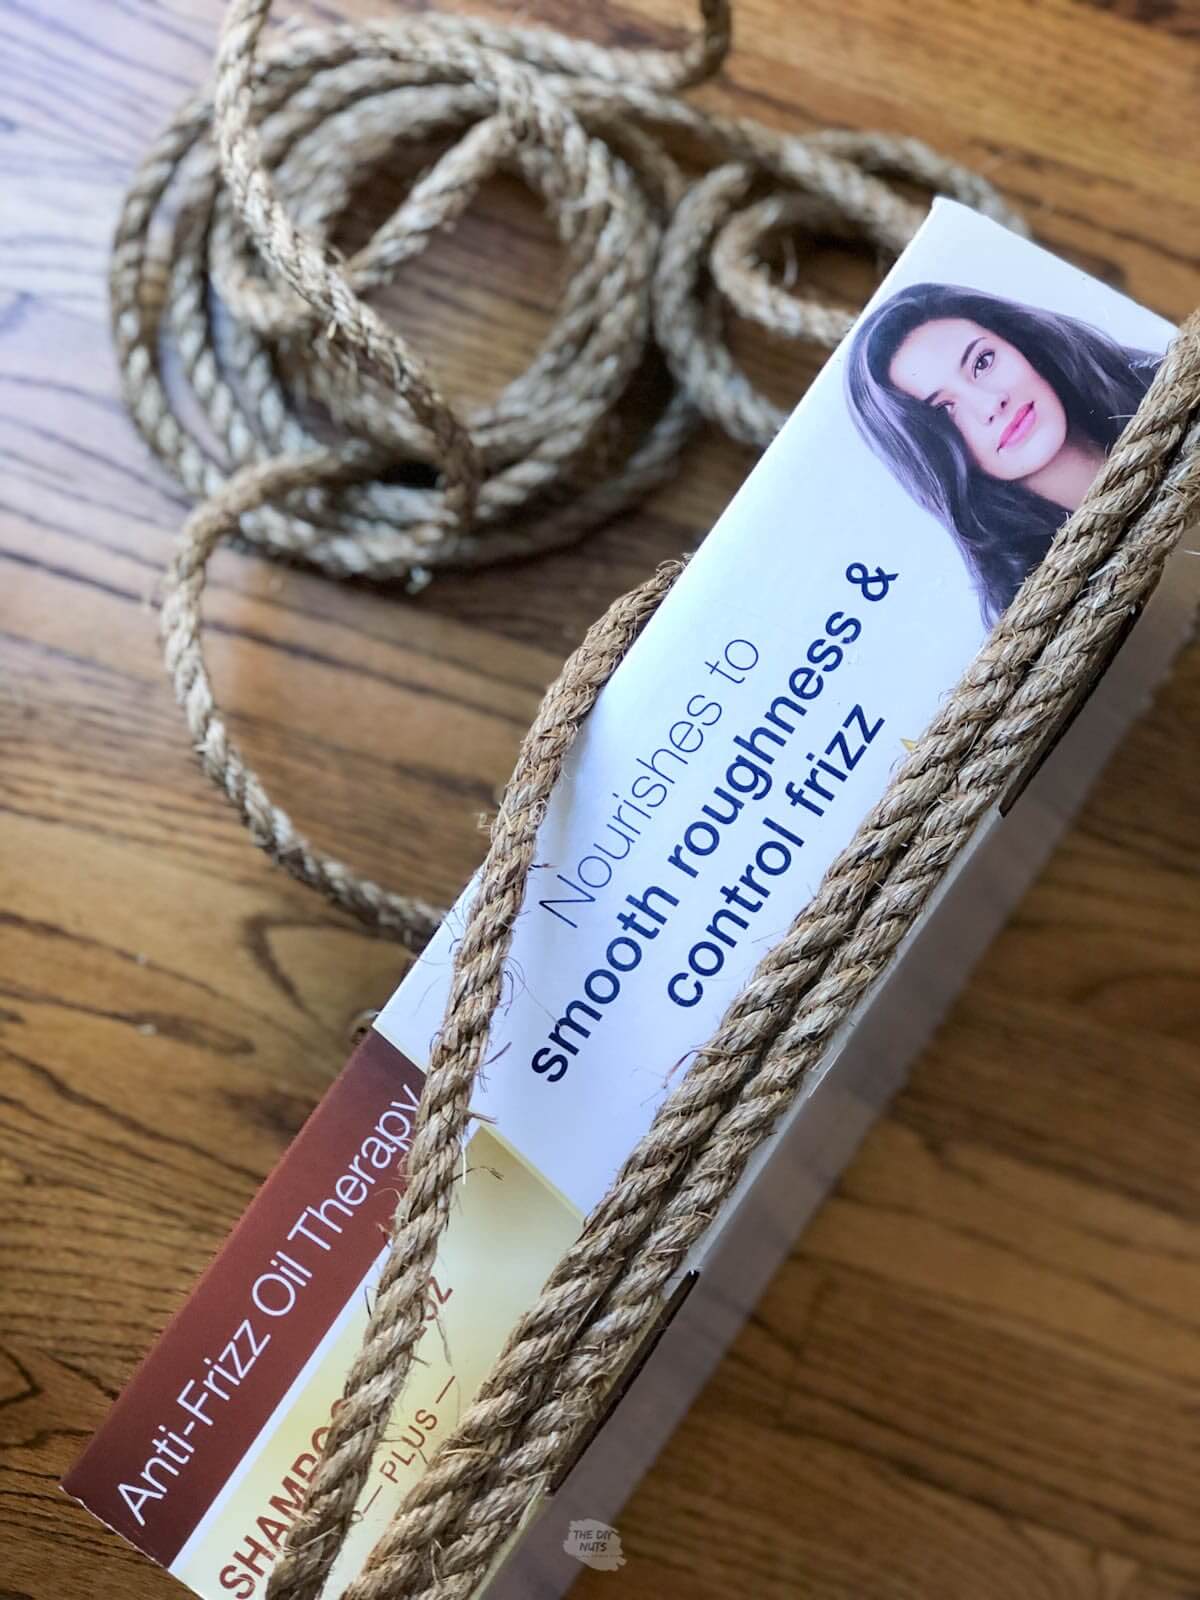
Optional: Add Accents Like Twine
If you noticed in the first picture on this post, I also attempted to make a DIY basket storage box with the DIY no-sew storage box I showed here. I added rope to the outside as an extra accent. I would recommend finding less sturdy twine to work with instead of this stronger rope.
Step 5: Put The Box Back Together
Put the box back together and enjoy having a DIY storage box that is a lot more than just an old cardboard box!
I hope one day I can get rid of those UGLY wire shelves and I think I know exactly what blog about shelving I may look at! I think just redoing the shelves may be just enough as my friend did in her linen closet.
Where else do we use these?
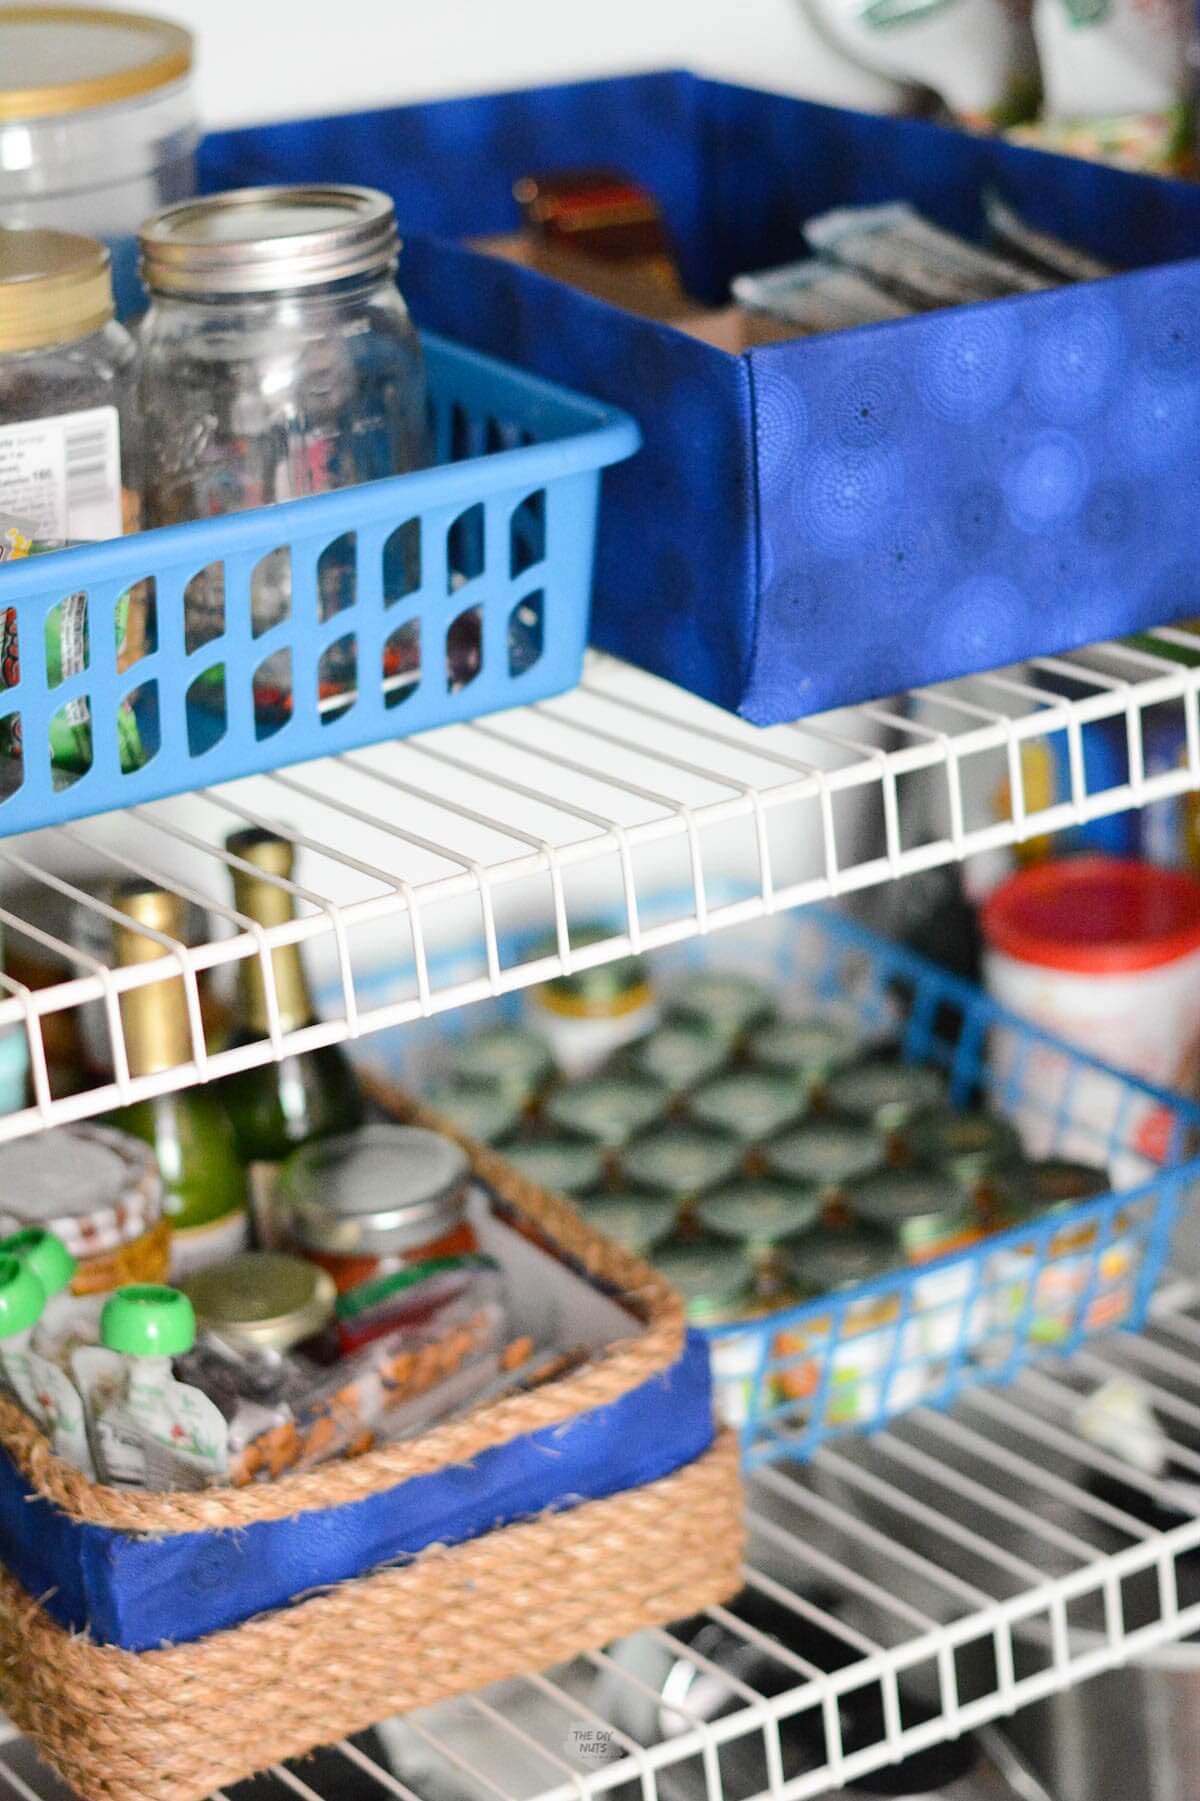
In addition to using my no-sew storage boxes to organize my kitchen pantry, I have also used them in our DIY baby nursery (and child’s closet), daughter’s room and in our DIY basement built-ins.
These DIY cardboard storage boxes are a lifesaver for me.
Related Organization and Cleaning Posts
I hope you can save money and help keep organized with these DIY cloth storage boxes and tips!
Follow us on Pinterest, YouTube or Facebook for more DIY inspiration!
Now let’s check out what some of my DIY friends did for our DIY project challenge using fabric and $50 or less!
- Joyful Derivatives: DIY No-Sew Drop Cloth Curtains
- Kippi at Home: Llama Pillow Pattern
- 1905 Farmhouse: How to Create Fabric Ribbon for Gifts
- Life’s AHmazing!: DIY Throw Pillows
- Southern Yankee DIY: DIY Linen Sign
- Mama Dares To DIY: DIY Painted Fabric Chairs
How To Make DIY Cloth Storage Boxes
Equipment
- Pair of scissors
- Glue gun
- Hot glue sticks
Supplies
- Cloth
- Cardboard Box
- Twine
Instructions
- Open box to lay flat.

- Cut about 1/2's around the box. Leaving more fabric on the edges that you will see.
- Use a glue gun to add line of glue to one area.
- Fold over fabric edge.
- Fold the side part last. This will be a bigger piece of fabrci if you want the blue in the insde edge.
- Snip diagonal cuts or fold the corner to get the fabric to lay nicely before putting the box back together.


Fantastic easy and so budget friendly to make a pretty fabric box with an up-cycled box!
Pinned!!!
Have a great week,
Kippi
#diyprojectchallange
Thanks Kippi! I am all for trying to make things look better for almost FREE!
Upcycled boxes are some of my favourite DIYs. Well done.
This is genius! What a clever way to save money and create something useful out of everyday items. The box turned out fantastic!
So easy, and yet so cute and functional! Love this idea!! 🙂
I love me some free organization! Especially when it’s easy too! Love the fabric and rope together!
Love this! We use diaper boxes a lot!