How to Build a Double Wall Mounted DIY Coat Rack
Are you looking for a simple way to hang your coats, jackets and bookbags? Our double wall-mounted hooks are the perfect solution that you can customize for your space.
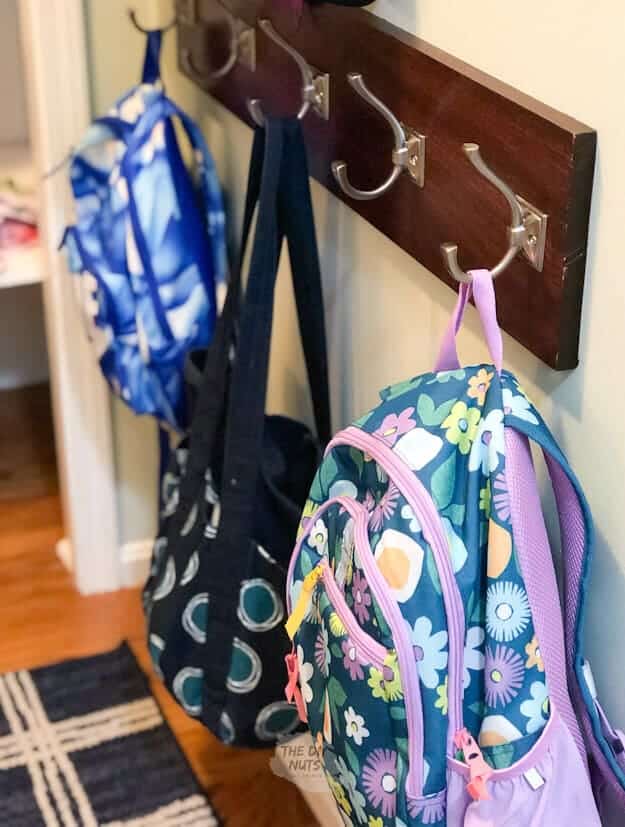
Our Entryway
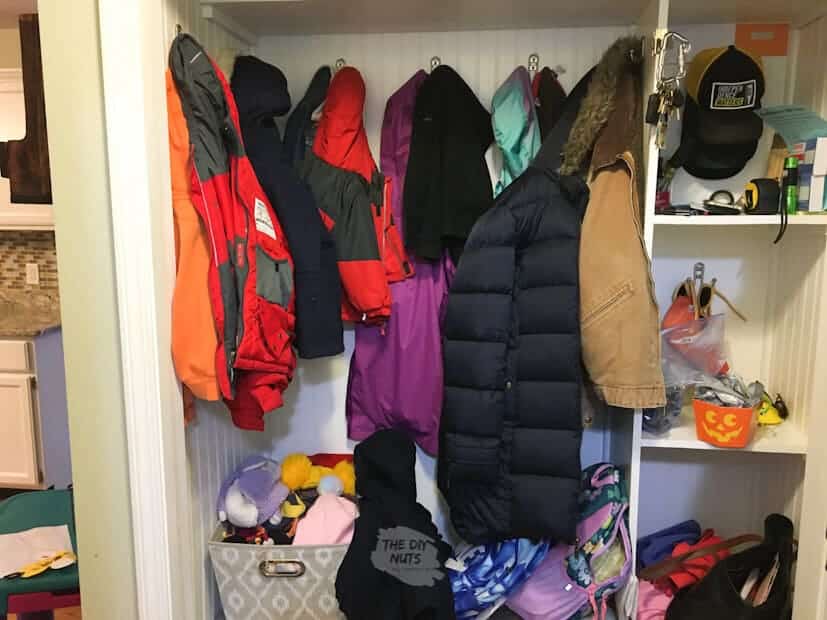
Our closet turned entryway station has recently become flooded with our family’s bookbags, coats, sweatshirts, masks, and more. This was exactly the same problem we were having in our garage with shoes needed to be organized (you can see how we solved that one here).
Why build two sets of wall hooks?
Kids get bigger and they need more space. We decided to add hooks that were accessible to all. Now no one can tell you they can’t reach the hooks and put their stuff away.
*Disclosure: I only recommend products I would use myself and all opinions expressed here are our own. This post may contain affiliate links that at no additional cost to you, I may earn a small commission. Read our full privacy policy.
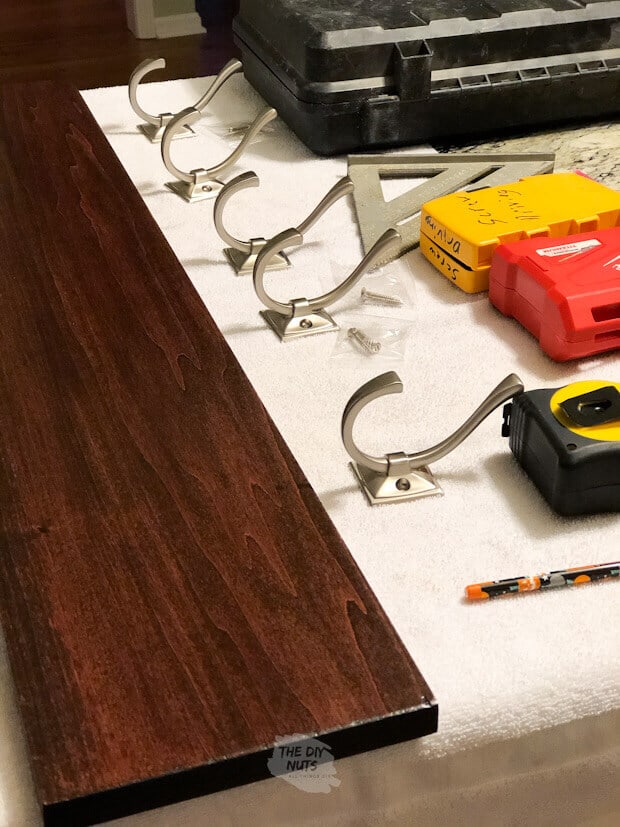
Recommended Supplies
- 1” x 8” x 8’ Pine or Poplar Board Cut to Size-We were able to get two coat rack boards out of one size
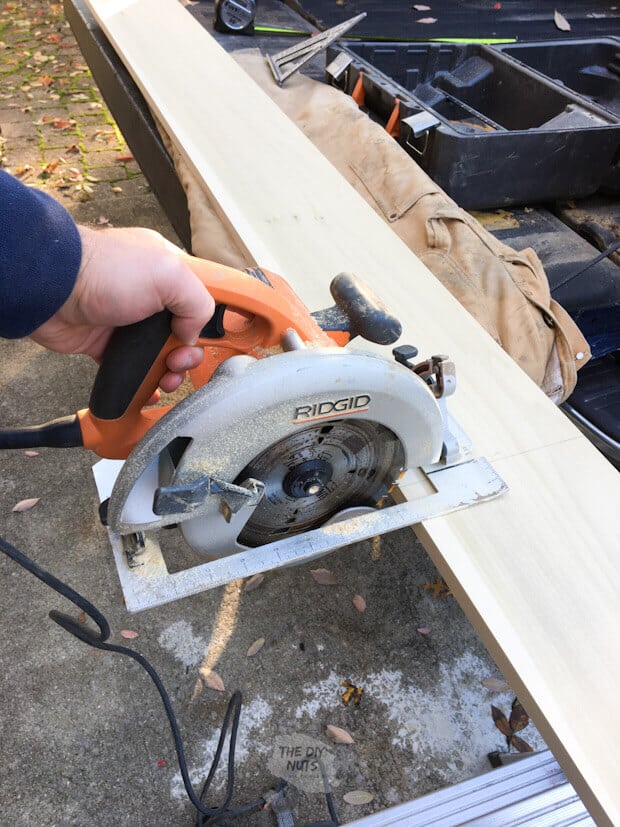
- Circular saw (if cutting yourself)
- Hooks (My husband loved the look of these simple hooks from Home Depot)
- Speed Square
- 4′ Level
- Tape Measurer
- Cordless Drill
- Stain color of your choice
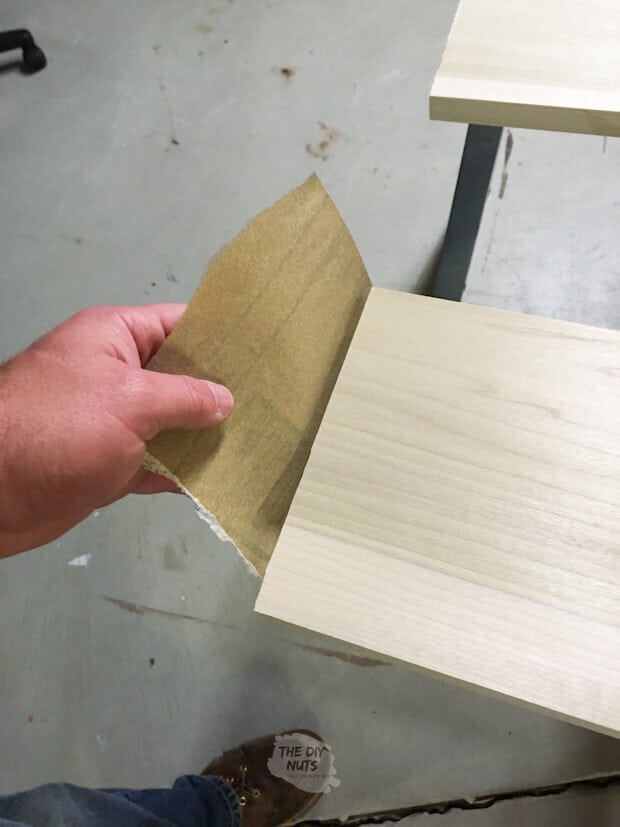
- 220 Grit Sandpaper
- Old T-shirt cut up
- Polyurethane in the finish of your choice
- 2” brush (This brush is a great economical brush)
- Sawhorses
- Wax paper
- Old 2 x 4s to rest the wood on while staining
- Mineral Spirits to clean brush
- Latex Gloves
Other Hooks to Purchase
Here are some hooks that I would have considered depending on the finishes you have in the surrounding areas.
- Rustic Matte Black Hooks for a more Farmhouse look. You honestly won’t believe the price on this ten-pack.
- Decorative Brass Hooks from Target for a more sophisticated look.
Read More: 7 Amazing DIY Wood Projects Using Our Favorite Stain Color
Before You Begin
Determine Design
Determine the size of the coat rack you want.
Our Coat Rack
- Is 36”s long x 7.75”s wide x 7/8”s thick.
- Hooks are 8”s apart from each other for reference.
- Determine the type of wood you want to use.
Tip For Picking Wood
If you are going to paint the coat rack then you can use pine. This is the cheapest option.
If you are going to sand, stain, and poly the wood you should use should be a nicer hardwood (which is more expensive). We used poplar wood since we knew we were staining the wood our favorite color.
How To Build Wall Mounted Hooks
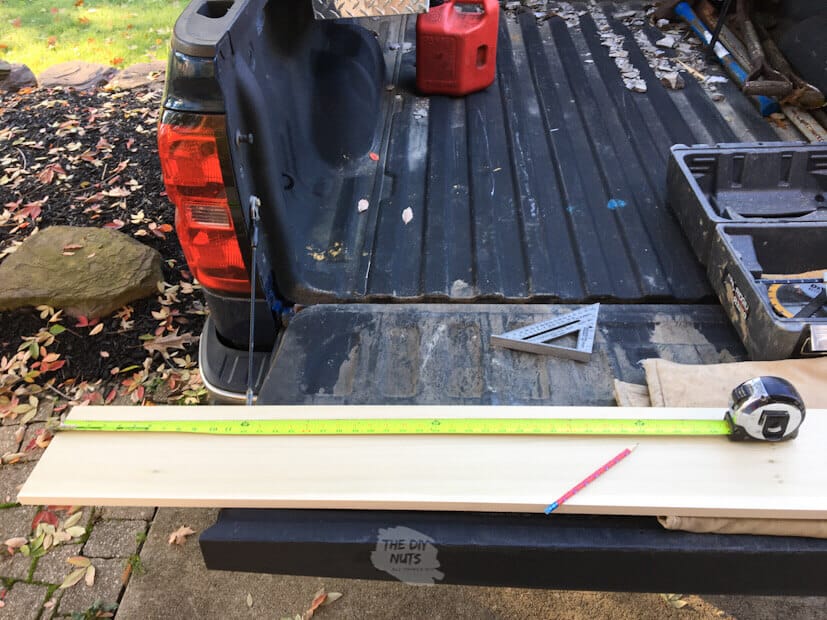
Step 1: Cut Two Boards To Size
Use a circular saw to cut the wood down to the size you want.
Step 2: Smooth Edges
Smooth out any rough edges with sandpaper.
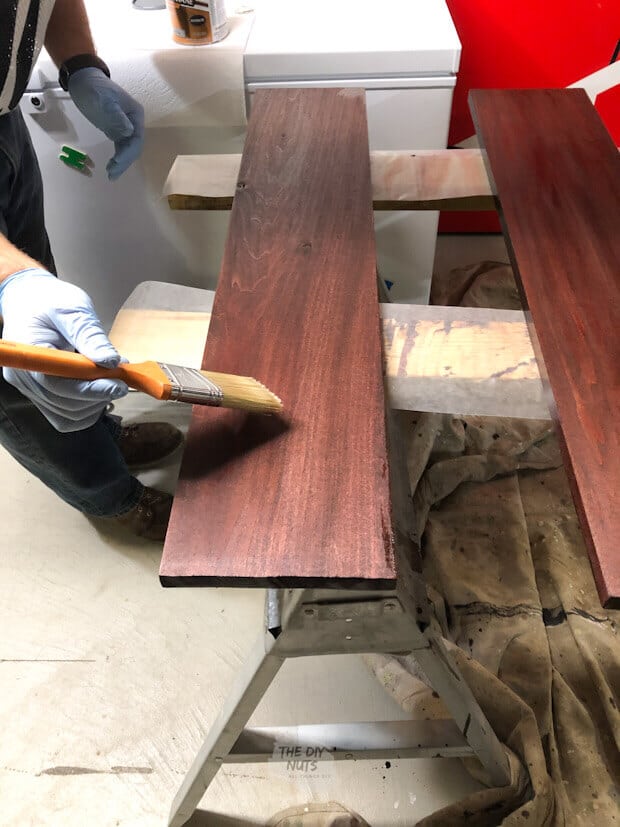
Step 3: Apply Stain To Wood
Select a stain color. We used this stain color.
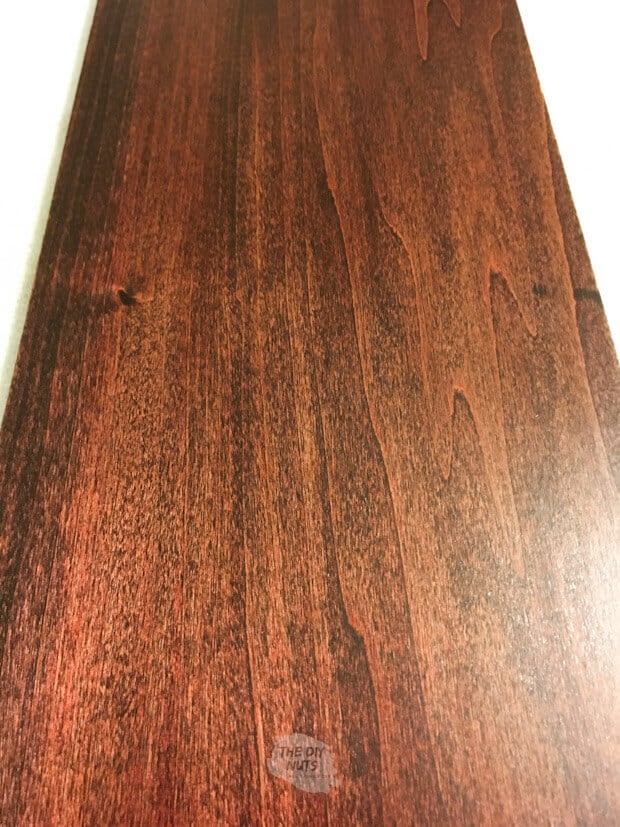
Tip: The longer you leave the stain on the darker the color will be.

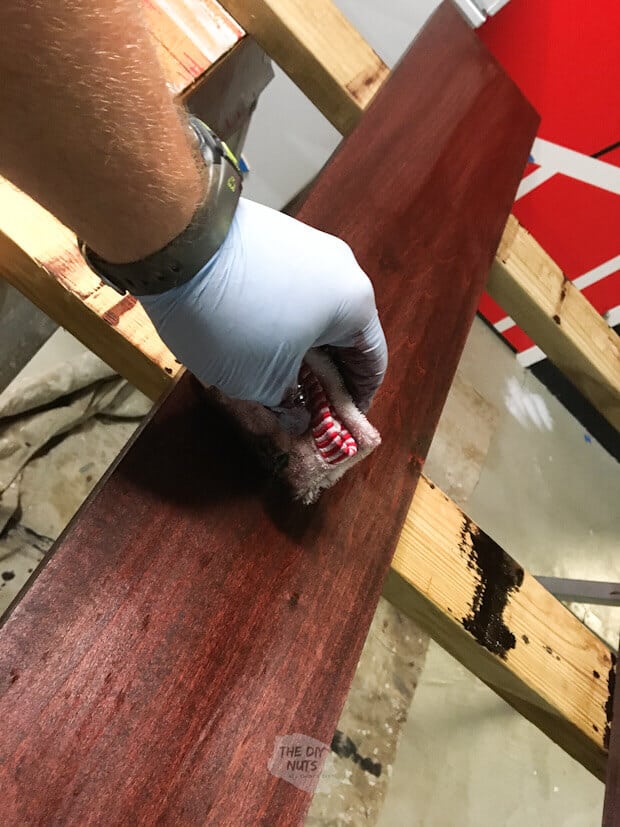
Tips For Staining Wood
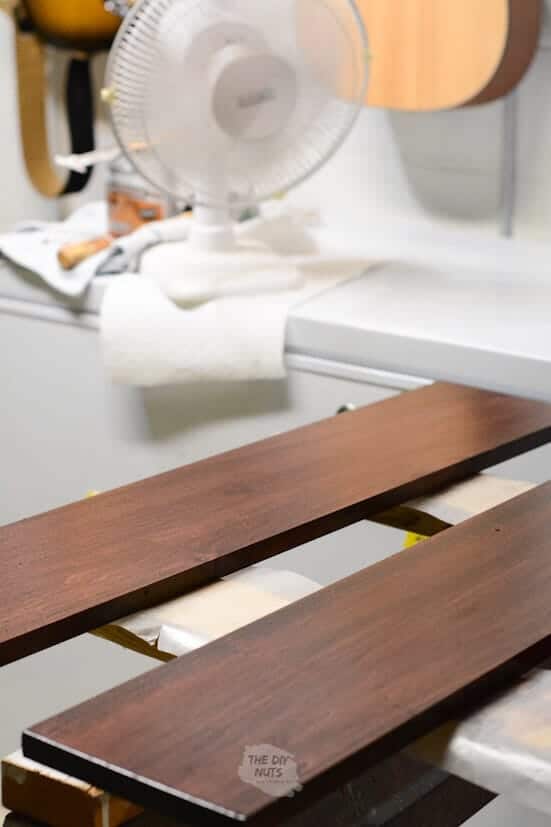
- Place your wood on the sawhorses, then a 2×4, then wax paper over the 2x4s.
- Wear latex gloves.
- Open the stain and stir it (do not shake). Make sure you read the instructions on the stain.
- Make sure you are doing this in a well-ventilated area as the stain has a mild odor.
- Use a cut-up old tee-shirt or old towel to apply the stain.

Step 4: Wipe Stain
After appx. 10 minutes wipe away the stain with a clean piece of cloth.
Step 5: Let Wood Fully Dry
Let the stain dry for 48 hours.
Step 6: Add Poly
Select a polyurethane to use. We used a satin finish.
Semi-gloss /gloss etc. are some other options you may want to consider. If you want a more rustic coat rack, I would stick with the satin finish.
Tips For Applying Polyurethane
- Wear latex gloves.
- Use a 2” wide brush and brush on the poly.
- Light coats are better than thick coats
- Make sure you brush the edges of the board after you do the top
- Let dry for 24 hours
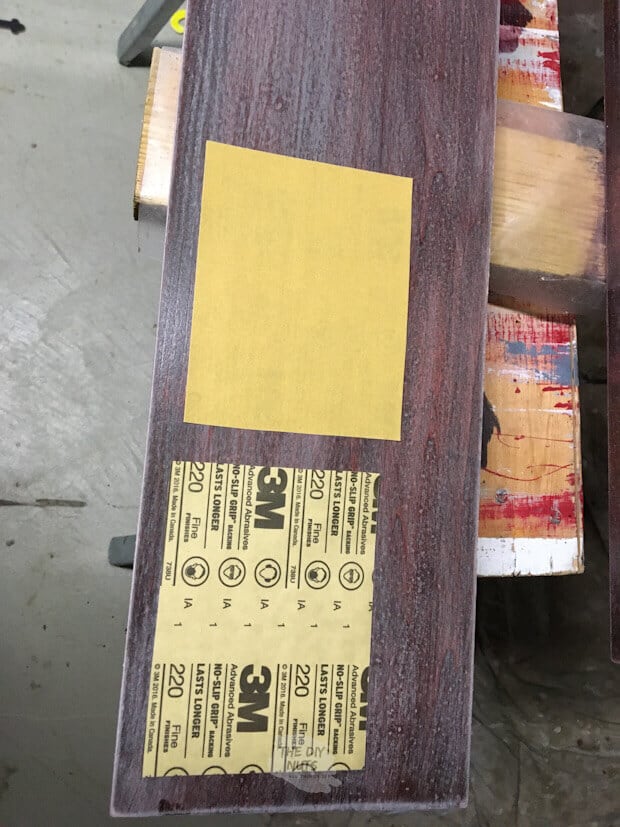
Step 7: Sand In Between Coats Of Poly
Once the first coat has dried use 220 grit sandpaper to “dress up” the first coat.
- This will remove air bubbles etc.
- Don’t worry that the first coat will look white and powdery when done.
- After sanding take a damp cloth, with water, and wipe down the board.
Step 8: Apply A Second Coat Of Poly
Take a dry cloth and dry everything off. Apply a second coat of poly.
Optional Step
Repeat this process as many times as you want. The more coats of poly the more durable the finish will be. We did two (2) coats and have never done more than three (3).
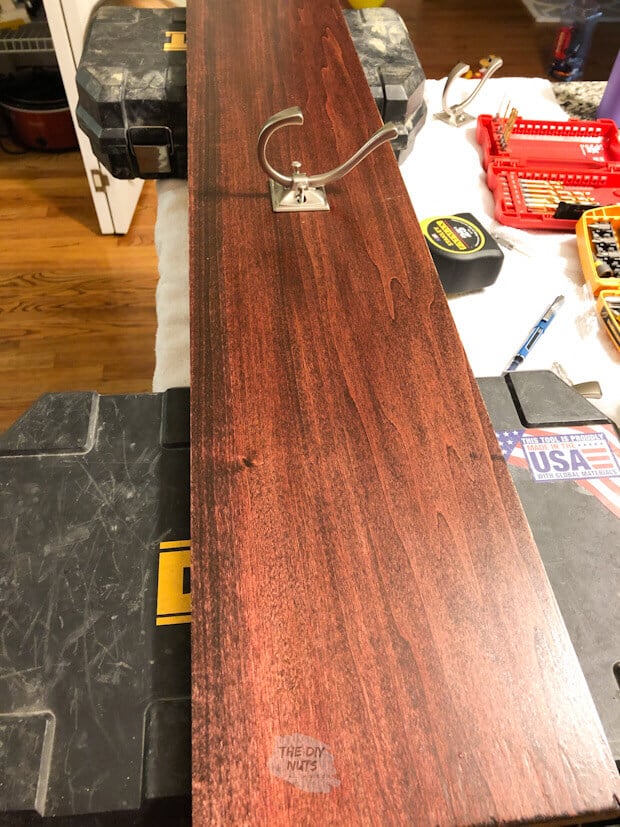
Step 9: Hang Boards
Measure and find the center of your board. We placed one hook already on and added the others once the board was mounted.
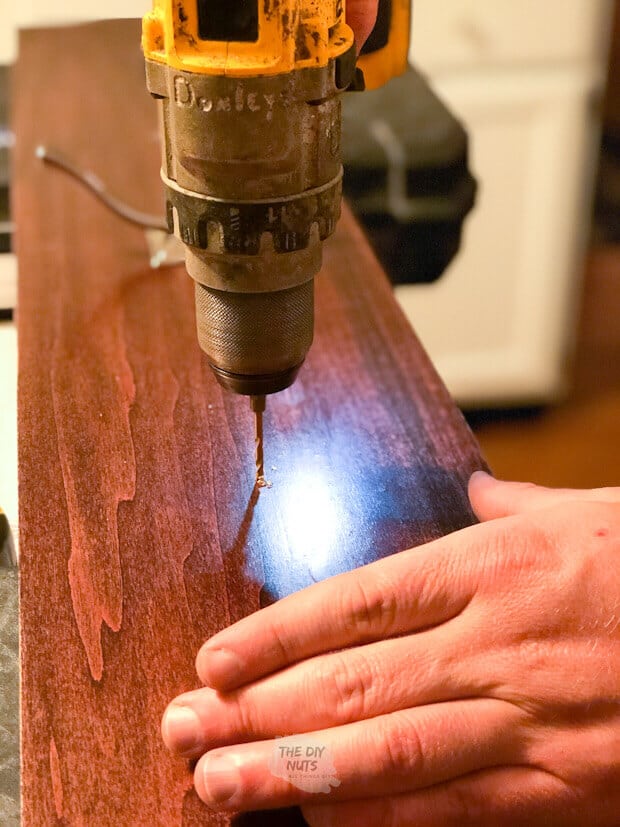
First, you have to hang the board. Use a stud finder to mark where you should be hanging the board.
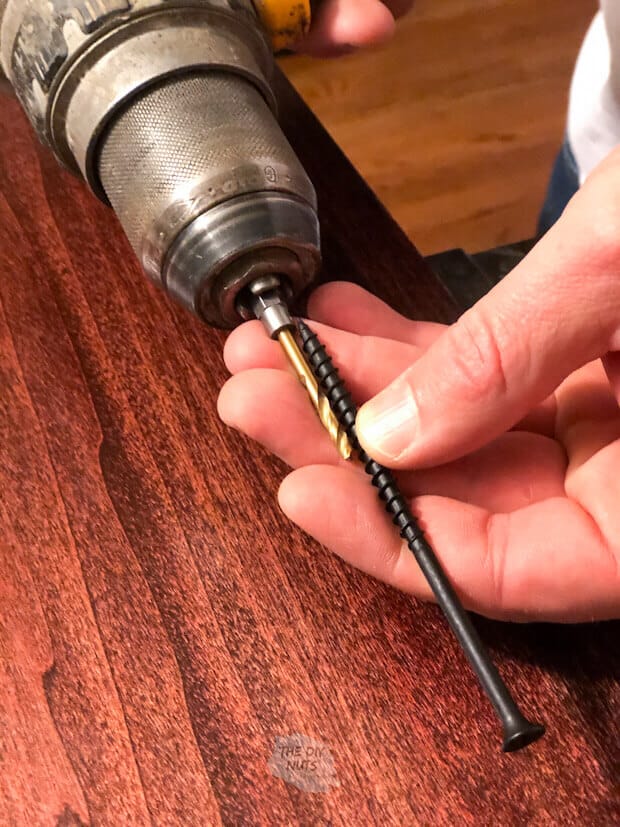
Drill Pilot Holes
Drill pilot holes through the board. Make sure the thickness of the hole will support the 4” screw.
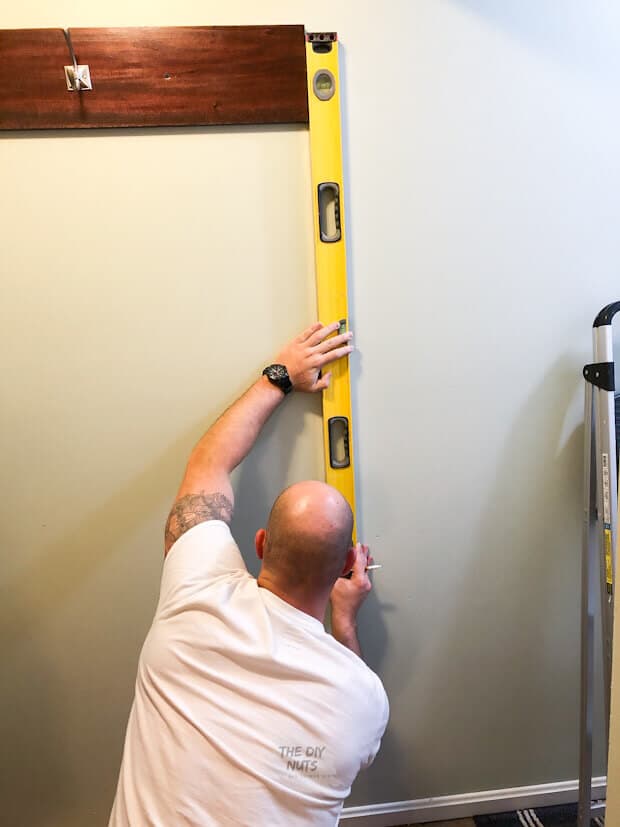
Make It Level
Hold the board up with the level on it. Make sure the bubble is level.
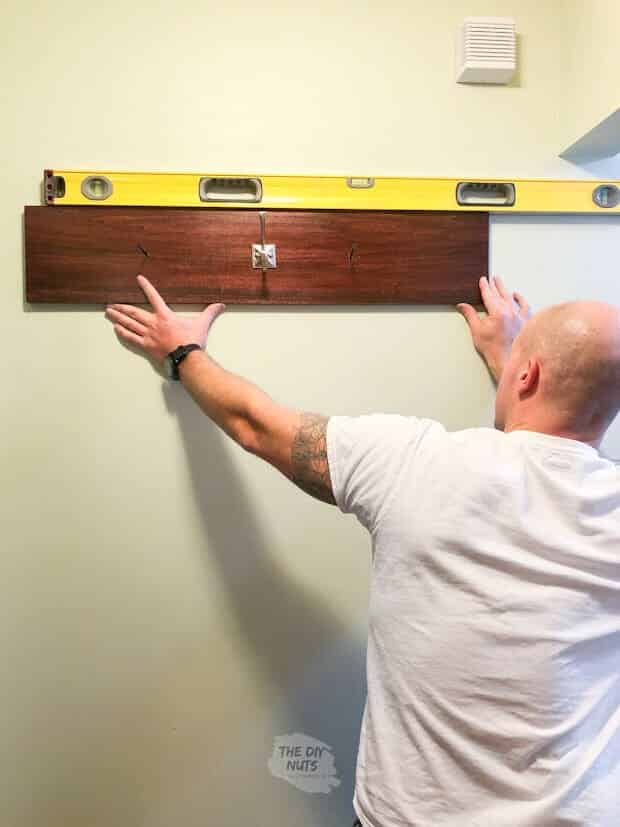
Screw It Into Studs
Have one person press the board into the wall, while the other screws into the studs.
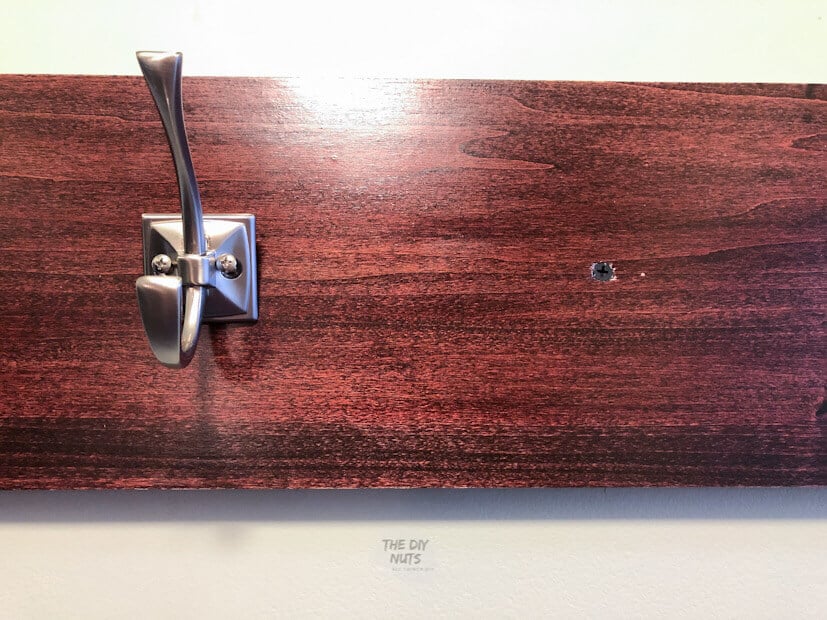
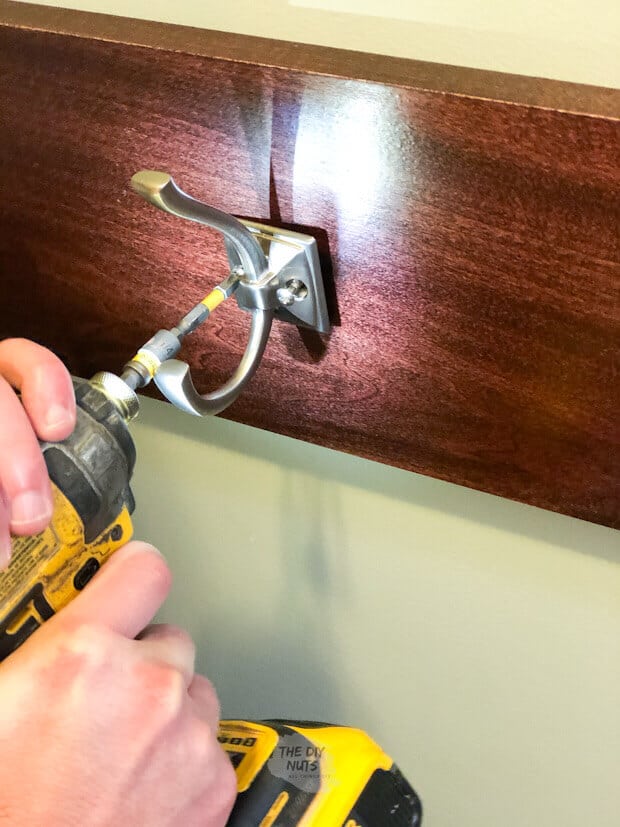
Step 10: Add Hooks (Hopefully Over Screws)
Once the board is up, you can measure and mark where the hooks will go. As we stated before, the hooks went over the screw holes so that you do not see them. This helps create a finished look.
Step 11: Attach All Hooks
Repeat until all of your hooks are attached.
Special Notes
- If you only plan on hanging coats, then you could use drywall anchors.
- If you plan on hanging backpacks, then you need to have your coat racks hung into the studs.
- We used 4”s long screws due to the thickness of the board + drywall being 1 – 5/8” thick and wanting enough “meat” into the studs.
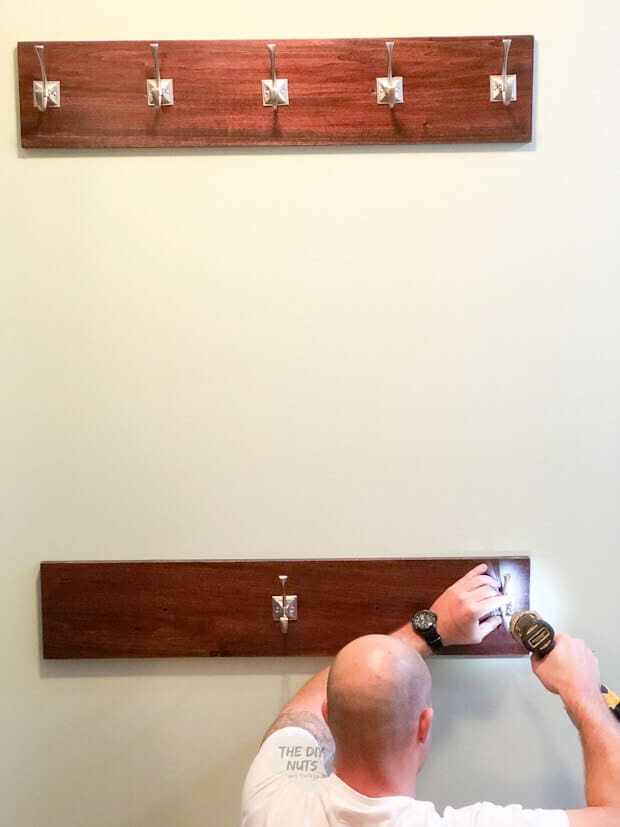
Step 12: Hang Second Board and Hooks
Use a 4’ level to make sure that your top wall hook and bottom wall hook are even.
Follow the above steps to mount your bottom DIY coat rack.
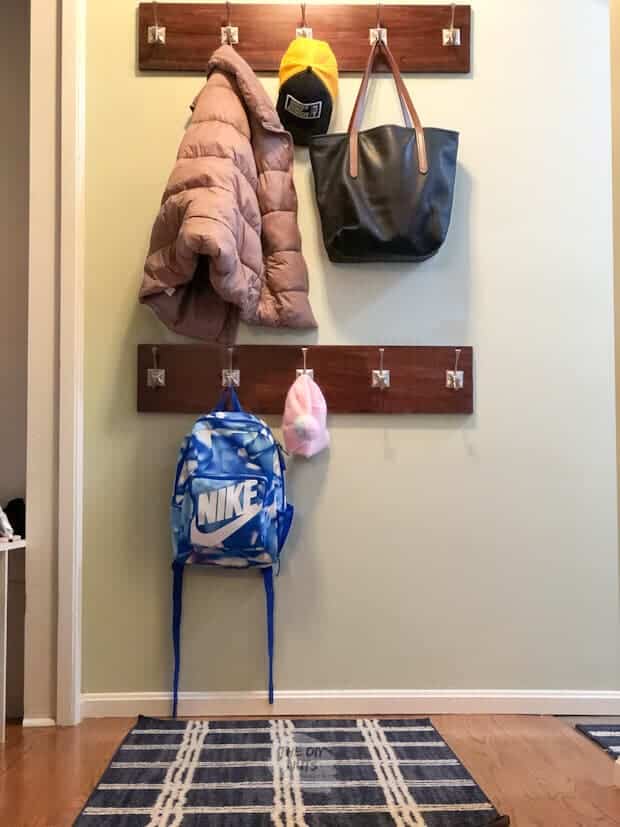
Luckily, my family has already realized that they need to use this area!
Tutorial FAQs
Purchase wood pre-sanded from a local lumber yard or from a large box store. We always advocate going to the lumber yard, but sometimes you just have to get your wood from a large retail store.
If you are painting your wall hooks, simply prime your wood and use latex-based paint. You can find our process and materials we like for painting oak wood cabinets makeover or oak painting projects here.
If you have noticed, we have not put the hooks on the board yet. After the board is mounted, then add the hooks. My husband did this because he wanted to try to hide the screws that are in the studs with the hooks (see the pictures below).
Due to where we wanted the placement of the wall hooks and where are studs are, one of the screws is pretty much hidden and one you can see next to the hook. My husband was able to fully cover the screws in the hooks we did in our bathroom.
However, it is your decision to put hooks on first and then hang or hang the whole wall hook board. Both are pretty easy.
Before you mount the next board, determine the height. We used made sure that an adult sweatshirt could hang with the next row of hooks below. Our bottom row of hooks is for bookbags so this worked for us.
Related DIY Projects Using Same Stain Color
- Screened-in porch tongue in groove ceiling
- Pallet Wine Rack
- DIY Art Displays
- DIY Industrial Bathroom Shelves