Prize Punch Board-Easy DIY Party Idea
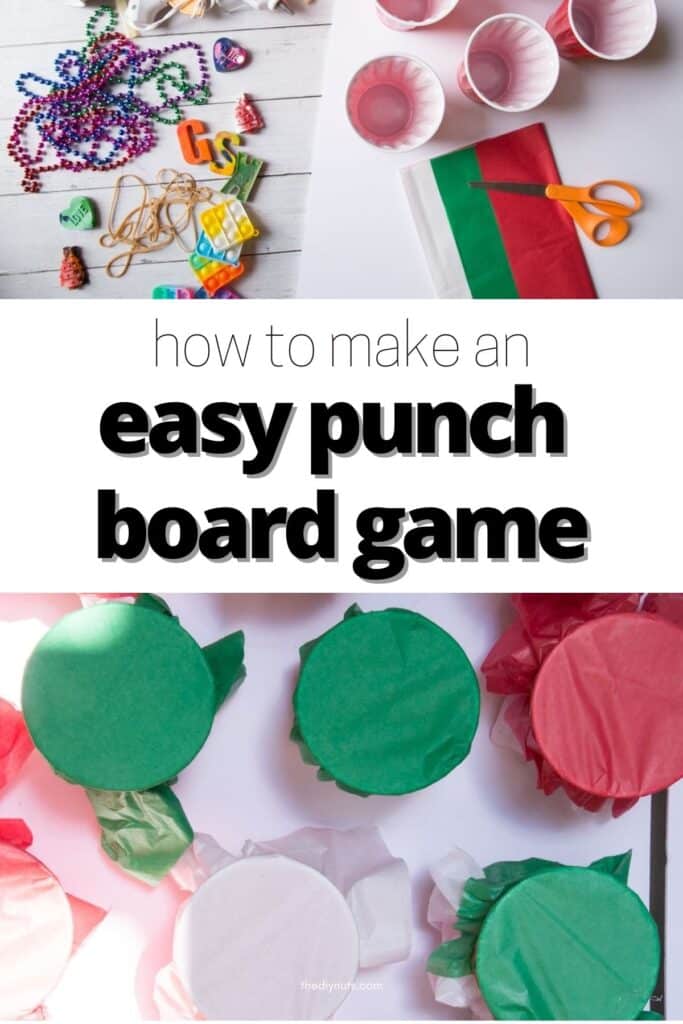
Are you looking for a fun kid activity to bring to those classroom parties or to have for your next gathering? As busy parents we love when we can make things cheaply, and easily, and that kids will love. Come along with us as we make the easiest DIY prize punch board!
*Disclosure: I only recommend products I would use myself and all opinions expressed here are our own. This post may contain affiliate links that at no additional cost to you, I may earn a small commission. Read our full privacy policy.
What is a punch board game?
It is a knock-off version of some of those games like Punch a Bunch you would see on the game show, The Price is Right. Simply punch the cup you want and reveal the prize.
You could use these boards as rewards, party games or incentives for a group or class.
Recommended Supplies
- Foam Core or Cardboard
- Glue Gun
- Large Plastic Cups
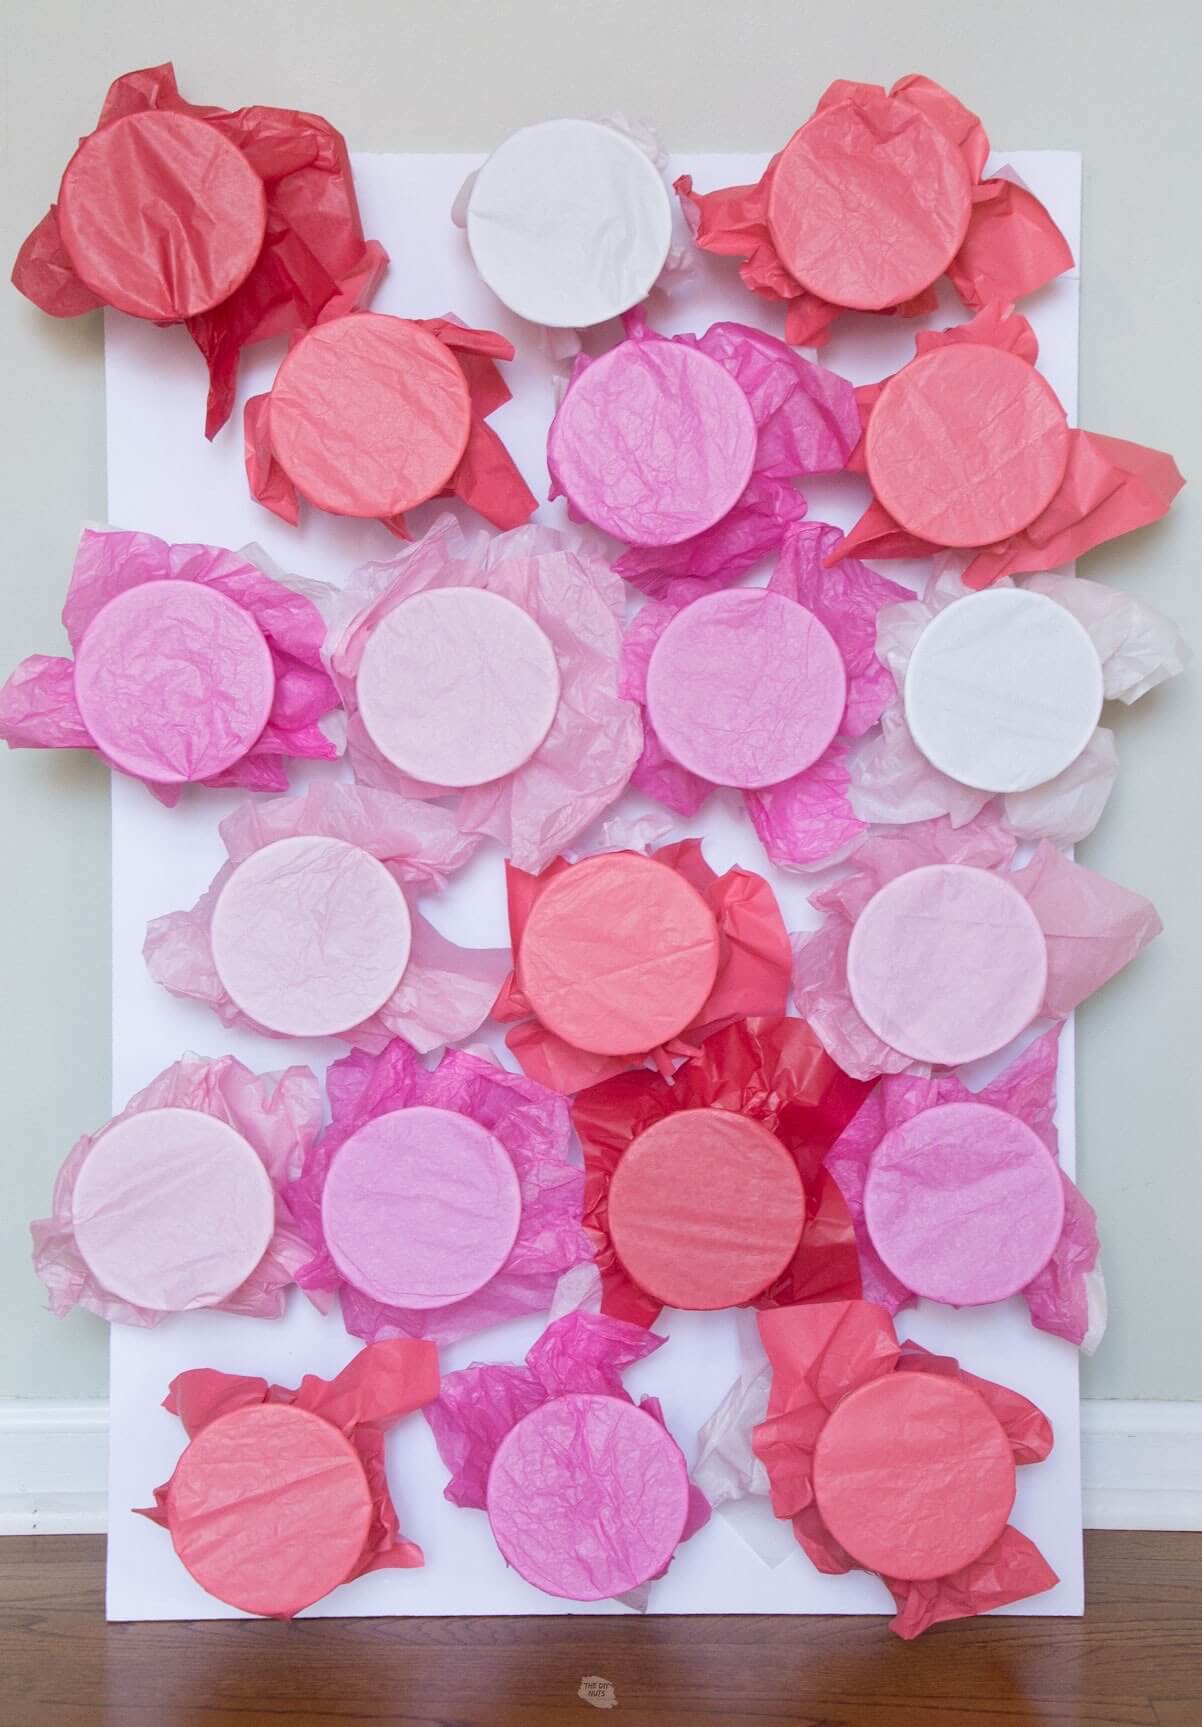
- Tissue Paper – we put two layers on top of our cups. We found it was easiest to work with larger squares (around 8” x 8” squares or for a neater look cut the tissue paper into circles)
- Rubber Bans
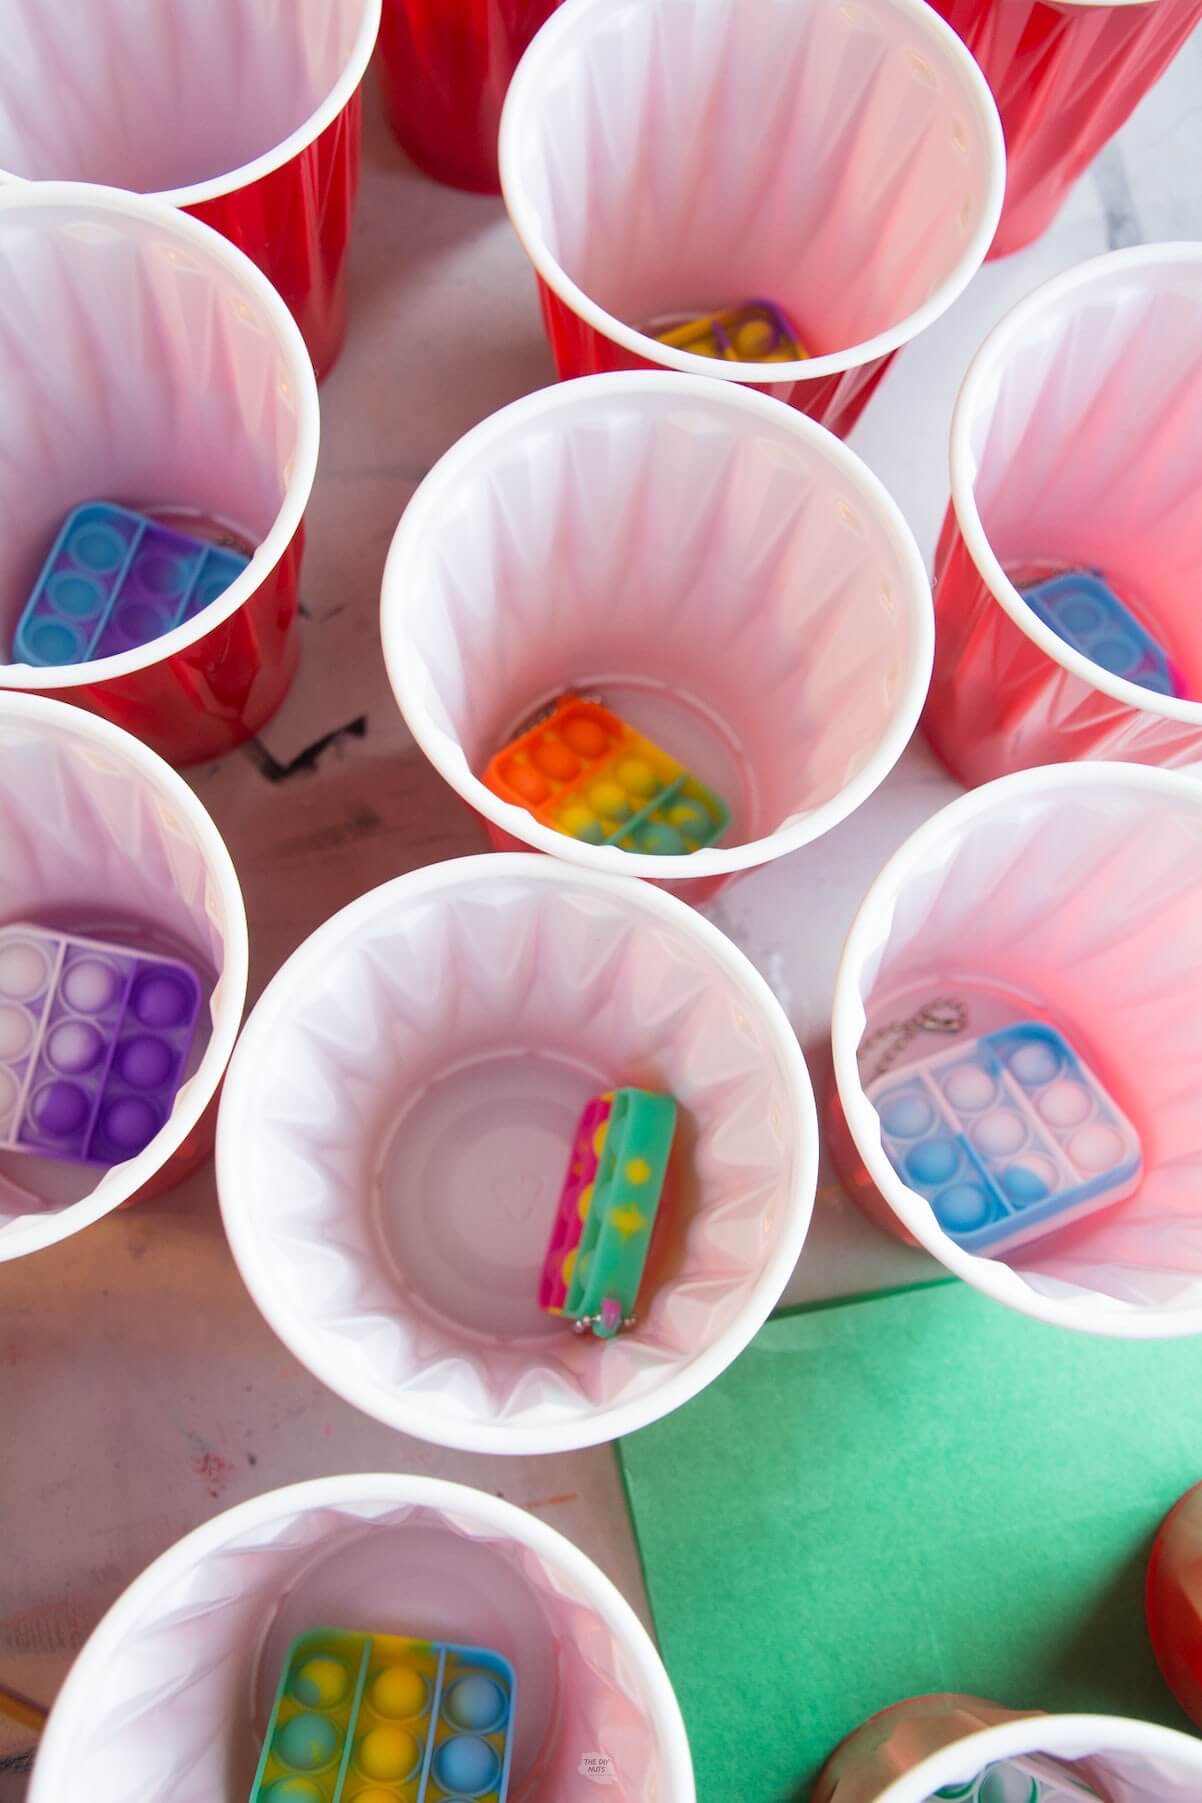
- Prizes: we used these pop-its as a lightweight option that kids love.
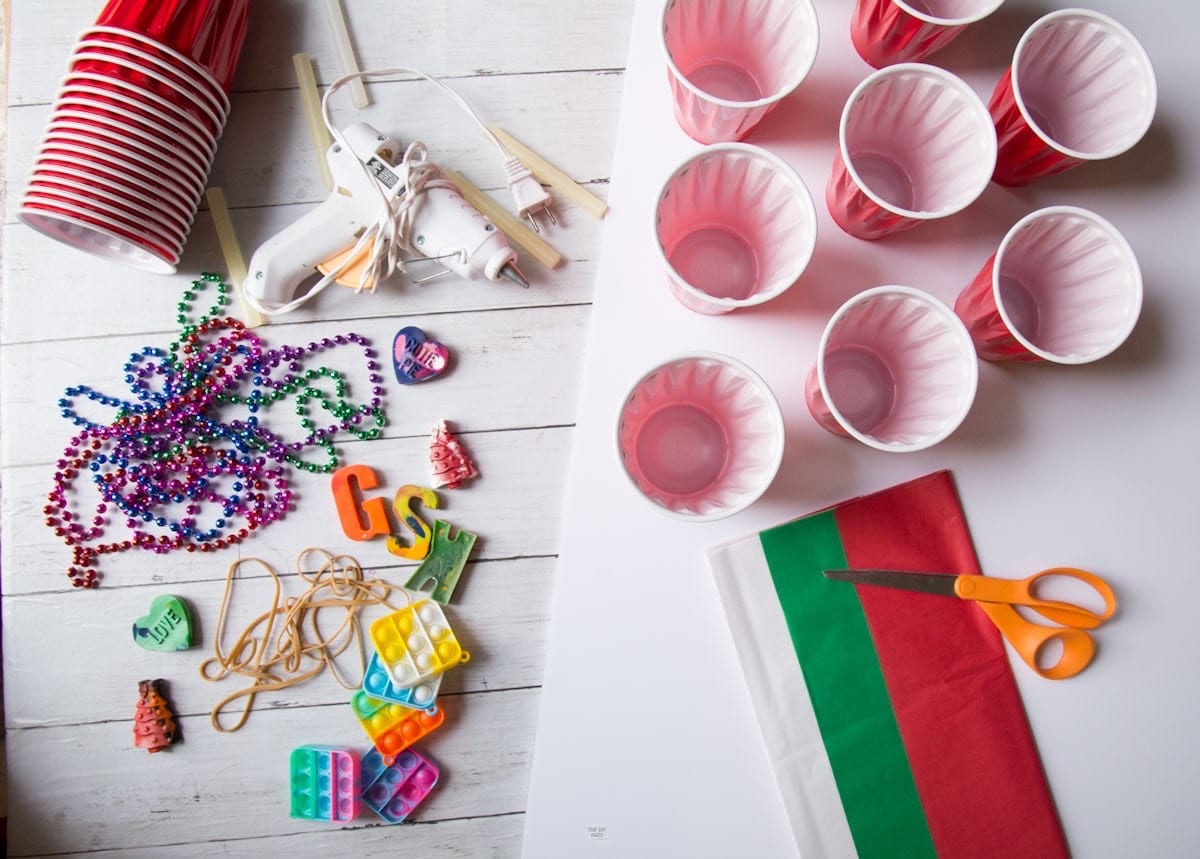
Optional: Bows or other things to decorate your board with
Prize Ideas
If you want to give out larger prizes you could place a piece of paper in the cups with the prize written on it. These punch boards could also be a fun fundraiser or idea for older children and adults if you put different amounts of money inside.
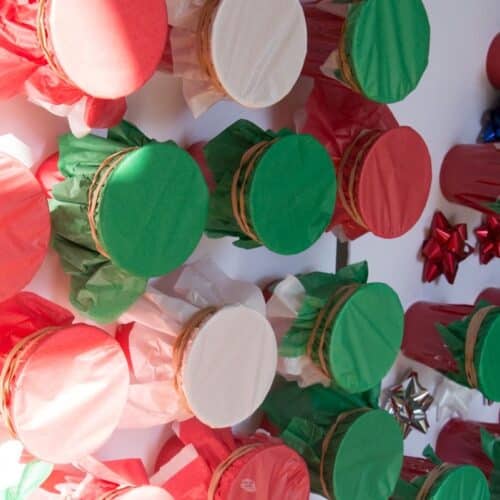
For our Christmas punch board, we put in these small pop-it keychains. Since this was going to be at a class party we wanted to keep the items similar to limit drama.
Whatever you choose to put in the cups, just make sure that the prizes are light enough so the cups can support whatever you place inside.
Other Prizes
- Small Necklaces
- Cheap Rings
- Candy
- Homemade Crayons
- Small Crafts
- Stickers
- Trading Cards
- Homemade Shrinky Dink Keychains or Charms
- Hair Accessories
- Erasers
- Socks
- Small Toys (just make sure they are lightweight)
- Gift Cards
- Money (sign me up for the money version)
Making Your Prize Board
Before You Begin
Decide on your general design. Take into account the number of cups you will need for your activity. You can have children only punch once or if it is a smaller gathering a few times.
Step 1: Add Prizes
Place your prizes into the cups. Make sure you are putting very lightweight items inside.
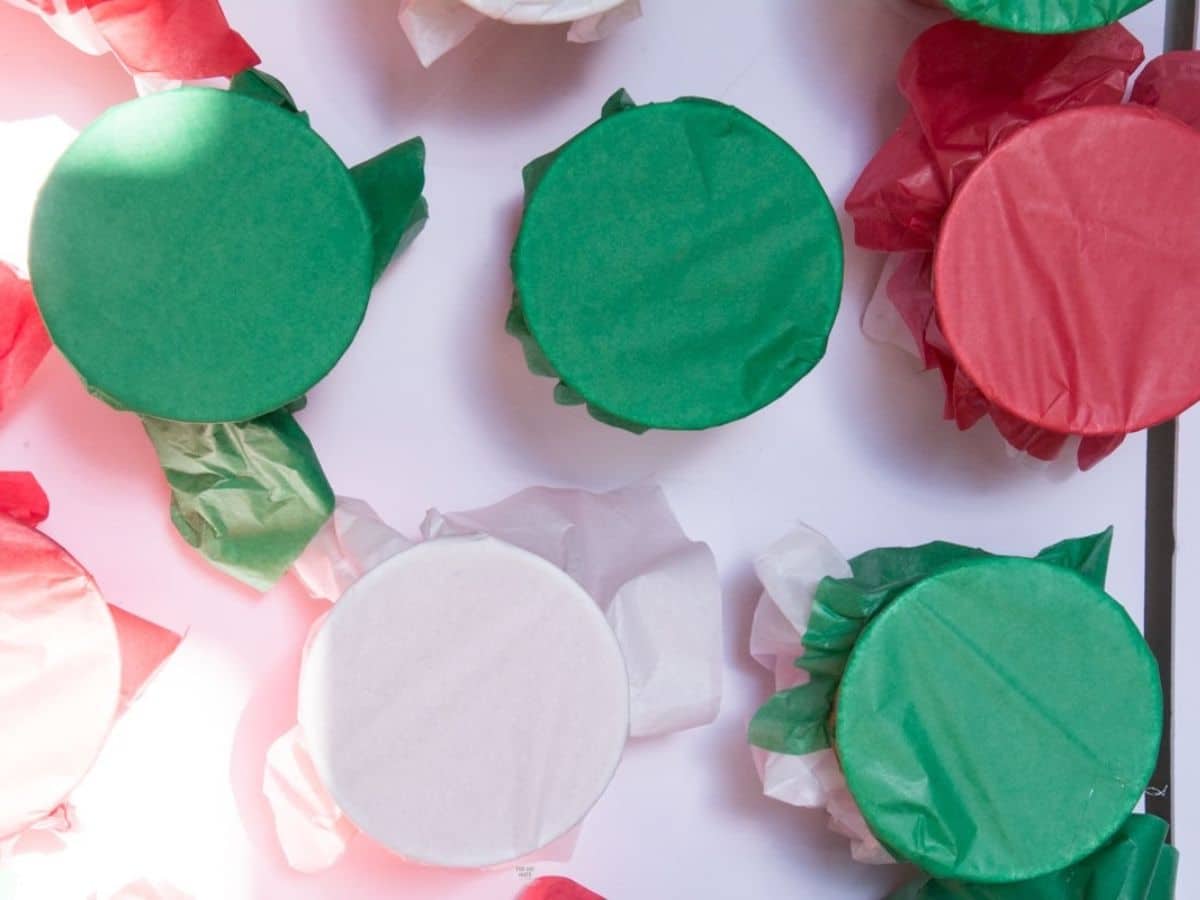
Step 2: Cut Tissue Paper
Pre-cut tissue paper into 8” x 8” squares. It does not have to be exact, you just don’t want your paper to be small as it makes it harder to pull it tight across the cup.
Step 3: Rubber Band The Tissue Paper On
We found it easiest to use two rubber bands. One for the initial covering of the cup and another doubled up to ensure the paper is tight enough.
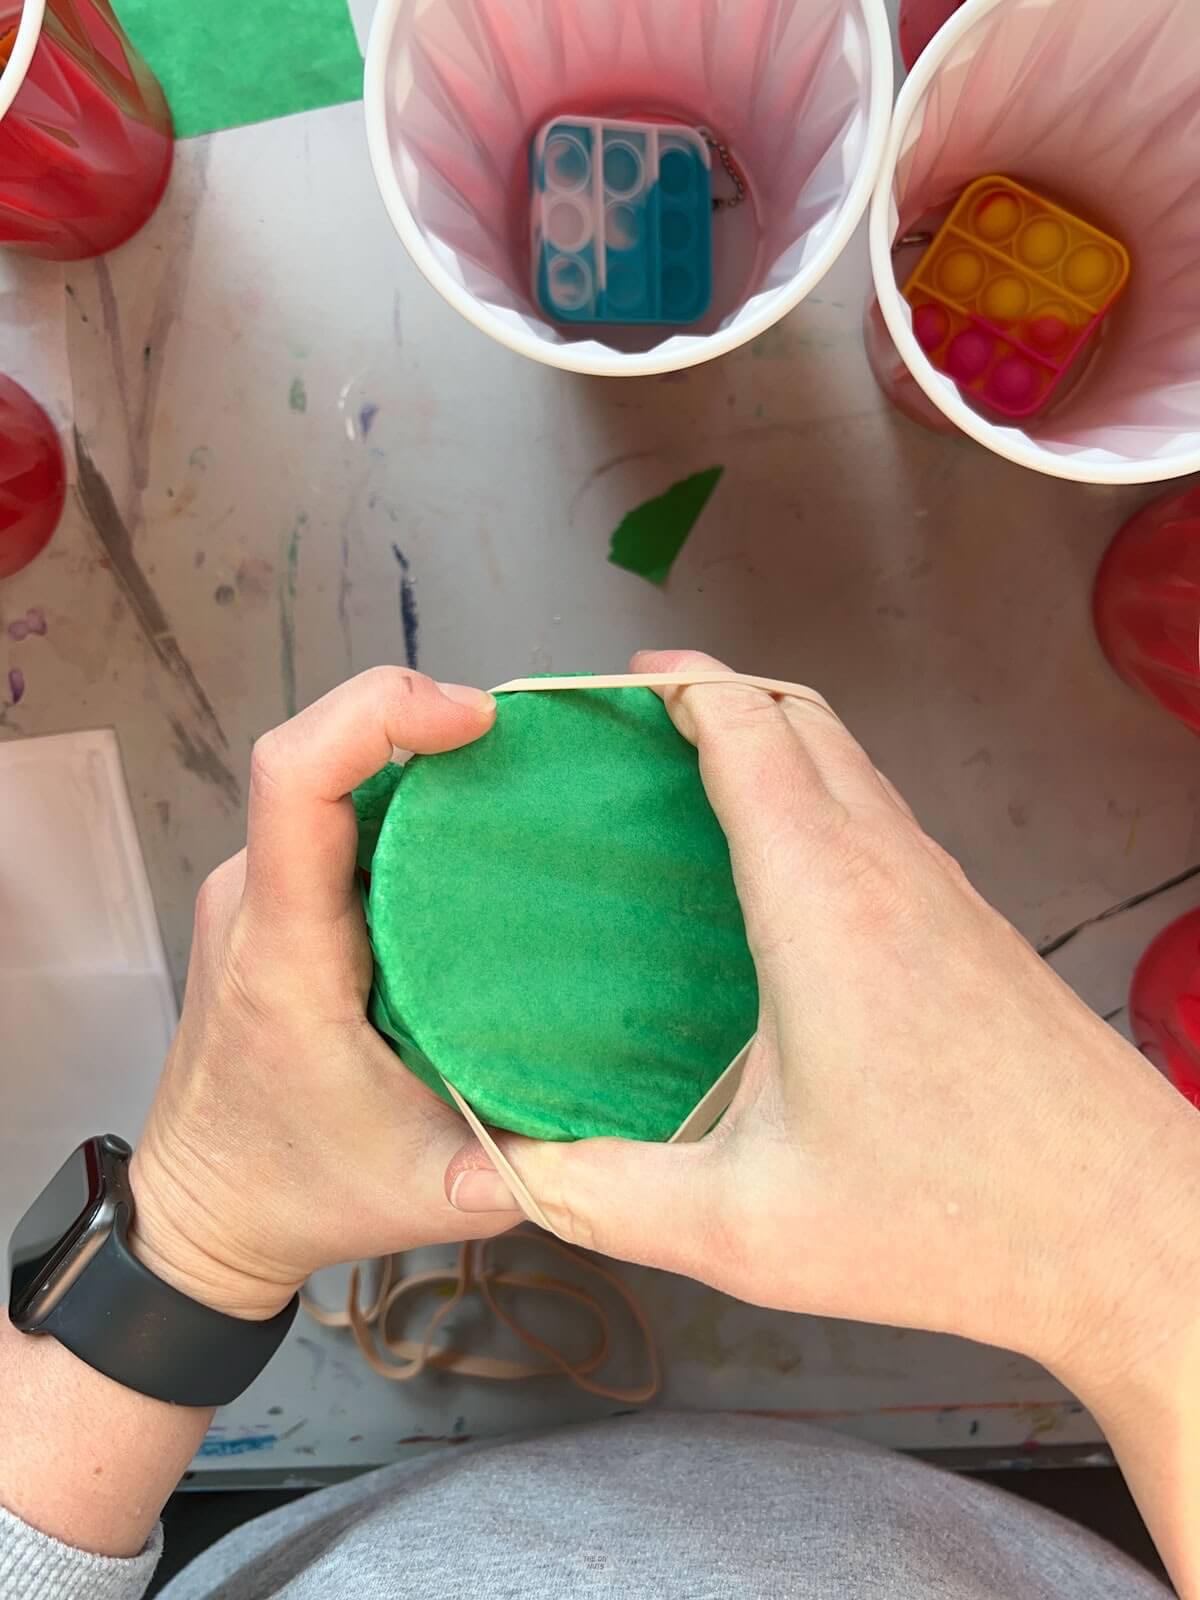
You could always test one out to make sure you are getting that rip when you punch.
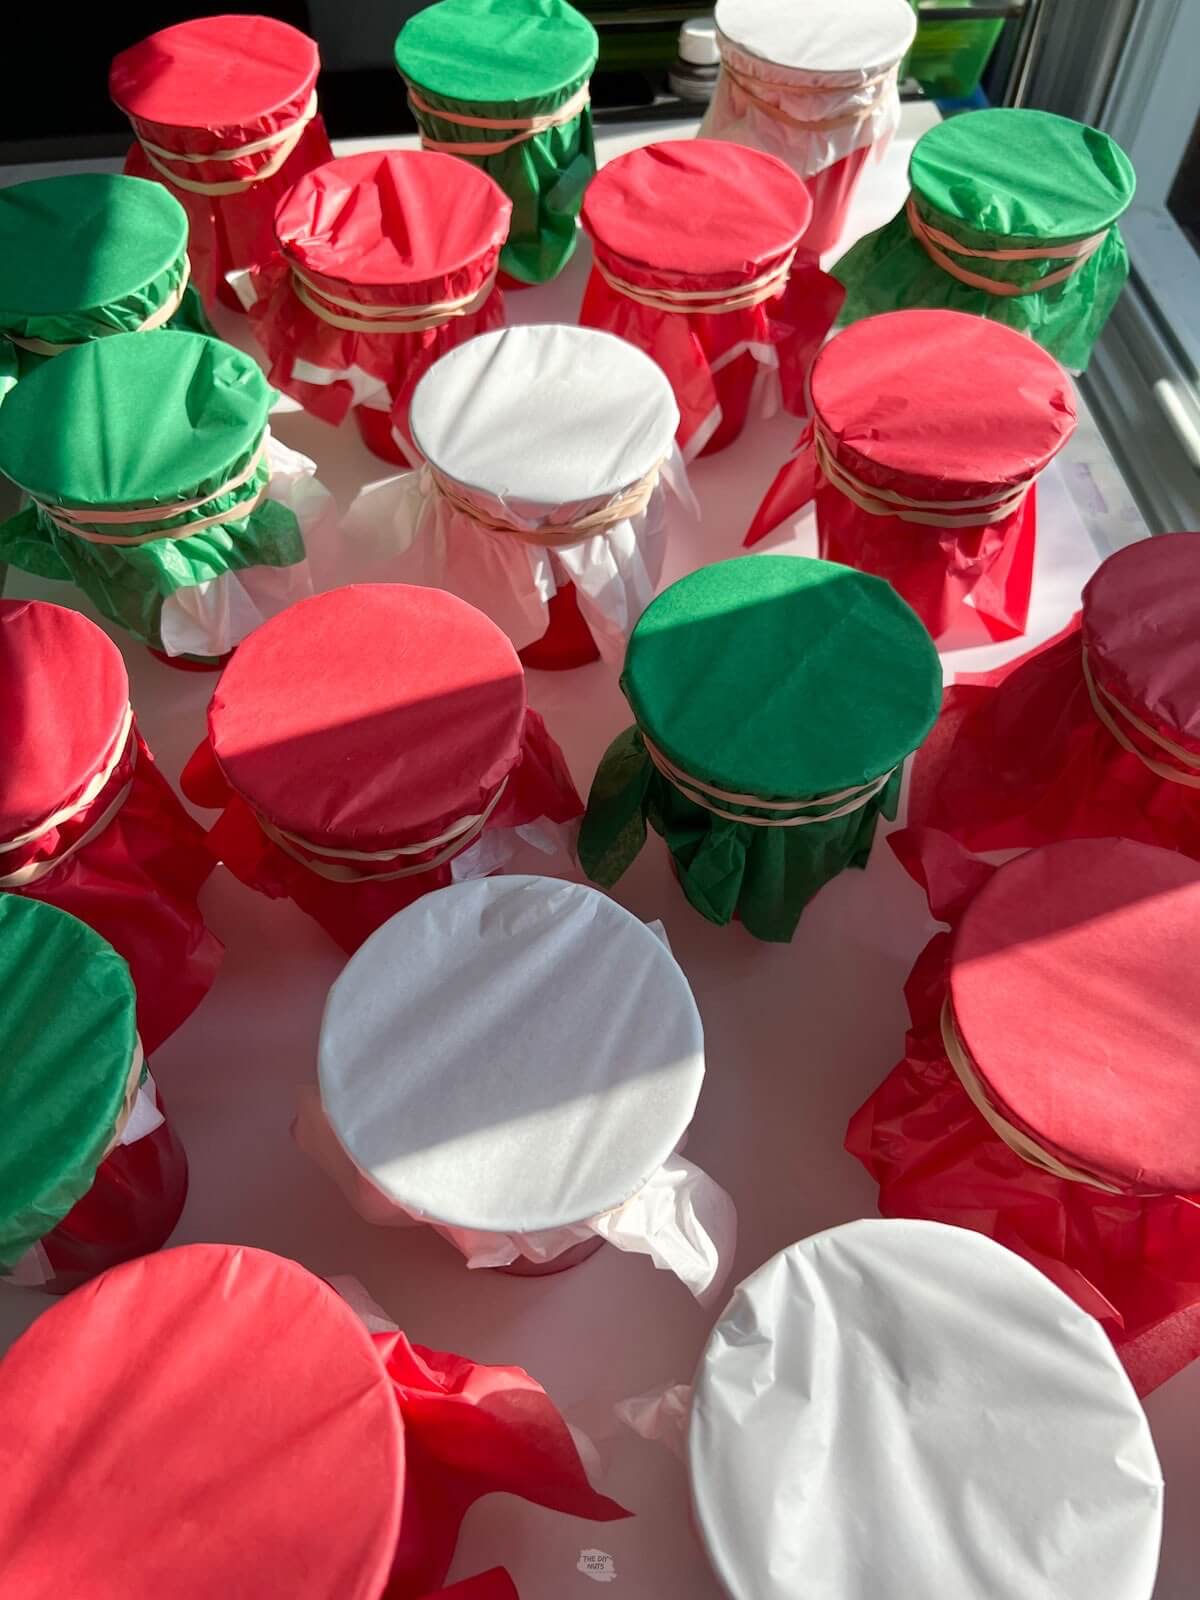
Step 4: Cover All Cups
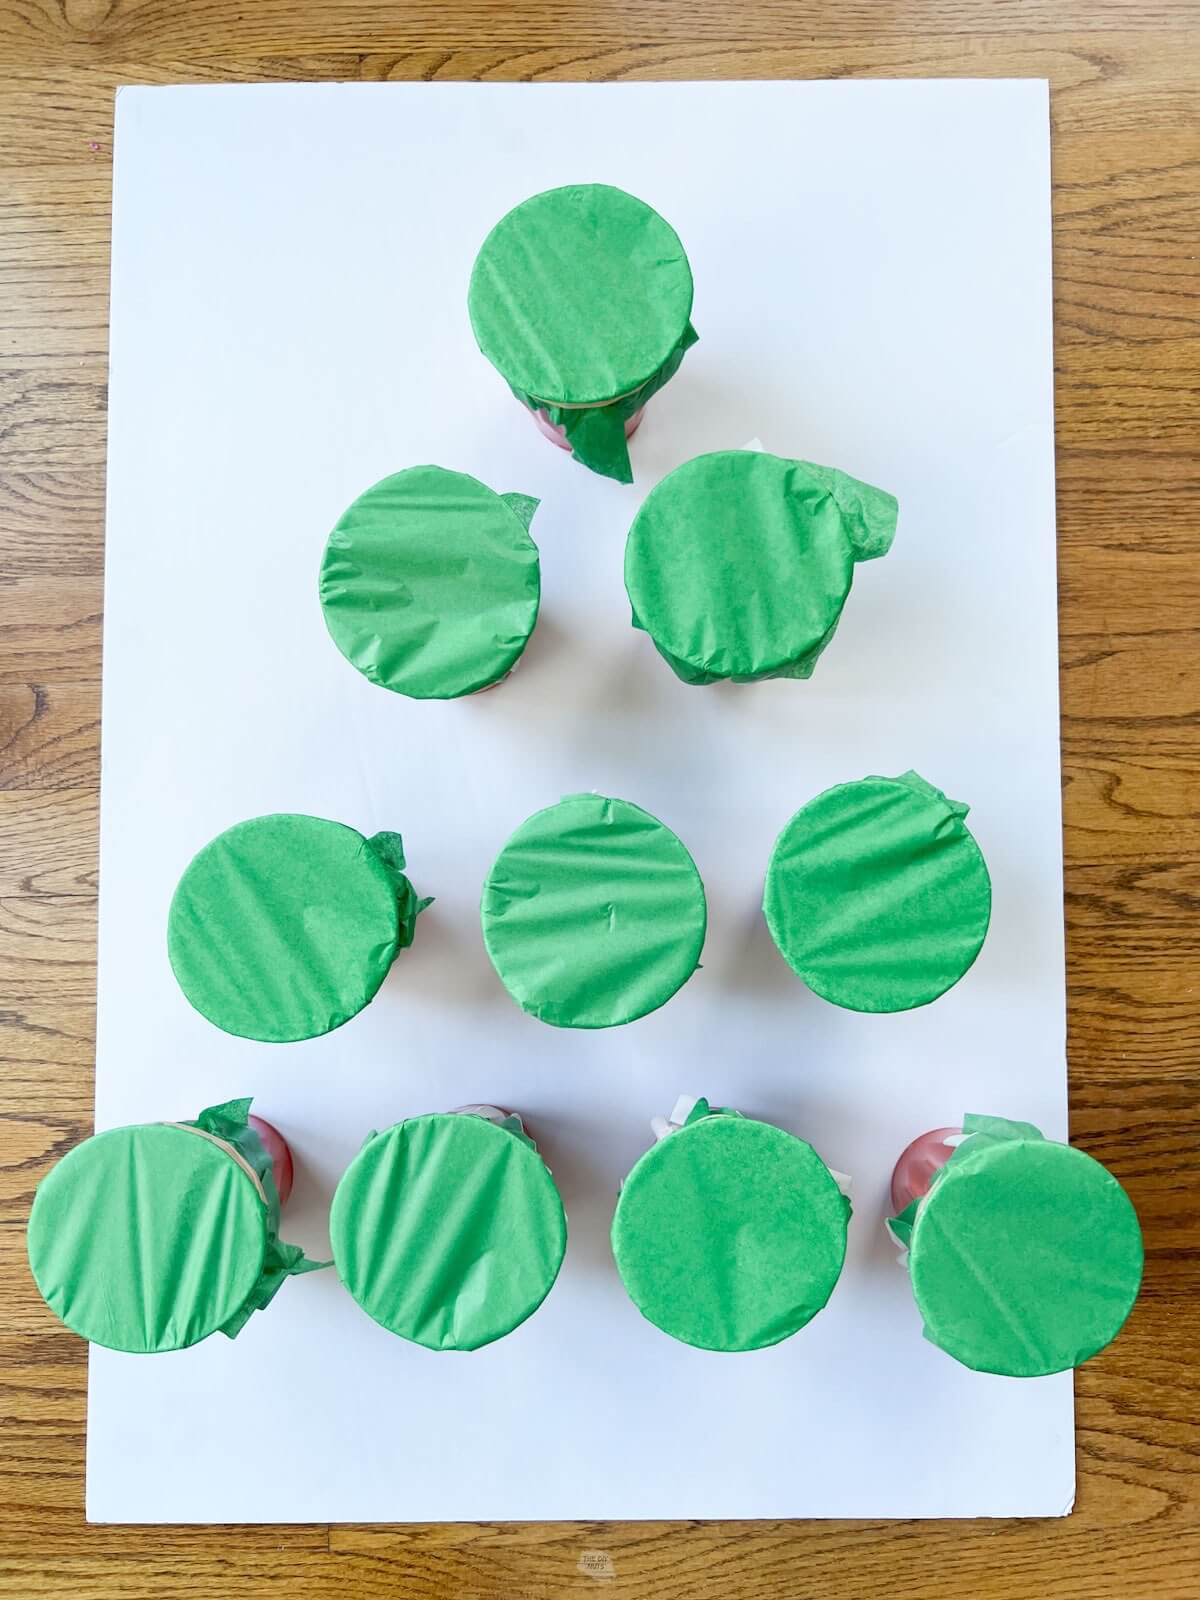
Step 5: Lay Out Your Design
While your glue gun is heating up, lay out the design you want to use. Leave spaces in between cups so that you can easily reuse the board. If you place the cups too close together then it will be really difficult to add the rubber bands again.
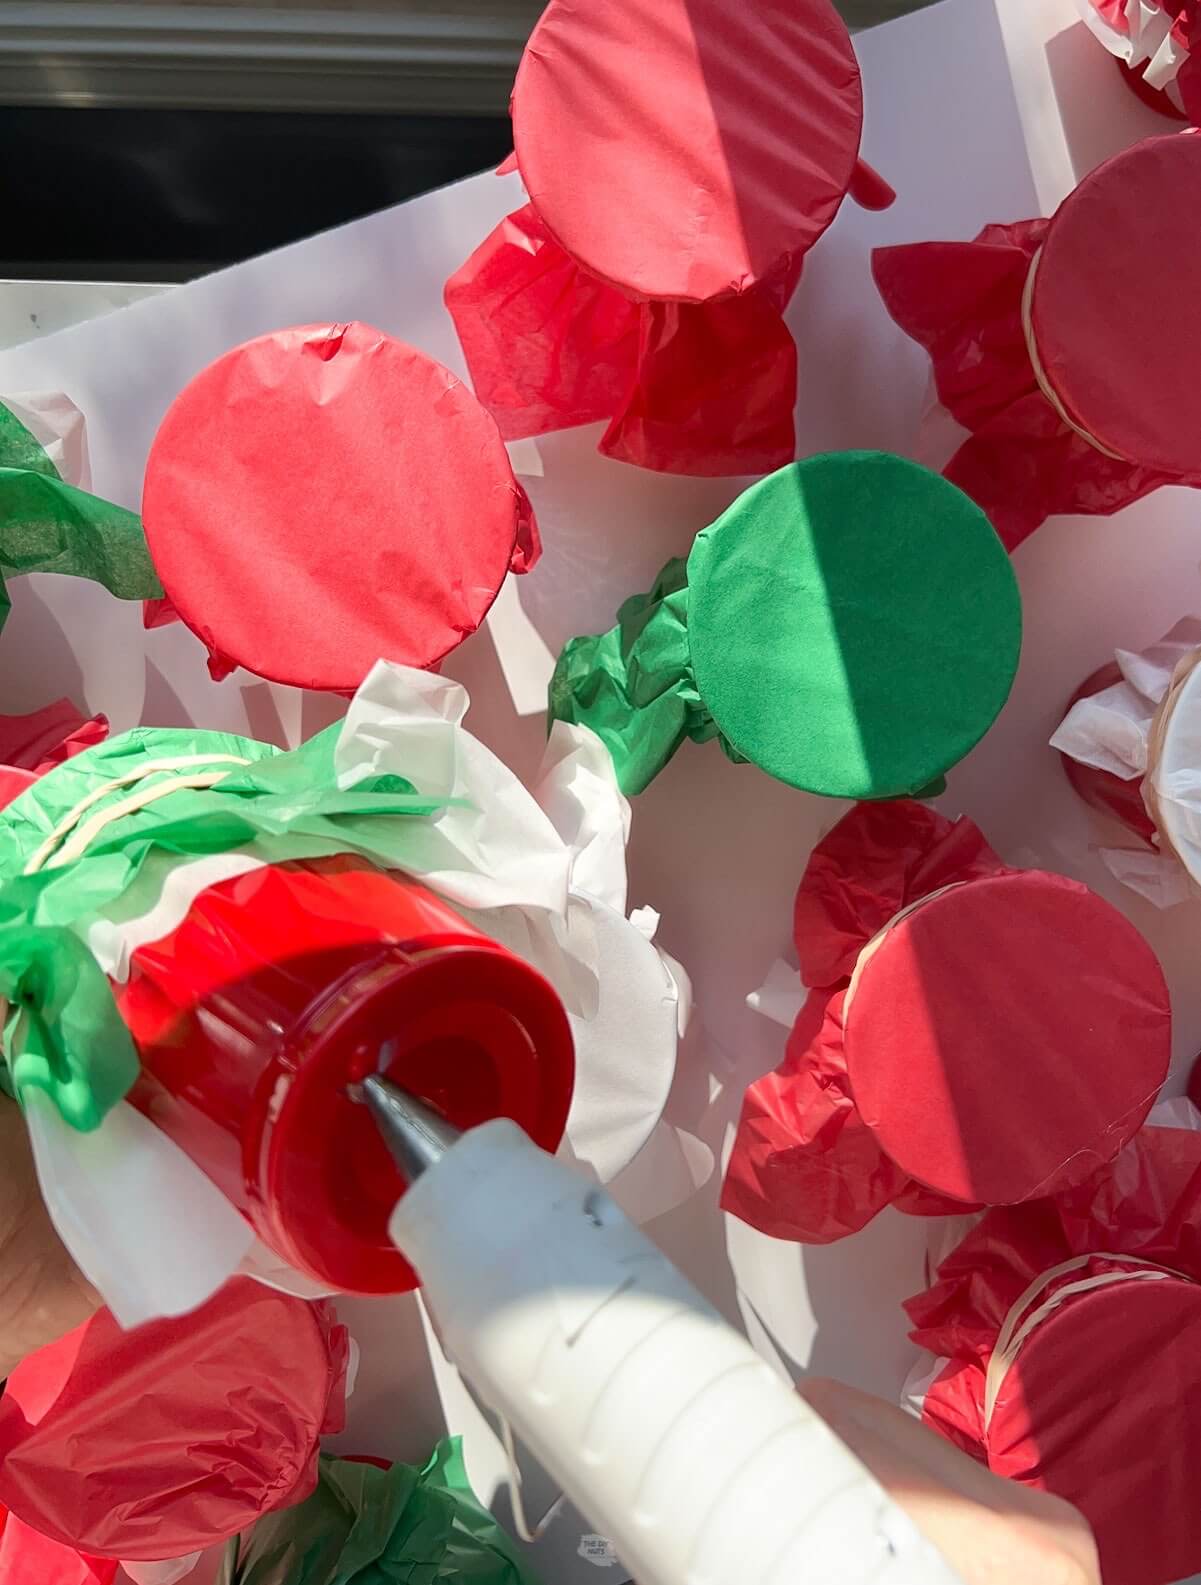
Step 6: Glue On Cups
Put a generous amount of hot glue on the bottom of each cup and stick it to the foam board. Holding each cup for a few seconds will help make sure that they stick properly.
Optional: Decorate Your Board
For our Christmas tree punching board, we chose to add wrapping bows as extra decorations on the tree.

We plan on using the random board for other holidays, so we didn’t attach or paint anything else to the boards.
Step 8: Have Fun Punching
Have fun watching children think they are in their own game show!
Tips For Making A Punch Board
- You can modify these designs to be any size or size of cups. The regular Solo-style cup works well as the opening is big enough for a child to punch.
- If larger children or adults are punching you can show them to punch or poke with their hand open and use their fingers to make a rip in the paper.
- The design options are endless. You can glue the cups in a specific shape or just randomly all over the board. We plan to reuse the random one for different holidays but just use different colored tissue paper coverings.
- Consider painting a simple sign first and then adding the cups on top. We have seen awesome candy cane boards, hearts and different tree shapes.

Reuse The Same Board
While the original boards took a little time to gather supplies and make, you can reuse the board over and over. All you need is fresh tissue paper and new prizes. We recently reuse the prize punch board for a classroom Valentine’s Day party. Just change the tissue paper colors!
How-To FAQs
This game is similar to a piñata in that you have to break open the cup to reveal a prize. Simply punch or rip through the tissue paper to reveal the prize inside.
Use two rubber bans to ensure that the tissue paper is tight enough. If your paper is pulled tightly or the rubber bands are too loose, the kids will just collapse the paper and not get that ripping sound!
We plan on having another smaller activity the children must complete first before they can come and punch for their prize.
If you are looking to make your punch board a little more sturdy, you could cut a circle slightly smaller than the cup opening. You could have the cup sticking into the opening for extra support.
Our foam core boards are 20″ x 32″ inches.
The randomly designed board holds around 20 cups. You could fit more if you place them a little closer together but that would make it harder to reuse the punch board when you want to place more tissue paper on the cups.
Related Easy DIY Projects
- Easy & Clever DIY Anniversary Decorations
- 11 Fun DIY Piñatas For Your Next Party
- Fun DIY Dipped Marbled Mugs
- How To Remove Sticker Residue (6 Easy Ways)
Follow us on Pinterest, YouTube or Facebook for more DIY inspiration!
Prize Punch Board Game
Equipment
- Glue gun
- Scissors
Supplies
- Foam Core or Cardboard
- Large Plastic Cups
- Tissue Paper around 8” x 8” squares or for a neater look cut the tissue paper into circles
- Rubber Bans
- Prizes we used these pop-its as a lightweight option that kids love.
Instructions
- Place your prizes into the cups. Make sure you are putting very lightweight items inside.
- Pre-cut tissue paper into 8” x 8” squares or circles with that diameter. It does not have to be exact, you just don’t want your paper to be small as it makes it harder to pull it tight across the cup.
- Use a rubber band or bands to attach the tissue paper over the cups. Using two rubber bands will help you get the tissue paper tight enough.
- Cover all your cups.
- Layout your desing on the foam core.
- Glue cups on by placing a generous amount of glue on to the bottom of the red cups.
- Optional: Add extra decorations to your board.
- Punch the tissue paper and have fun playing the game.
Notes
- Space cups out so that you can reuse your board for different holidays.
- Test the tightness of your tissue paper so that you make sure you hear the rip or pop sound. If the paper is too loose, it will just collapse on itself instead of rip.
- Whatever you choose to put in the cups, just make sure that the prizes are light enough so the cups can support whatever you place inside.
- Consider painting a simple sign first and then adding the cups on top. We have seen awesome candy cane boards, hearts and different tree shapes.