How to Build An Easy DIY Pegboard
Are you looking for an easy way to build a pegboard for your craft room or garage? We love this added storage space in our kid’s craft room.
*Disclosure: I only recommend products I would use myself and all opinions expressed here are our own. This post may contain affiliate links that at no additional cost to you, I may earn a small commission. Read our full privacy policy.
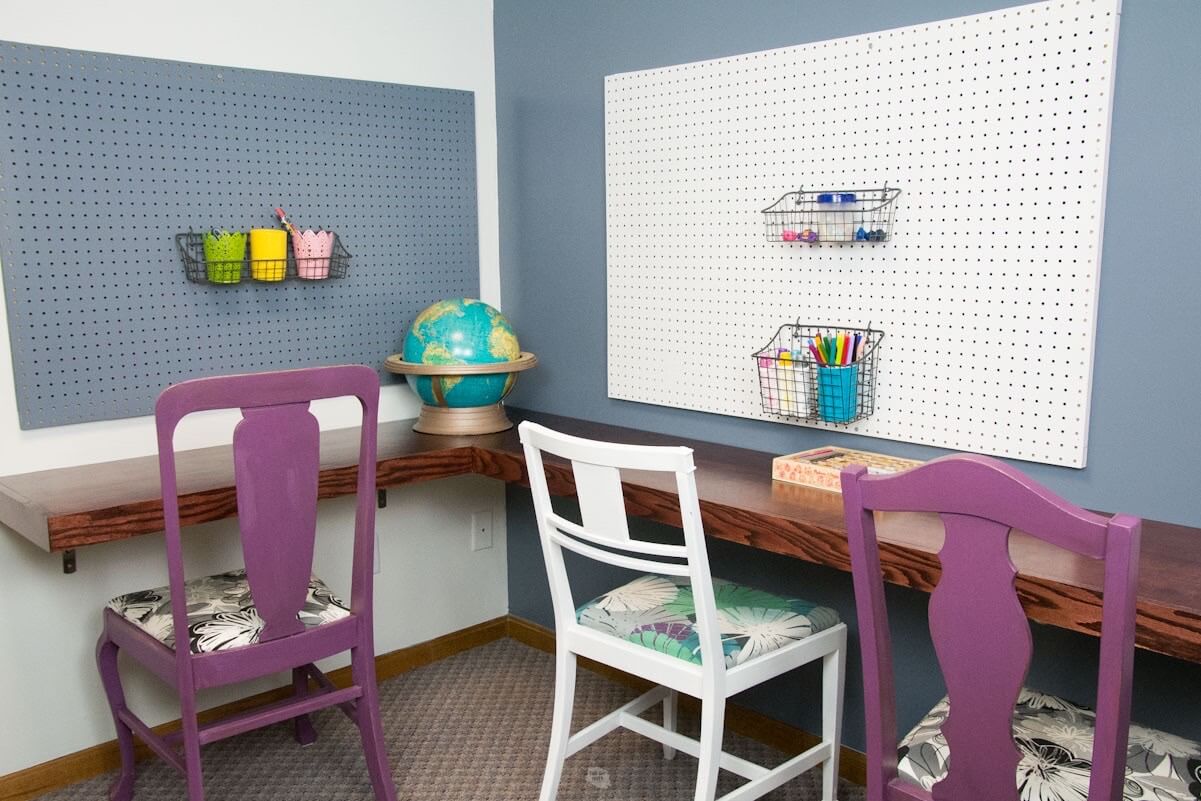
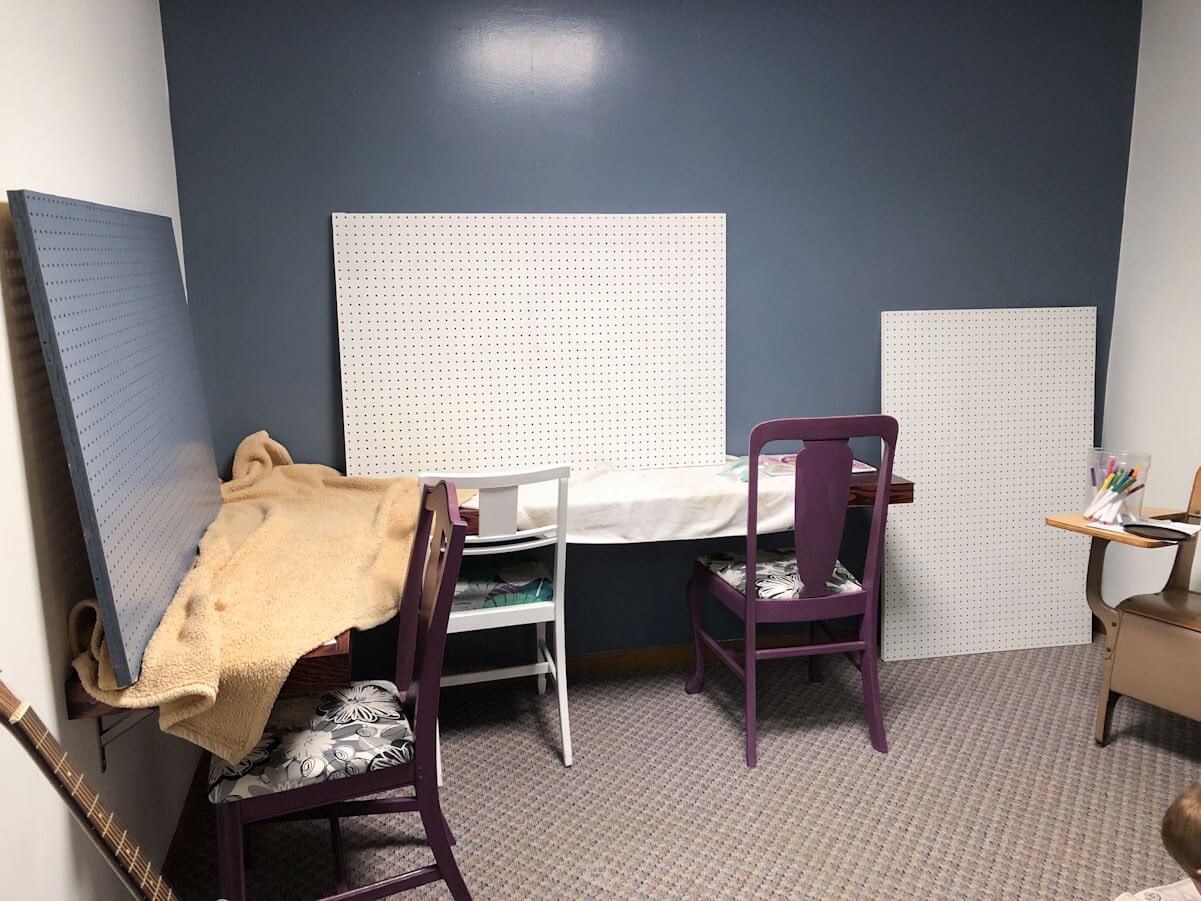
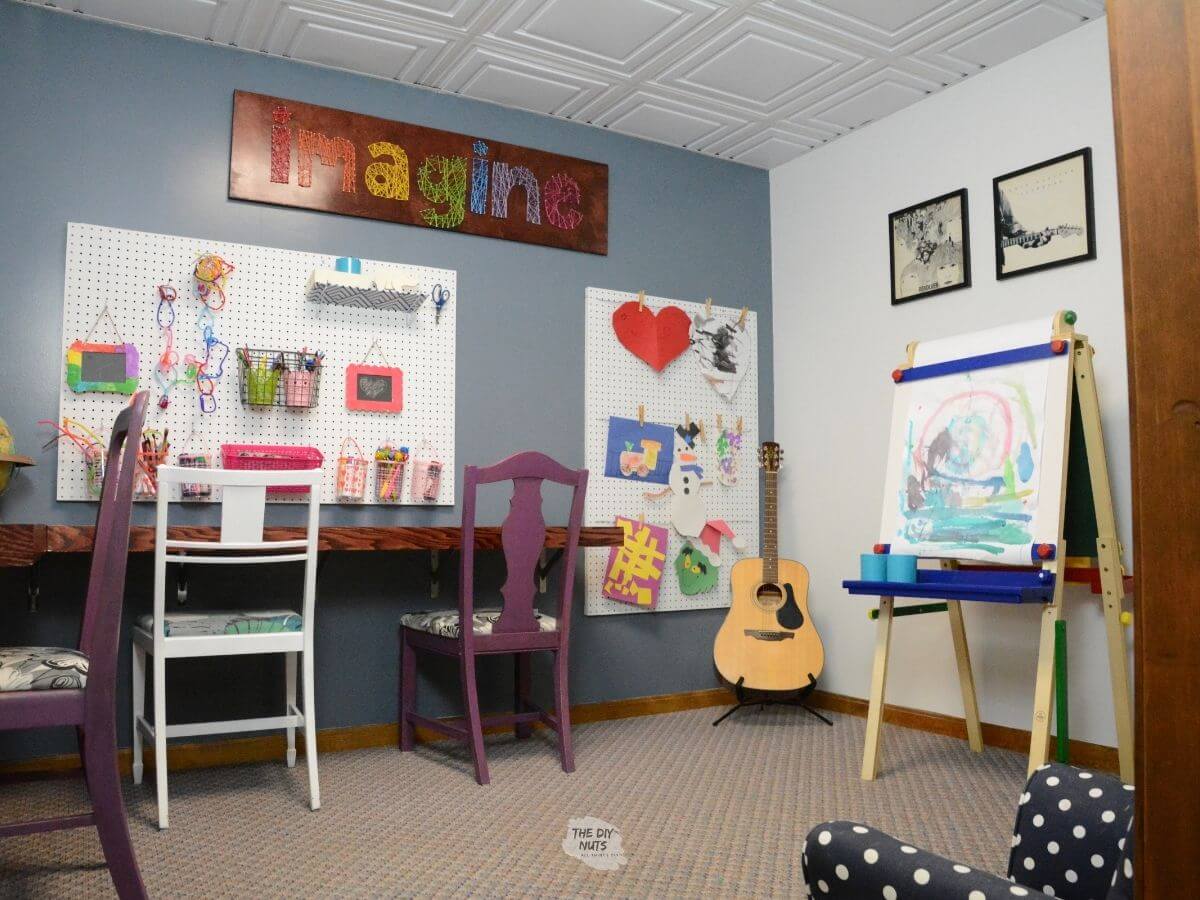
This tutorial will show you how we built multiple pegboards to add to our basement kid craft room. When we first were designing our DIY corner desk for this space, we knew we wanted something to go above the desk.
What easy wall decor looks good and is functional?
Especially because this is our children’s schoolroom, we wanted to provide each child with his/her own space. Therefore, adding our own pegboard above each desk spot we thought was a great solution.
Supplies Needed
- Pegboard
- Circular Saw
- Screws
- Wood Scraps
- Stud Finder
- Drill
- Nail Gun
- Paint in the color of your choice
- Rollers/Brushes
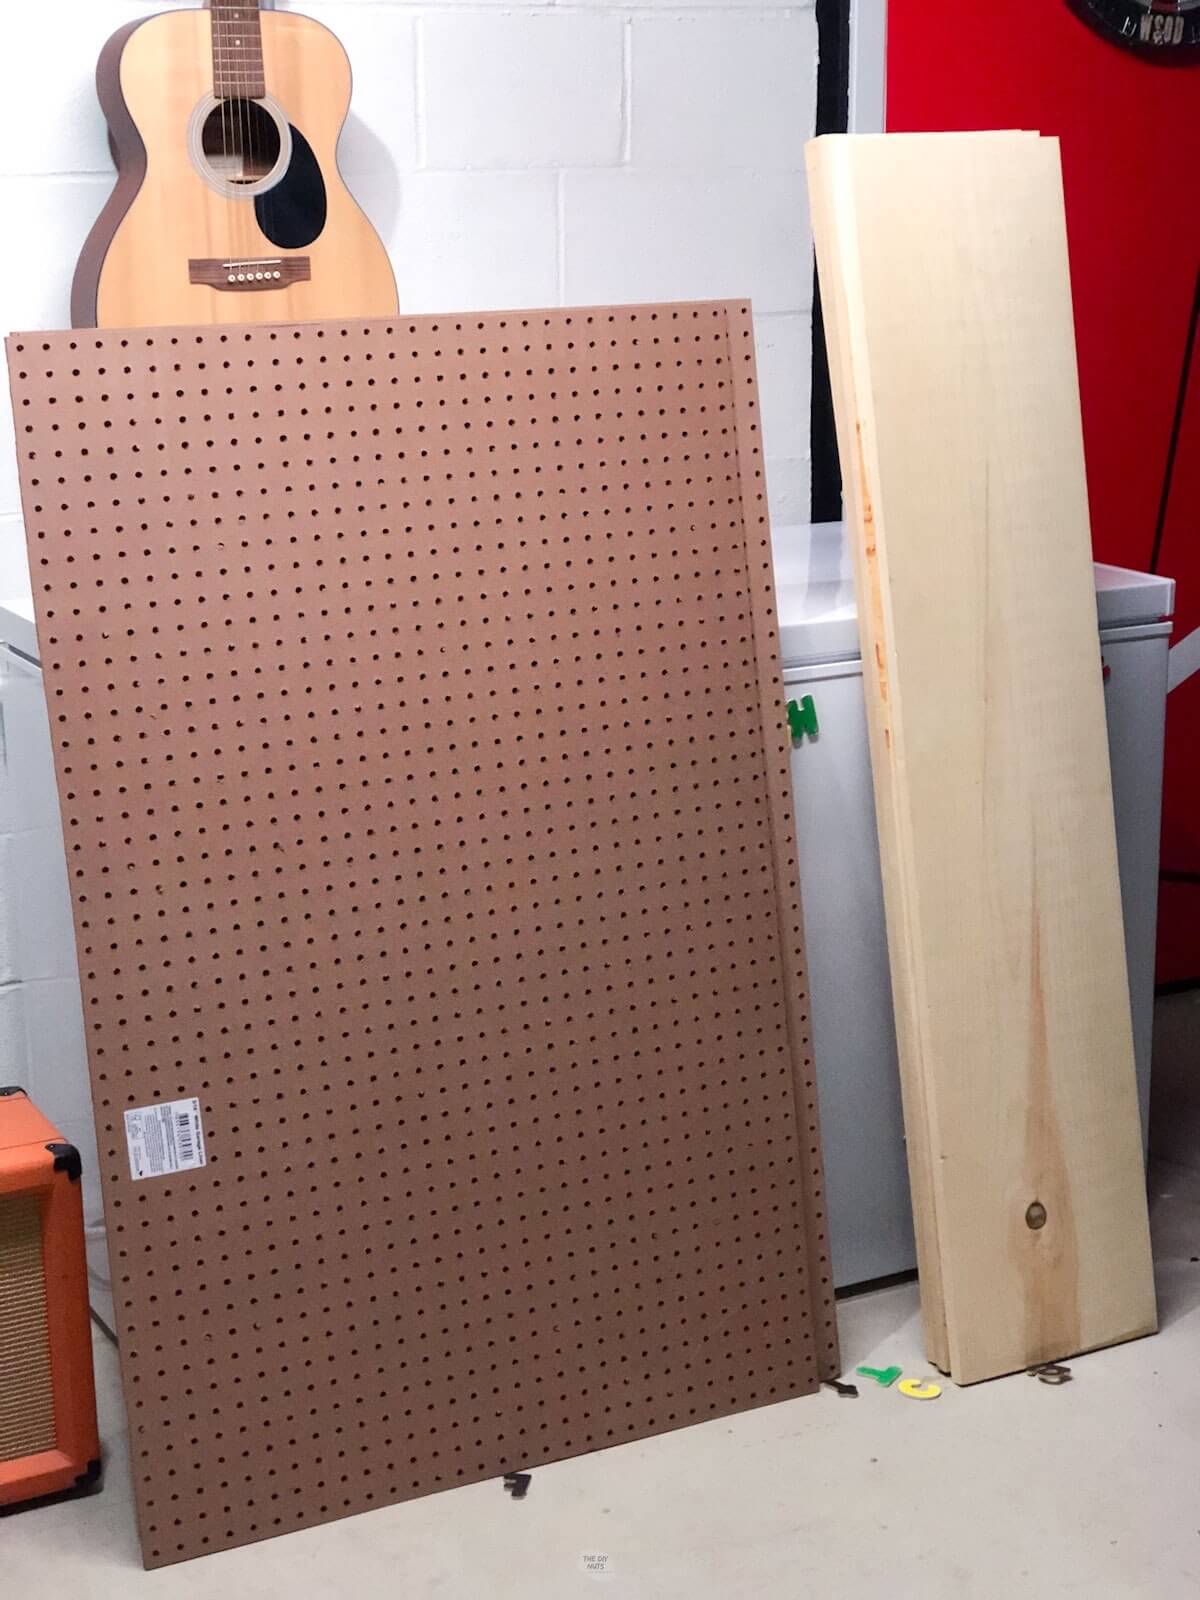
You can also see the wood next to this pegboard used to create shelves in this craft room closet.
How To Build A Wall Pegboard
Step 1: Cute Boards To Size
Cut the pegboard to size. I have seen some amazing complete DIY pegboard projects made from plywood, but these simple and easy pegboard organizers use the premade pegboards you can buy.
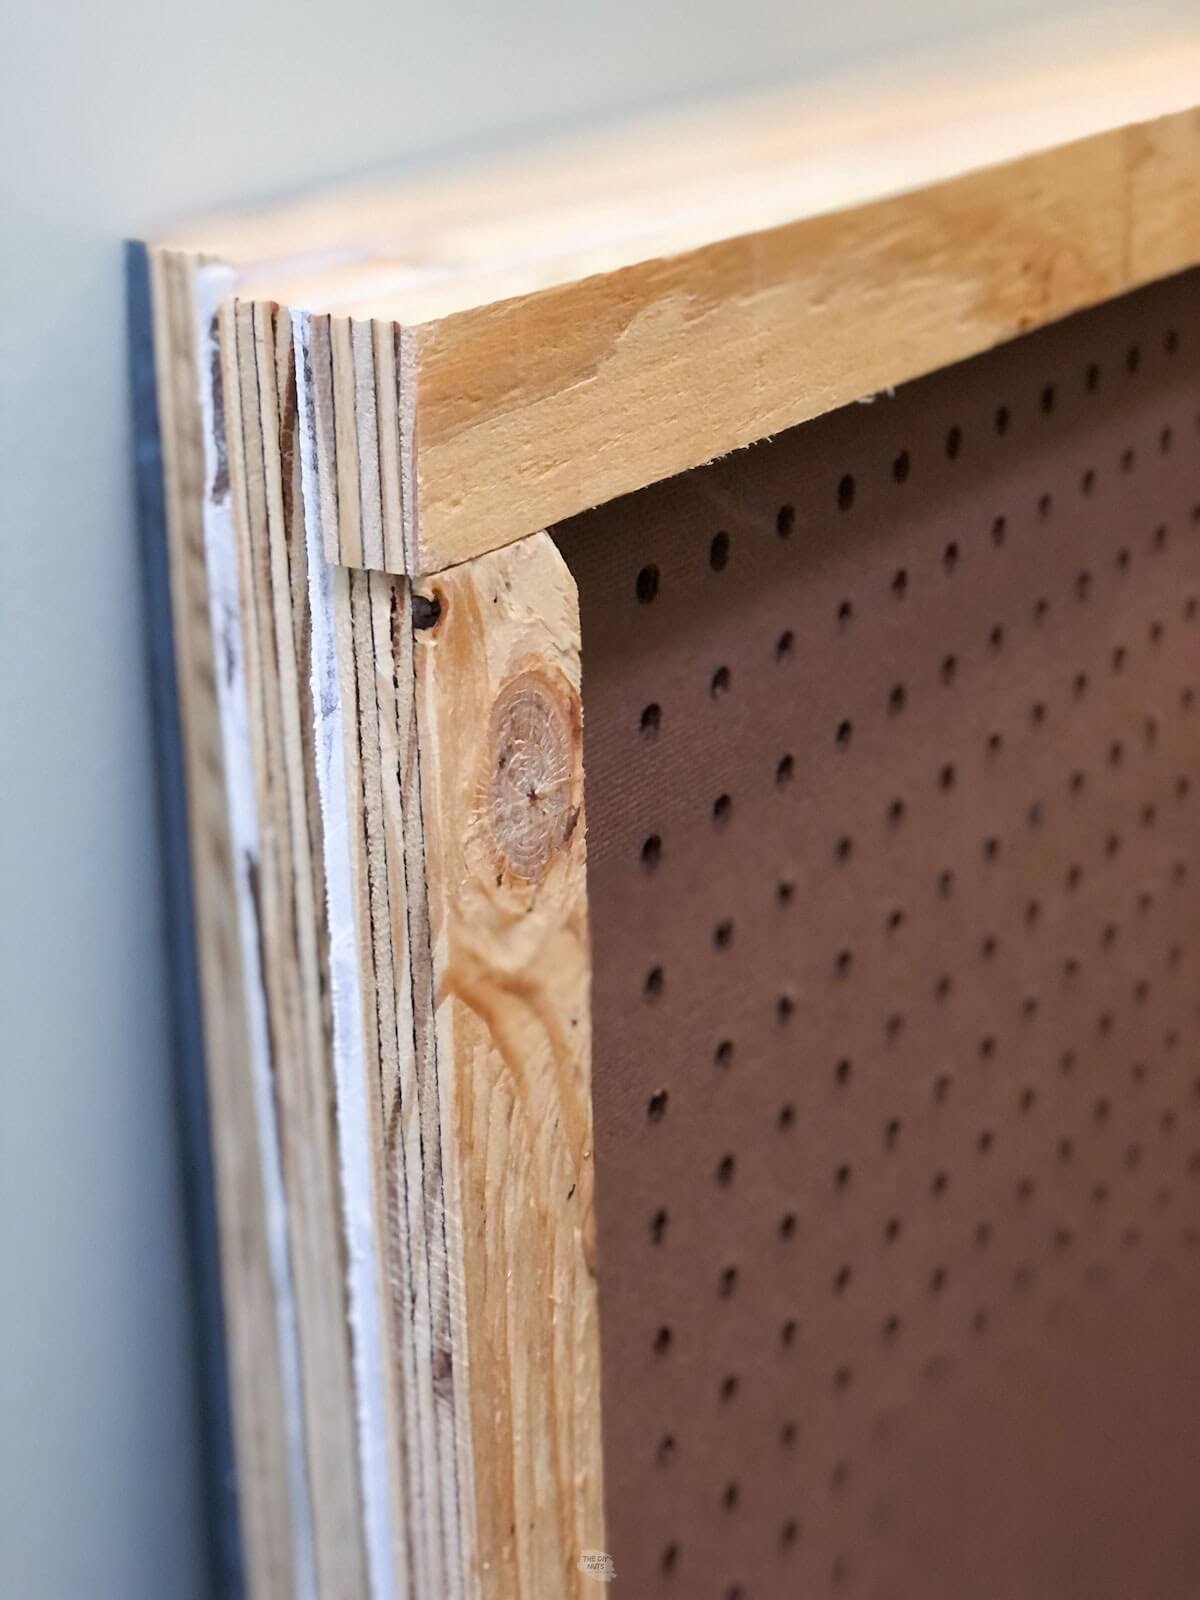
Step 2: Create A Wood Frame
Create a “frame” for the back of the pegboards. In order for the hooks and other items you may want to hang on your board, the pegboard needs to be off the wall.

We used ripped-down plywood to create these pieces to match the width and length. Any extra wood scraps or furring strips would work for the backing.
Step 3: Attach Wood Frame
Use a nail gun to attach the wood pieces.
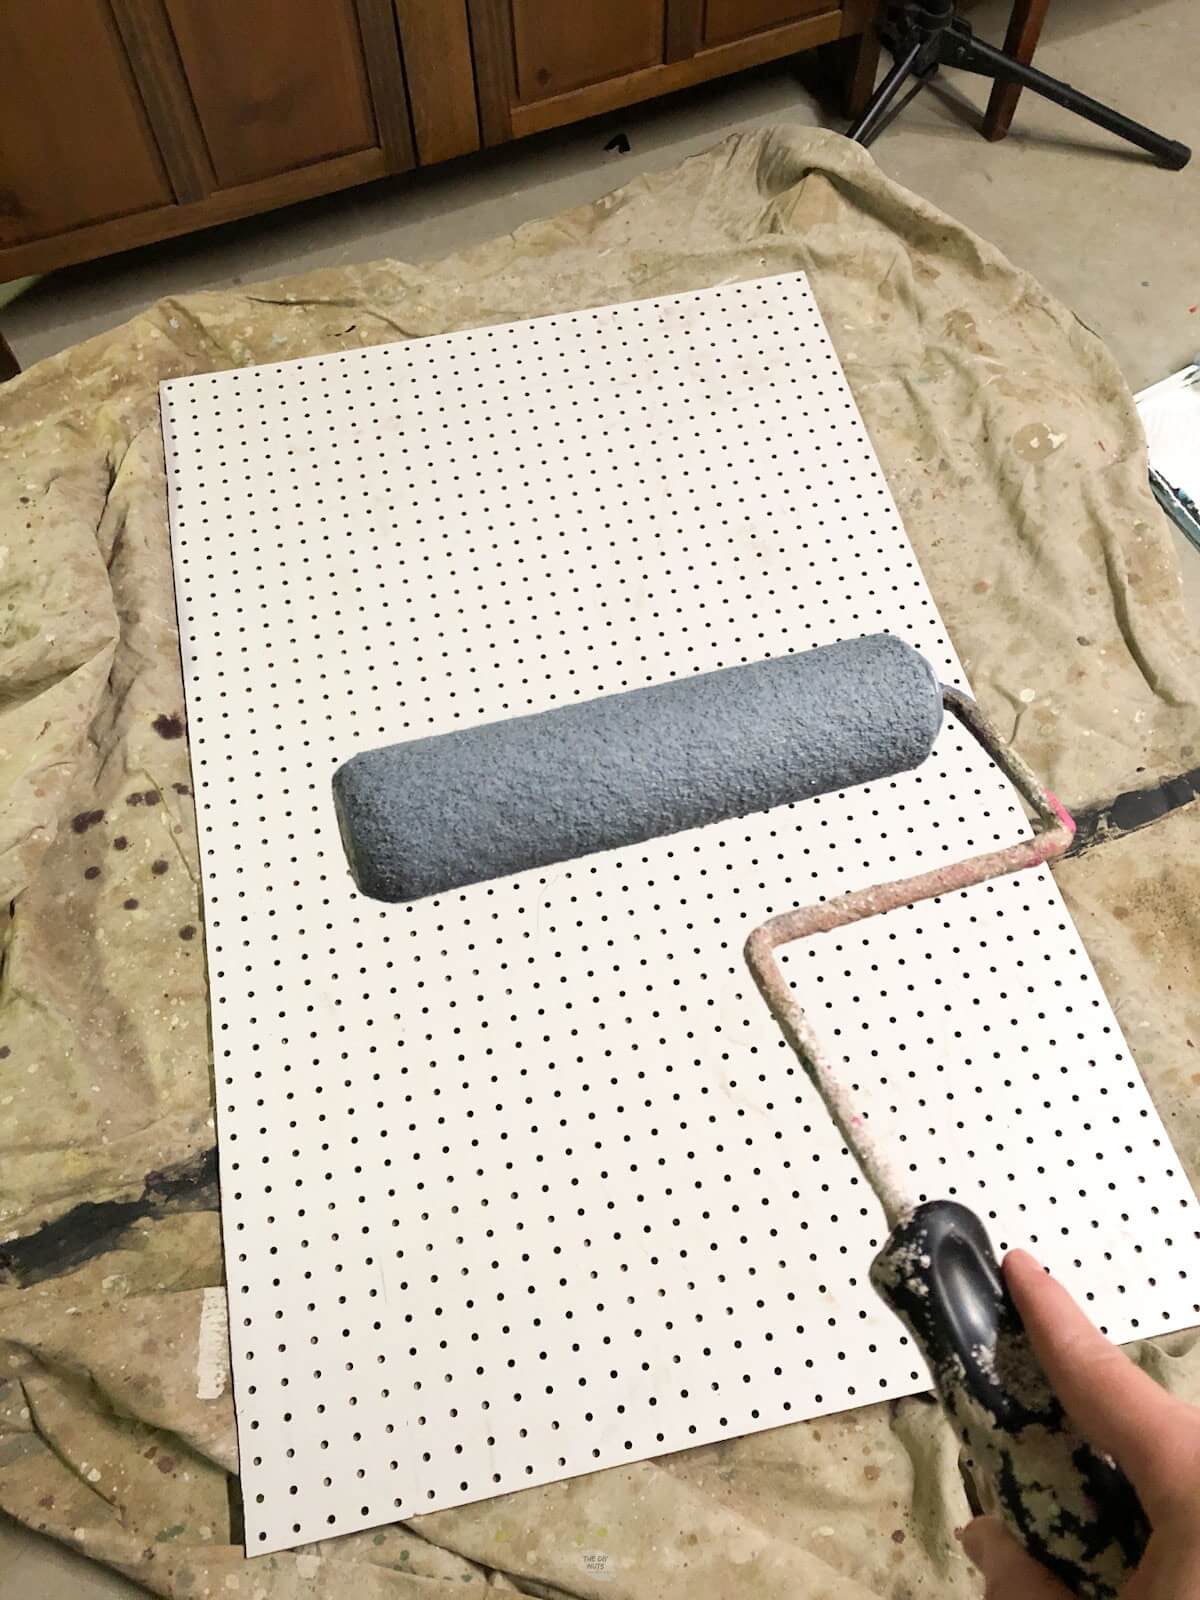
Step 4: Paint Pegboards
Paint the pegboards a color of your choice. In our room, we had an accent wall created with this blue paint color and SW Pure White. We painted one blue-gray and the two other ones with Pure White.
Consider also painting the sides of the frame for a cohesive look.
If you are looking for more pegboard inspiration, check out these from HGTV.
How To Install
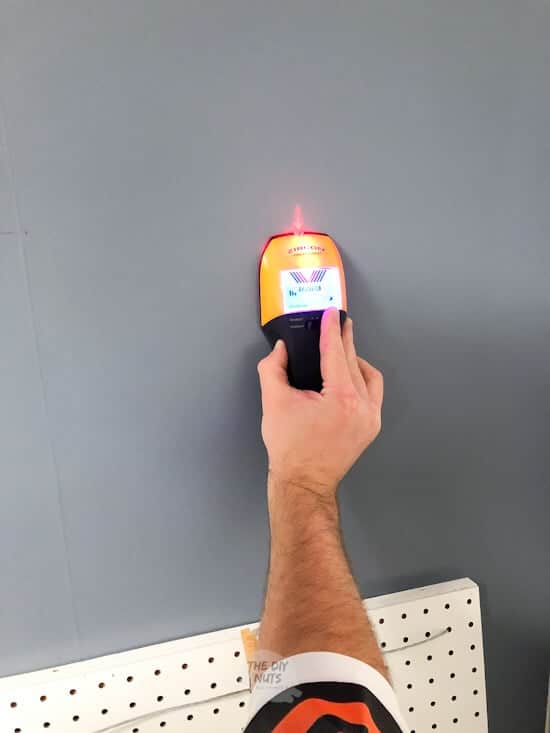
Step 5: Find Studs
Use a stud finder to locate studs. They are normal 16” apart.
Step 6: Mark Hanging Height
Use a 4′ level to mark the height you want to hang. Before screwing the pegboard organizer on the wall, place the level on top. Make sure the bubble is in the middle.
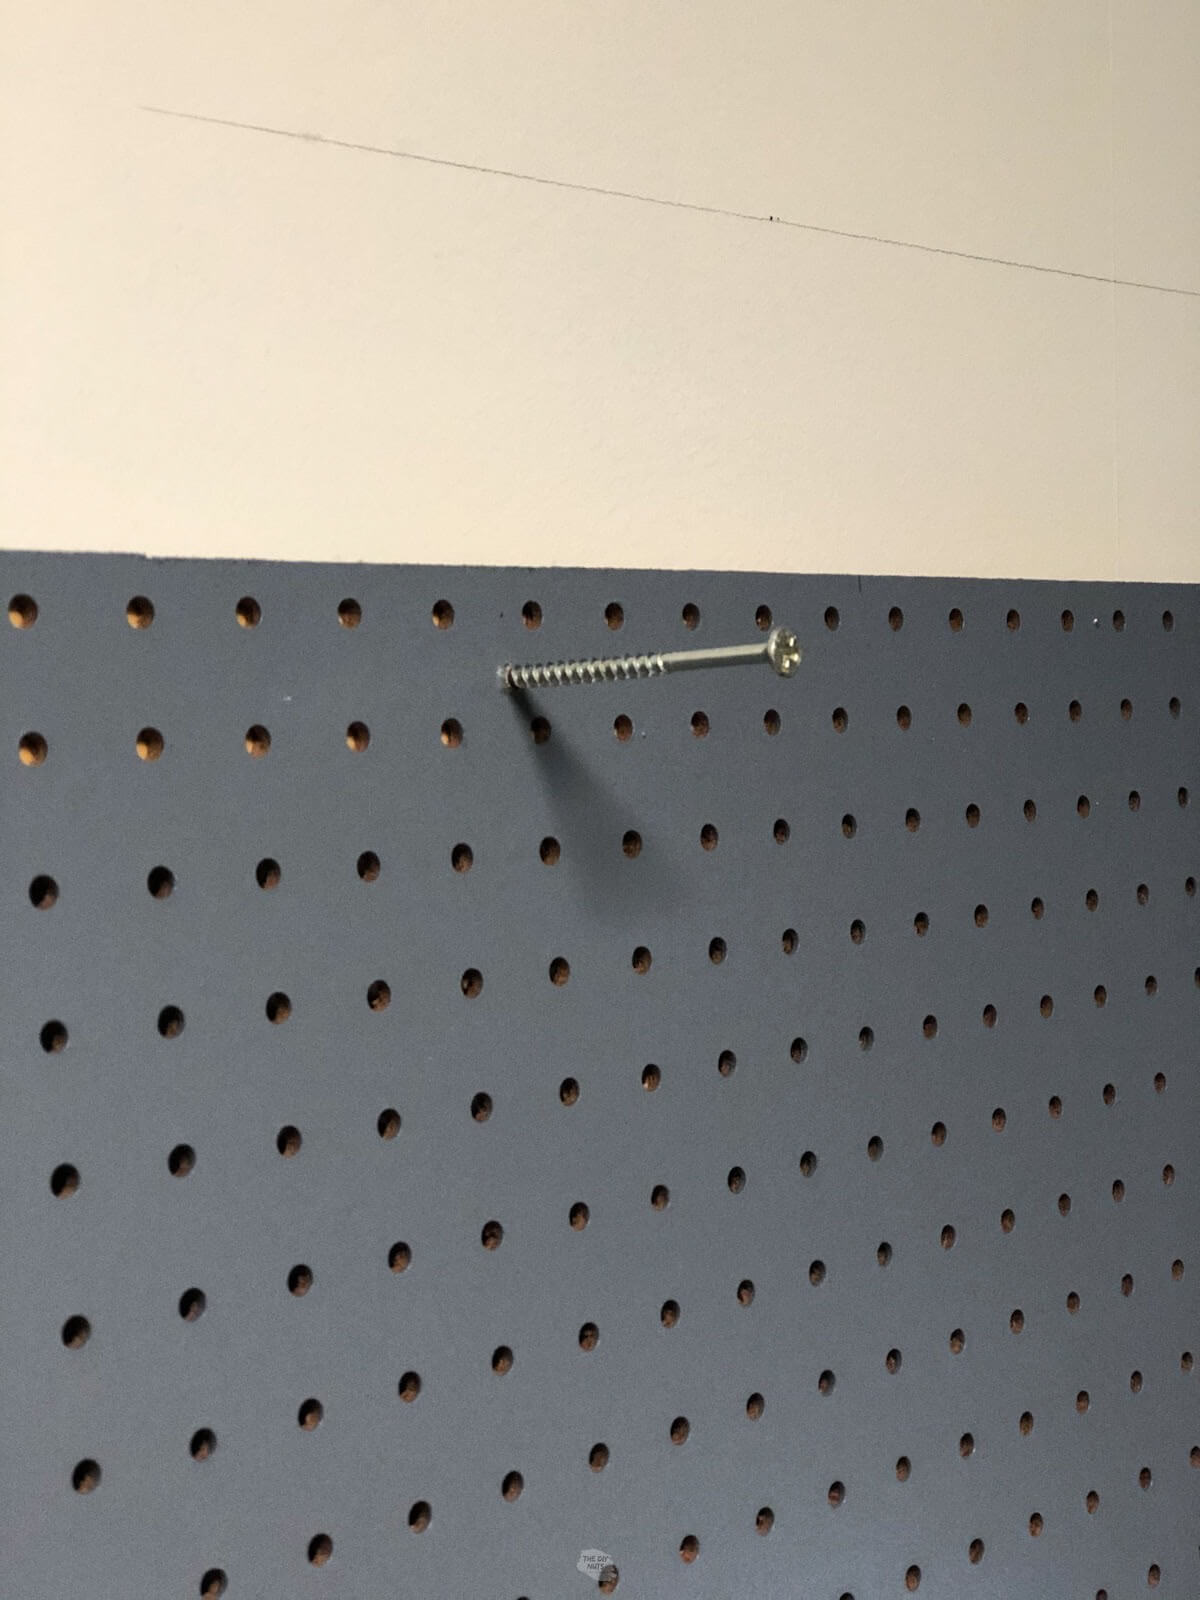
Step 7: Screw Pegboards Into Studs
Screw through the front of our pegboards to the studs. However, you could always add a hanging wire. We wanted our pegboards to be as permanent as possible due to safety reasons.
How do you make a pegboard look good?
Here are a few options we are considering to finish our pegboards and make them visually more appealing.
- Use doll rods to create small shelves.
- Paint them
- Use these baskets that hook into the pegboard.
- Add fun wire or ribbon with clothespins to hang artwork.
- Use S-hooks to add a small frame with artwork or a saying in it.
- Use doll rods and s-hooks to store ribbons.
- Add personalized touches such as wooden letters or other initial letters.
- Glue PVC pipe to store markers, etc.
- Add a DIY banner
- Use specific pegboard hooks to display supplies and more.
- Use shelf hooks and create a DIY shelf (not even using wood).
Want to purchase pegboard accessories?
Here is a list of a few things we may plan on purchasing.
- 114-piece pegboard accessory: Not that expensive and may solve all of our needs.
- 84-piece hooks with baskets: A little more expensive, but this kit comes with baskets.
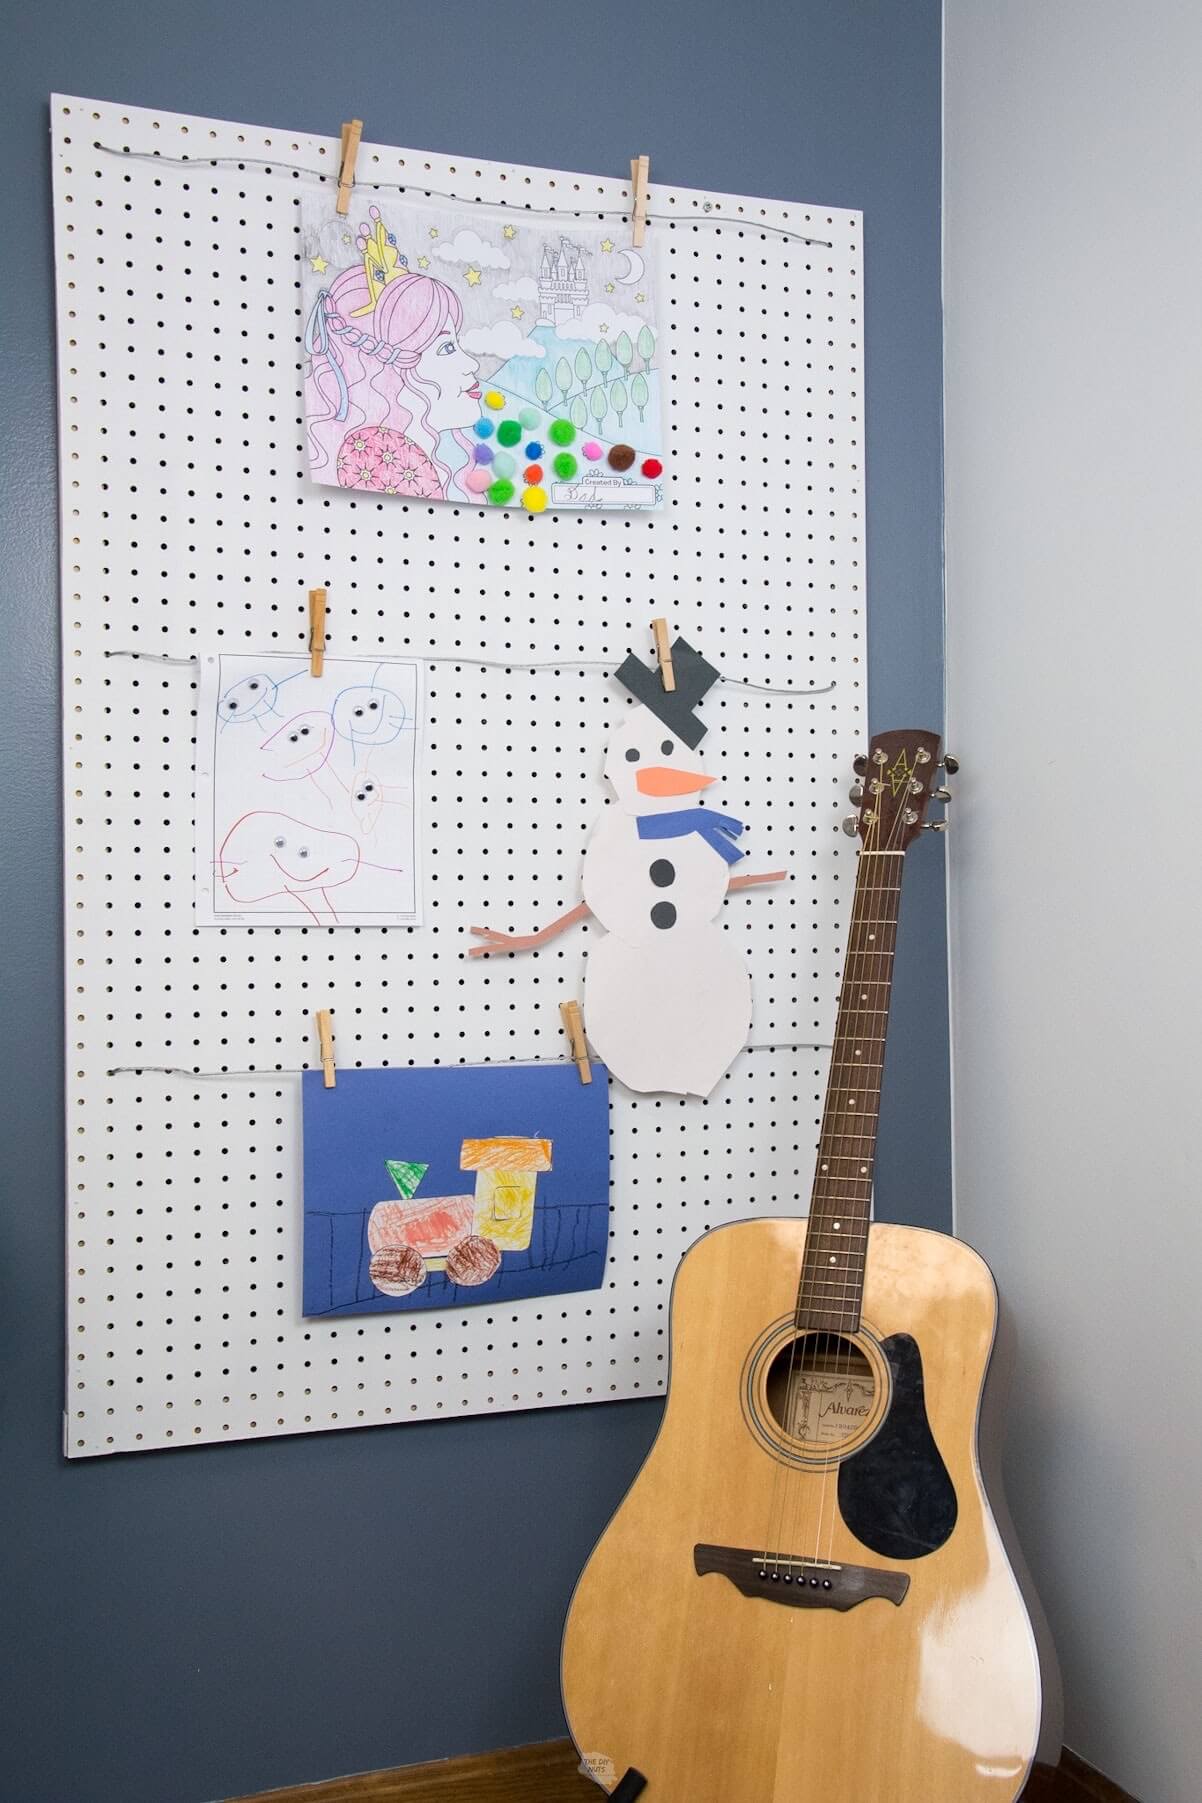
How To Turn A Pegboard Into An Easy Art Display
The one pegboard we hung vertically to easily pin our kid’s art projects.
Before You Hang
Add a wire and tie it behind the board.
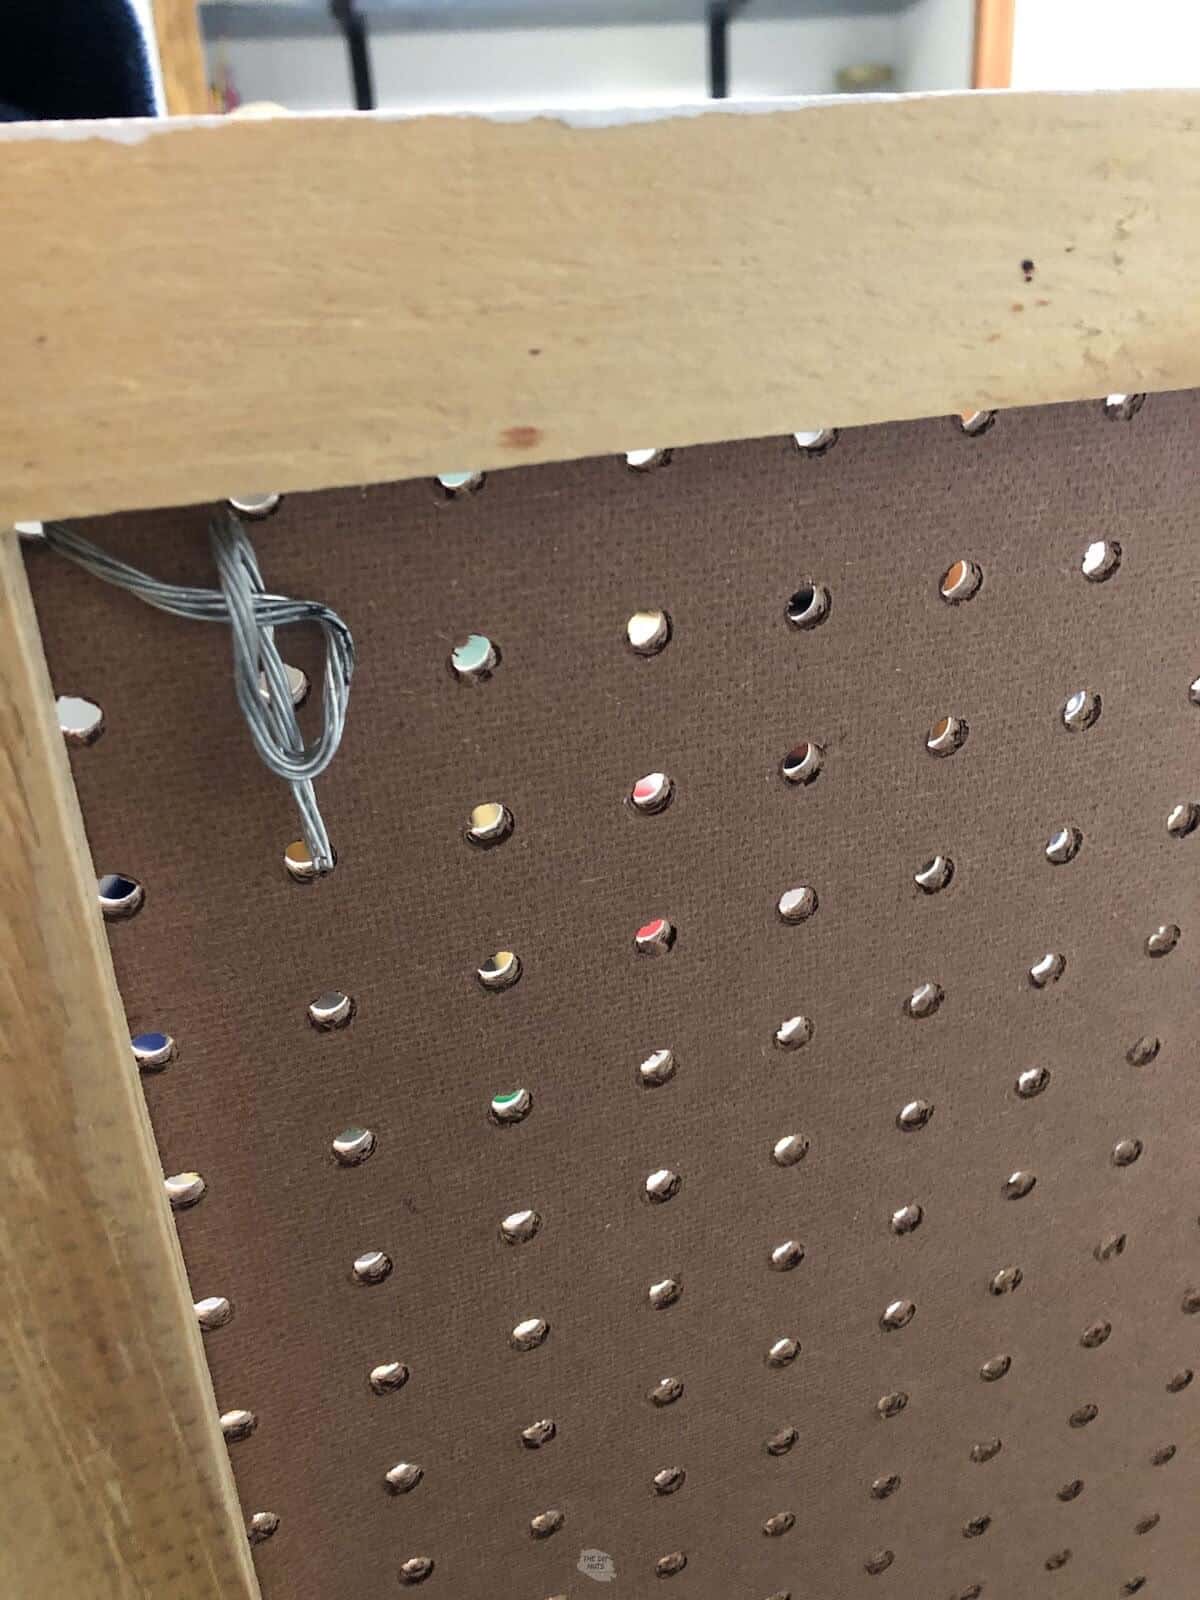
Thread the wire through the front and tie another knot. You can add clothes pins to display art.
How-To FAQS
Yes, you could miter wood to create a frame on the front of your pegboard.
Your pegboard will need to be at least a 1/2″ off the wall in order for the hooks to work.
We did not prime our pegboard and didn’t have a problem with the paint sticking. Our white paint did have a primer built in. The pegboards we bought were prefinished white on one side. If you are using pegboard that is not prefinished we recommend priming before painting.
All 3 pegboards measure 48″ x 32″. Any larger and you may need to add a wood support strip across the middle for support. Ours are not flimsy at all.
On our accent wall, we hung our large DIY string art and let our kids design the pegboard storage. We hope that this room inspires our family for years to come!
Related Posts
We are so happy we chose to build a simple DIY pegboard for our craft room!
Build An Easy DIY Pegboard
Equipment
- Rollers/Brushes
- Circular Saw
- Screws
- Stud Finder
- Drill
- Nail Gun
Supplies
- Pegboard
- Wood Scraps
- Paint in the color of your choice
Instructions
Build Pegboards
- Cut pegboards to size with a circular saw.
- Create a frame for the back of the pegboard. You can rip plywood or use furring strips. You want your boards to be at least 1/2" off the wall.
- Attach frame to the pegboard using a nail gun.
- Paint with a roller. Painting the sides will help create a more finished look.
Install Pegboards
- Find studs with a stud finder
- Use a 4' level to mark the height you want to hang.
- Place level on top of pegboards before hanging to ensure your board is level.
- Screw threw the top of the pegboard and frame into studs.
Notes
- We purchased prefinished pegboards and did not need to use primer before painting.
- In order for metal pegboard hooks and accessories to work, your boards need to be around 1/2″ thick once your frame is added.
- You can add a frame to the front to dress-up your pegboard or even paint a fun design on them.
I love the end result! Looks really good and it’s mega practical!
Hi Sandra! These are super practical and great for our space. I am currently in the process of figuring out pegboard accessories and other ways to really organize these pegboards.
This is brilliant! I’ve been thinking of making one of these for my new office and you’ve just convinced me it’s the right thing to do!
Hi Jayne. This DIY pegboard was perfect for our little kids. We have debated about “dressing” it up a little, but it just helps have a place to put things.