How To Hang Shelves On Concrete and Cinderblock Walls

If you want to add extra storage to concrete or cinderblock walls, but don’t really know how, this detailed tutorial is for you. Attaching bracket shelves doesn’t have to be too hard. Just make sure you have the right supplies (don’t worry we cover that).
We seem to keep doing organization projects. Like most families, we were looking for a way to add extra storage to our kids’ craft room. This basement closet was perfect for adding wall shelves to the concrete block walls.
The “Before” Basement Closet
As you can see, the basement closet was in need of some serious help. Before we could add closet shelves we had to:
- Clean and waterproof the concrete block wall.
- Add a new coat of white paint to freshen up the space and create a cohesive color.
- Design the closet layout and figure out the style of shelf brackets.

Supplies You’ll Need
*Disclosure: This post may contain affiliate links that at no additional cost to you, may earn a small commission. Read our full privacy policy.

TOOL RECOMMENDATIONS
- ECOMONIC – Dewalt Hammer Drill 1/2 in.
- MIDDLE OF THE ROAD – Bosch 11255VSR Bulldog Xtreme (drill with multiple speeds)
What is a Tapcon?
A Tapcon screw is specifically when attaching to concrete, block, or brick.

Making DIY Bracket Wall Shelves
Using brackets and wood allows you to create a custom look in a budget-friendly way easily.
- CUT THE WOOD TO SIZE – The 1 x 12 pine boards we used were pre-finished (pre-sanded) from Home Depot.
- PRIME AND PAINT WOOD – Prime and paint the wood using a small foam roller. This will take a little time as you have to apply two coats. Wait for each one to fully dry before flipping over to do the other side.

Our Paint Station
Place boards on sawhorses with a 2 x 4s on top. In this picture, you can see how we set up for a variety of painting projects.
READ MORE: See how this color was used to redo our bathroom vanity and oak railing!
How To Hang Shelves On Cinderblock Wall
However, it was not going to be as easy as this particular closet in our house is constructed out of concrete masonry units (CMUs), also known as cinderblocks.
Step 1: Mark Holes
Use a tape measure, a pencil, and a level layout (mark the drill holes) for the concrete screws.

TIP: It is best to anchor into and drill into the grout lines above and below the actual CMU blocks (see photo)
Step 2: Check If Level
Place a 4’ level from hole to hole to make sure you’re close to being level. The CMU grout line itself should be pretty level…(just check and don’t assume).

Step 3: Pre-Drill Bracket Holes
Using the hammer drill and bit pre-drill all of your bracket holes. Make sure you wear safety glasses people!

Step 4: Add Tapcons
Once the bracket holes are drilled put the Tapcon through the bracket and sink anchors with a cordless drill.

Step 5: Continue For All Brackets
Continue the above steps until all of your brackets are attached.

Step 6: Add Shelves
Place the painted shelves on the brackets and use the screws that came with the brackets to attach the shelves to the brackets from the underside.

Follow us on Pinterest, YouTube or Facebook for more DIY inspiration!
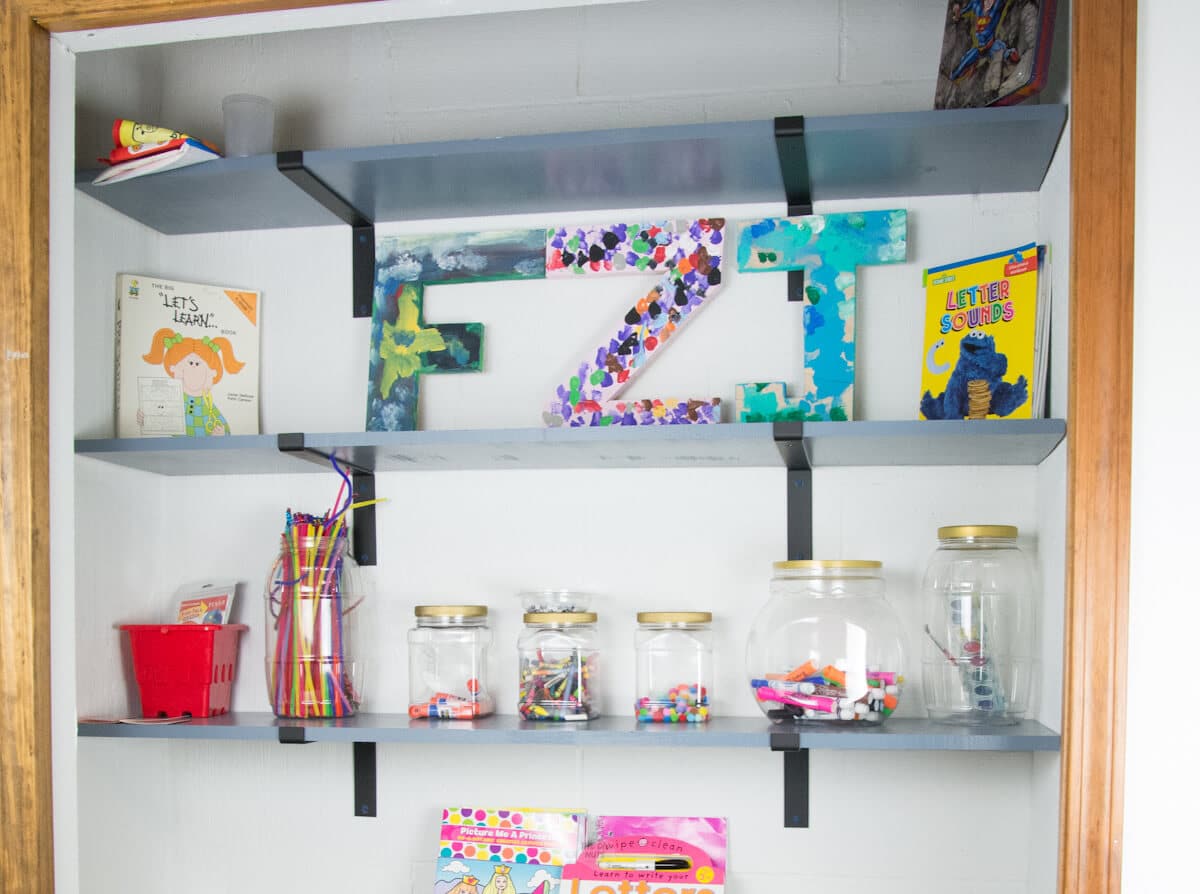
The “After” Closet
Organize your closet and space. We used recycled containers and other craft projects to help decorate our shelves.

Tips
- If the wall where you are hanging the brackets is drywall and 2×4’s use a stud finder and screw the brackets into the studs.
- Use the cinderblock grout line as a guide to help you keep it all level.
- You can stain your board instead of paint for a farmhouse look.


More Basement DIY Projects
Check out a few of our other basement DIY projects!
- Easiest Drop Ceiling Makeover Idea
- Our Basement Powder Room Makeover
- Other DIY Basement Projects – including how we added built-in storage with stock cabinets.
From drab to a very useful space, we are happy with these DIY farmhouse shelves.
If you like this tutorial, please give it 5 stars below 🤩🤩🤩🤩🤩. Your support helps us continue to provide unique and budget-friendly DIYs.

Equipment
- Hammer Drill
- Cordless Drill
- 4' Level
- Tape Measurer
Supplies
- Shelf Brackets
- Wood Shelves painted or stained
Instructions
Build Shelves
- Cut wood to size.
- Paint or stain shelves to fit your space.
Hanging Bracket Shelves On Cinderblock
- Use a tape measure, a pencil, and a level layout (mark the drill holes) for the concrete screws.
- Place a 4’ level from hole to hole to make sure you're close to being level.
- Using the hammer drill and bit pre-drill all of your bracket holes.
- Once the bracket holes are drilled put the Tapcon through the bracket and sink anchors with a cordless drill.
- Continue the above steps until all of your brackets are attached.
- Place the painted shelves on the brackets and use the screws that came with the brackets to attach the shelves to the brackets from the underside.
Video
Notes
- It is best to anchor into and drill into the grout lines above and below the actual CMU blocks
- The CMU grout line itself should be pretty level…(just check and don’t assume).