DIY Corner Wood Floating Desk With Simple Brackets

We absolutely love utilizing all the space in our home. This DIY corner desk was the perfect fit in our basement. Learn how to build your own wall corner desk to capture all the space in your home.
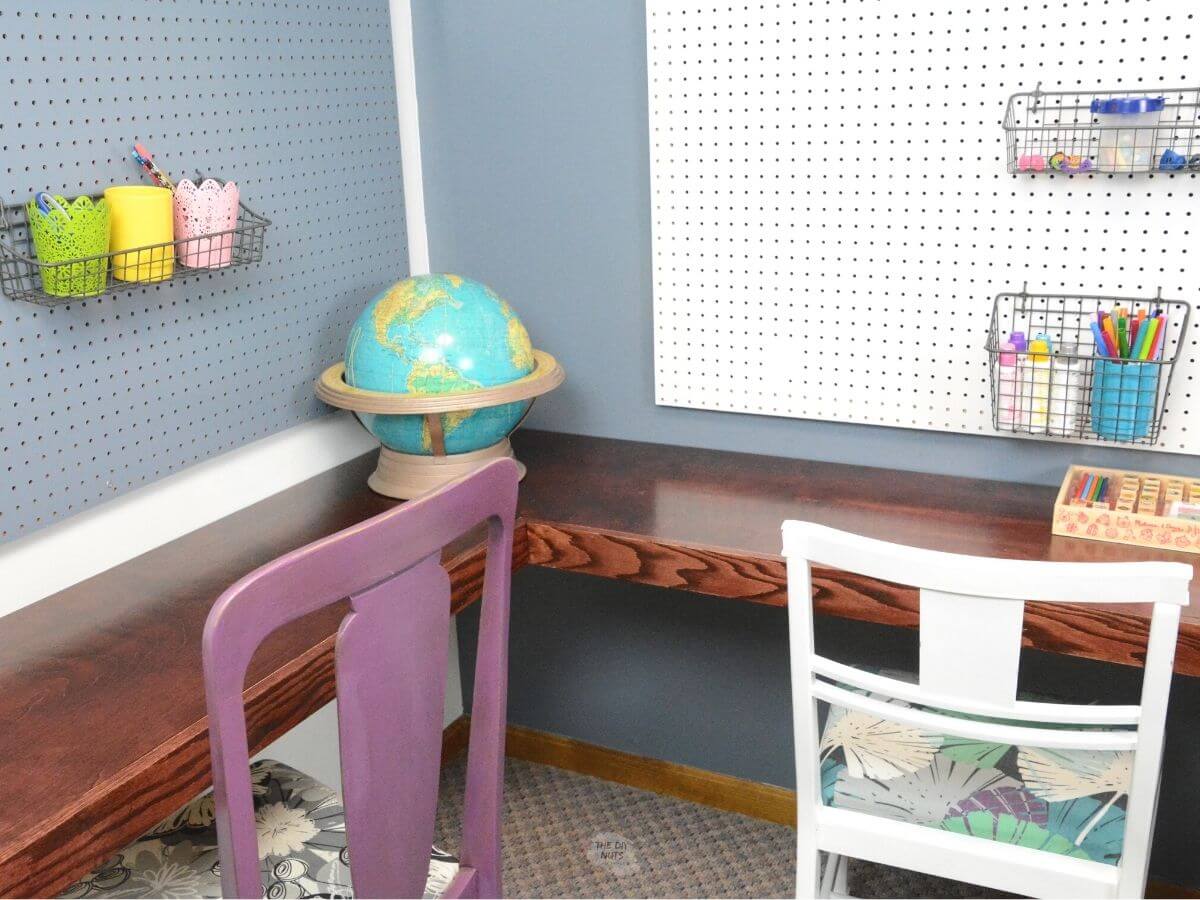
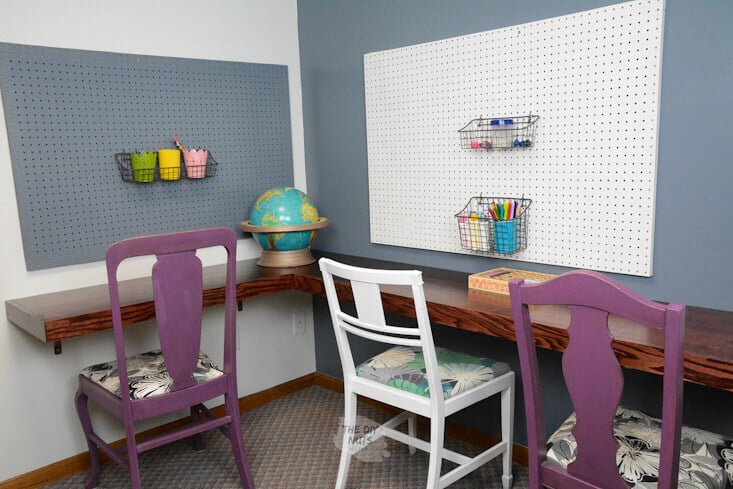
This DIY desk project continues all the fun things we have been making to turn a room in our basement into a kid craft room. We felt creating a DIY floating wooden desk with 3 seats was the perfect DIY basement project for the corner of the room.
Why did we decide to build an L-shape corner desk?
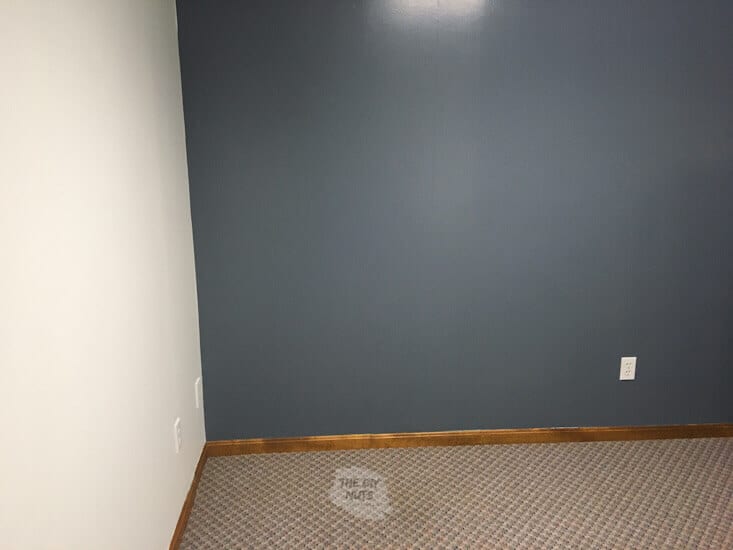
At first, our kid’s craft room design included a floating desk along the back wall. However, the corner of the room was the perfect space to create a home office for our children.
The layout of the small room made it so that a floating corner desk was going to be better. It may be a little tight but doable if all three children wanted to be in there at once. The best part about this design is that we are able to customize each child’s workspace.
How to determine the size and desk design?
For reference, our desk is approximately 55″ on one side and 83″ on the other side x 18” off the wall. The L-shaped desk was best to utilize the space of this small room.
Here is a diagram to help you visualize the dimensions of our desk. Remember that our desk is meant for kids. If I were making this for myself, I would most likely have made the desk a little wider than 18″.
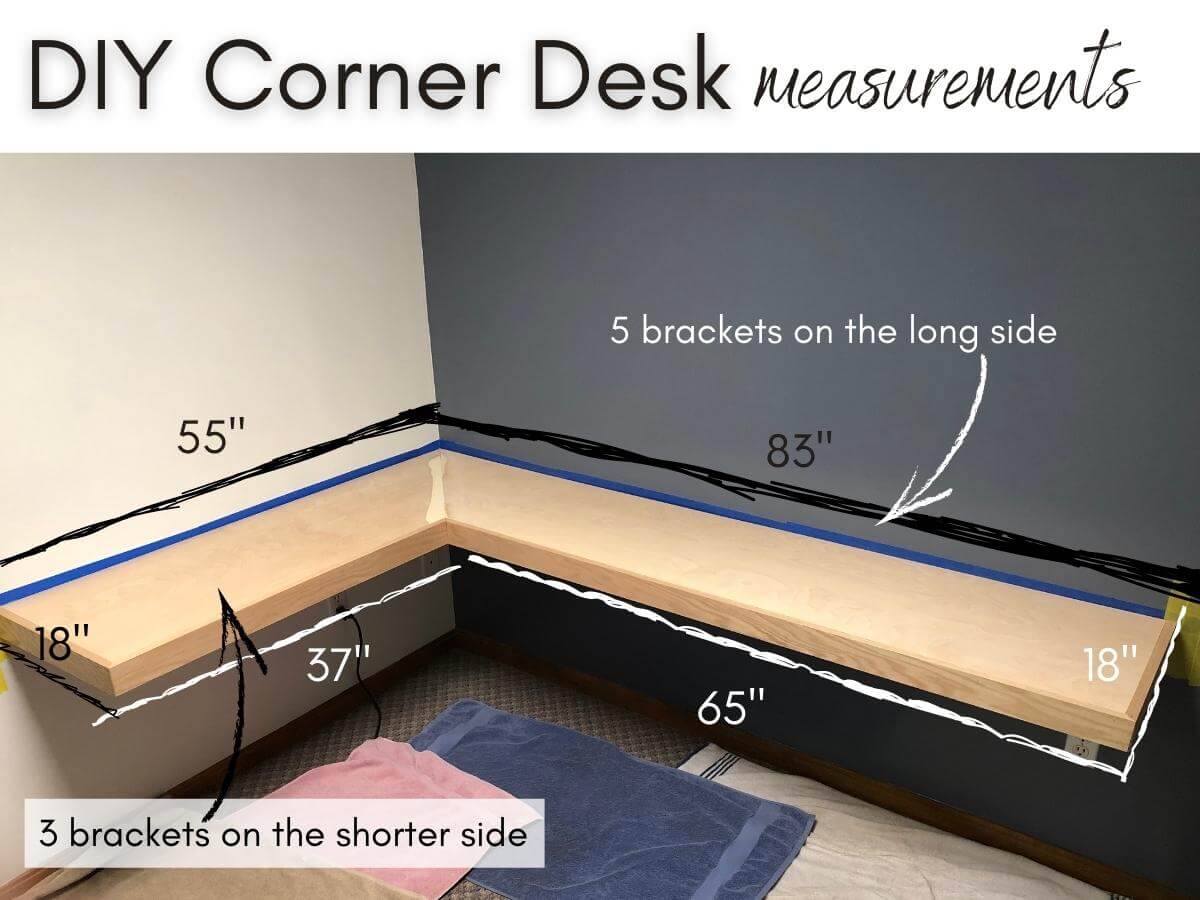
You can modify these measurements to create a small corner desk for your home office that might need to only fit one person. However, we would recommend that you make your desk for an adult wider than 18″ deep.
Height of Desk
You will also need to decide the height of your desk. We made ours 2” shorter than our kitchen table but made sure regular-sized chairs would fit. You may need to work a little backward on your design and make sure whatever stools or chairs you are using will work.
Using things you already have is part of our DIY mentality.
Erin
Other Factors To Consider When Constructing Your Floating Desk
- Determine the desk materials you want to use. Our desk is made of birch plywood and oak molding for the front piece.
- A Butcher block top could also be a great option, but it would be more expensive.
- If you want to paint the plywood or need a cheaper option, you could construct this completely out of CDX. It would not have as nice of a finish, but it would be cheaper.
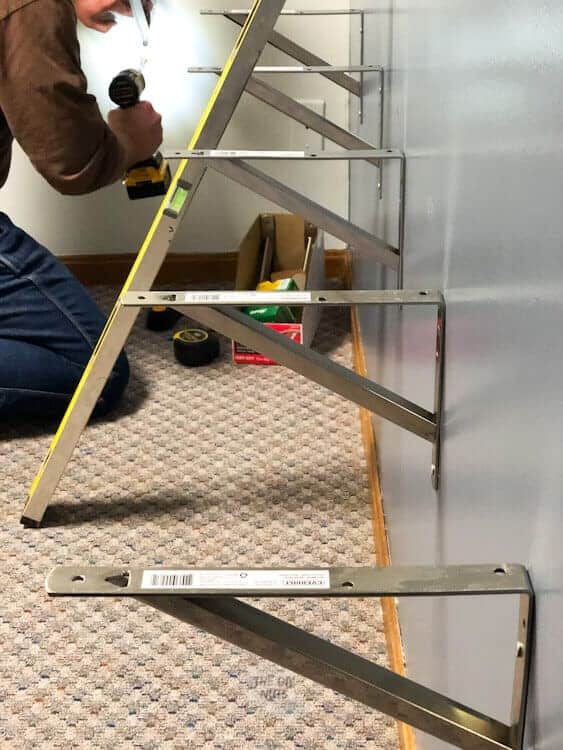
- Wood studs behind your drywall are typically spaced 16” apart. We bought one bracket for each stud for the length of the desk.
- Using shelf brackets still gives the illusion of a floating desk but the sturdiness of heavy-duty brackets. Once the whole desk area and the room are completed, you honestly can barely see our brackets (unless you are looking up at the bottom of the desk).
Supplies You’ll Need
*Disclosure: This post may contain affiliate links that at no additional cost to you, may earn a small commission. Read our full privacy policy.
Tools needed
- Circular Saw or Table Saw
- Miter Saw (Optional: This project finally made my husband get his own miter saw and he was so excited he scored one for ½ off on Black Friday)!
- Air Compressor
- Brad Nailer & 1.25″ Brads
- Stud Finder
- Cordless Drill
- Drill Bits
- 4’ Level
- Wood Clamps
- Speed Square
Corner Desk Tutorial
1. Using a stud finder, a 4’ level, a tape measure, and 3” + long screws attach the brackets to the studs at the desired height.
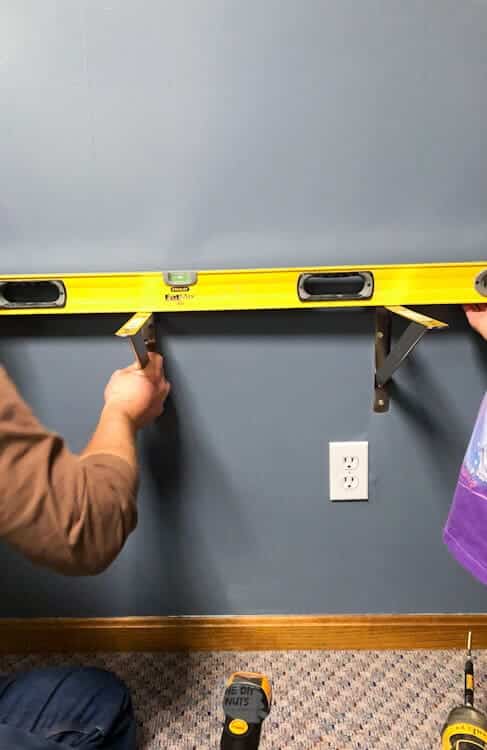
Find the studs. Start on one end and screw in one bracket. Measure the same height up on the next stud spot. Hold the bracket with the 4’ level on top of both. You may need to slightly adjust the height of that bracket before securing it to the wall using 3” long drywall screws.
Continue until all of your brackets are in place.
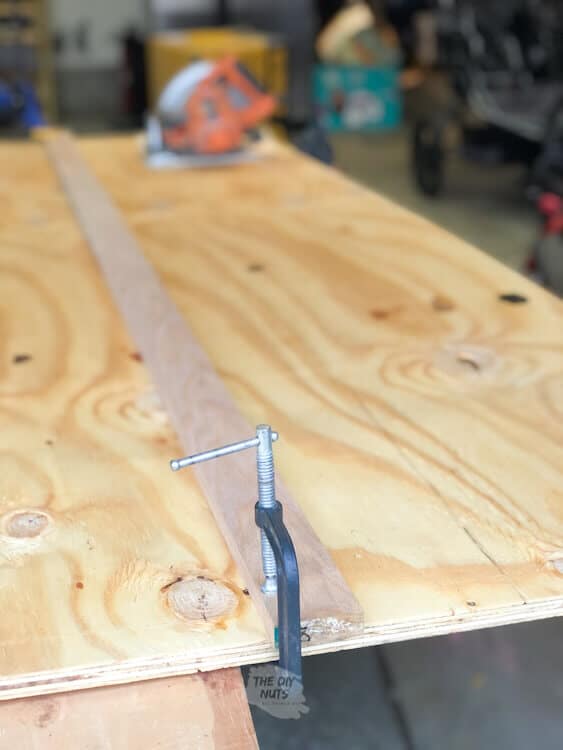
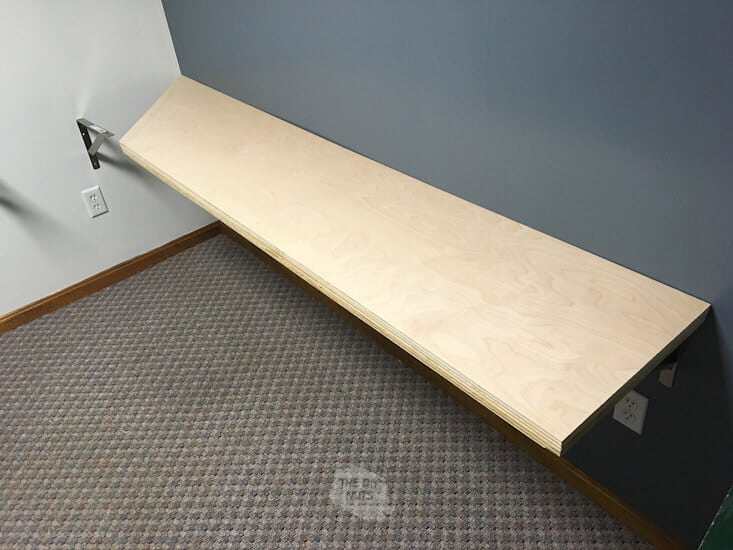
2. Use a circular saw or table saw to cut down plywood to the desired width (ours is cut at 18” wide).
The top of our desk is made out of two (2) layers of plywood. The nice birch is on top and the more construction-grade plywood is on the bottom.
Tip Alert: How to use a circular saw to make a straight edge?
If using a circular saw, use a straight edge to make the cuts as straight as possible (see photo). You clamp a straight edge to act as a guide on your plywood. This will assist you in making the straightest edge you can without a table saw.
3. Once the four (4) pieces have been cut to the same width clamp and glue them together. We have 4 pieces due to the l-shaped desk design. If you are only making a regular desk, you would only have two (2) pieces of plywood.
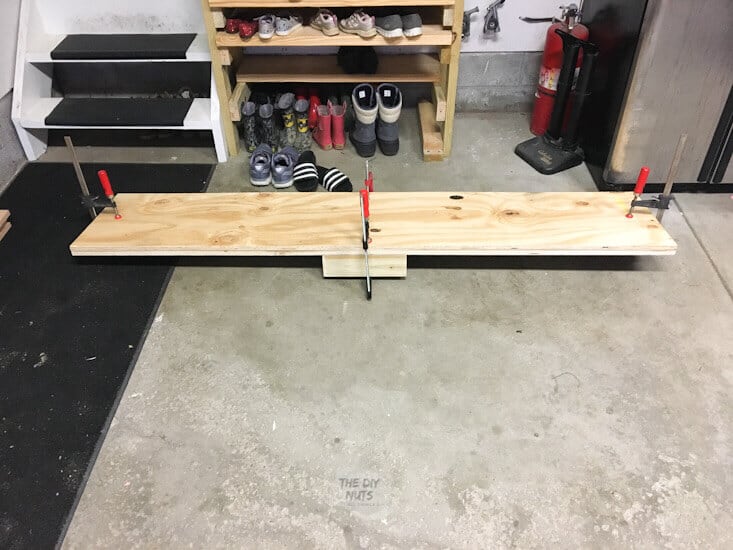
4. The next day using a straight edge cut the boards to length. You will be cutting through two pieces of plywood that are glued together.
5. Trace a 45-degree angle on one of the two glued-together boards (birch plywood and CDX plywood) using a speed square off the corner of the board.
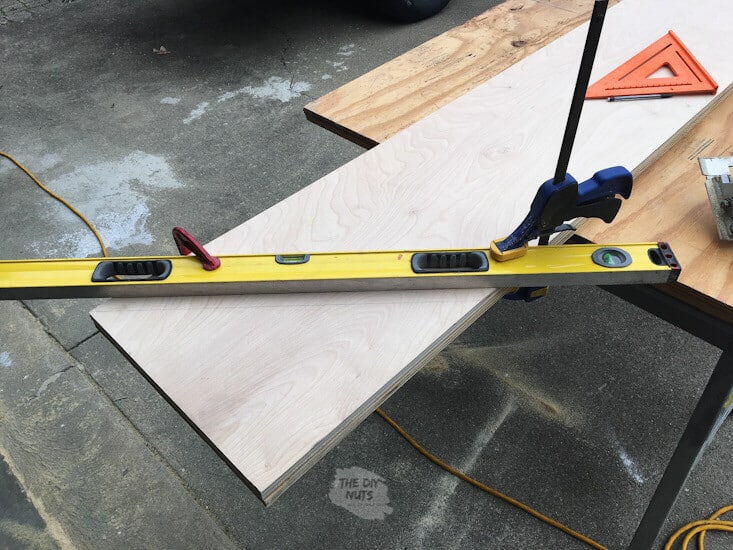
6. Once you have drawn a 45-degree angle, cut the first board at a 45-degree angle.
7. Take the first cut board with the 45-degree angle and lay it on top of the previously installed desk brackets.
Here is where it may be tricky. Most likely your corner isn’t exactly 90-degrees. If you have a perfectly square room, let us know, but normally it is close but not perfect. Therefore, you cannot just assume that you can cut another 45-degree angle on the remaining board and have it fit perfectly.
Tips For Corner Board Installation
Take two scrap pieces of plywood, that are the same width as your newly cut 45-degree angle board and place them on the other side of the brackets.
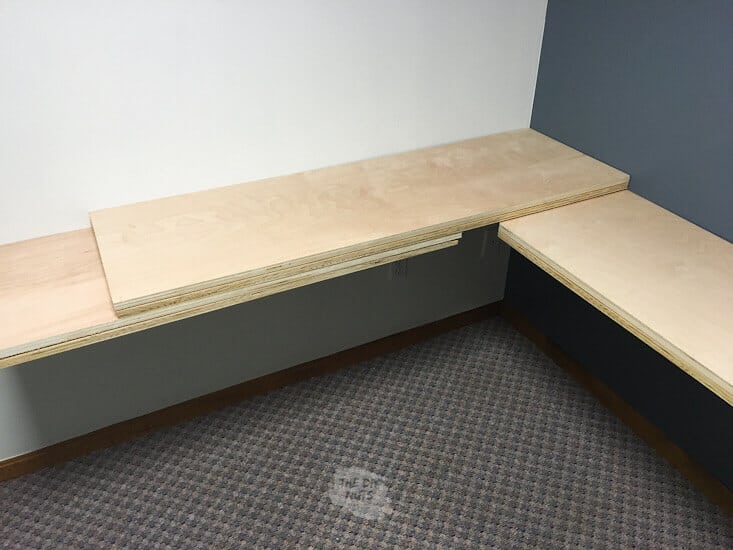
This will allow the uncut board to rest on top of the first cut piece. Go on the bottom side and trace with a pencil the correct angle.
This will guarantee you are cutting the angle on the new board to equal your actual wall corner.
8. Cut the glued-plywood board at the angle drawn.
9. Place painter’s tape above and below the desk at the brackets This will help if you are staining or painting the desk once it is in place. Due to the nature of our basement and the size of the room, we wanted to construct our desk first, before staining.
10. Attach the desk board to the brackets by using 1” screws from the bottom up. Pre-drilling the screw holes, will help this process to go easier.
11. Use a miter saw and start at one end of the desk cut piece by piece the oak trim.
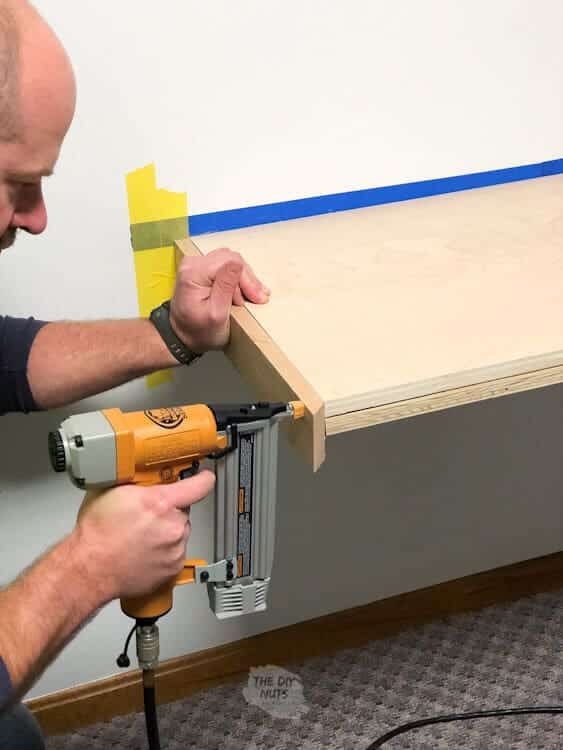
12. Use an air compressor, brad nailer, and wood glue to install the trim pieces. Start at one end and work your way around the desk.
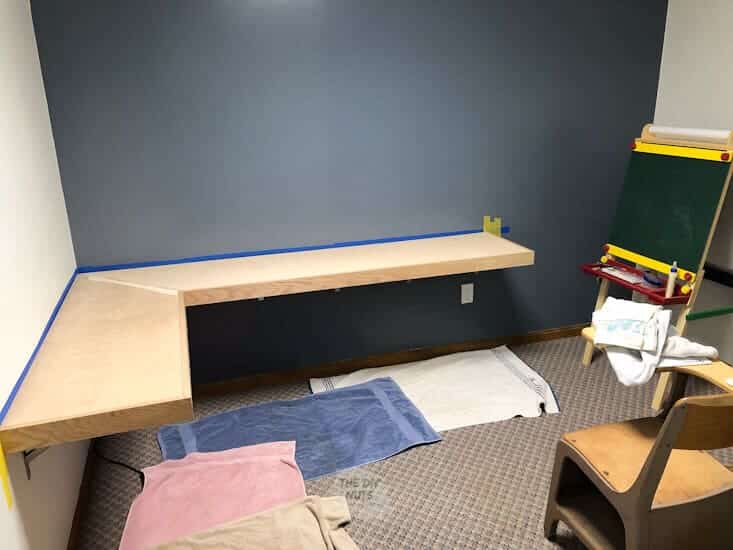
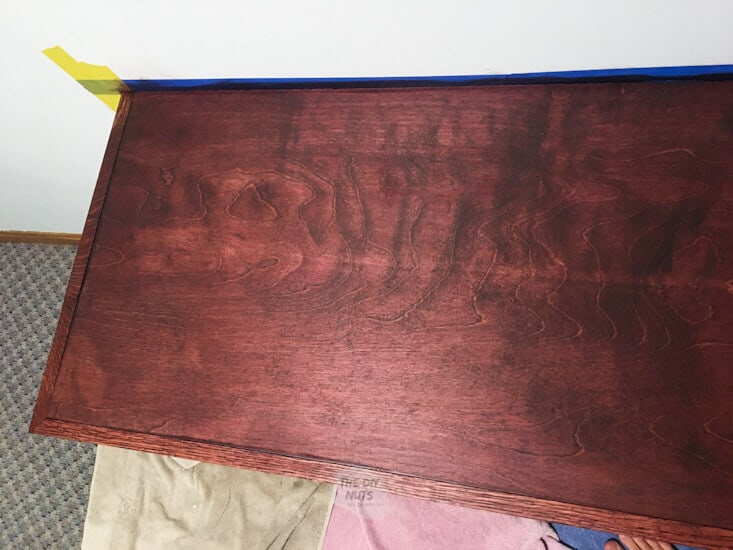
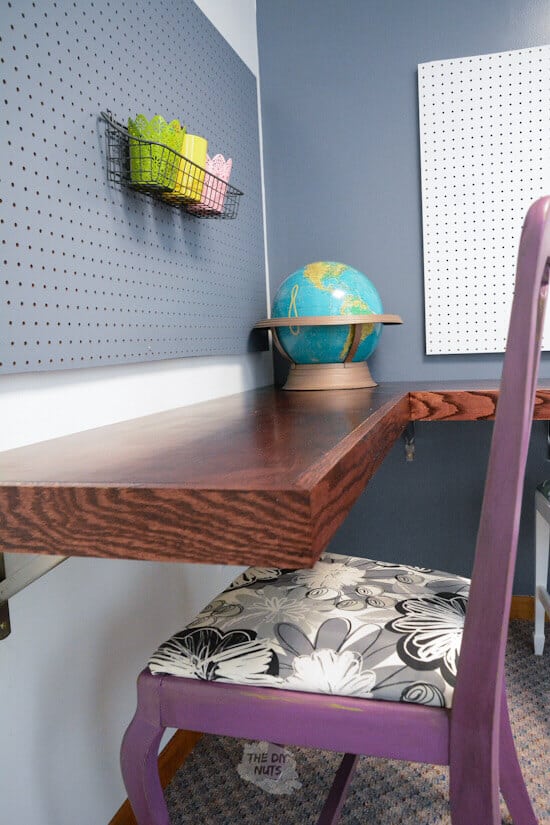
13. Apply stain. We used our favorite stain color on this desk and are happy we did!
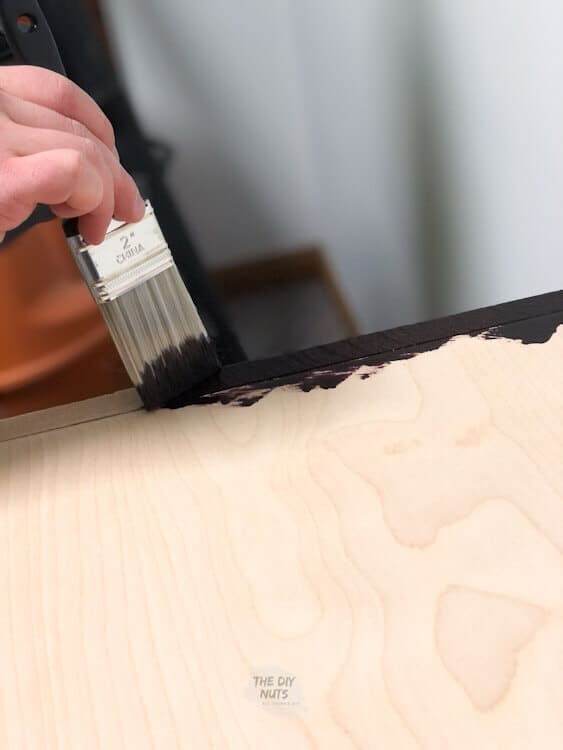
14. My husband was able to apply the Red Mahogony stain to the whole desk. Then he went back to it wipe off. The color was the exact richness we were going for.
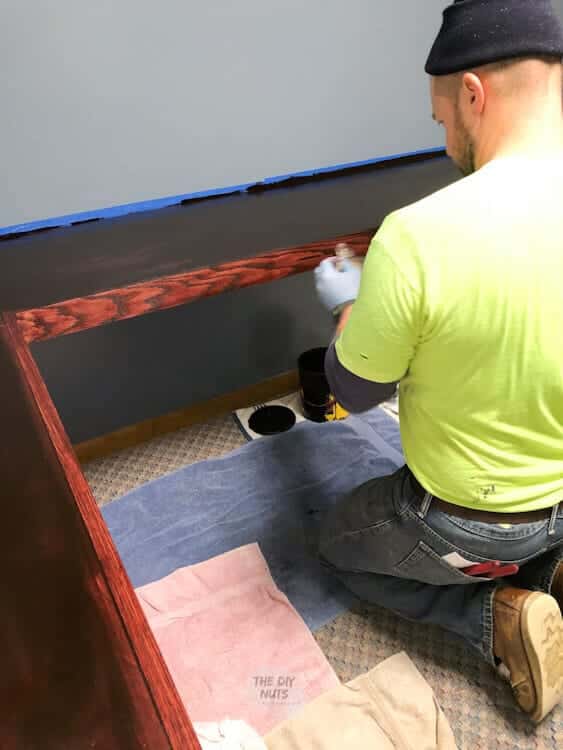
15. Poly, sand, poly, sand, poly. Our desk had 3 coats and sanding the polyurethane in between layers creates a more finished and smoother look.
Make sure to check back in the future to get a tour of the complete craft room for our children. They have already spent hours creating in there!
Follow us on Pinterest, YouTube or Facebook for more DIY inspiration!
Tutorial FAQs
Using a piece of oak trim will help conceal the edge of the plywood was the perfect solution to using plywood for our desk. This created a more finished-looking & custom desk. Again, this will cost you a little more money, but we totally think it is worth it. We have seen simple plywood desks that leave the unfinished edge, so that is up to you.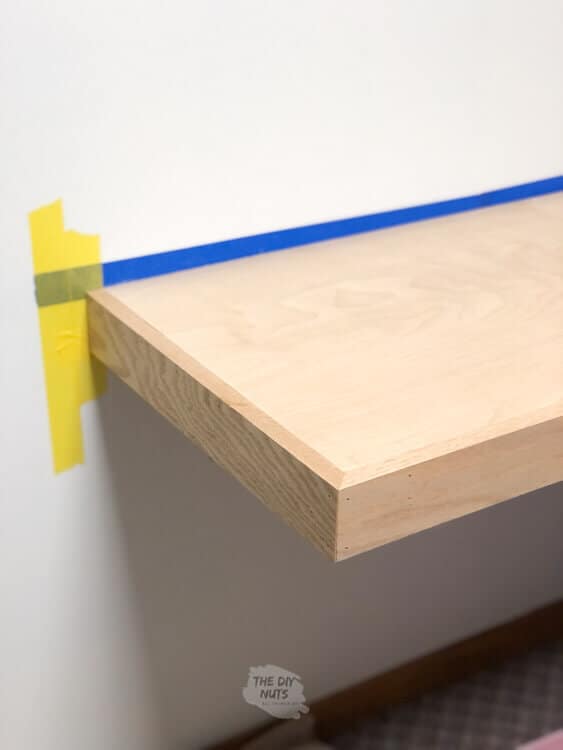
We used 1.25″ brads to attach the wood trim to the desk.


More Craft Room DIYS
- WALL DECOR: How To Make A Large String Art
- DIY CRAFT STORAGE: How To Add Shelves To Cinderblocks
- DIY SUPPLY ORGANIZATION: How To Build An Easy Pegboard
- DIY ART DISPLAY: How To Build DIY Shadow Boxes
We just love our DIY corner wooden desk and so do our little artists!
What a great use of space!!
Hi Lauren. Thanks for the kind comment. My children love this craft room desk and we love they have a specific place to go.
This looks great. I will pitch this idea to my son who wants a corner desk in his room.
Hi Lauren. I am glad that you like this corner desk idea. Good luck with your DIY desk project!
What a great idea! This would be a total space saver in my house
Hi Mackenzie. Thanks. We love how we were able to create a floating desk that could fit 3 people in this small room.
Hi Erin,
Thank you for sharing. My husband and I just finished our L-shape desk thanks to you. I would love to show you pictures.
Hi Marie! I would love to see those pictures. You can email me: erin@thediynuts.com.
This is wonderful! We are planning on doing something similar for my new home office. One question though, you mentioned it was about 4′ on one side and 5′ on the other and I can’t figure out those measurements from the plywood sizes. Can you help me figure out where I’m going wrong in my thinking? 😀 Thanks!
Hi Alexis. Thanks for writing a comment. I went back and created a graphic to better show the dimensions of our DIY corner desk. When we stated 4′ x 5′ we were referring to the inside part of the desk, but I changed that in the post to truly show in inches all dimensions. I hope that makes sense and helps you with your DIY desk build.
@Erin,
Thanks so much! This helps tremendously! We’re going to start working on our in the next couple weeks. I’ll let you know how it turns out! 🙂
Good luck with your corner desk!
Love this! Wondering if the plywood marks/dents easy if kids write on it (on paper, but does go through and dent the top)?
Our DIY corner desk has surprisingly cleaned up really well and doesn’t seem to have dents on it. Just make sure you fully seal the surface with a few coats of polyurethane and you should be all set.