How To Whitewash Oak Cabinets For A Boho Chic Vanity Makeover

Our tastes are evolving, this includes trying to figure out ways to incorporate modern, light wood surfaces into our home decor. Our whitewashed ’90s oak bathroom cabinets turned out better than I could have hoped.
The most challenging part of this DIY project was removing the past finishes. Once that was done, giving the oak a bleached look was relatively easy.
The Before Vanity

The first time we updated this bathroom, we added gel stain to the cabinets and painted a herringbone wall. But, like with anything, it was time for an upgrade, and I couldn’t be more pleased with the outcomes of this round of bathroom DIYs.
Supplies You’ll Need
*Disclosure: This post may contain affiliate links that at no additional cost to you, I may earn a small commission. Read our full privacy policy.

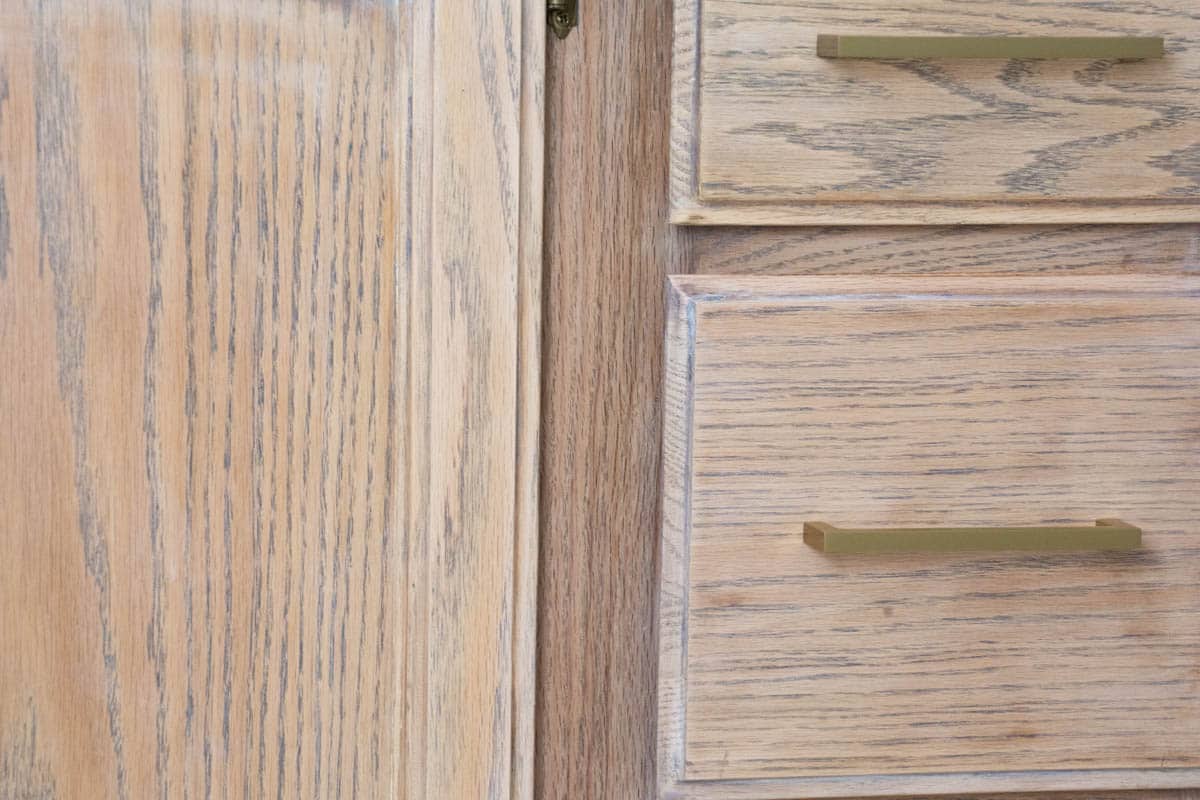
How To Whitewash Oak Cabinets
There are several different ways to achieve a driftwood or white oak look in your home. Our cabinets worked because we had previously removed the darker gel stain.
Before You Begin
- Remove any hardware and hinges.
- Setting up a workstation for drawers and doors is always a good option.
- Tape out any areas you do not want the stain to get on. Add drop cloths to the floor.
Step 1: Remove The Previous Finish
Not only did we strip the gel stain off, but we also sanded all the wood with 80-grit, 100-grit, and 220-grit sandpaper on our orbital sander. This removed most of the darker stain and also removed the previous honey/orange stain.
Full Gel Stain Removal Tutorial
We detail everything we did to strip the gel stain from our 90s oak vanity.

Here, you can see how some of the previous stains are still in the grain. If we were using a fresh piece of wood, we would probably quickly apply a dark stain before adding the white transparent stain.

Step 2: Paint The White Transparent Layer
Using a small foam brush, paint a transparent layer of Minwax.

You can see that we completely covered the wood’s surface.

Step 3: Wipe Off
For our cabinets, we wiped off the layer after 2 minutes. You can experiment with how long you leave the stain on to achieve your desired look.

Step 4: Let Dry
Let your staining fully dry.

Step 5: Add Polyacrylic
We applied 3 layers of Satin polyacrylic for our cabinets using a synthetic 2″ paintbrush. I lightly sanded in between layers for a smooth finish.

Tips
- One of the toughest areas to get to was the side with particleboard. To help with this, we sanded the side with 220-grit sandpaper to give the color extra tooth.
- You can repeat layering to make the color look whiter.
- Adding an extra stain color under the transparent layer is an option for different looks.

Follow us on Pinterest, YouTube or Facebook for more DIY inspiration!
Before and After Oak Bathroom Cabinet

We can’t wait to share more about our DIY projects in this budget bathroom makeover! Stay tuned for all the details on one of our favorite room makeovers to date.


Room Sources
- COUNTERTOP: Engineered Top With Sink
- GOLD HARDWARE: Large Handles In Champagne Gold
- FAUCET: Gold Kohler Wide Spread Faucet
- RUG: Budget-Friendly Target Find
More DIY Bathroom Projects
- How To Paint A Laminate Countertop This Weekend
- Countertop Ideas That Go With Oak Cabinets
- How To Easily Paint Bathroom Cabinets Yourself
- 12 Ways To Update Your 90s Home Without A Complete Remodel
Not only did we get a completely fresh look, but we were also able to work with what was already in this bathroom. We love it when we take a chance on a DIY and it works out better than we expected.

If you like this tutorial, please give it 5 stars below 🤩🤩🤩🤩🤩. Your support helps us continue to provide unique and budget-friendly DIYs.
How To Whitewash Oak Cabinets

Equipment
- Gloves
- Foam Brush
- Sand Paper (100, 220)
- Rag
- Drop Cloths
Supplies
- Transparent White Layer
- Polycrylic We used satin finish
Instructions
- Remove any hardware and hinges.
- Set up a workstation for drawers and doors is always a good option.
- Tape out any areas you do not want to get the stain on. Add drop cloths to the floor.
- Remove previous finish by sanding with an orbital sander (if necessary). End with 220-grit sandpaper before adding whitewash.
- Use a small foam brush to paint a transparent layer of Minwax. Completely cover the surface.
- Wipe away stain with an old cotton t-shirt of rag.
- Let your stain fully dry.
- Apply 2-3 coats of polycrylic with a brush. Let each layer fully dry and lightly sand with 220-grit sandpaper before applying your next coat.
Notes
- We left our stain on for 2 minutes before wiping.
- Make sure your drawers, doors and cabinets are completely dust-free before adding stain or polycrylic.
- You can repeat another layer of stain if you want your final outcome to be be lighter.
- You can also put this transparent layer on top of other stain colors.
- Experiment with your stains to get the outcome you want before beginning.