Our Tips For Removing Gel Stain From Wood
Work with what you already have in your home. If are sick of the gel-stained wood projects in your house, you can use our tutorial to learn how to remove it. We did the elbow grease and testing for you.
And as trends go, lighter wood is very on trend right now. Removing the gel stain from our wood cabinets was #1 on the list for this bathroom makeover. We love painting cabinets and repainting them, but our tastes are evolving.
The best part about stripping the gel stain was that we also removed the honey oak color in the process.
Here we are, full circle, working on a budget bathroom makeover again. Ten years ago, I gave our hallway bathroom a mini makeover that included gel staining the oak vanity.
Why We Love Cabinet Makeovers

Supplies you’ll need
*Disclosure: This post may contain affiliate links that at no additional cost to you, I may earn a small commission. Read our full privacy policy.
*We chose to use Citristrip because we have used it in the past and don’t mind the smell. Since we were working inside, we did not want the overpowering smell of some of the other chemical strippers.

TIP: Make sure to shake the paint stripper well before beginning.
How To Remove Gel Stain
Step 1: Set Up Your Workspace
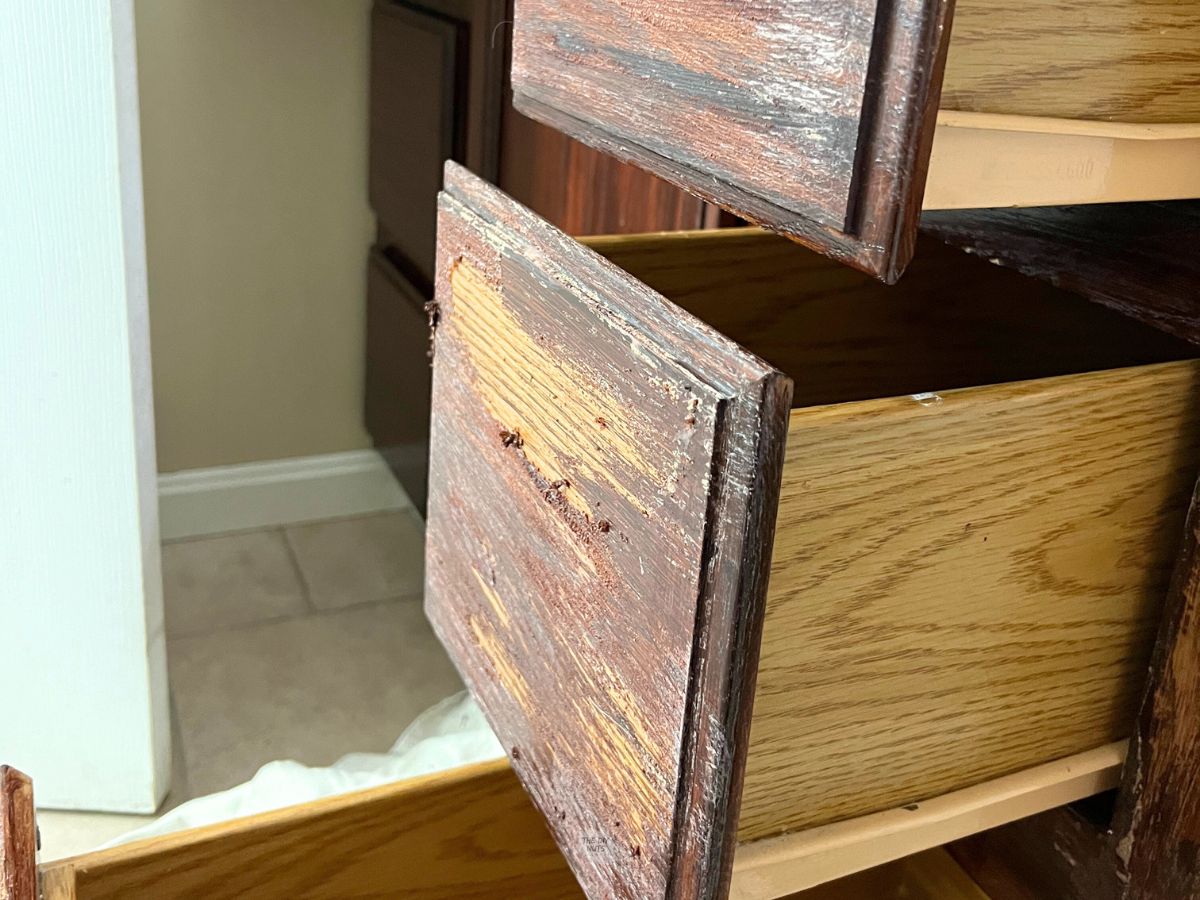
- Remove the drawers and doors from the vanity and place them outside.
- Cover the floors – we used drop cloths, then added plastic bags on top so we could throw them away.
- Tape out any areas you don’t want paint stripper to get on.

Step 2: Apply Paint Stripper
You want to apply a thick layer of Citristrip. Some people will say you can cover it with plastic and let it work. However, we found the sweet spot to let it sit for 10-15 minutes before starting to scrape.

Step 3: Scrap With A Plastic Putty
Carefully begin scraping the gel stain off. Have a container nearby to hold the excess material. Continue working and scraping until you have removed some of the gel stain.

You can also use a painter’s tool. However, be careful not to damage your wood with the sharp edges.

Step 4: Repeat
While you will get some areas to really come over, you must repeat the covering, letting it sit, and scraping at least one or two more times.

Step 5: Wipe Down With Mineral Spirits
You will have leftover Citristrip residue and gunk on your wood. We found that wearing gloves and using mineral spirits on a green sponge helped remove the residue and leftover gel stain.

Step 6: Sand
You may be able to get most of the gel stain off with the stripper. We had success using 80-grit followed by 120-grit sandpaper by hand to remove stubborn areas.

In addition to hand-sanding, we also chose to sand our bathroom vanity with an orbital sander to remove the initial honey oak stain.

Tips
- Take your time. Stripping stains or paint is never fun and can be time-consuming.
- Don’t let the Citristrip dry. It worked best when it started to bubble but was still wet.
- Using mineral spirits helps remove excess residue and leftover gel stains.
- Change your sanding pads as soon as necessary.
- We used 80 grit and 120 grit, and then finished our wood with 220 grit sandpaper.

Tutorial FAQs

Stay tuned to see how we added a white transparent layer to help create a driftwood appearance on our vanity makeover.
Follow us on Pinterest, YouTube or Facebook for more DIY inspiration!
budget bathroom ideas
More Bathroom Inspo
Makeovering your bathroom doesn’t have to be expensive. Check out some of our favorite bathroom DIY projects here.
Related DIYs
- 31+ Cool Repurposed Furniture Ideas
- 16 Modern Bathroom Vanity Makeover Ideas
- Countertop Colors That Go With Oak Cabinets
We can’t wait to continue working in this space to create a unique bathroom for our family.
If you like this tutorial, please give it 5 stars below 🤩🤩🤩🤩🤩. Your support helps us continue to provide unique and budget-friendly DIYs.
How To Remove Gel Stain From Wood

Equipment
- Old Plastic Container or Cup
- Rubber Gloves
- Plastic Putty Knife
- Steel Wool or Scothbrite Pad
- Drop cloths, plastic coverings etc.
Supplies
- Paint Stripper*
- Mineral Spirits
- Sand Paper-varying grits
Instructions
- Take the drawers and doors out of the vanity and place them outside.
- Cover the floors – we used drop cloths but then also added plastic bags on top so we could just throw those away.
- Tape out any areas you don’t want to get paint stripper on.
- Apply a thick layer of paint stripper with a cheap paint brush.
- Let it sit for 10-15 minutes before starting to scrap.
- Carefully begin scraping the gel stain off with a plastic putty knife.
- Have a container nearby to put the excess material in. Continue working and scraping until you have removed some of the gel stain.
- While you will get some areas to really come over, you must repeat the covering, letting it sit and scraping at least one or two more times.
- Wear gloves and apply mineral spirits to steel wool or rough sponge. Rub residue and leftover gel stain to hlep clean your surface.
- If needed, sand your wood for best results. We used 80-grit followed by 120-grit sandpaper by hand to remove stubborn areas.
Notes
- You may be able to get most of the gel stain off with just the stripper.
- If needed use a painter’s tool to help remove the gel stain. Be careful not to damage your wood.
- You will need to repeat using the paint stripper at least 2 times, if not 3.
- Don’t let the paint stripper dry on your wood. It needs to be wet to work.
Honey oak to “driftwood” – Wow just Wow. Thank you for the answer to an issue that had me stumped!
Hi Amy! I am glad you like how what we did to our oak cabinets. Good luck with your makeover.