Creative DIY Children’s Dress-Up Wardrobe: Trash To Treasure
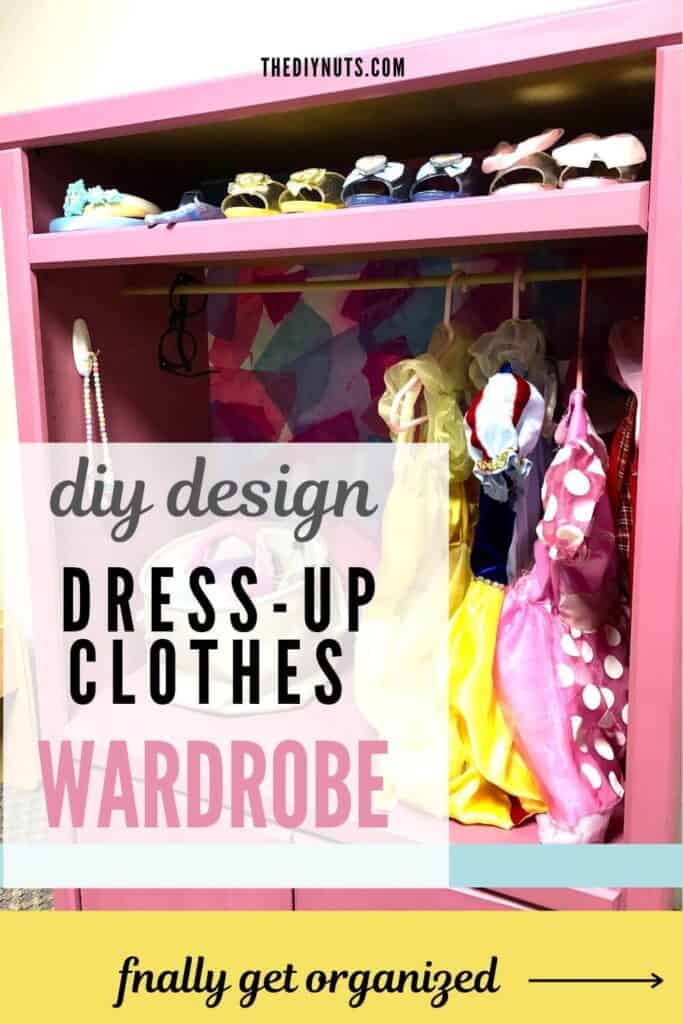
Have you ever just been driving somewhere and instantly got an idea? That is exactly what happened with this old entertainment center. Learn how we used DIY chalk paint to make a DIY dress-up clothes storage solution.

*Disclosure: I only recommend products I would use myself and all opinions expressed here are our own. This post may contain affiliate links that at no additional cost to you, I may earn a small commission. Read our full privacy policy.
Toys and clothes can slowly take over spaces in your home. The dress-up clothes storage ideas (bins, trunks, and hanging in the dress-up closets) just were not cutting it for me.
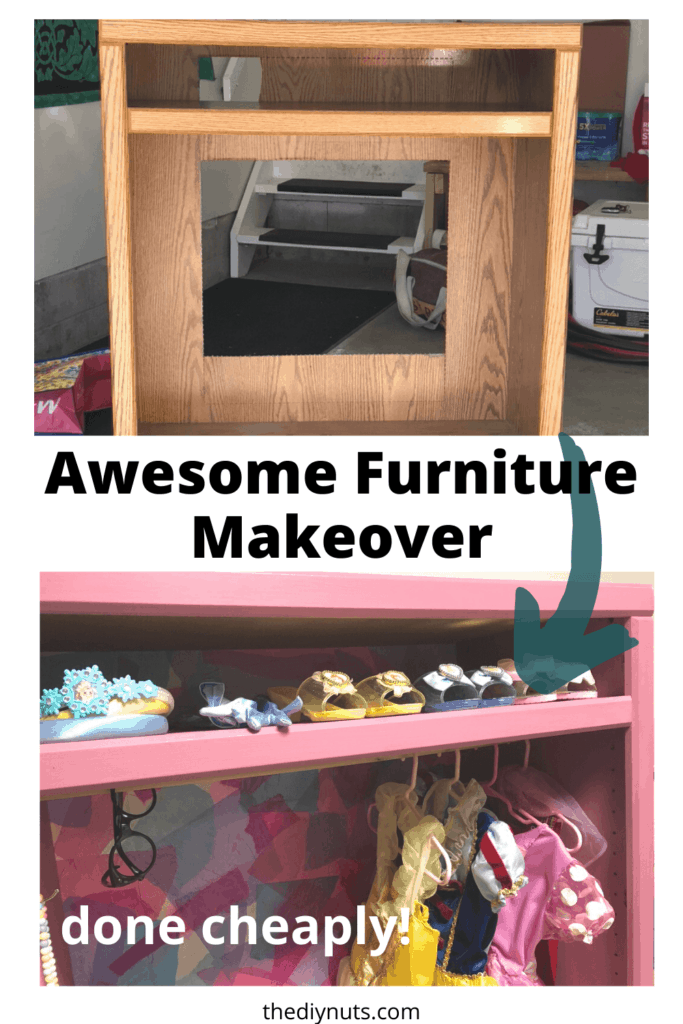
The “Before” Laminate Cabinet
Literally, this old TV cabinet was sitting at the end of a driveway in my neighborhood, screaming for me to pick it up. There are so many good repurposed furniture ideas for a TV cabinet, but I knew I had the perfect one for our family.
As I drove by it, I instantly thought about making a DIY children’s wardrobe for my daughter.
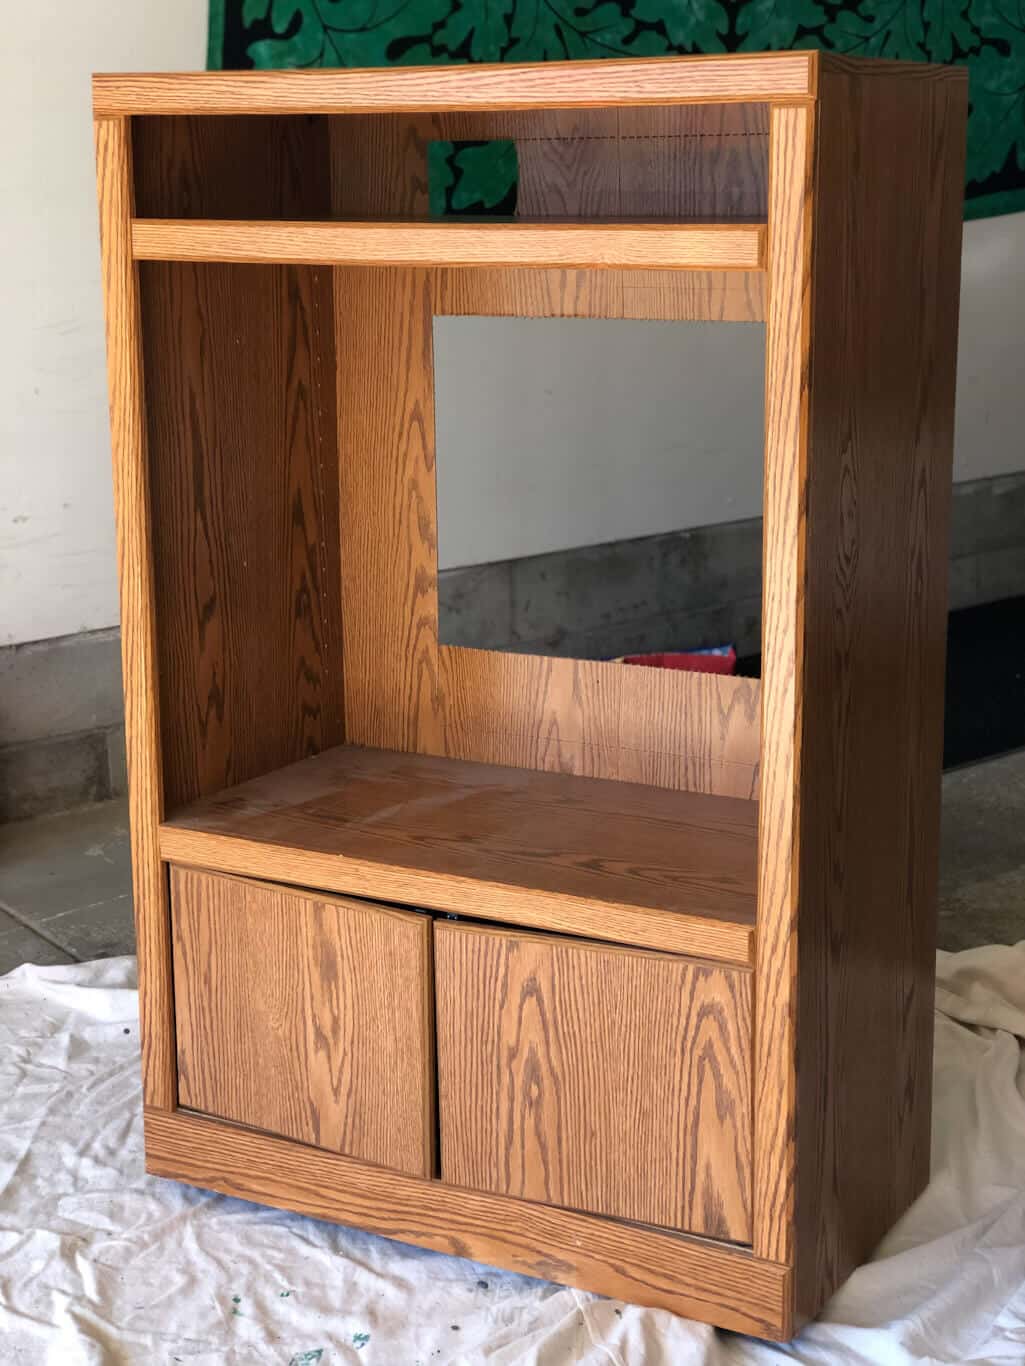
PRO TIP: Before taking free items from Facebook groups or at the end of people’s driveways (like we did for this playhouse as well) make sure that it is sturdy and worth your time. We have been so lucky that we only redone old furniture pieces worth redoing.
My husband was a little skeptical about taking this, but it was sturdy, even if it was made of particleboard. Because I knew this DIY children’s dress-up wardrobe would only be in our lives for the next couple of years, I wasn’t worried about having a solid wood furniture piece that I wanted to last for years…
And as I told my husband, it is FREE and I have an idea so you better just go get it.
Erin
Kid’s Dress-up Storage Idea and Plan
- Add a spring rod for hanging dress-up outfits (stay tuned, we ended up doing something a little different)
- Create a fun and patterned backdrop for this DIY Armoire
- Create DIY jewelry & accessory holders
- Paint it a fun color (most likely DIY chalk paint because who wants to prime anything)
- Create some sort of dress-up organization in the bottom cabinets (may involve DIY storage baskets for all the dress-up shoes, crowns, and capes)
Other Design Considerations
- Should I add anything to the outside?
- Extra dress-up clothes hooks?
- Should I add a small mirror inside the dress-up closet?
- How would I attach anything to particle board backing?
Just start creating and see what happens! You don’t have much to lose when you are repurposing furniture (especially free furniture).
Easiest Way To Paint Laminate Furniture
Chalk paint is known for adhering to many surfaces. Using chalk paint to add color to this old cabinet was the perfect solution.
Before painting, prep the surface by wiping off the furniture. You can also use a deglosser to help clean before any furniture makeover.
Decide On Color
First, you have to decide on the color you want. You can choose to mix or buy your own paint color.
I ended up mixing old paint that we had to get a color that I thought would work.
Con To Mixing Your Paint Color
The only thing is that you have to make sure you have enough of that color. You will not be able to just go to the store and order it as easily.
I have even mixed paints to paint small rooms (like the bedroom in our basement) just so we don’t waste paint and money.
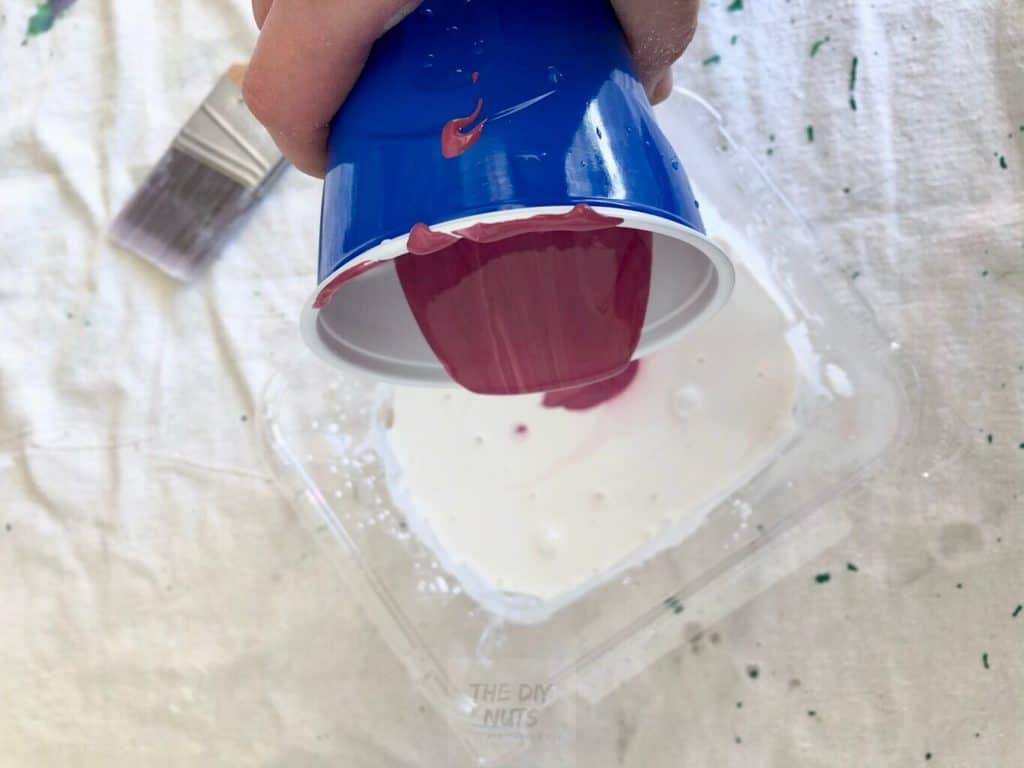
For this repurposed cabinet, I mixed different types of paint. This works because you end up adding the plaster to change the sheen or surface quality to more matte.
Therefore, mixing an old red enamel door paint and a light gray color sample gave me a nice rosy color that was perfect for this dress-up closet.
Our DIY Kid Dress-Up Wardrobe Tutorial
You can see how I have used this DIY chalk paint to redo other furniture pieces in our house.
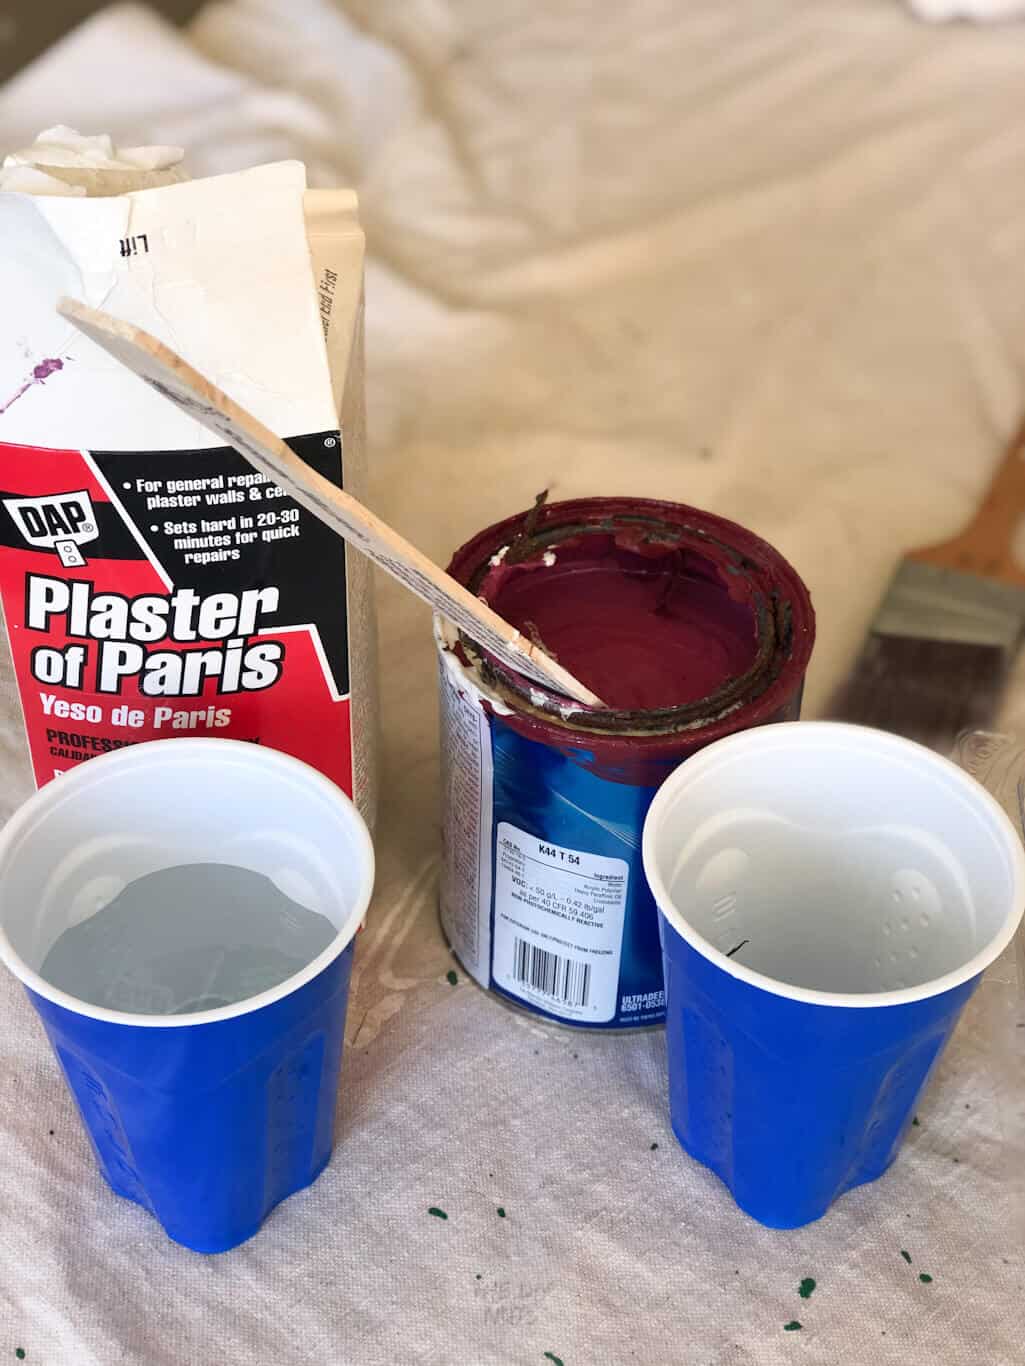
Step 1: Mix Chalk Paint
Mix the ⅓ plaster with ⅓ (or a little less) water in a larger container (an old spinach container was the perfect paint holder).
Pour water in first and then add plaster slowly. Use the other end of the brush to stir. Work to get all lumps out.
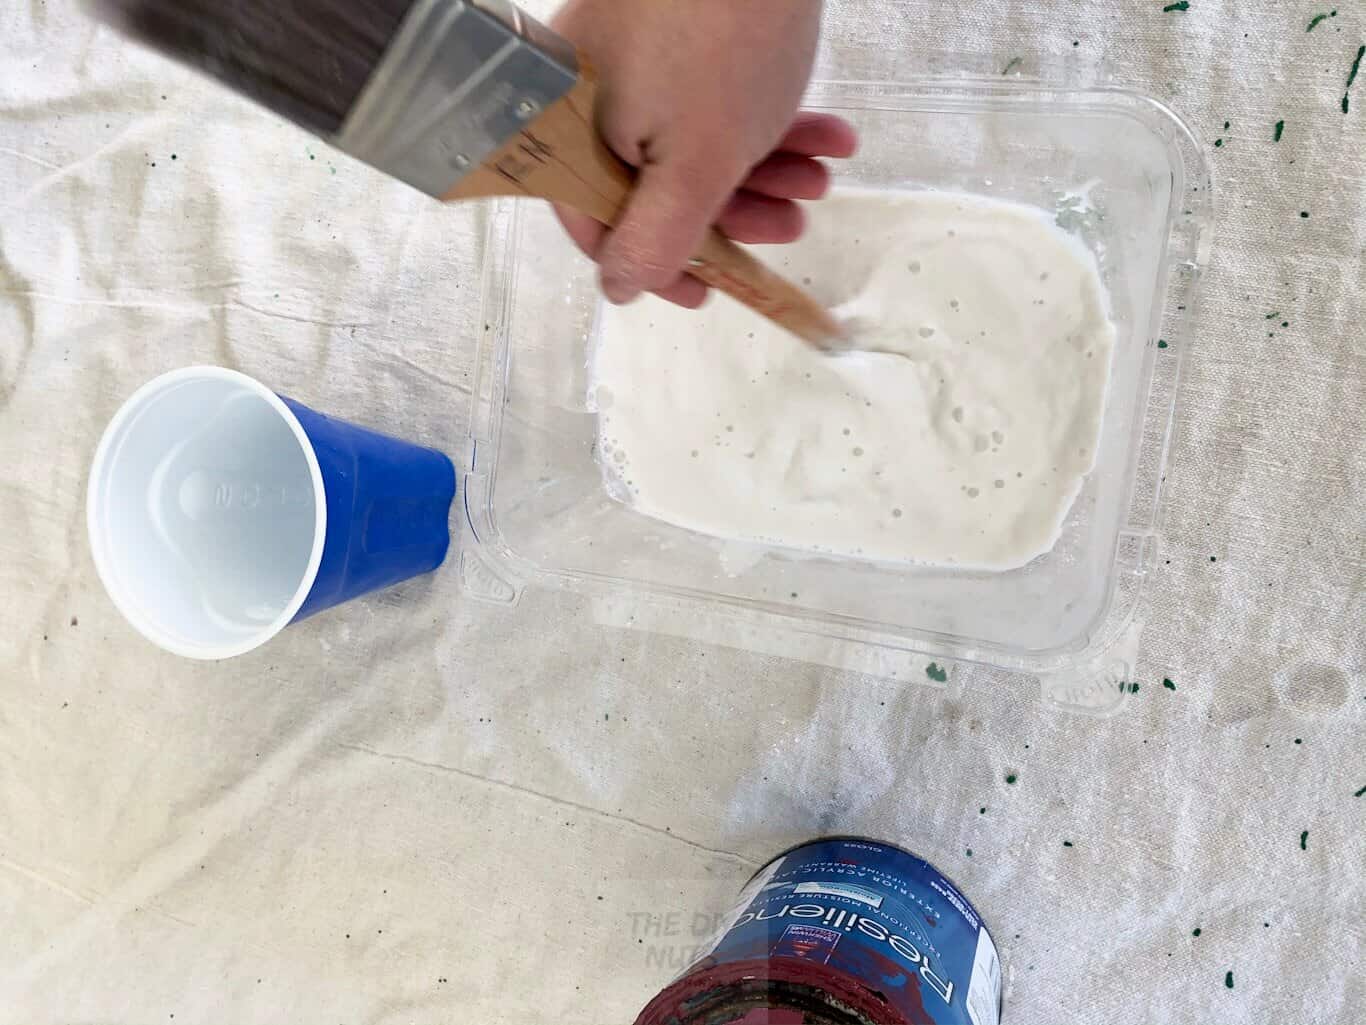
Slowly mix in ⅓ paint (or a little more) to the mixture.
Once it is completely stirred together, start painting.
PRO TIP: Mark a cup or another container with a line. This way, you do not have to ruin anything like a nice measuring cup. This marked container will act as a guide, and you put equal parts in.
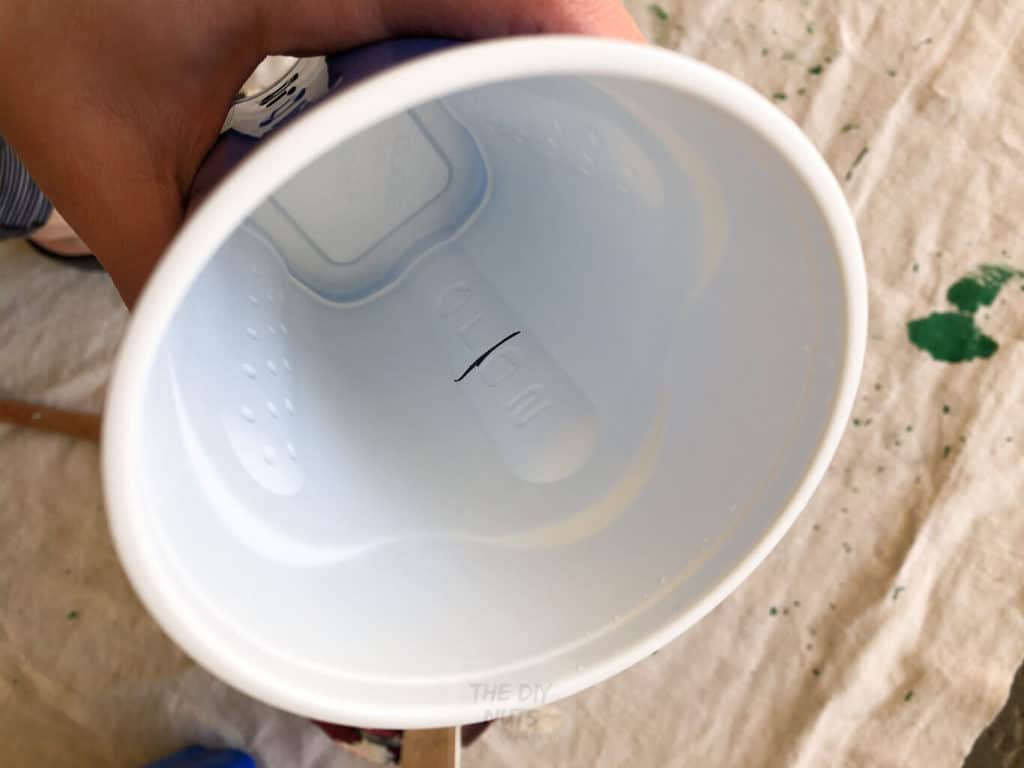
Try to get the measuring right the first time. I know this is not an exact science, but a little less than ⅓ water will help your paint be more opaque.
You may need to experiment with the ratios of your chalk paint recipe depending on the paint you are using.
Step 2: Paint 2 or 3 coats of DIY chalk paint
We ended up needing 2 coats of homemade chalk paint to help cover the wood grain of the particleboard.

Design the Back of a DIY Children’s Wardrobe
This is where my creativity and willingness to fail came into play. I considered a lot of different ways to remake the back particleboard into a fun dress-up station for my daughter.
Ideas for the Back of DIY Dress-Up Closet
- Find a fun cloth remnant to hang on the back
- Create a large painting using acrylic paint.
- Use a fun collage technique that young children love to create my own back of the closet.
- Use fun marble or other awesome contact paper to modernize the back of the cabinet.
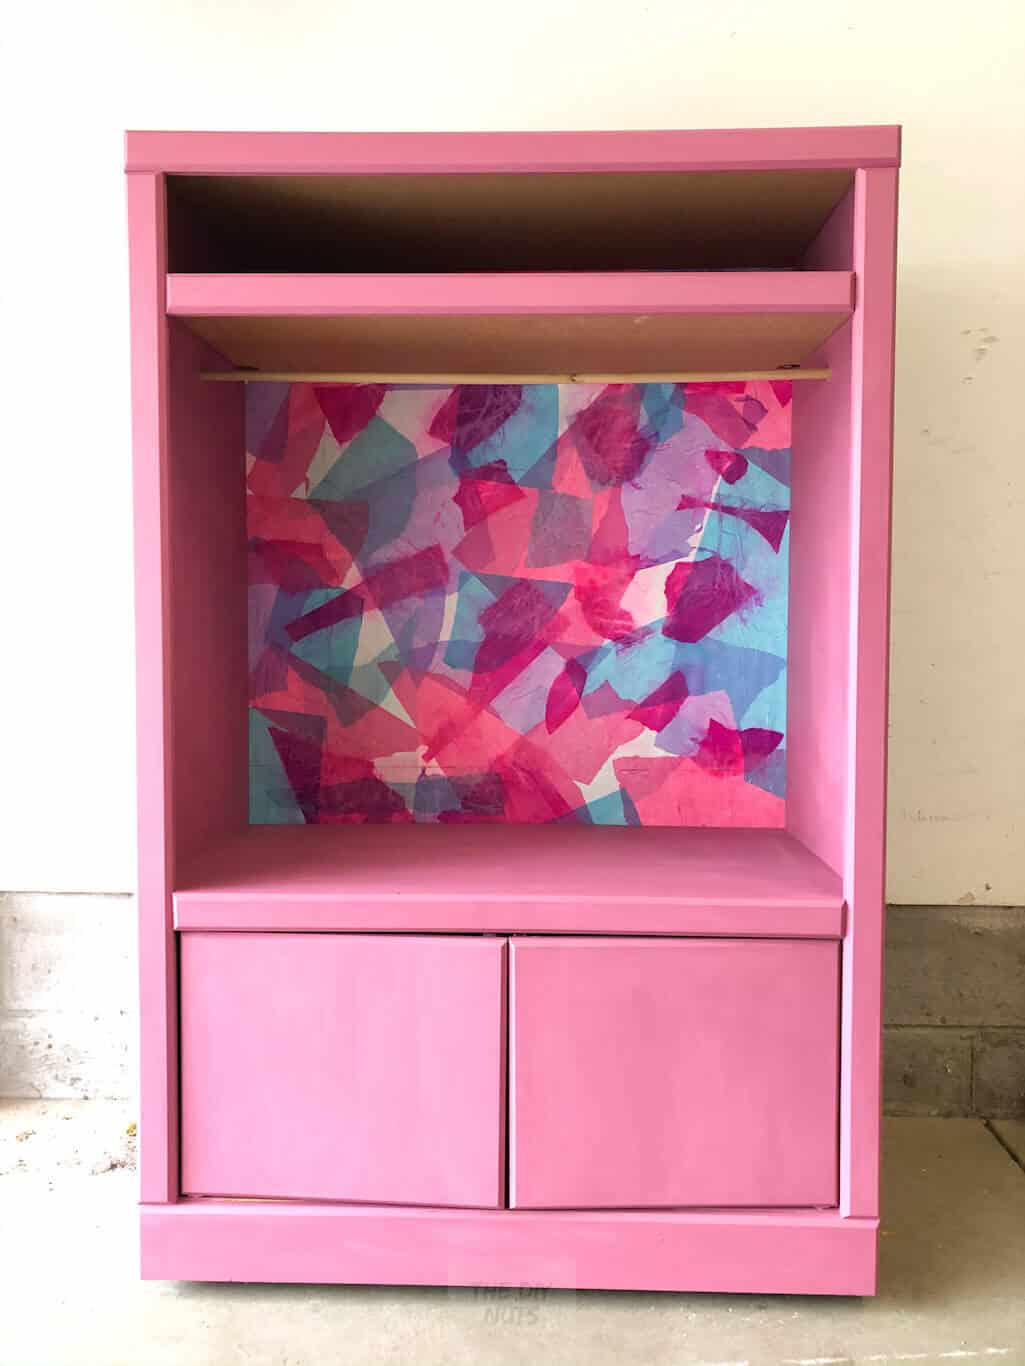
After I typed this out, I know that it doesn’t seem like the most logical choice. However, repurposing the back of the old entertainment center with a collage technique would add a unique element to this children’s closet design!
Read More: See how we used contact paper to completely repurpose an UGLY filing cabinet!
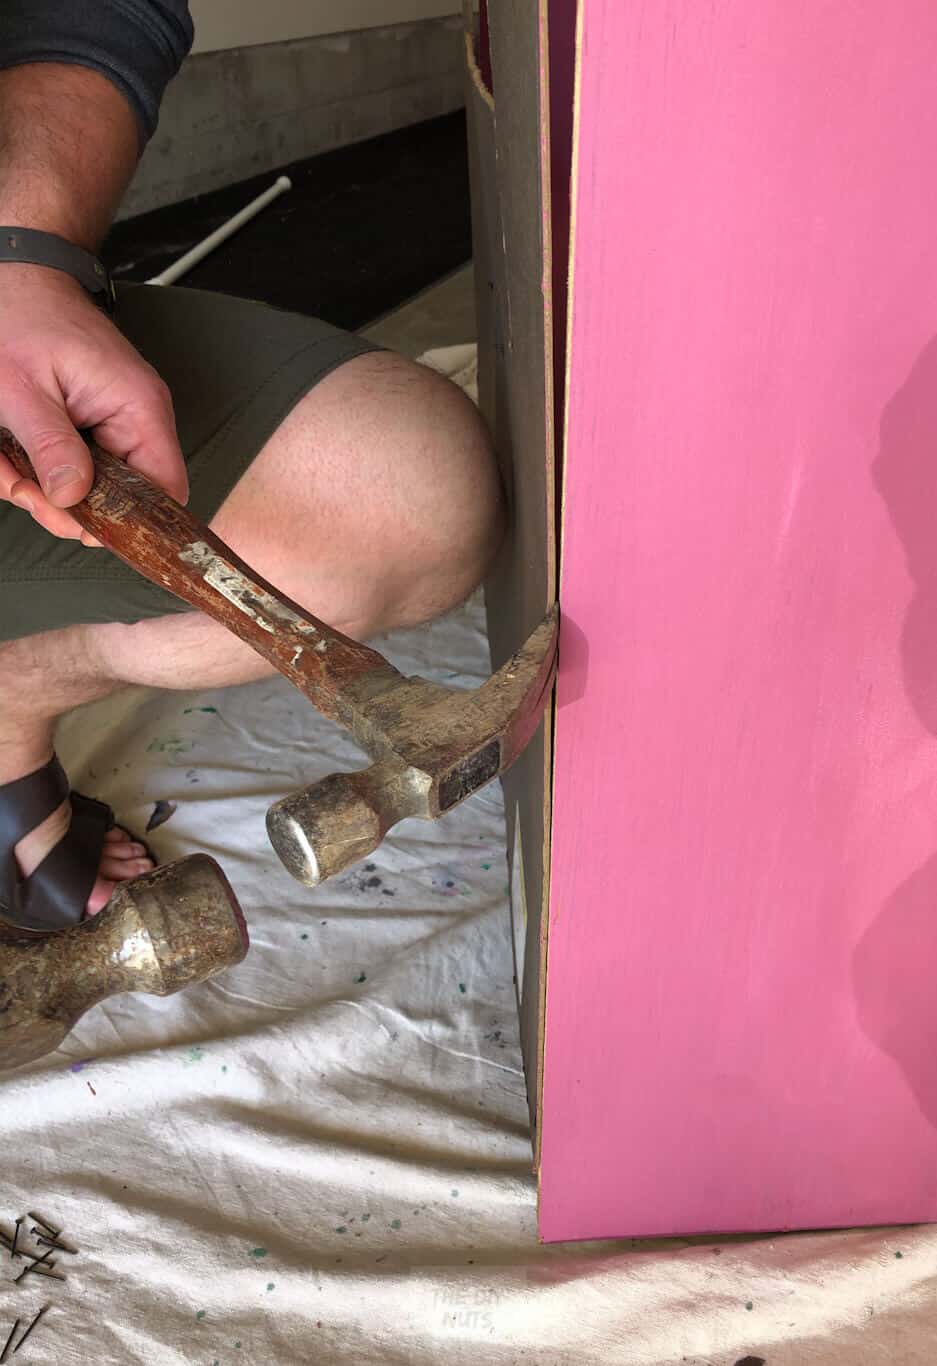
Step 3: Remove Backing
Remove the old backing board. This one was simply tacked in; however, we had to use a hammer to remove it.
Make sure to save the nails in a bag because you will be using them to put them back on in the end.
Step 4: Create The Back Of The Dress-Up Wardrobe
Create a white flat surface on top of the old backing.
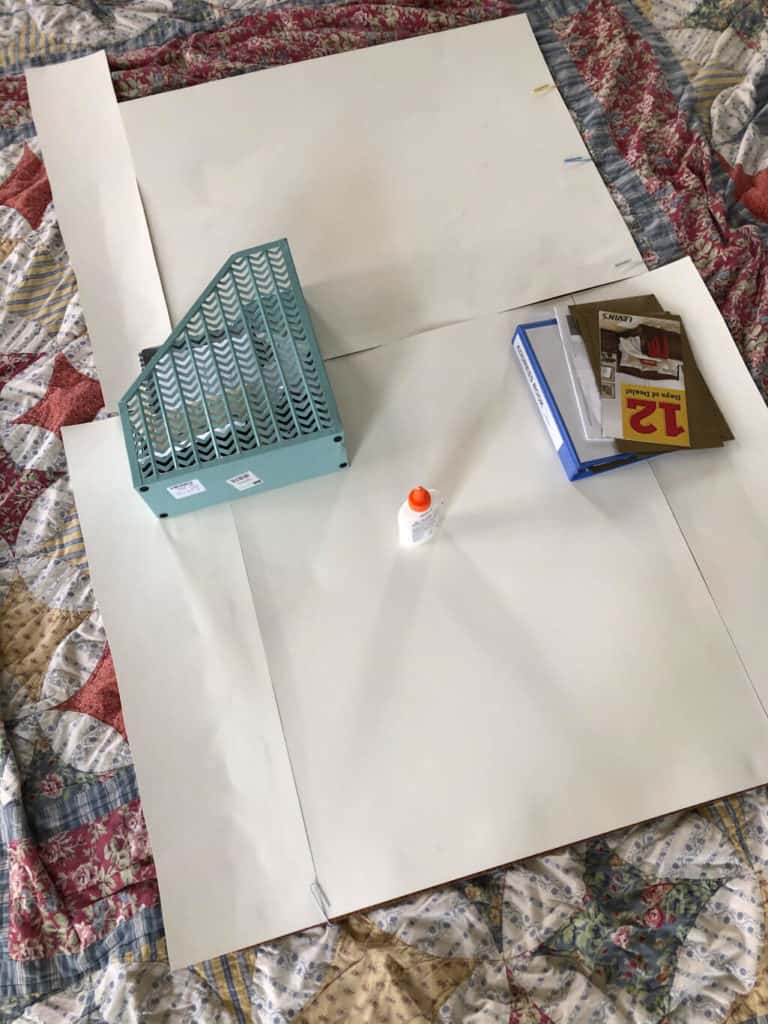
Simply glue the white tagboard with my favorite regular glue, then go back with a glue gun to make the surface as flat as possible.
The seams from the tagboard didn’t bother me. The tissue paper helped hide the seams when the collage was all done.
It would have been nice to have a cordless glue gun. I think I may need to invest in one soon!
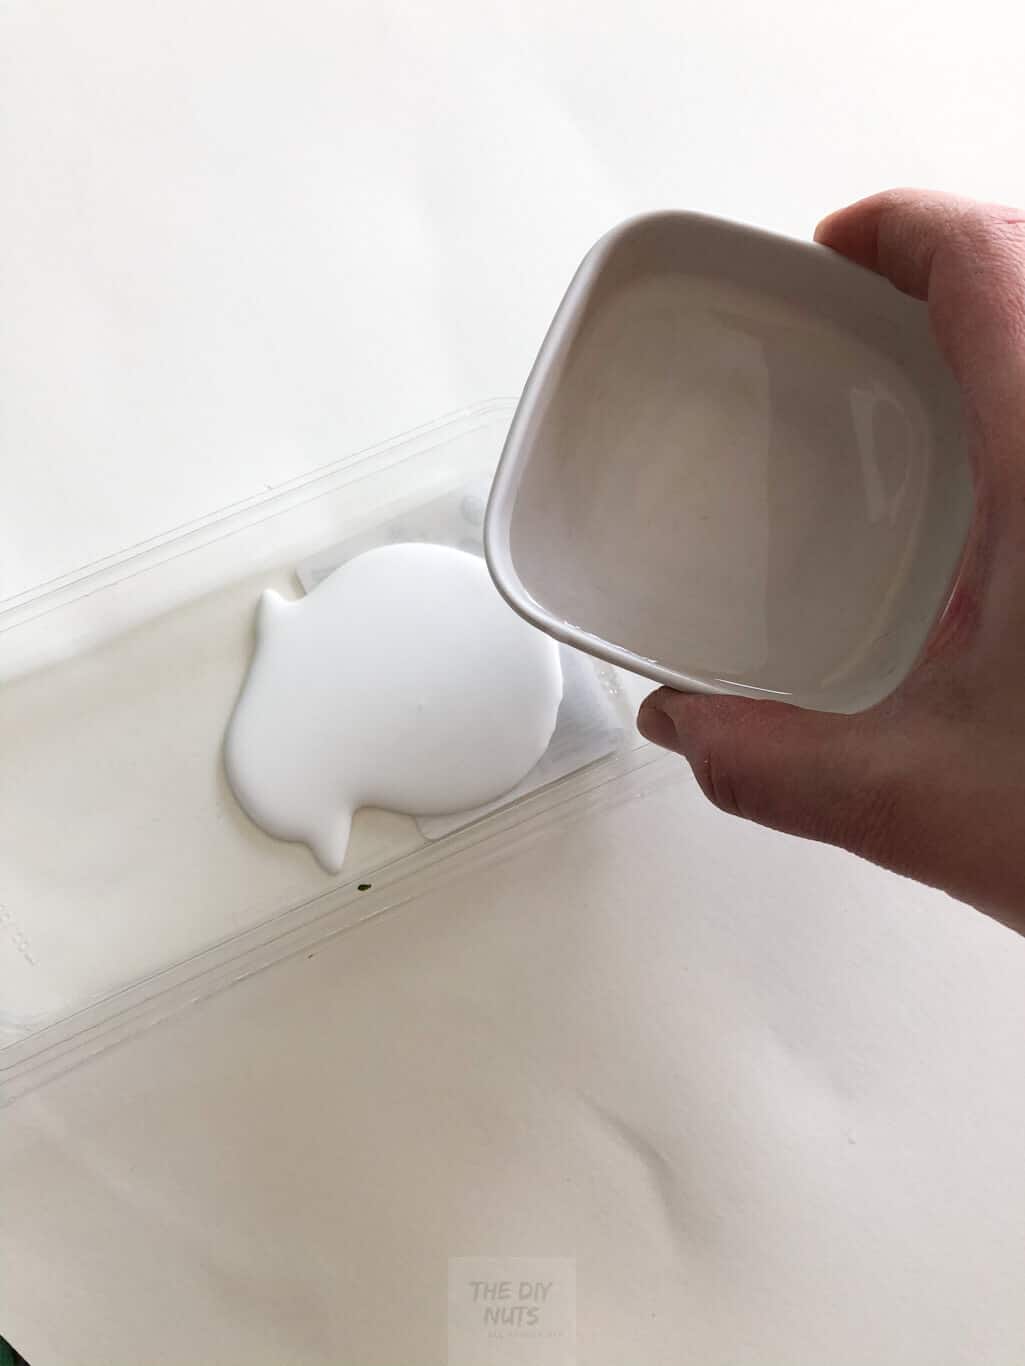
Step 5: Make Collage Glue
Mix 1/2 part glue and 1/2 part water. Again, I used an old plastic food container to mix the glue in.
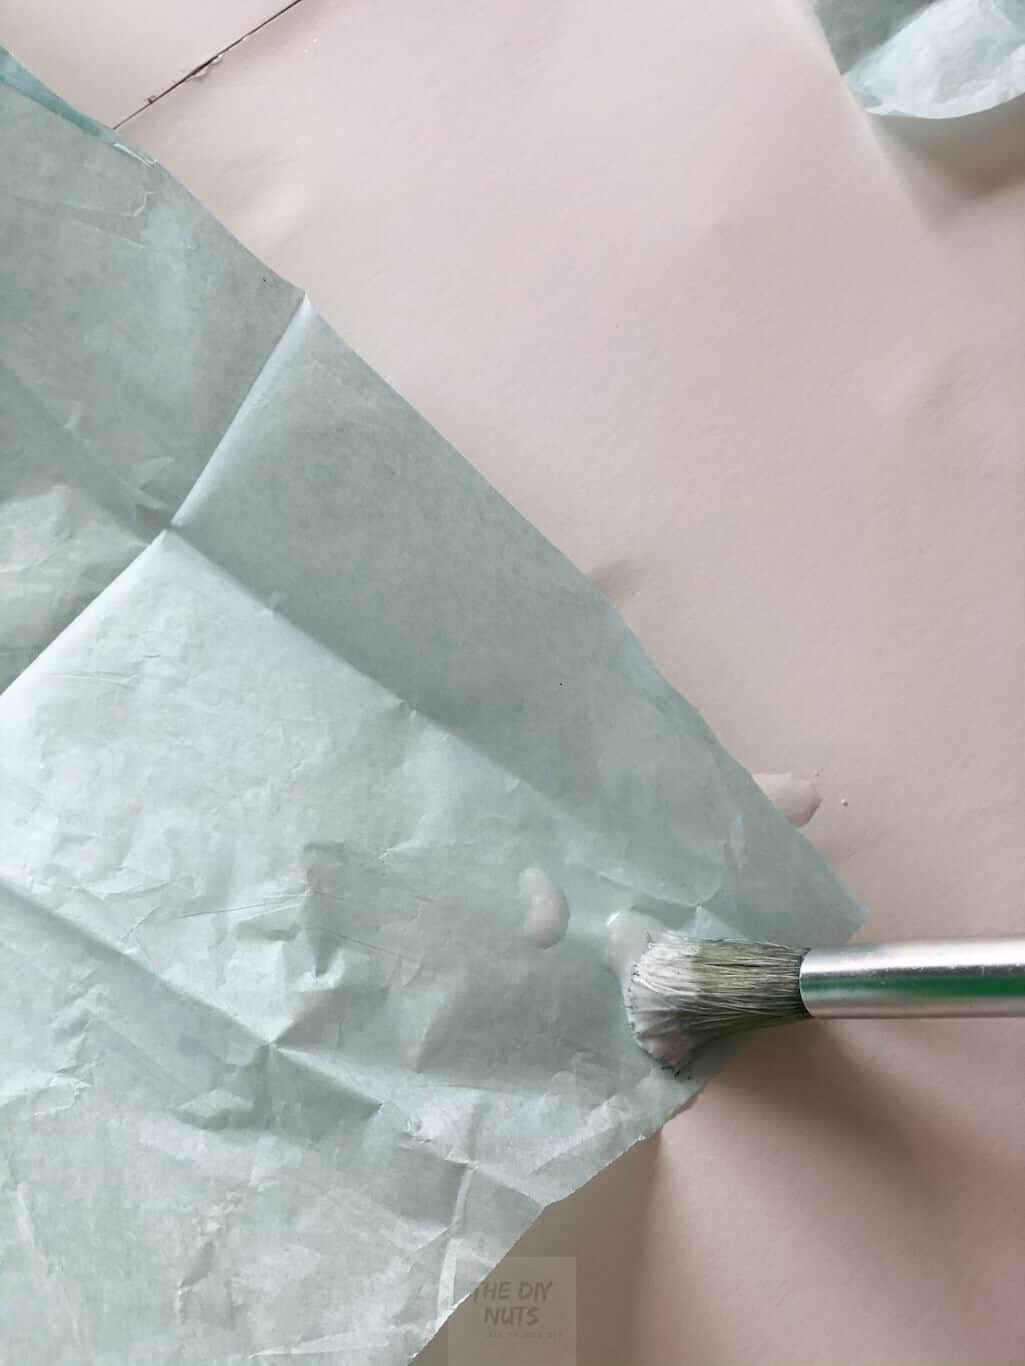
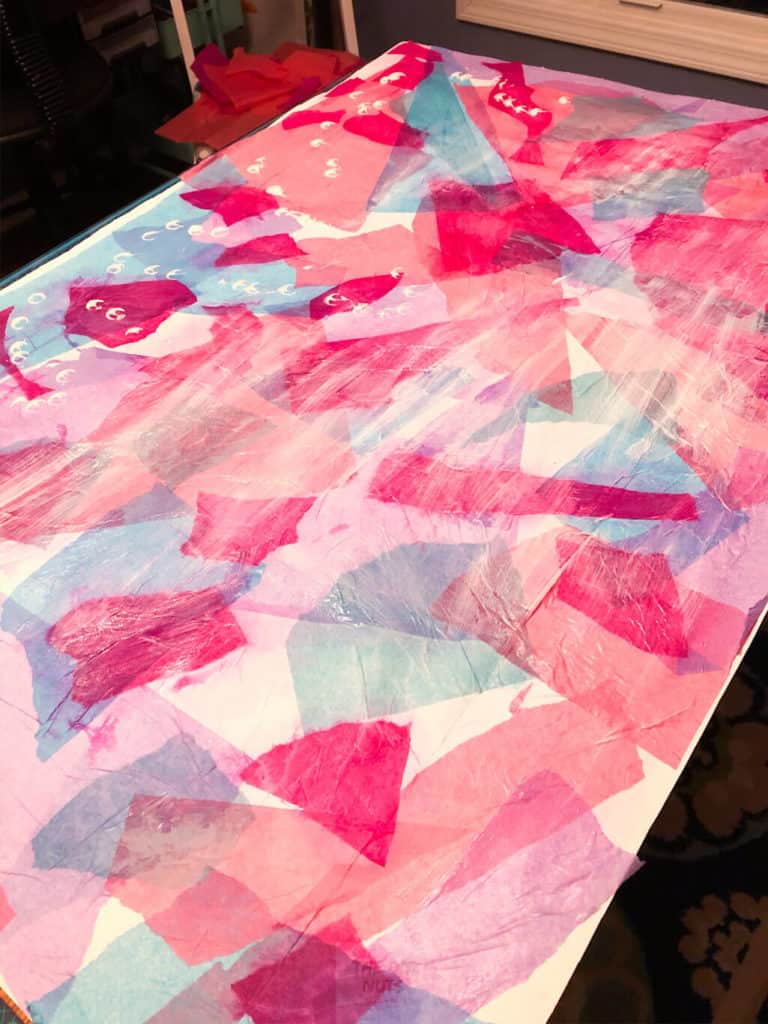
Step 6: Add Tissue Paper
Paint the glue mixture onto the tissue paper. Please note that when choosing tissue paper, you need to decide whether you want your colors to blend more or bleed into each other. If you want blended colors, try this method with bleeding tissue paper.
Use an old brush and simply cover the whole piece of tissue paper. Overlapping tissue paper can create a really fun look.
When I first started making the collaged backdrop, I used regular old tissue paper I had at home. Then I thought it needed a little extra pop of pink to match my chalk-painted exterior, so I ripped some shapes using bleeding tissue paper.
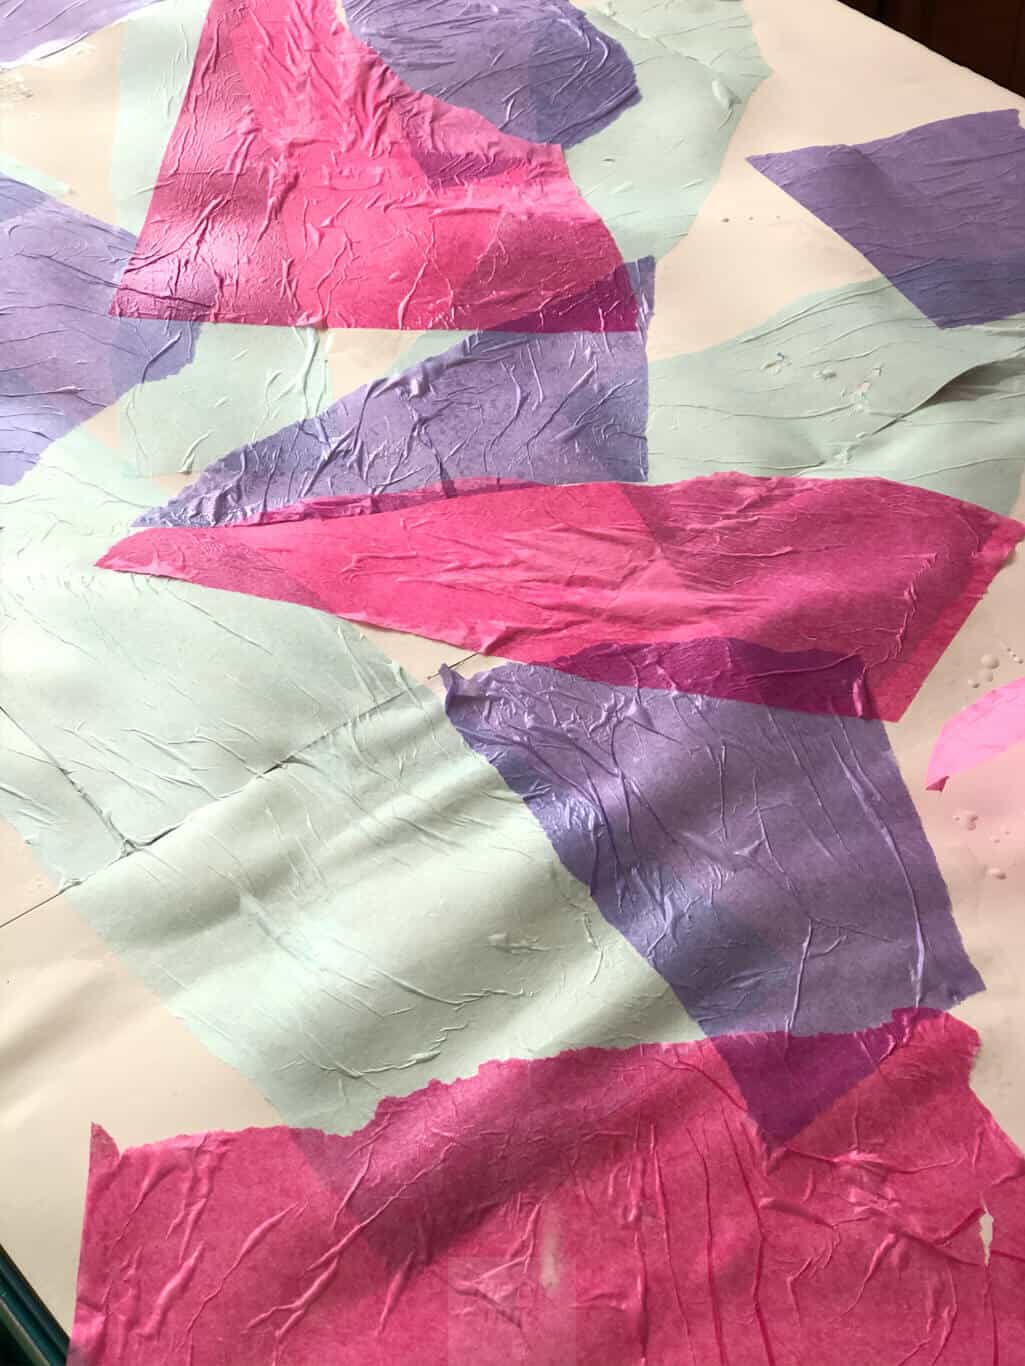
If you have never experimented with bleeding tissue paper, you should. Kids and adults can get some really amazing collages for all types of projects!
Step 7: Seal The Background With Mod Podge.
This was an extra step I took to ensure the backing of my dress-up station would last. I ended up using this Mod Podge because I had free samples. It was great for a paper collage.
Step 8: Put It All Back Together
Attach the backing board back on
Use the nails from when you took the backing off, line up the board and hammer back in the backing board.
Step 9: Add A Doll Rod
Add a doll rod or spring rod to your wardrobe. Under the shelf, we cut a thicker doll rod, drilled even holes on the side, and slid the rod through.
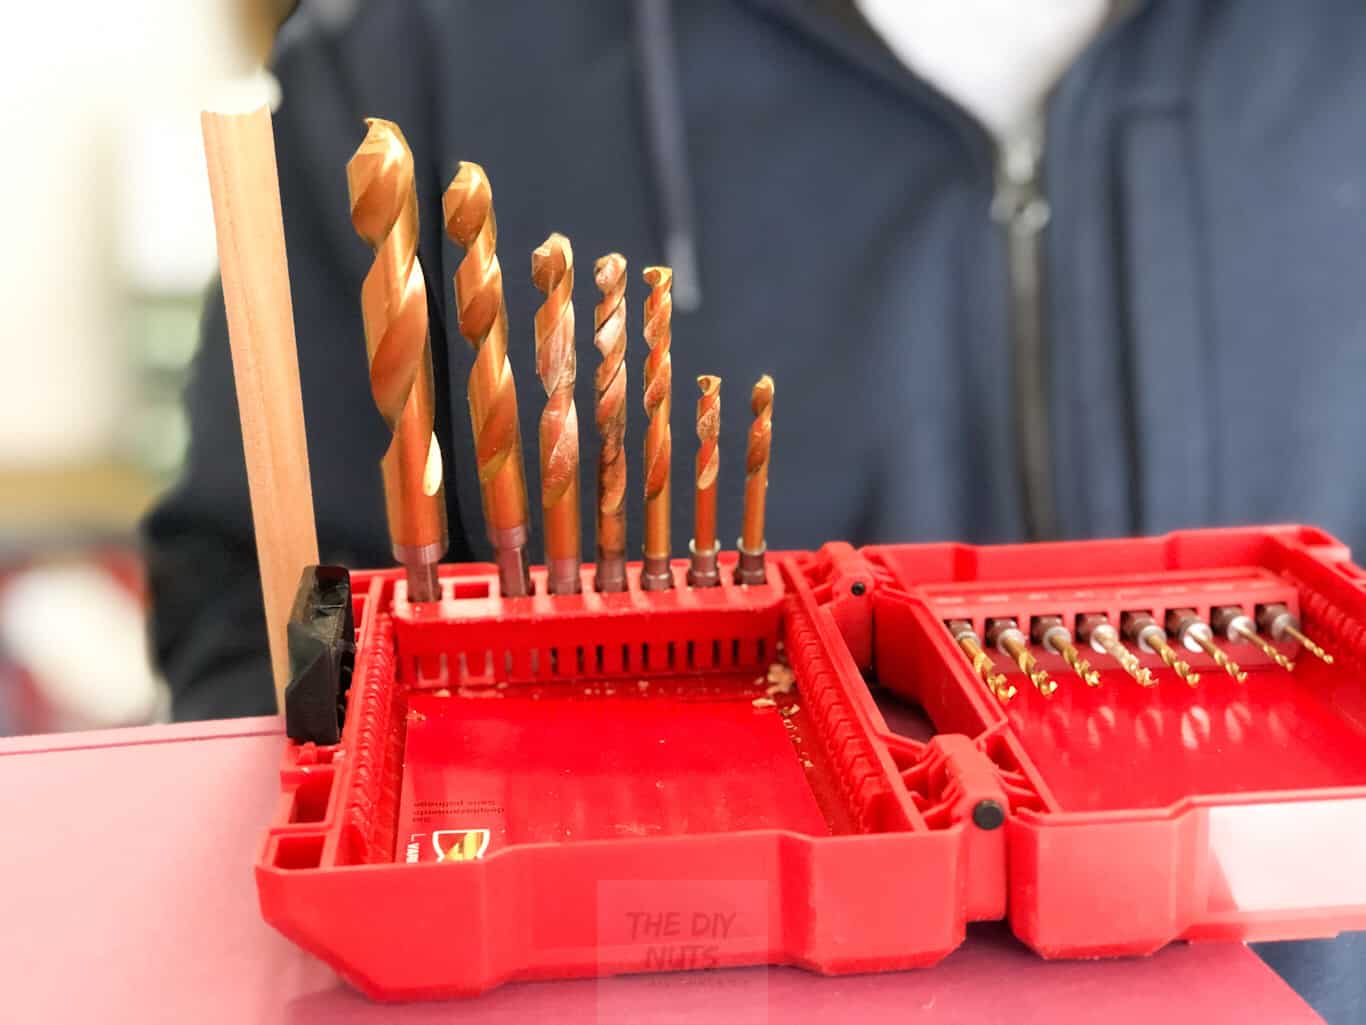
Using the right size drill bit made this much sturdier than a spring rod. However, if you don’t own a drill, I am sure a spring rod would be great.
Step 10: Add Extra Storage or Accessories
In the future, we plan on making DIY jewelry holders that will attach to the inside of the closet. I currently have a small hook attached and hung a necklace. My daughter loved this and asked for more hooks.
I am still looking for the perfect storage containers or fun baskets to add to the inside, but I may end up having to make cloth storage boxes soon!
Follow us on Pinterest, YouTube or Facebook for more DIY inspiration!
How-To FAQs
In retrospect, it probably would have been easier to remove this before I used the chalk paint. At the time, I wasn’t sure I was taking the whole back off.
I love having a space to put all of the dress-up shoes, clothes, and accessories! My children even help keep it organized because they know that it is their special dress-up clothes storage space. We hope you love our DIY children’s dress-up closet as much as we do, and we hope to inspire you for your next DIY repurposed furniture project!
This turned out so cute! Such a fun way for little ones to get the whole dress up experience!
Hi Kari. Thanks for the kind words. My daughter loves storing her princess dresses and my son stores his superhero outfits in the cabinet below. It works out great because they both have separate dress-up clothes storage.