How to Build DIY Closet Shelves
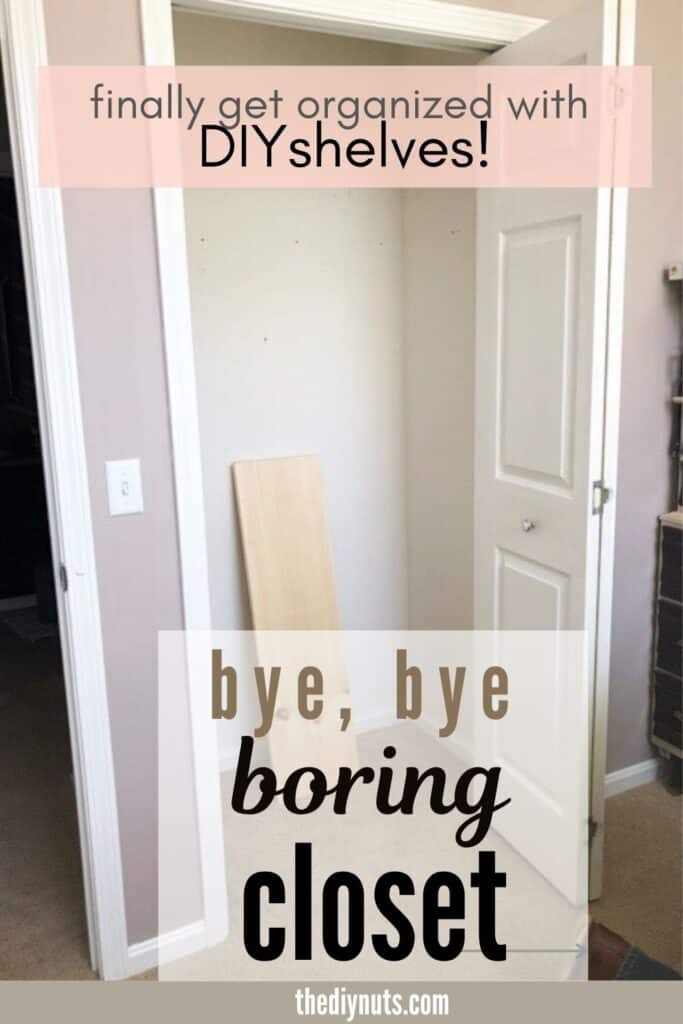

Adding wooden closet shelves is the perfect way to get a custom closet organizer that works for your needs. Here is our step-by-step tutorial to build simple DIY wooden shelves in your closet.
One Closet At A Time
Do you feel more at peace when your house is organized? When life seems to be chaotic, getting organized is always good for my soul.
This DIY shelving project was nice because it allowed us to be creative in a home improvement project while helping this small closet finally get organized!
*Disclosure: I only recommend products I would use myself and all opinions expressed here are our own. This post may contain affiliate links that at no additional cost to you, I may earn a small commission. Read our full privacy policy.
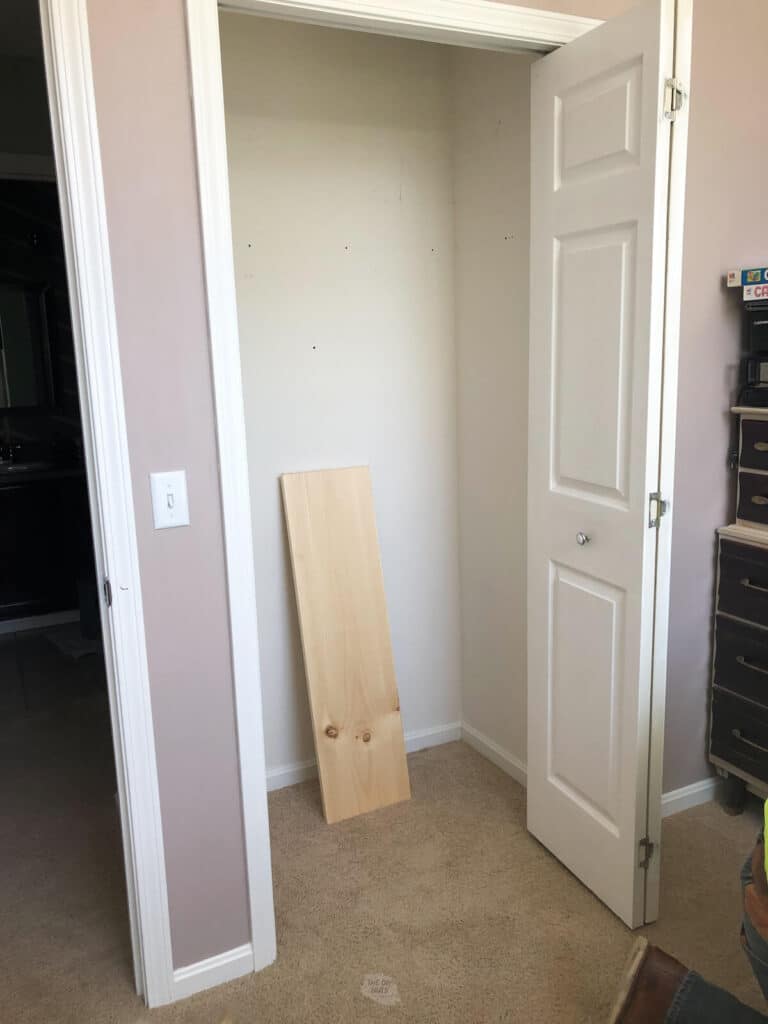
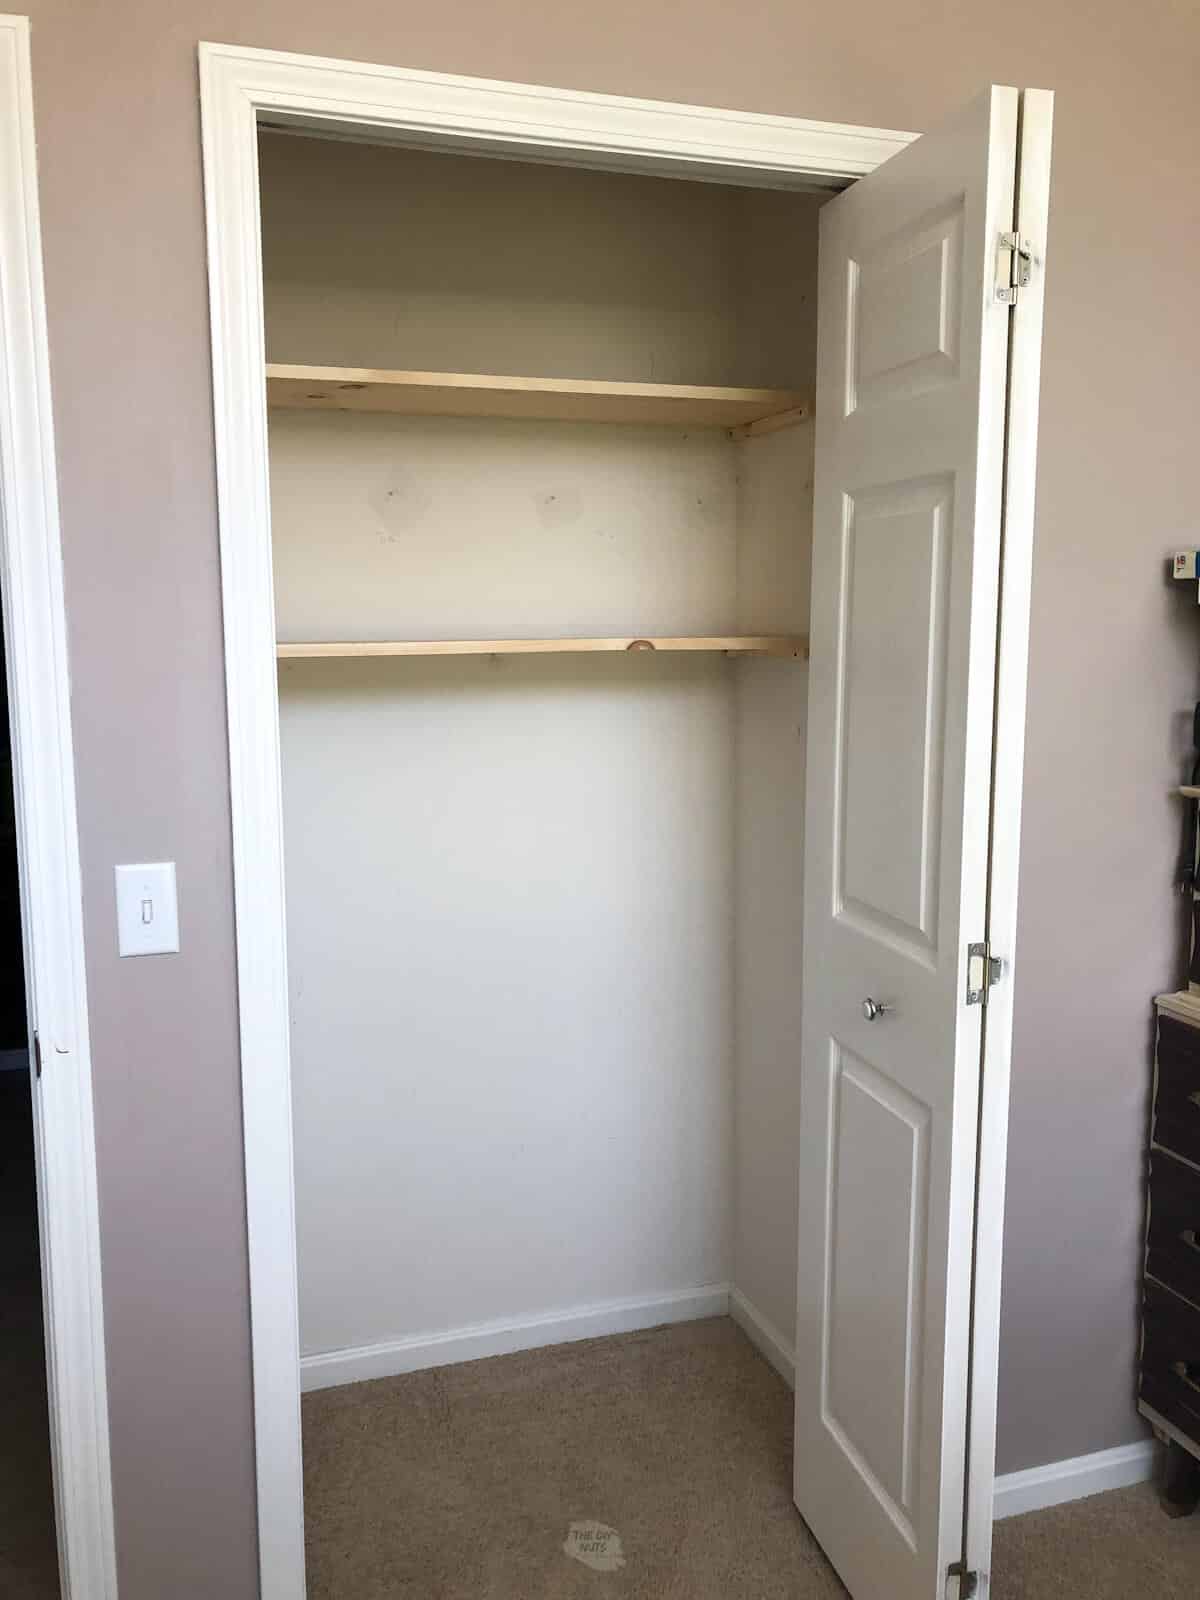
The “Before Unorganized Closet”
Here is a “before” attempt at trying to organize this small closet. I even tried to use a clothes organizer to store the games. It was brilliant (until it wasn’t). The weight of the games was just too much for a simple closet organizer!
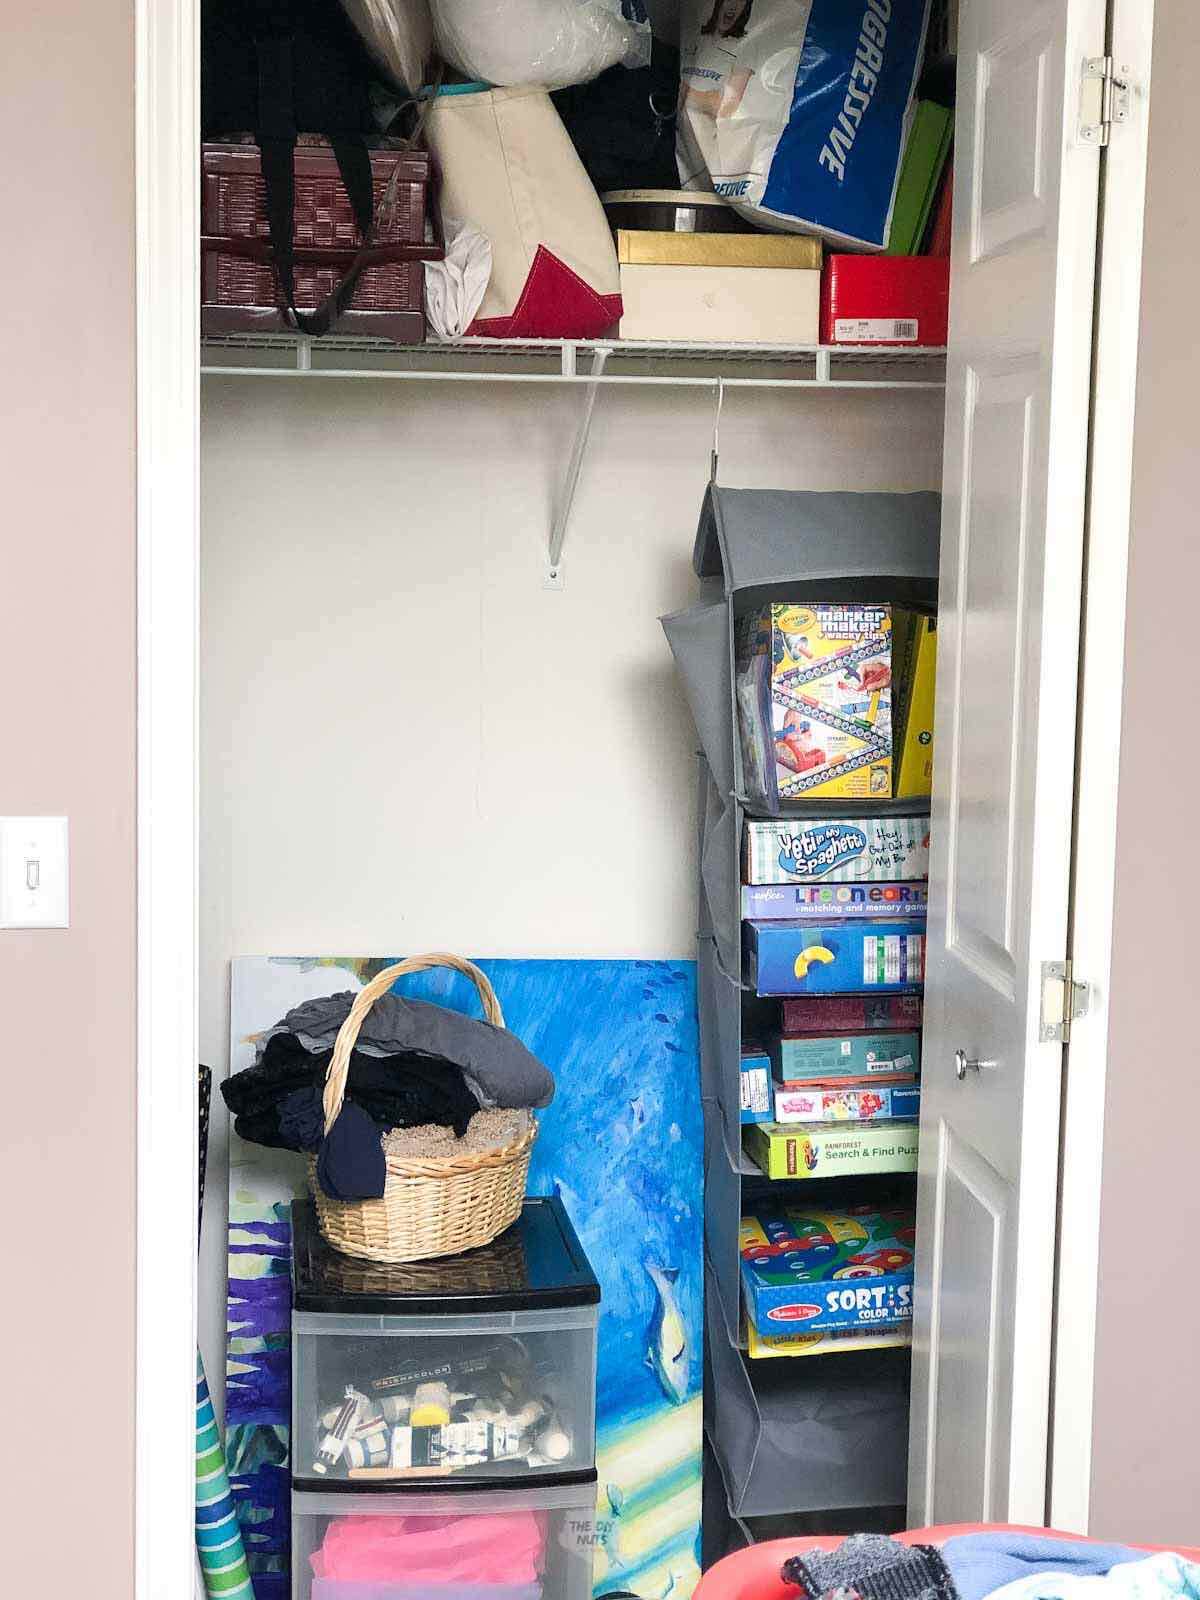
Once that happened, I knew I needed a better and more permanent wooden closet shelving idea.
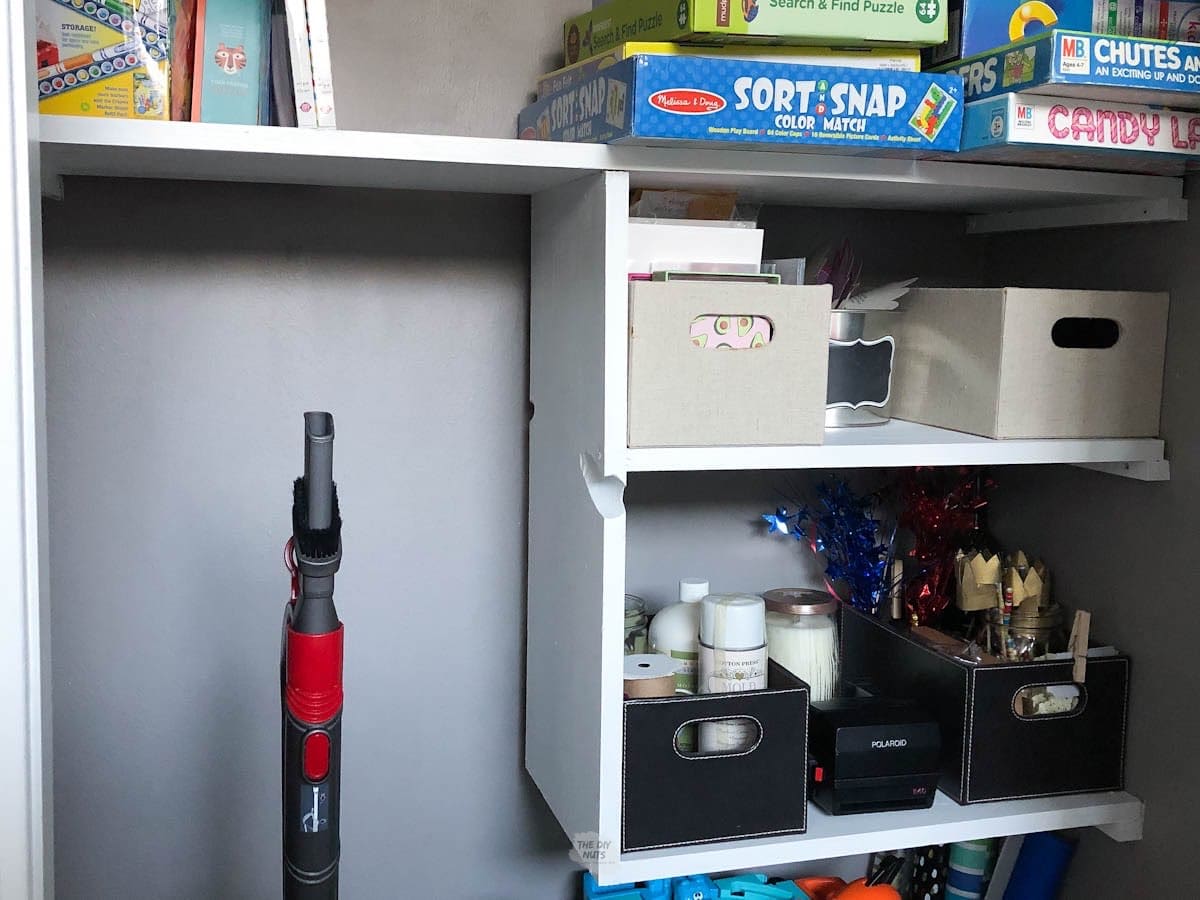
Simple, painted pine wood shelves would certainly help my family organize art supplies, kid’s games and still give us a place for our vacuum.
Reasons To Build Shelves
- Can customize your design
- Wood (like pine or common whitewood) is sturdier and more sag resistant
- Cheaper than having a closet company come out
- More aesthetically pleasing than wire shelving
- Can use different types of brackets if not wanting to build all parts of your closet shelf
Before You Begin
The first thing we had to decide is what would be stored in this closet. While we do use this room as a spare bedroom, no one really currently hangs clothes in this closet.
We did want to factor in that one day, my husband’s mother may stay longer and want to hang a few pieces of clothing. The simple closet organizer design also factored in a place for the vacuum to go.
Need to hang clothes? Add a rod in the spot designated for the vacuum eventually if needed.
In addition to one vertical spot for large items, this design has a variety of shelving heights. It also does not touch the carpet (in case we ever decide to replace it).
You can easily customize this simple closet shelving design idea with various heights to meet your storage needs.
Other Design Considerations
- What will be stored in the closet?
- Do you need to hang clothes?
- What is the height of the items you want to store?
- How many shelves do you need?
- Do you want cubbies or only shelves?
- What color do you want your shelves to be?
Make sure you get the free printable instructions at the end of the post.
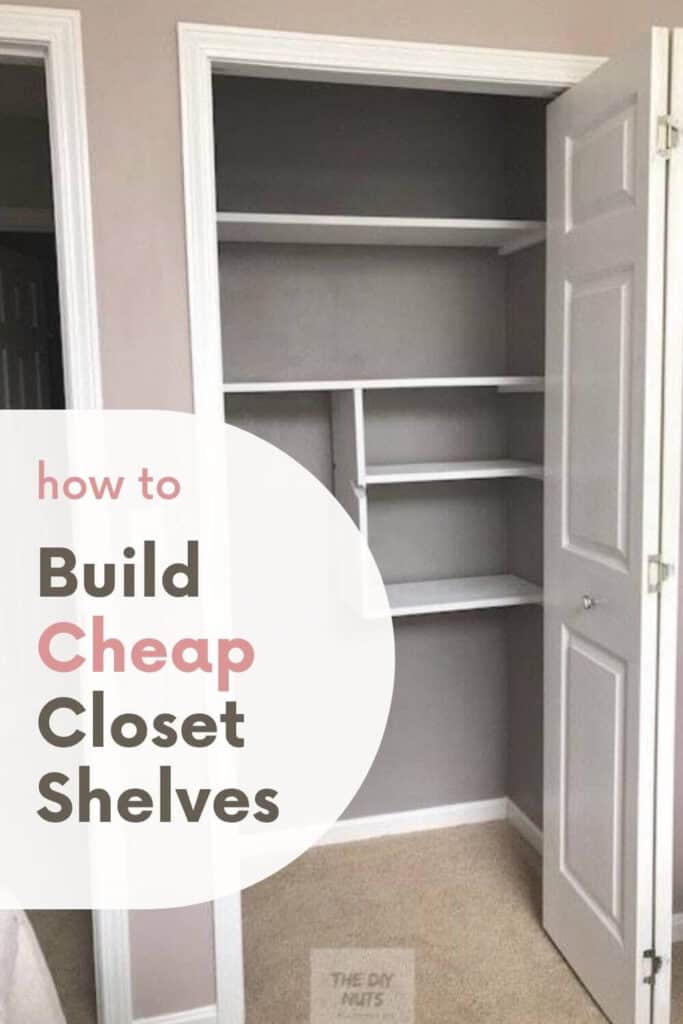
Easy Wooden Closet Shelf Plan
Consider Varying Height Of Shelves
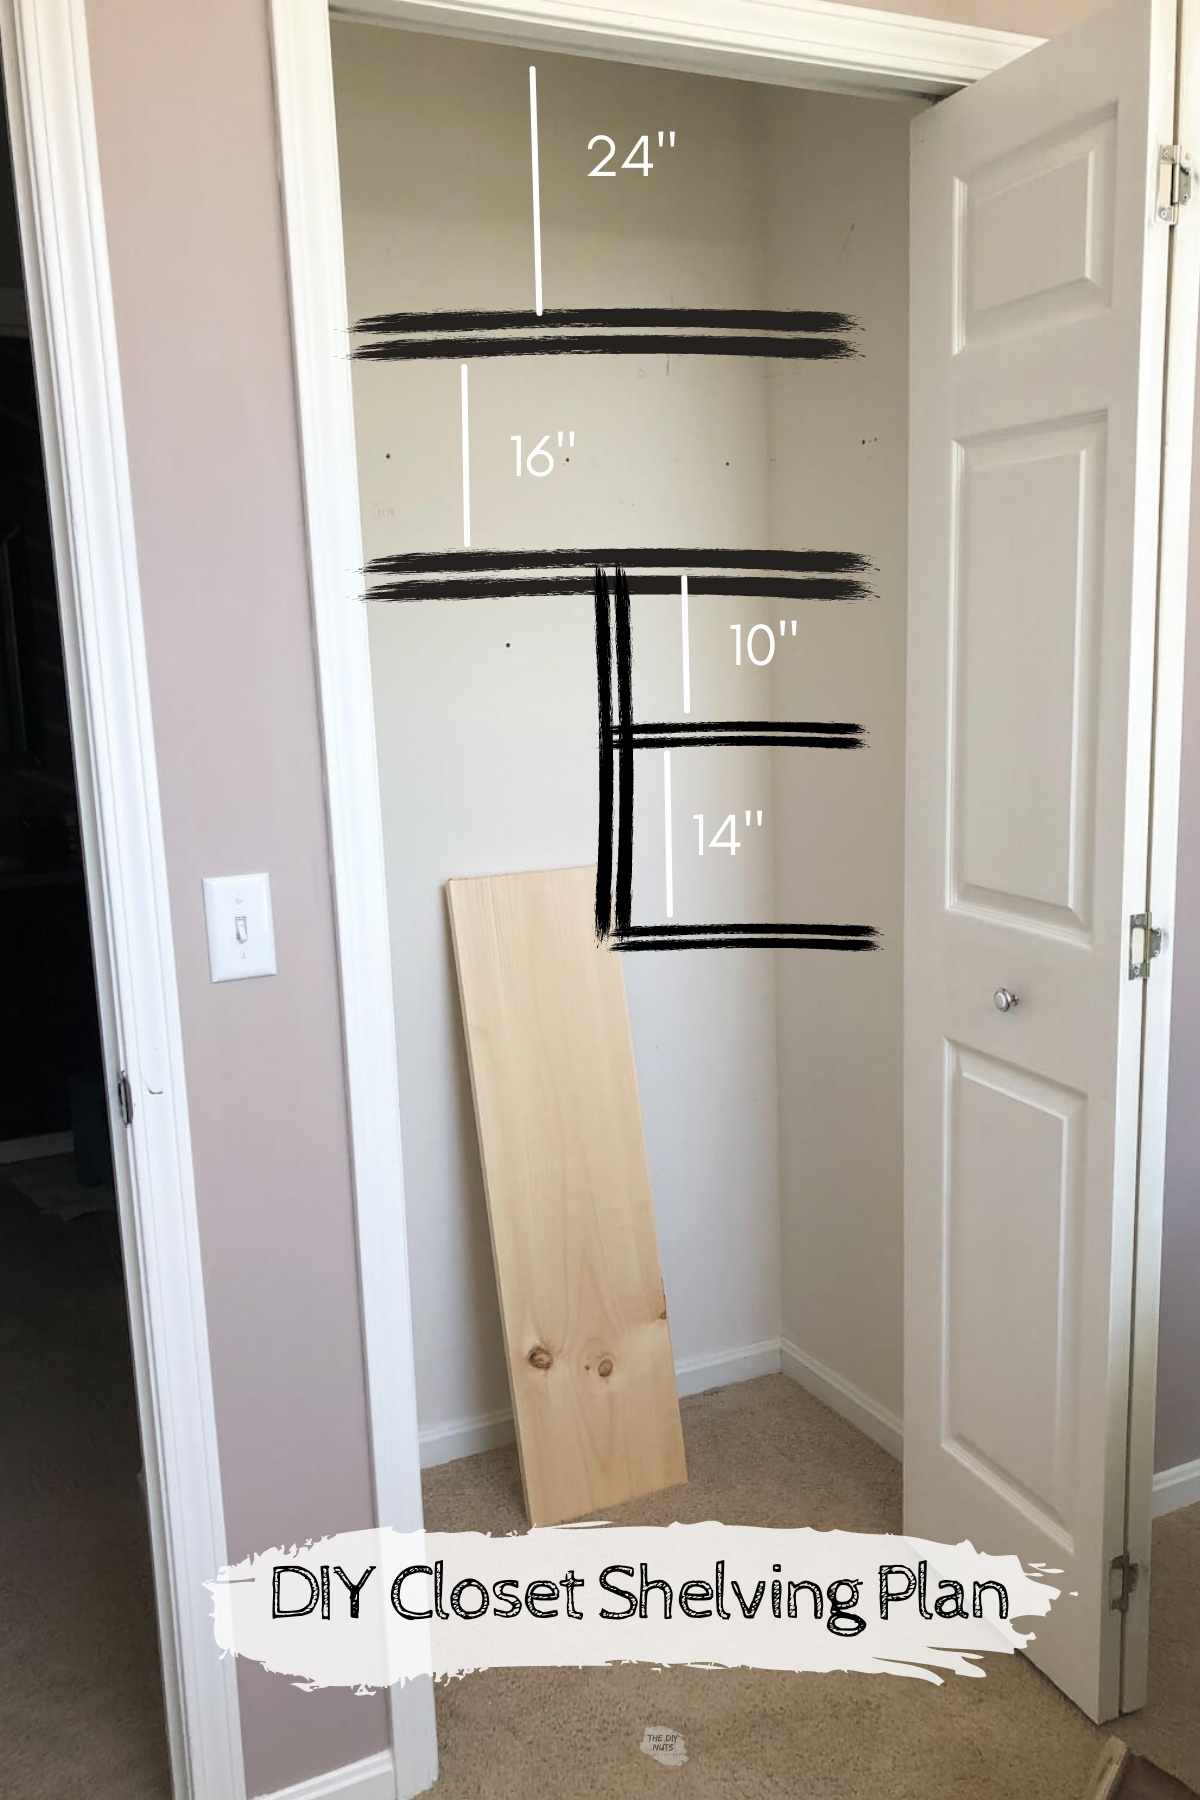
As you can see, the heights for each shelf varied. I would not recommend making your top shelf any smaller than 2 feet away from your ceiling. If you make that shelf too close to the top of the ceiling you won’t be able to actually get anything up there if your closet is built like ours.
Looking for a different closet shelf idea?
Check out our farmhouse bracket shelving idea in our basement closet using these brackets.
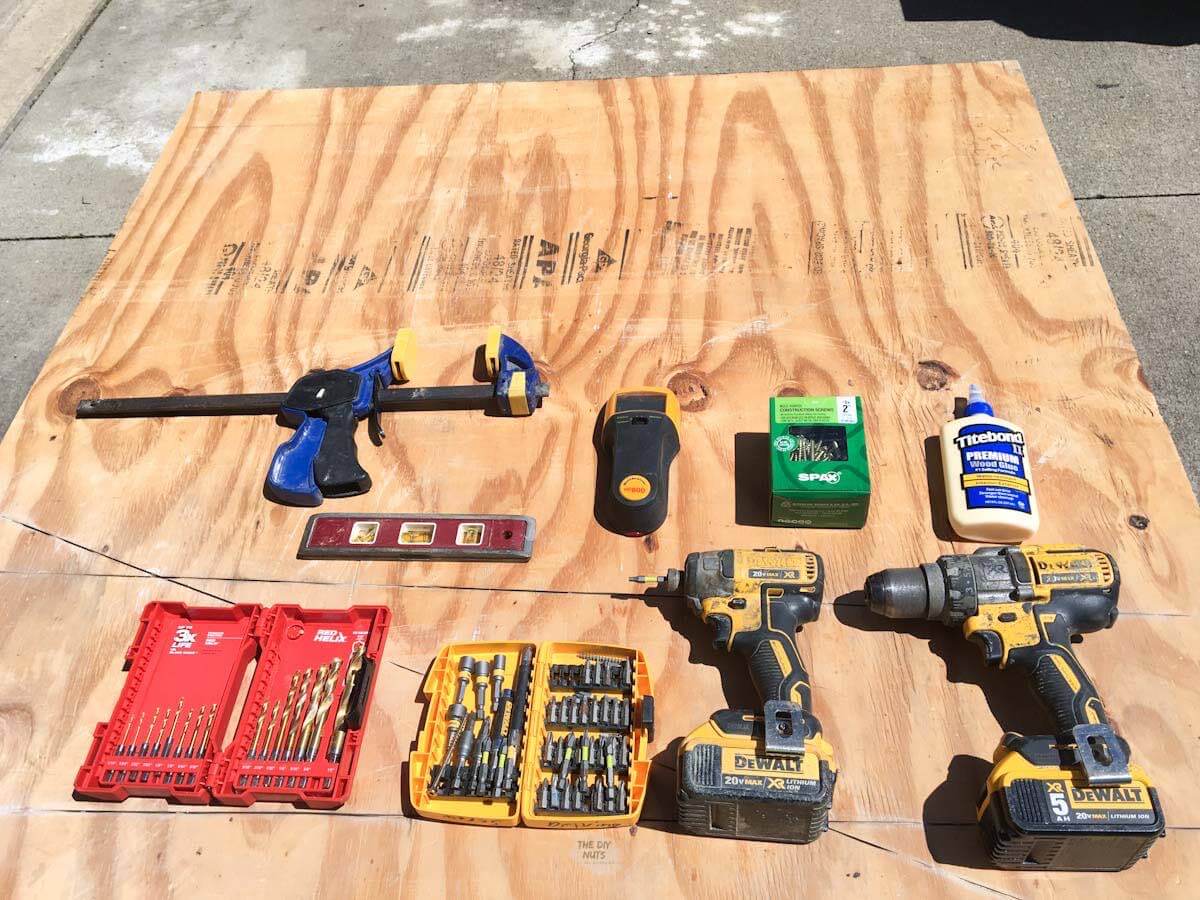
Recommended Supplies & Tools
- 1” x 12” x 8’ Pine or Whitewood Common Board (We needed 2.5 boards for the size of our closet)
- Measuring Tape
- Torpedo Level
- Drywall Screws
- Circular Saw
- Drill
- Wood Screws (1 ½”)
- Wood Glue
- Pencil
- Stud Finder (This is the one we used!)
Shelf Painting Supplies
- White Enamel Paint in semi-gloss or gloss
- White Latex Primer (We like this brand or Sherwin Williams Multi-purpose latex primer)
- Wall Paint in the color of your choice (SW Polished Concrete is what I had leftover)
- Drywall mud (depending on if you need to patch drywall before starting)
How To Build Wooden Shelves For Small Closet
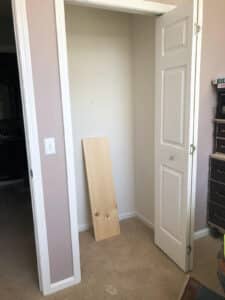
Step 1: Empty Closet
Remove all existing contents of the closet. We had to take down a wire shelf and take all the unorganized stuff out!
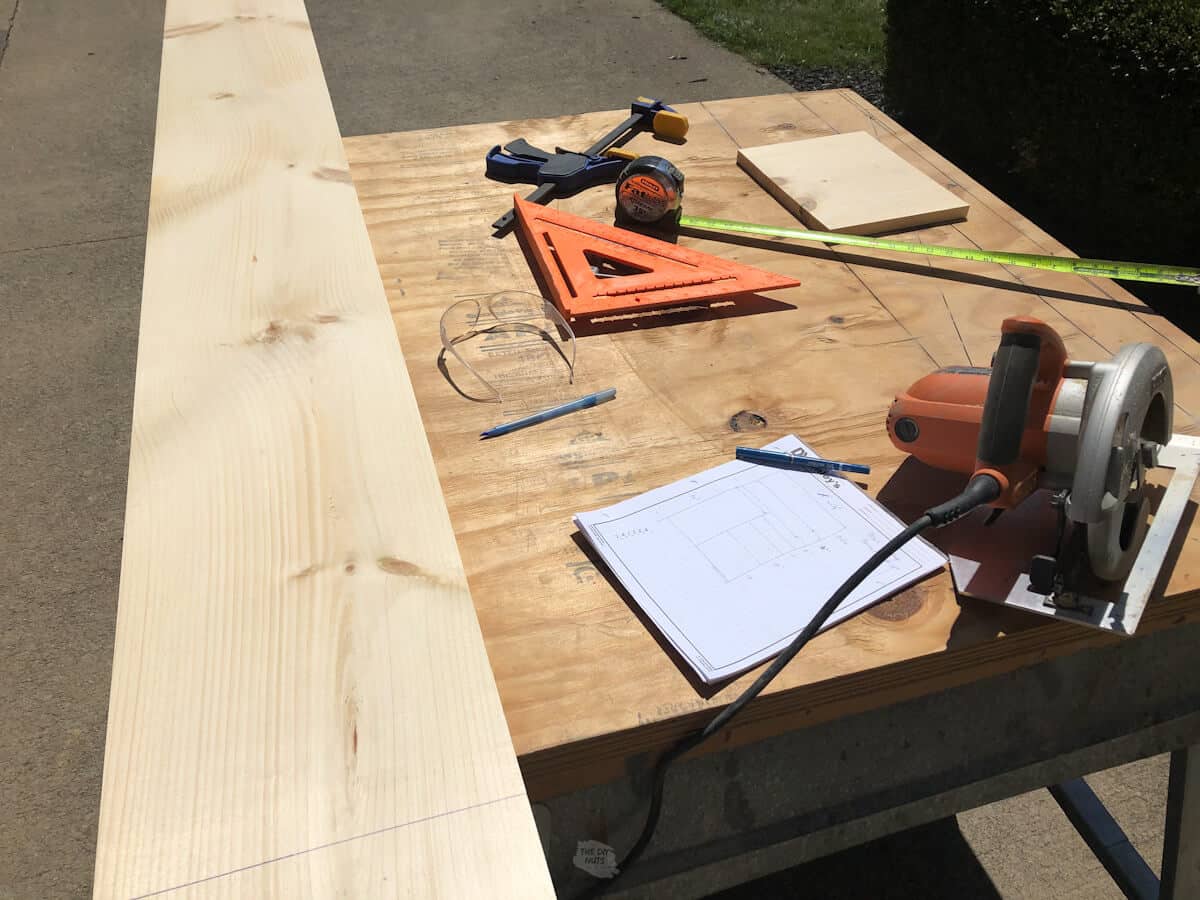
Step 2: Create A Plan
Develop a sketch of your closet based on your closet measurements. For reference, our closet was 8 ft. tall and 40” wide. See the above image for our plan.
Also, pay attention to the depth of your closet. We found that 12” (or actually 11 ¾”) deep shelves would be perfect for the purpose of our closet. Pine board standard width does not go larger than 12”.
Step 3: Decide the heights for your shelves.
Depending on the purpose of your closet shelving, you may need more or fewer materials.
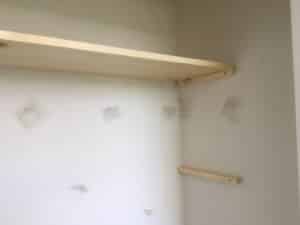
Step 4: Use Drywall Mud
Patch any holes with drywall mud from the removed shelving.
Step 5: Paint Base Coat
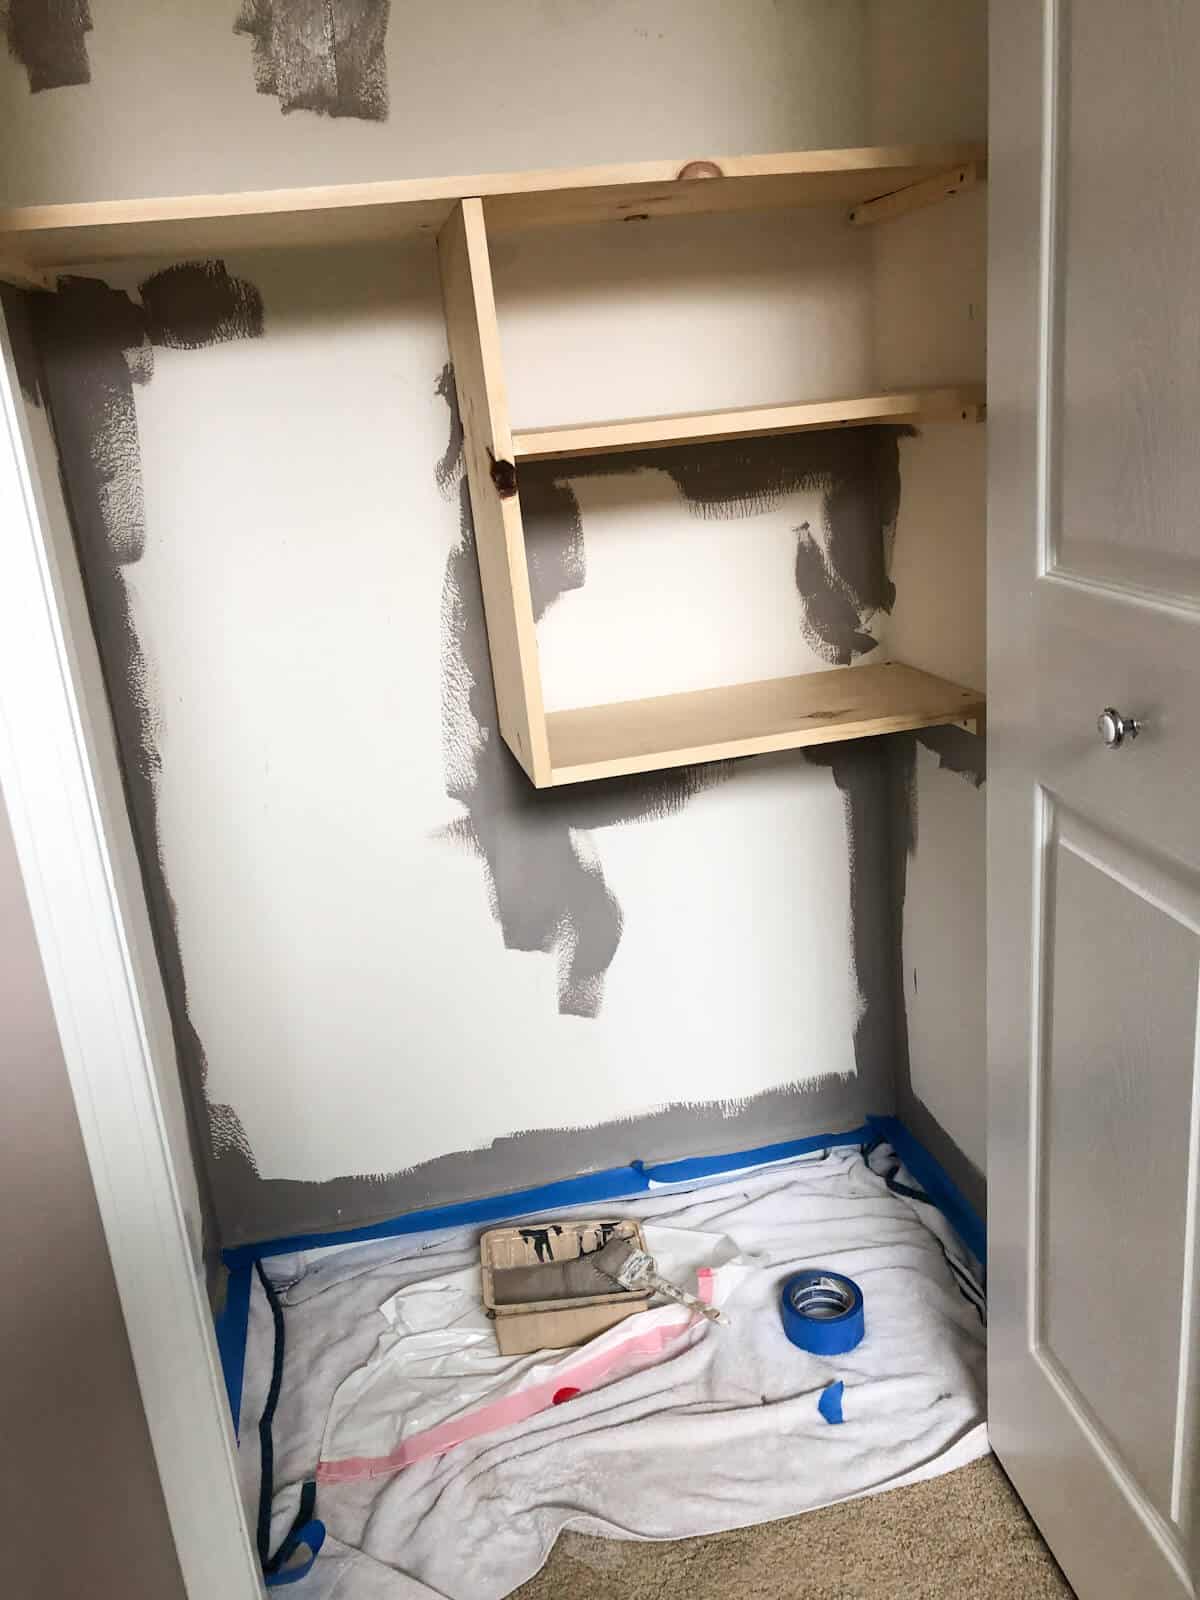
Paint the closet first. Do as I say and not as I did (see closet painting explanation below).
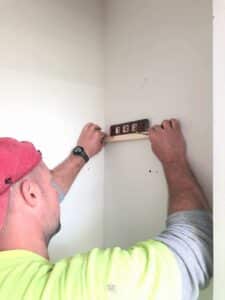
Step 6: Fine Studs
Use a stud finder to find where DIY shelving brackets will be screwed in. You should have studs located near the back corners and once you find those, the others will be 16” or less away.

Step 7: Build Pine Shelving Brackets
Make a DIY shelving bracket using pine board scraps. Our pine wood scraps act as DIY shelving brackets. They were approximately 1” x 1” x 12” for all shelving brackets on the sides of the closet.
Step 8: Make Sure Brackets Are Level
In our design, we built the top two shelves first. Level the DIY shelf bracket with a torpedo level in the desired spot. Place both brackets on opposite closet walls 2’ down from the ceiling.
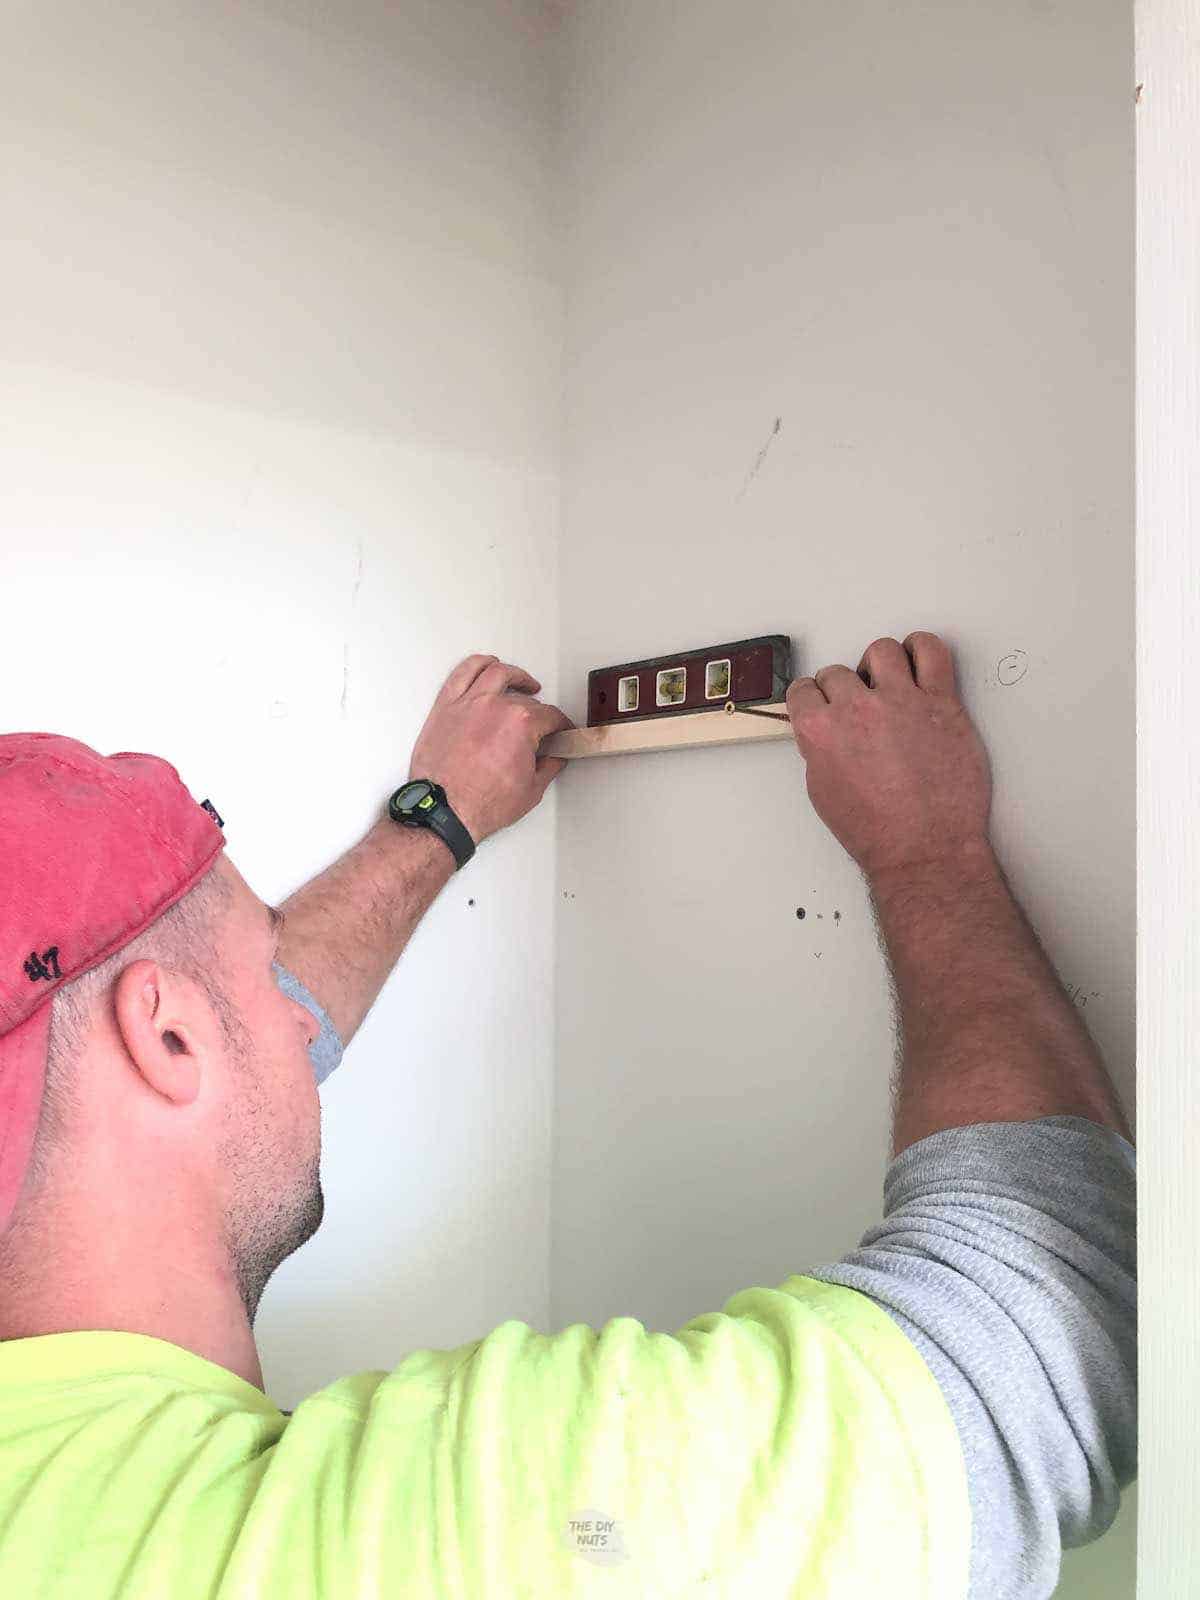
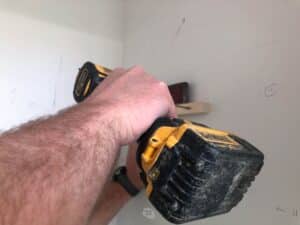
Step 9: Drill Pilot Holes and Attach Shelving Bracket
Due to the thickness of the homemade shelving bracket, drill pilot holes with the level on before screwing DIY shelving brackets to studs.
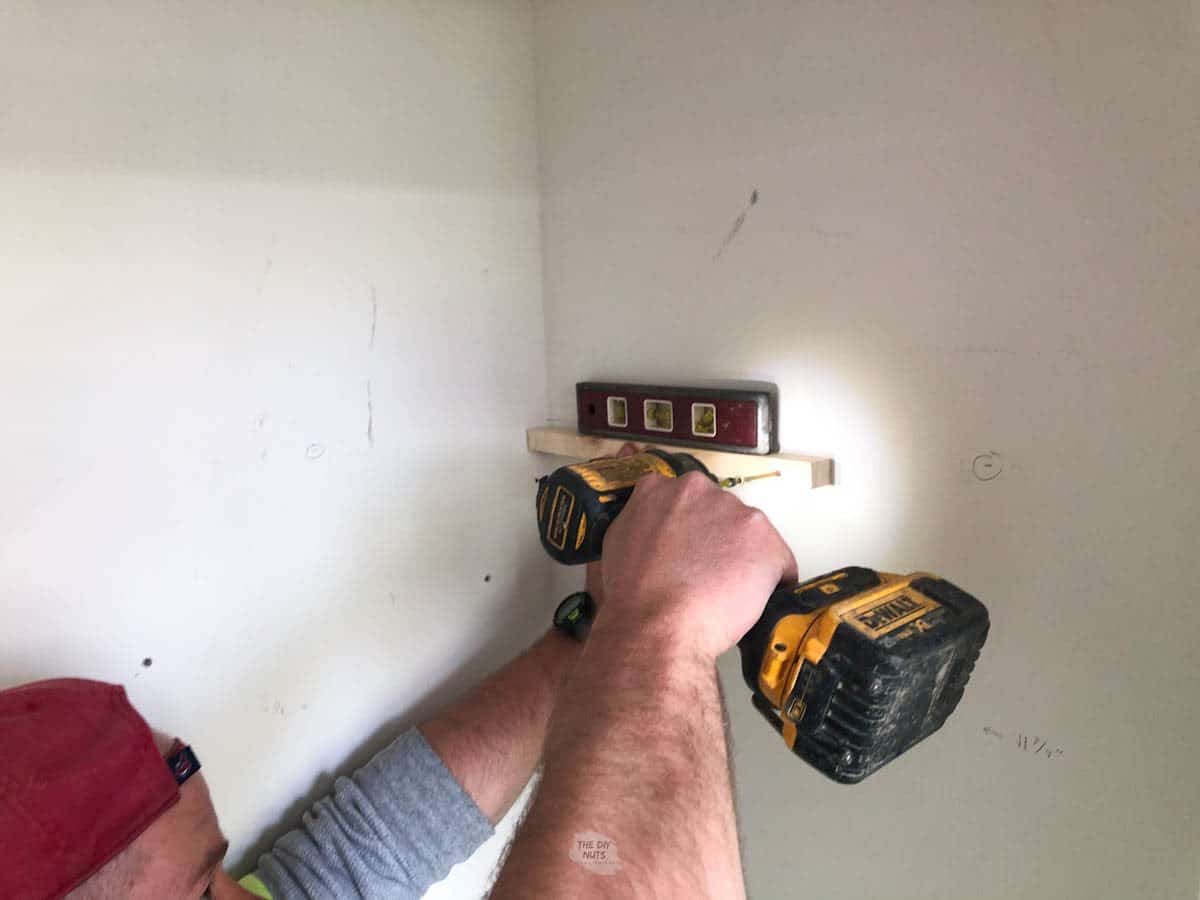
TIP ABOUT SCREWS TO USE
The length of the screw has to be longer than the width of the bracket and the width of the drywall. We used these sized screws.
Step 10: Cut Wood For Length Of Shelf
Cut 1” x 12” pine board to the desired length equal to the width of your closet. Our top shelves are 40” across the back of the closet.
Step 11: Glue & Attach Wood Shelf To Brackets
Put wood glue on the homemade wooden shelf brackets, drill the pilot hole near the back corner of the pine wood board, and DIY shelving bracket. Attach with 1 ½“ wood screws.

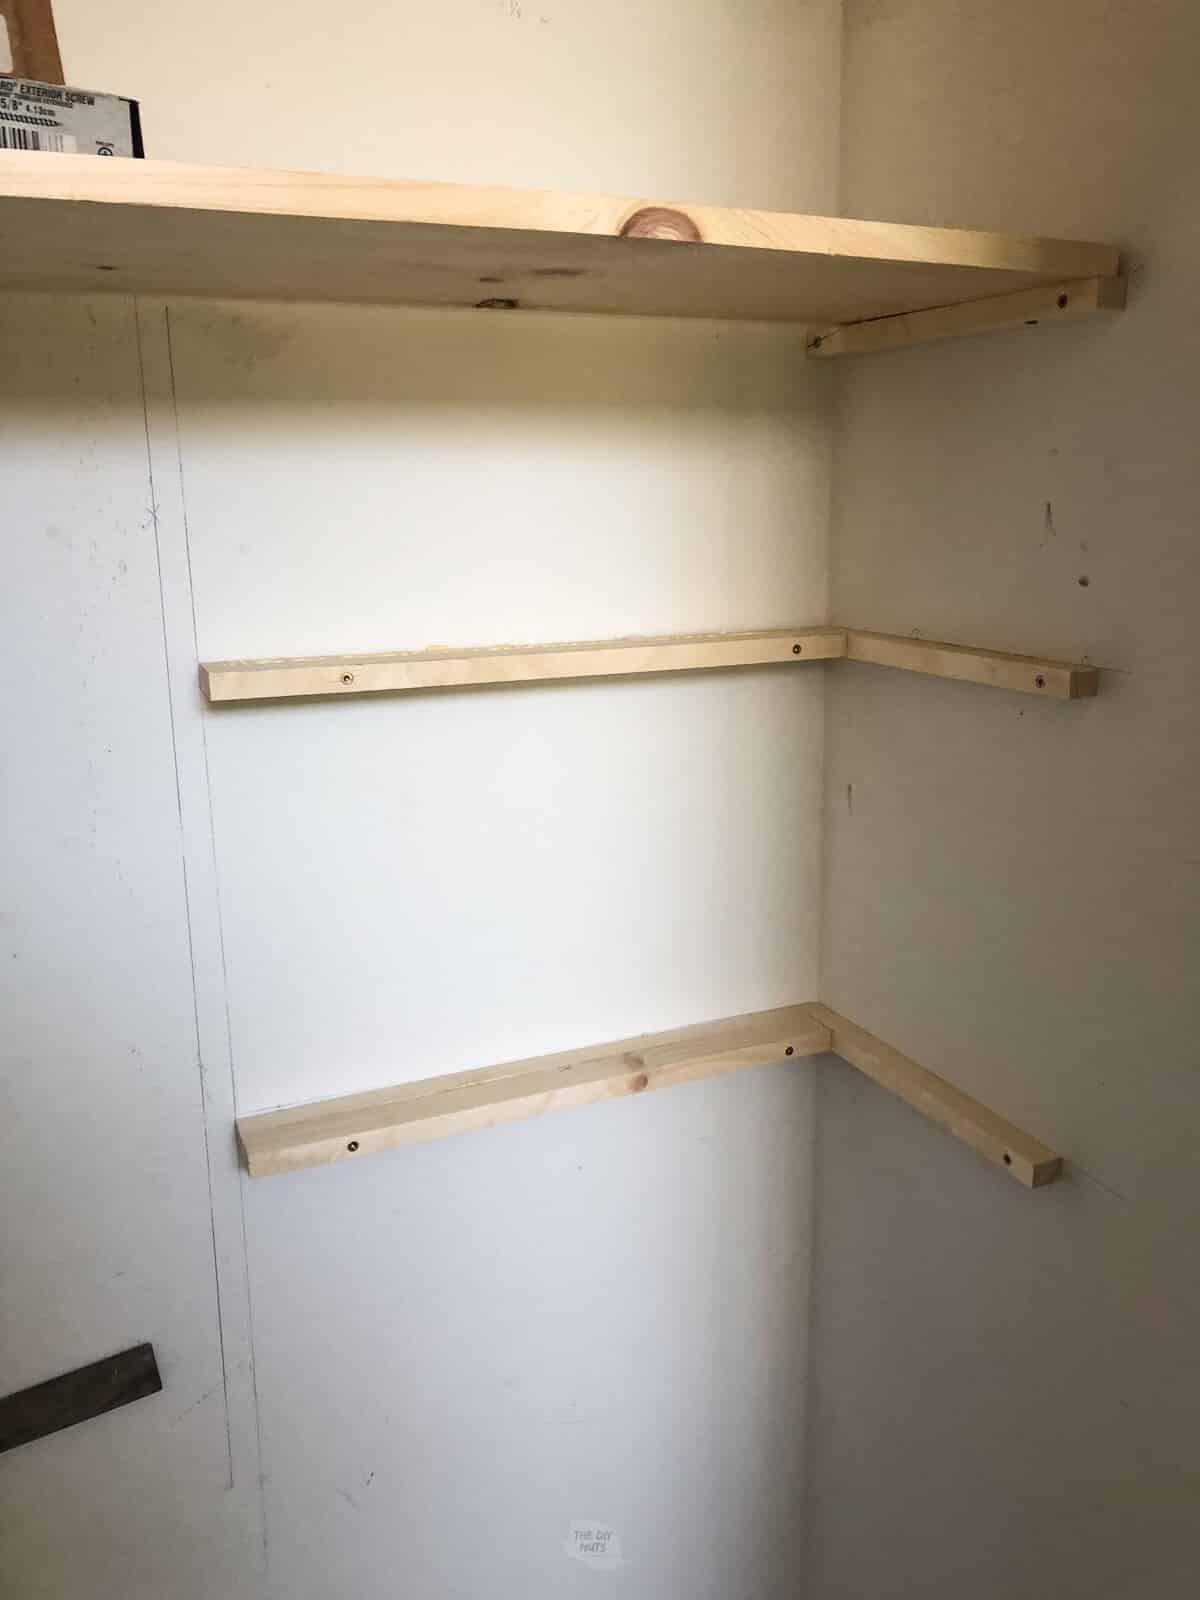
Step 12: Repeat Steps To Build Other Shelves Across The Closet
Add another set of homemade brackets 16″ down from the top shelf. Add wood with wood glue, pilot holes and screws on top of homemade shelf brackets for all shelves that go completely across your closet.
You could just continue to build simple wood closet shelves in your closet using this basic idea.
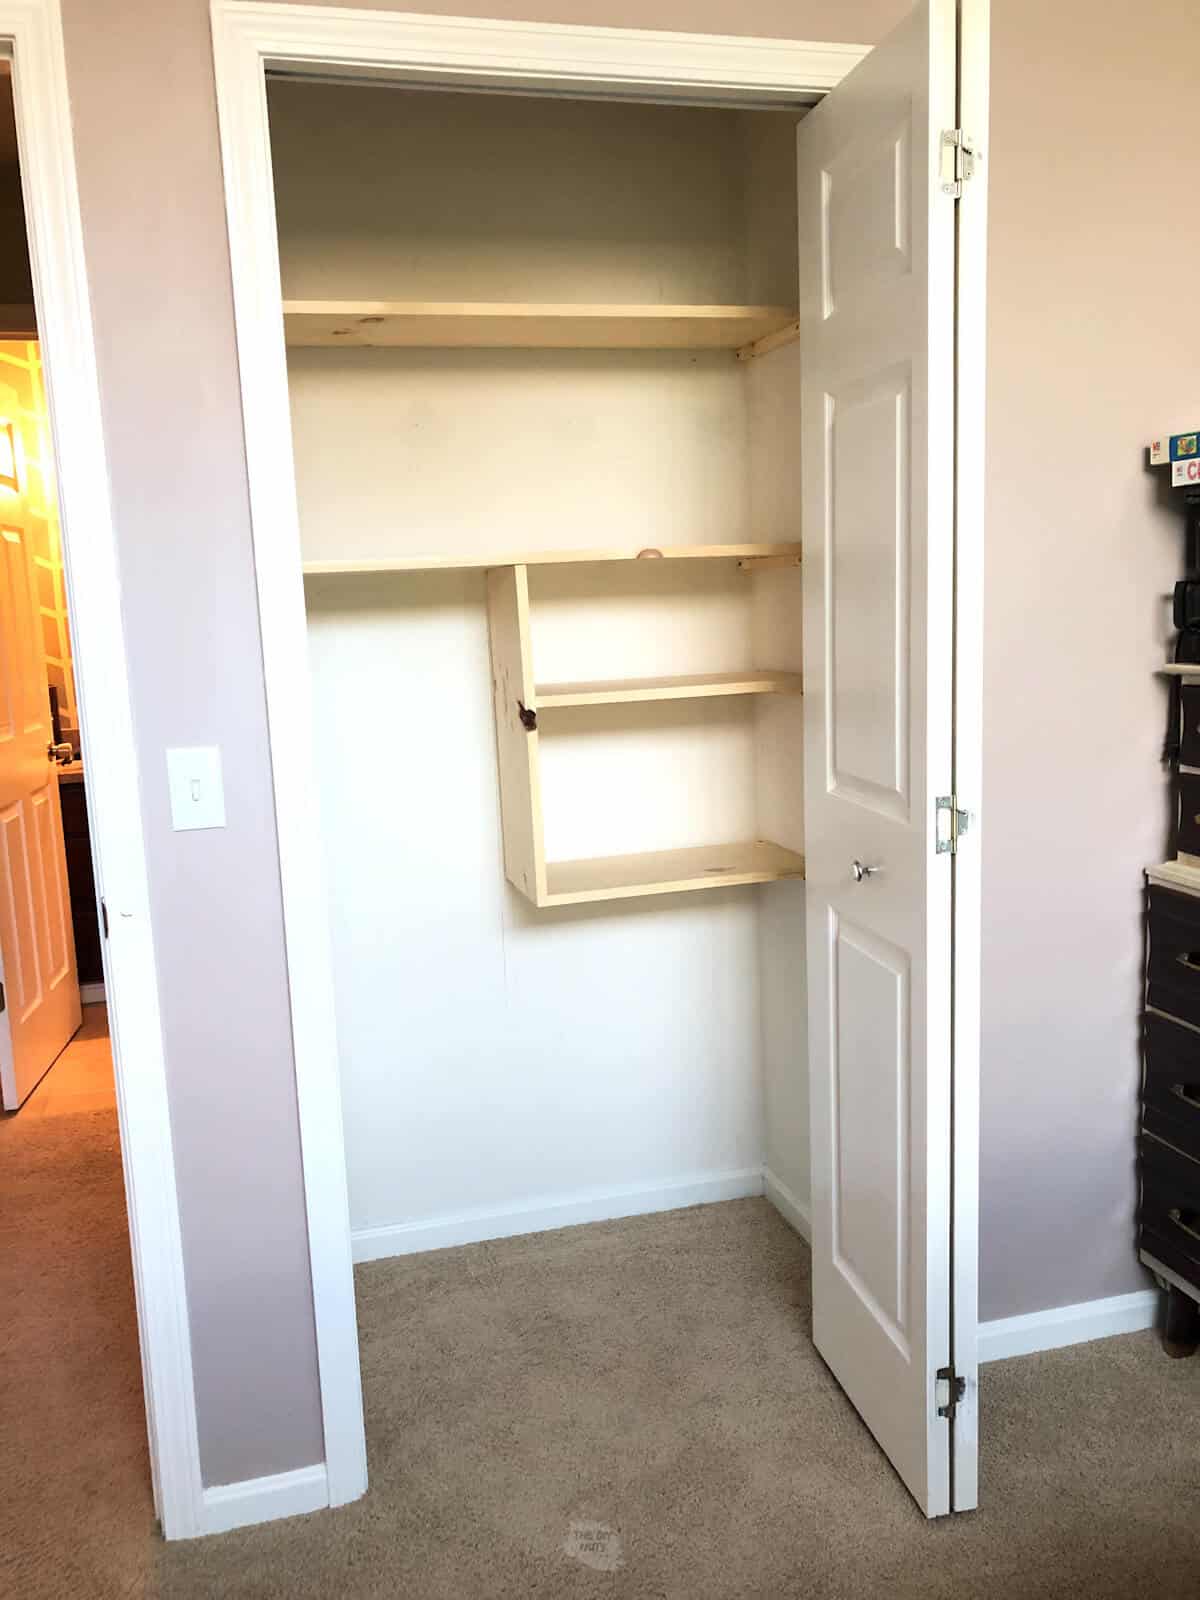
How To Build Closet Shelves That Do Not Go All The Way Across
We decided to also have some shelves that did not go all the way across. We wanted to be able to store our vacuum in this closet while still having some shelves.
Step 1: Add Wooden Bracket On One Side
Put DIY closet side brackets on the following steps outlined above.

Step 2: Create A Corner Bracket
Build another DIY shelving bracket out of pine wood scraps to attach to the corner (see picture). Level, drill pilot holes, add wood glue and screw into studs in at least 2 places.
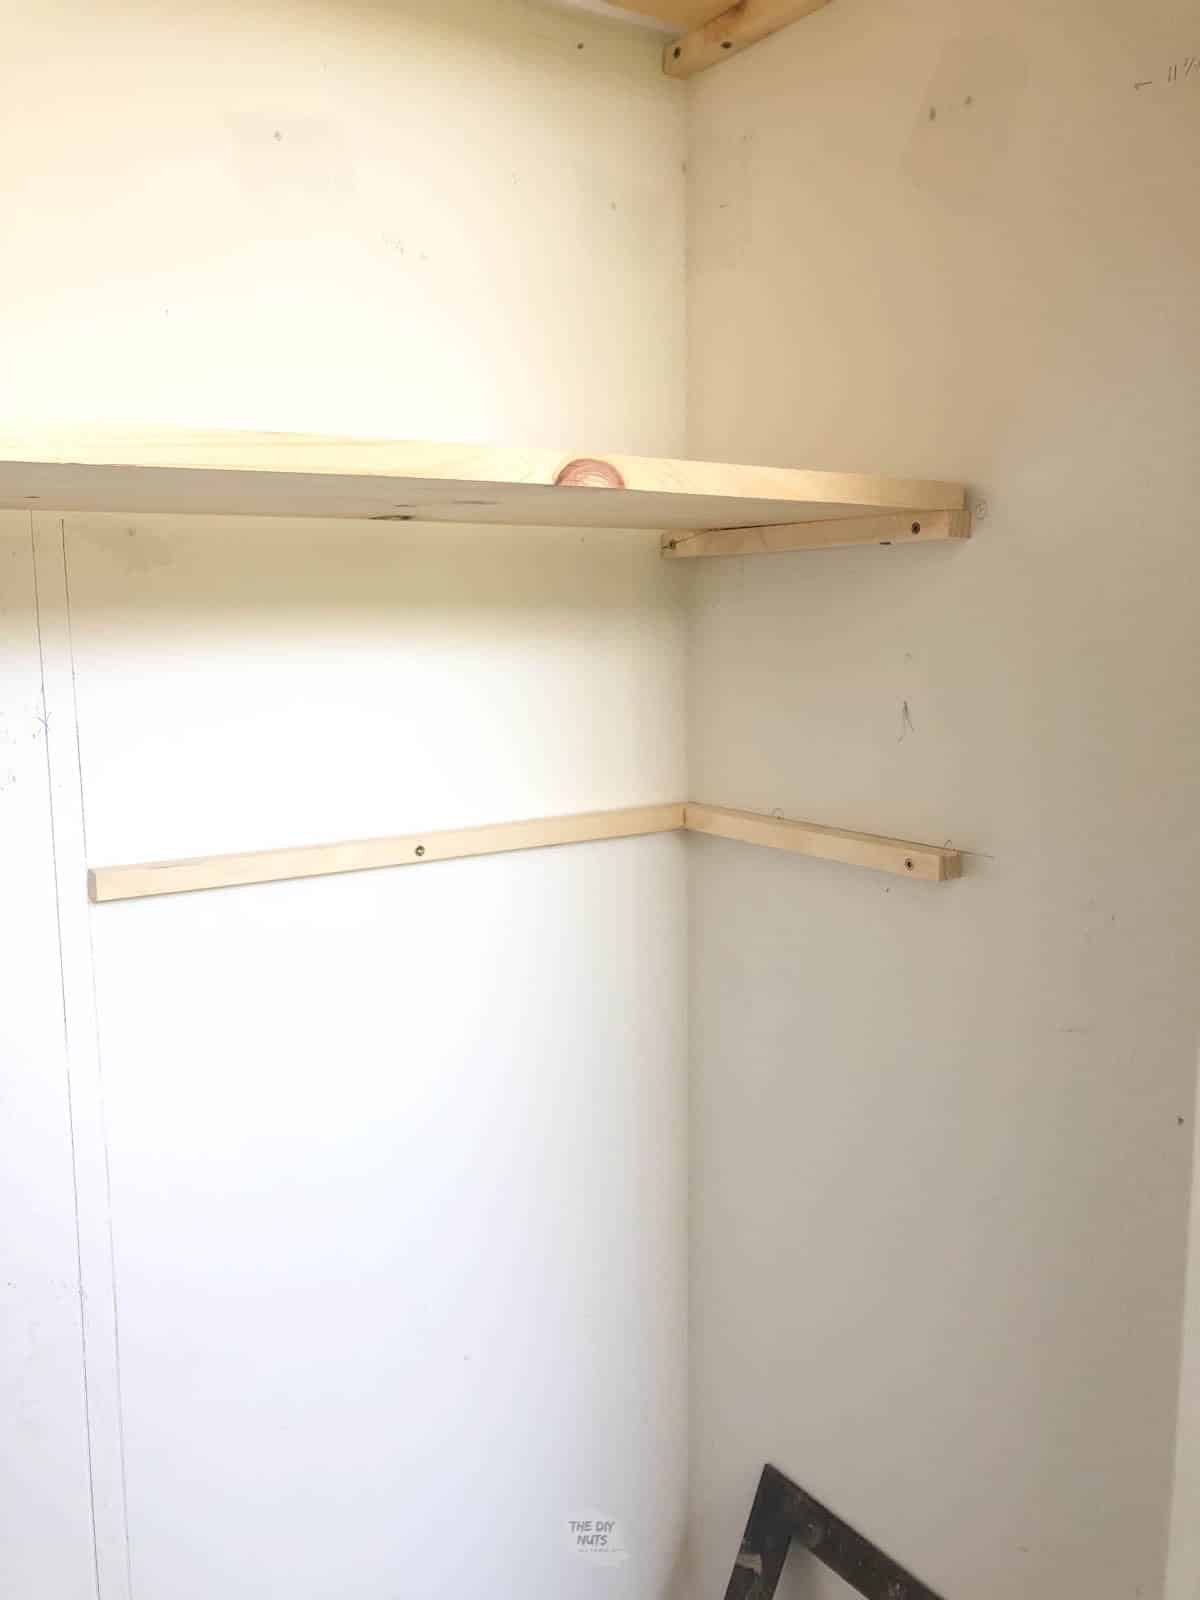
Step 3: Adjust If Not Square
Due to our closet being out of square, we had to add an extra 1” x 1” pine scrap to corner DIY brackets to allow our pine shelving to rest nicely and match the depth of the other shelves.
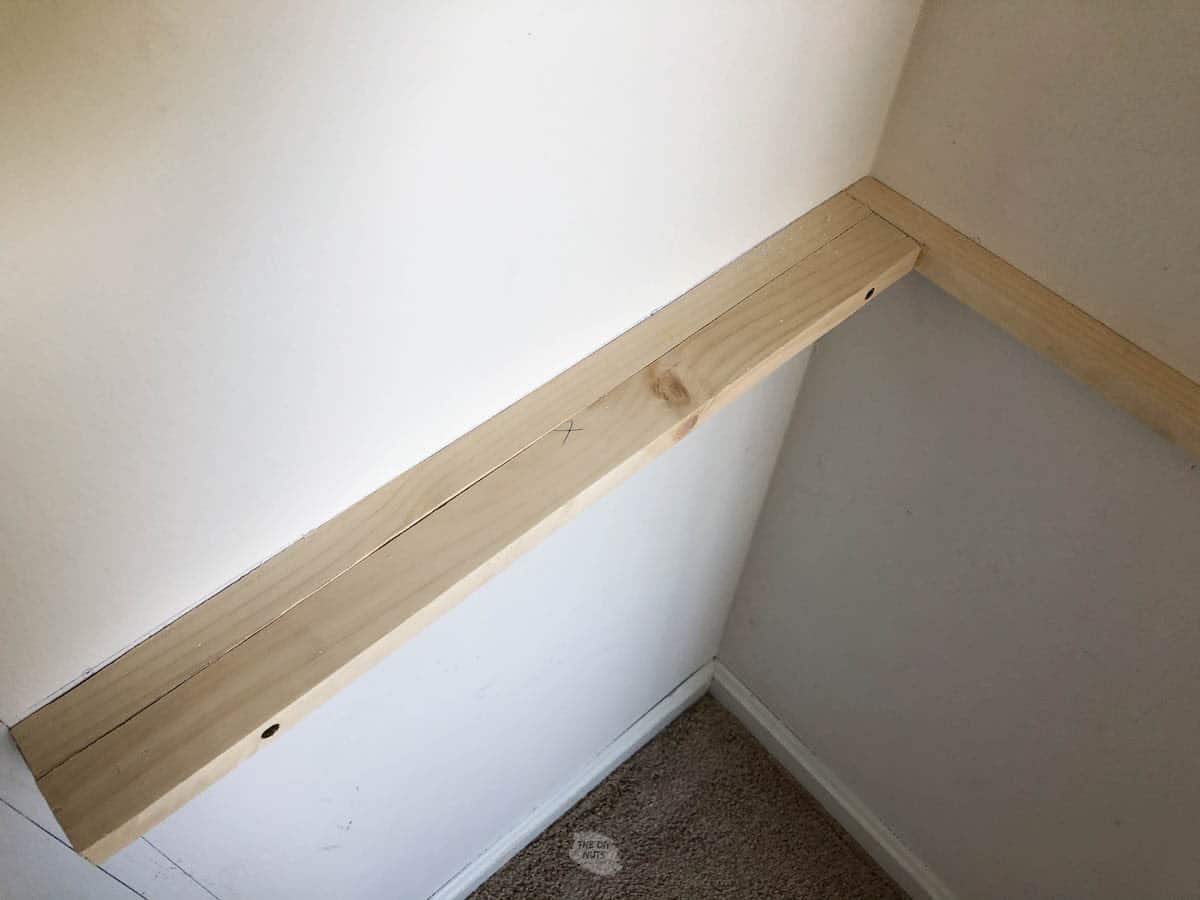
Step 4: Build Another Corner Bracket
Follow the same steps of using glue, pilot holes and screws to attach the shelf top.
However, for these shelves, you will need to glue and attach the top of the shelf to the back corner bracket and the side bracket.
Step 5: Cut Closet Shelf Boards
Cut a board to the desired length to create a box with shelves that do not go completely across. Our bottom shelves are 22″ long.
Step 6: Attach Shelf Boards
Glue, drill pilot holes, and screw board to the smaller shelves in 2 places on each shelf.
I should have painted the closet walls first!
Painting The Closet Shelves
We totally made a mistake, but it was simply because my husband had the time to build shelves before I had time to paint. This would have made my life so much easier.
I had to paint the wall first with a small roller and brush. It really wasn’t that bad, because it is just a closet and really didn’t have to be perfect.
Even though we don’t recommend painting your closet after you put the shelves in here is what it looked like.
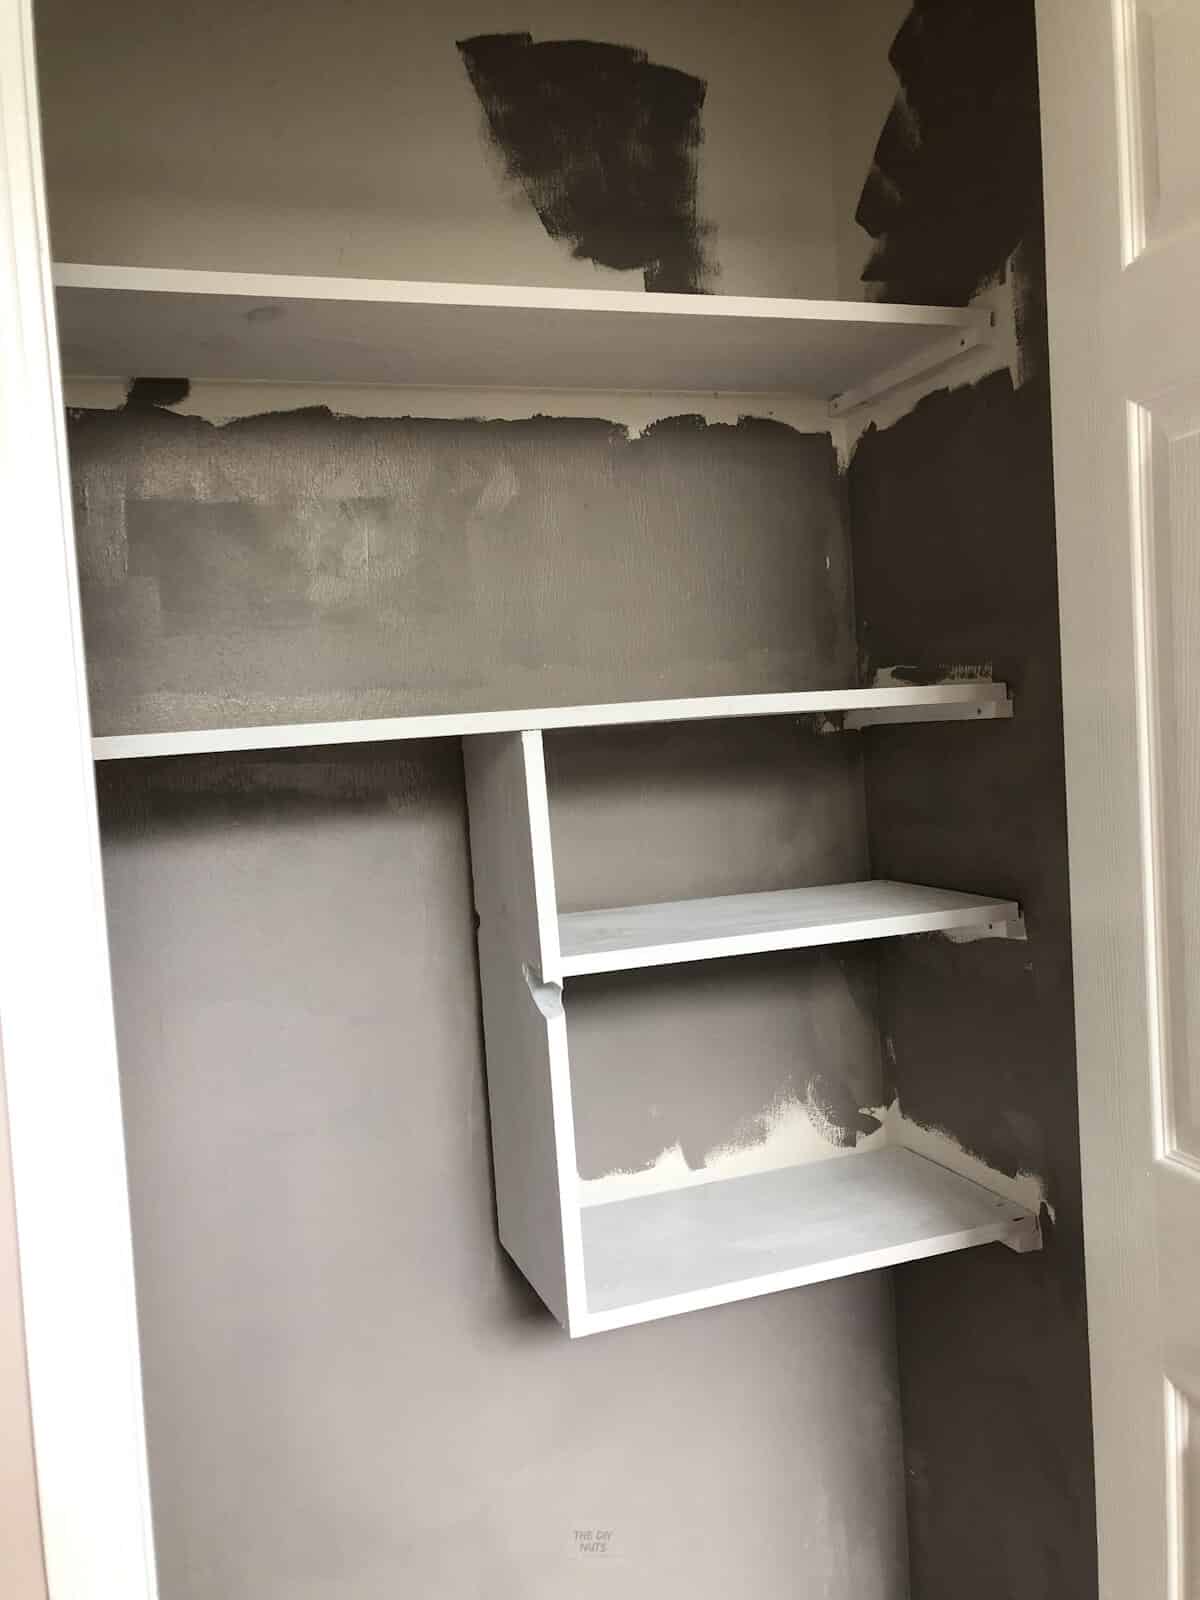
Step 1: Trim Around Shelves
Trim out the wall. We used SW Polished Concrete.
Step 2: Prime Wood
Use a primer to prime shelves with a brush or small foam roller.

Step 3: Paint Shelves White
After the primer is dry, paint white latex enamel on your shelves (or any color your choice). We have a great post about some of the most popular white paint colors if you need help. Our color was SW Proclassic paint in Pure White.
Step 4: Finish Painting Closet
Trim out any other spots that you need to with a brush. As we said, make your life easier and just paint the walls of the closet first!
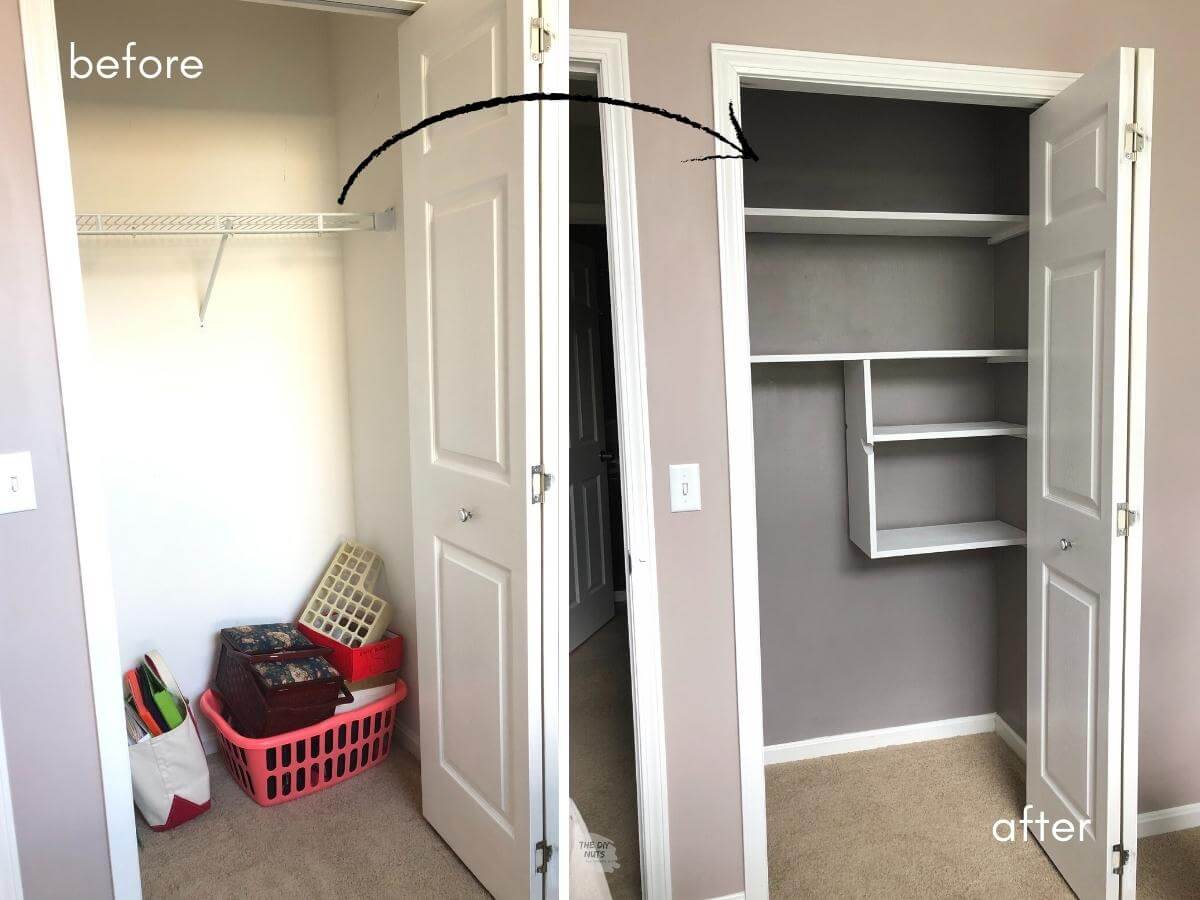
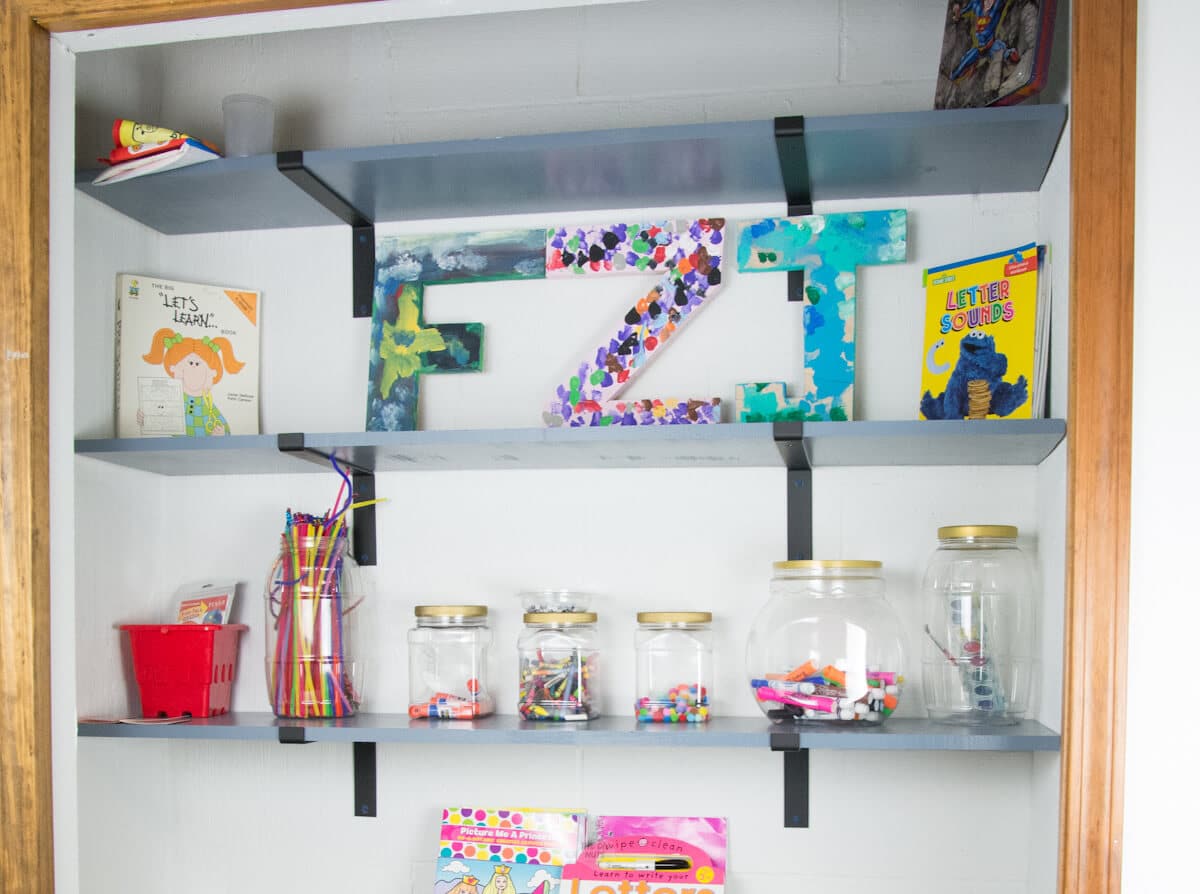
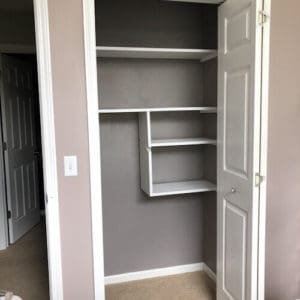
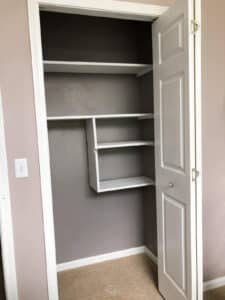
Finished Closet With Dark Walls
For a closet, I know it is different to not have the back wall be all white. I decided to try to use the same gray paint that I used on my small bathroom accent wall.
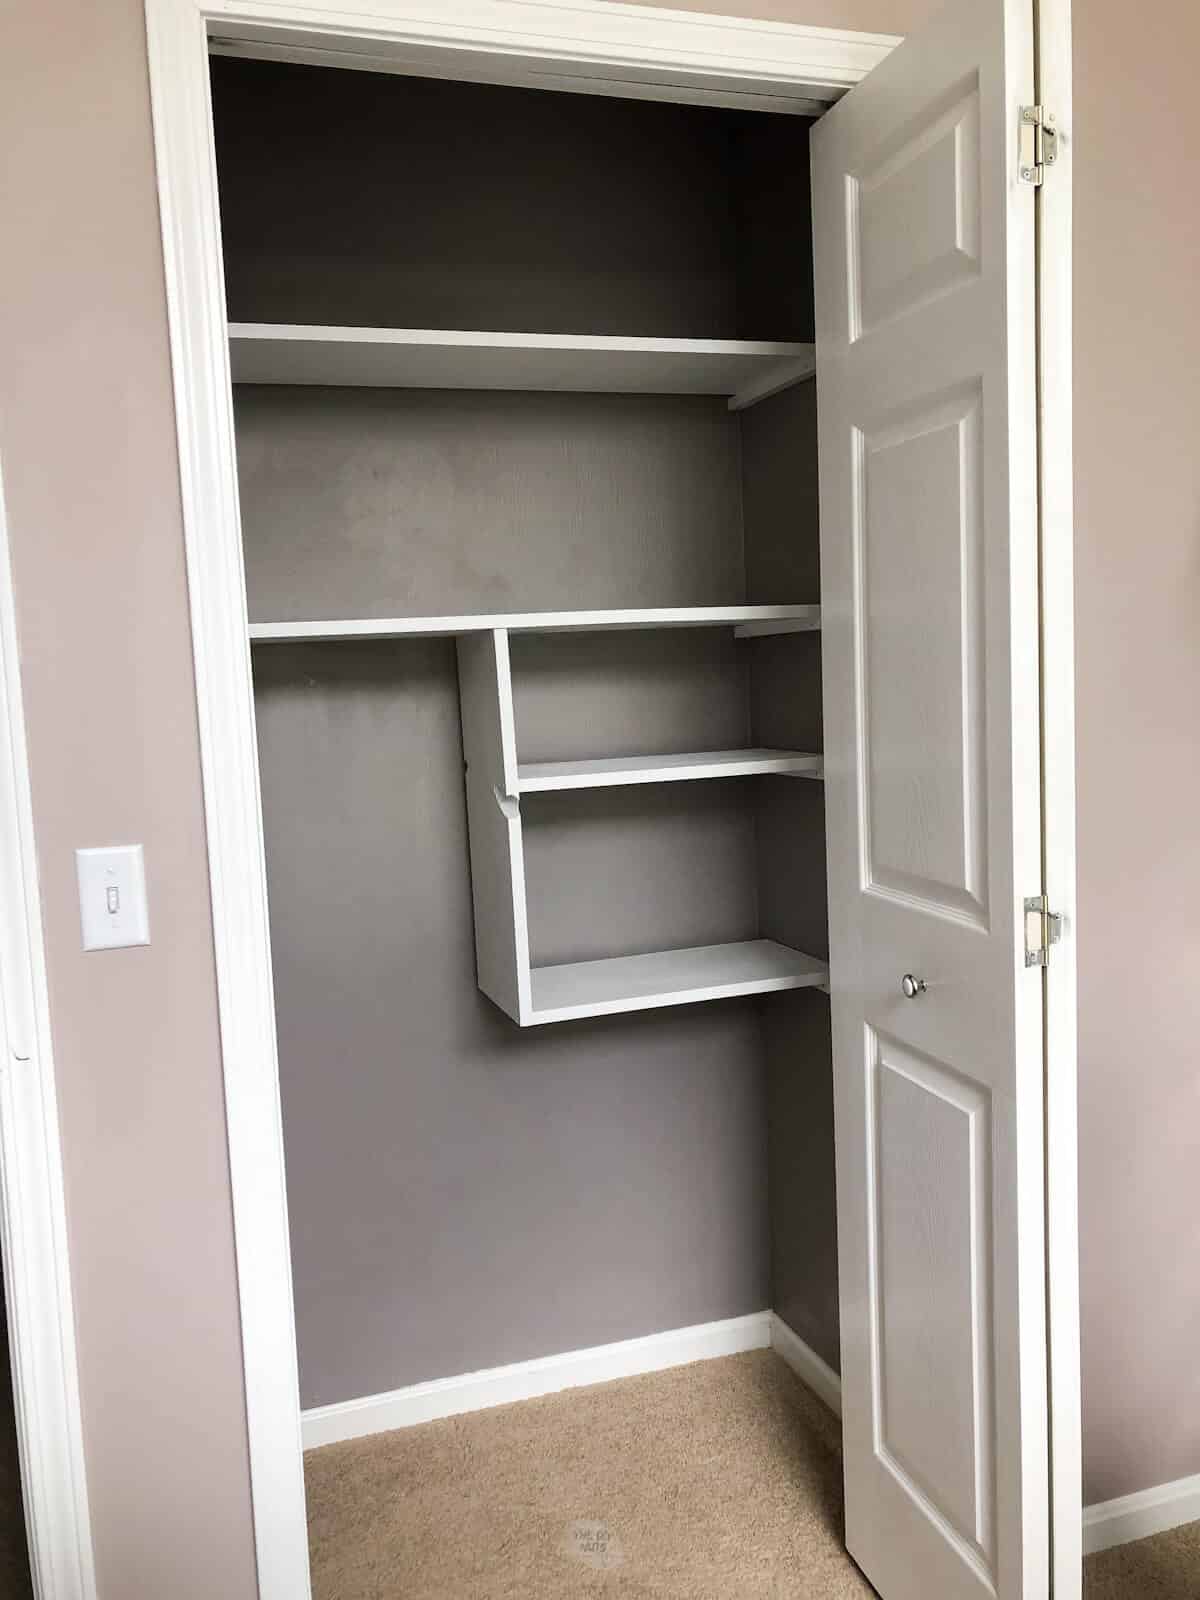
Having color contrast in this closet truly made it unique while staying on budget! We absolutely love the darker walls and white shelves.
Looking for other shelving ideas? Read more about 40+ DIY Shelves For Any Home Decor Style
Practical Tips For Getting Organized
I am not a professional organizer nor is my house always clean. However, the biggest thing I try to remind myself the following tips:
- Take your time and organize right at the beginning
- Whether that is folding something correctly, putting lids on Tupperware, or putting something back in its proper space. You will be happy you took the extra 2 seconds to do it right.
- Slowly revisit and reorganize. 5 minutes here and there can really help you stay on top of it
- Sometimes, it is okay to just close the closet door and deal with it later.
- You always feel better when things seem to be decluttered and organized (just getting moving).
Past DIY Organization Projects
A few years ago (before this blog was started), my husband followed very similar steps to turn an entryway closet into a storage cubby near our garage door entrance. You can see here, how we used beadboard and hooks to really add to our hallway organization.

Follow similar shelf-building steps to create a faux mudroom in a hallway closet in your entryway. The only difference is that the wood goes all the way to the floor and you can add beadboard to the wall for a more built-in look.
Another great organization DIY project that I love is this DIY children’s wardrobe that I was able to redo very cheaply. We finally have a place to store all those dress-up clothes.
Our Related Posts to Organization and Shelving
After this simple shelf-building project in this small closet, I do feel a sense of relief. One more closet that can slowly become organized.
Closet Shelving Organization Systems To Buy
Now if after reading our post, you decide this is not a full DIY project. Here are a few closet organization products or systems you may be interested in listed above.
- Closetmaid Adjustable Closet Organizer Kit: Very highly rated and seems to work for a variety of spaces.
- Rubbermaid Configurations Deluxe: Again, also highly rated and adjustable. A little bit more expensive than the Closetmaid version.
- Resin Slat Expandable Closet Organizer System: Reviews state that this is a great & solid piece for the price.
Tutorial FAQs
You can use pine (like we have here), melamine, plywood, MDF or wire systems for DIY shelving in your closet.
We are happy with our simple and easy closet shelves. We know that there seem to be a lot of steps, but this really can be a great weekend DIY project.
Follow us on Pinterest, YouTube or Facebook for more DIY inspiration!
How To Build DIY Closet Shelves
Equipment
- Measuring Tape
- Torpedo level
- Drill
- Circular Saw
- Wood Glue
- Pencil
- Stud Finder
- Clamp
- 2.5″ Synthetic Paint Brush
Supplies
- 2.5 1" x 12" x 8' Common Whitewood or Pine Board
- Drywall Screws
- 1 1/2" Wood Screws
- White Latex Paint
- Wall Paint
- White Primer
Instructions
- Remove all existing content from the closet.

- Patch any spots on the wall and paint the walls with the color and finish of your choice.
- Develop a sketch of your closet design. See tips above for factors in your closet.

- Use stud finder and mark where you will be screwing in wooded brackets (small pieces of wood made from scrap pine wood).

- Cut 2 pine wood brackets for all shelves. Ours measured 1" x 1" x 12'.
- Mark the wood where the studs are and drill pilot holes through the pine wood scraps.
- Attach pine wood brackets for the first shelf. Use a torpedo level to make sure they are level.
- Use screws to attach the bracket to wall into the stud.
- Cut common pine wood to desired length (the width of your closet).
- Attach shelf to wood brackets by using wood glue and wood screws. Again, drill pilot holes before using 1.5" screws.
- Repeat bracket building steps and add pine boards across for each level.
- Use steps to create wooden shelves to fit your design.
- Prime and paint closet to fit your style.


Erin, I guess we were working on similar DIY this weekend. We made shelves for the bathroom and kitchen cabinets. It looks so organized and doubled our storage place. Your closet looks perfect now!
Hi Andrea! Yes, it is totally the time to get organized! Every time I turn around there is some sort of project like that I want to do!
I think I’m gonna put my husband and brother in law on this project once social distancing is over. I would to better organize our closet, but it’s so overwhelming.
Hi, Jen! You always feel so much better when you declutter! Thanks for the kind words and good luck with your project.
What a difference in the before and after pictures. Your new shelves look so much more functional, more storage space and overall beautiful. Great job!
Hi Kam! Thanks for the kind words. I absolutely hated the “before” closet and could never really keep it organized. These simple wooden shelves really were the DIY storage solution for us!
This is going to come in so handy. Thank you for sharing this DIY!
Hi, Sandra. I am glad that you like these easy DIY shelves.
I am so excited to start this new DIY project. I need more space in my son’s closet. This will be extremely helpful.
Hi, Quianna! Good luck with your DIY closet shelving project! You will love how much storage you will have.
Hey Erin. Shelves look nice. You mention the studs would be 16″ or less from the back wall and the brackets are 12″ long. If the stud is 12″-16″ from the back wall, it would be helpful mentioning if you’d recommend using drywall anchors or longer brackets or another solution.