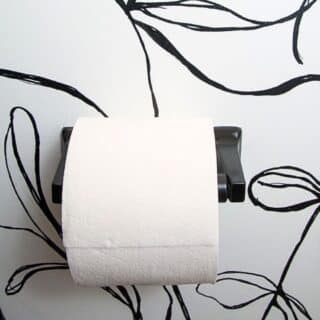
How To Easily Paint Your Bathroom Accessories
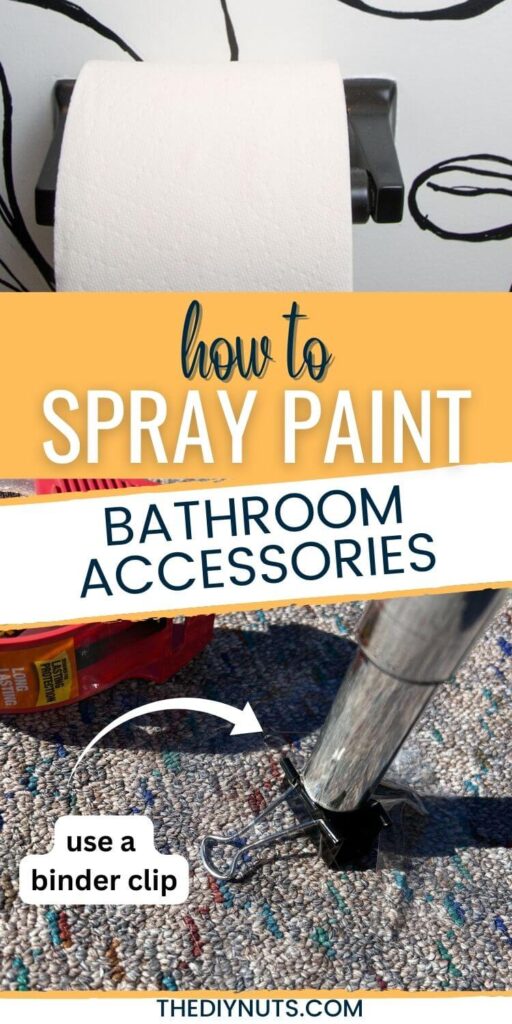
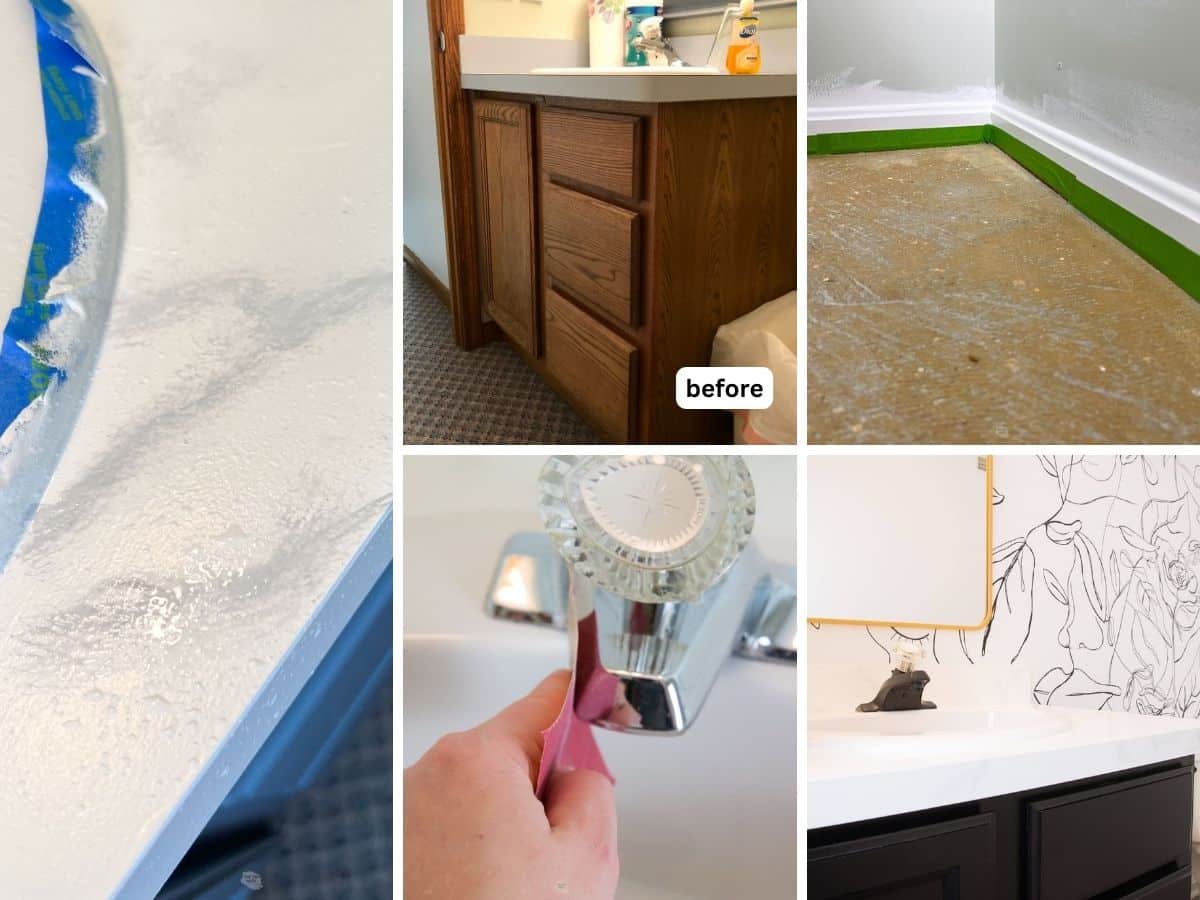
If you are like us, then you don’t want to spend a ton of money when it comes to changing the look of your space. See how we were able to paint our bathroom toilet paper holder & accessories to match our new black and white bathroom.
*Disclosure: I only recommend products I would use myself and all opinions expressed here are our own. This post may contain affiliate links that at no additional cost to you, I may earn a small commission. Read our full privacy policy.
Use our easy tips to help update your bathroom accessories to match your style. We are using a similar method that we also used to spray paint our faucet black and to paint cabinet hardware.
Is spray painting bathroom accessories a good idea?
Yes, and you will only use a little of the paint on these projects. Therefore, once you have a stash of supplies these spray painting projects will practically be free. Just make sure to work in a well-ventilated area.
Recommended Supplies
- Automotive Primer: our local hardware had the one with filler but normal automotive primer will work just fine. This is probably optional but will help your paint adhere.
- Universal Black Paint in Satin or Ultra Cover Spray Paint (in any color of your choice)
- Deglosser With Rag
- Green Scotchbrite Pad or Extra Fine Sandpaper (higher than 220)
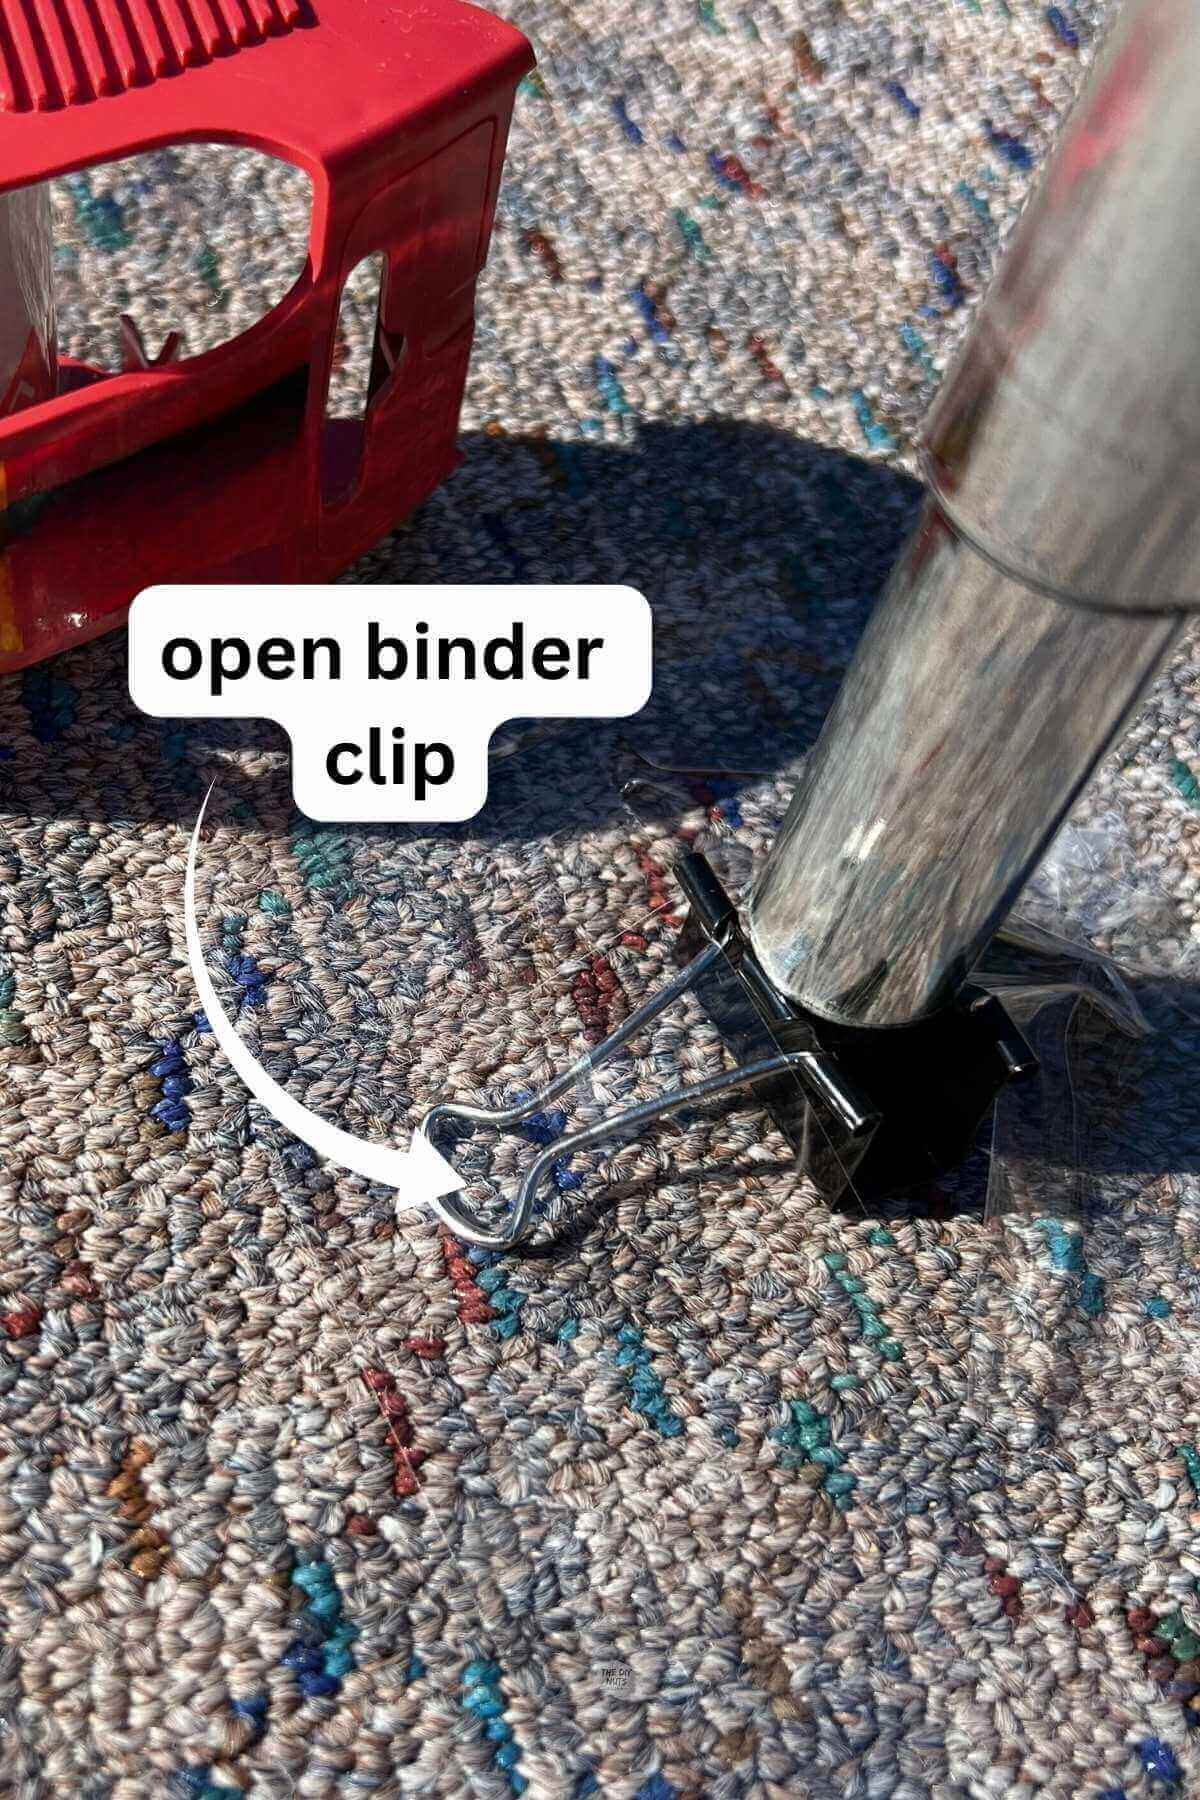
- Binder Clip and Tape: you will see how we propped up the roll holder to easily paint.
- Place To Use Spray Paint: this was an old piece of carpet outside for us!
- Protective Gear: gloves or mask if spraying indoors
How To Spray Paint Your Toilet Roller Holder
Before You Begin
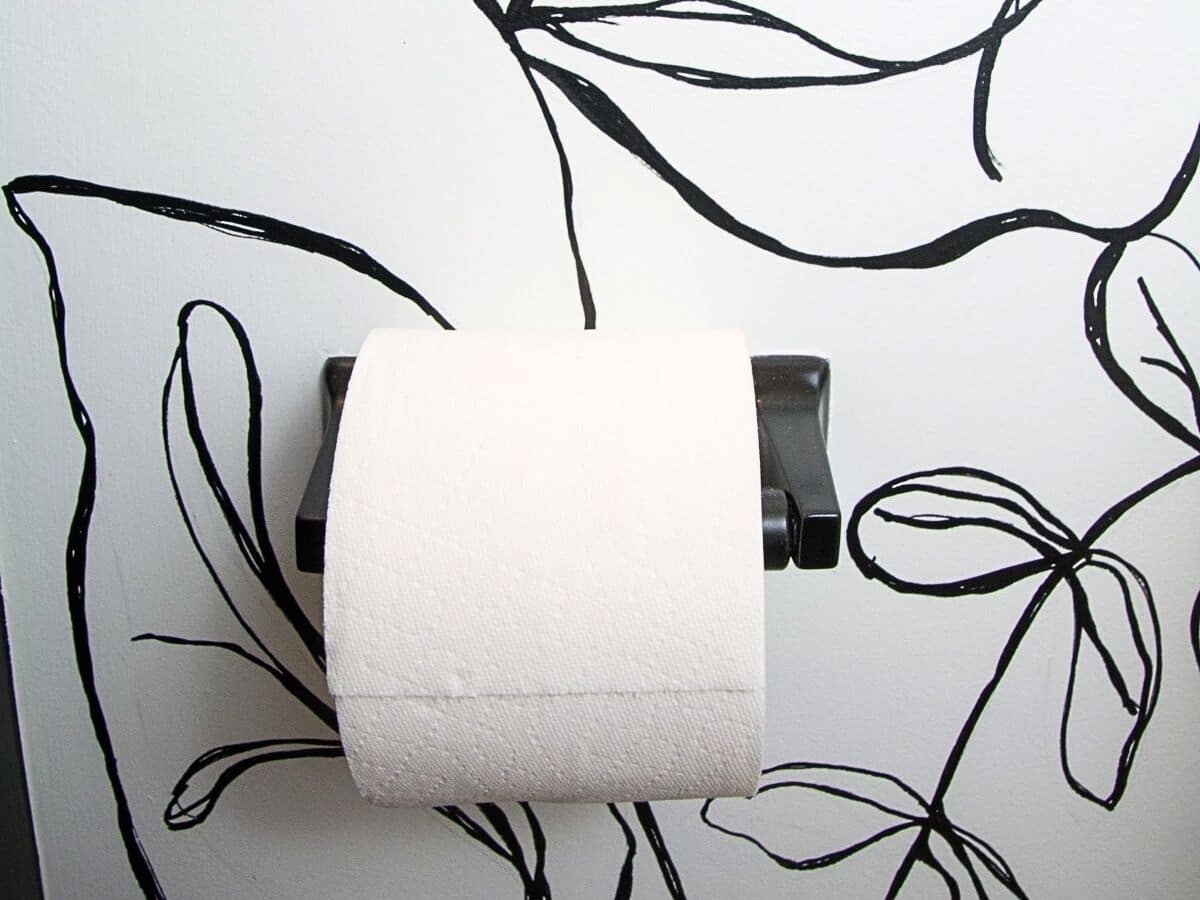
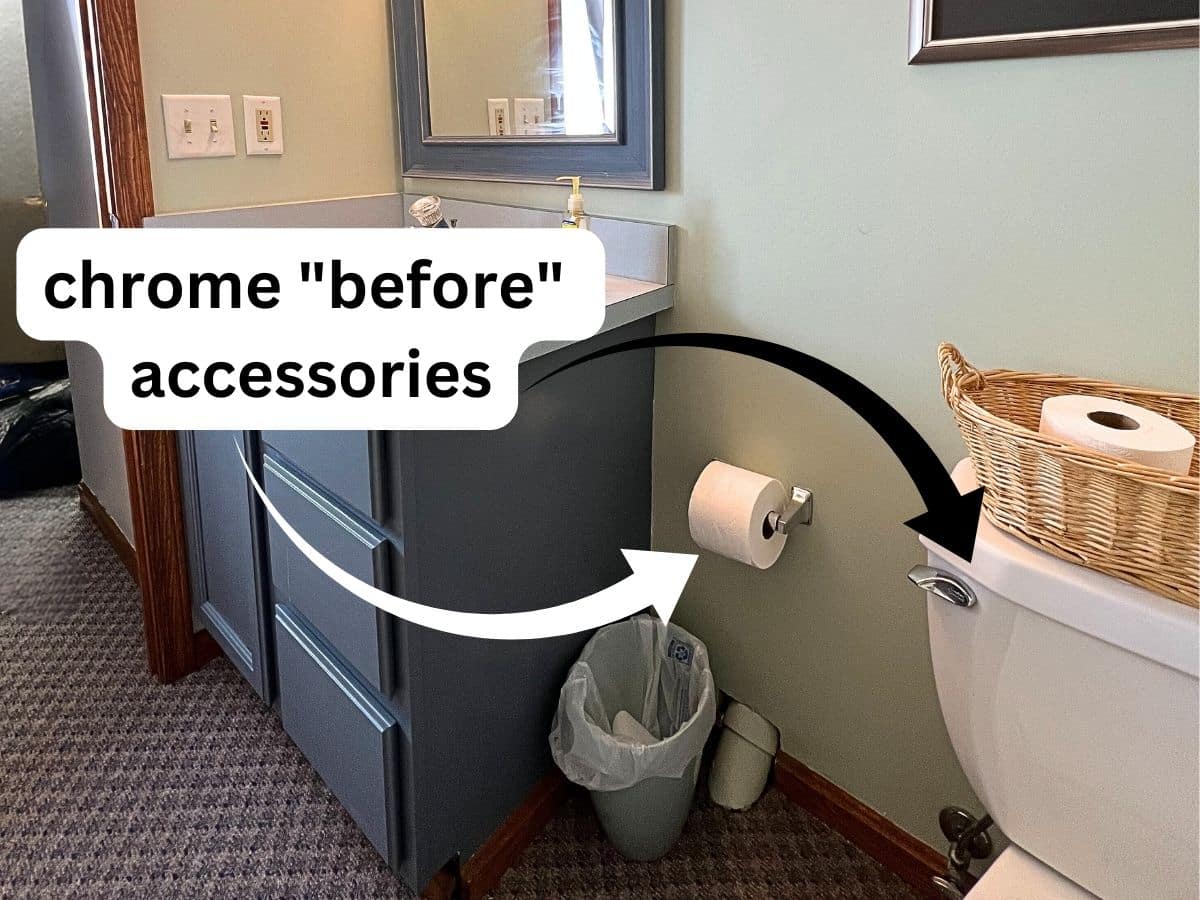
Remove the old accessory from the wall. You only need to remove the parts that you will see. If your toilet paper has anchored in the wall you shouldn’t need to remove those.
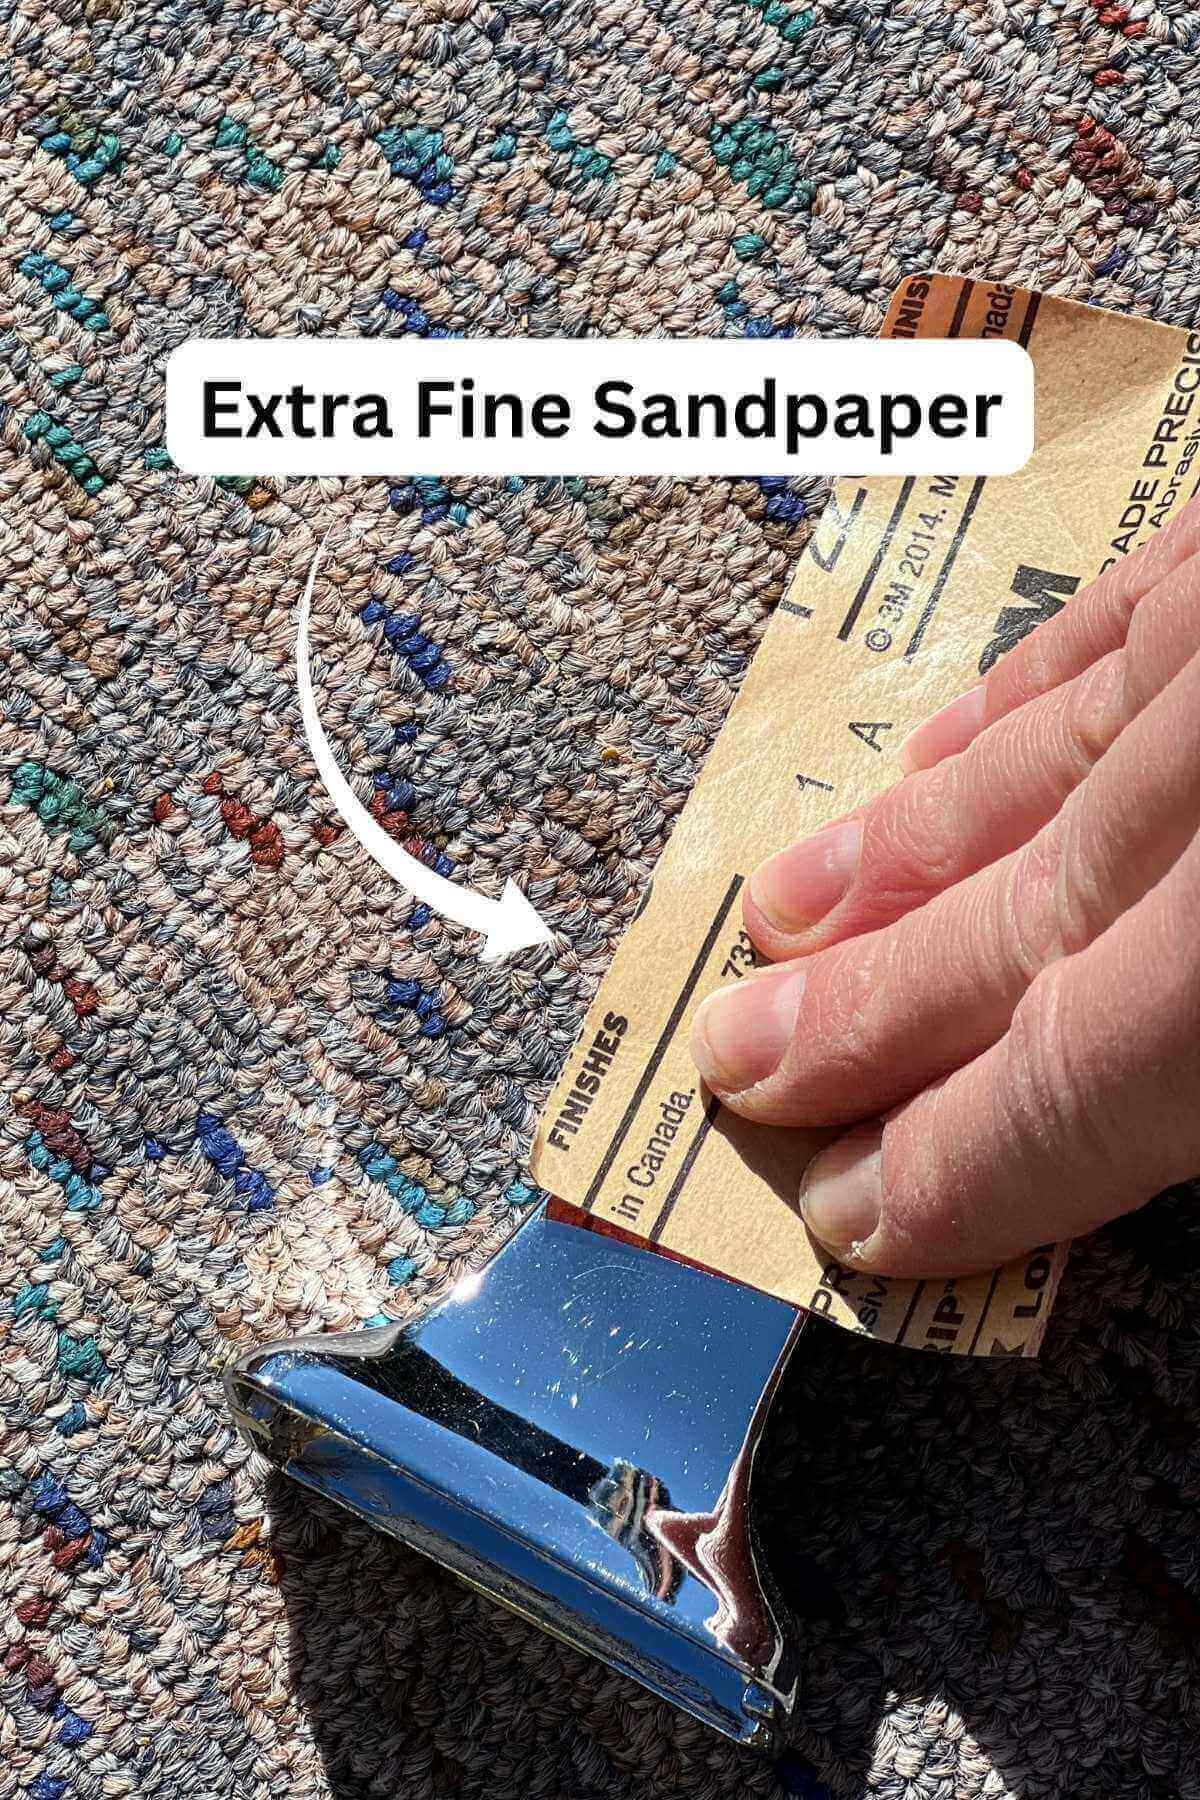
Step 1: Scuff The Surface
You want your primer and paint to stick well. Roughen the surface of your metal or ceramic with a green pad or extra fine sandpaper (220 or higher).
Step 2: Clean Your Accessories
Wipe down with a deglosser on a rag. Let this fully dry.

Step 3: Set-Up Your Paint Station
You should spray paint all parts of your toilet paper roll separately. The toughest part about painting a round item is that you have to figure out how to prop it up.
You can tape a binder clip to a flat surface and then place the role part in the clip.
Step 4: Add Primer (Optional)
For best adhesion, we like to use a primer meant for metals. This may be a little overkill, but we had the supplies so why not? If your accessory isn’t touched that much, you could probably just get away with using spray paint with primer built-in.
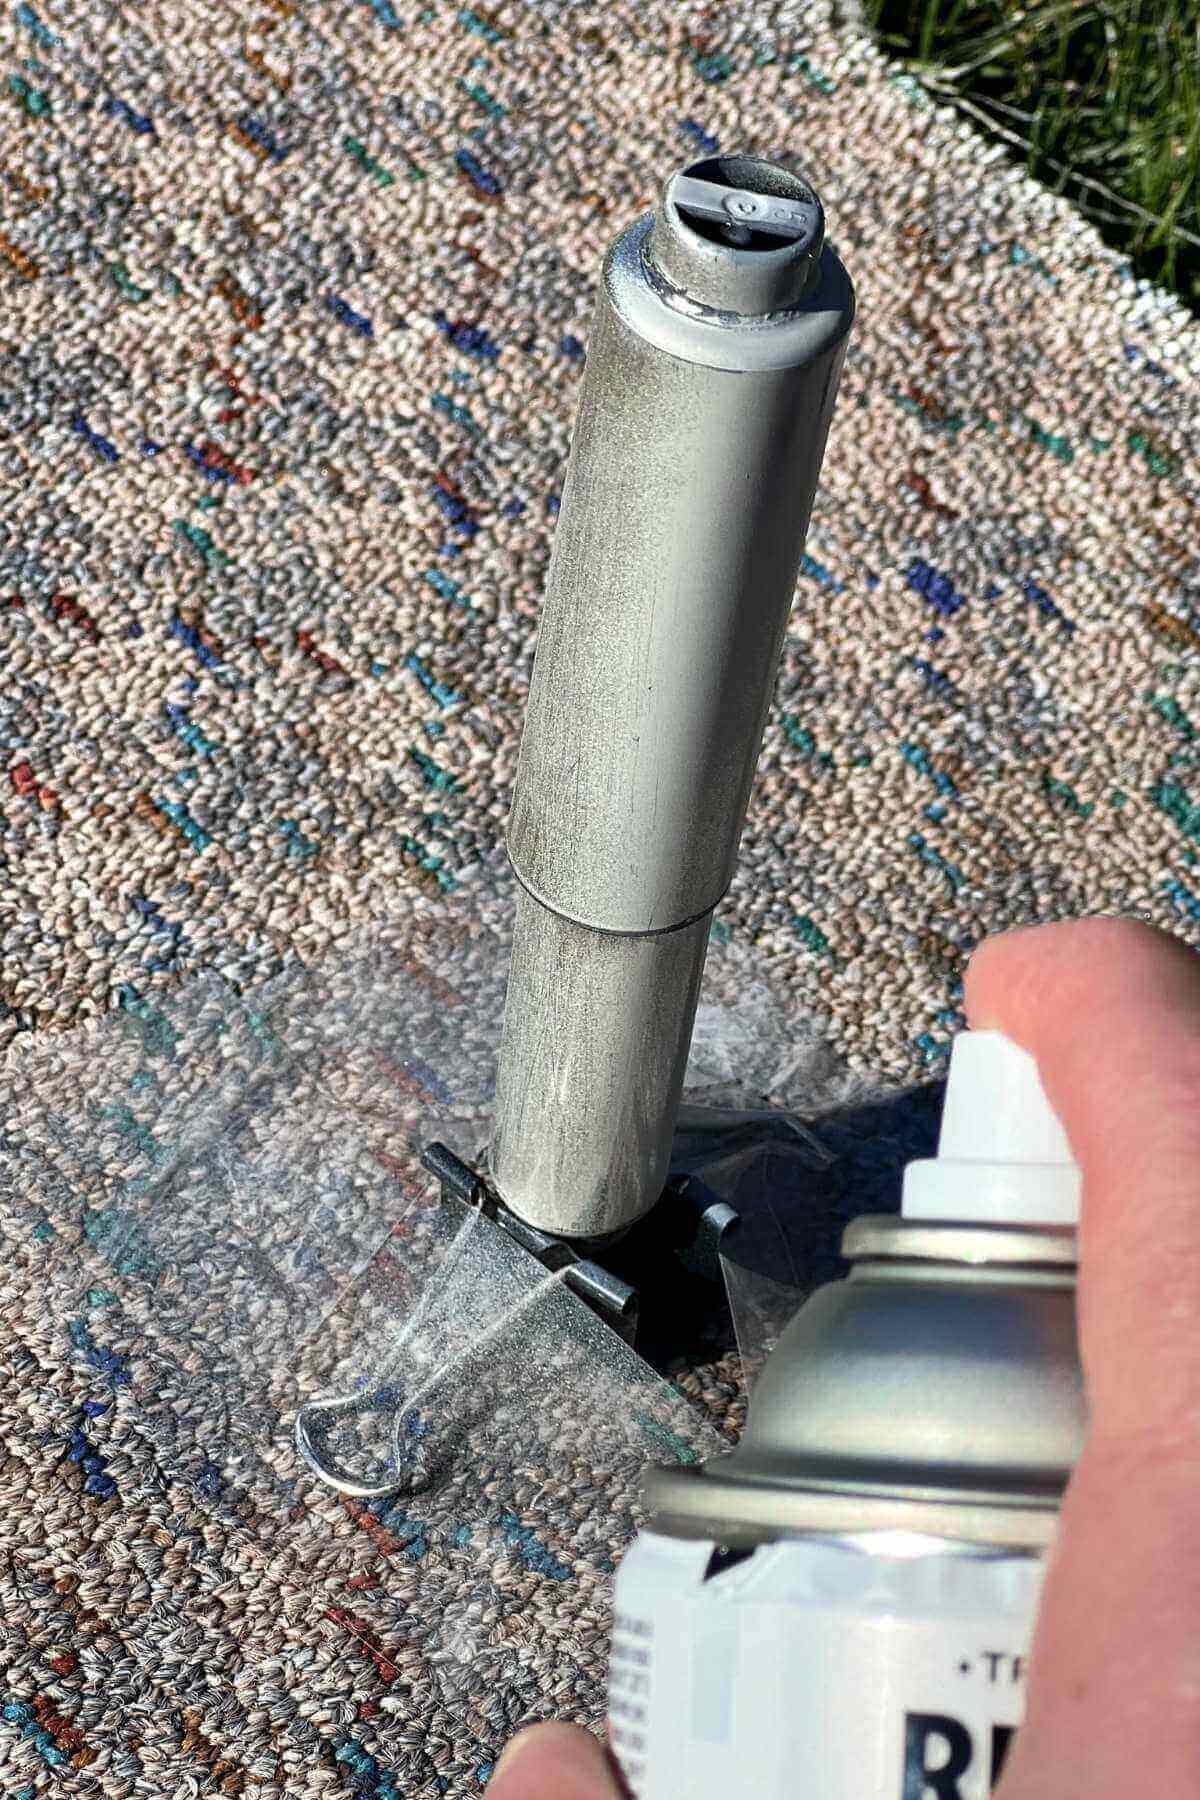
Use large sweeping motions about 6-10″ away from the holder and cover it completely. Check for different angles that it is covered.
Step 5: Let Dry
Read the instructions of the materials you are using to know how long to let your primer dry.
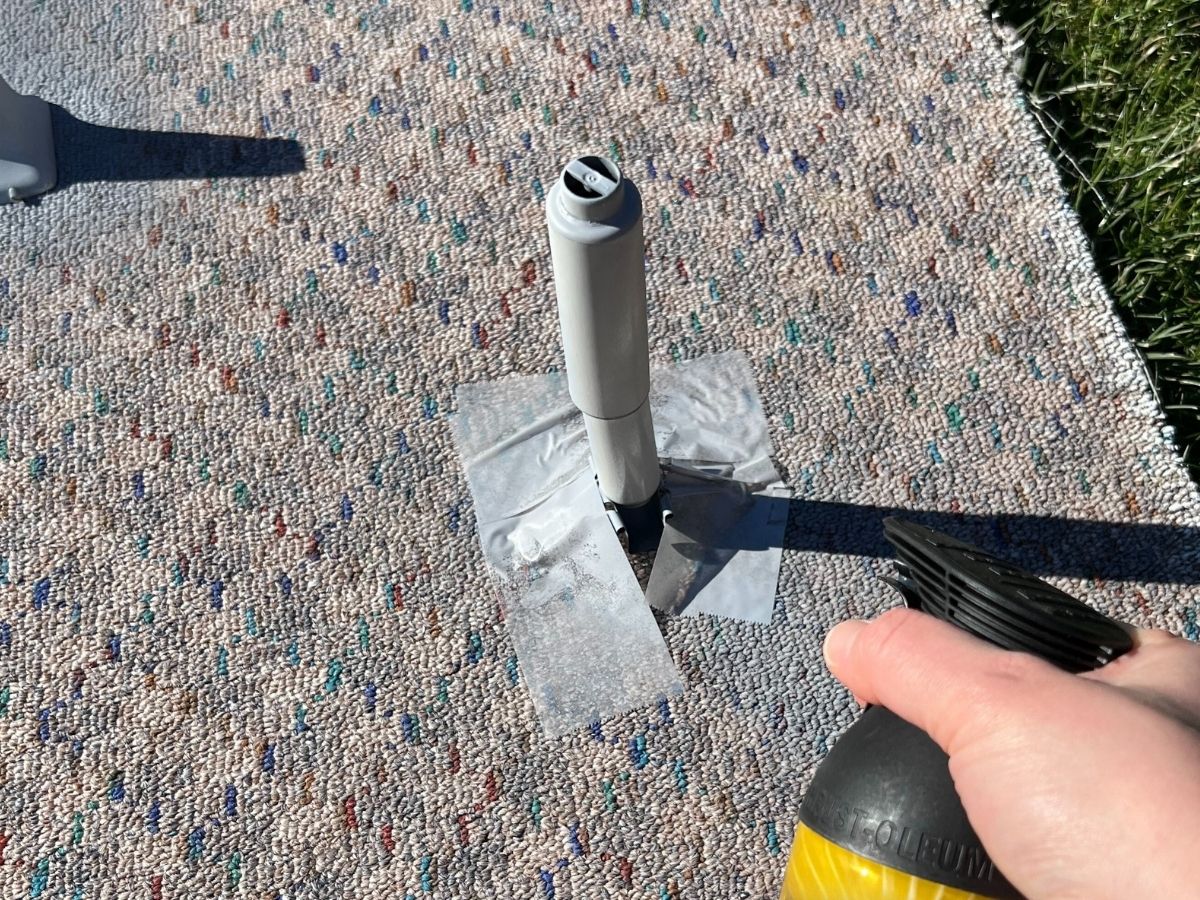
Step 6: Repeat With Colored Spray Paint
Work in layers for best results and let the paint dry in between. Typically, 2-3 coats of paint will give your complete coverage. Spray your toilet paper holder from different angles and about 6-10″ away.
Step 6: Let Dry
We recommend letting your toilet paper roll holder dry for at least 24 hours before reinstalling and using it.
Tips To Get A Smooth Finish
- Shake the can well before starting and do a test spray to make sure the spout is clean.
- Use thin coats of spray paint.
- Be patient in between coats.
- Make sure your bathroom accessories are completely dust-free before spraying.
- Hold the spray nozzle at different angles to help fully paint the hardware.
- Most likely at least 3 coats of spray paint will be needed.
- Don’t try to spray paint on a really humid or windy day.
- If you see a drip you can lightly sand it after the paint has fully dried and then spray another coat.
- Use large sweeping motions when spraying. It is best if you start spraying right before the item and stop past your item. This will stop large droplets from landing on your hardware.
- Hold the can at the right distance: Hold the can 8 to 10 inches away from the surface you’re painting. If you hold it too close, the paint may drip or pool, and if you hold it too far, the paint may not cover the surface evenly.
How-To FAQs
Yes, the above method would work well for metal, ceramic and plastic accessories. You just want to make sure that you are using the proper spray paint for the surface you are changing.
Yes, just like with any painting project the prep is very important. Make sure to clean the surface of the toilet paper roll thoroughly and allow it to dry completely before spray painting. You may also want to scuff the surface to help the paint adhere better.
Generally, 2-3 coats of high-quality spray paint should help you change the color of your bathroom accessories. It may vary slightly depending on the type of paint and the color you are using.
Follow us on Pinterest, YouTube or Facebook for more DIY inspiration!
Related Reading
You can see how we used other budget DIY projects to easily makeover our small bathroom. Here are a few of the other projects we completed:
Get These Tutorials!
- How To Repaint A Bathroom Cabinet: Get our tried and true method for repainting painted cabinets. We just love the modern feel of adding classic black to the vanity.
- How to Paint Laminate Countertops: This step-by-step tutorial will show you exactly how to paint your countertops without using an expensive kit.
- How To Install Peel and Stick Flooring: You won’t believe how this flooring was redone for under $40!
- Fun Paint Marker Accent Wall Tutorial: Learn how to create faux wallpaper with only paint pens.
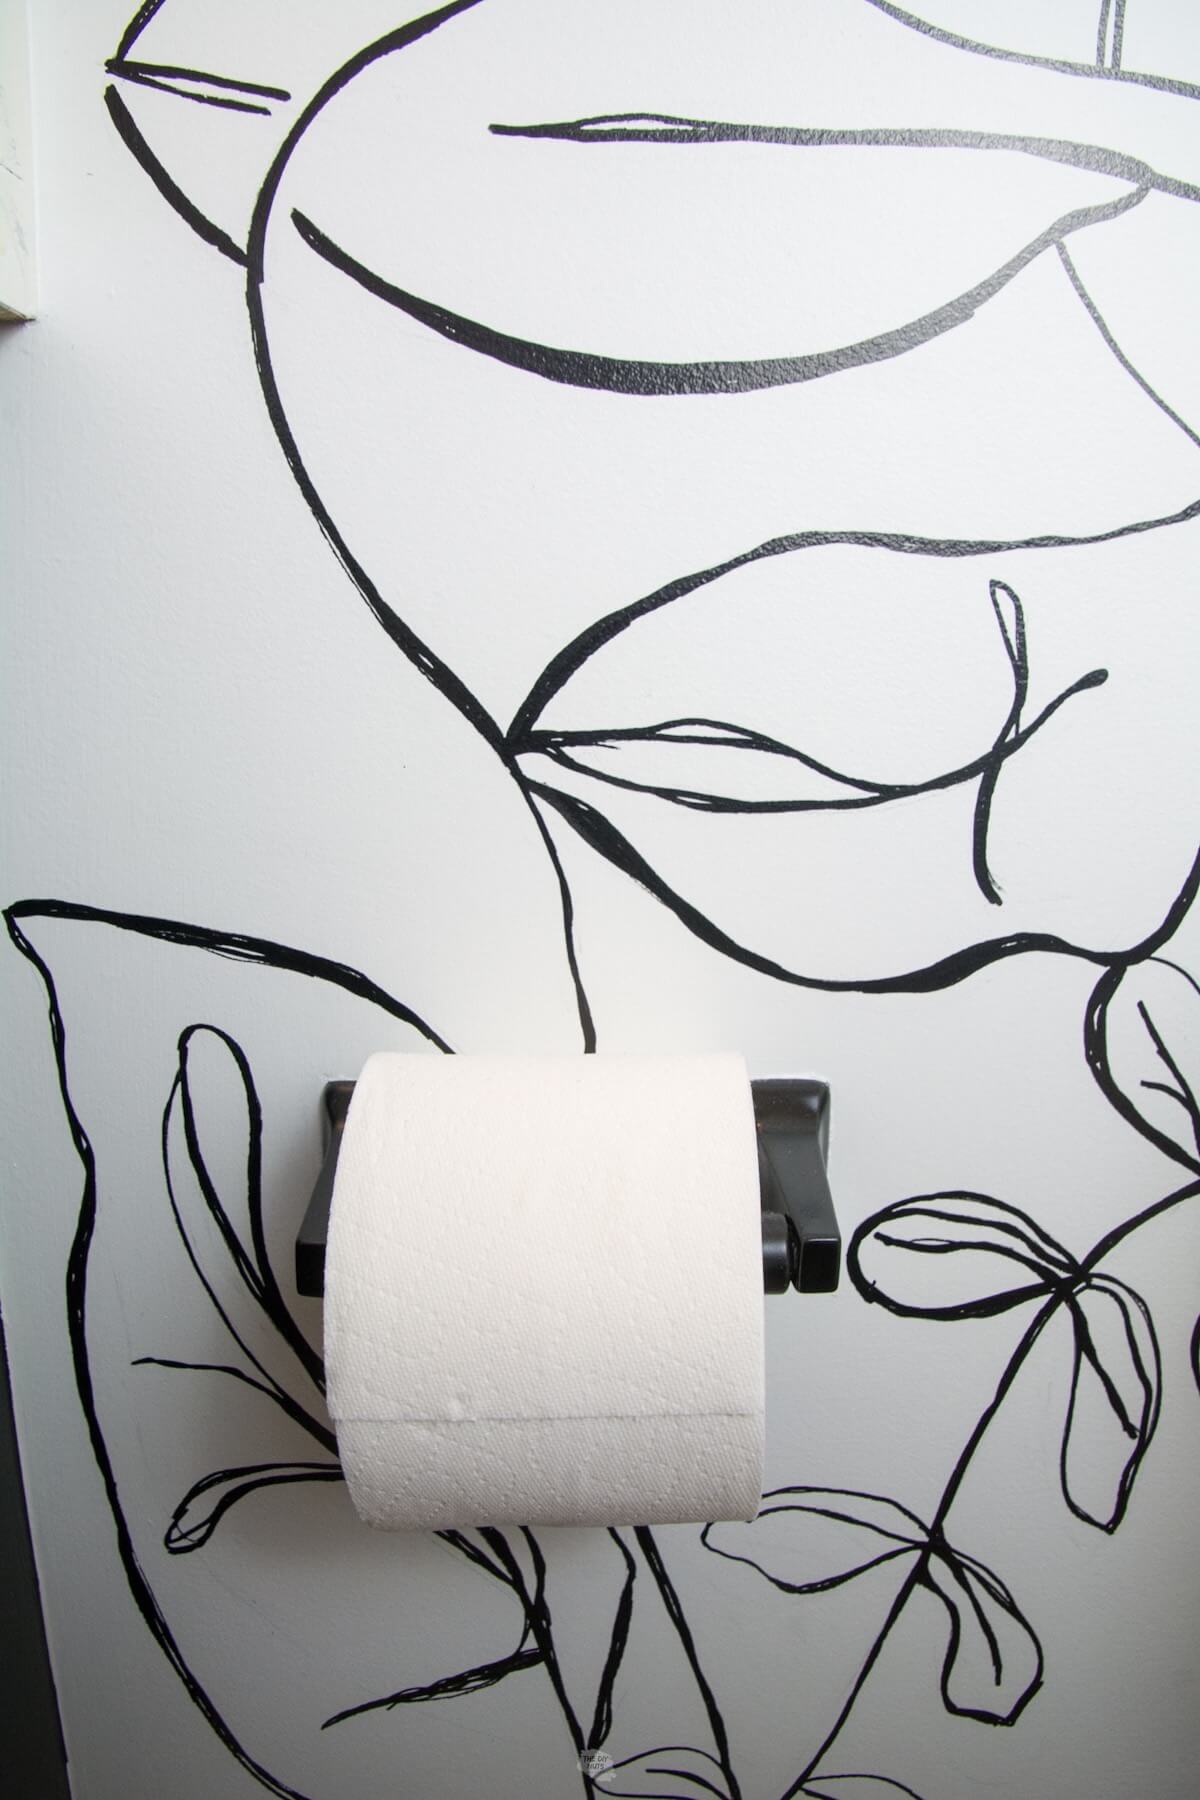
Painting a toilet paper holder is an easy and affordable way to match your new style or add a pop of color to your bathroom decor. With just a few simple steps, you can transform your plain toilet paper holder.
If you like this tutorial, please give it 5 stars below 🤩🤩🤩🤩🤩. Your support helps us continue to provide unique and budget-friendly DIYs.
How To Paint Bathroom Accessories
Equipment
- Place To Spray
- Screwdriver
- Rag
- Binder Clip
- Clear Tape
Supplies
- Spray Paint
- Bonding Primer Spray Paint optional
- Deglosser
- Extra Fine Sandpaper or Green Pad
Instructions
- Remove the old accessory from the wall.
- Roughen the surface of your metal or ceramic with a green pad or extra fine sandpaper (220 or higher).
- Wipe down with a deglosser.
- Set up a spray painting station with a binder clip. Prop toilet paper roll holder upright in clip.
- Cover all surfaces with the spray bonding primer. Let dry.
- Use spray paint in large sweeping motions. Let first coat fully dry.
- Repeat for 2-3 coats making sure you fully are covering the holder and other accessory parts.
- Let part dry overnight before reinstalling in your bathroom.
Notes
- Take apart the toilet paper roll holder. Spray all parts separately for the best finish
- Shake the can well before starting and do a test spray to make sure the spout is clean.
- Use thin coats when spraying.
- The primer is optional as you can also just use a spray paint with a primer built-in.
- Use large sweeping motions when spraying. It is best if you start spraying right before the item and stop past your item. This will stop large droplets from landing on your hardware.
-