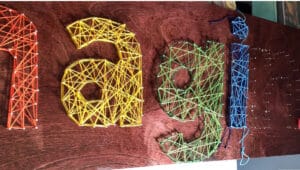
Large DIY Word String Art Idea Tutorial
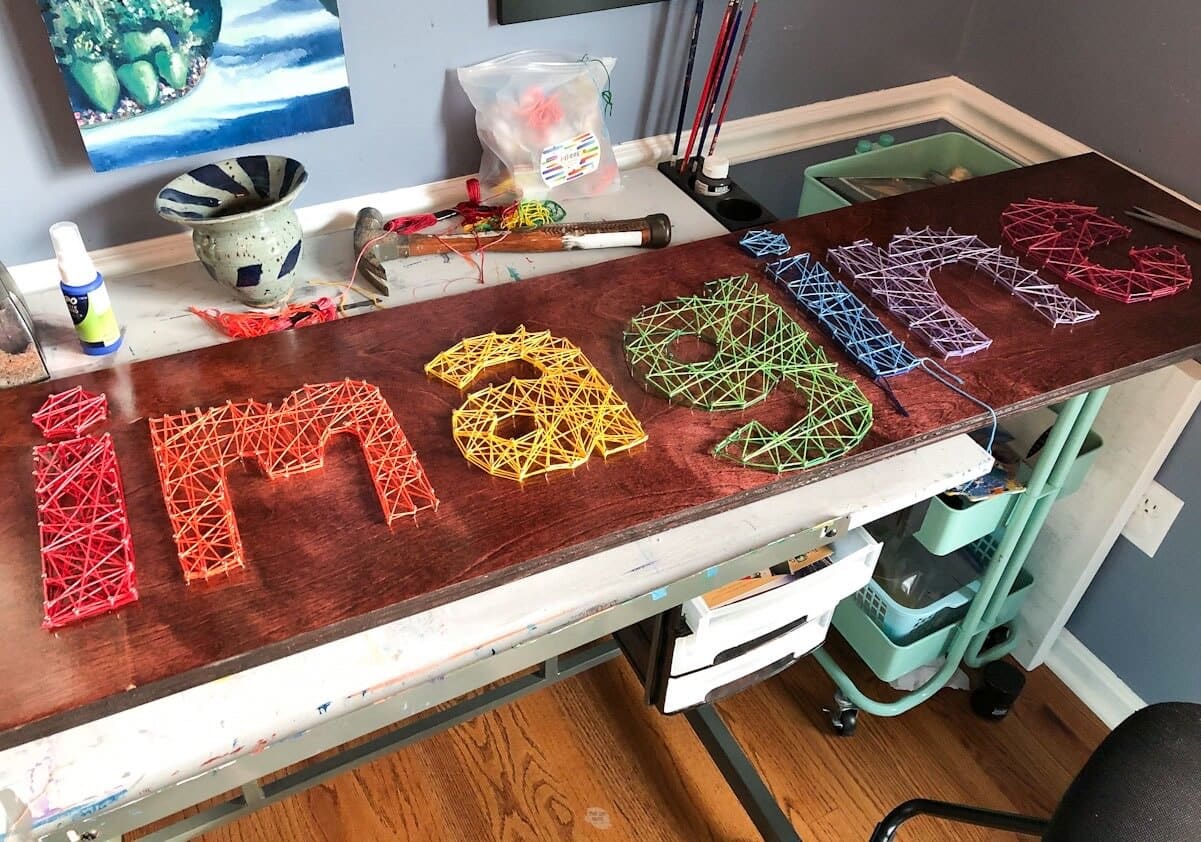
We can’t believe that we were able to make this large rainbow word art idea for under $20. It was the perfect addition to our kids’ craft room. Learn how to create one with our easy tutorial.
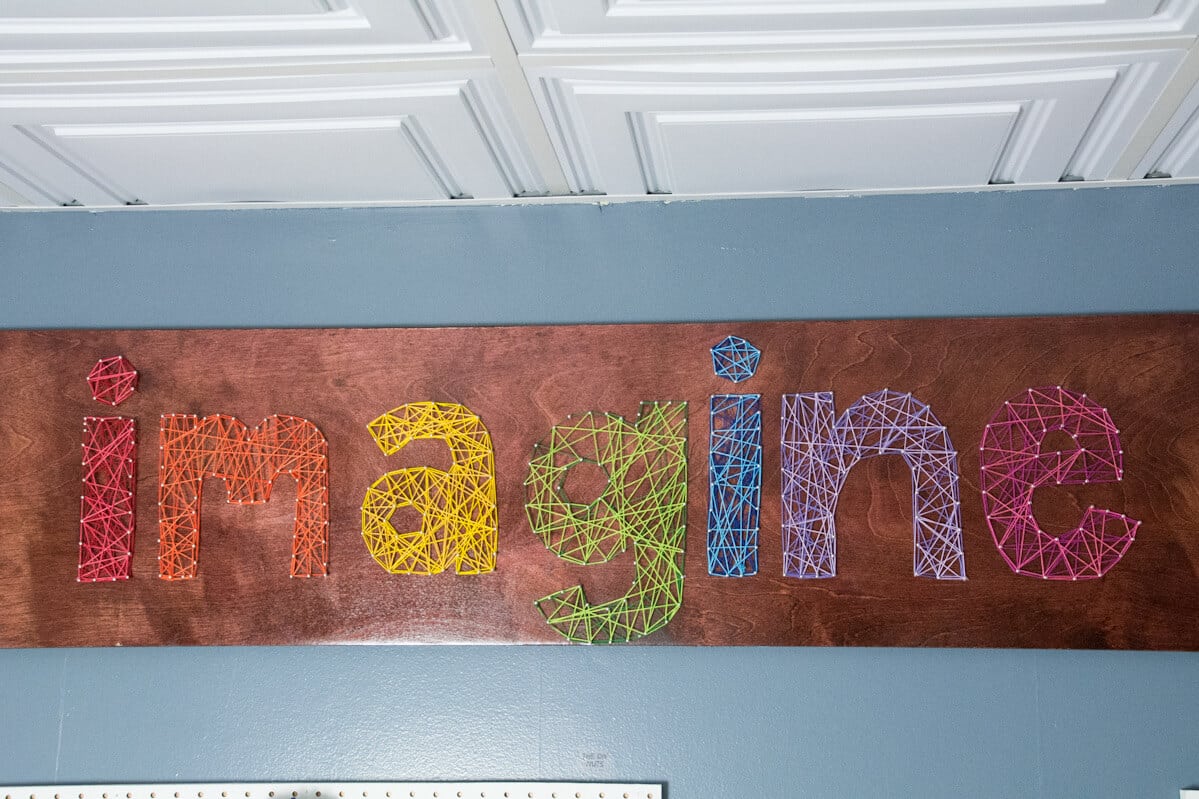
String art was a popular craft in the ’70s. We love retro craft ideas and think we were able to bring them into the future, creating a modern, large word string art that will inspire.
Imagine that… (pun intended once you see the final string art project) and make sure to check out the printable instructions at the end of the post as well.
Our Kid’s Craft Room
Yet again, I am starting a post with one DIY project leading to another. This is true with this large DIY string art project. We have been working on changing a small room in our basement into a homeschool and craft room for our children.
Once our DIY craft pegboards and DIY corner desk were complete, we knew we wanted a large word art piece on the wall.
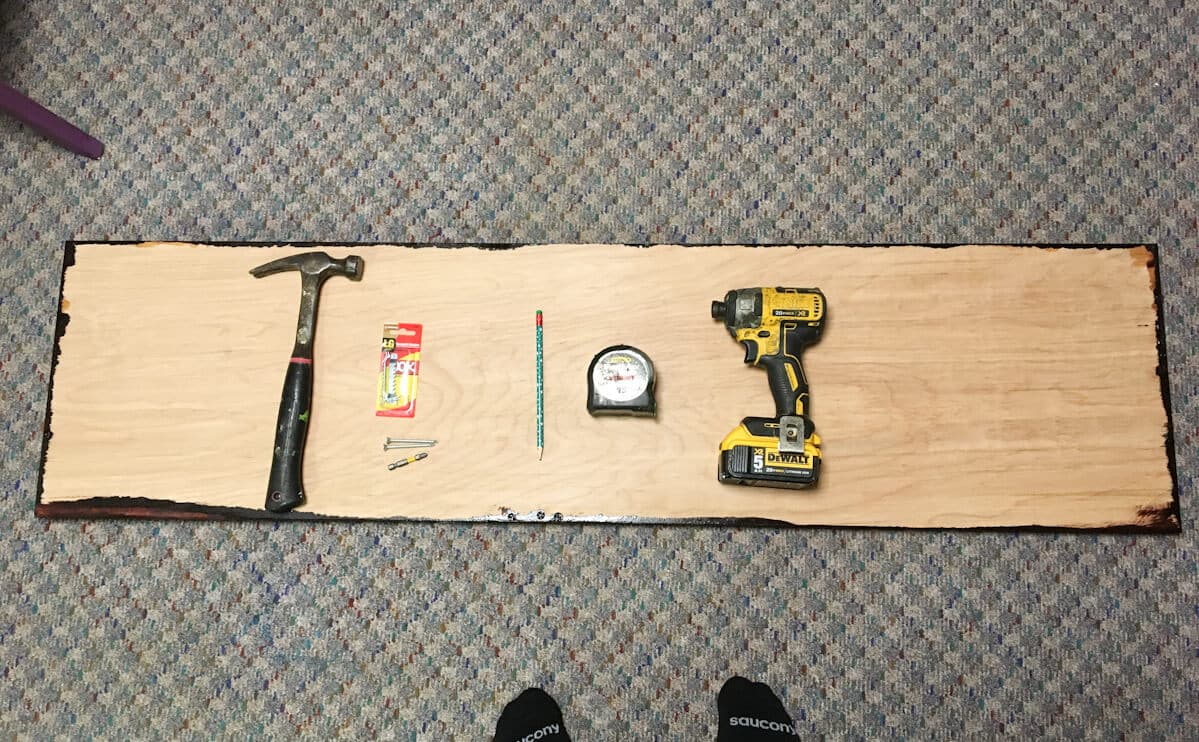
Supplies You’ll Need
*Disclosure: This post may contain affiliate links that at no additional cost to you, may earn a small commission. Read our full privacy policy.

Notes On Supplies
- STRING – This is the exact multi-colored string pack we ordered for our art. I have tons of colors left over. Other string options include using thread or yarn. However, depending on your design or size, you will really want to consider if those will work.
- NAILS – When researching for our large string art, we found that small linoleum nails worked the best. We used two whole packs to create our project. I was skeptical at first that these small nails (¾”) would work, but they were sturdy enough without taking away from the design.
What are the dimensions of our string art?
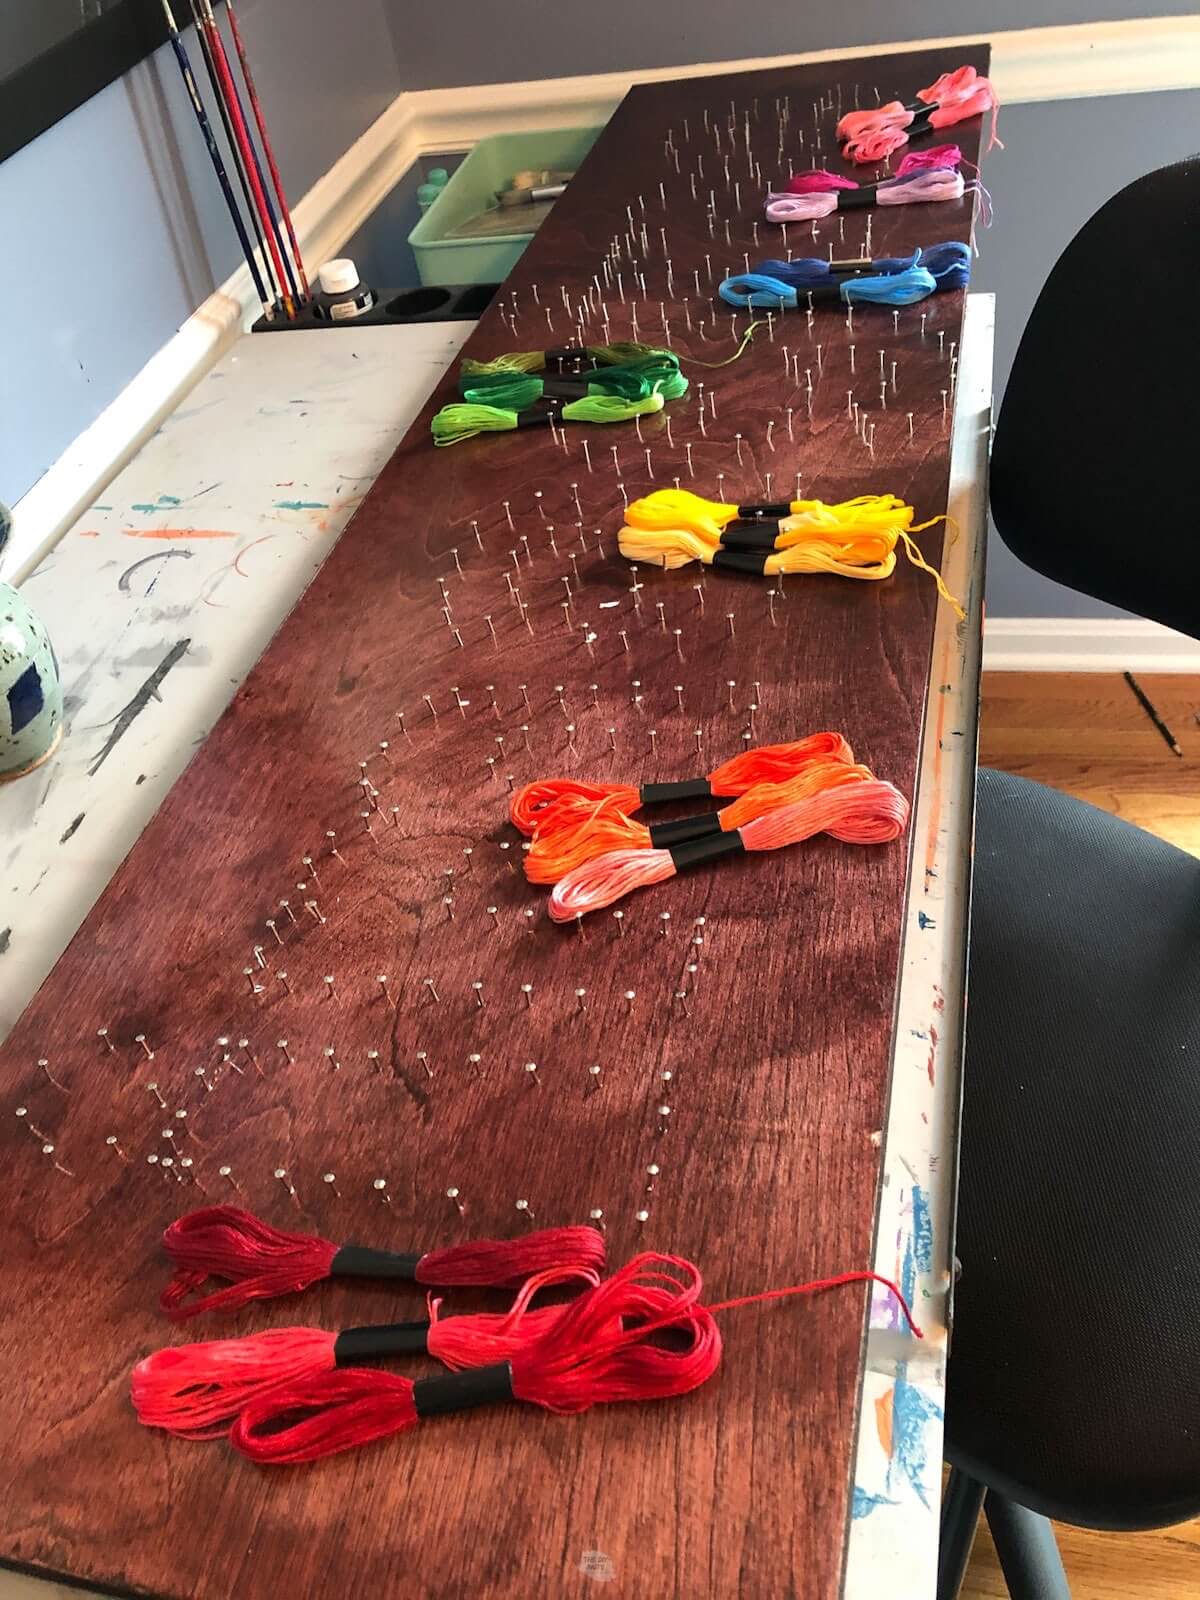
Our word string art is 4 ft. by 15 inches with large letters. Each of our letters used two skeins (or fewer) of thread.
What is a skein of string?
A skein refers to a bundle of string. We used two different colors of embroidery string for each letter to give our words a little more dimensionality.
How To Make String Art
Step 1: Create A Base
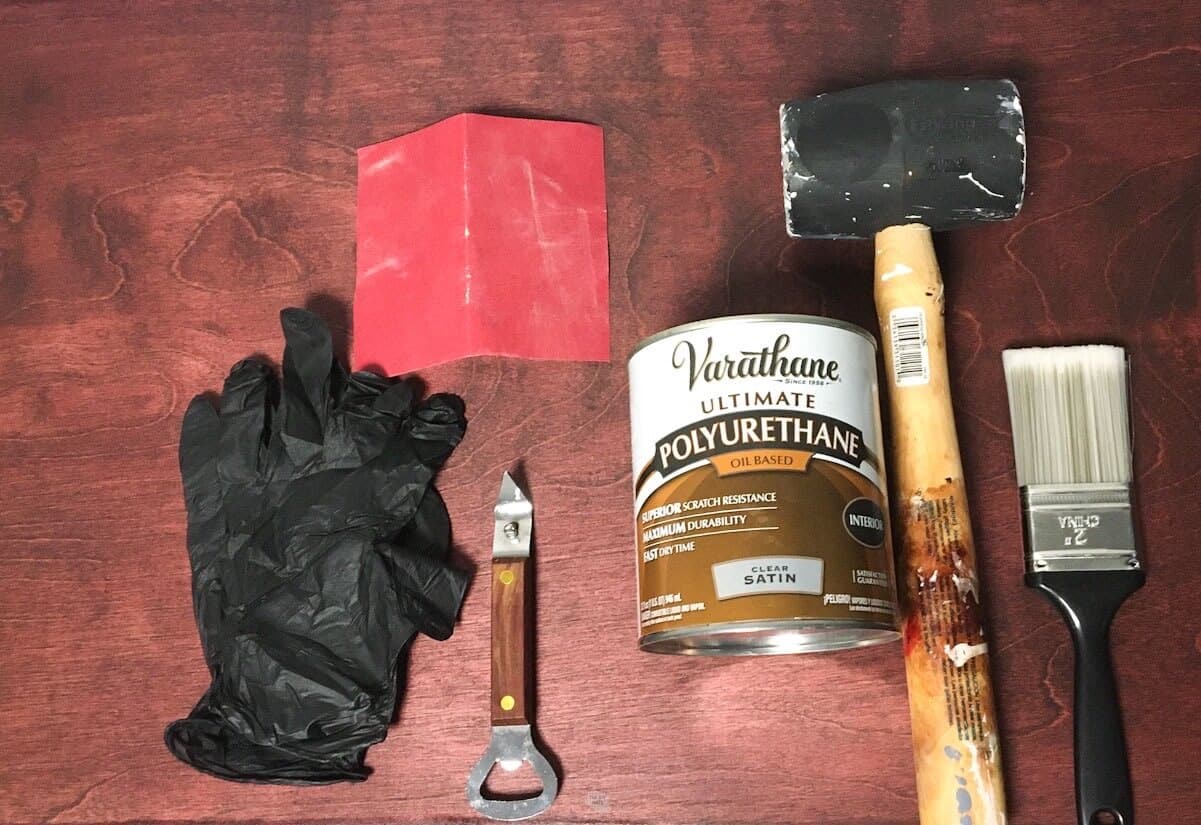
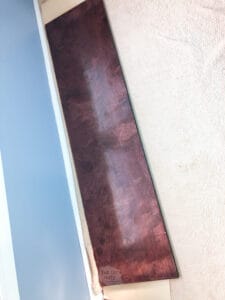
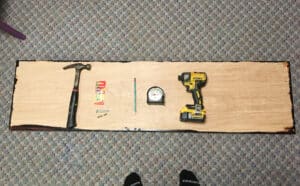
Prep your hard surface or wood base. For us, this included cutting a large piece of birch plywood (15” x 48”), staining and using poly.
And you know we used our favorite stain color!!!
If you don’t believe us, check out all of the other DIY projects we have done using this color. Since we had the nicer plywood, we wanted our board to be stained to match the floating desk the word art would go above.
Step 2: Plan Out Design
Once the board is prepped, ready and dry you will need to plan out your design.
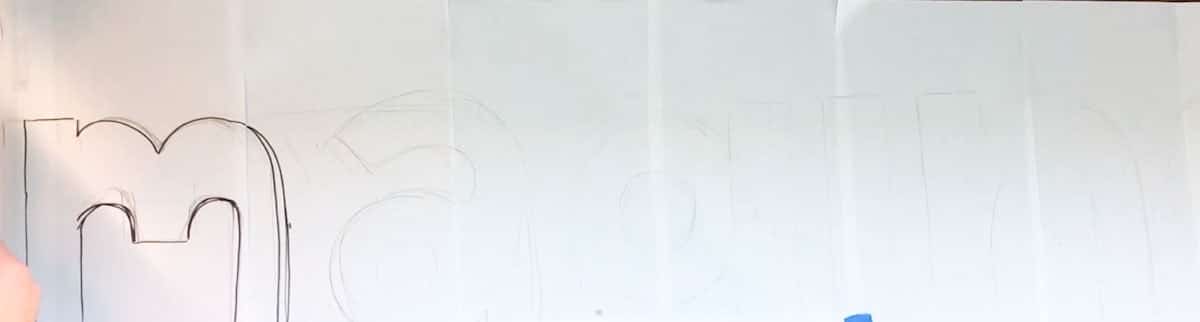
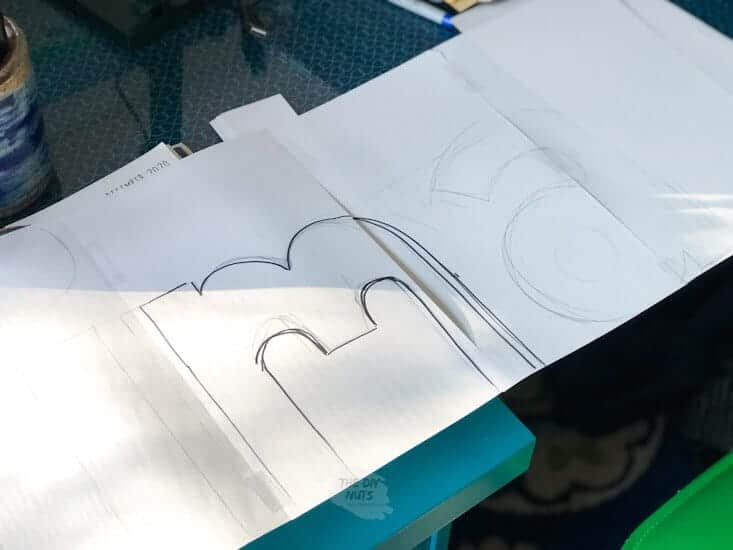
Step 3: Sketch Design On Paper
Print or draw your letters or image. Simpler and cleaner lines will work better. I tried to print letters out to use.
Since our wood was so large, I ended up just sketching the letters myself. To make your design work, try to keep the width of your letters consistent across most areas.
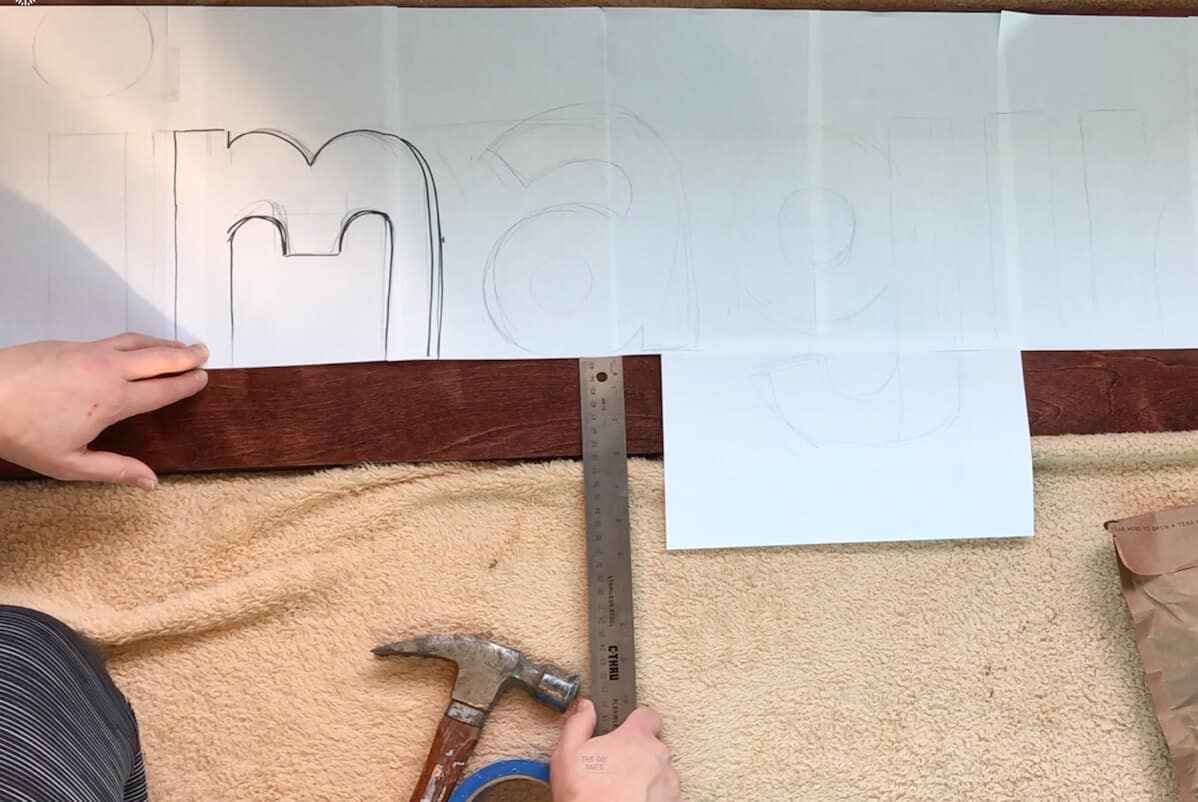
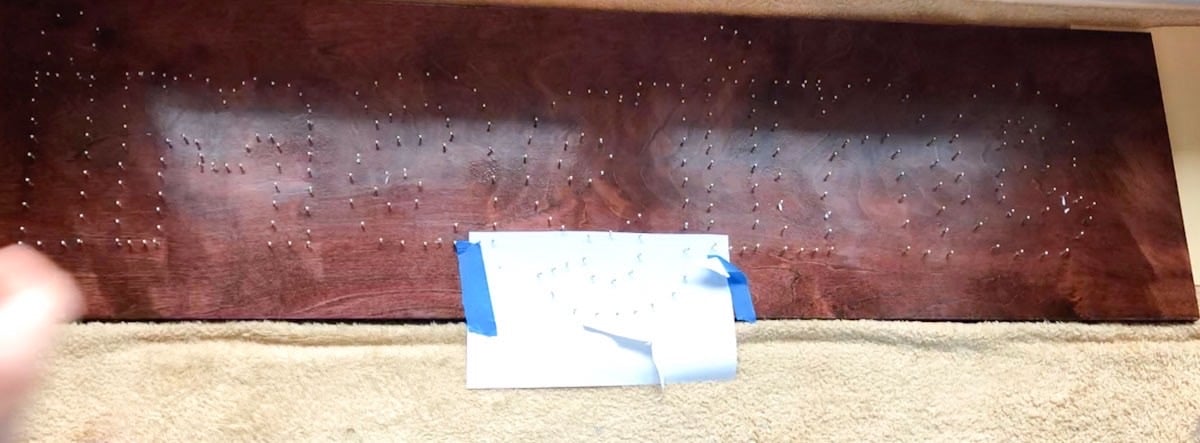
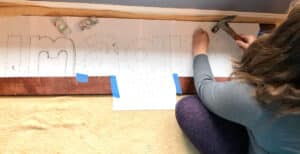
Step 4: Attach Template Paper To Board
Use painter’s tape to lightly tack your drawing down. Make sure that your word is straight and equally spaced from the sides and bottom.
Triple-check this! The last thing you want is to look at a crooked word after you have worked so hard.
Step 5: Start To Add Nails
Lightly tap nails around the edges. At first, I was placing my nails too close together. Nails only need to be about 1/2″ apart. Don’t worry about measuring, just go with it.
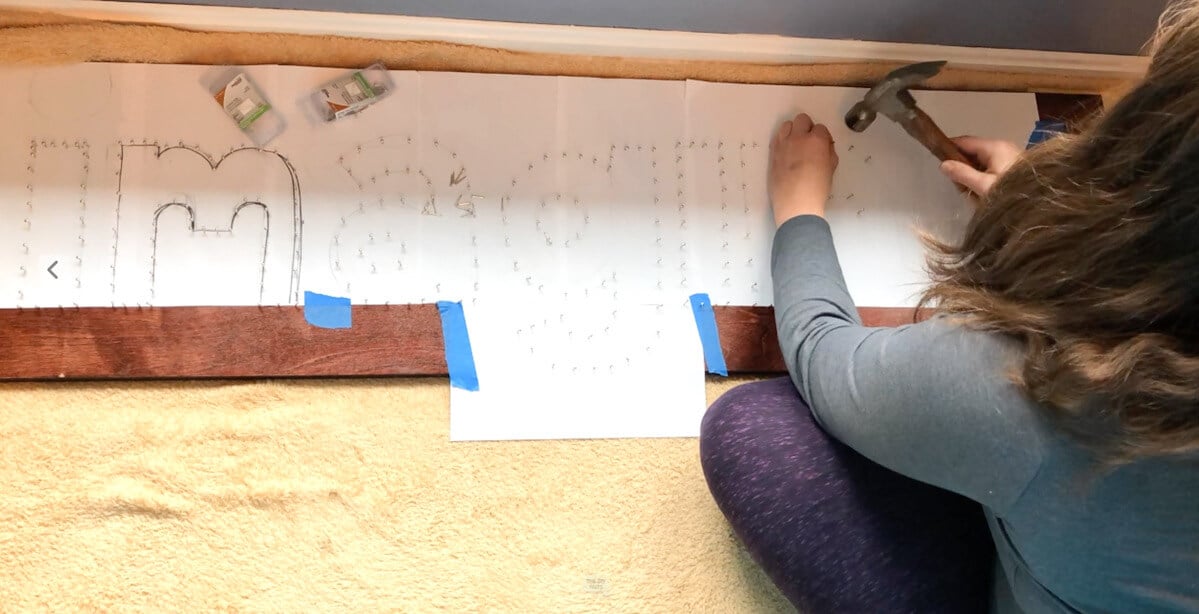
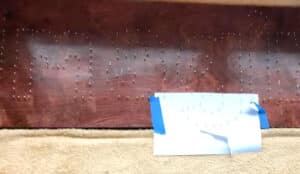
Step 6: Remove The Paper
Once all of your nails are securely in, you can carefully remove the paper. Some paper may be stuck around the nails, and you will just have to carefully pick it out.
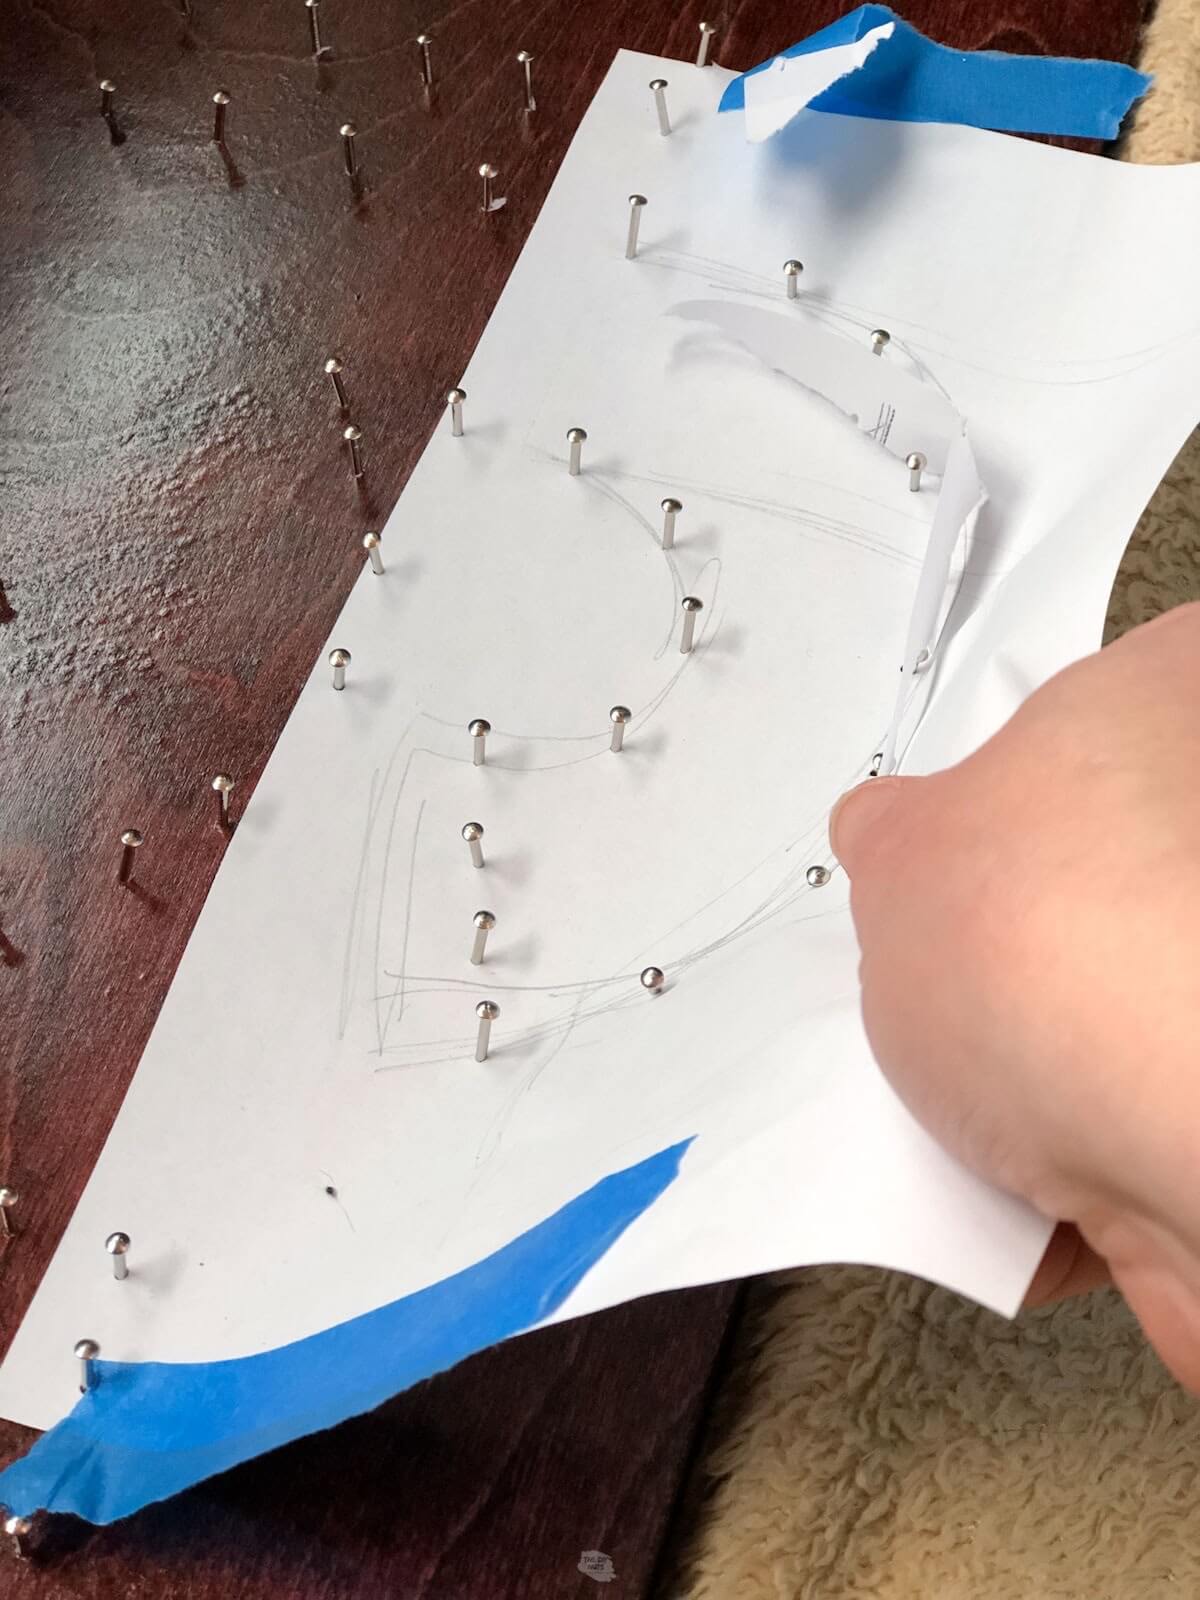
Check for any small pieces of paper you can pull out. Don’t worry about the ones that you can’t see. You will cover them with strings.
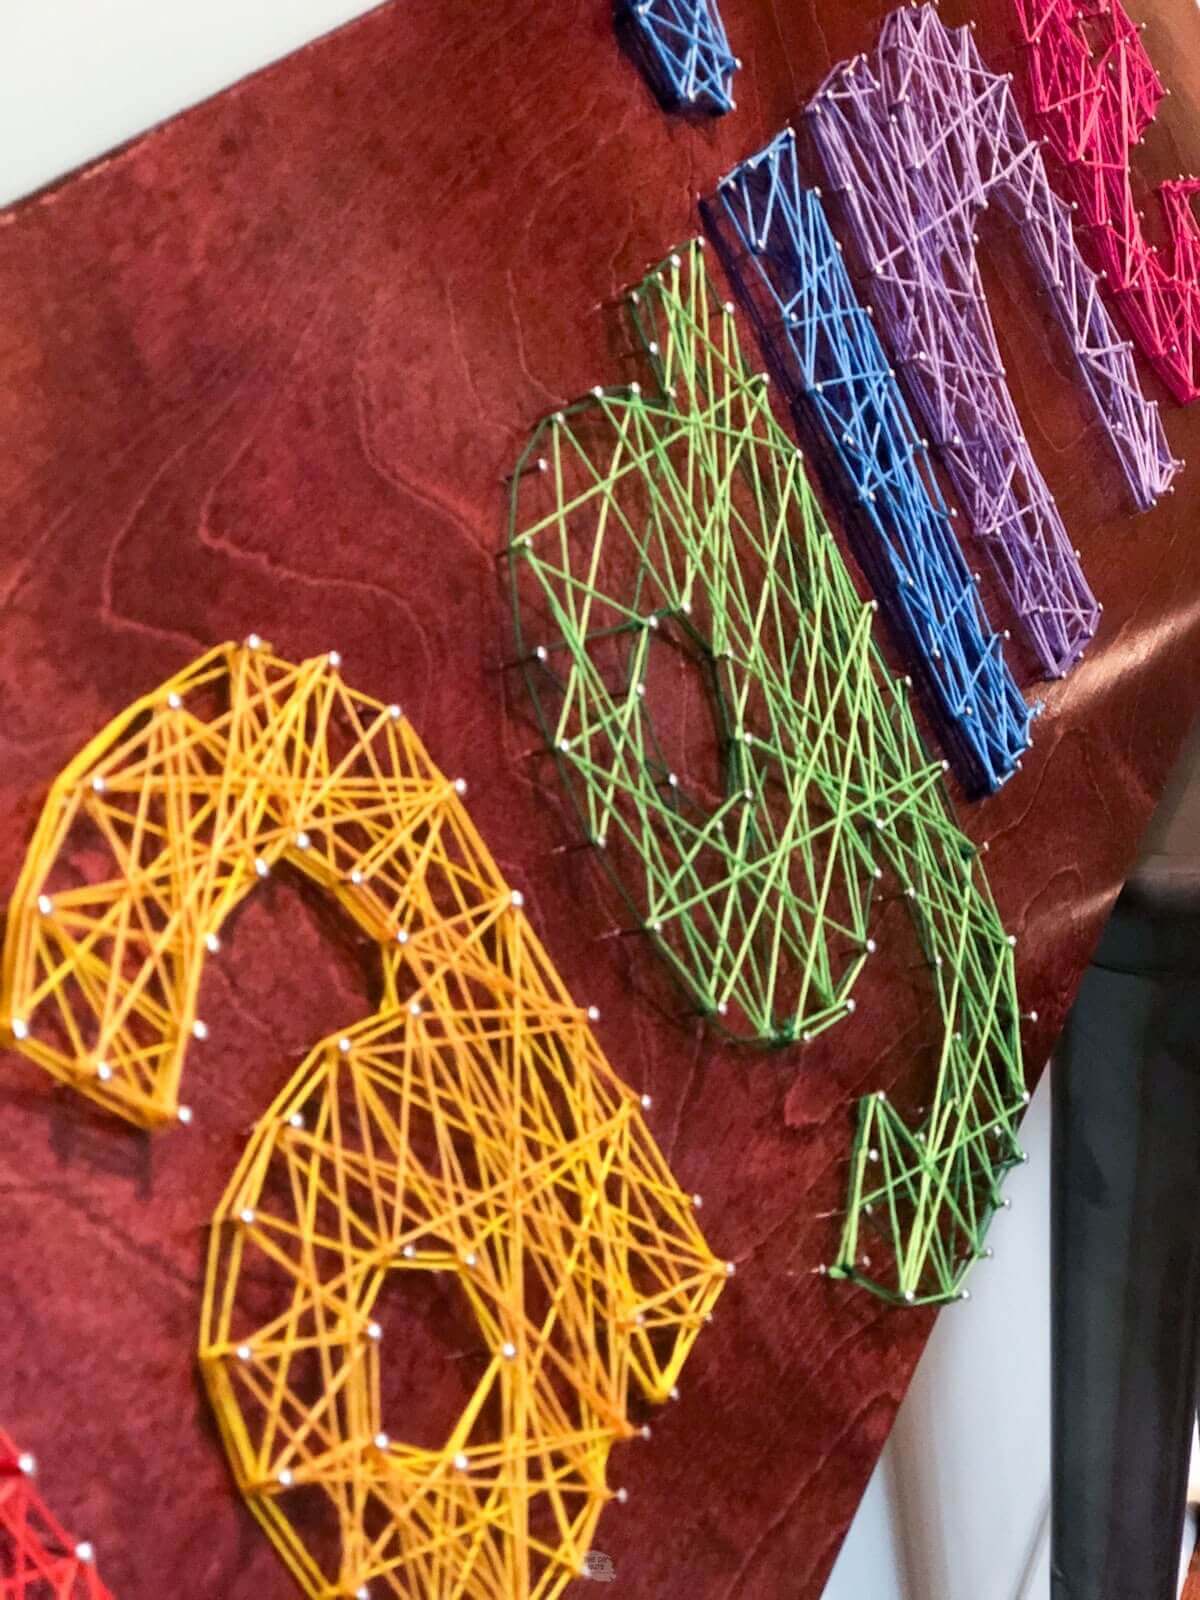
Step 7: Plan Out String Colors
Plan out your colors of embroidery string.
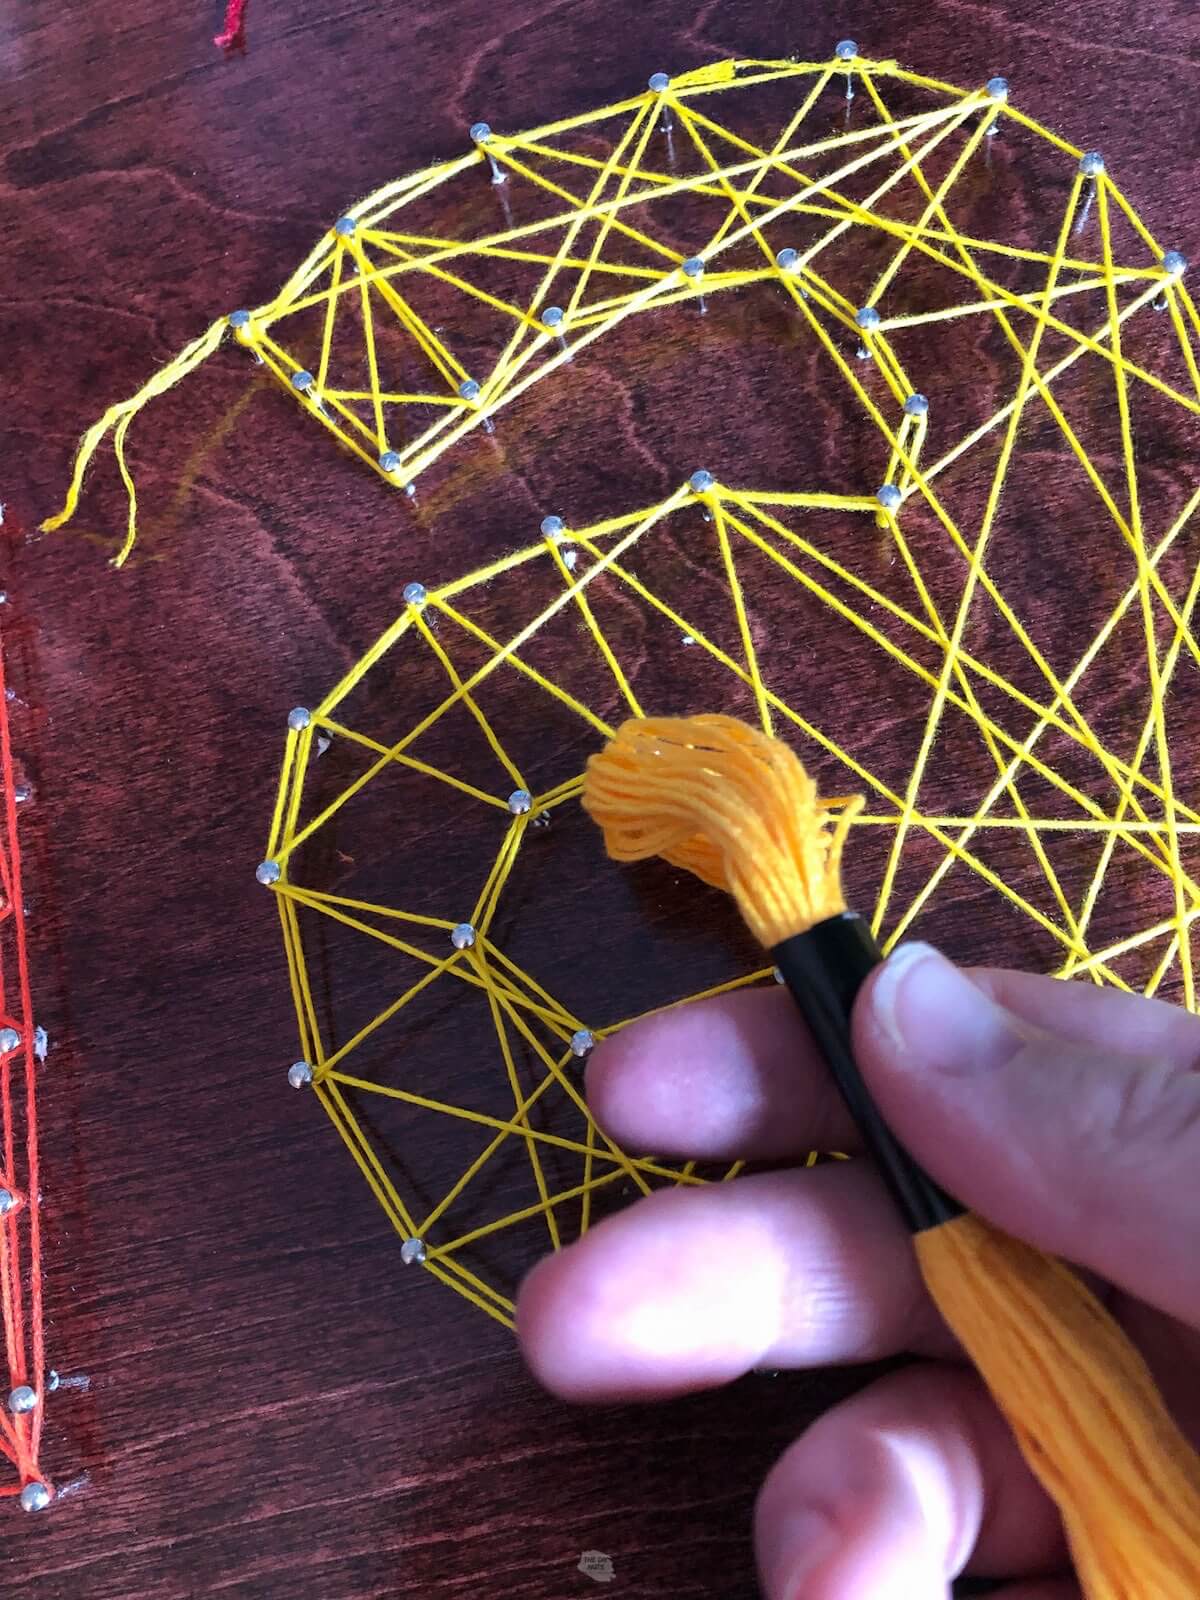
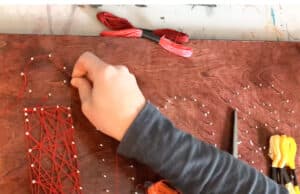
Step 8: Tie a Knot In The Corner and Wrap The Outside Of The Letter
Tie your string in the color and begin carefully tracing the outside of your letters of design.
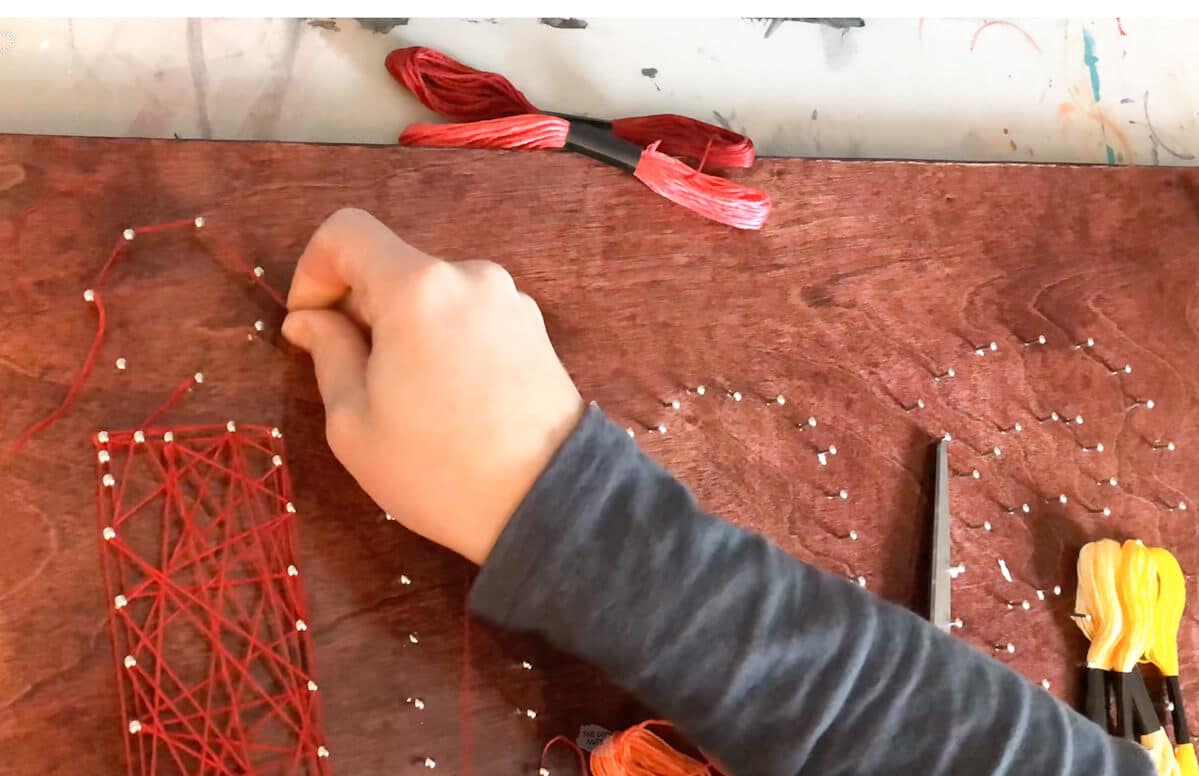
When you get to a corner, you need to wrap it around and change direction. We tried to outline each letter on the inside of the nail and the outside.
Step 9: Wrap String In Random Patterns Inside
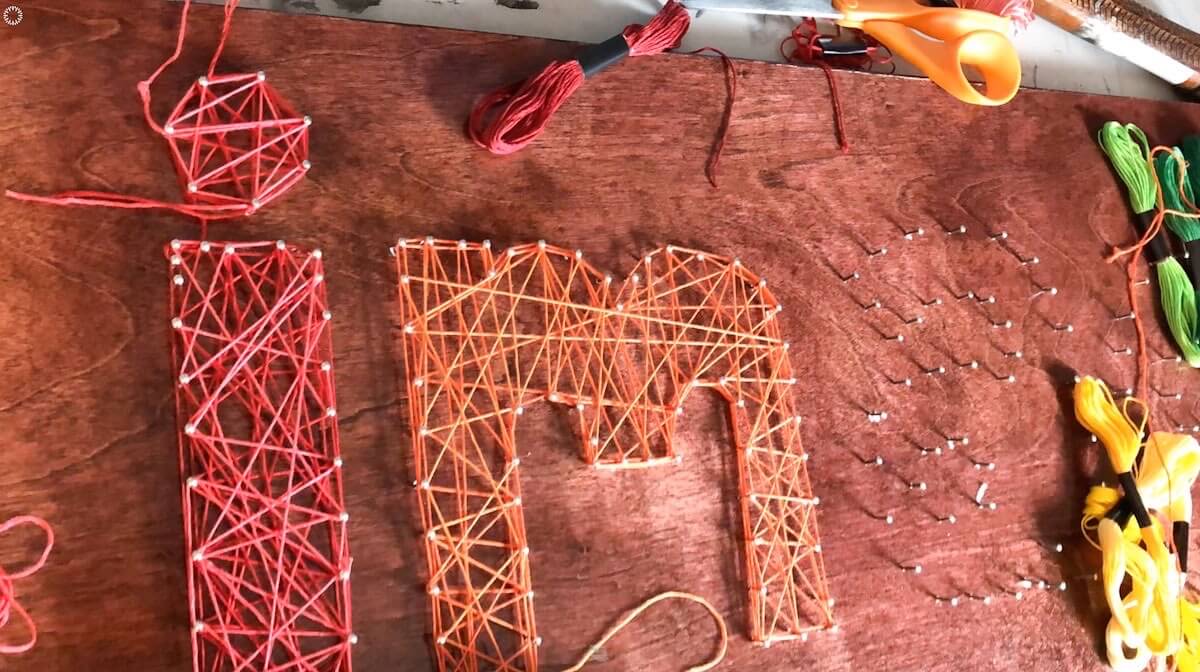
Once your design is outlined, start randomly wrapping the string around it.
Step 10: Tie The String In Corner Again
When done, tie off the string. We found that ending near where you started worked.
You can tie the tails together to hide them. Don’t cut the tails too close or you will chance the knot coming undone. Tie them twice before trimming excess string.

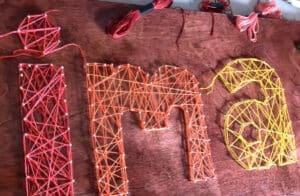
Step 11: Repeat Steps With Different Colors & In All Letters
Add additional colors following the steps above. In our rainbow string art design, we used two different tones of the main color.
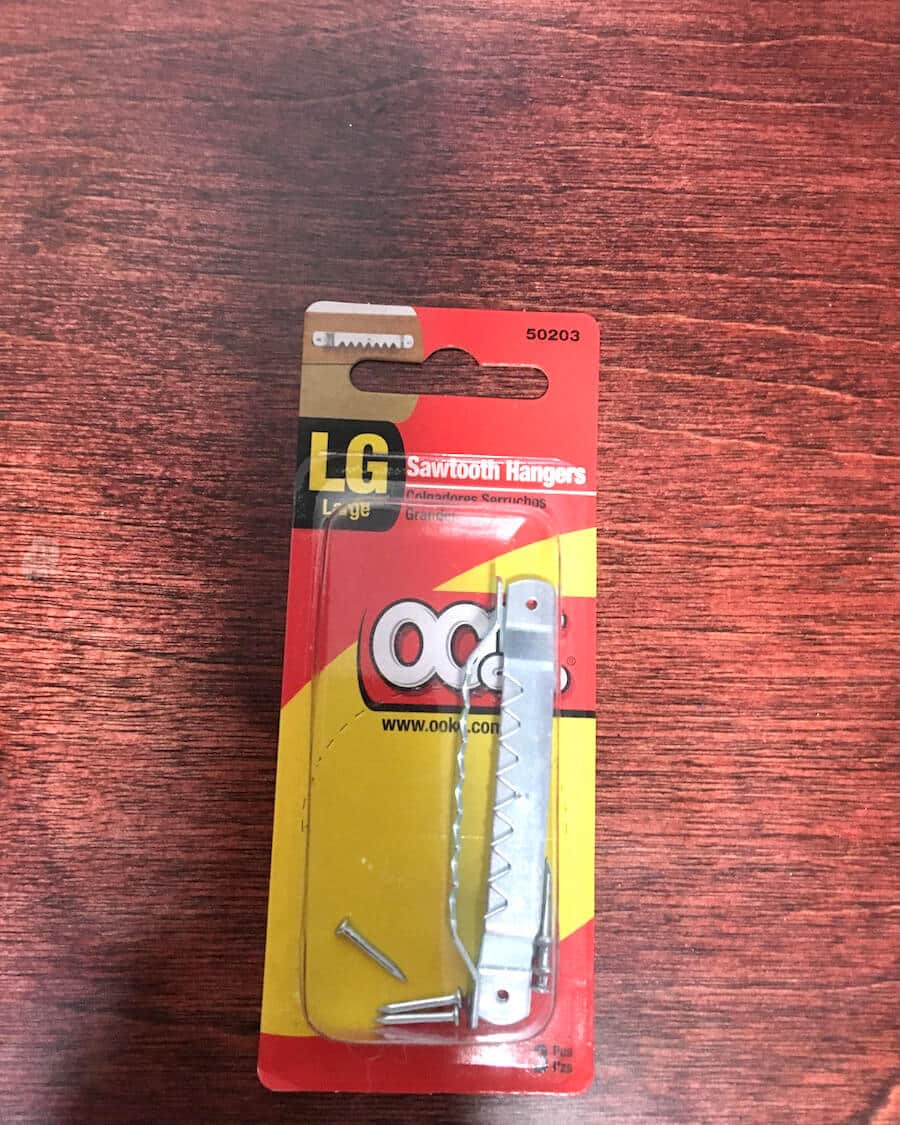
Step 12: Add Hanging Hardware To The Back
Add hanging hardware to the back of your board. Hang in a special spot to have your large word inspire all!
Tips For Hanging
You can hang this artwork in a variety of ways. Because we used such a large piece of wood, it was best to use sawtooth brackets and hang them on the studs of our wall.
Recommended Supplies
- Sawtooth brackets
- Hammer
- Stud Finder
- Pencil
- Measuring Tape
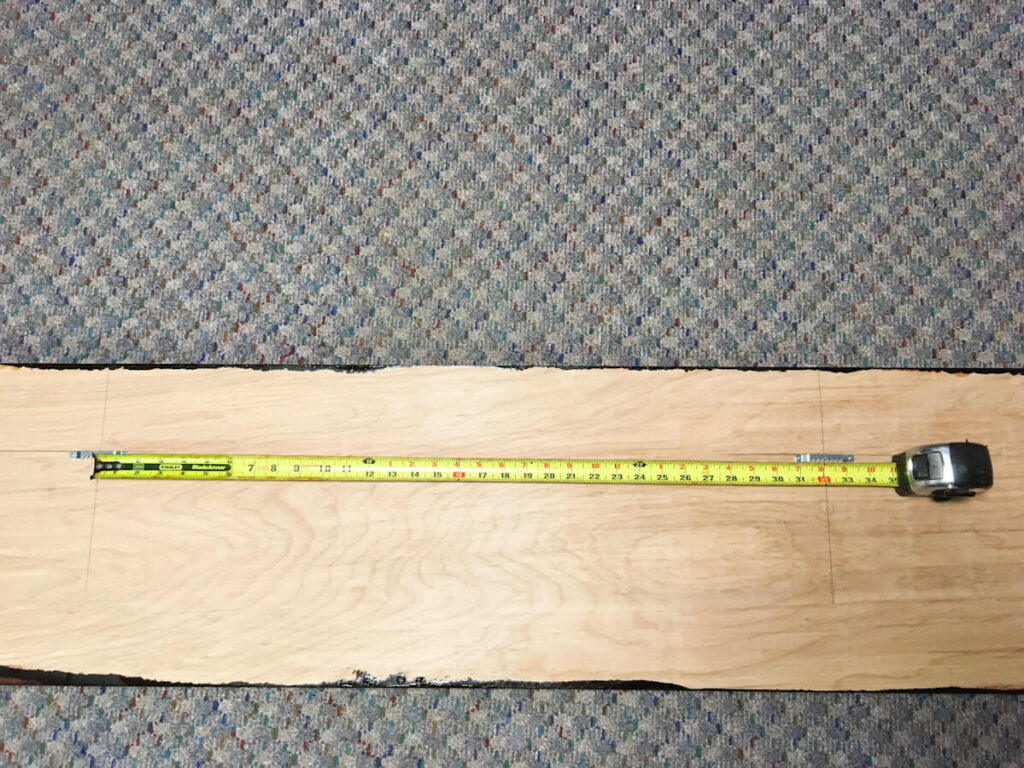
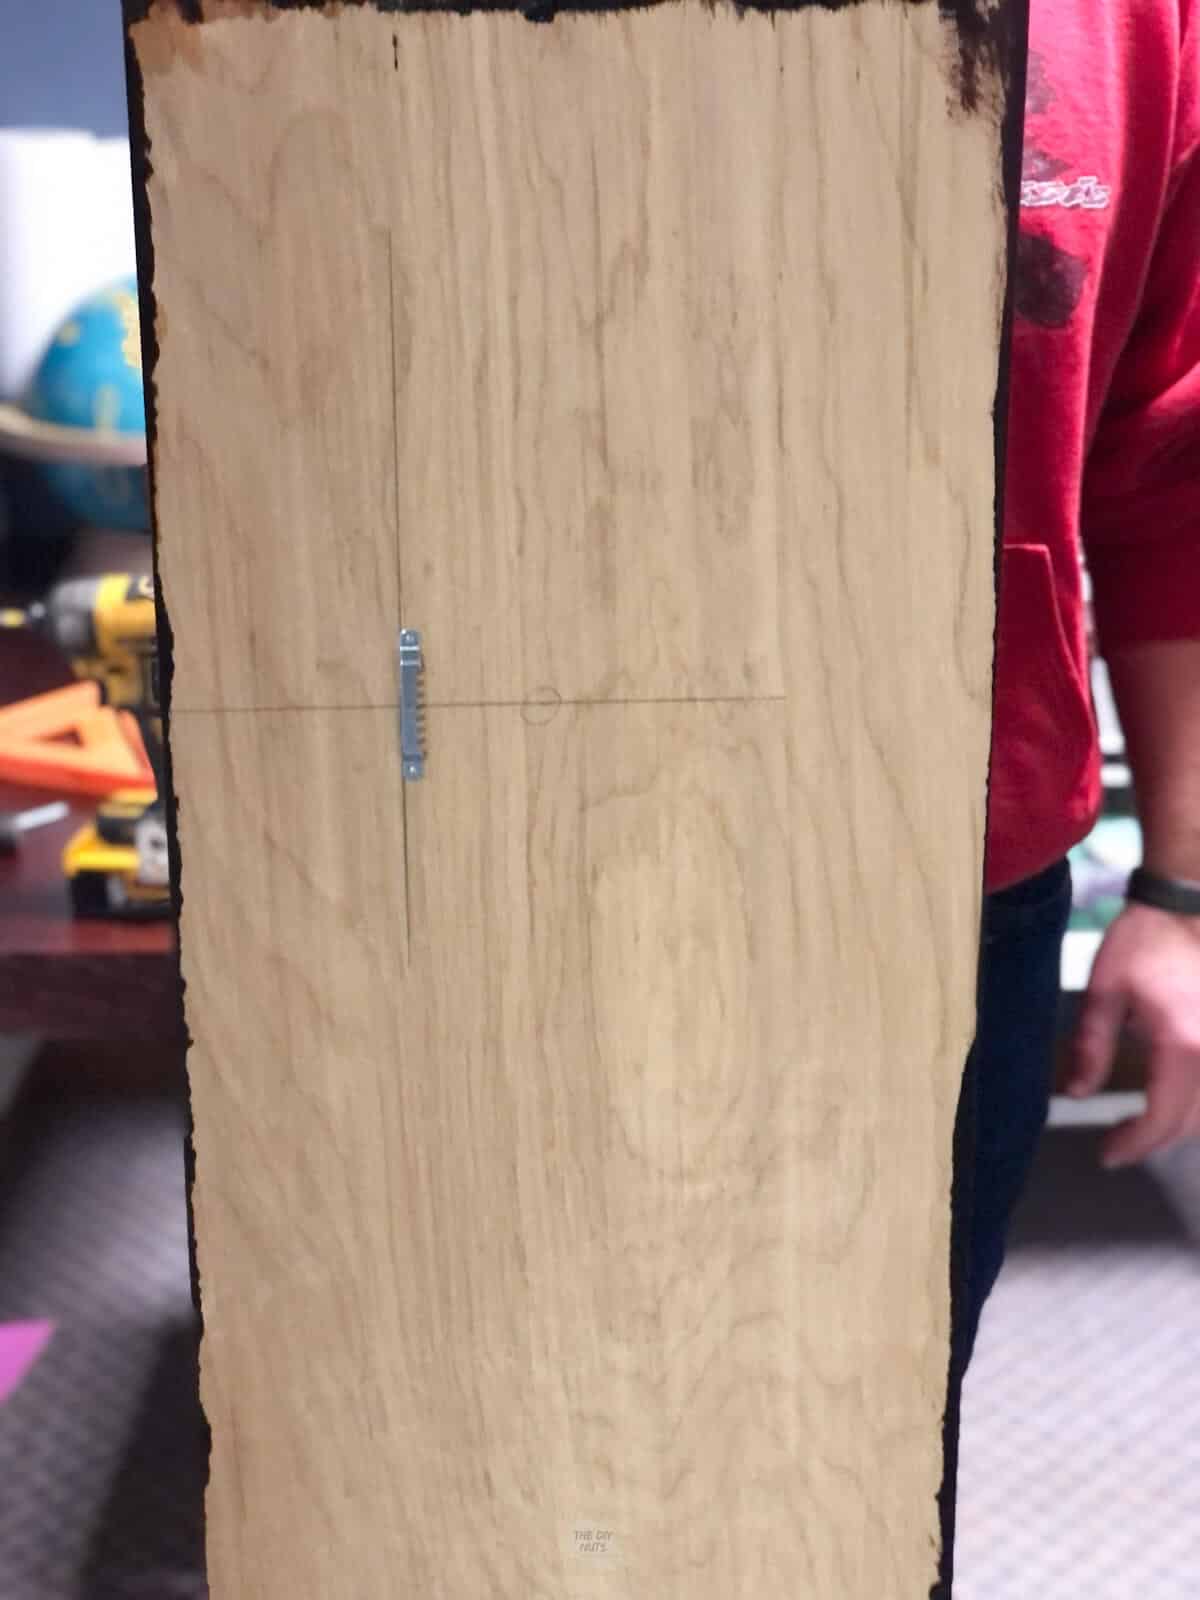
Step 1: Mark Middle & 16″ Out On Each Side
On the back of the board, measure the total length of your artwork. Find the middle of your work.
We wanted our large string art to be hung in studs, so we added two sawtooth hangers 32″ apart. 16″ from the middle on both sides, and 4″ down from the top of the string art.
Step 2: Add Sawtooth Hangers
Attach the sawtooth hangers on the marked spots.
Step 3: Find Studs Or Install Drywall Anchors
Find studs using a stud finder. If you want the artwork hung in a location other than studs, you can use drywall anchors if it’s heavy.
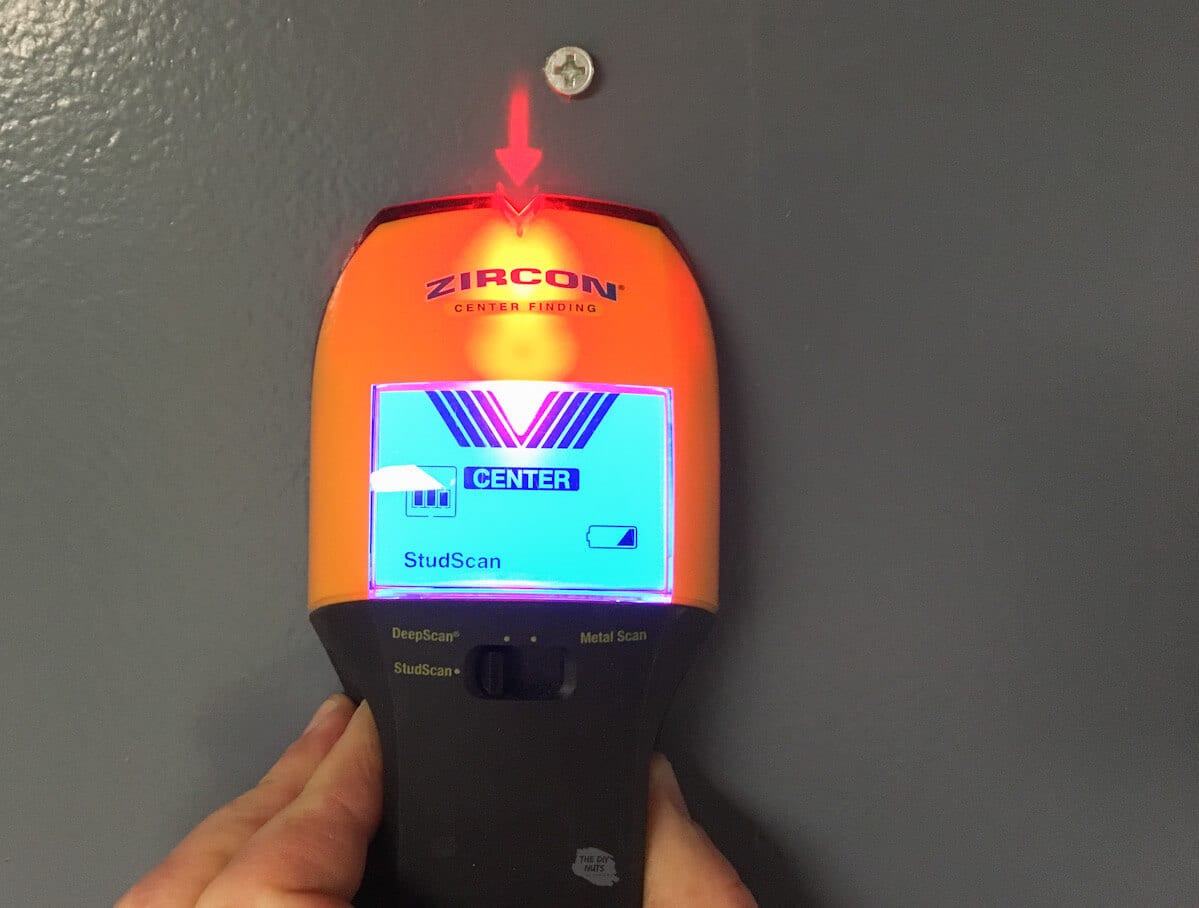
Step 4: Place Screws In Studs and Hang
Place screws in the studs. Hang artwork.
Final Large Word Art
I love the finished string art. However, like most DIY projects, this one is not for the faint of heart. After using the small nails on the first letter, I told my husband we should have done a smaller word. Once the nails are done, the stringing does go rather quickly.
Craft FAQs
This project was done on and off again on a weekend. Once we had the board, it took around 3-4 hours to complete.
If you love the idea of string art, you may just not want to make your board 4 feet long. A smaller string art project can probably be done in an hour if you choose a simpler and smaller design. I would say our large one was more of a weekend DIY project!
We were able to create this large string art for under $20 with leftover string to use for future projects.
A lot of the cost depends on the base you use If you have leftover scrap wood, then this could be done for even cheaper. Embroidery string and linoleum nails are relatively inexpensive.
Our piece of wood was a leftover from our DIY desk project, so we already had those supplies.
Will I be making another large string art anytime soon? Probably not, but we do love how great it looks.
Related Craft Posts
- Check out the whole finished kid craft room and craft closet!
- How To Shrink A Shrinky Dink
- DIY Paper Maché Piñata
Follow us on Pinterest, YouTube or Facebook for more DIY inspiration!
How To Make String Art

Equipment
- Hammer
- Ruler
- Pencil
Supplies
- Embroidery String
- Small Nails
- Wood or base we used scrap birch plywood
- Brackets for hanging optional
Instructions
- Prep your hard surface. For us, this included cutting a large piece of birch plywood (15” x 48”), staining and using poly. Plan out your design once board is dry.

- Create a template or print text on copy paper. You can also just sketch the letters out to be the customize size you want.
- Use painter's tape to attach template to wood. Make sure that your word is straight by measuring the bottom of the letters and end of the wood in several spots.

- Lightly tap nails around the edges. At first, I was placing my nails to close together. I realized I did not have to do that. I aimed to tap them in about 1/2".

- Once all of your nails are securely in, you can carefully remove the paper. Some paper may be stuck in around the nails and you will just have to carefully pick it out.

- Tie a knot in the corner of your first letter. and start wrapping Leave a little leftover to make to easier. You will just hide the tail when you are done.

- Go around the perimeter of the letter first and then criss-cross in a random pattern afterwords.

- If doing a rainbow word, repeat above step to add a lighter color on top.

- Hide tails of extra strings when finished and hang your art by adding a bracket to the back in two equidistant spots.


Video
Notes
- Use at least 2 or 3 different colors on the same letters. This will give you more depth and interest.
- Modify this design to make a rainbow string art in the size you want.