DIY Wood Pallet Storage Crate Box On Wheels
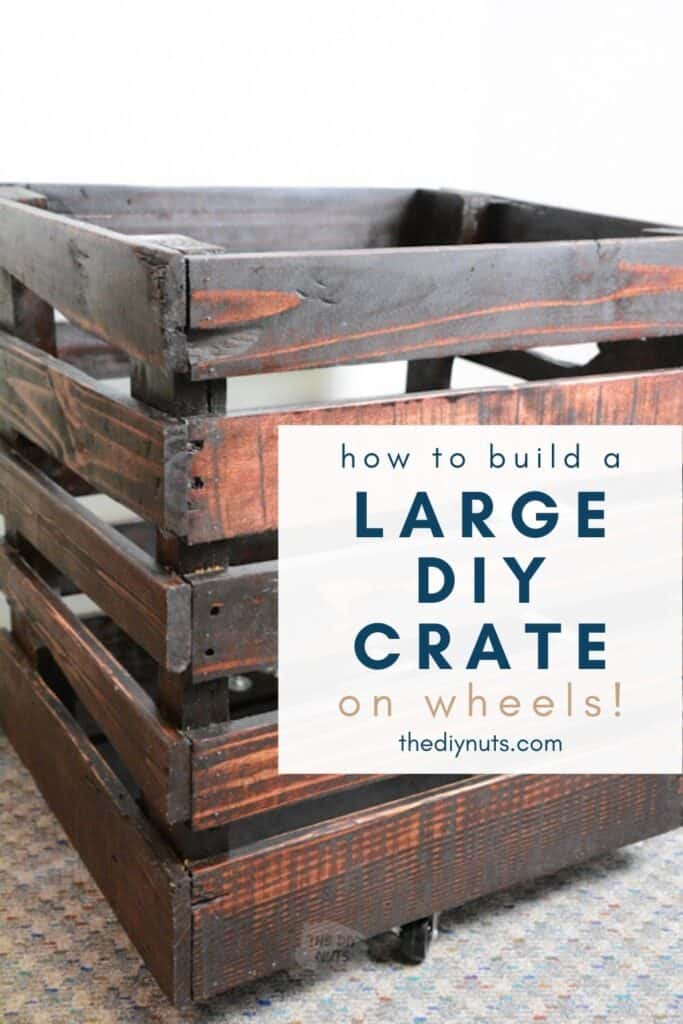
Do you have extra pallet wood laying around? See how we created a large storage box to help keep our basement organized using the free wood we already had.
*Disclosure: I only recommend products I would use myself and all opinions expressed here are our own. This post may contain affiliate links that at no additional cost to you, I may earn a small commission. Read our full privacy policy.
Our Design
When we first started to design our children’s craft room closet, we knew we would stop the shelves 2 feet off the ground. We debated about what to create for the floor. We wanted to create a large storage wooden storage crate to help keep our basement from not getting overtaken by toys and books.
If you have young children, then you know how easily this can happen. We have found the more specific places we have to put things, the better. And a higher chance that our children may actually put things back where they belong.
DIY Crate Design
The most important thing was that this storage box would be on wheels.
I shopped around and was debating about using a premade crate that you can get anywhere. However, the biggest issue was that they would not be tall enough for our space.
So what do you do when you can’t find what you want, DIY of course! In this case, a LARGE DIY wooden crate on wheels from a pallet (since we had the wood).
What can you make out of one pallet?
There are so many things that people love to make out of reclaimed wood. Not only are you recycling, but you most likely are getting the wood for free. And who doesn’t love that?
- DIY Art display
- DIY artwork: you can stain or paint something simple to create a one-of-a-kind work.
- Pallet Wine Rack (check out the one my husband made before this blog even existed)
- Storage crates
- Outdoor Rockwall or toy (we used new wood for ours in our backyard, but have seen amazing outdoor toy ideas using pallet wood)
- Small end table for your deck
- Pallet wood furniture: think benches and sectionals.
- Wood shelf
- Raised garden bed (again we went with real cedar for ours)
- Mail holder for your entrance
With a little elbow grease, you can create pallet DIY projects to fit your needs.
Pallet Finding Tips
Luckily my husband has access to crates that normally are getting thrown away. We have a pile in our backyard that we have saved just in case.
Most construction or industrial businesses have leftover pallets and you should be able to find some for free or close to free.
You can also look on Craig’s list or in your local Buy-Sell-Trade Facebook Group (learn the lingo of these groups in this post).
Quick Pallet Tip: Make sure that you are always getting permission to take crates, etc. The last thing you want is to get into trouble for thinking you were taking free wood.
Before You Begin
You can modify these plans to create a wooden box of any size. Just note this DIY box project ended up taking more time than originally thought.
We have found that pallet wood, while free, does require a decent amount of prep.
In hindsight, we are still happy we did this box project, even if we couldn’t believe how long this took! I would say this happens to my husband regularly.
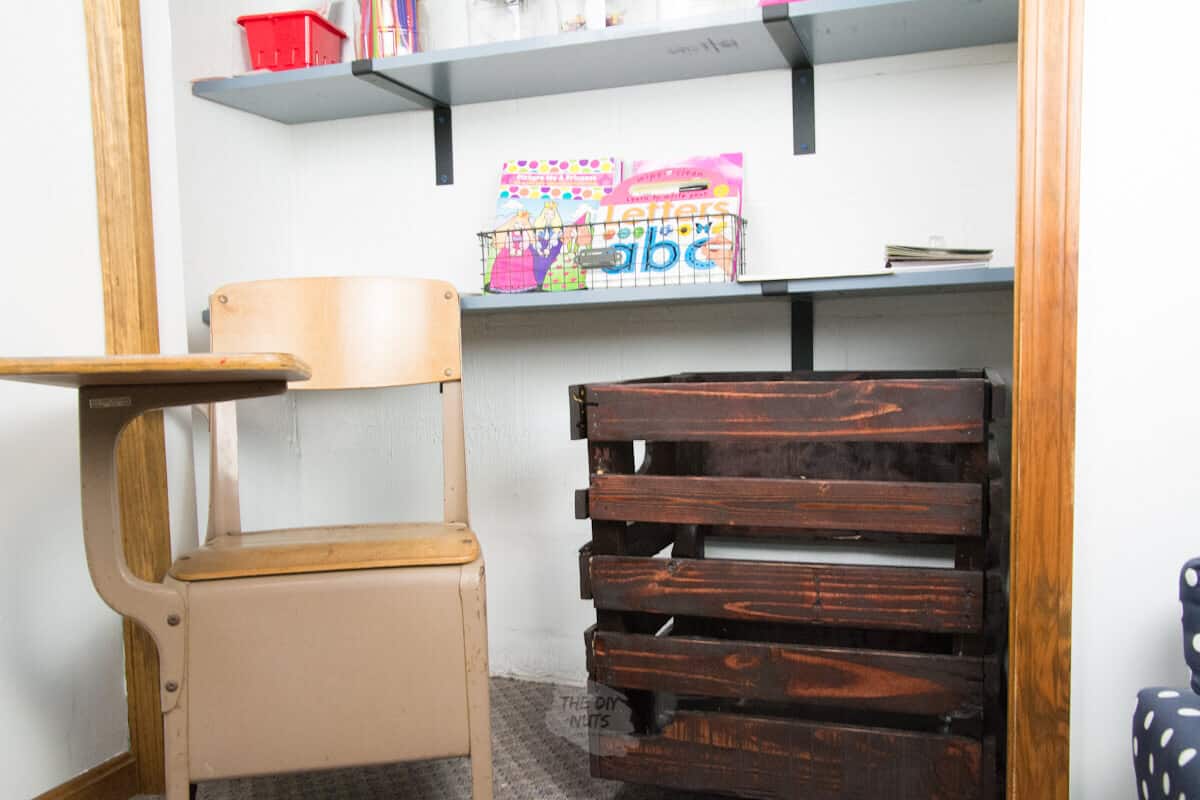
Luckily we now have a very large storage crate that we can add to our children’s craft room.
No one said DIY is always easy, but you do end up with something custom that would have cost a lot more to purchase.
Recommended Supplies & Tools
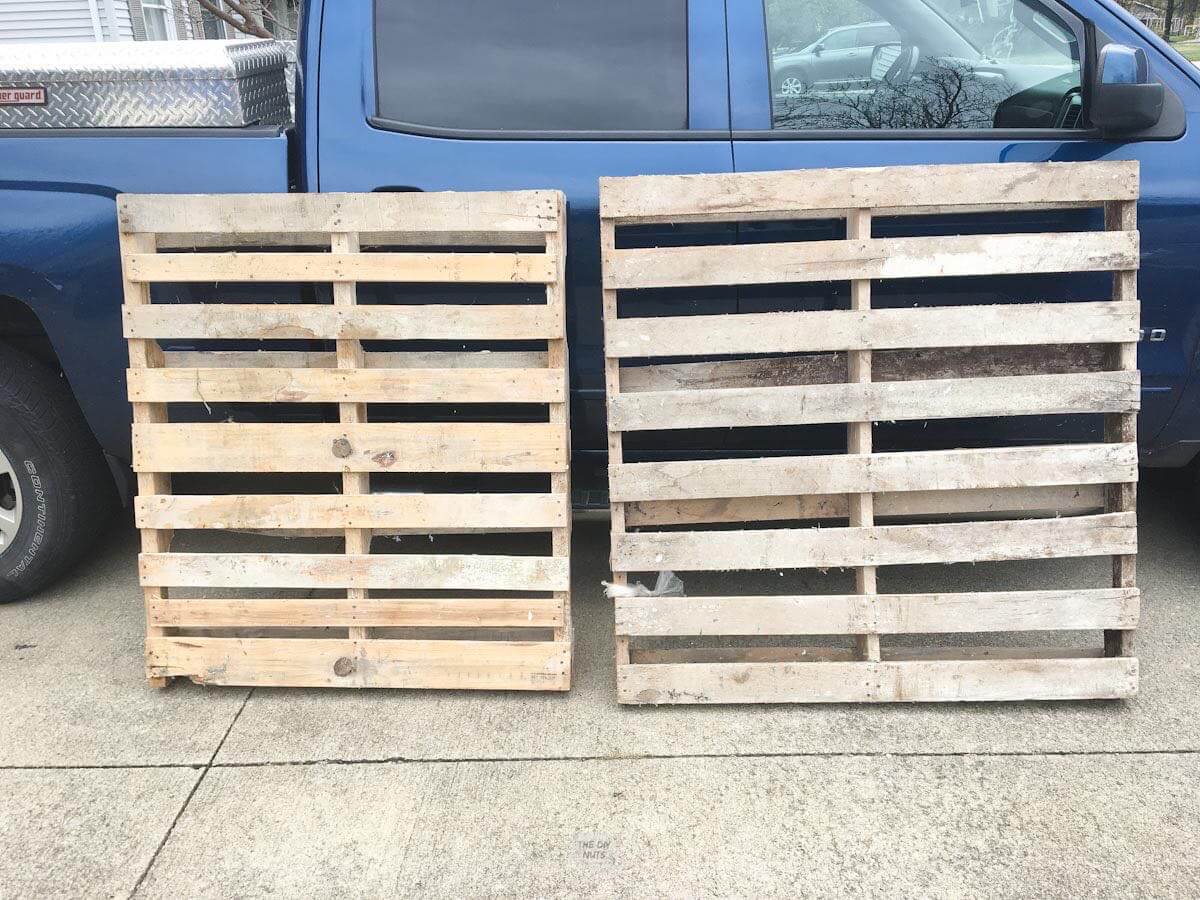
- Two (2) pallets-our pallets measured (overall) 40” wide x 48” tall
- Two (2) claw hammers to take the pallet apart
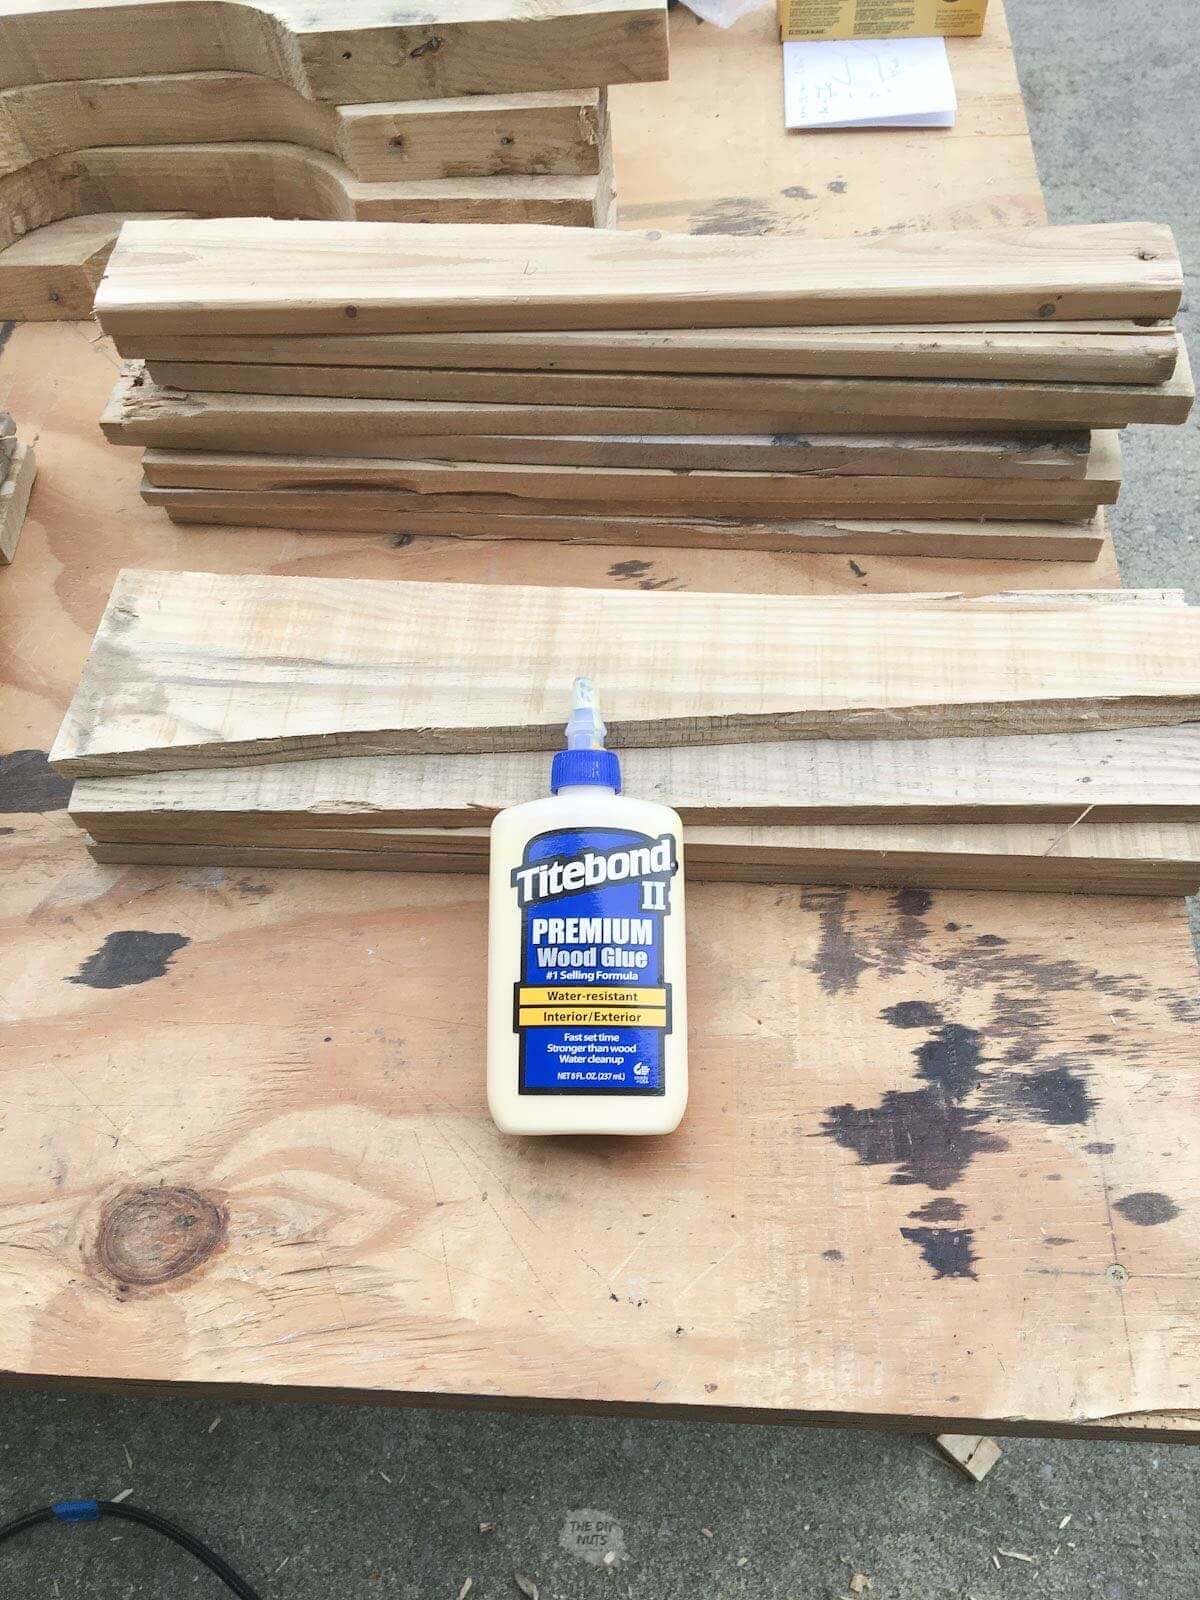
- Titebond II Wood Glue
- Tape Measure
- Air compressor For Brad Nails Or Screw Gun and Screws
- Circular Saw
- Palm Sander / Sandpaper for a palm sander
- Stain
- Spray-on Poly
- Four (4) casters or wheels + appropriately sized nuts and bolts (we used ¼” diameter bolts)
- Drill and drill bits depending on caster, nut & bolt size

How To Build Wooden Pallet Storage Box
Step 1: Decide how big you want your crate to be.
Our crate measures 19”s wide x 22”s deep x 22”s tall. This size crate required two the wood from two (2) full-size pallets.
Depending on the size of your DIY crate, you will need to acquire 1 or 2 pallets. If you are lucky you can find oak pallets. Remember you will be making five sides (four sides + the bottom).
Do not waste any time sanding or cleaning the pallets until you have taken them apart.
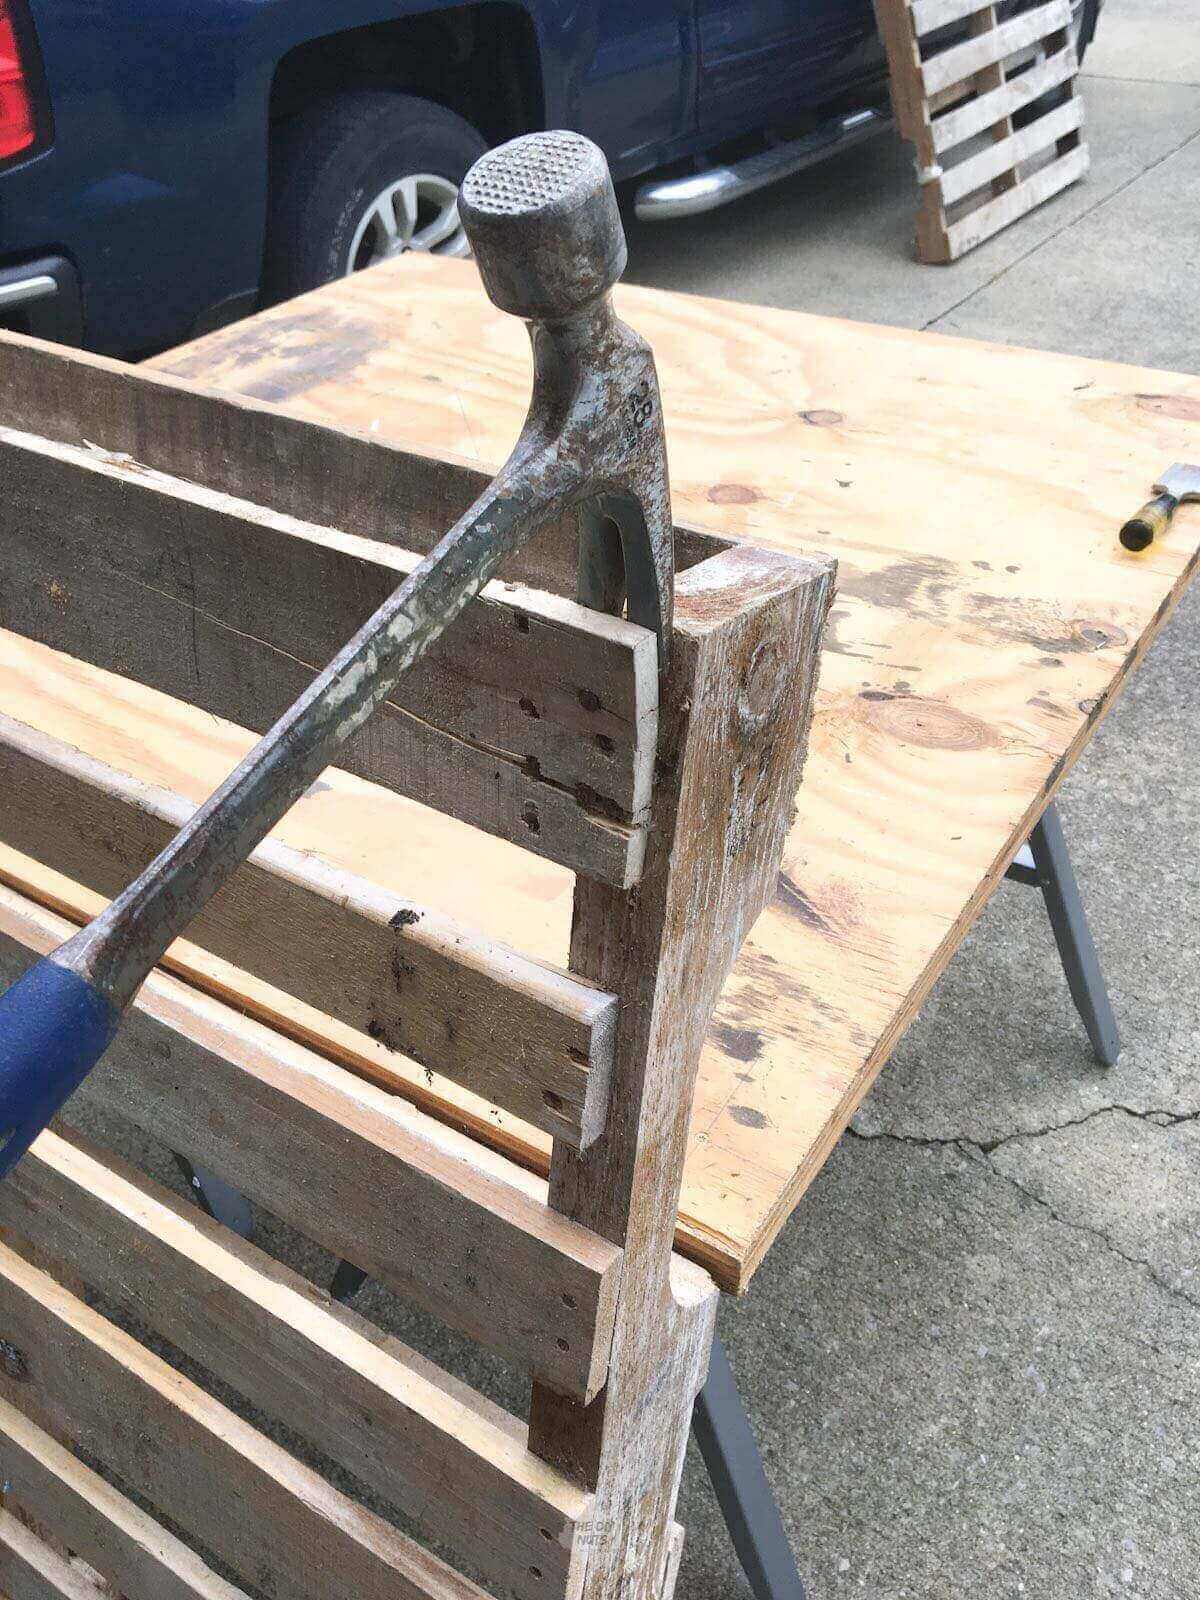
Step 2: Take apart pallet wood.
To do this we used two (2) claw hammers (See picture). The goal is to not damage the horizontal wooden “strips” or the backside vertices.

The pallets will have or should have three (3) vertical strips underneath the horizontal “strips”. Separate the horizontal “strips” from the vertices.
Each horizontal will have one (1) or two (2) small nails connecting it to the vertical. In taking the pallets apart we broke appx. six (6) horizontals.

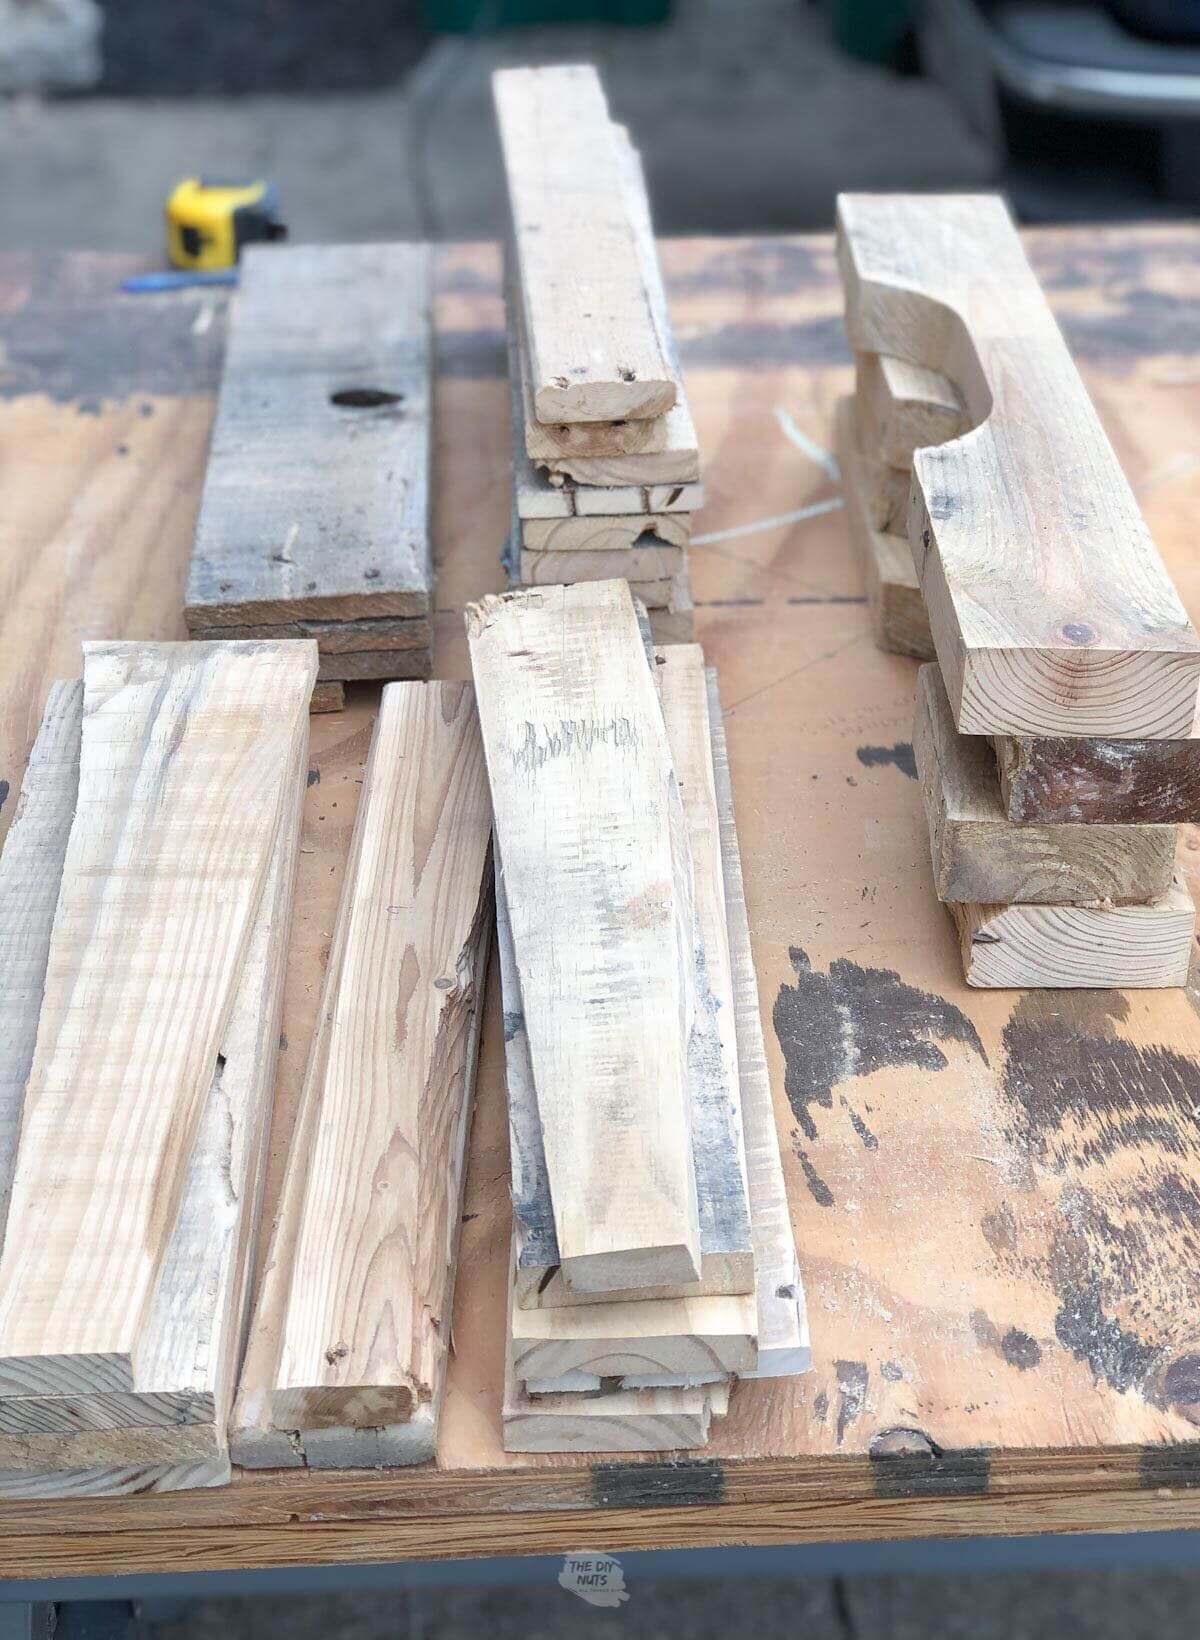
Step 3: Cut everything to size.
Once the pallet wood is separated out cut everything to size. You don’t want to waste any time sanding pieces or parts of the wood that will not be used.

Don’t Worry About Dirt and Oil
Also if the pallet has dirt or oil on it. Don’t worry about it and don’t clean it. The sanding will take care of it.

Step 4: Sand Your Wood
Once everything is cut to size start sanding. We used this palm sander.

Depending on the condition of the pallet wood this may or may not take a while. We started with 65 grit sandpaper then went to 85 grit, then 120 grit, and then 220 grit.


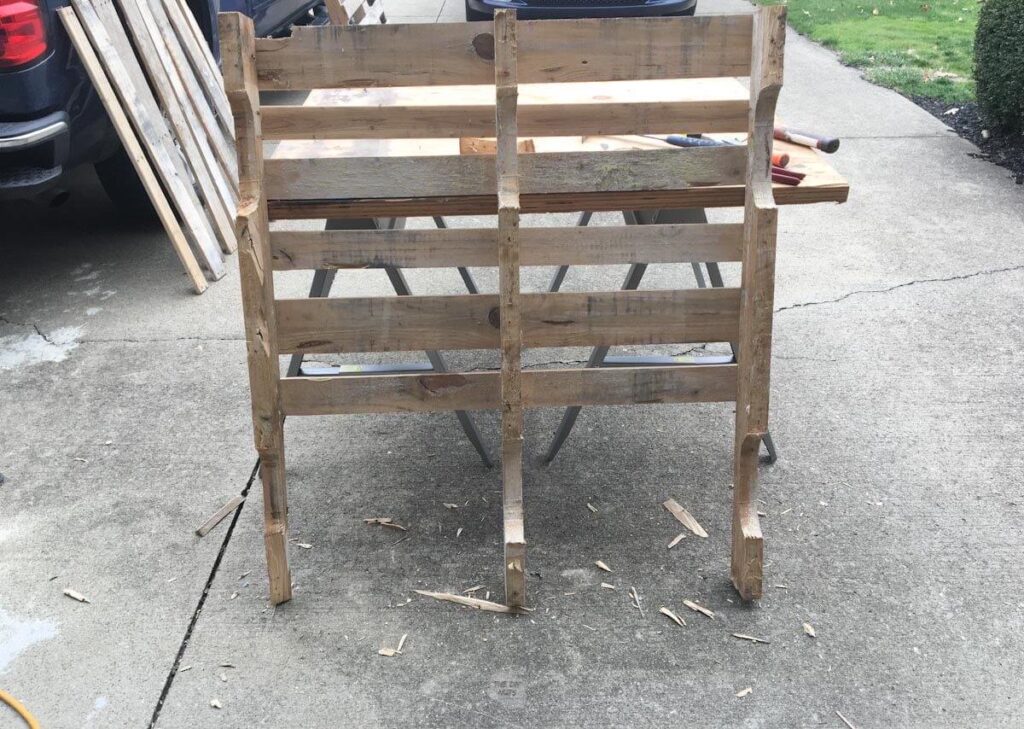
Step 6: Build 2 Sides
Continue using a brad nailer and wood glue to build the sides of the box.

Step 7: Attach Side Together
Then attach two sides together with a similar technique to build the box.
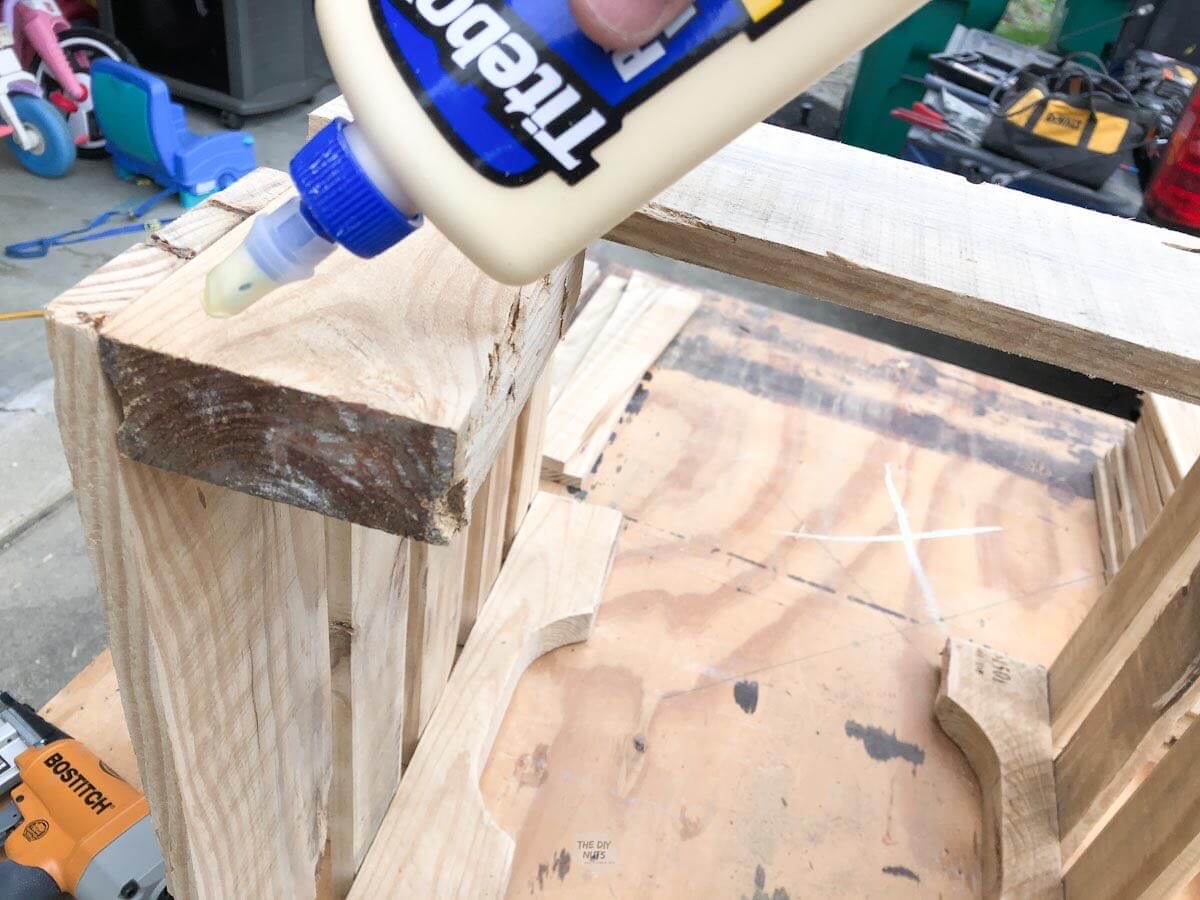
Step 8: Clean Glue As Working
Use a damp paper towel to wipe up any overflow from the glue.

Step 9: Make Bottom
Attach wood pieces along the bottom of the box.

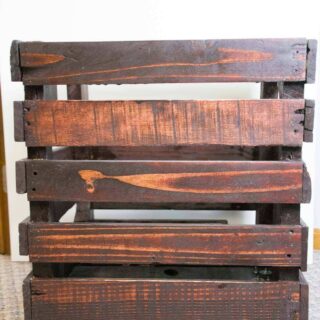
Step 10: Apply Stain
With the box now assembled choose your favorite stain color (ours is Minwax’s Red Mahogany) and apply. Check out all of the projects we have used this stain color on!!!
Stain Applying Tips
- Remember the longer you leave the stain on the darker the color is.
- Use a scrap piece of the pallet wood to determine the amount of time vs. shade of color you desire.
- Our shade took appx. 20 minutes before wiping it off.
Step 11: Add Spray On Poly
Once the stain has dried use a spray-on poly vs. brush-on poly. We used spray poly, due to needing to poly the outside, inside and bottom of the crate.
Use three (3) light coats and sand between the first and second coats only.

Step 12: Attach Casters
Once everything is sprayed and polyed attach the casters.
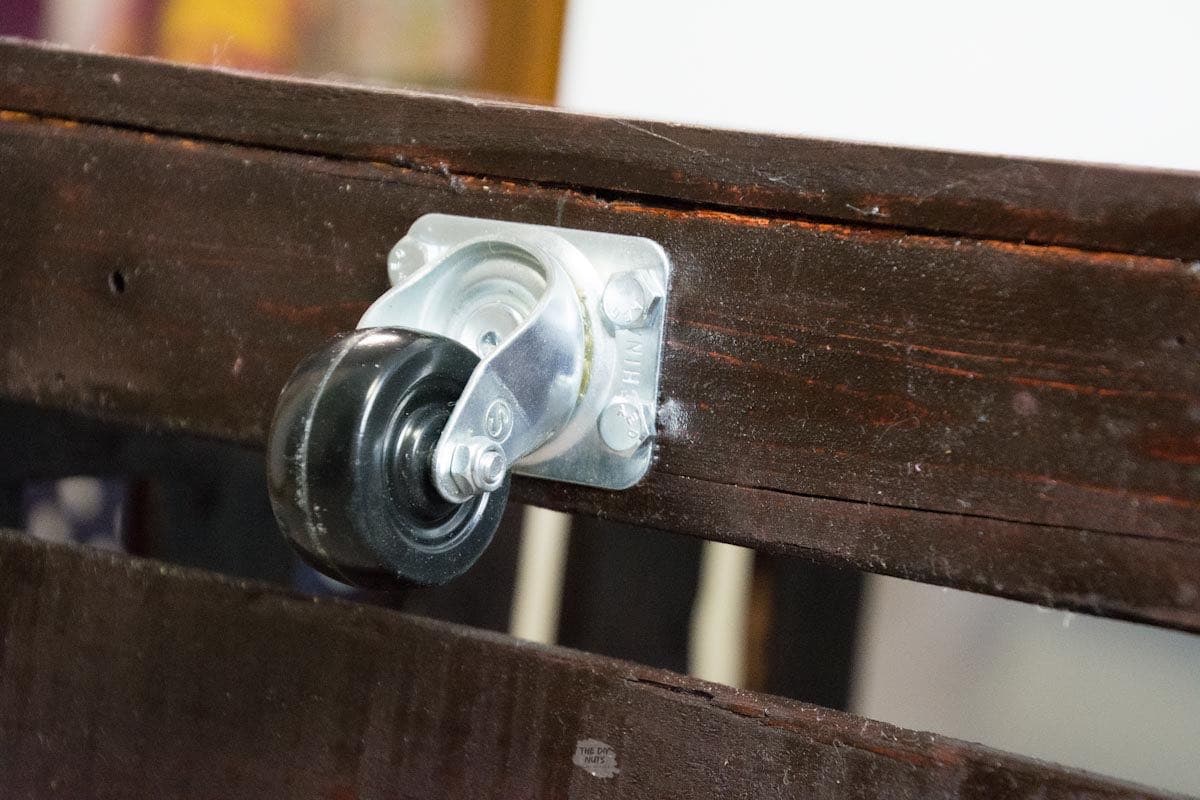
Make sure you choose to put the casters far enough on the inside (from the outside edge) for the drill and drill bit to fit (size of the drill vs. the inside face of the wooden crate).
See the finished kid craft closet in this post!
Relate DIY Projects In Craft Room
- Large DIY String Art
- DIY Floating L-Shaped Desk Using Simple Brackets (by far one of the best DIY projects we have done that really utilized the space we had)
- How to Build A DIY Pegboard
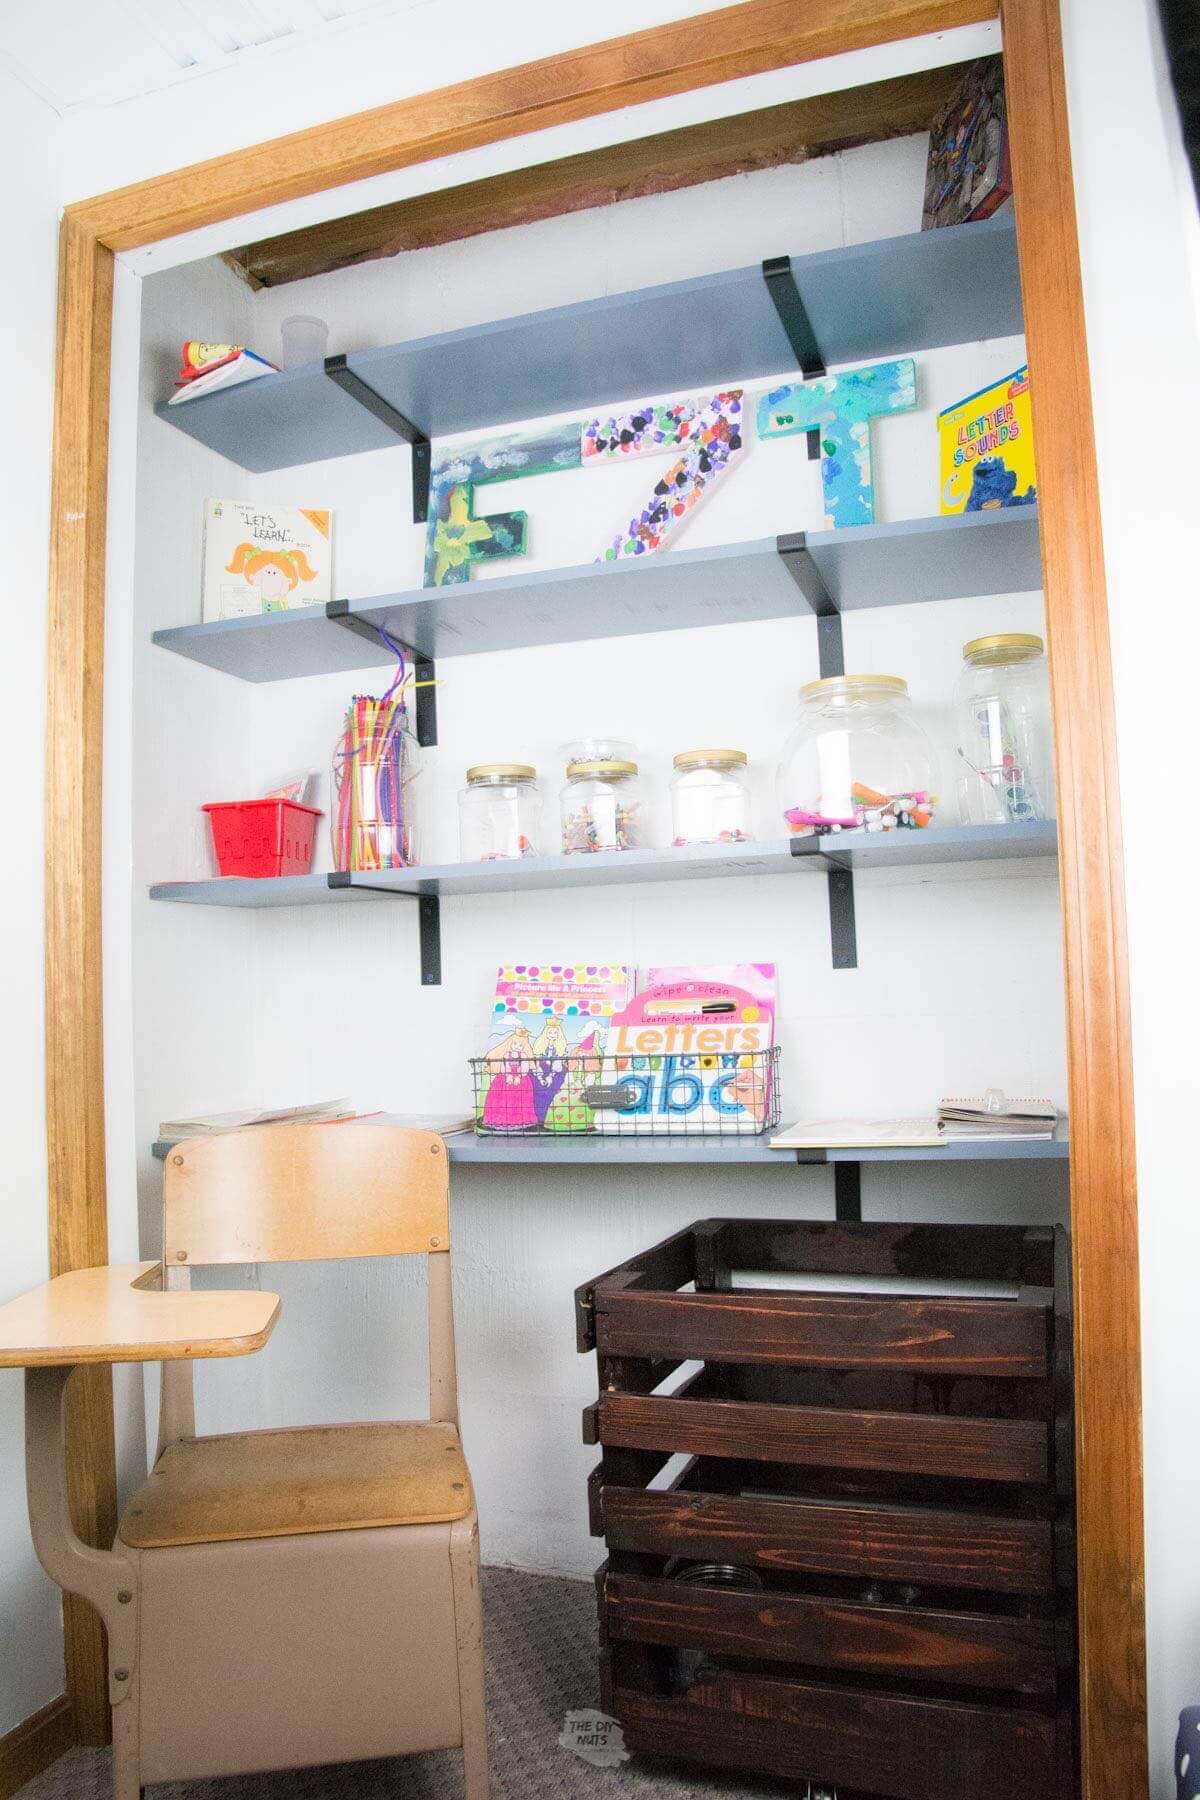
They absolutely love this creative space and we love that we have created a space with so much DIY storage. This DIY wooden crate on wheels is just another DIY way we stay organized!
Follow us on Pinterest, YouTube or Facebook for more DIY inspiration!
Tutorial FAQs
An average pallet is 40″ x 48″. It took almost all of the wood from two (2) pallets to build our crate.
We used 1.25” long brad nails. The purpose of the brad nails is only to hold the crate together while the wood glue sets up.
DIY Wood Storage Crate On Wheels
Equipment
- 2 Claw Hammers to take the pallet apart
- Tape Measure
- Air compressor Or Screw Gun and Screws
- Brad Nails
- Circular Saw
- Palm Sander
- Sandpaper For Palm Sander : variety of grits
- Drill and drill bits depending on caster, nut & bolt size
Supplies
- 2 pallets our pallets measured overall 40” wide x 48” tall
- Stain
- Titebond II Wood Glue
- Spray-On Poly
- 4 casters or wheels + appropriately sized nuts and bolts we used ¼” diameter bolts
Instructions
- Decide on the design of your crate and size.
- Take apart pallet wood.
- Cut wood pieces to size using circular saw.
- Sand wood pieces using a palm sander. Start with 65 grit, then 85 grit and finally 220 grit.
- Begin to build box sides with wood glue, brad nails and air compressor.
- Attach horizontal piece across your box and continue unitl two sides are built.
- Attach two sides together with glue, brad nails and ari compressor.
- Clean any overflow from the wood glue as you are working.
- Attach 3-4 pieces of wood across the bottom of your box.
- Apply stain in the color of your choice.
- Once stain is dry, use spray-on-poly to protect box. Use three light coats and sand in between the 1st and 2nd coats.
- Attach casters.